Google Play Developer Account
 Updated 10 months ago
by
Amalia
Updated 10 months ago
by
Amalia
You can publish your app to the Android Play Store through your Google Play Developer account. When you create an app for publication, it is required by Google's guidelines and policies that you set up your account yourself.
Before you create your Google Play Developer Account, be certain that you will be able to provide billing details for your organization.
How do I create a Google Play Developer account?
- First you need to set up your Google Account. It is recommended that you create a non-personal Google email address as you are not able to change the Google Play Developer Account Holder. If you already have a Google account that you want to use to sign in to your Developer Account, skip to the next step.
- Now to register your Google Account as a Google Play Developer account click here.
- Choose An Organization account type and click Get started.
- After choosing an organization, you need to provide the information shown below:
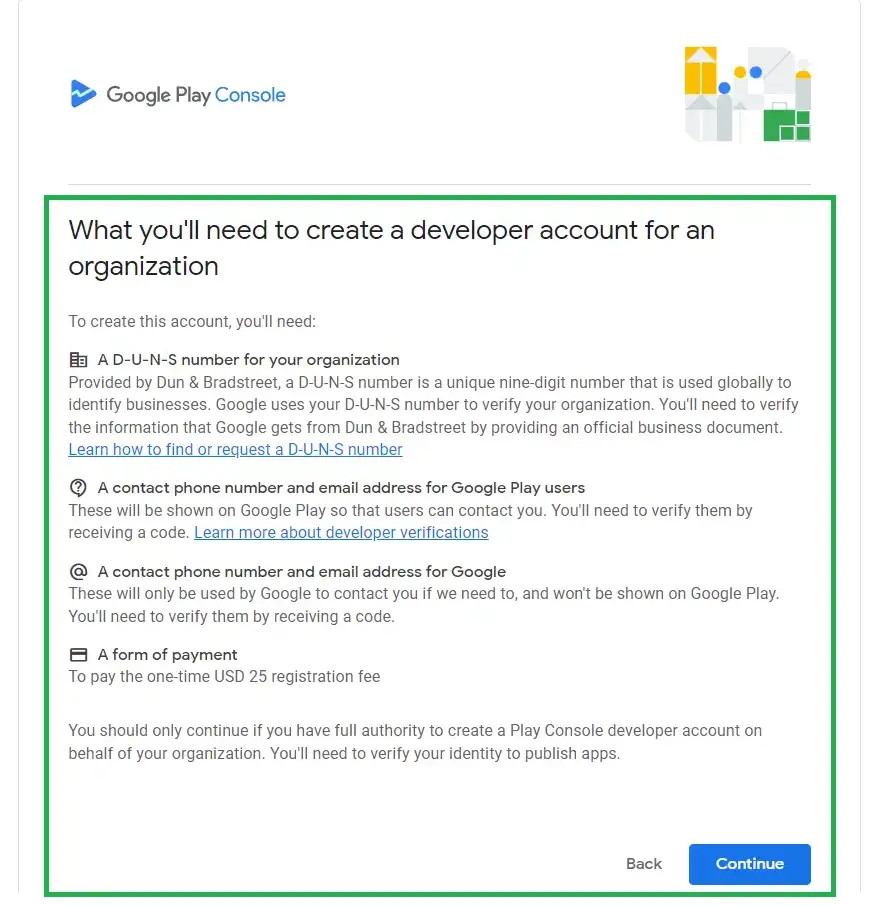
Creating a Google Play Developer account for an organization
After choosing the Organization account type, click Continue. You need to provide the following information:
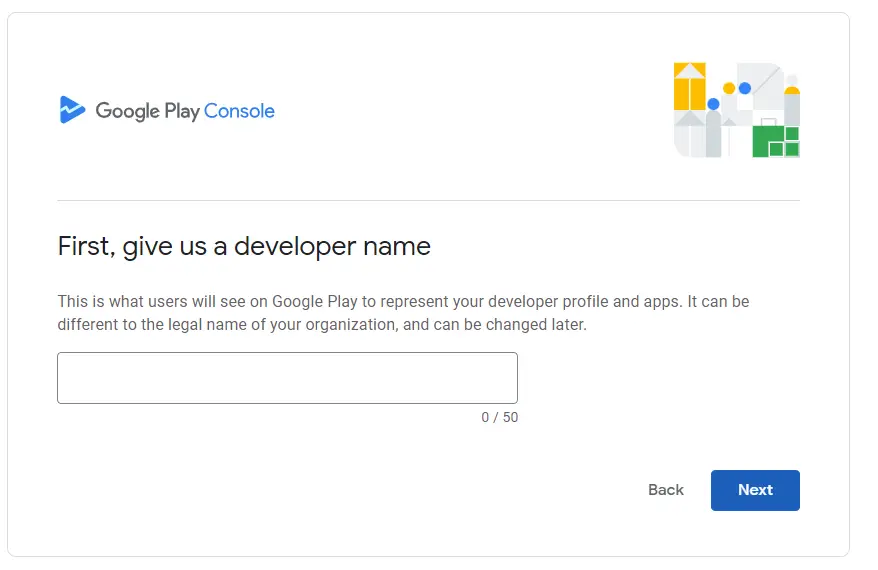
- Enter a developer name and click Next.
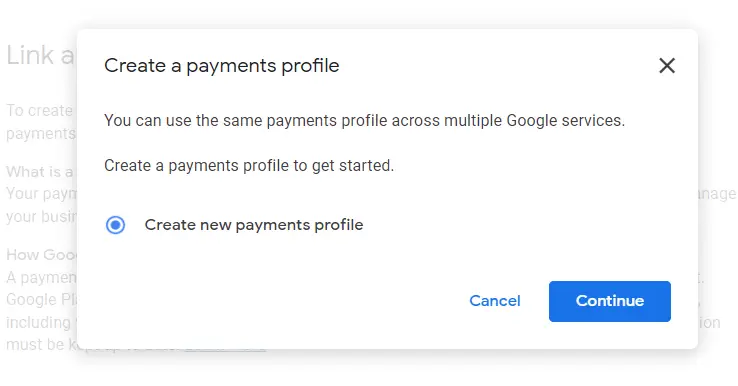
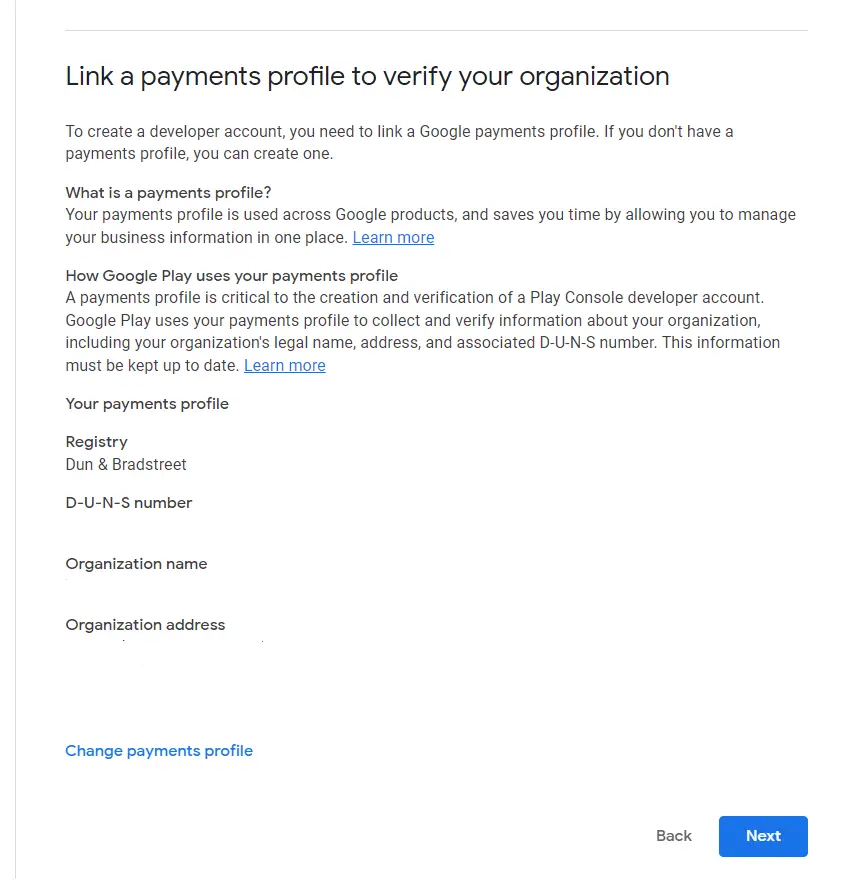
- Create or select a payments profile.
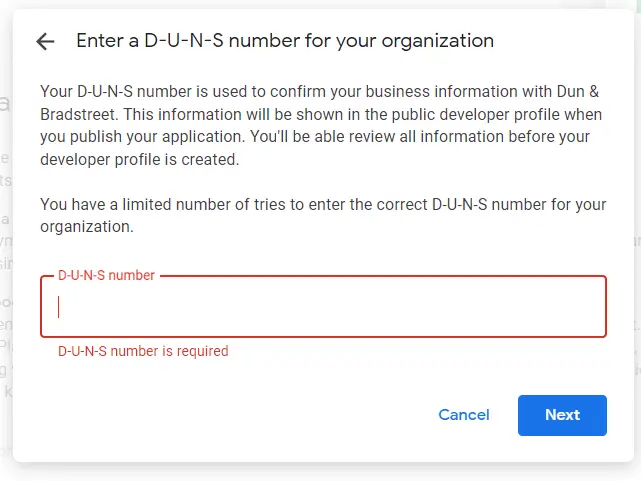
- Enter a D-U-N-S number and click Next for confirmation (for organization account only).
- Verify the payments profile and click Next.
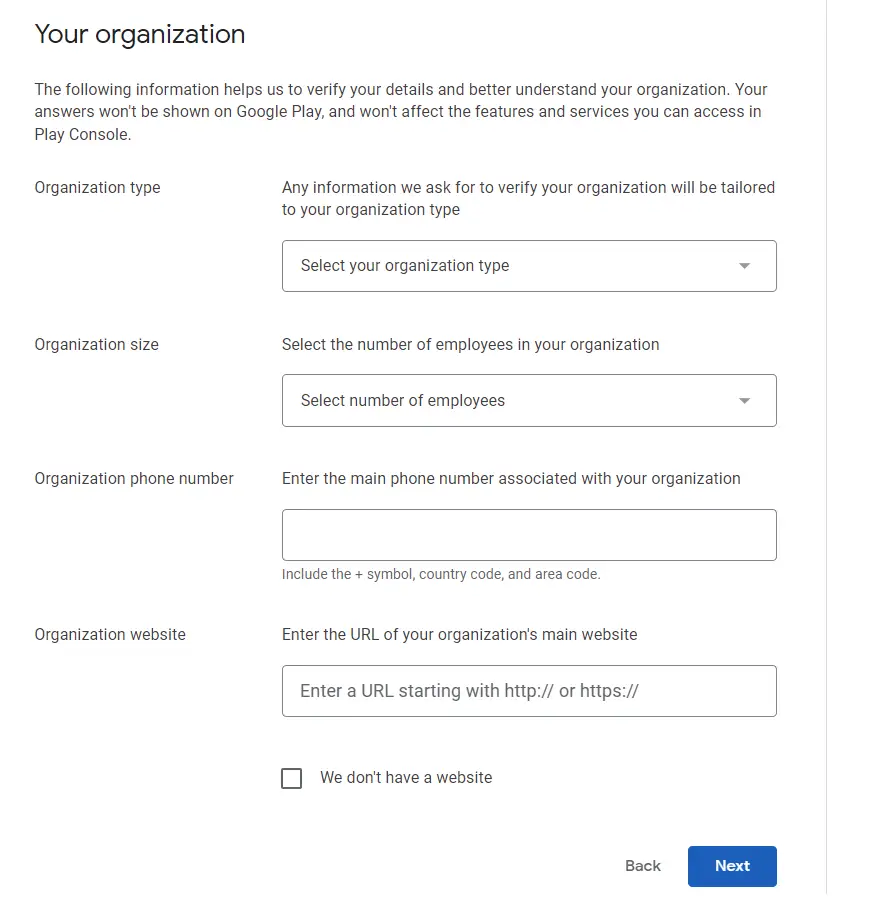
- Fill your organization's details: Organization type, Organization size, Organization phone number, Organization website and click Next.
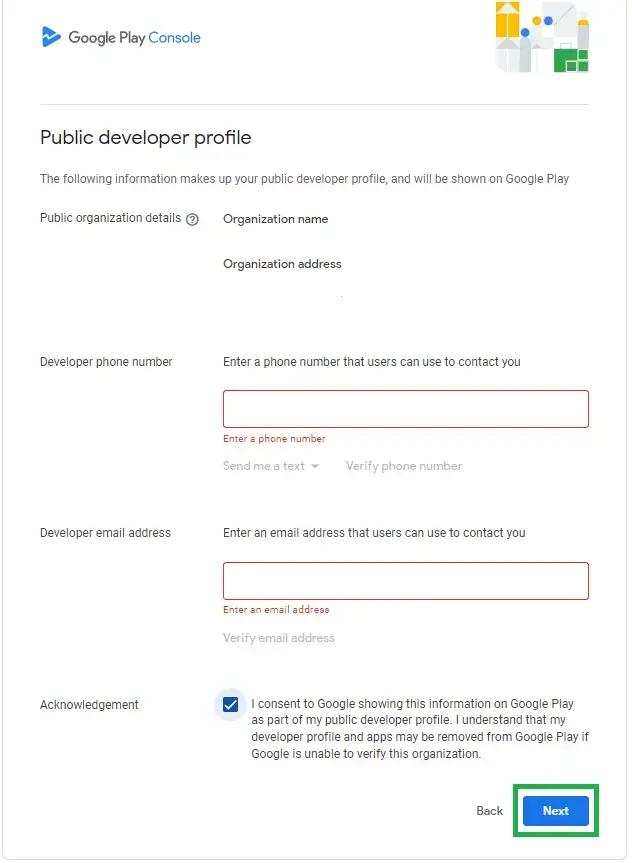
- Enter and verify the developer phone number and email of your public developer profile, tick the acknowledgement box and click Next.
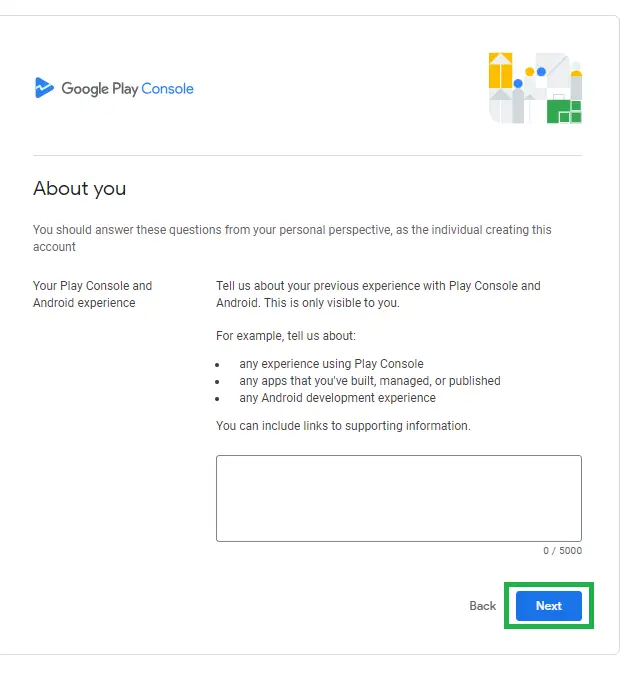
- Fill information about you and click Next.
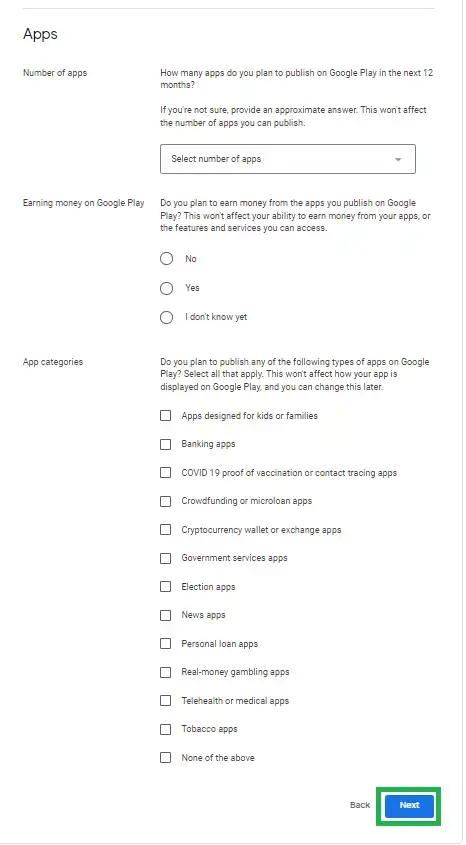
- Fill app information and click Next.
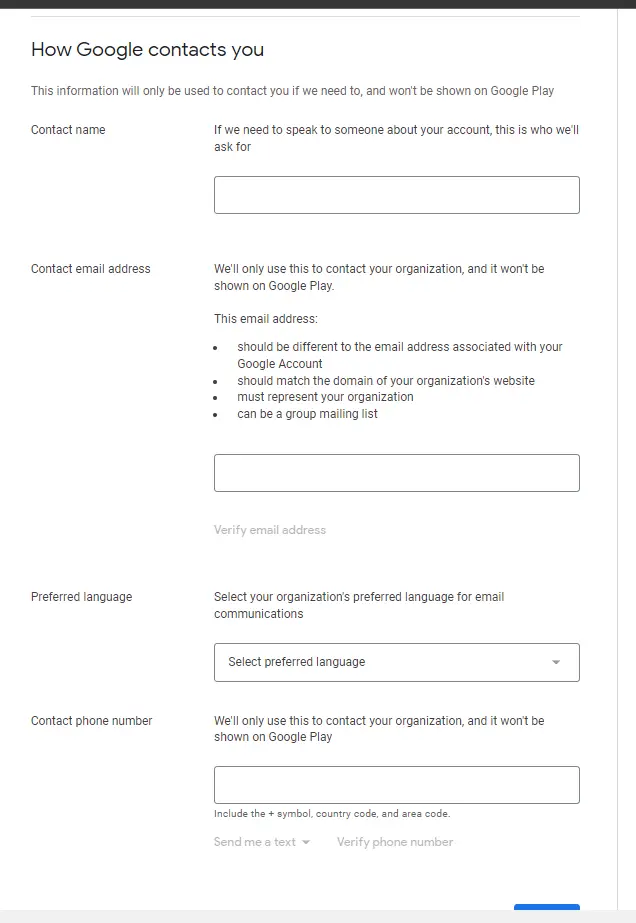
- Fill in your contact information and click Next.
- Read and agree to the Terms by ticking the checkbox, then click on Create account and pay.
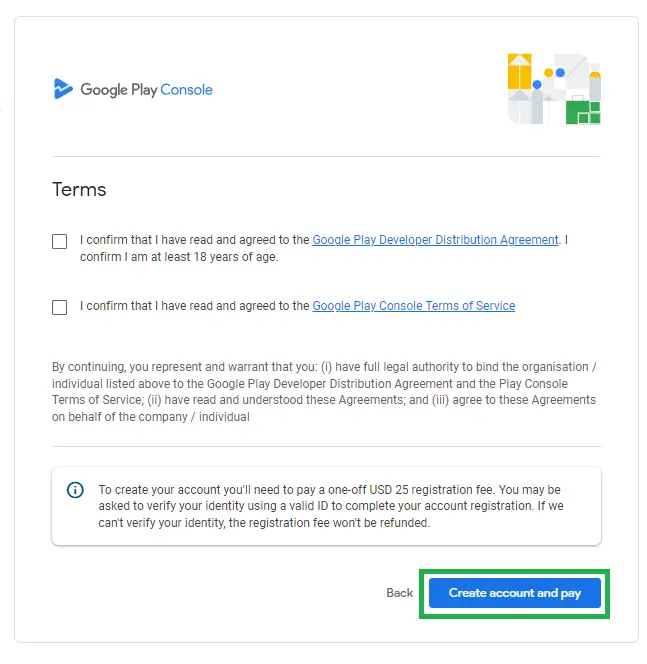
- Complete your purchase by adding your debit or credit card details to pay the $25 sign up fee.

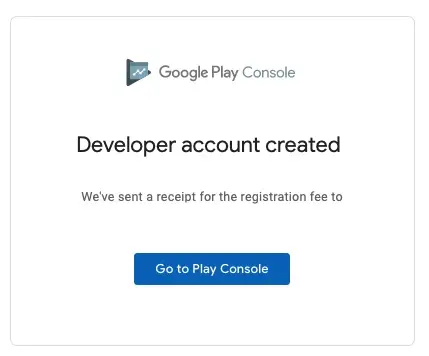
After making payment, a pop-up will appear confirming that you have created your Google Developer account. You can click on Go to Play Console to access your Developer Account Menu and set your account preferences and details.
Two-factor authentication
Two-factor authentication is a store security rule that customers are required to use depending on their store configuration.
In case you have the two-factor authentication enabled and you have granted us global access, you should add your telephone number and InEvent's corporate number so we can publish the App.
Please, contact your customer success representative for the number that should be entered.
Click here to learn how to set it up.
How can I set up a test environment for my app?
Google Play Console provides setup features to help you and others beta test the licensing of your application before it is published. By implementing licensing, you can make use of the Play Console features to test your application's policies and the handling of different licensing responses or error conditions.
Set up application licensing
- Log in to Google Play Console
- Click on Setup > License testing
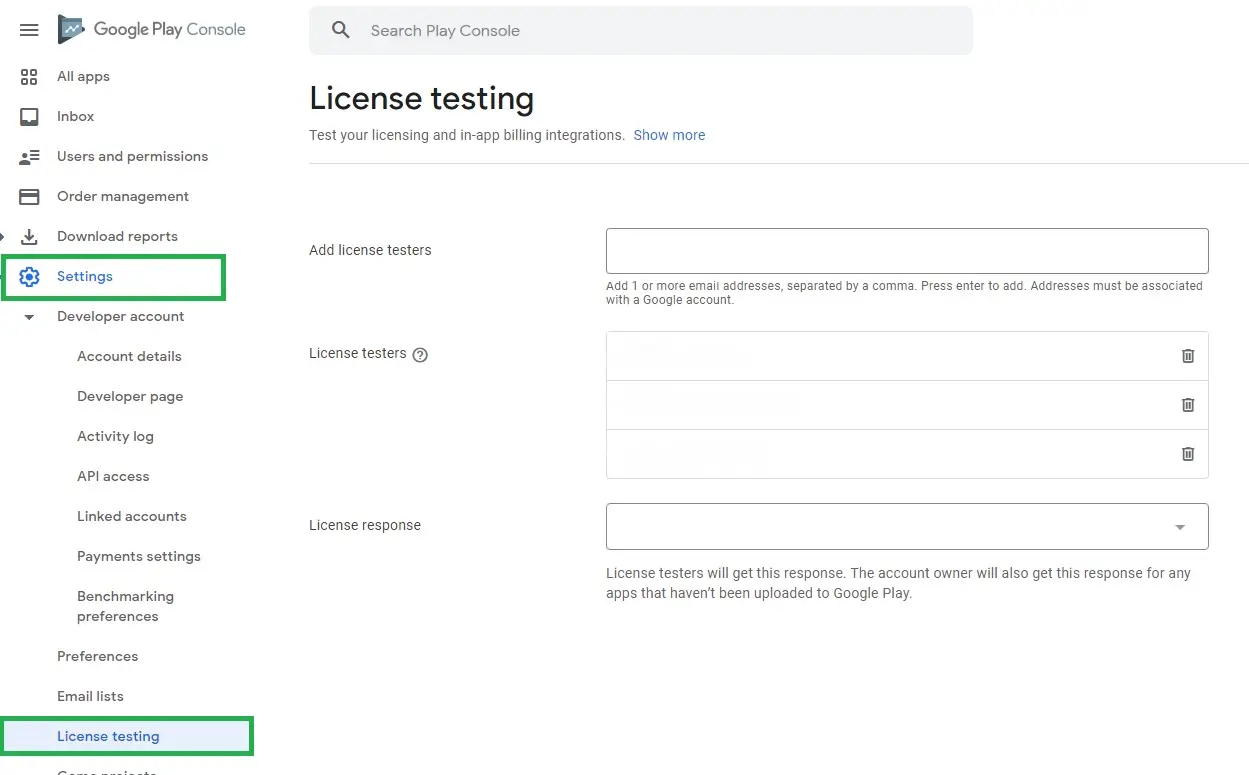
- In the box Add license testers, you can enter the Gmail addresses of your testers.
- At the bottom right corner of the screen, select Save changes.
What is an internal, closed or open test?
By using the Play Console, you can test your app with three particular groups before you release it to production.
Each test group will help you gather the feedback you need to make the changes in your app as you continue to develop it.
Internal test
This is an up close and personal testing technique. The application is shared with up to 100 testers, who test the application for problems, bugs, and glitches.
Closed test
The closed test feature is used for pre-release version testing of the app with a larger group of testers compared to internal testing.
Open test
This is the final and most extensive form of app testing, as anyone can participate in the testing program and submit feedback. You can run the test with a large group of people and put the test version of the app on Google Play.