Setting up your events
 Updated 1 week ago
by
Chioma Okenwa
Updated 1 week ago
by
Chioma Okenwa
To have the best experience possible with InEvent, it's important to make sure that all settings have been done correctly in your event, according to your needs. You can follow this guide to help you get started on creating your event!
Creating an event
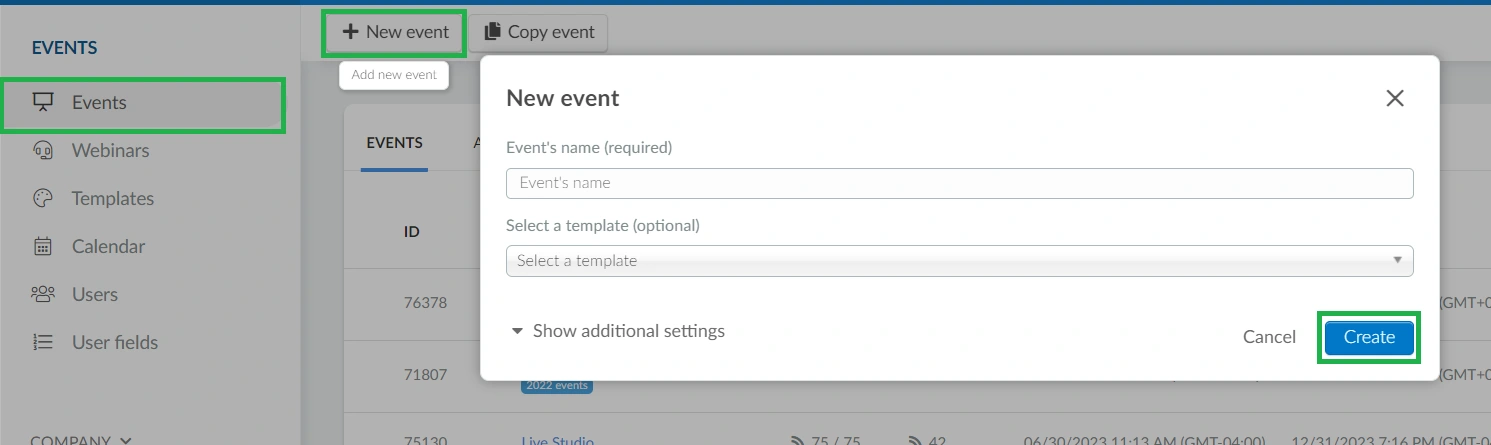
The first step is to create an event. To do so, on your company level, select Events on the left bar menu, and then click on + New Event.
Choose a name for your event, and you can also choose a template for it as well. To learn more about templates, click here.
When you're done, click on Create.
Before starting to add any content or information to your event, it's important to check and adjust the Tools available for your event. To do do, go to Settings > Tools.
Here you have some pre-defined tools according to your plan, and these can be disabled if you wish. However, some features can be enabled regardless of the chosen plan. Most of these are under the Control, Block, and Extra sections. To learn more about this, click here.
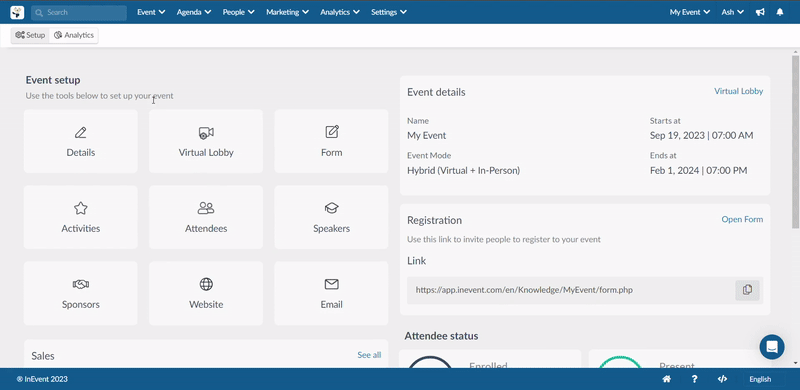
With that done, you can now start setting up your event!
Event Details
On the details page, you'll be able to configure the basic information on your events, such as a cover banner, end and start date, event privacy and mode, etc.
To check out all topics covered here, please review the Event Details article.
Sponsors, Exhibitors, Speakers, Content
With details set up, you can start adding the basic information to your event. It's important to have this as one of your first steps to ensure that everything on the event's structure is ready before people have access to it.
This step is made up of 4 different elements:
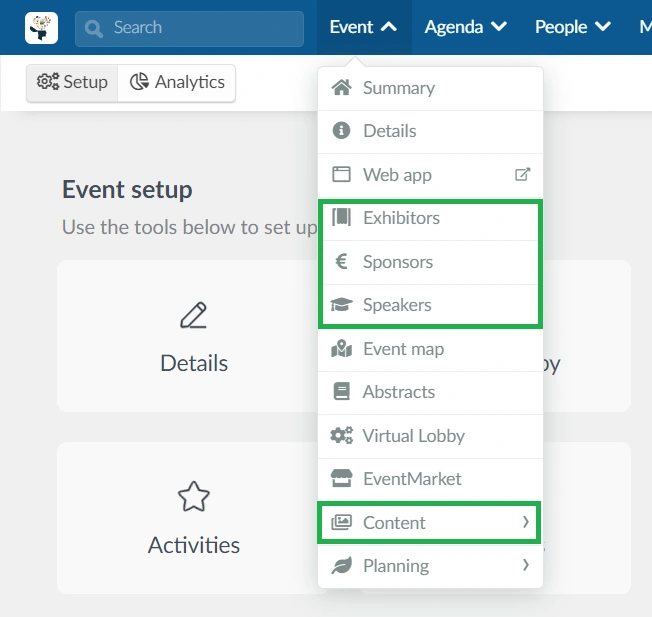
- Event > Exhibitors: Add companies that are exhibiting at your event. On the Exhibitors page, you can set contact information, allow a virtual room (if your event is online), as well as create ads for them.
- Event > Sponsors: Add companies that are funding your event. On the Sponsors page, you can set contact information, give them a virtual room (if your event is online), as well as create ads for them.
- Event > Speakers: enter information on who's speaking at your event.
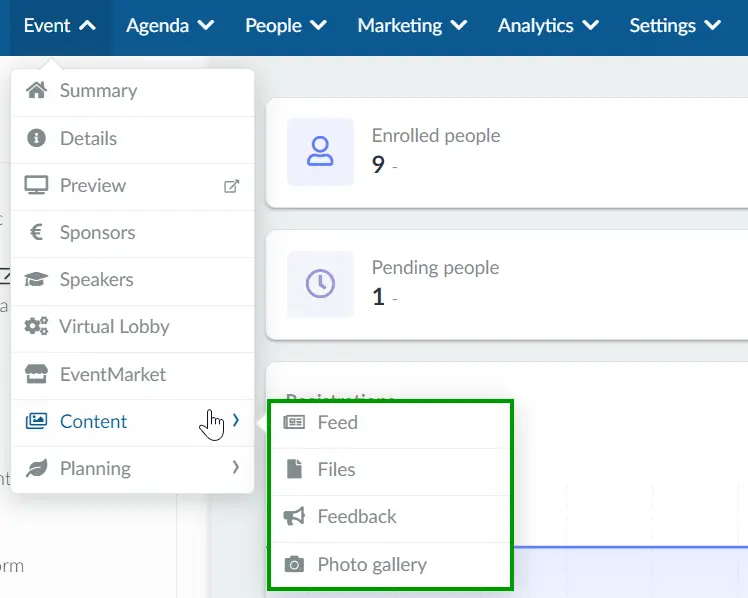
- Event > Content: This area of the event is divided into 4 subareas.
Please click on each heading to navigate to the relevant FAQ:
- Feed - A way of interacting with attendees with posts or by linking your social media accounts.
- Files - Place where you can upload files relevant to your event.
- Photo Gallery - Area to post photos related to the event
- Feedback - Place to create a feedback form related to the event as a whole
Activities
On Agenda > Activities, you'll be able to add sessions to your event. These sessions can be both online or not, and online sessions can be configured to be as live-stream, pre-recorded content or even integrate with 3rd party applications.
Interactions
Now it's time to set up all features that include any type of interaction with your participants. That can be in the form of:
- Polling - Participants can answer polls in live sessions.
- Quiz: Participants can answer quizzes in live sessions
- Questions - People can send out questions in the Question tab in live sessions.
- Comments - Participants can send out comments with speakers and also interact with one another in the Chat tab in live sessions.
- Gamification - A way of stimulating and engaging your participants in your event.
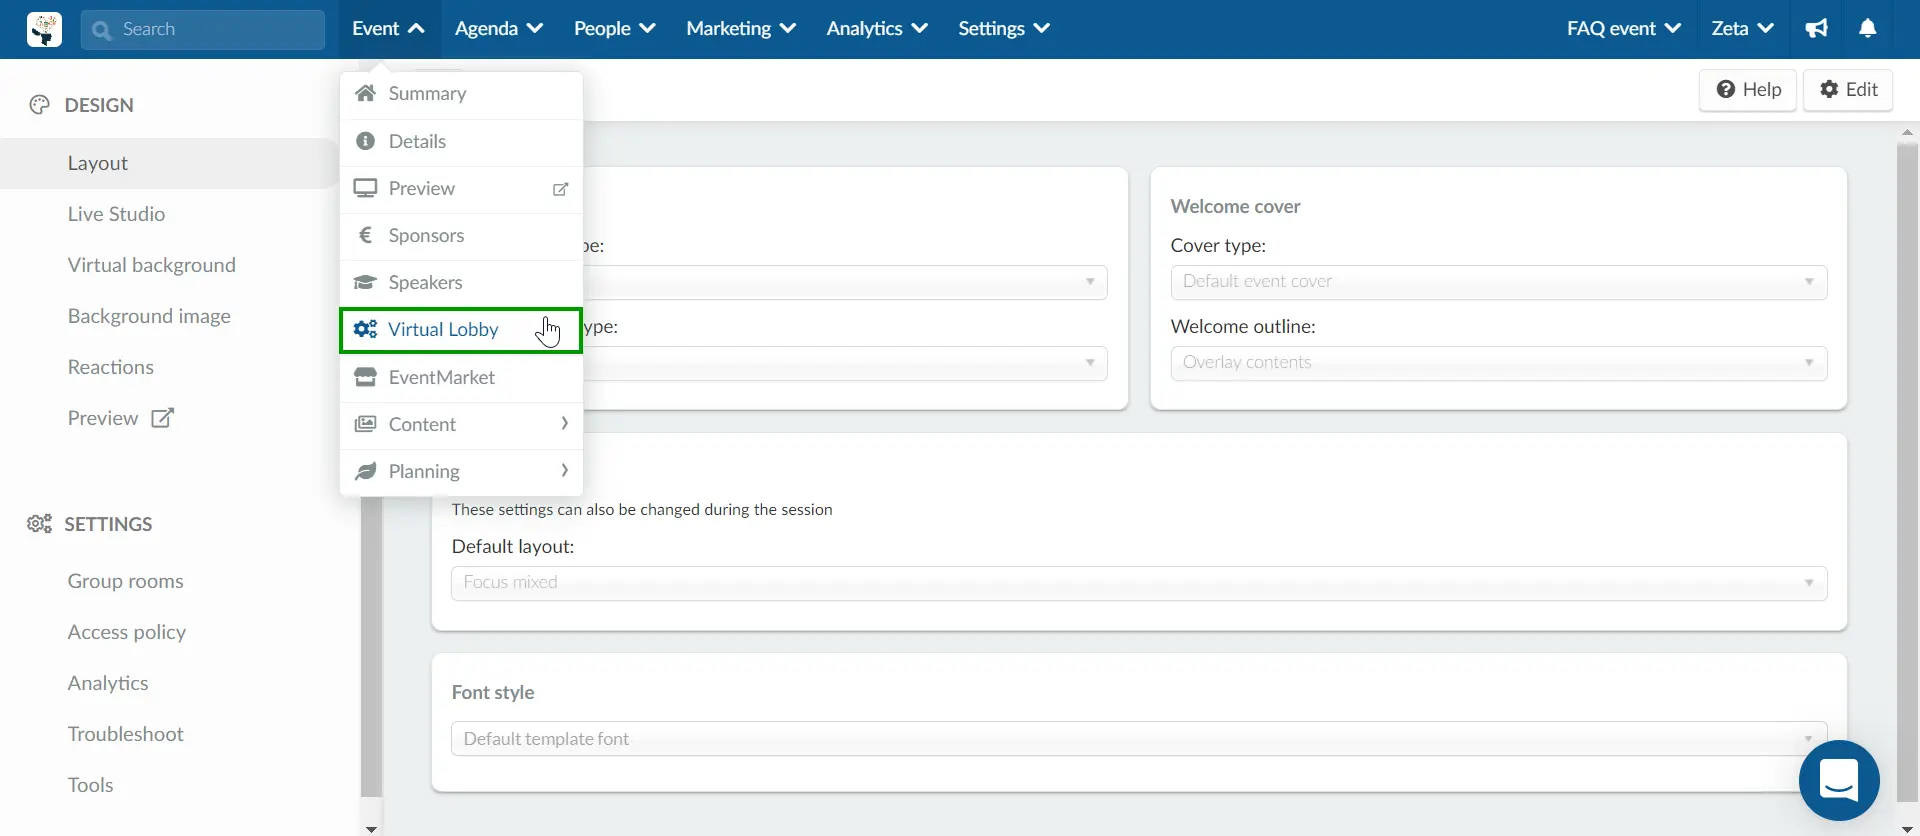
Virtual Lobby
If you are hosting a virtual or hybrid event, you should go to Event > Virtual Lobby to set up your preferences regarding room access, welcome card, networking, interactions among other options.
Customization
With all the basic structure done, it's time to start customizing your event. This can be done through Tabs, Tags and Tracks, and Headings.

Please check each of the following bullet points to go to the respective FAQ:
- Tabs - A place to change and customize the tabs that appear on both your mobile App and online Virtual Lobby.
- Event Tags and Tracks - These are a way of organizing your event, and can be applicable to Speakers, Sponsors, Activities, and Attendees.
- Headings - On the Headings page you'll be able to change default texts and messages that are shown throughout your event.
Besides those customization features, there's a way of changing and making direct appearance changes on the Virtual Lobby (on available layouts, background images, and default font, for example). To do so, you'll have to go to Event > Virtual Lobby.
Communication
At this point, it is crucial to check out your confirmation automatic email before adding any attendees to the platform. That is due to the fact that since the confirmation emails are triggered automatically once an attendee is added to the event, it is imperative to have that email set up according to your needs and match up with the event's branding and aesthetic.It's a good idea to also learn other ways of communication with the audience, via Custom forms, Push messages, and SMS sender.Registration
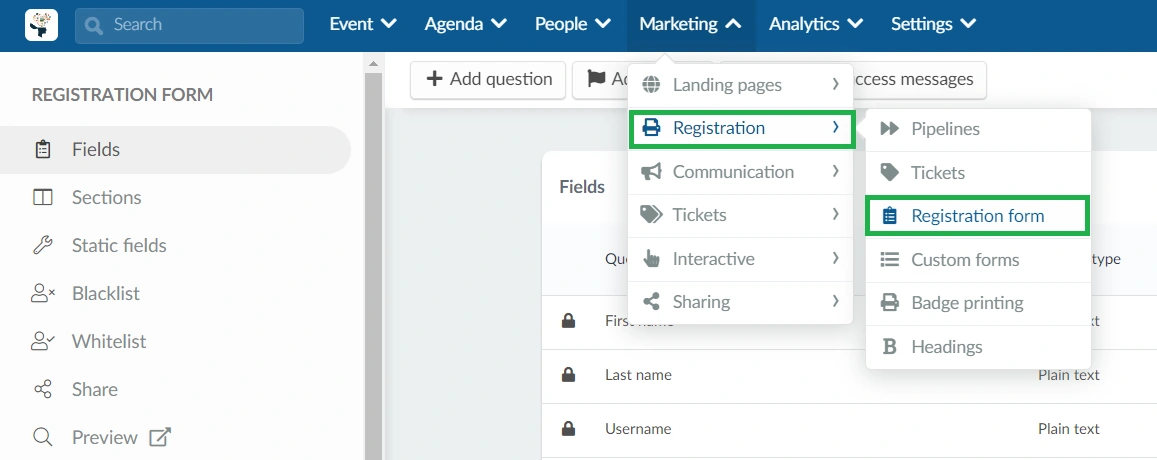
It's important to set up the registration form at this point. Click here to check which plans include Registration features.
To access your registration form, go to Marketing > Registration > Registration Form. Here, you'll be able to add/delete questions, check the answers, and share your form.
At this stage, you'll also be able to set up tickets for your event if it's ticketed.
Website
Create a custom website for your event where users can see details of the event and also register via the website. You can create a website using the Website tool or you can create your website with the Landing page feature.
You can add event information such as: event schedule , speakers , sponsor, map integrated with Google Maps to get to the venue and photos of the event .
People
With all other steps concluded, it's finally time to start adding people to the platform. That can be through either the Registration Form, where people enroll themselves, or by the event hosts manually adding people to the participants' list.
Depending on the settings of the event, the participants could be added to the platform as Attendees, Invitees, and Leads.
There is also a possibility to directly add users to the Waitlist and Lists, for more information about the Waitlist click here, and for the List here.
Dry run
To avoid possible points of failure on the day of your event, have your speakers, room hosts and administrators run through their permissions and presentations ahead of time as much as possible.
Test equipment and internet connection speeds, and identify solutions and backup plans.
And just like that, you're done! You are all set up and ready to have an innovative experience with your online events! Don't forget to after it's done go and check the Analytics to see how has your event performed in regards to attendance, engagement, and much more!