Sign language channel
 Updated 1 month ago
by
yasmine haj sassi
Updated 1 month ago
by
yasmine haj sassi
Focusing on web accessibility, Inevent offers the opportunity to make events more attainable for community members who are deaf or hard of hearing. It is important to remember that each country has its own national sign language and sometimes also regional signed languages. So the first step is to define who is the audience and where are they located. If you are planning to reach a worldwide audience, you should consider something called International Sign.
International Sign (IS)
This communicative success is linked to various factors:
- First, people who sign in IS have a certain amount of shared contextual knowledge.
- Secondly, signers may take advantage of shared knowledge of a spoken language.
- Thirdly, communication is made easier by the use of iconic signs and visual resources.
After those important tips, let's go through the step-by-step on how to include the Sign language channel in your sessions and have an event successfully prepared for different audiences. And if you wish to include multiple audio interpretation channels, please check this article.
For event organizers
When advertising your event, clearly state the availability of sign language interpretation so that hearing-impaired viewers are able to find the accessible information.
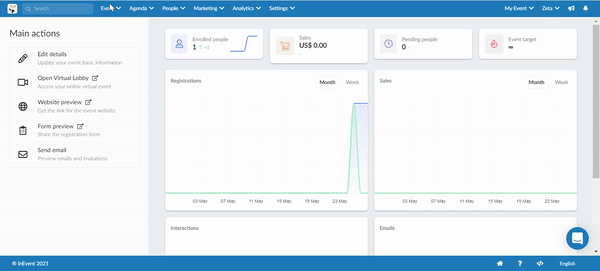
How can I activate this feature for the event?
To enable this feature, go to Settings > Tools and look for the Live section. Press Edit and check the box for Audio interpretation.
How do I create a sign-language channel for an activity?
Next, you should also enable this feature inside the activity by going to Agenda > Activities, select the activity you want this channel to take place, and scroll down on the Details page until you see Audio interpretation (multiple languages).
Once you have enabled the audio interpretation option, you will see the options to choose the language of your choice from the drop-down bar. After you have selected Sign Language, press Create.
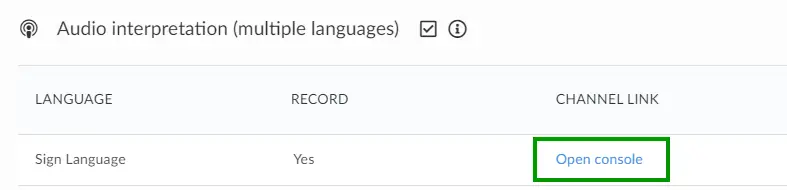
Giving the interpreters access to the session
After creating the sign language channel, simply copy the Open Console link and share it with them.
Recording the session
It is possible to record the session as well as the Sign language channel into different file tabs, for more information on how to do that, please click here.
For interpreters
Preparation
Planning ahead means half of the work done. Interpreting is an exhausting activity – both physically and mentally. Keeping up with the story, context, jargon, references is no easy feat. This is especially so when interpreting a conversation or a Q&A session.
It is recommended to have at least a team of two interpreters per language combination, and if the session is longer than two hours you will need at least a team of three interpreters.
The interpreting team needs to understand what will happen:
- Outline of the complete event - This gives the team a general idea about the structure, duration of sessions, and helps with planning and when to switch to another team member.
- The content per session - Share the abstract and slides of every session prior to the event. This is very helpful to understand the context and intent of the talk.
- List of names - Share with the interpreters the names of presenters, moderators, sponsors, and whoever has an active role in the event, so they will know how to spell the names of everyone correctly.
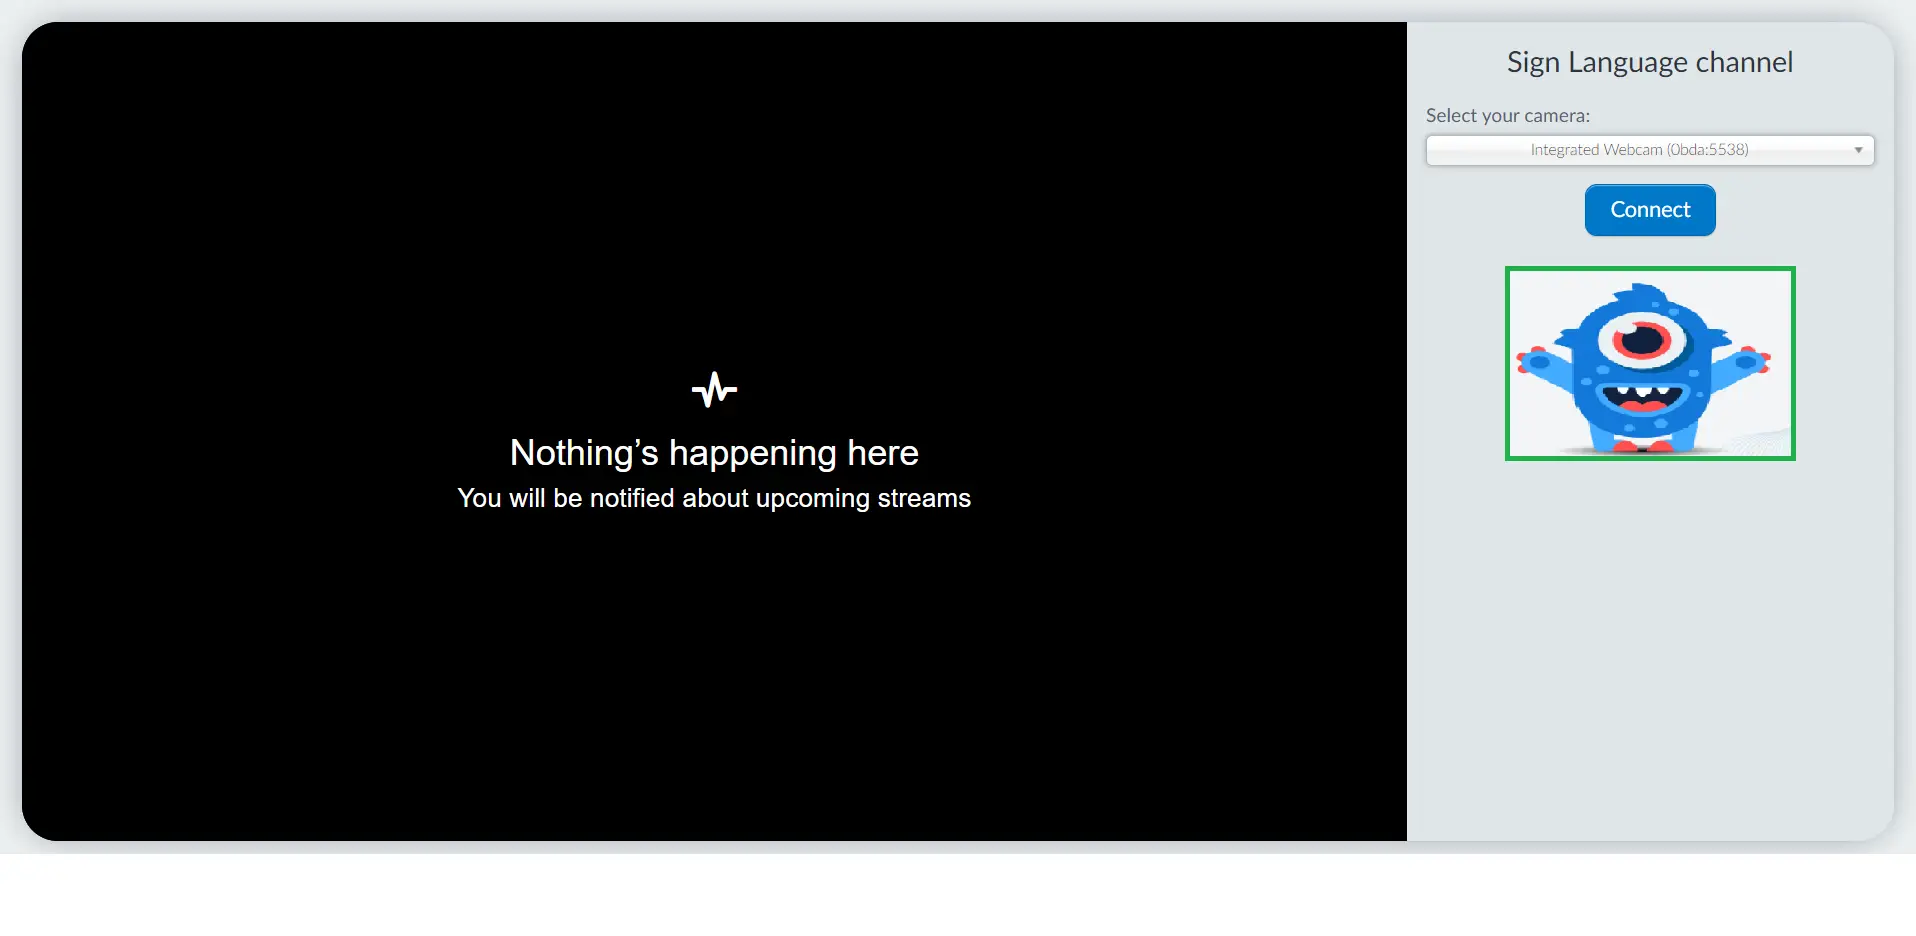
Accessing the console
The interpreter will see the live session on the bigger plan and on the right, the option to select the camera input source under Select your camera. After selecting the camera, press Connect.
Once you press Connect, you will receive a confirmation informing you that You are connected, and the number of users that are listening to your channel.
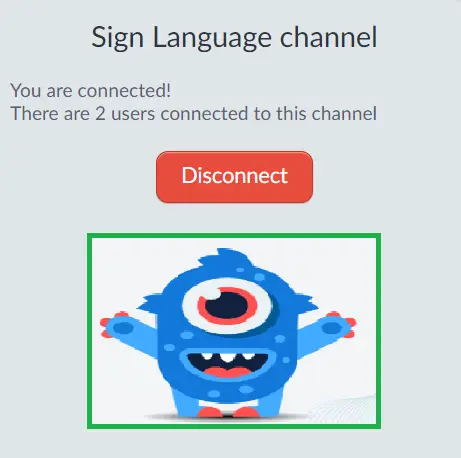
Once the session is over and you wish to disconnect, press the red Disconnect button (as displayed in the image above).
For attendees
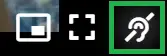
How can I select the Sign Language channel?
You can select the Sign language channel by clicking on the ear icon on the right side of the screen as displayed below:
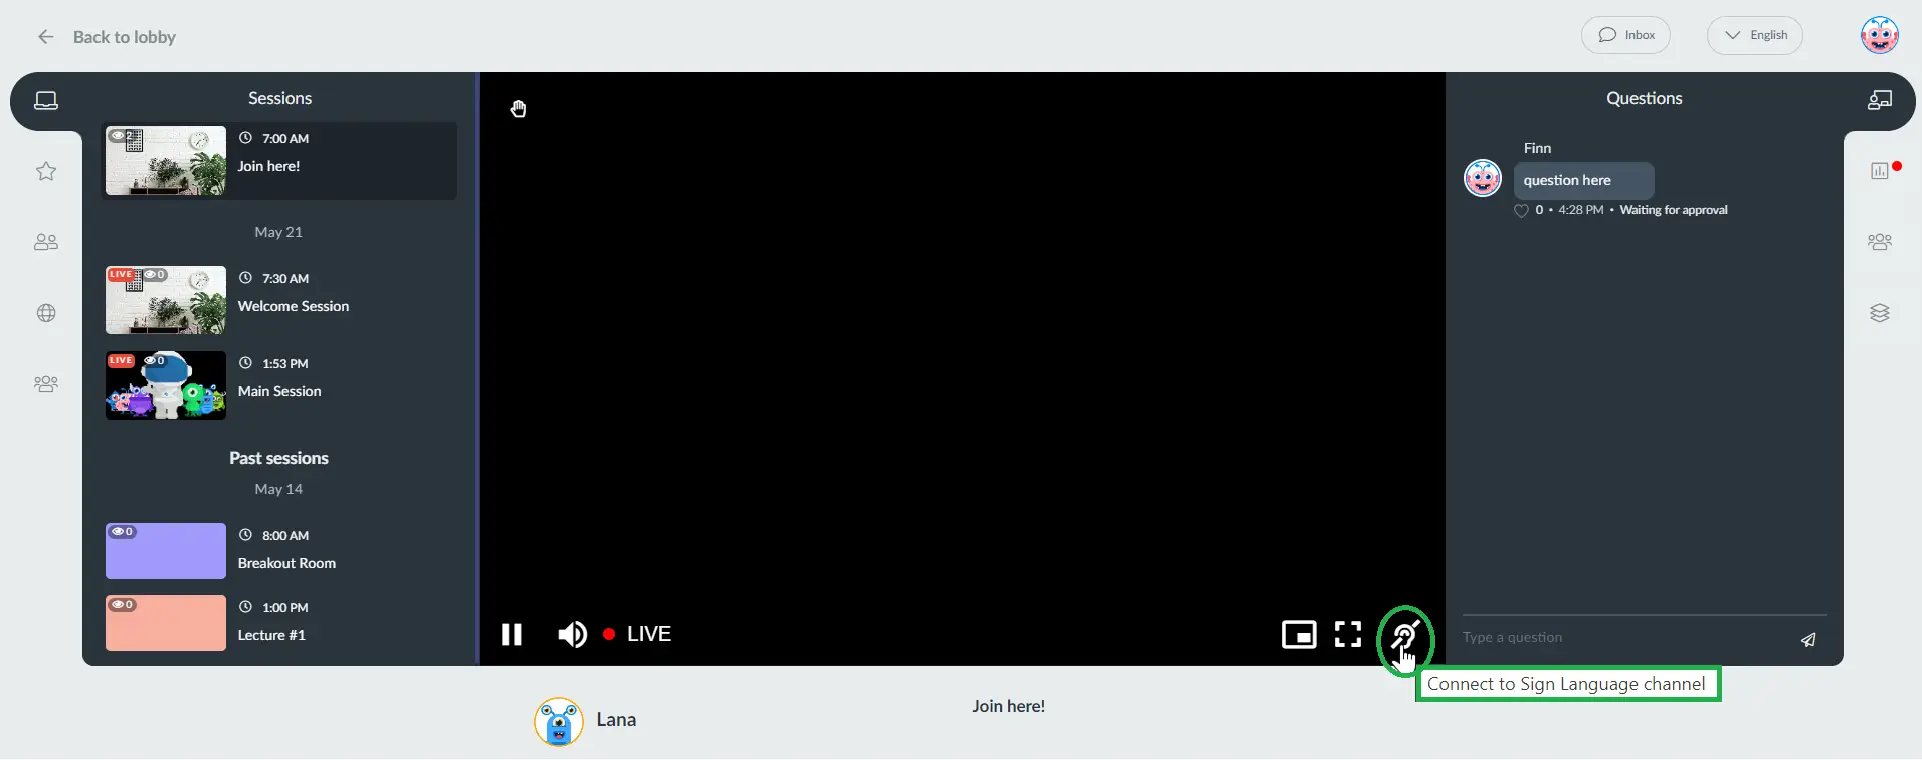
Please notice that, if you click on the ear icon and an orange dot displays next to it, that means the interpreter has not yet connected to the Sign language channel.

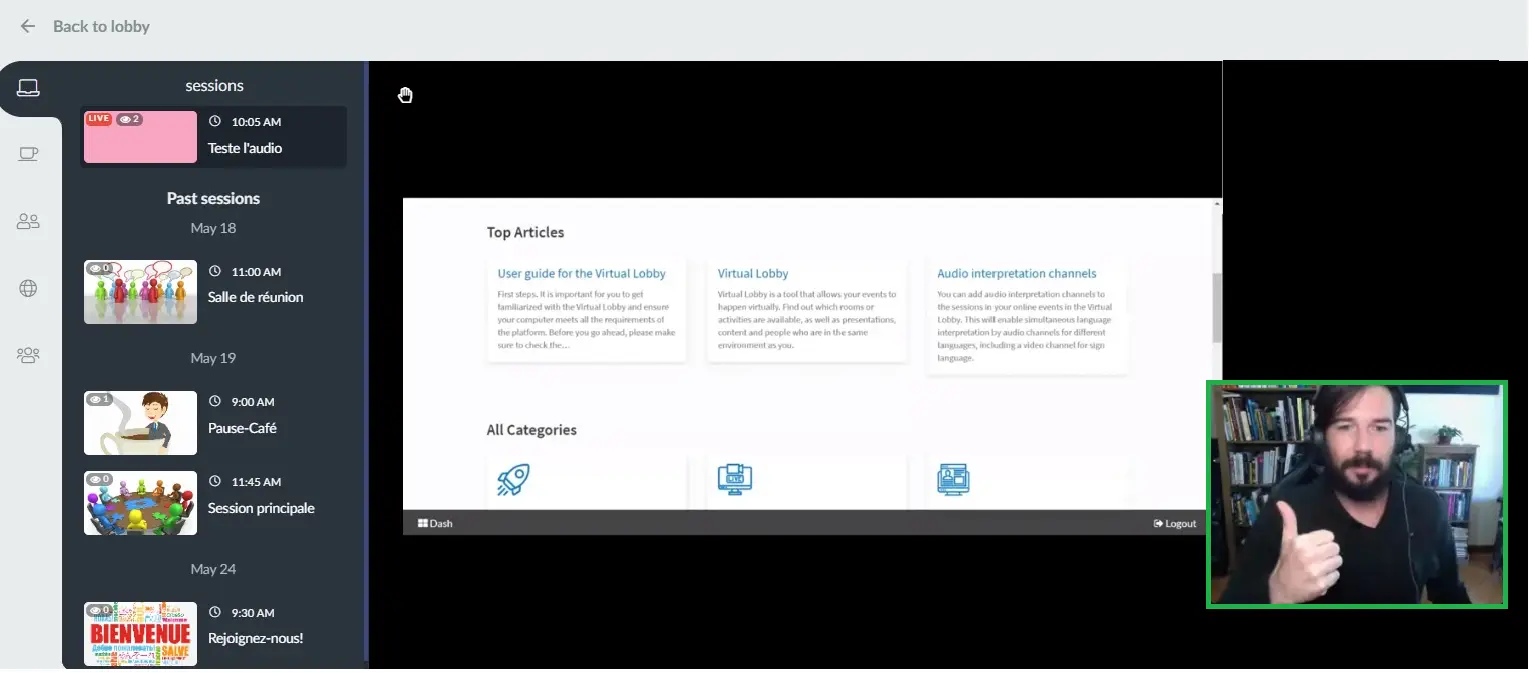
Once the Interpreter joins the room, a smaller screen will be automatically displayed with the Interpreter of sign language alongside the main presentation.
To disconnect from the Sign language channel, simply click on the ear icon again and the screen will disappear from the main presentation.