Itinerary with Personalized Messages
This feature helps organize the logistics (or any information) of attendees attending your event. It enables organizers to send attendees logistics and travel information (or any other type of specific information). Event Organizers can then upload information regarding attendees' flights, hotel rooms, or transfers onto the platform.
Additionally, the in-app tab named Itinerary explains the event instructions for attendees, letting them know details of when and where to arrive for the event, lodging information, and their transfers. The organizer can upload this information using the attendee's spreadsheet in admin mode on the platform. Additionally, with the spreadsheet, organizers can include individualized information for each attendee.
How do I Insert unique information for each person?
There are two options for entering this information on the platform.
Individually
You can send information one by one, individually, through the InEvent platform.
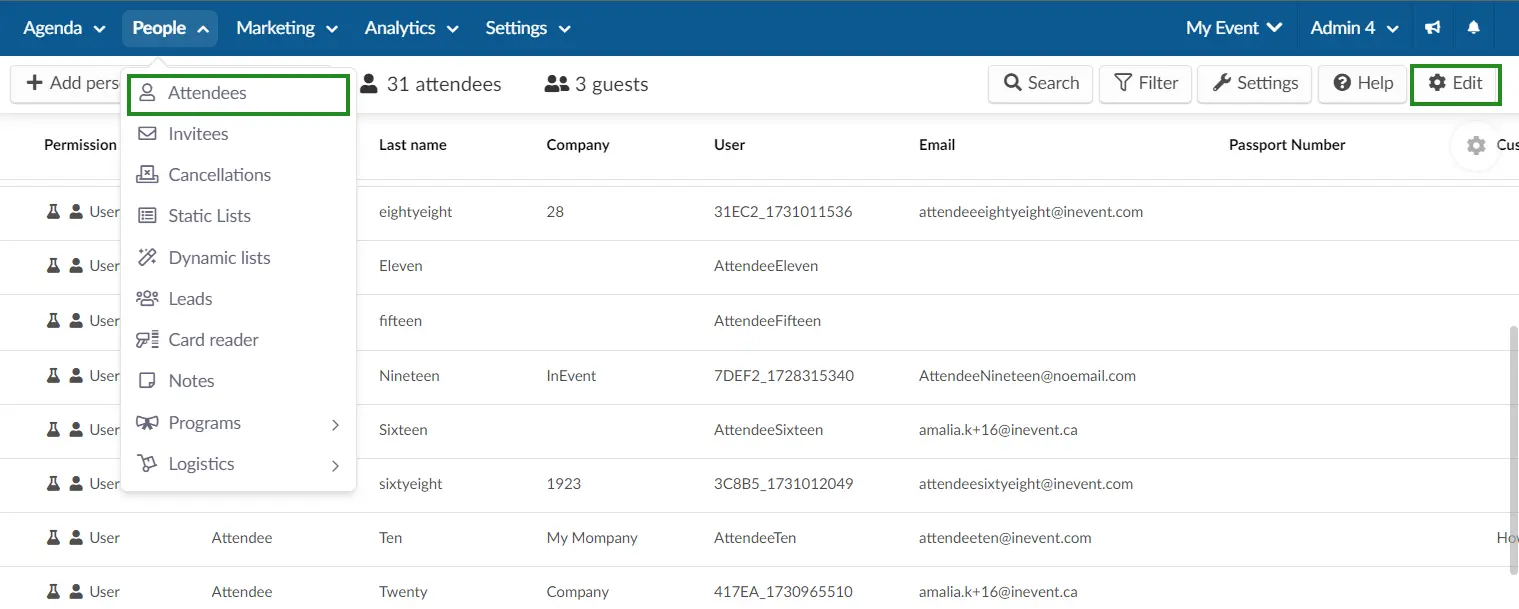
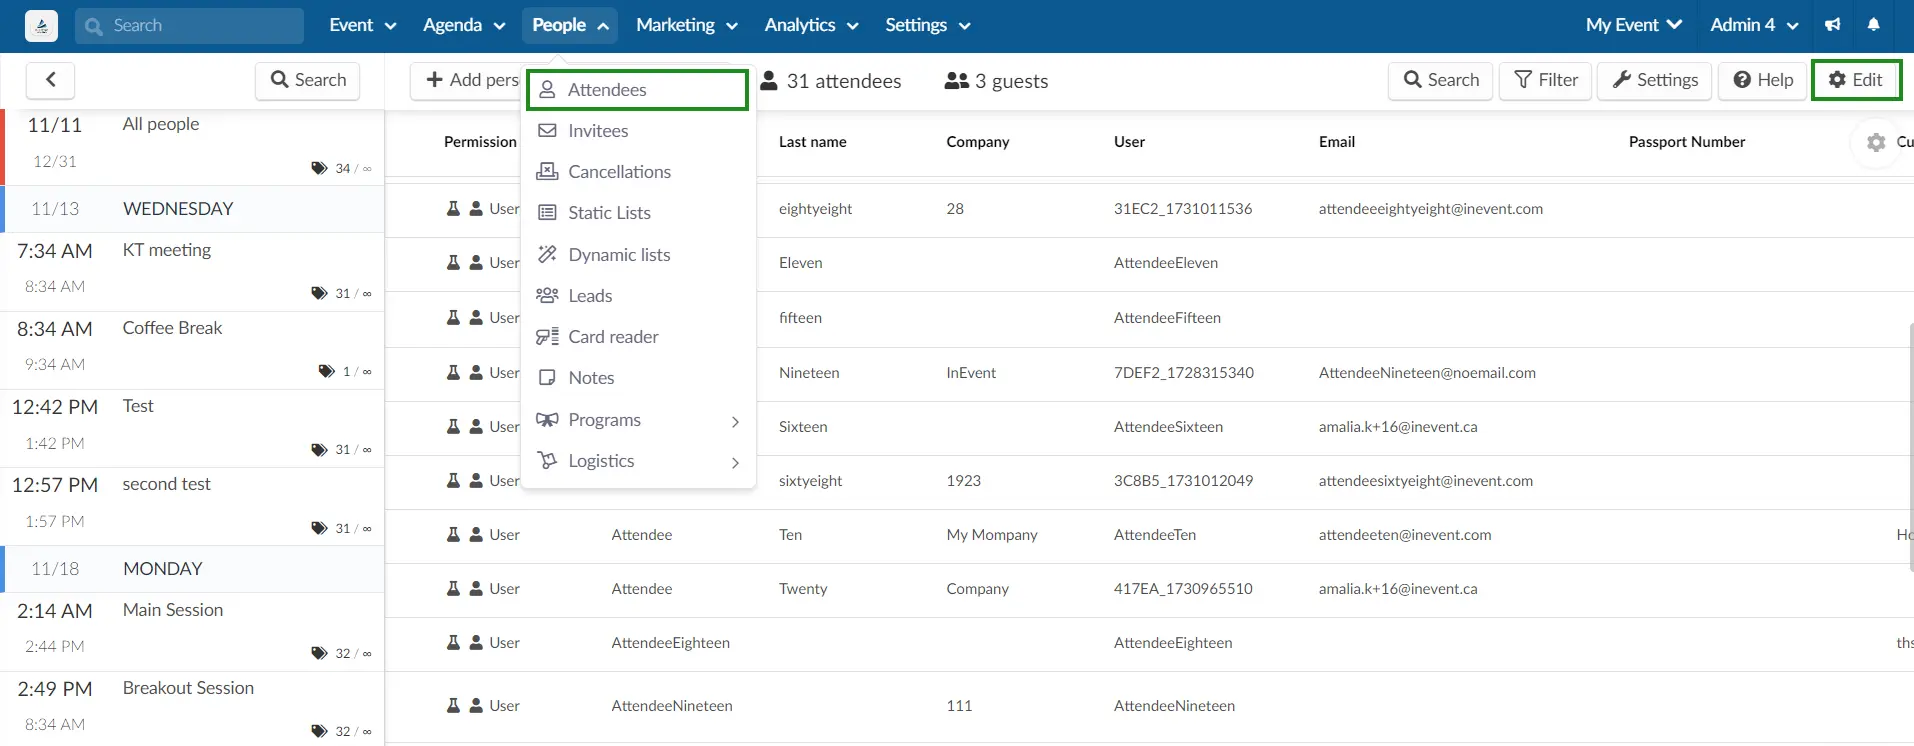
To do this, click on People > Attendees, then click on the Edit button in the top right corner.
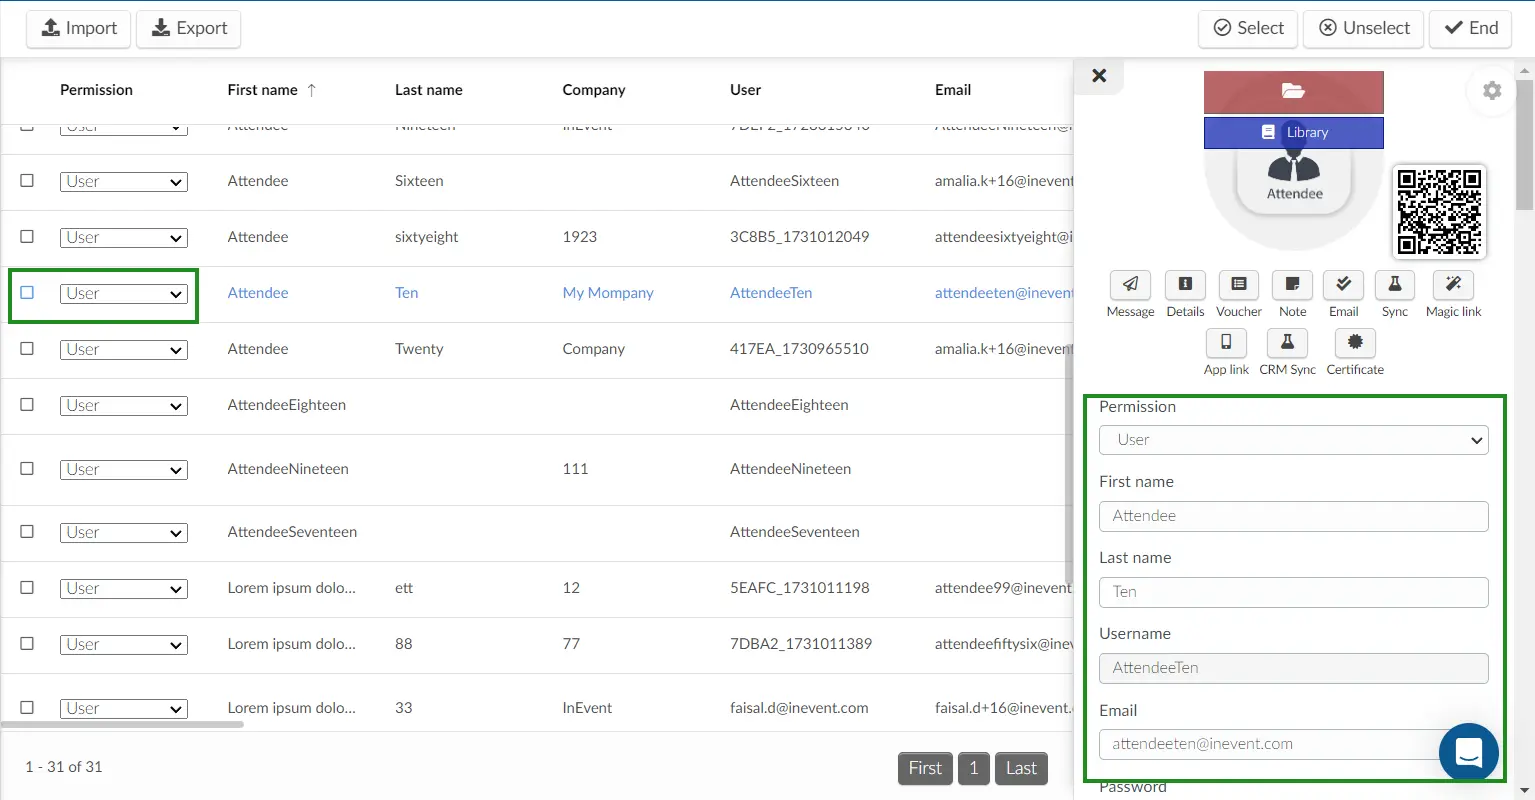
Click on the desired person, and a window will open on the right side of the screen, which displays the person's information.
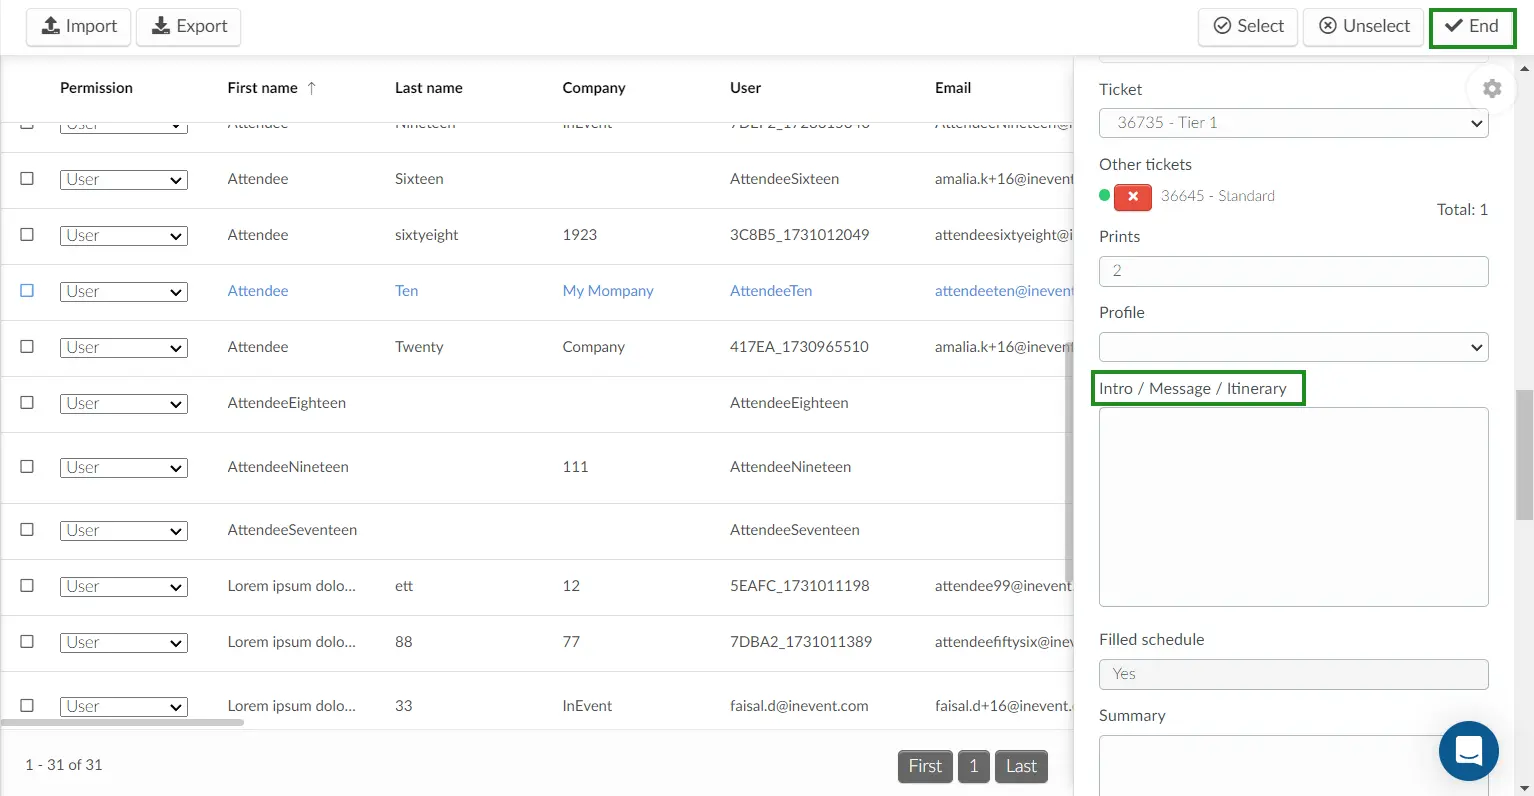
In the details window to the right, scroll down to Intro/Message/Itinerary.
To send the message, you must fill in the information regarding the Itinerary/Logistics and click on the End button in the top right corner to Save.
Insert in bulk through a spreadsheet.
You can send messages to everyone using an imported spreadsheet.
To do this, you will need to download the default file of attendees in People > Attendees > Edit
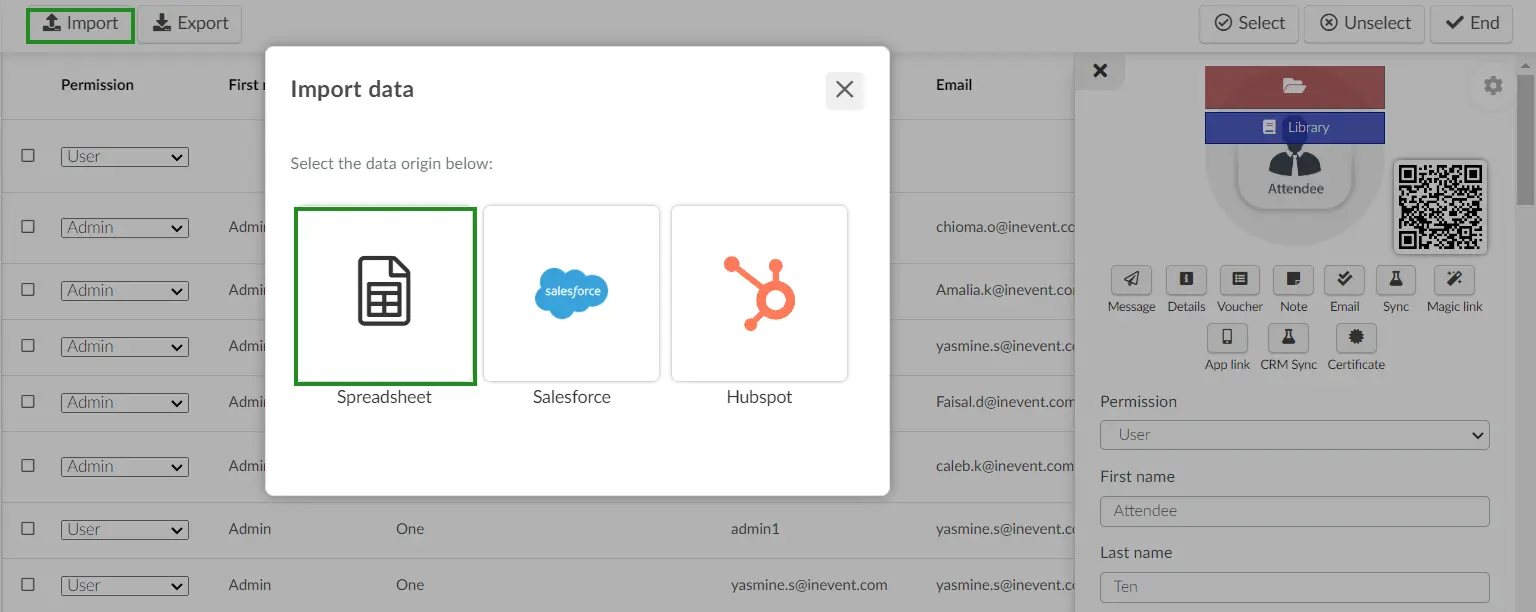
Then, click on the Import button in the upper left corner and select Spreadsheet.
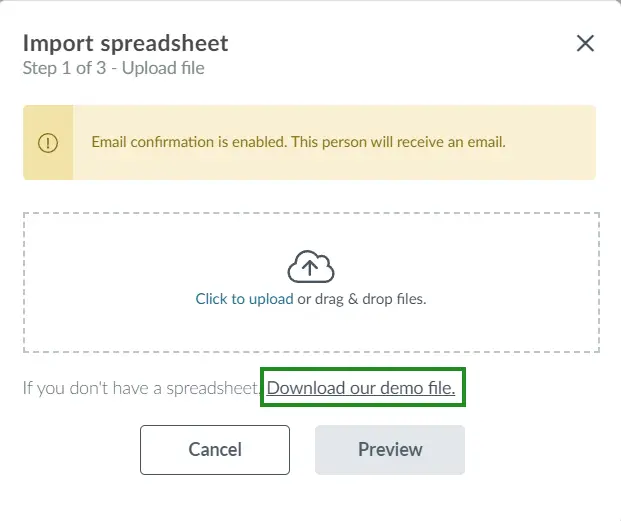
Then click on the Download our demo file.
The default file is in an Excel spreadsheet that organizers must fill in and then import back onto the platform. All information you enter is automatically updated whenever you import a new file with attendee information.
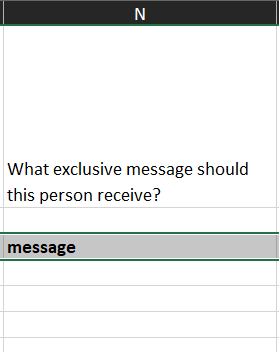
To send a message to all attendees, you have to fill in the column asking, What exclusive message should this person receive? in the spreadsheet.
Hint: You can copy, paste, or drag down the cell to help replicate the messages.
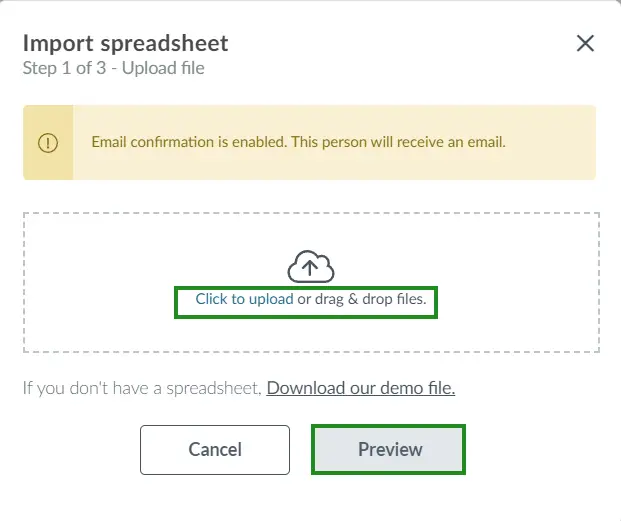
Once you have entered the information, you need to import the excel sheet onto the platform. To do this, click on the Click to upload button to choose the excel file or drag and drop files to upload, and then click on the blue Preview button.
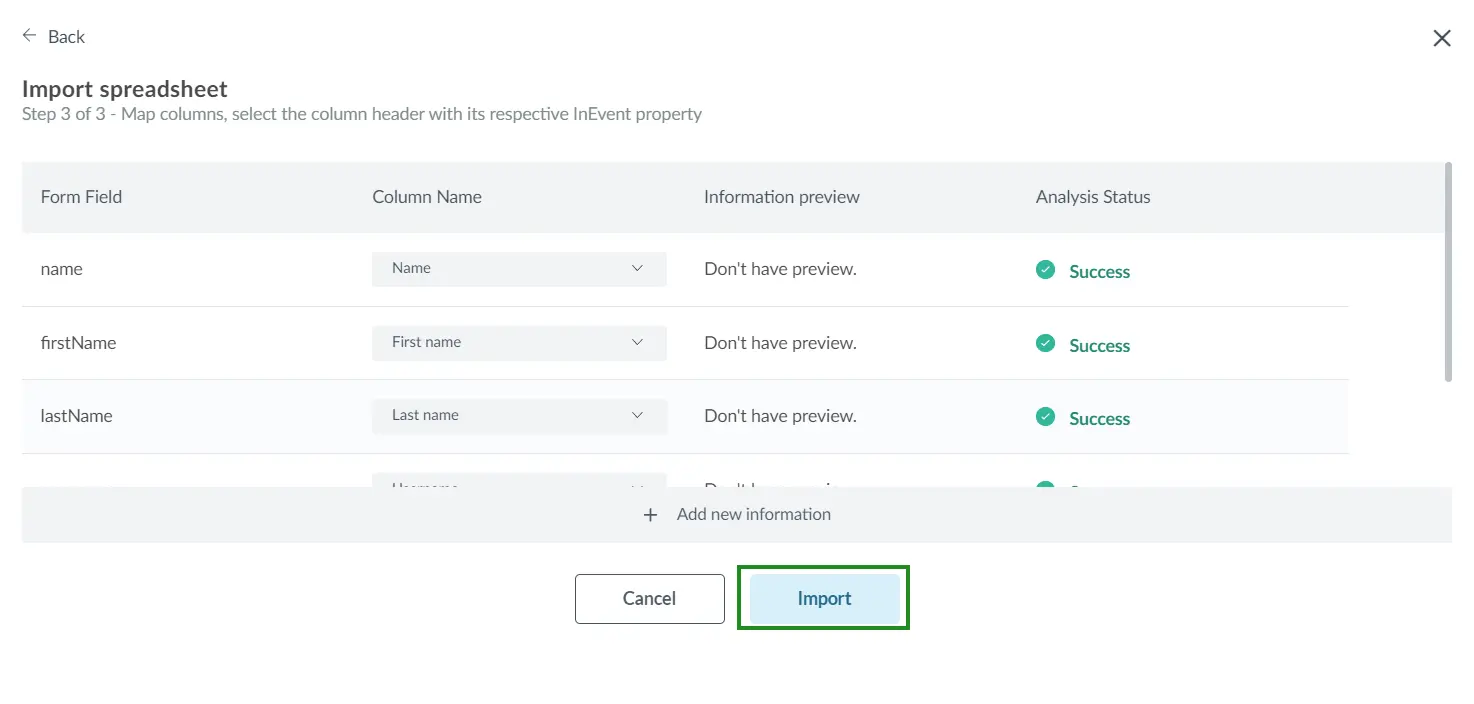
In the preview window, you can double-check that all the information in your spreadsheet matches the information. You can choose to leave some fields empty. Click on Import once you are done double checking the fields
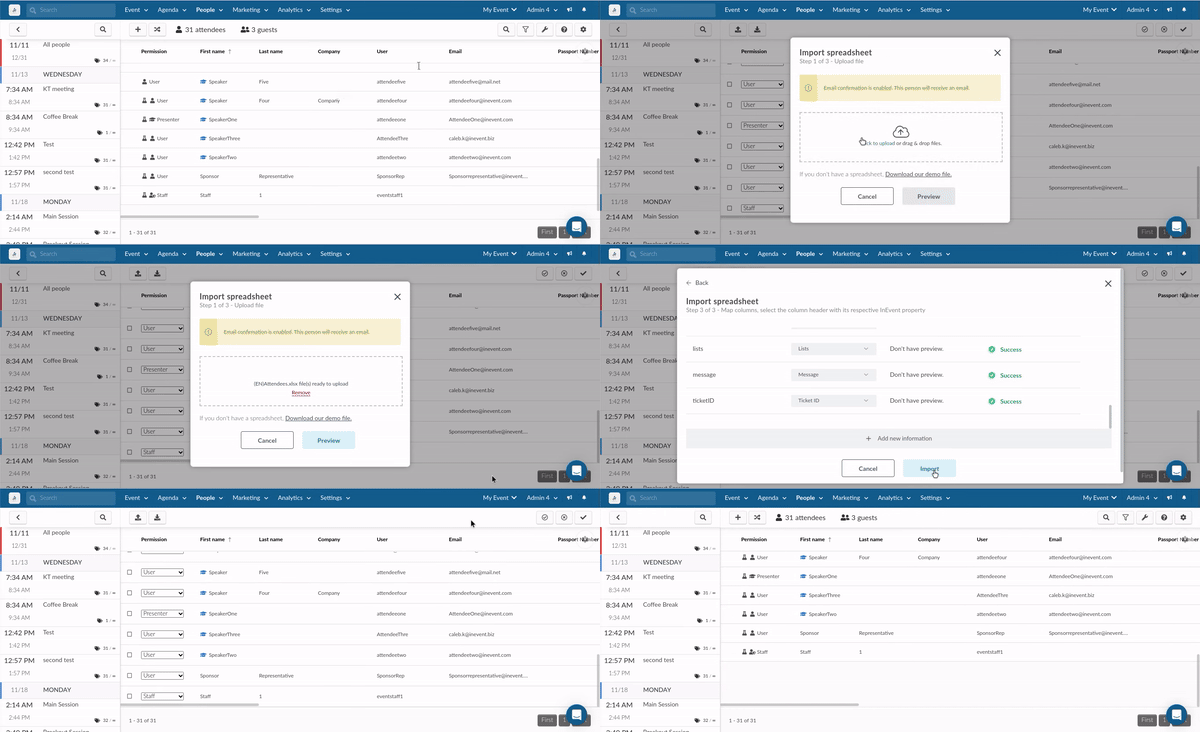
Once you have completed the import, a message box will confirm the import of the excel sheet. Click End in the top right corner to finish editing. See Gif below:
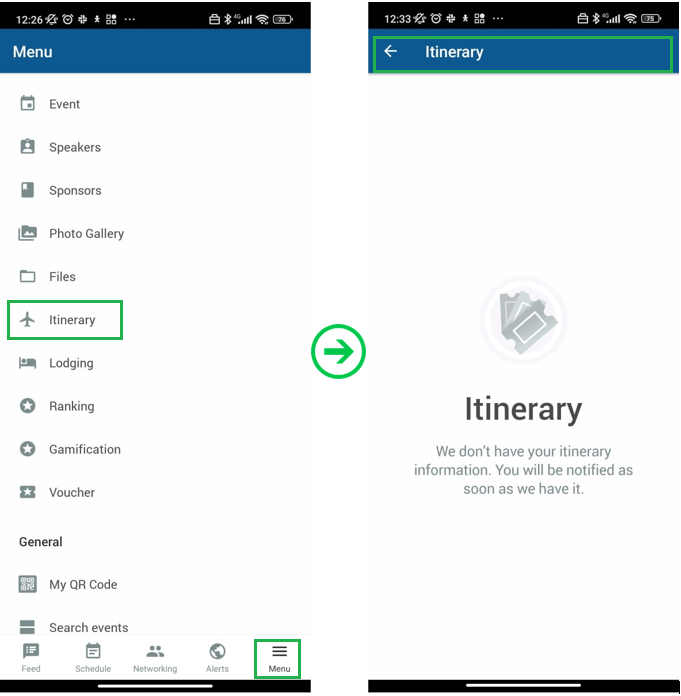
How will the user view the itinerary in the app?
To view the Itinerary in the app, Press the Menu tab, then in the Event field, press Itinerary. The user can then view the event Itinerary you sent for them.
