Multilingual Translation Support
 Updated 11 months ago
by
Chioma Okenwa
Updated 11 months ago
by
Chioma Okenwa
InEvent supports clients in 4 different centers around the world: North America, Europe, Middle East & Africa, Asia Pacific, and Latin America. It is possible to use InEvent's platform in 180 languages, the system detects the user browser or app to display the content in the suitable language.
Setting up the main and content language for your event
Company Level
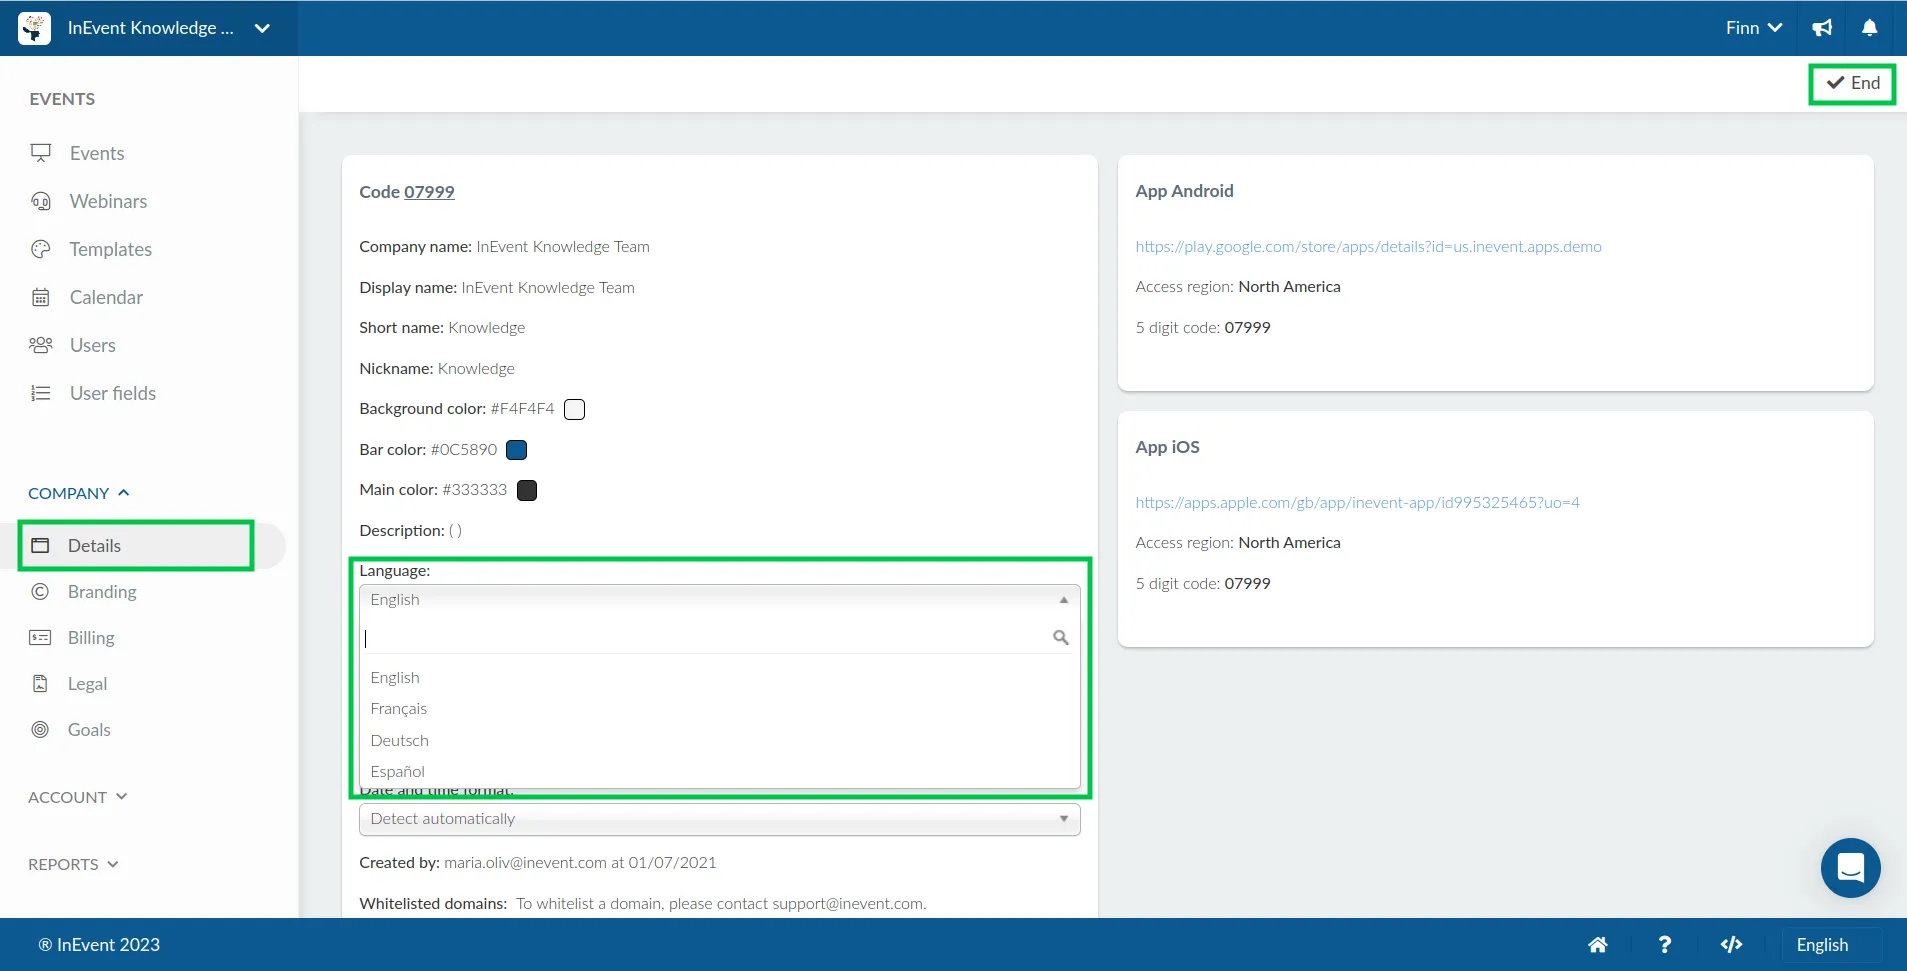
There are two ways to set up the Content language for your event. First, let's take a look at how to set it up at the Company Level.
- On the menu on your left, select Company > Details.
- Next, click on the Edit button in the upper right corner and navigate to the Language drop-down menu. Select any of the languages available as an option.
- In order to save your changes, click on the End button in the upper right corner.
Event Level
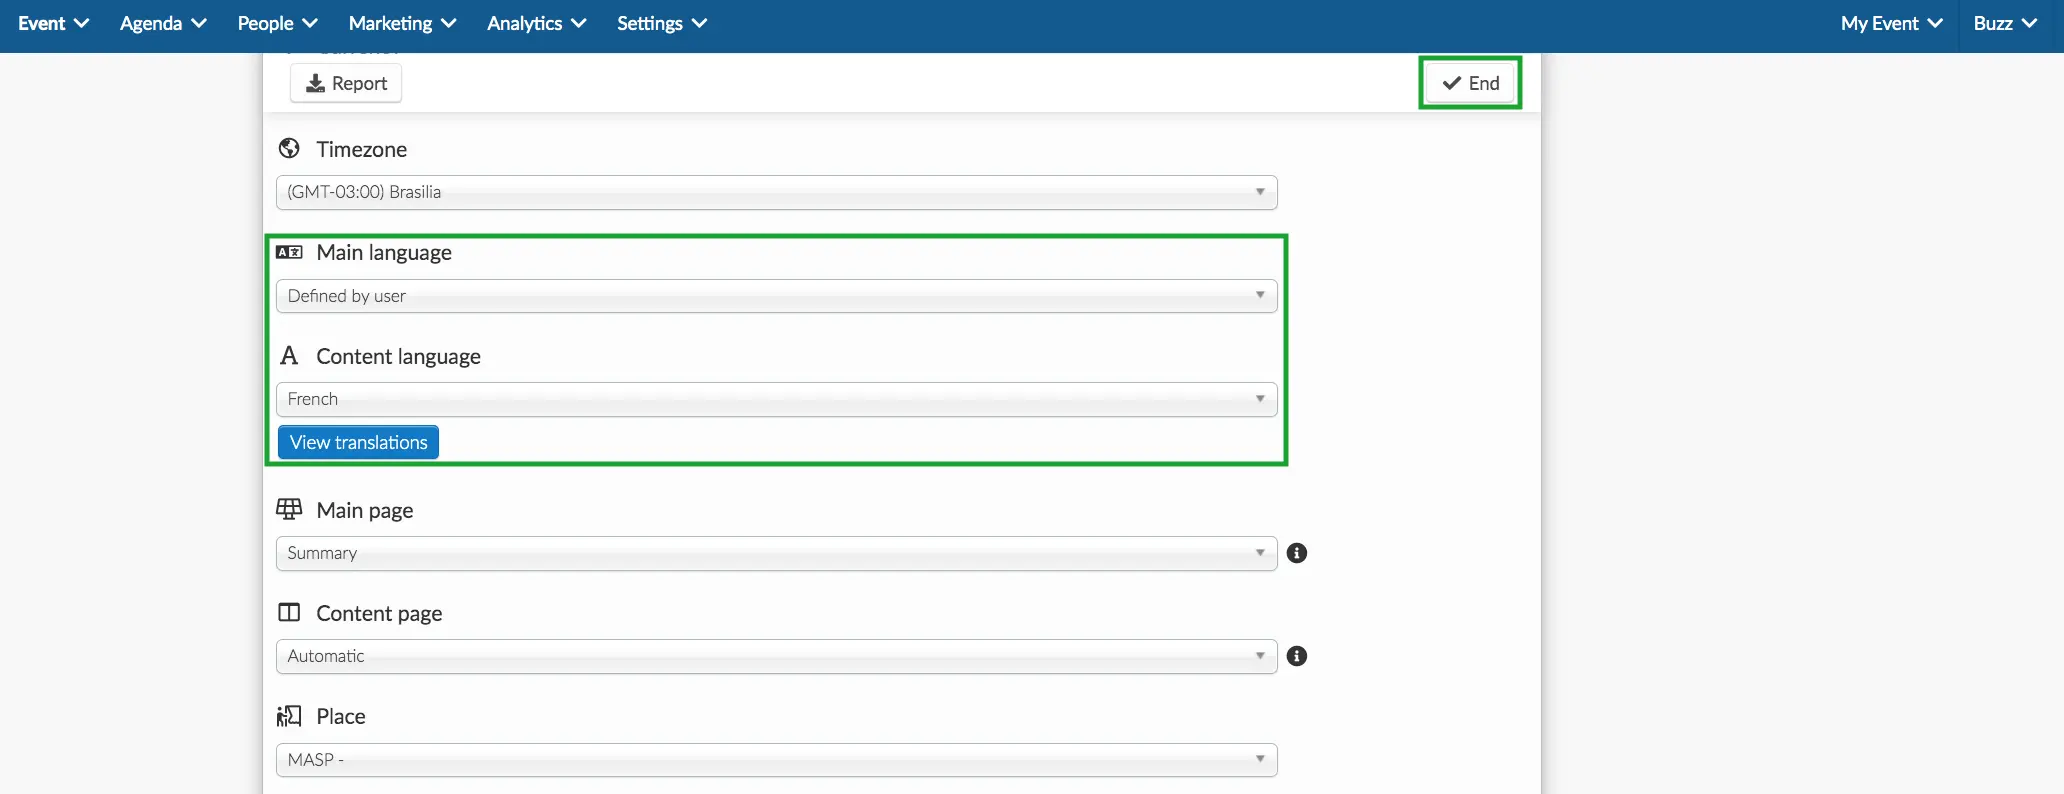
Another possibility is to set the Content language for your event at the Event Level. You can also set the Main language of your event here, see below how:
- To set these options, first go to the details page in the platform, by clicking on the top menu Event > Details.
- After that, click on Edit and scroll down until you find the Main language and Content language options.
- Now simply click on the drop-down menu of one of the options and choose the desired language. When finished just click End to save the changes made.
View translations and how to remove them
The View translations button below the Content language option shows you the number of event content that has been translated into the selected language. To learn more about how to translate content on the platform, go to the next section.
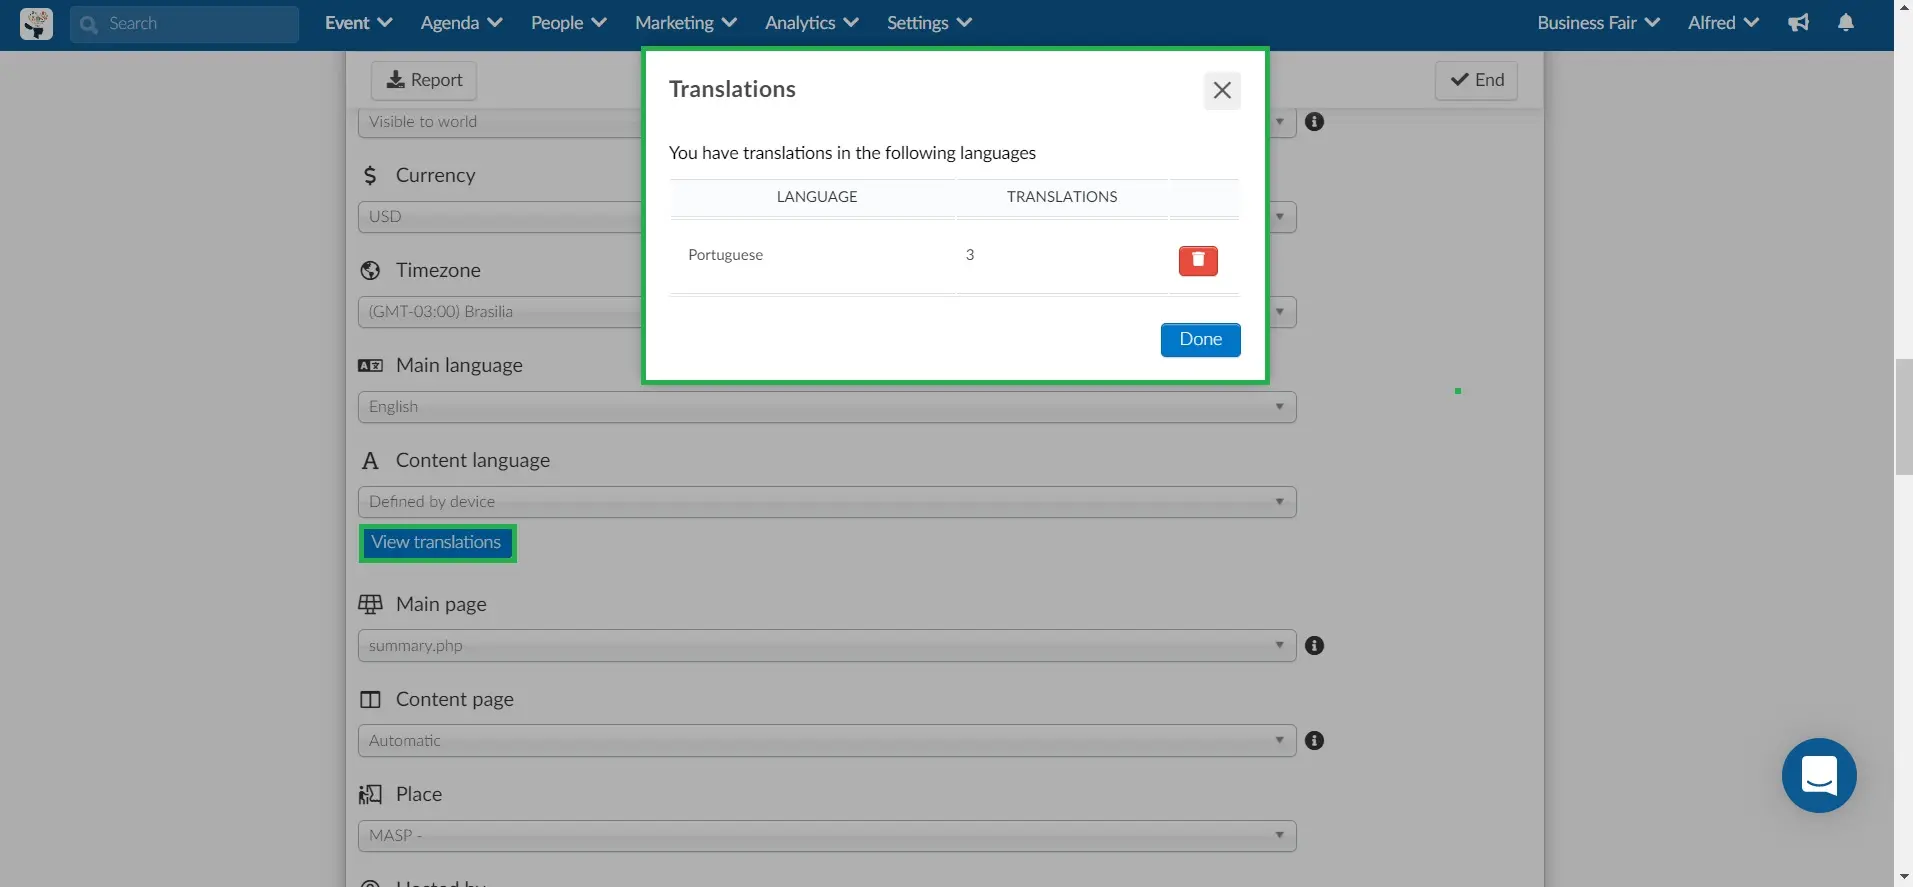
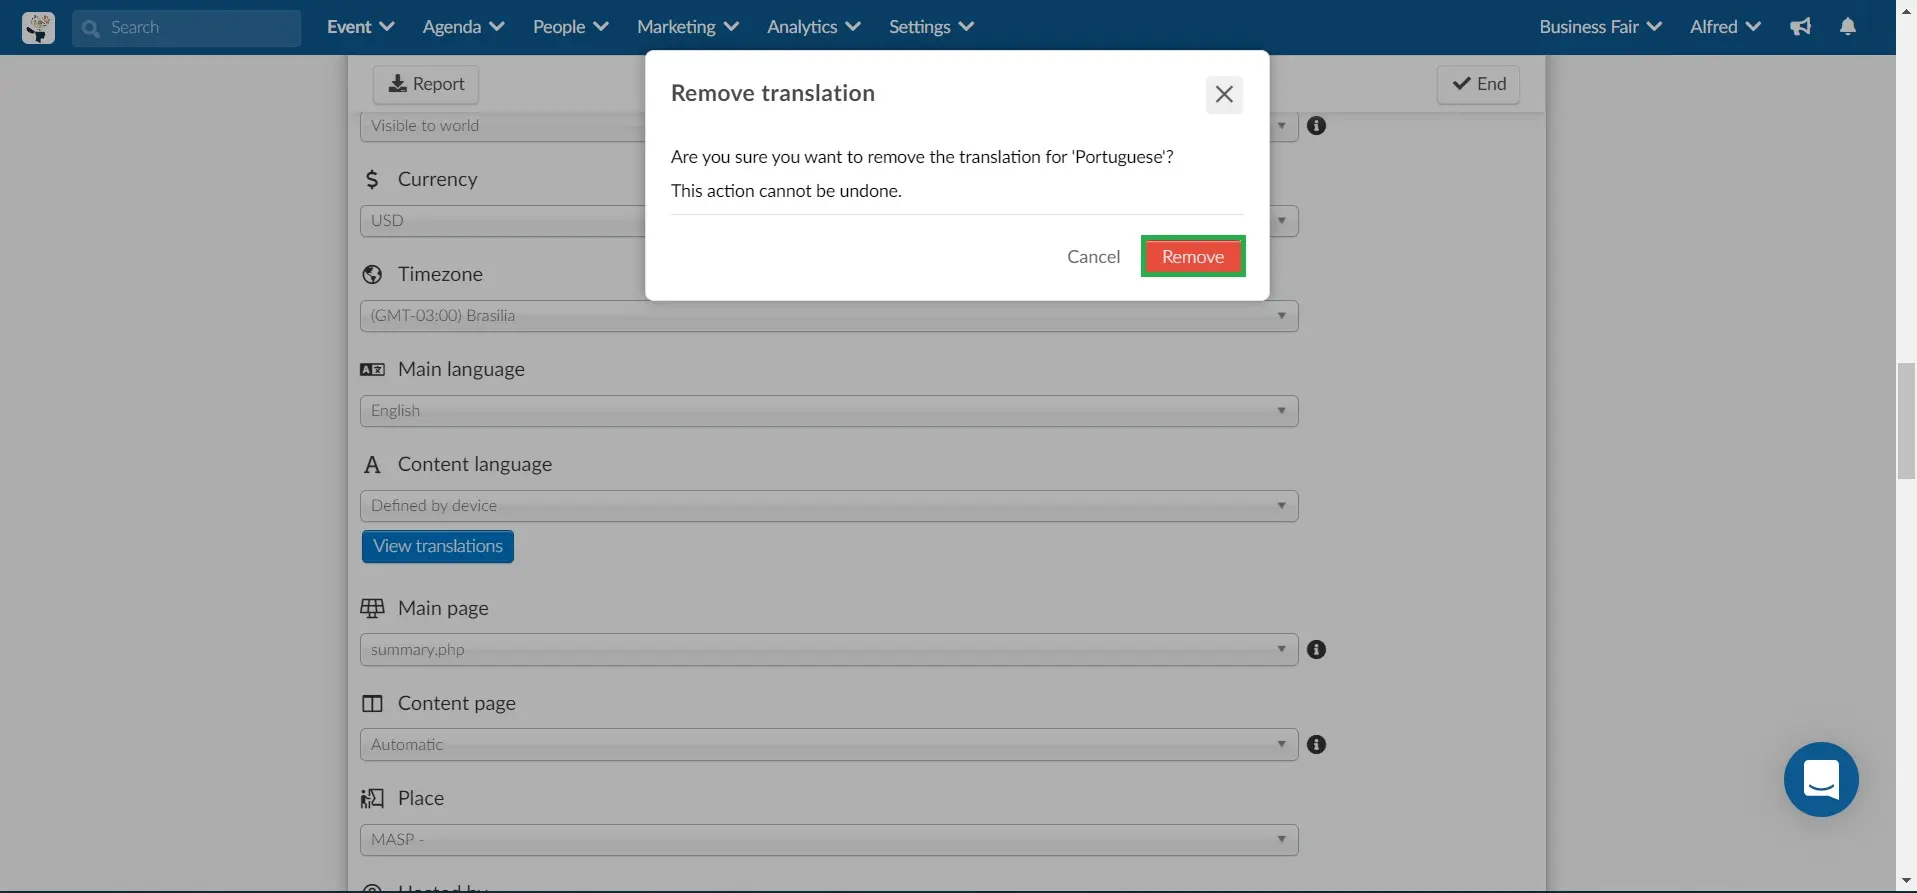
If you want to remove all translations, just click on the trash icon and then on Remove.
Setting up translations for your event
It is important to keep in mind that you must go to the page of the feature you want to translate in the platform to be able to translate it. Below you can see each translation option:
Event Details
- Go to Event > Details > select Edit > hover over General description > Translate.
- Select the language you wish to translate into from the dropdown, Add translation
- Type your translation or click on Generate for automatic translation
- If needed, repeat for additional languages, and press Save > End.

Activities
- Firstly click on Agenda > Activities, select the activity > click on Edit
- Hover over the title or description and select Translate > select the language you wish to translate into from the dropdown, click on Add translation
- Type your translation or click on Generate for automatic translation
- If needed, repeat for additional languages, and press Save > End.
Speakers mini-bio and category
- Go to Event > Speakers >select the Speaker > click on Edit
- Hover over the Speaker mini-bio or category and press the Translate icon, select the language you wish to translate into from the dropdown, and press Add translation
- Type your translation or click on Generate for automatic translation
- If needed, repeat for additional languages, and press Save > End.

Sponsor mini-bio and category
- Click on Event > Sponsors. Then select the Sponsor > press Edit
- Hover your mouse over Category or Mini bio > press Translate, select the language you want to translate to from the drop-down menu, and press Add translation
- Type your translation or click on Generate for automatic translation
- If needed, repeat for additional languages, and press Save > End.

Registration form
- Go to Marketing > Registration > Registration form > Edit
- Select the custom field you want to edit > hover your mouse over the Title or Subtitle > click on Add Translation
- Type your translation or click on Generate for automatic translation
- If needed, repeat for additional languages, and press Save > End.

Custom form
- Go to Marketing > Registration > Custom Forms. Choose your Custom Form > then click on Edit
- Select the custom field you want to edit, hover over the Title or Subtitle > click on Add Translation
- Select the language you want to translate to from the drop-down menu > Add translation
- Type your translation or click on Generate for automatic translation
- If needed, repeat for additional languages, and press Save > End.
Headings
- Go to Settings > Headings.
- Select the Open text details icon next to the Default text you wish to translate > Edit > hover over Value > Translate
- Select the language you wish to translate into from the dropdown > Add translation
- Type your translation or click on Generate for automatic translation
- If needed, repeat for additional languages, and press Save > End.
Website sections and registration label
- Go to Marketing > Landing Pages > Website.
- Now click on Edit > COG Icon (Next to the section you wish to edit) > Hover over the section Label > Click on translate
- Select the language you wish to translate into from the dropdown > Add translation
- Type your translation or click on Generate for automatic translation
- If needed, repeat for additional languages, and press Save > End.

To translate the Registration Label, in the Website configuration page, hover over Registration label > Translate, select the language you wish to translate into from the dropdown, Add translation, type your translation, repeat for additional languages, and press Save > End.