Networking via the mobile app for attendees
 Updated 1 month ago
by
Chioma Okenwa
Updated 1 month ago
by
Chioma Okenwa
The Networking feature enables interactions between attendees on the mobile app. Attendees will receive a generated contact list of other attendees and their information among those who are present at the event. Attendees can select to share their contact information, social network links etc. Then, send a message to another attendee among those at the event.
Accessing the default Networking of the mobile app
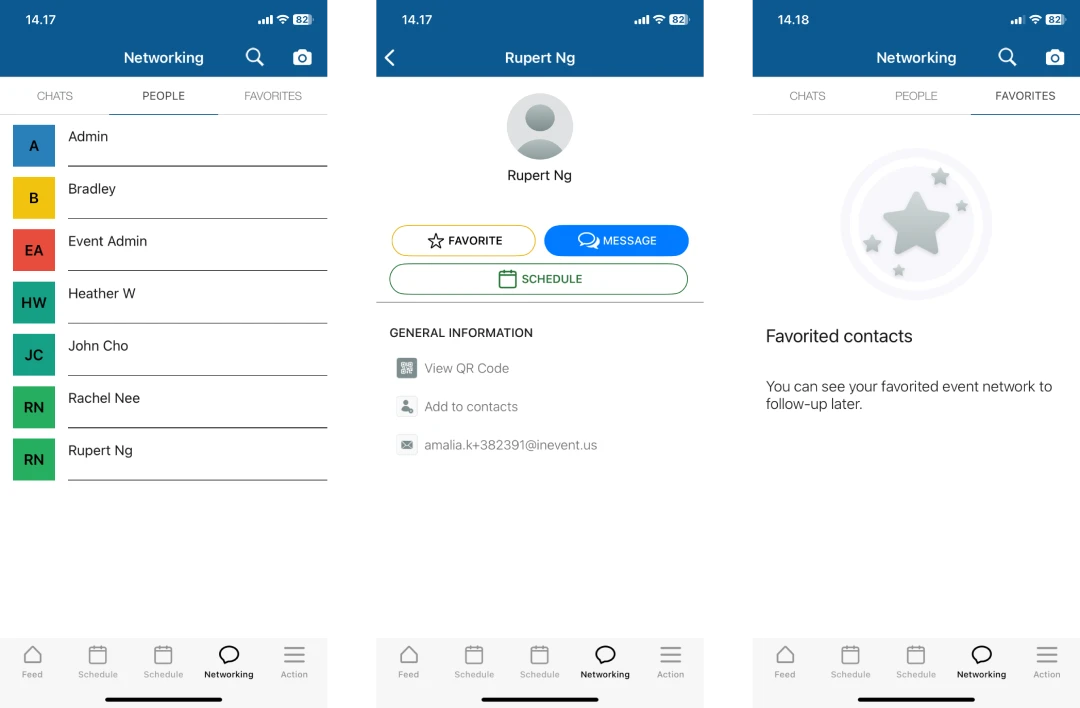
After logging into the mobile app and accessing your event, click the Networking button. Under the People section, you’ll see a list of other active participants. Tap a participant’s name to view their profile, where you can add them to your favorites or send them a message.
Additionally, you can also use the search function to enter another attendee's profile name and use the QR scanner to scan their attendee QR code to quickly open their profile.
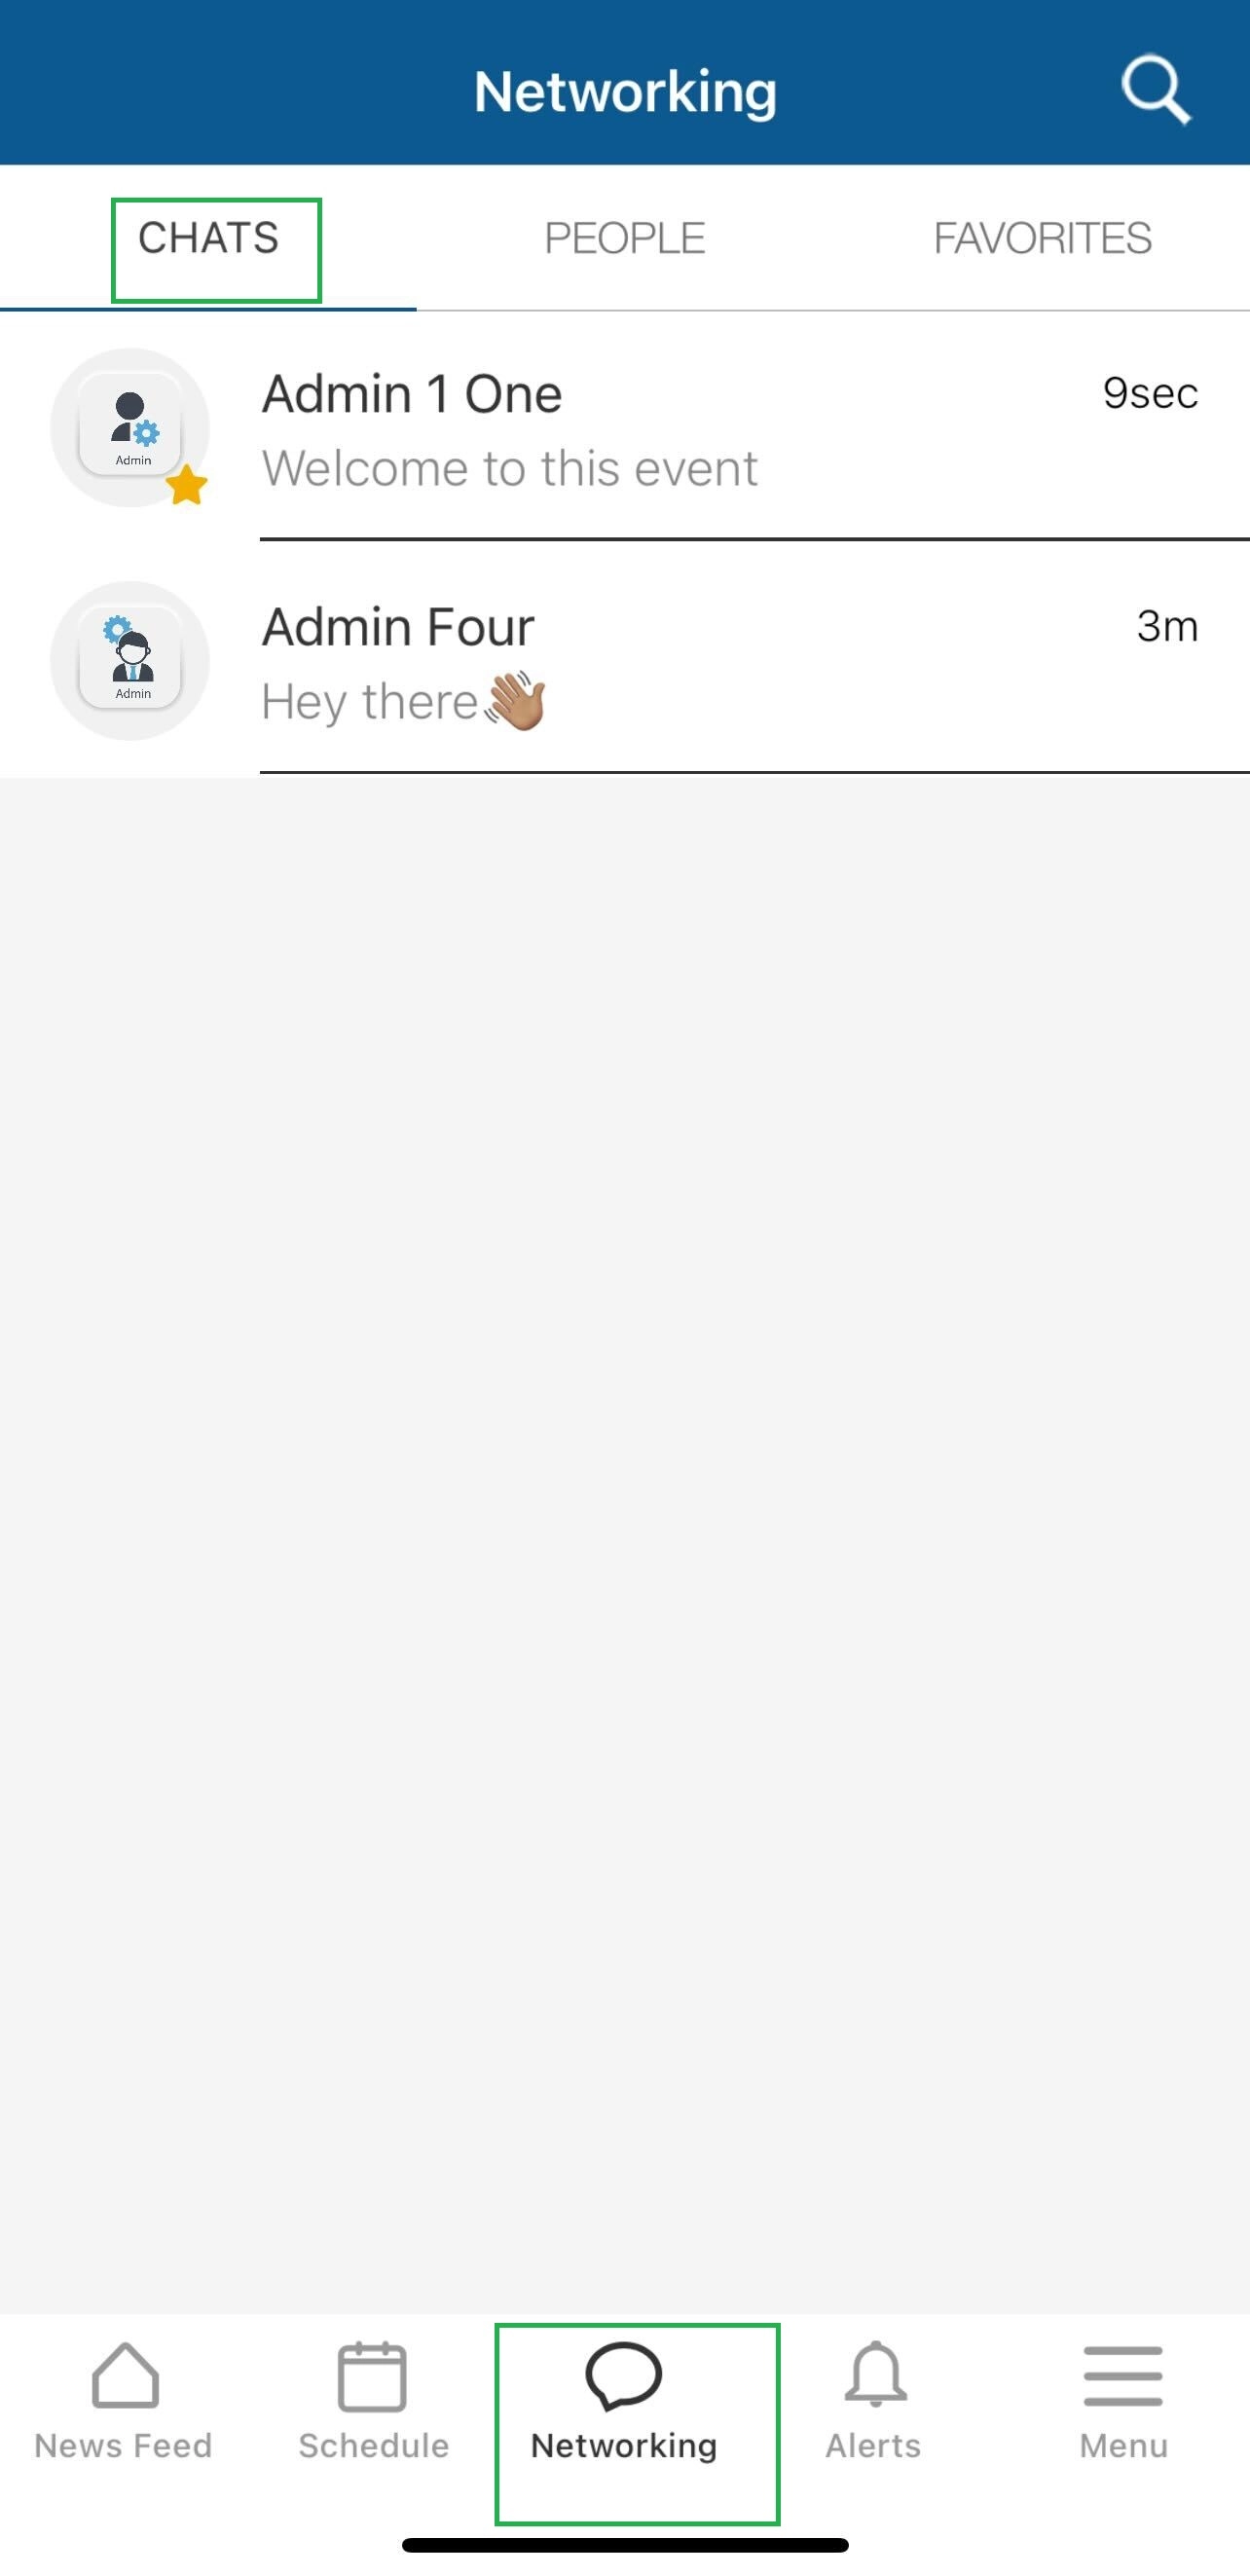
Messages sent to other participants will be displayed under the Chat section.
Making your profile visible to others
You have an option to make your profile visible or invisible to others. To do so, click on: Menu > Profile > Edit Profile > toggle on the Visible to others button.

Accessing the Web app Networking tabs from the app
Attendees can also access the Web app networking tabs on the mobile app by clicking on the Menu button at the bottom of the screen and selecting one of the available tabs, such as Networking, Group Rooms, Speed Networking, etc.
From the Virtual Lobby Networking tab, you will see a list of other attendees. You can send a message to another participant by clicking the Message button, then type your message.

Or you can also schedule a meeting with a participant for a video call.

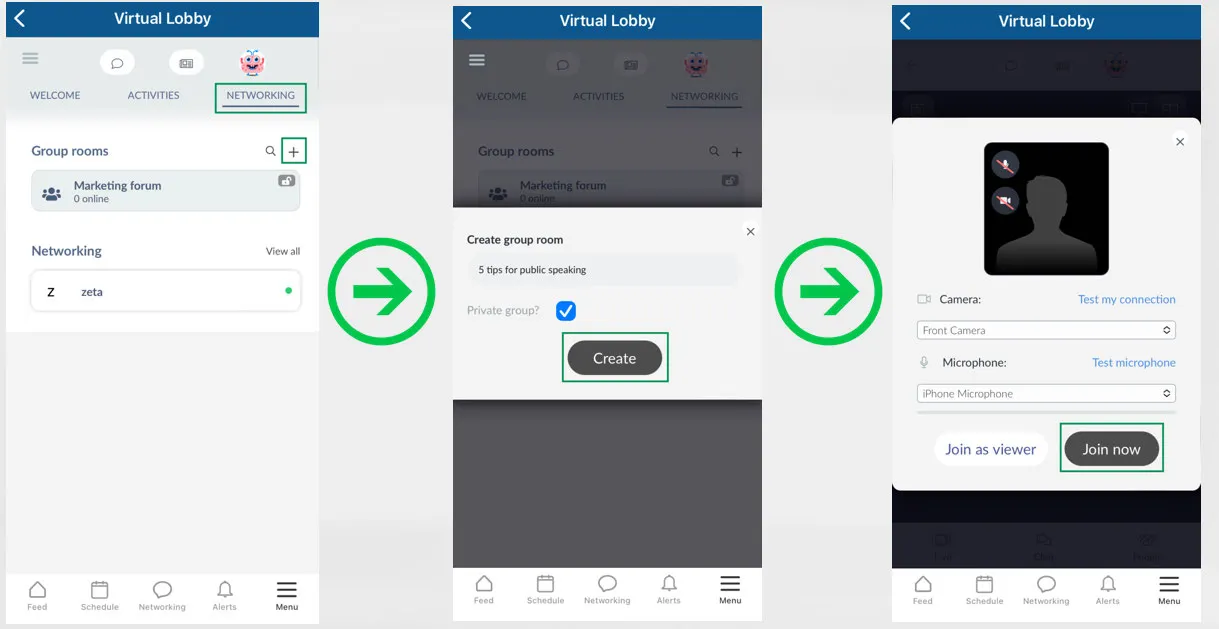
From the Group room tab, you can also access the group rooms available:
Creating a new group room on the application
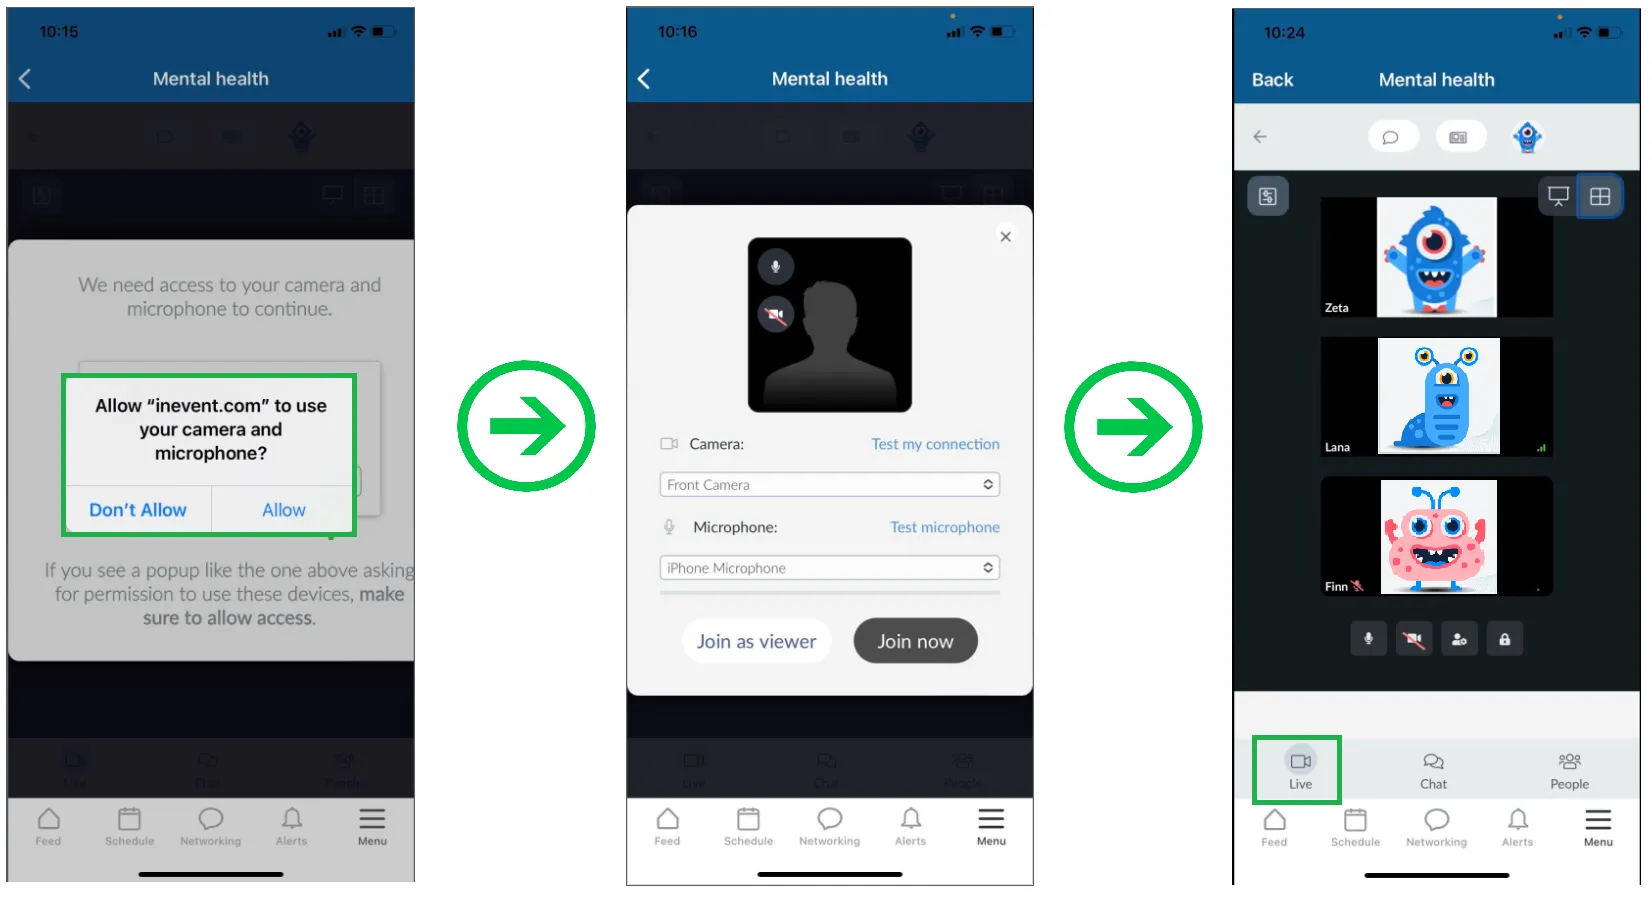
In the Group room tab, you can search for group rooms and click on the + button on the right to create one. Then you will be able to enter the name of the group and set if it's visibility: private or public. Assuming you have already authorized InEvent to have access to your camera and microphone, all you have to do is click on Join Now to access the group.