Flight Management
This feature allows you to organize the logistics and information of your travelers. You can upload information and flight details of each attendee, indicating: Departure time, arrival time, airport of origin and destination, flight number, and other information.
This article intends to teach how the event organizer can add the flight information for each attendee profile and how the attendee can see those details when receiving the info by email or while using the app.
For event organizers
How do I enable this feature?
To enable this feature, go to Settings > Tools > select the Hospitality section. Then, click on Edit, and make sure you toggle the Flights button. To save the changes, click on End.
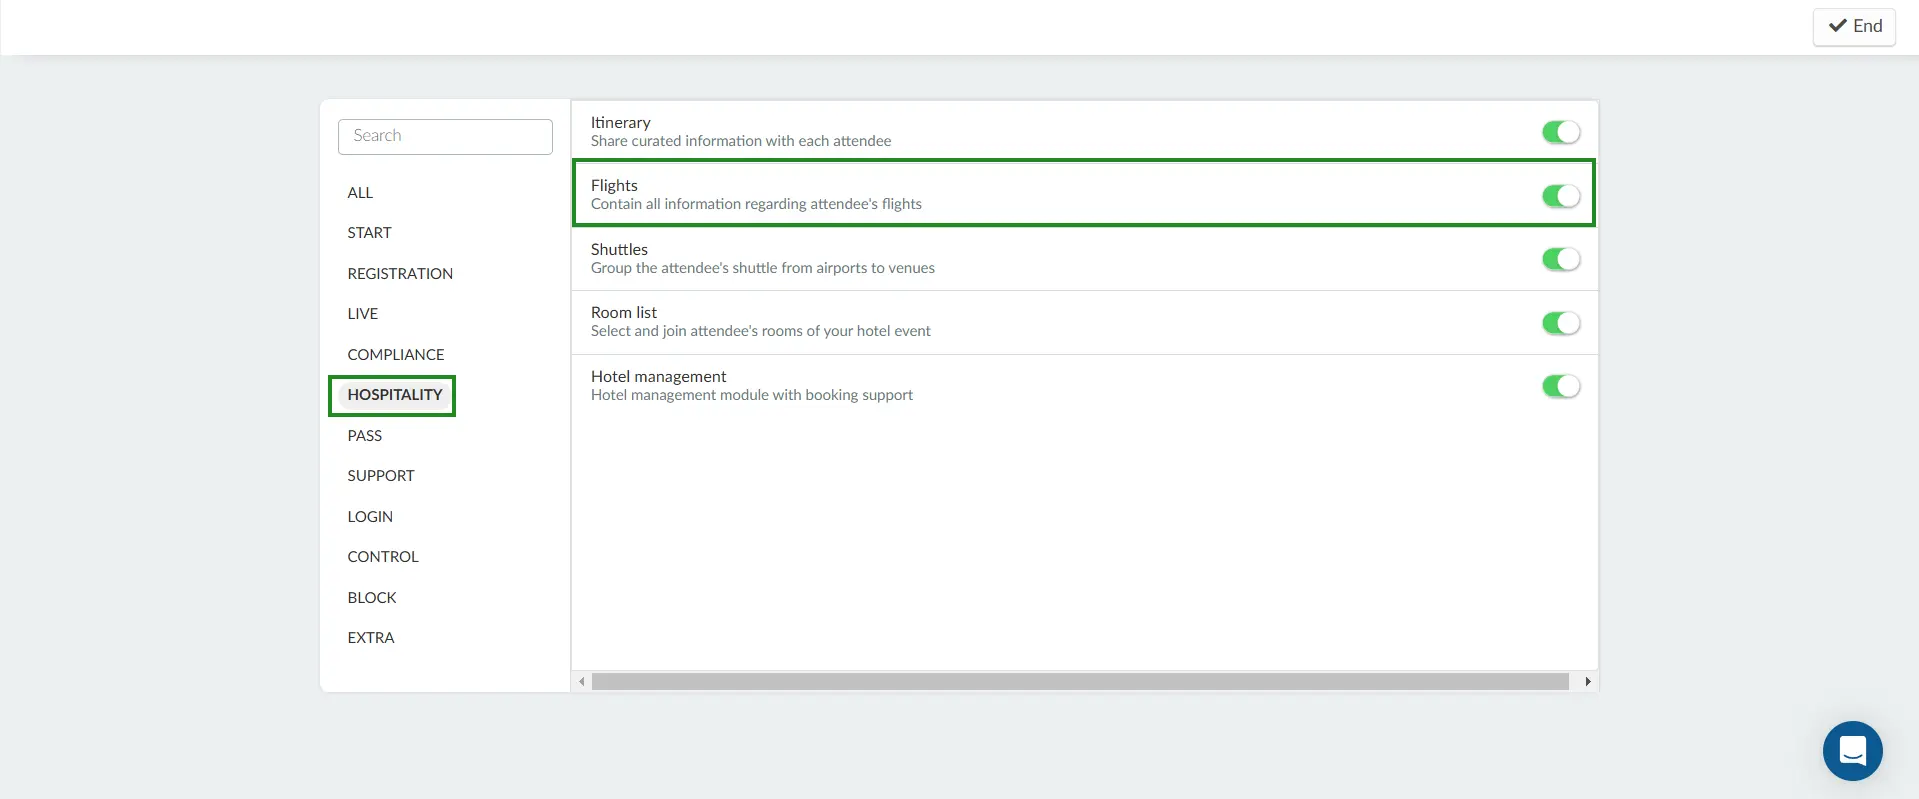
If instead of seeing a button, you see No or Purchase, that means you need to follow the steps below to activate it.
To enable this feature in the company tools, you must follow these steps
- Go to the company level, and click on Account > Tools in the menu on the left-hand side.
- Select the Hospitality section, click on Edit, and make sure you toggle the Flights button.
- Click on End to save the changes.
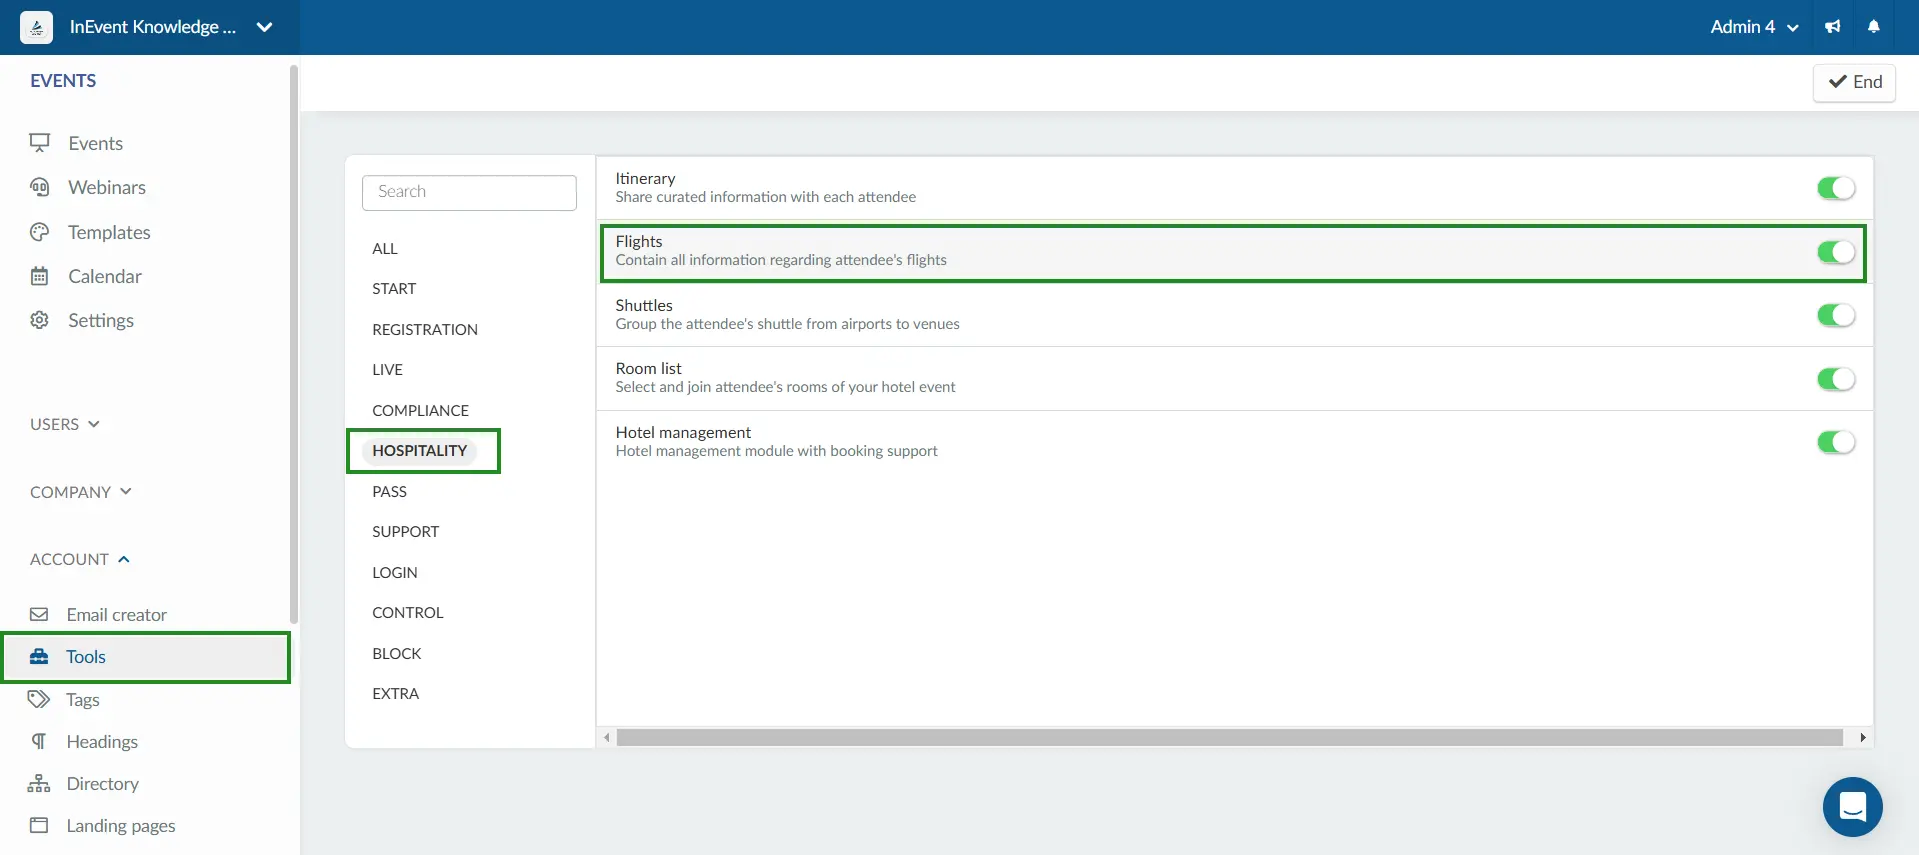
- If you went to the company tools and instead of seeing the checkbox, you still saw Purchase, this means that this feature is not in the plan you have purchased. To check which features are part of each plan, Click here.
How can I add flight information?
Manually
To manually add your flight information, follow the steps below.
- Click on: People > Logistcs > Flights > + Add Flight.
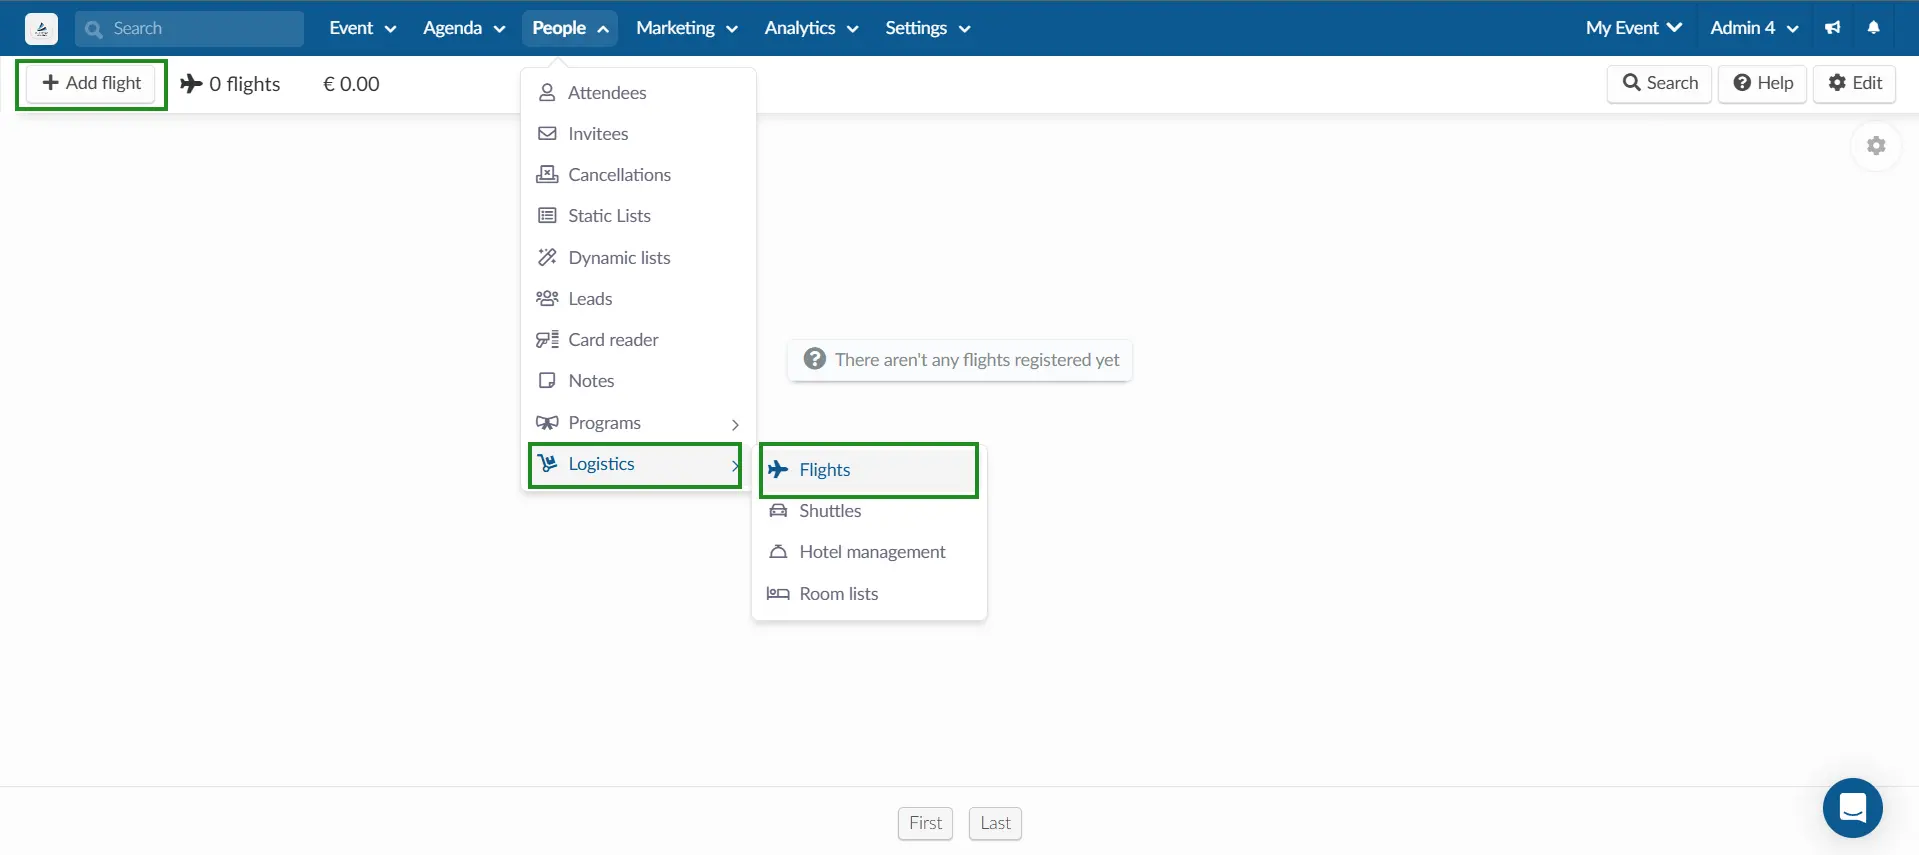
- Then choose a person, fill in the blank fields and click on Create.
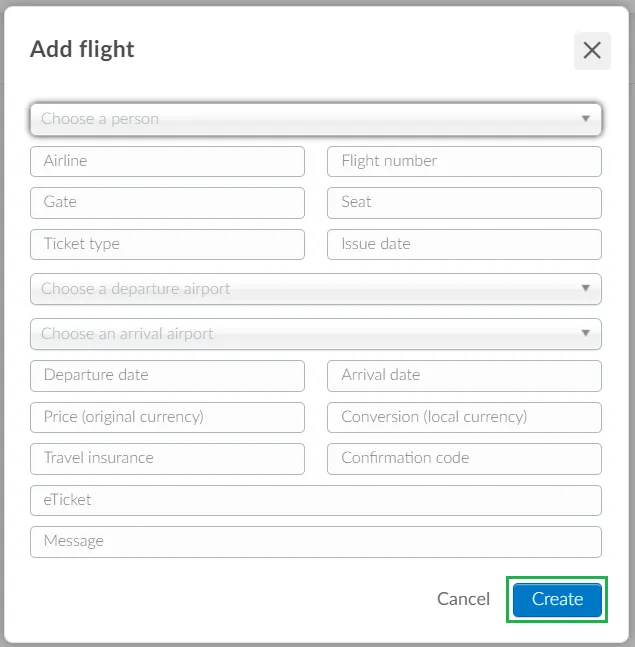
These are the mandatory fields you need to fill in:
- Person
- Airline
- Flight number
- Gate
- Seat
- Ticket type
- Issue date
- Departure airport
- Arrival airport
- Departure date
- Arrival date

In bulk
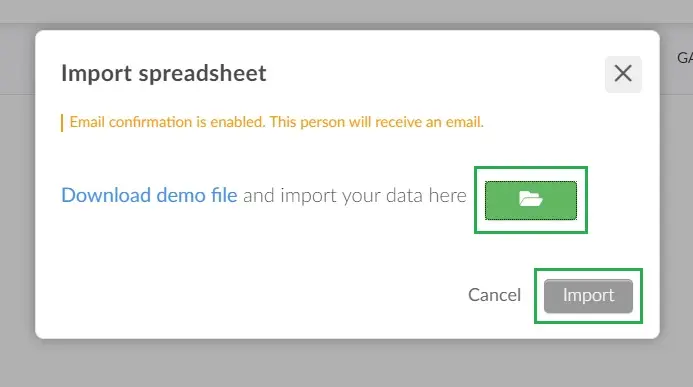
To upload your flight information in bulk, follow the steps below.
- Click on Edit > Import > Download Demo File.

- When the download is complete, enter the requested information into the spreadsheet.
These are the mandatory fields you need to fill in:
- Username
- Airport Begin
- Airport End
- Date Begin
- Date End
- Date Issue
- Then, save the file and upload it to the platform by clicking on Import > Green File Icon > selecting your file > Import > End.
How do I edit registered information?
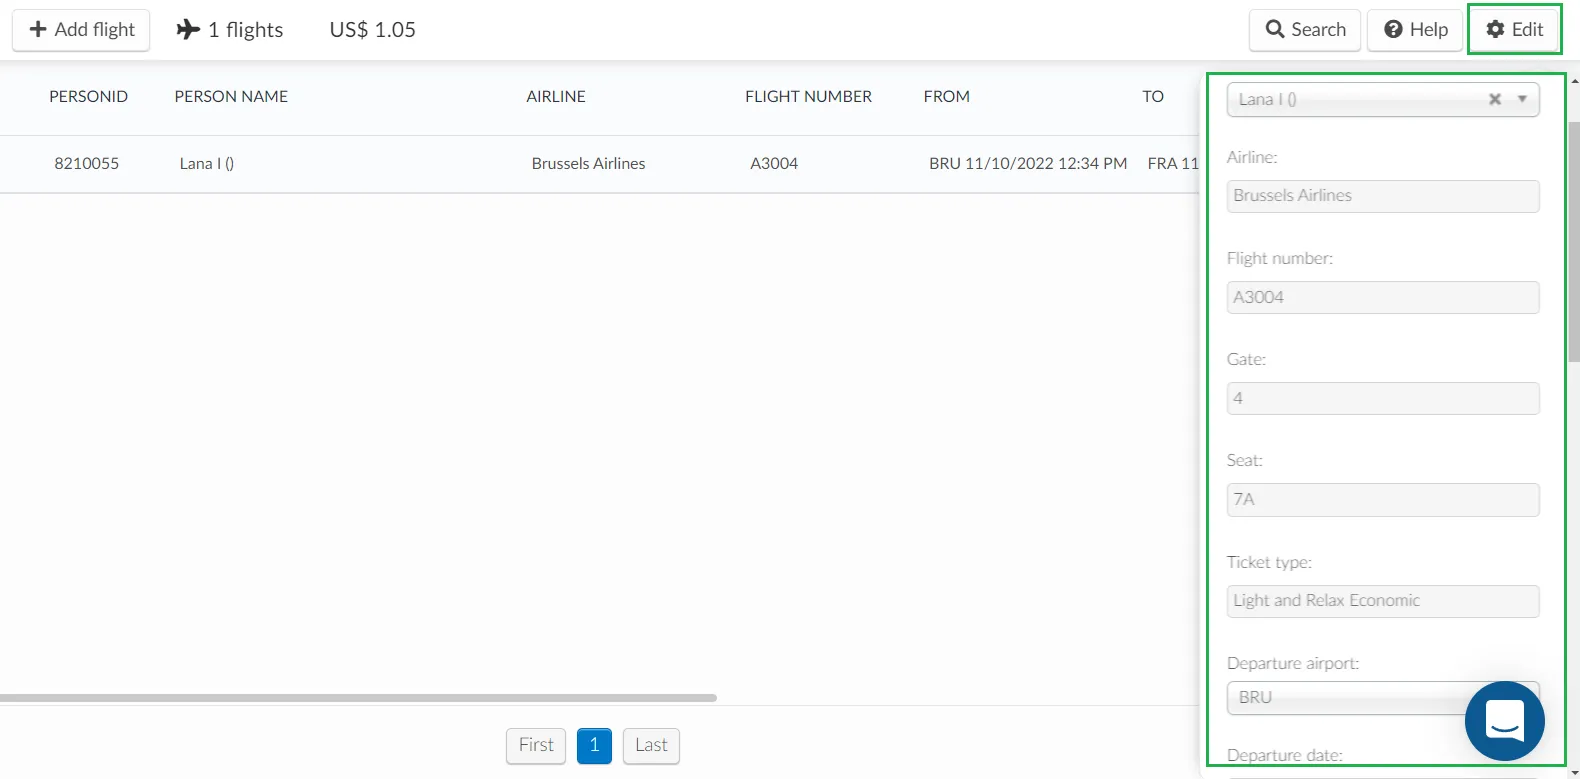
To edit the information of already registered flights, select the desired user/flight and click on Edit.
In the menu on the right, you can edit the registered information. To save these changes, click on End.
How do I remove registered information?
To delete an attendee's flight information, click on Edit, tick the box corresponding to the information you wish to delete, and click on the button Remove in the upper right corner.

How do I add flight information to an email?
To share the flight details with your attendees via email, you must create an email and add a digital voucher.
Click here to learn how to do so.
For attendees
How can I view my flight details?
To view the itinerary information, you can send it by e-mail or through the mobile application.
E-mail
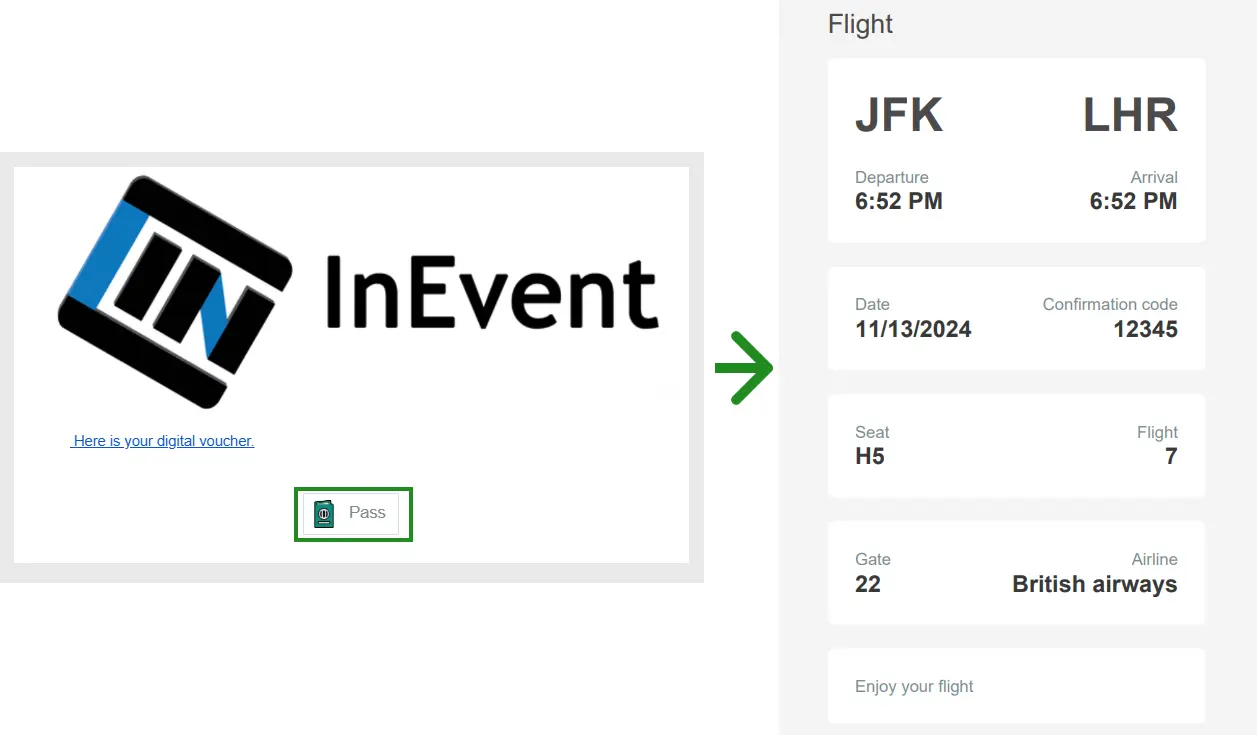
The email containing the digital ticket voucher with the flight details will look like the example shown below:
App
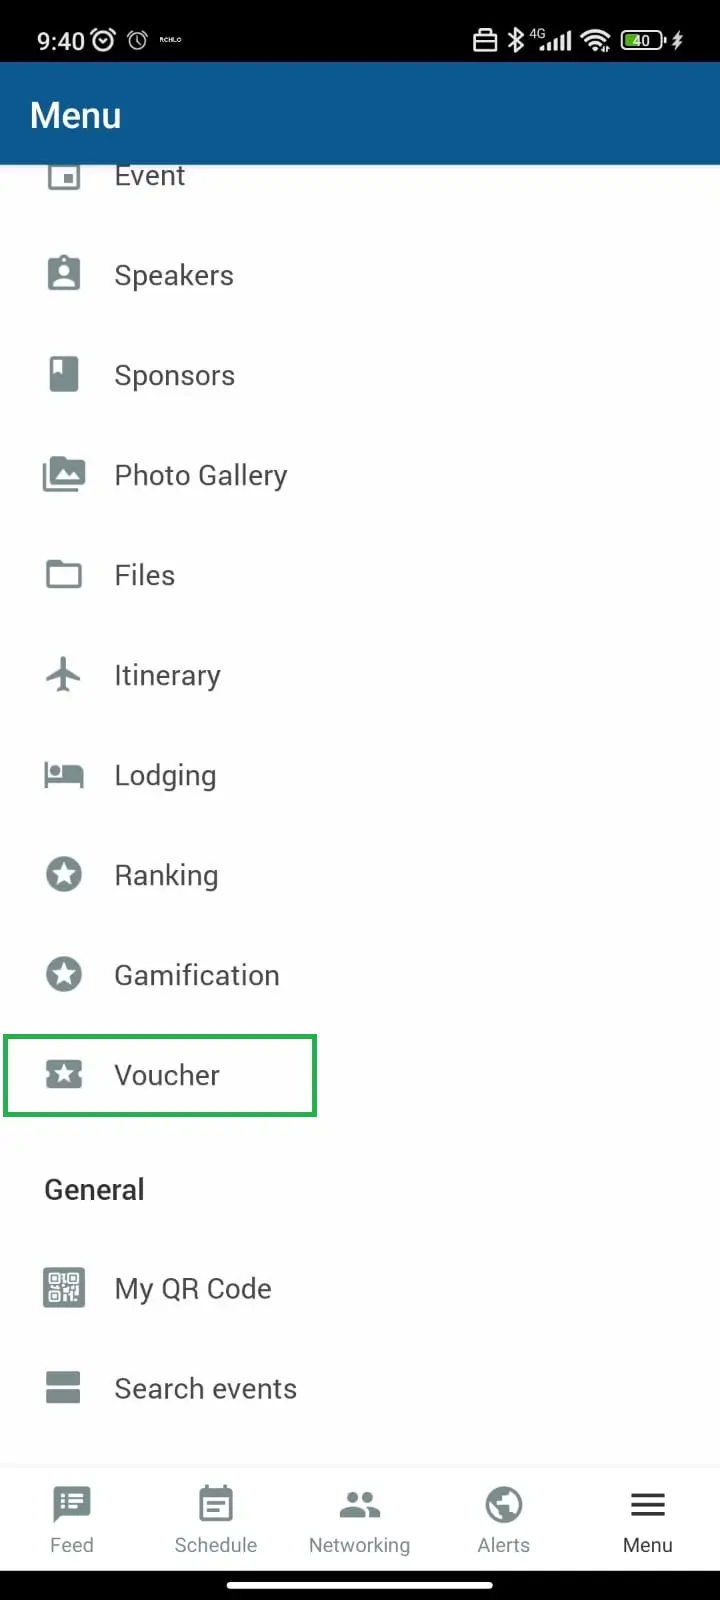
This image shows how to view the flight information by going to the Menu > Voucher section in the mobile application.
How do I extract a report?
To extract a report on your Flights, go to People > Logistcs > Flights, click on the Edit button and then press Report at the top left corner of the page.
A message will appear along the top of the screen letting you know that your excel sheet is being processed and the report will be sent to your email once completed.


