Email senders
 Updated 2 years ago
by
Amalia
Updated 2 years ago
by
Amalia
Event organizers can use the Email sender feature to review and control email addresses used to send emails to attendees or invitees.
Checking Email senders
To see the email senders go to Marketing > Communication > Email senders.
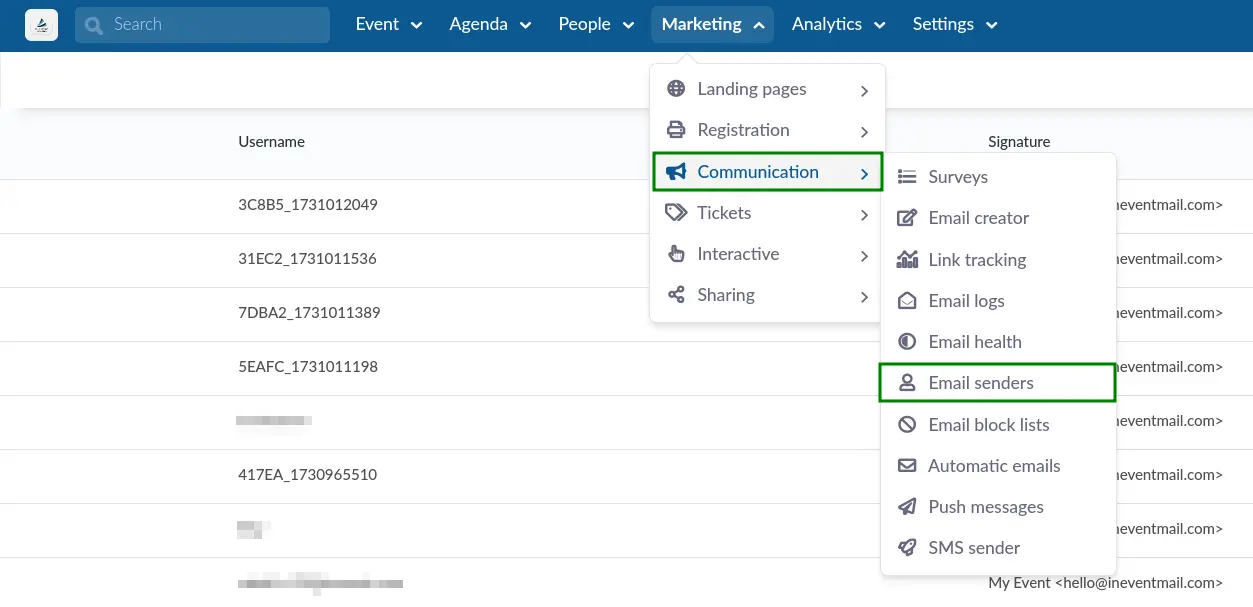
The email senders tab will show you all your email senders, their username, signature, and status, as shown in the image below.

Rechecking the DNS of a sender
To recheck the DNS of a sender, click on an entry in the page. Then, click on the blue Recheck DNS button in the newly opened window on the right.
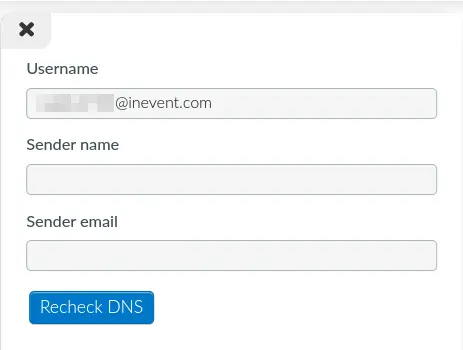
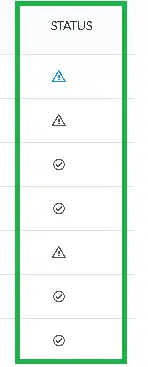
After doing so, the updated status will be displayed under the Status column.
Filtering Email senders
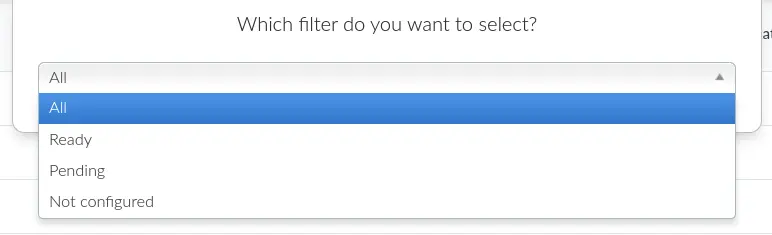
You can also search or filter by Status. The available options are All, Ready, Pending, and Not configured.
Custom email
Configure the custom email that will be the standard for your event. This way, all the digital communication sent through the InEvent system will arrive at the attendees and invitees with the sender of your choice.
For more information on setting up custom email for communications, refer to our Custom Email article.