Email domain policy
 Updated 2 months ago
by
Lorenzo
Updated 2 months ago
by
Lorenzo
By using the Email domain policy feature, you will be able to either block some unwanted entities from accessing your registration form or allow some identified entities to bypass certain registration form restrictions. People who try to register using a blocked email domain will not be able to proceed while people with emails containing approved domains will be allowed easy access to the registration form.
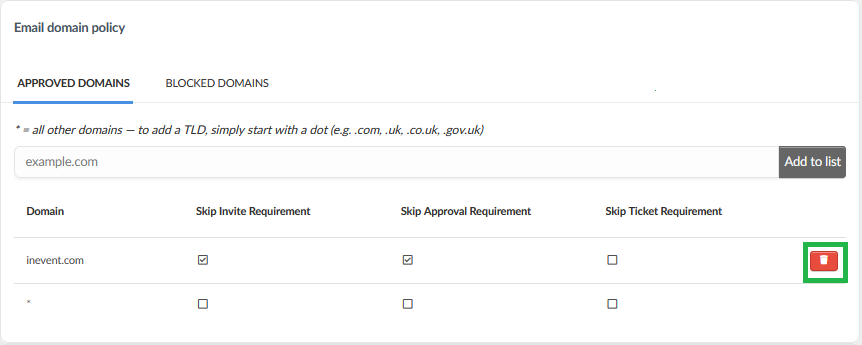
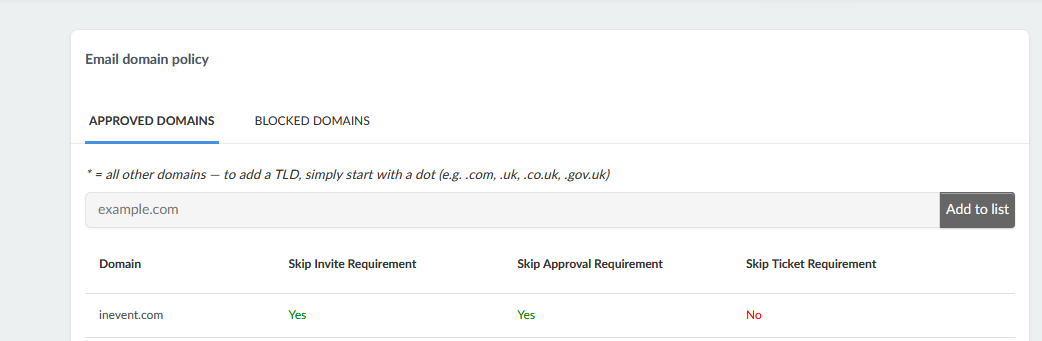
Approved domains
In the Approved domains tab, you’ll be able to add domains to the approved list to bypass either the Ticket, Invite or Approval requirements. To do so, follow the steps below:
- Enable the Edit mode.
- Type in the domain you wish to approve in the bar (for example,
inevent.com) - Click Add to list. The domain will be added and allow you to configure additional options depending on the Settings you have enabled.
For the Approved domains tab to appear, at least one requirement (Ticket Requirement, Invite Requirement, and/or Approval Requirement) must be enabled. Only the requirements you turn on will appear as checkbox options for each approved domain. For example, if only Ticket Requirement is enabled, only the Skip Ticket Requirement checkbox will show in the Approved domains tab. If all requirements are enabled, then all corresponding checkboxes will be available for the added domains.
When the checkboxes are enabled for the specific requirements, the selected domains will be able to completely bypass those requirements when filling the Registration form.
- Invite requirement: if you enable it, even though being on the invitees list is a requirement to access the registration form, users with the approved domains will bypass this restriction.
- Approval requirement: if you enable it, even though by default administrators must approve attendee enrollment, users with the approved domains will skip this step.
- Ticket requirement: if you enable it, even though purchasing a ticket is a requirement to enroll at this event, users with the approved domains will not need to purchase a ticket to become an attendee.
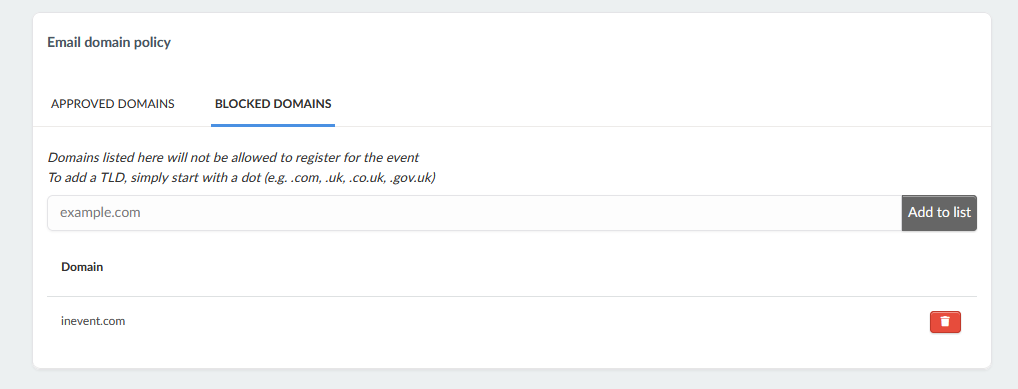
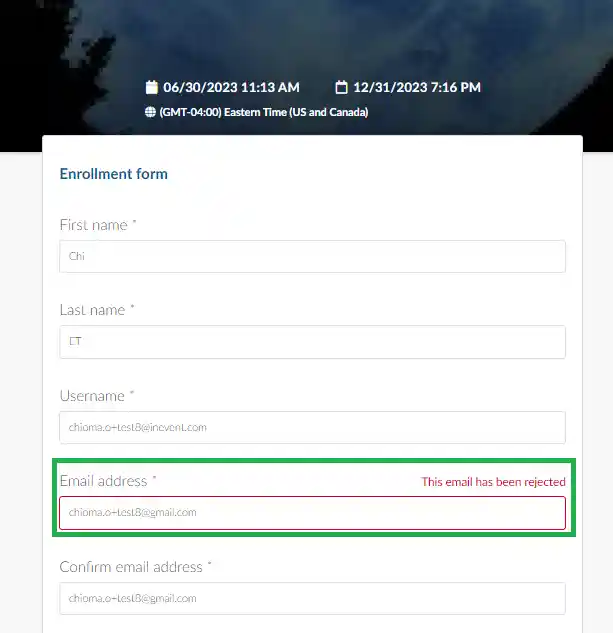
Blocked domains
The Blocked domains tab allows you to reject email domains from registering into the Registration Form. To add an email, simply make sure Edit mode is on, then add a domain (for example, inevent.com) then Add to list. This way, they will be added to the list and when they try to register, it will let them know this domain is disallowed.
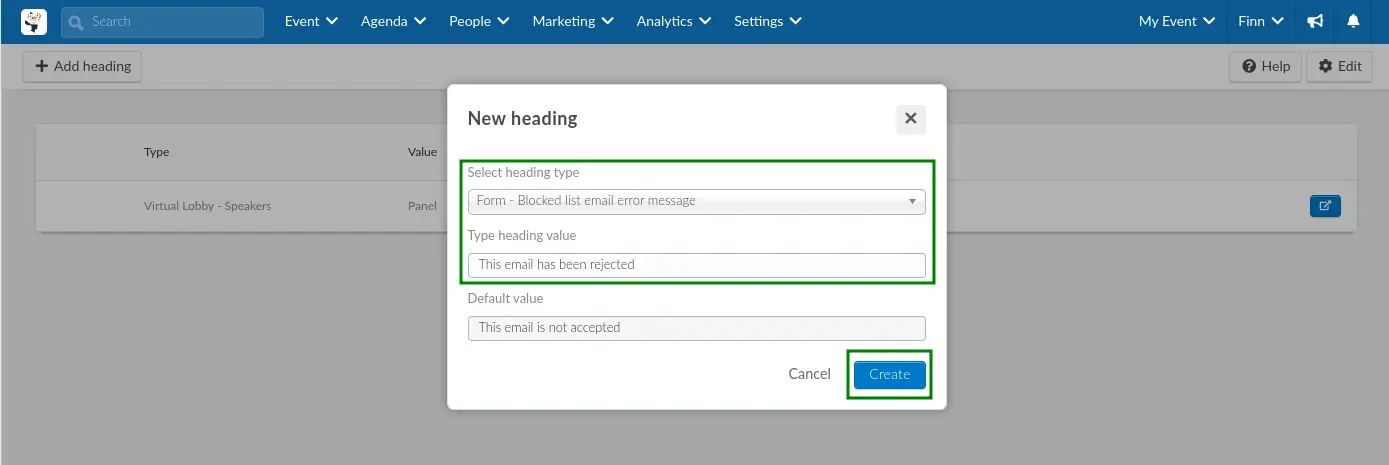
Customizing the error message for blocked domains
You can customize the error message This email is not accepted using the Headings feature. To do this, go to Account > Headings at the company level or Settings > Headings at the event level, then follow the steps below:
- Click on Add heading.
- Choose Form - Blocked list email error message from the Select heading type drop- down.
- Type in the new heading value in the Type heading value box.
- Click on Create.
Below is an example of how the customized heading looks on the Registration form.
Removing domains from the Approved/Blocked list
To remove domains you have added to the list, follow these simple steps:
- Press Edit
- Click on the red icon next to the domain
- Press End to save changes