Activities with restrictions and choice blocks
 Updated 11 months ago
by
Faisal Durrani
Updated 11 months ago
by
Faisal Durrani
Define the restrictions between different activities, regardless of day and time, in a way that your attendees will only be able to attend one at a time or to multiple activities at the same time, depending on your event’s needs.
Schedule Lock
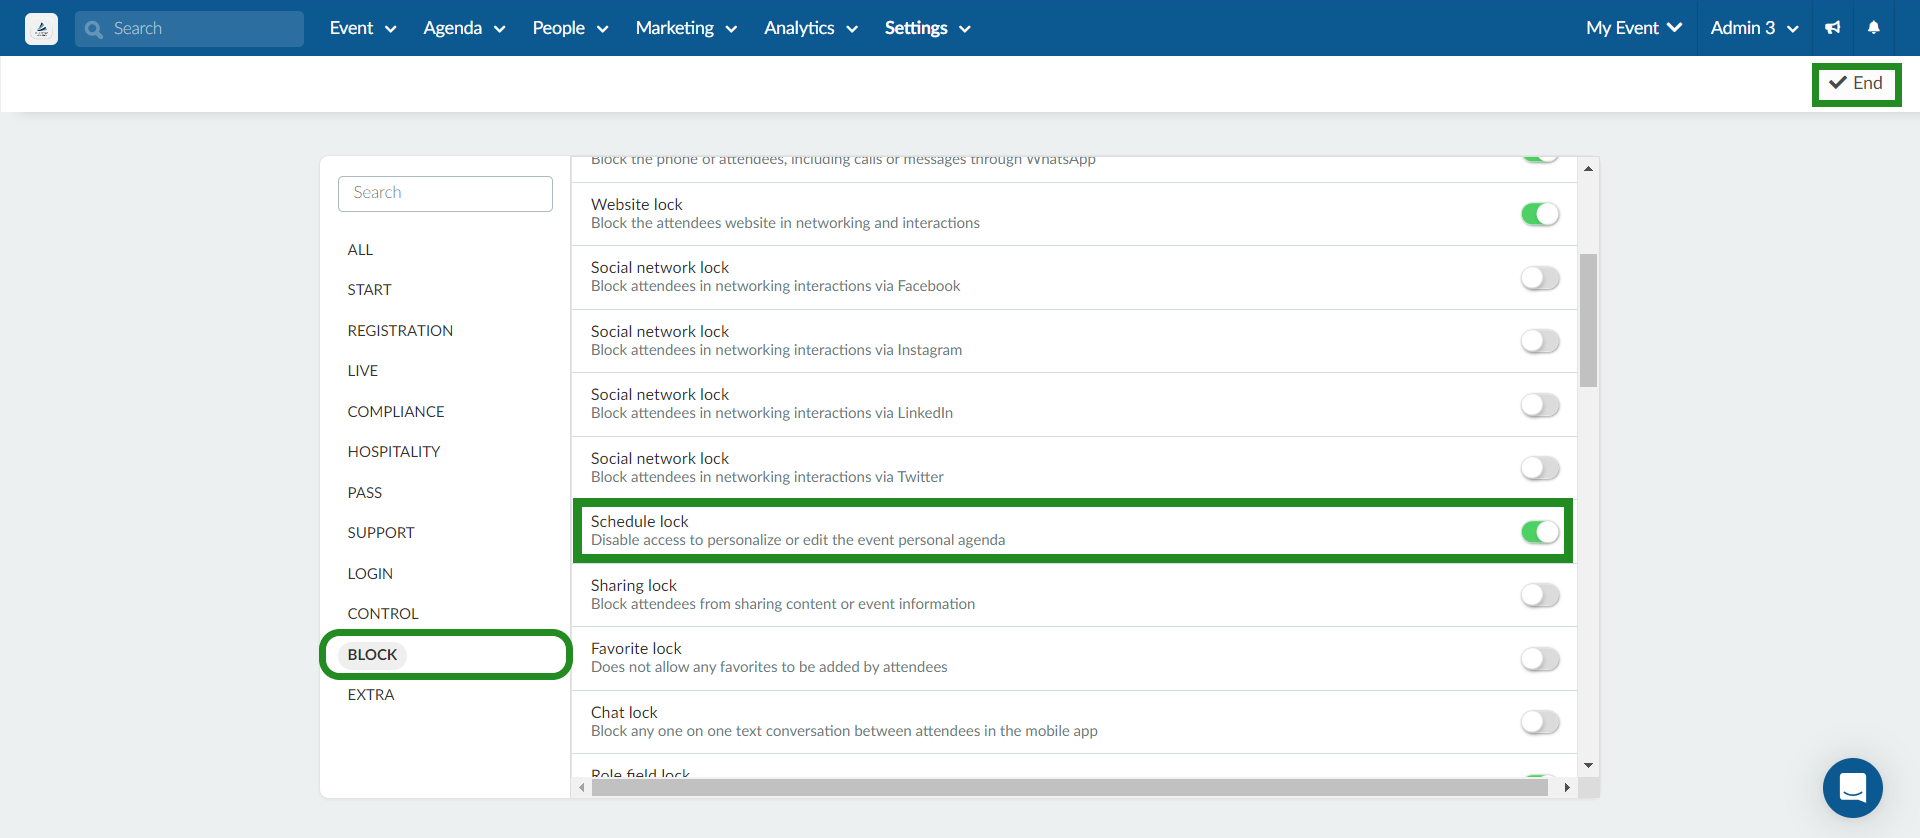
The Schedule lock tool restricts attendees from unpinning activities in the My Agenda page. When this tool is active the attendees won’t be able to choose which activities they want/don’t want to attend. To enable it, go to Settings > Tools, click on the Block section and locate Schedule lock. Click on Edit and toggle the button beside Schedule lock to enable it.
Enrollment lock
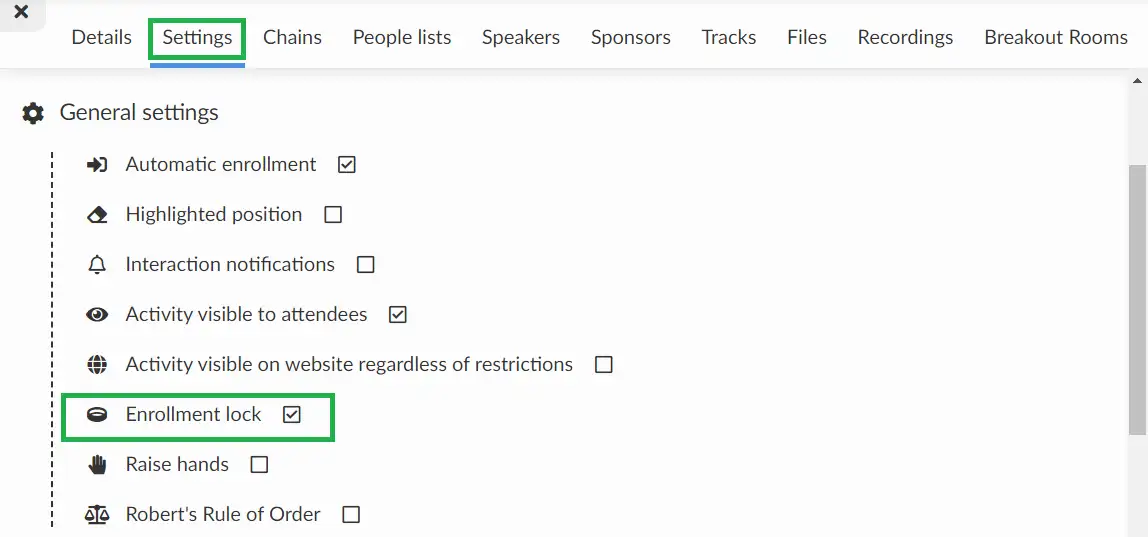
This feature is available for each activity individually. If you want to prevent attendees from customizing their agendas for specific activities, you can enable the Enrollment lock for each one.
To do this, navigate to Agenda > Activities, choose the activity you want to modify, and then go to the Settings > General settings. Look for the option Enrollment lock and check the box to enable it.
Ensuring functionality of locks
Schedule lock
To know if Schedule lock is enabled, follow these steps:
- Go to My Agenda tab in the Virtual Lobby.
- Click on the Unpin button under an activity you are registered in.
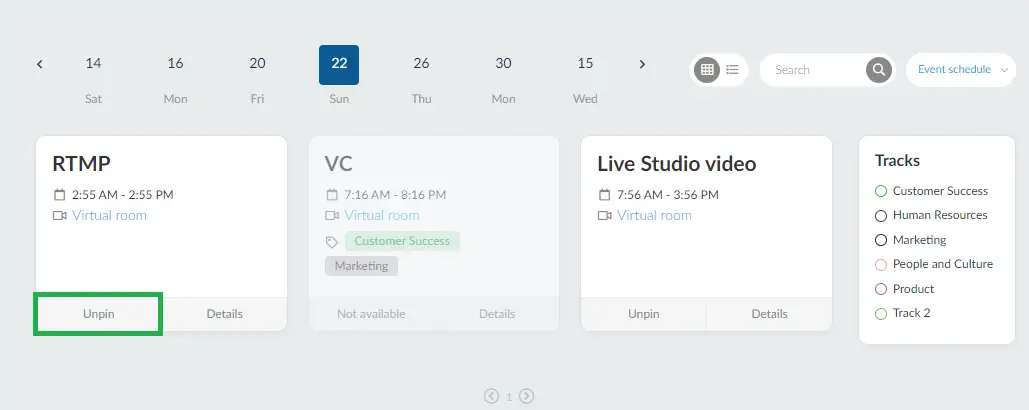
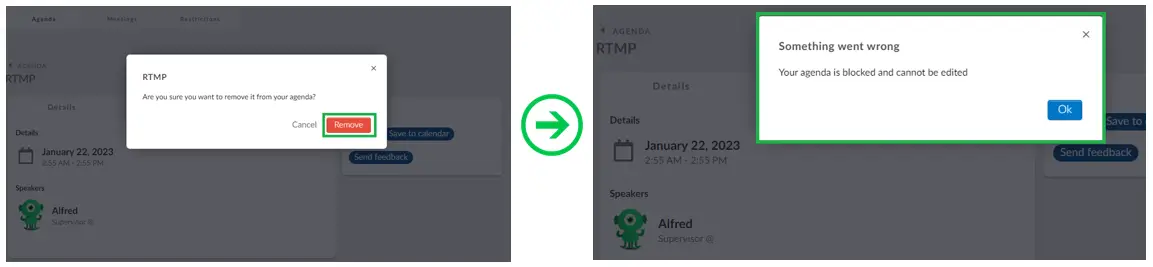
- Press Remove in the confirmation box, and the message below will appear.
Enrollment Lock
If the Enrollment lock has been enabled for specific activities, the Unpin button will be disabled (for the particular activities) under the Agenda tab:

Concurrent Schedule
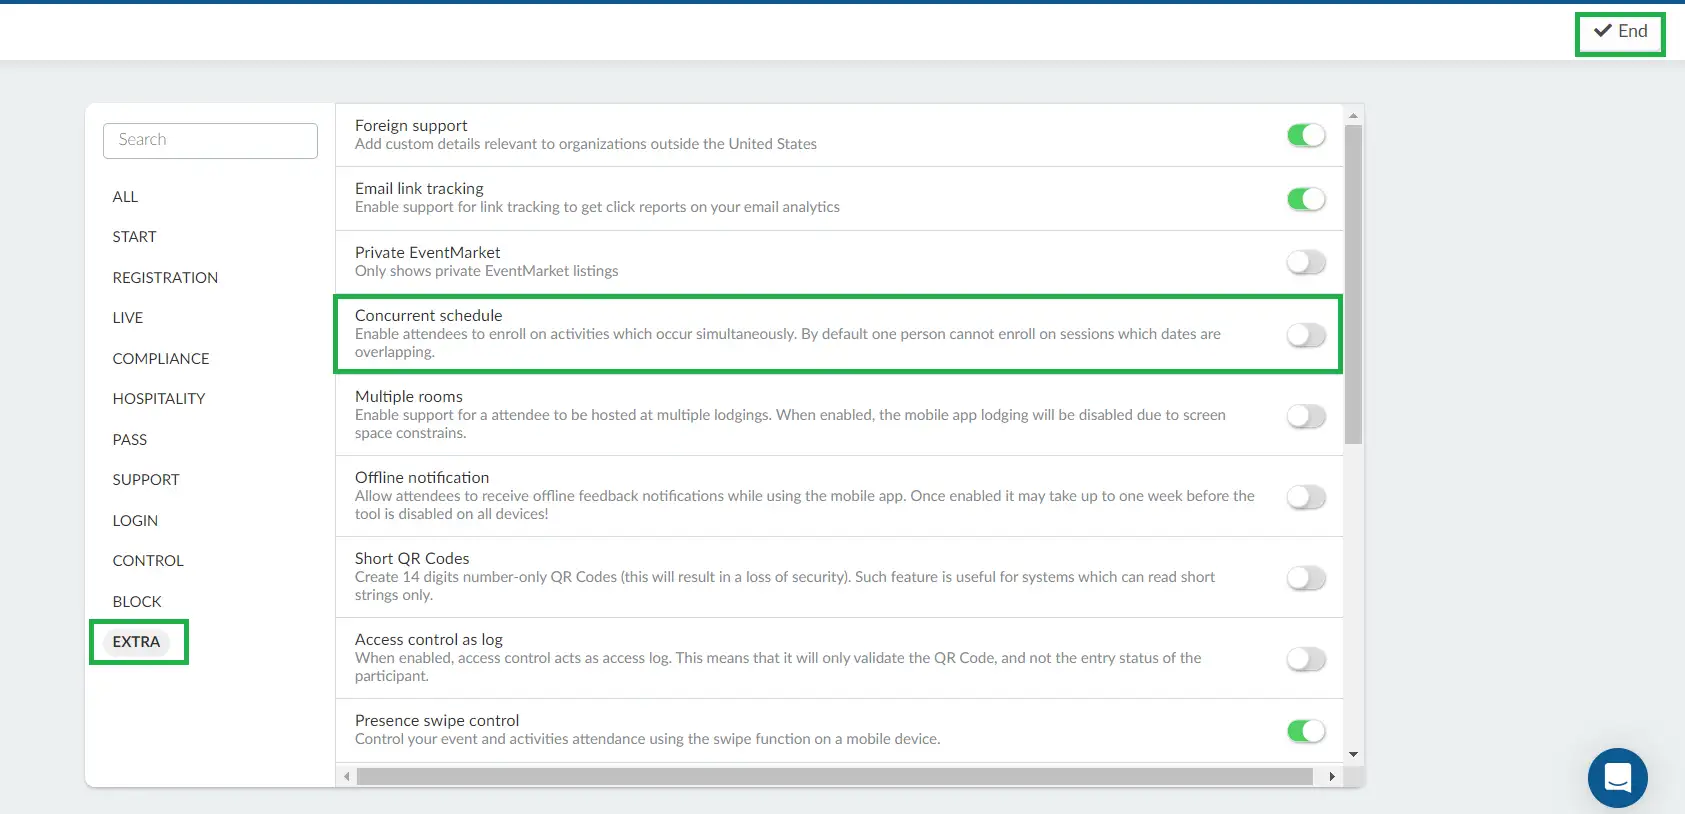
By default, participants cannot enroll in sessions that occur simultaneously. To allow attendees to enroll in activities with overlapping dates, navigate to Settings > Tools, click on the Extra section, and toggle on the button corresponding to Concurrent Schedule. If you want to prevent attendees from enrolling in activities that occur simultaneously, disable this feature by toggling off the button.
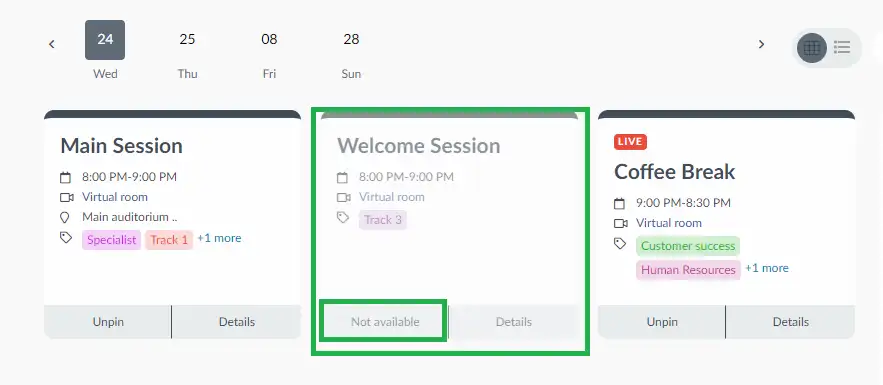
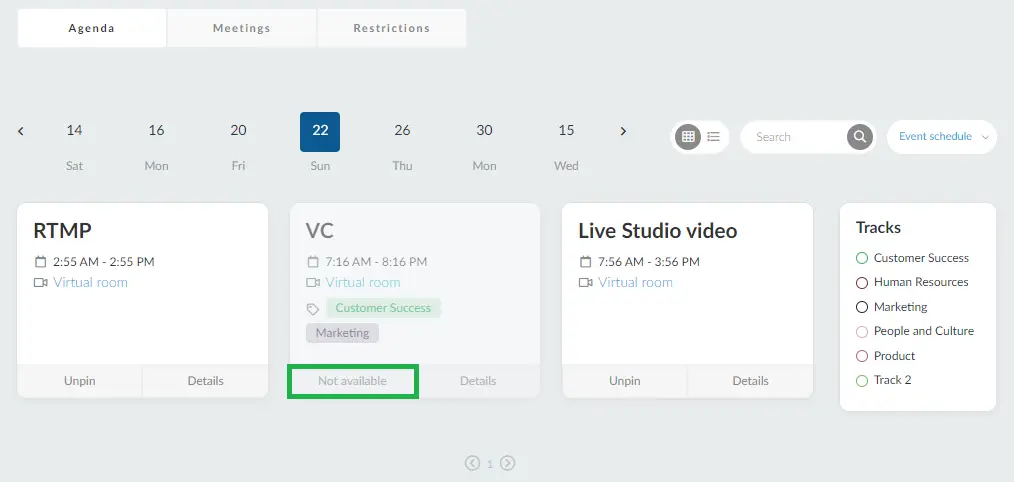
When the Concurrent Schedule tool is disabled, users visiting the My Agenda tab in the Virtual Lobby will see activities with overlapping dates faded out, with the card(s) displaying Not available. The user will be enrolled in only one of the activities.
If you click on the activity's card, you will see the message below:
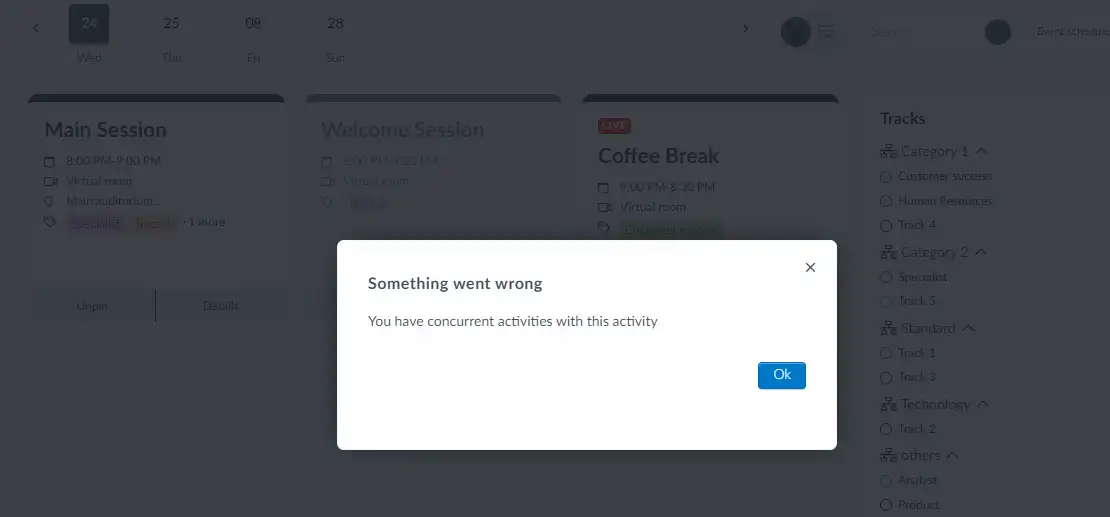
Attendees will need to unpin (unenroll) from one activity to be able to enroll into any other activity happening concurrently.
using same schedule.
Chains
Activity chains allow you to connect some activities with each other so that a person cannot sign up for one if they are registered for another, regardless if they are at a different time or day.
This feature is useful when you have a limited number of activities in your event, or when an activity is repeated several times during your event, as it can give an opportunity for more people to participate in them.
Below you will find out how to create chains.
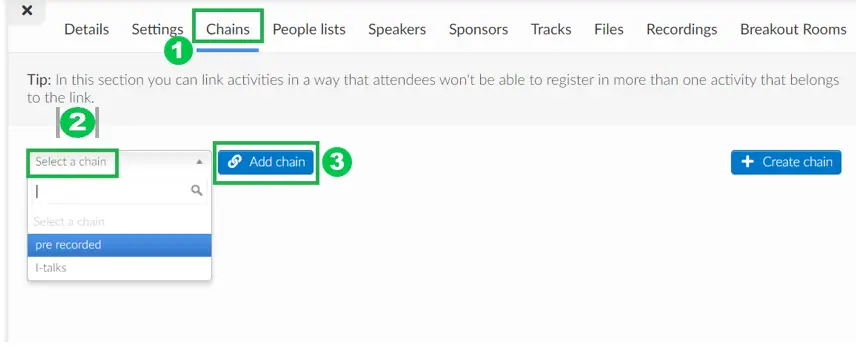
- In Agenda > Activities, select the activity on the left in which you want to add a chain and go to the Chains tab. Then, click Edit to make changes to this section and press Create chain. This will create a chain with the name of this activity, and it will appear just below the dropdown.
- To connect a chain to another activity, just select the activity and in the Chains tab, you'll see a drop-down bar. You should select the chain you have created and click on Add chain. To save, click End. Note that by adding your chain, it will appear like the image shown below.
Determining if Chain is functioning properly
When attendees access the My Agenda tab, they will notice that if they try to pin more than one activity in the chain, other activities within the chain will automatically be displayed as Not available and they will be unable to join the rooms of these activities.
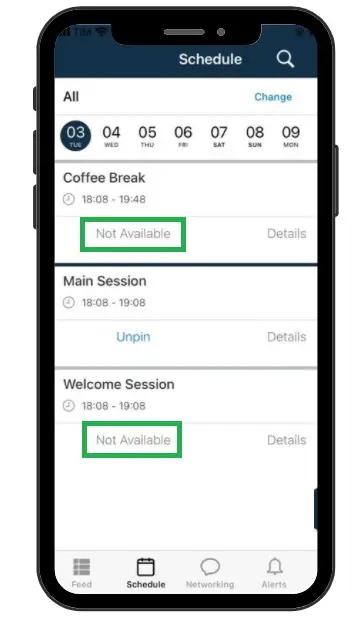
Appearance of the Chain in the App
When participants access the Agenda area, after signing up for an activity the others will appear with the information Not available.
Deleting and Editing Chains
To delete a chain, go to Agenda > Activities, choose the desired activity, then click Edit, then in the Chains tab simply click on the orange trash can icon. After that click End to finish.
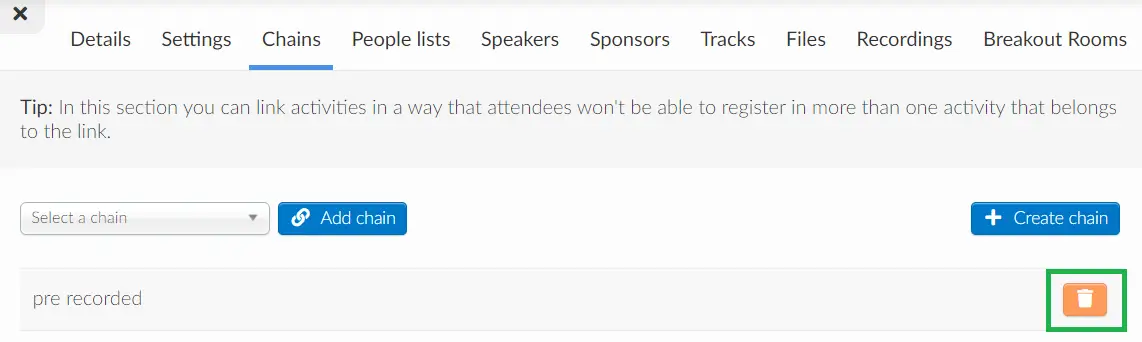
You can also change the name of the chain. Select the desired activity, from there, navigate to the Chains tab. Click Edit and an edit (pencil) icon will appear beside the added chain. Click on the icon to rename the chain as needed.
People lists
Once the lists of people and the activities on the agenda have been created, you can go to the agenda management dashboard and associate which activities will be part of each group's agenda.
- To do so, go to Agenda > Activities.
- Next, choose the activity you wish to associate with a list. A window will open up on the right side of the screen, and you should press People lists > Edit.
- Then, choose which list you want to associate with each of the activities. Remember that only the people on the list can see and register in that activity. Select a list from the drop-down menu and then press Add list.
- When you have finished, press End to save the changes.
Once this is done, attendees will only be able to see the activities they have been linked to through lists
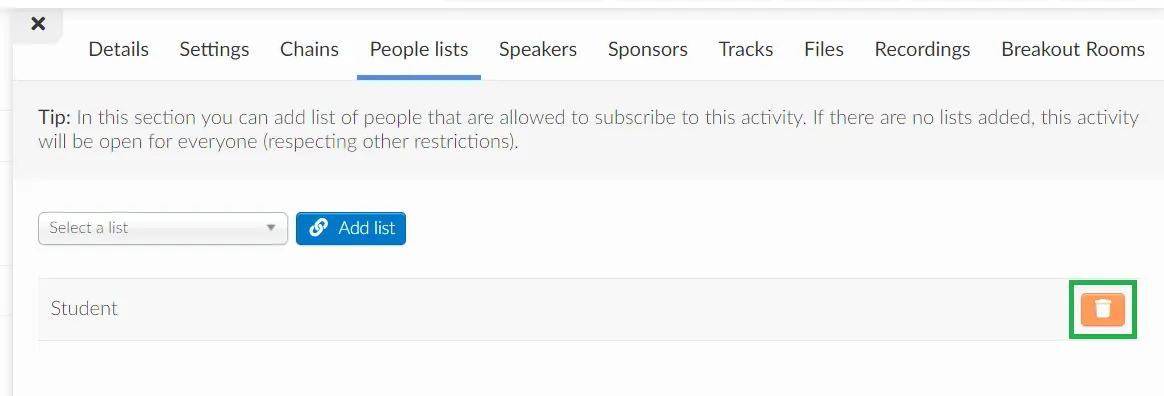
Removing list of people from an Activity
To delete a list of people from an activity and make it accessible to all attendees, simply click the orange trash icon and press End to save the changes.
Impact of Transferring Attendees to a New List
The attendees will lose their subscription to every activity associated with the first list they were removed from, and gain access to all activities associated with the new list they were added to.