Abstract Management: Submitting, reviewing, and approving abstracts
 Updated 1 hour ago
by
Chioma Okenwa
This article explains how attendees submit abstract forms, reviewers evaluate submissions, deciders approve or reject abstracts, and event organizers access reports and analytics.
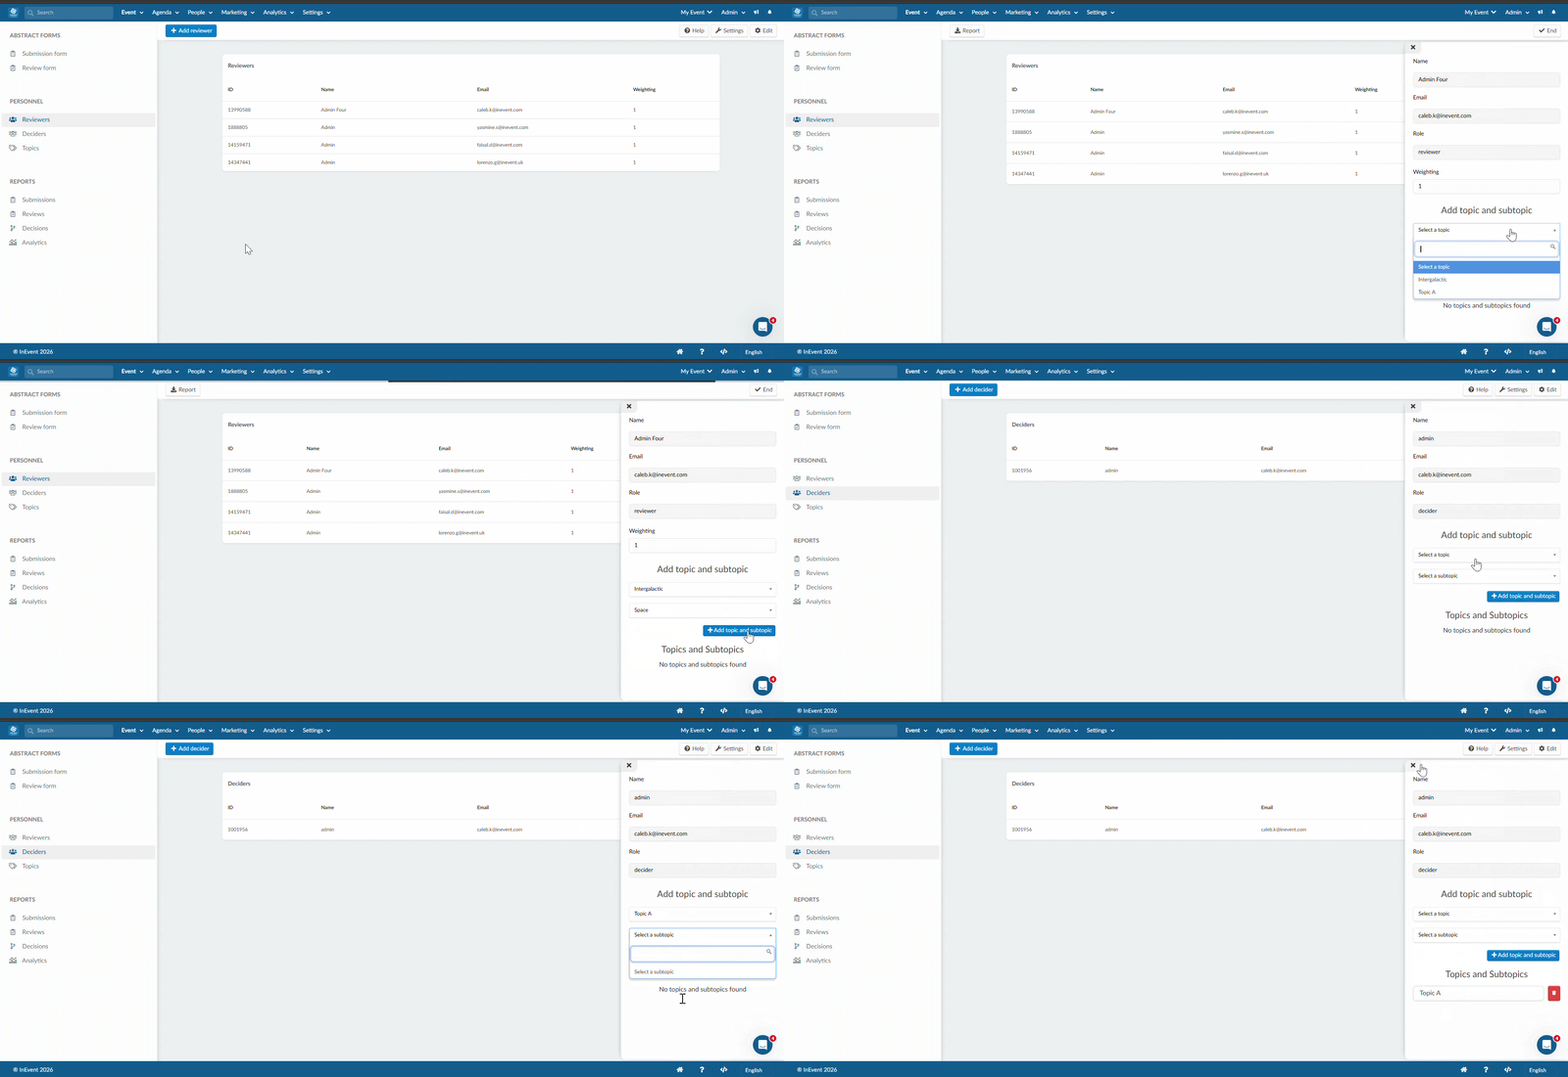
To learn more about configuring forms, reviewers, and deciders, refer to the Abstract Management: Configuring forms and Reviewers and Deciders article.
Abstracts dashboard in the web app
Once the Abstracts tab is visible, attendees can access the abstract form by navigating to the Web app and opening the Abstracts tab. The dashboard displays different information depending on the user's role.
Submitters can view the following information:
- Form: The name of the abstract form.
- Status: The form's completion status. Unfilled forms display Pending, while completed forms display Submitted.
- Approval status: The form's approval status. Forms awaiting a decision display Pending, approved forms display Approved, and rejected forms display Rejected.
- Date open: The date when the form becomes accessible to attendees.
- Date close: The date when the form becomes inaccessible to attendees.
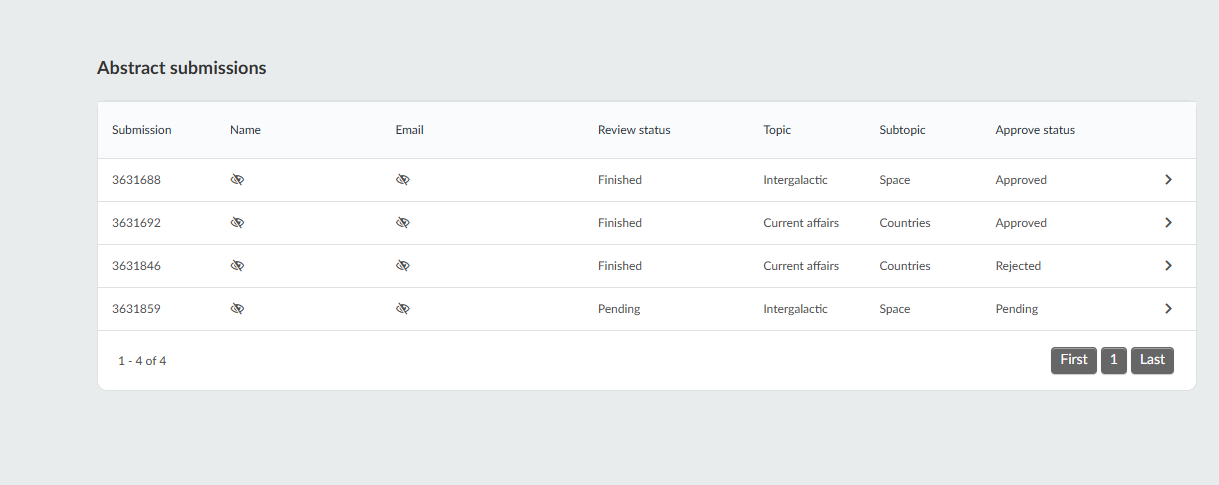
Reviewers can view the following information for each submission:
- Name: The name of the person who submitted the abstract form.
- Email: The submitter's email address.
- Review status: Indicates whether the submission has been reviewed. Submissions awaiting review display Pending, while completed reviews display Finished.
- Approval status: Indicates whether the submission has been approved. Submissions awaiting approval display Pending, while approved submissions display Approved.
- Reviews: The number of reviews completed for the abstract.
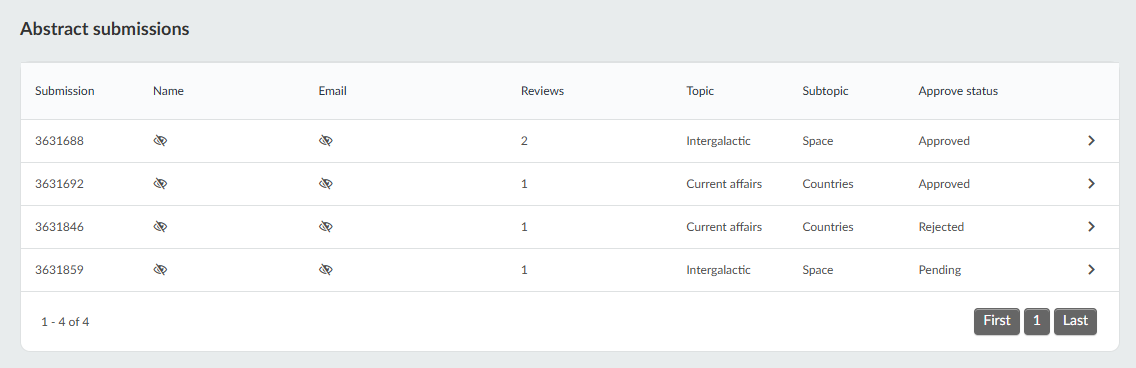
Deciders can view the following information for each submission:
- Name: The name of the person who submitted the abstract form.
- Email: The submitter's email address.
- Reviews: The number of reviews completed for the abstract.
- Approval status: Indicates the current approval status. Submissions awaiting a decision display Pending, approved submissions display Approved, and rejected submissions display Rejected.
If Abstract review by topic is enabled and topics have been assigned to Reviewers or Deciders, they will only see submissions from attendees who selected those topics when completing their abstract forms.
Submitting an abstract
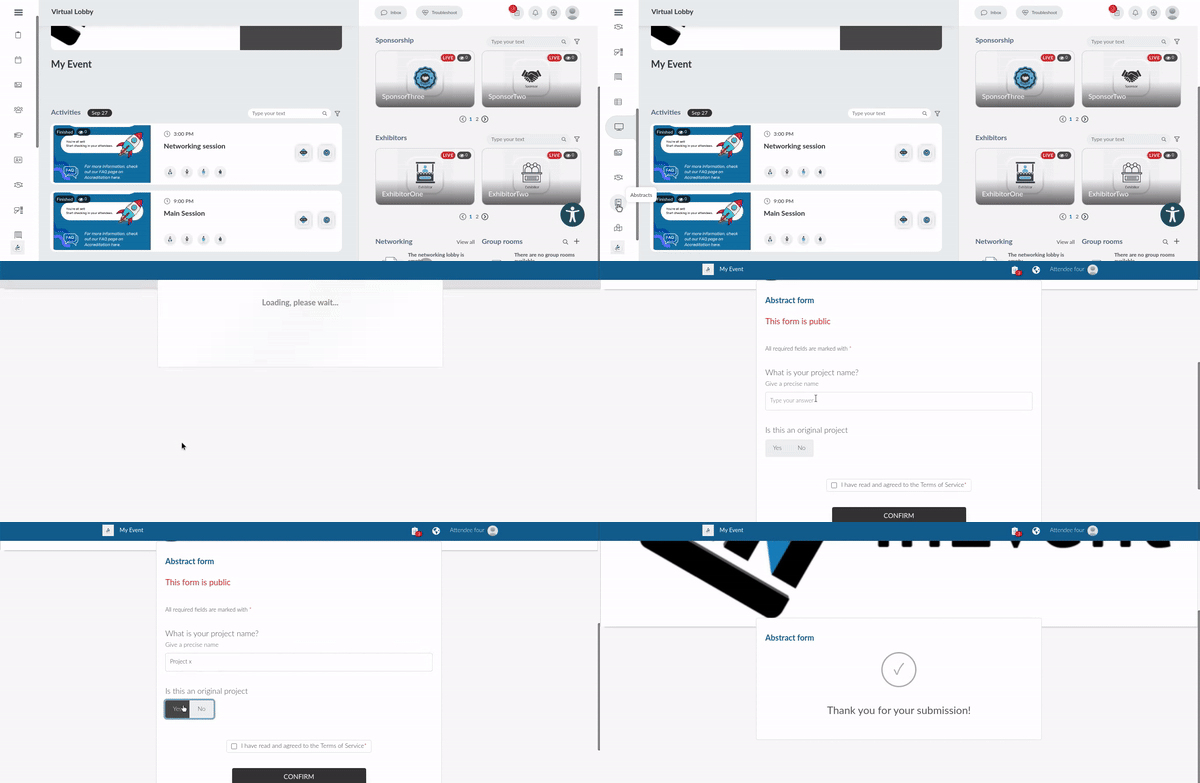
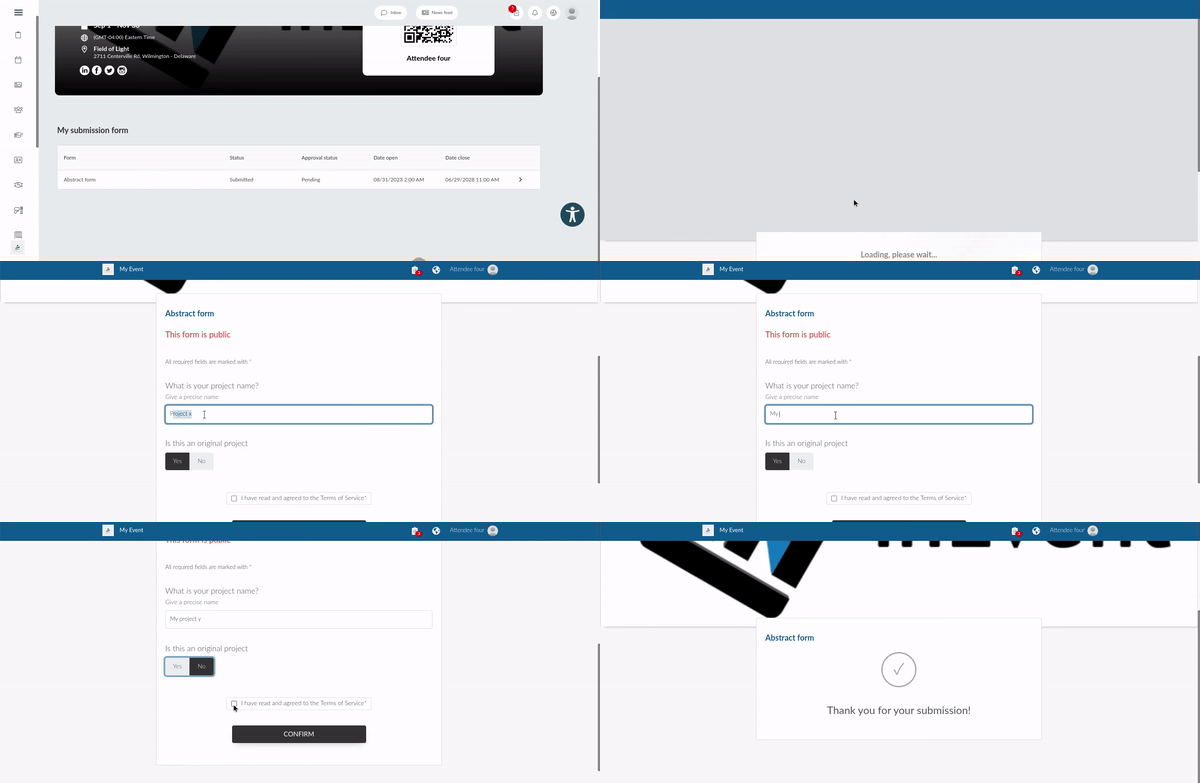
Attendees can submit abstracts through the Abstracts tab in the web app.
- Access the event's Virtual Lobby.
- Click the Abstracts tab.
- Open the submission form.
- Fil the required fields.
- Click the submission button to submit the abstract.
After submission, attendees can check their abstract's status.
Editing or resubmitting an abstract
Attendees may edit or resubmit their pending or rejected abstracts.
Rejected abstracts can only be resubmitted if resubmission after rejection is enabled.
Adding submission authors
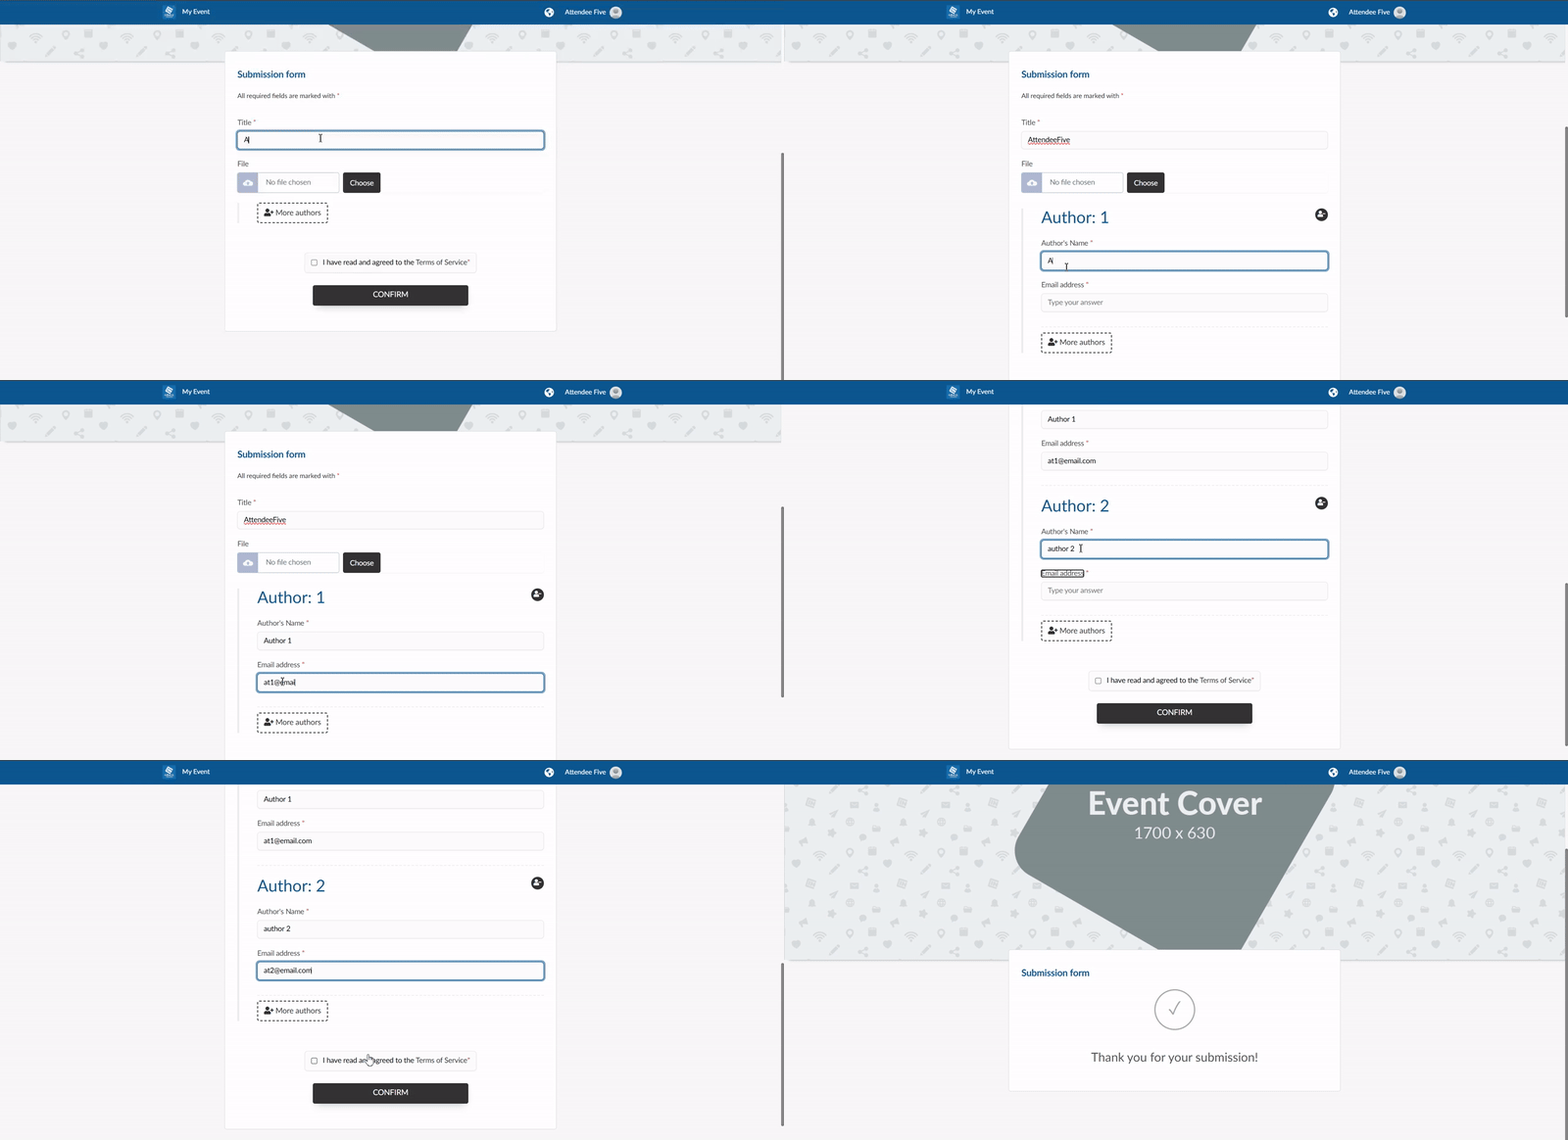
If the submission authors tool is enabled, attendees can add coauthors to their abstracts using the More authors option, where available.
Enter the coauthors' names and email addresses as required.
Reviewing abstracts
If you are a Reviewer,
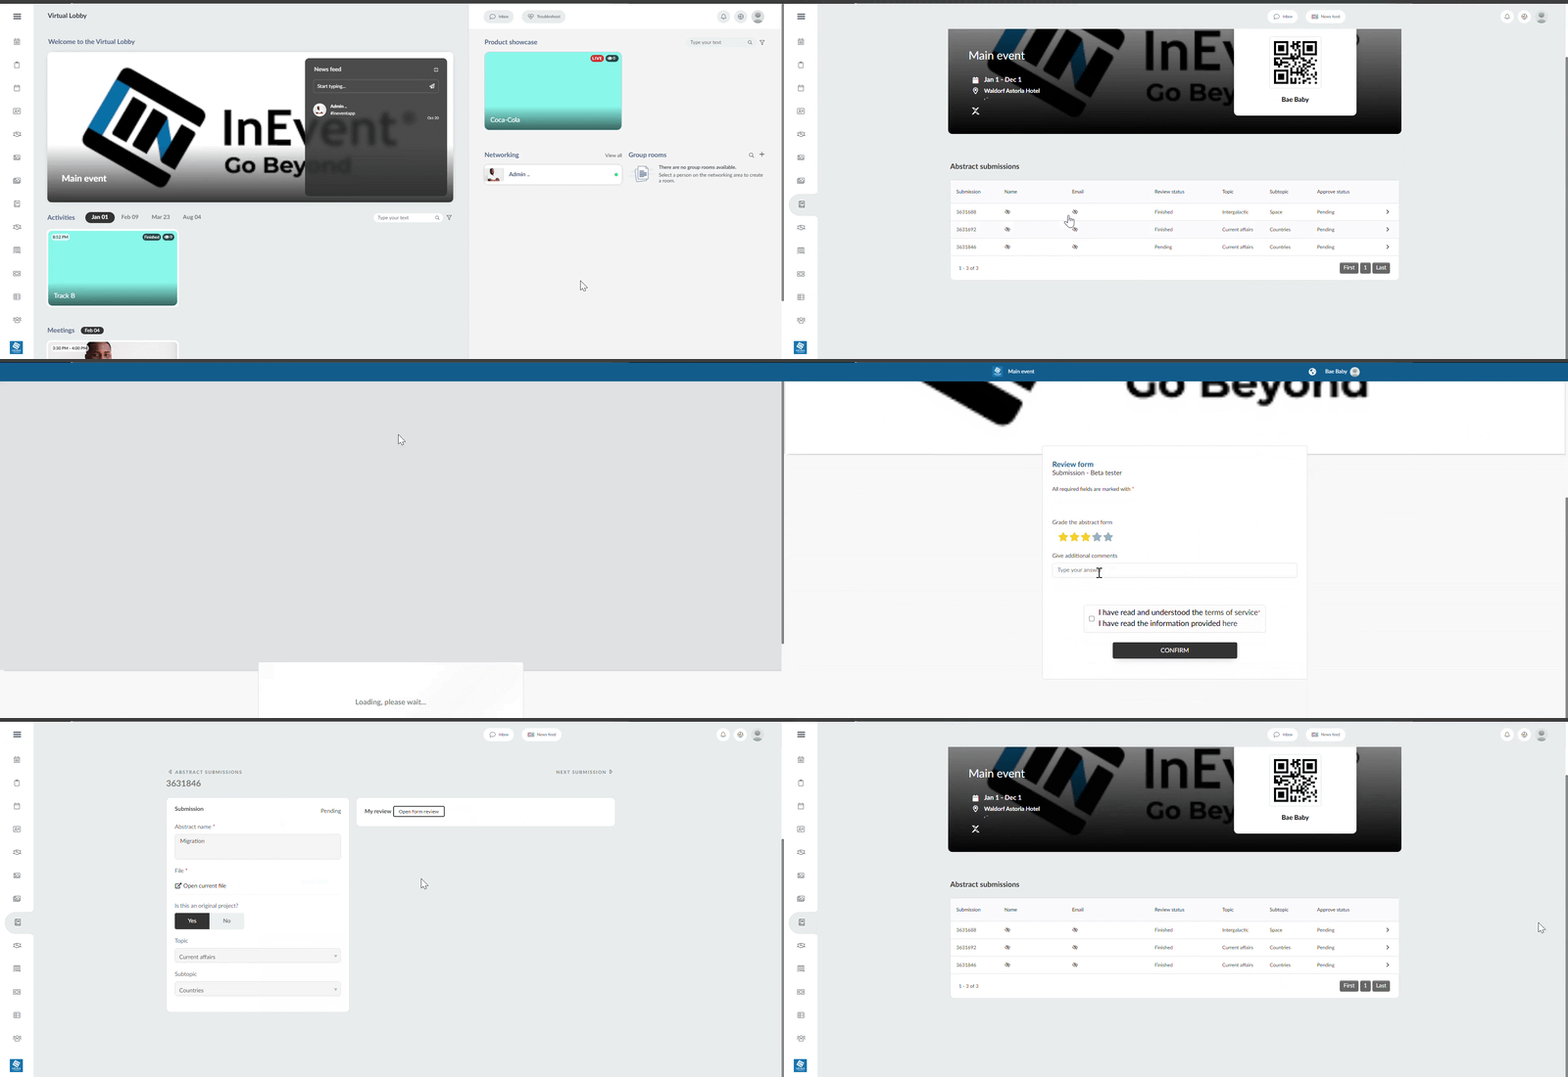
- Go to the web app and open the Abstracts tab.
- Open the submission you want to review.
- Click Open form review.
- Complete the review form.
- Click Save to submit your review.
Editing a review
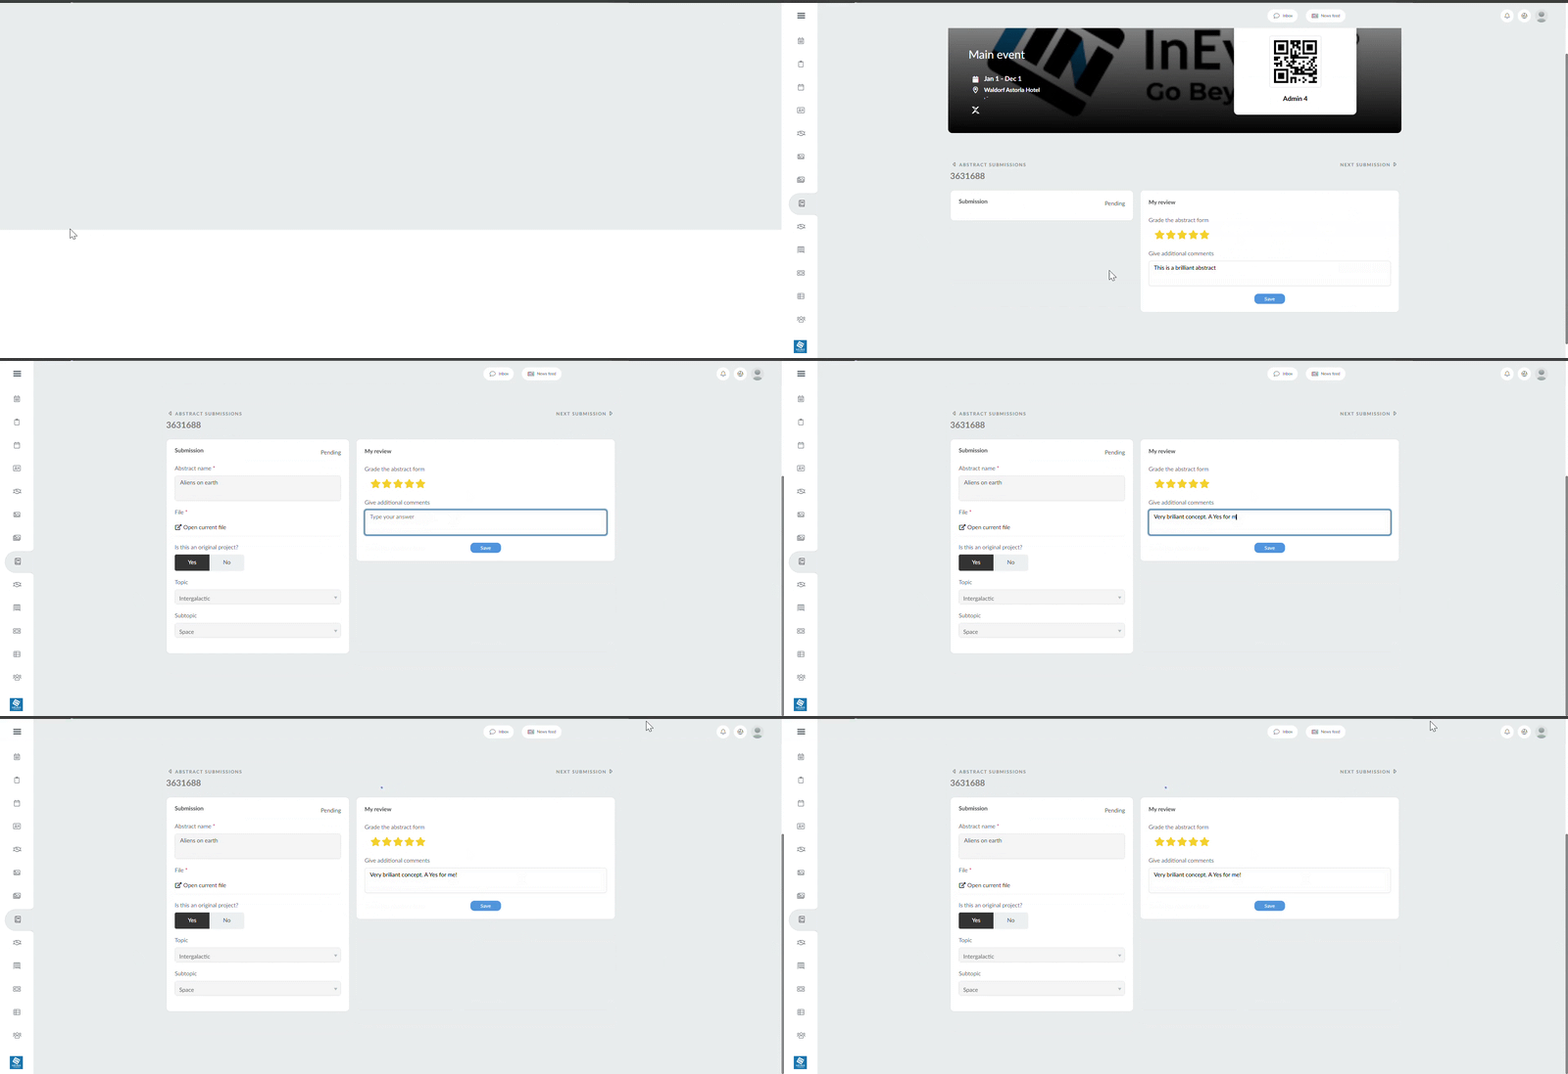
Reviewers can reopen their reviews and make changes when permitted.
After completing a review, they can move to the next assigned submission by clicking the Next submission button.
Approving or rejecting abstracts
Deciders are responsible for making the final approval or rejection decision on abstract submissions. To To approve or reject an abstract:
- Go to the Web app and open the Abstracts tab.
- Open the submission you want to review.
- Review the submitted abstract and its available evaluations.Reviews are displayed on the right side of the page.
- To view a review in detail, click on it.
- Approve or reject the abstract using the available decision options.
- The submission status will be updated to Approved or Rejected, depending on your decision.
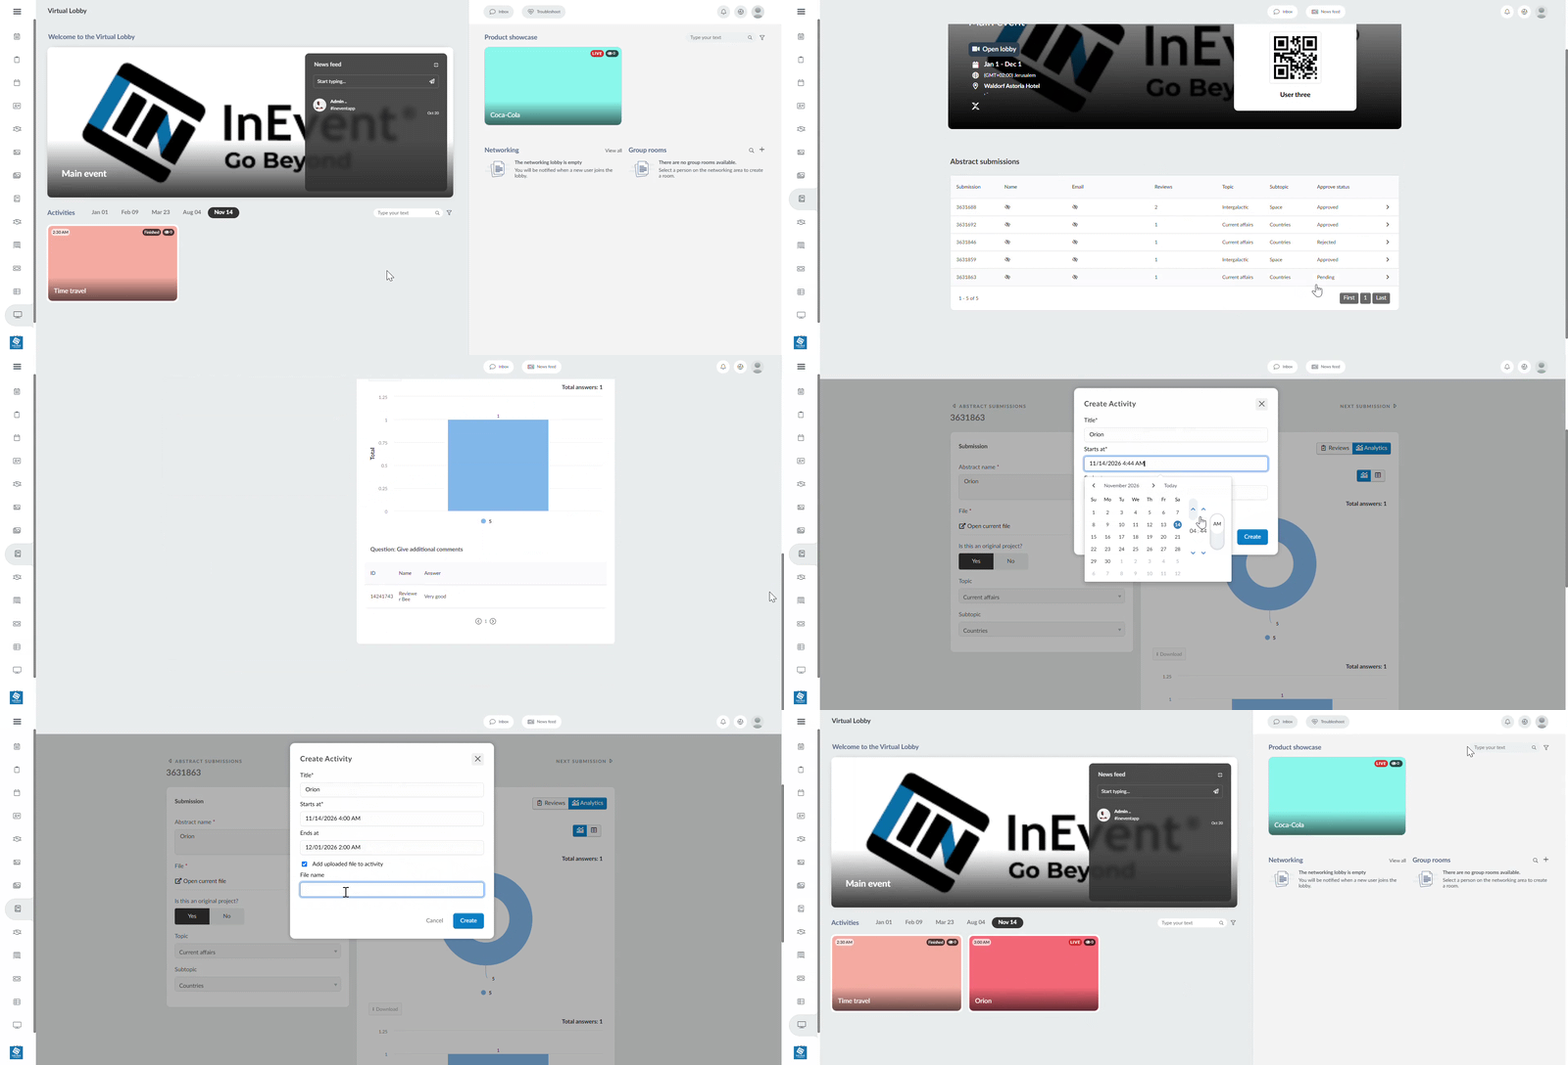
If you approve the abstract, you can also create an activity from it:
- Select the option to create an activity and click Continue.
- Review the activity information, including its title and date.
- If a file was uploaded, tick the box to add it to the activity and enter a file name.
- Create the activity.
The activity will then be available on the My Agenda and Virtual Lobby pages.
Abstract reports and analytics
Organizers can access reports and analytics to monitor abstract submissions and reviews.
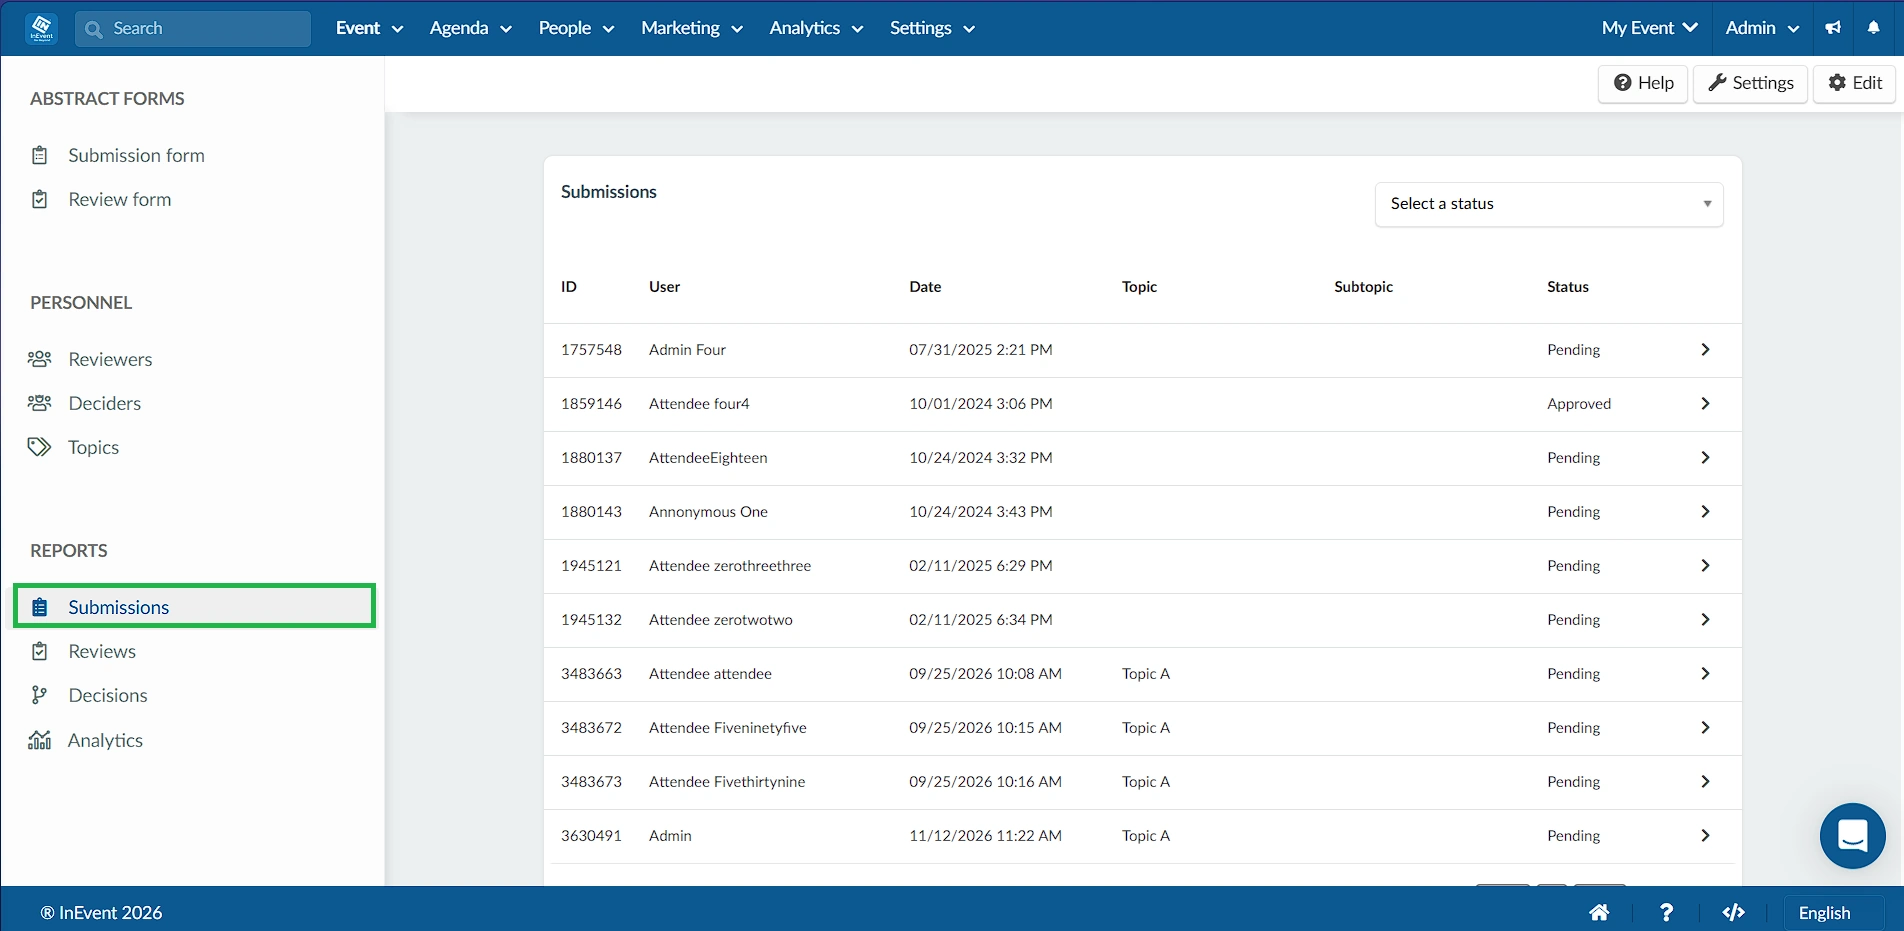
Submissions
In the Submissions tab, you can view all abstract submissions and the submitters who submitted them.
You can select a status: Approved, Rejected, Pending or All. Click on a submission to view its details.
Reviews
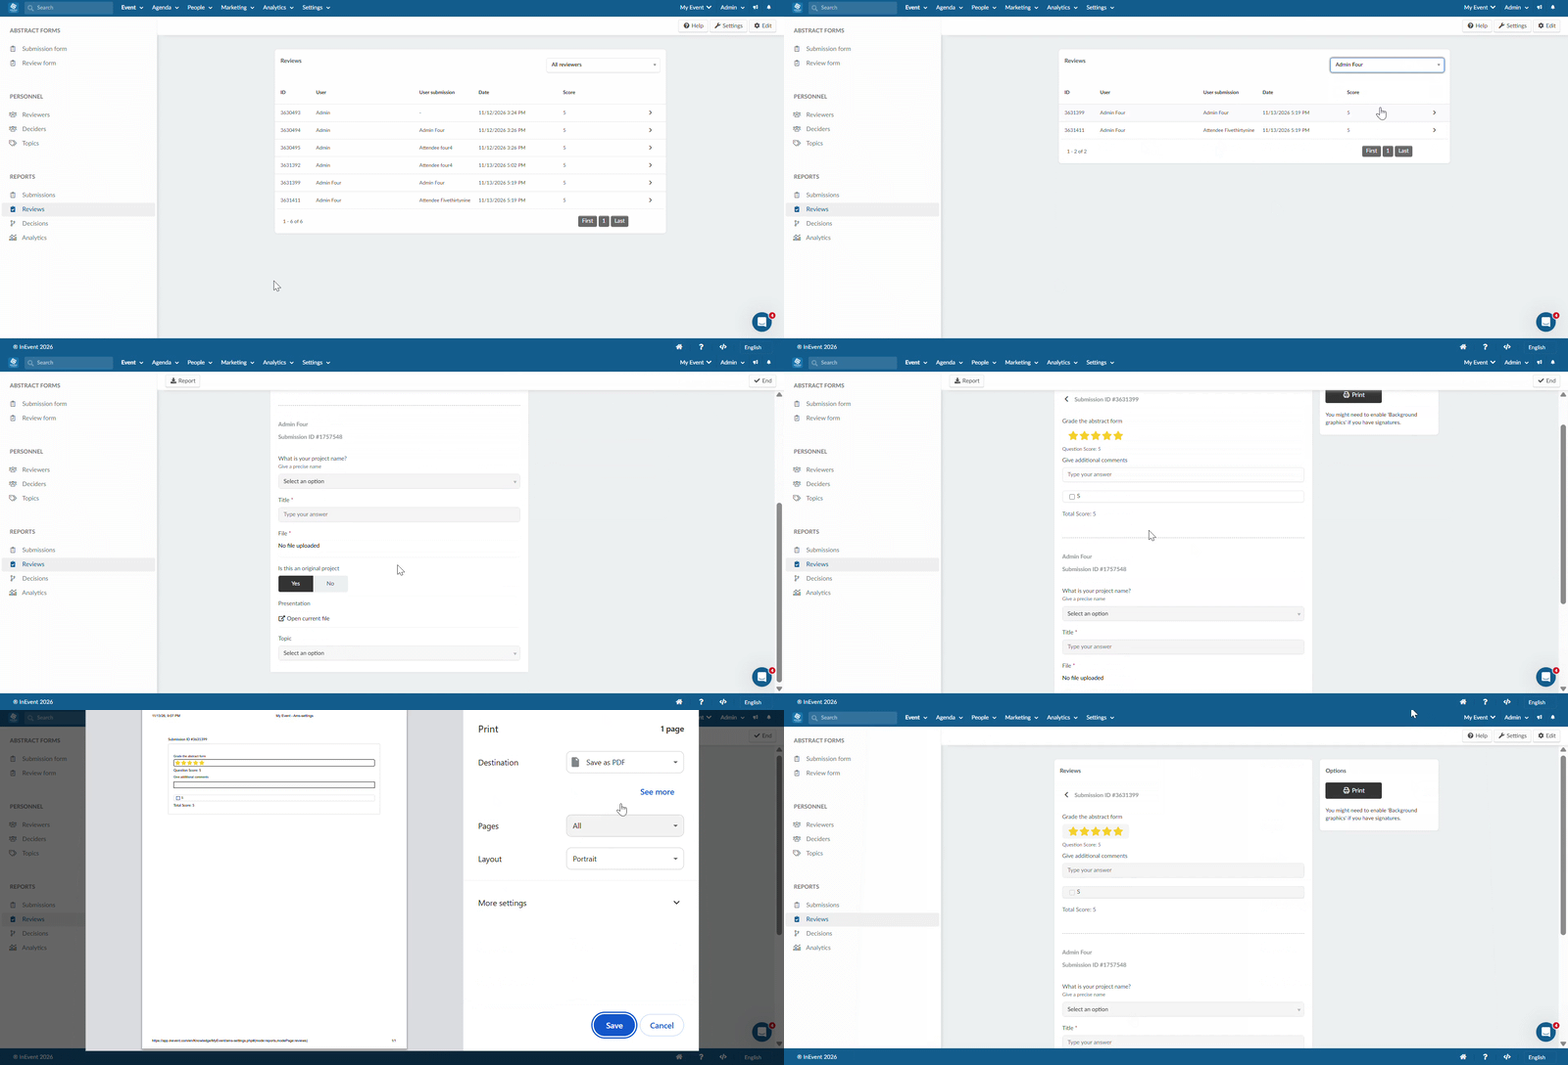
In the Reviews tab, you can view all reviews submitted for abstract submissions.
- Filter reviews: Select a reviewer from the Select a reviewer dropdown to view their reviews.
- View review details: Click on a submission to view its full review.
- Print or save reviews: You can print reviews or save them as PDF files.
Decisions
In the Decisions tab, you can view all decisions made on abstract submissions. Each entry displays the following information:
- ID: The decision's unique identifier.
- User: The user who submitted the abstract.
- Date: The date and time the abstract was submitted.
- Total score: The cumulative score assigned by reviewers, including weighting.
- Status: The decision made on the abstract, either Approved or Rejected.
You can also click on a submission to view and edit its answers, as well as print or save as PDF.
Analytics
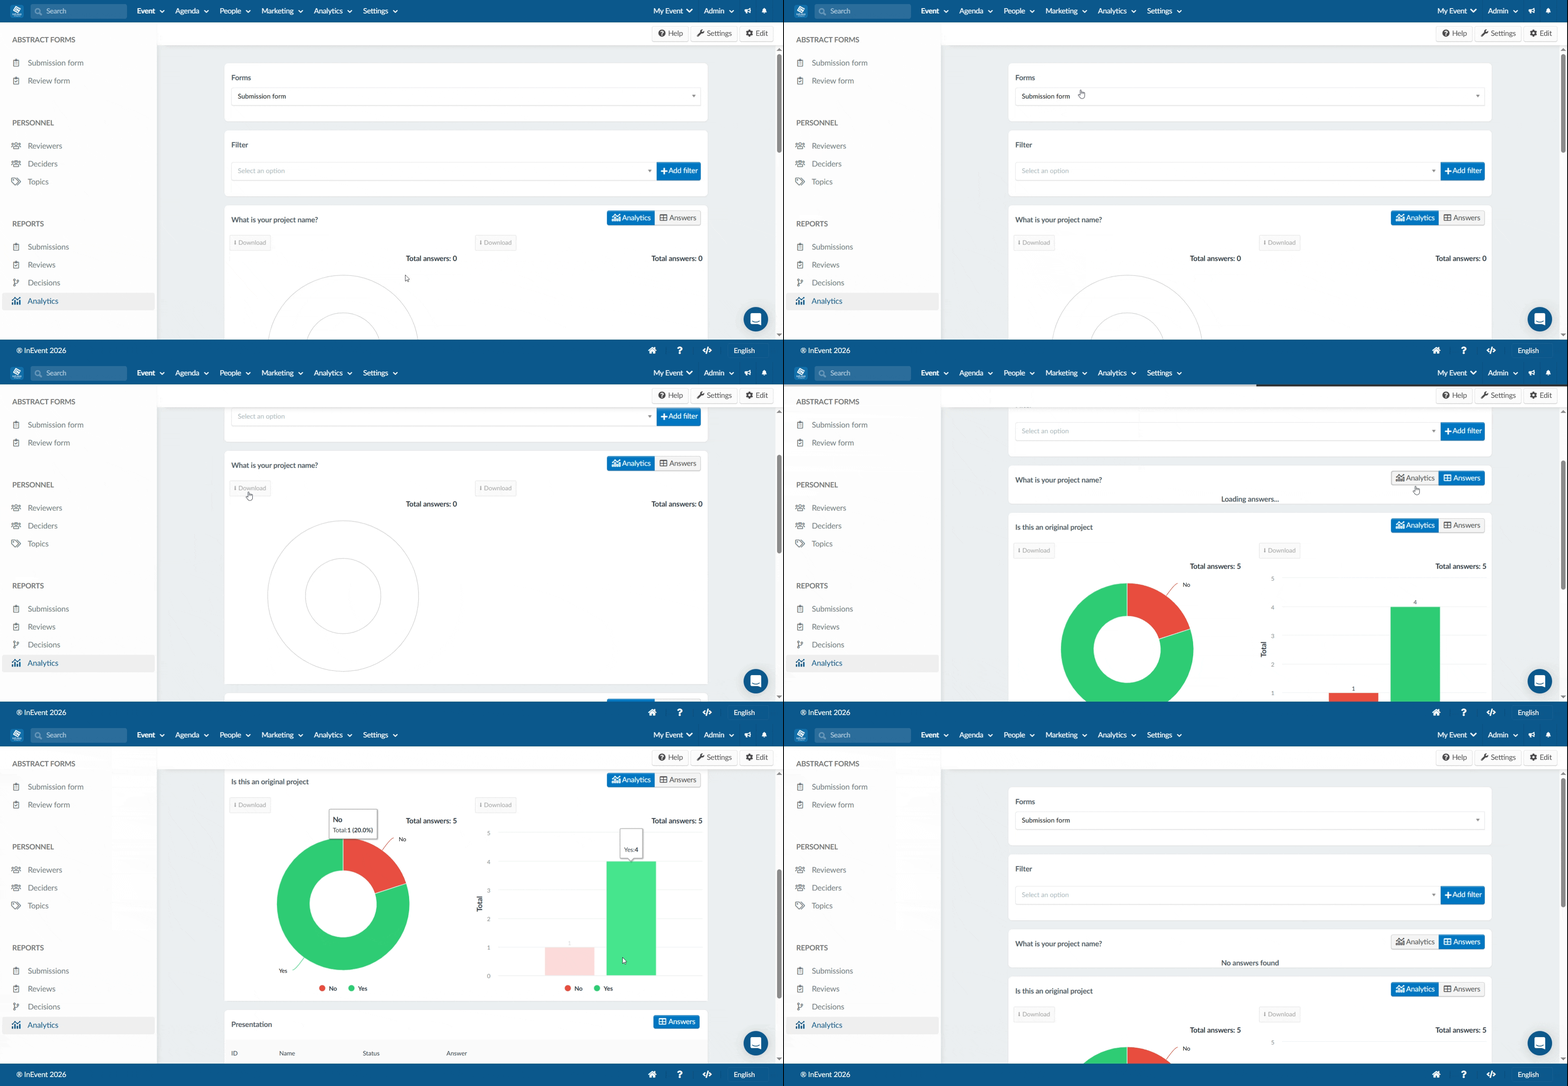
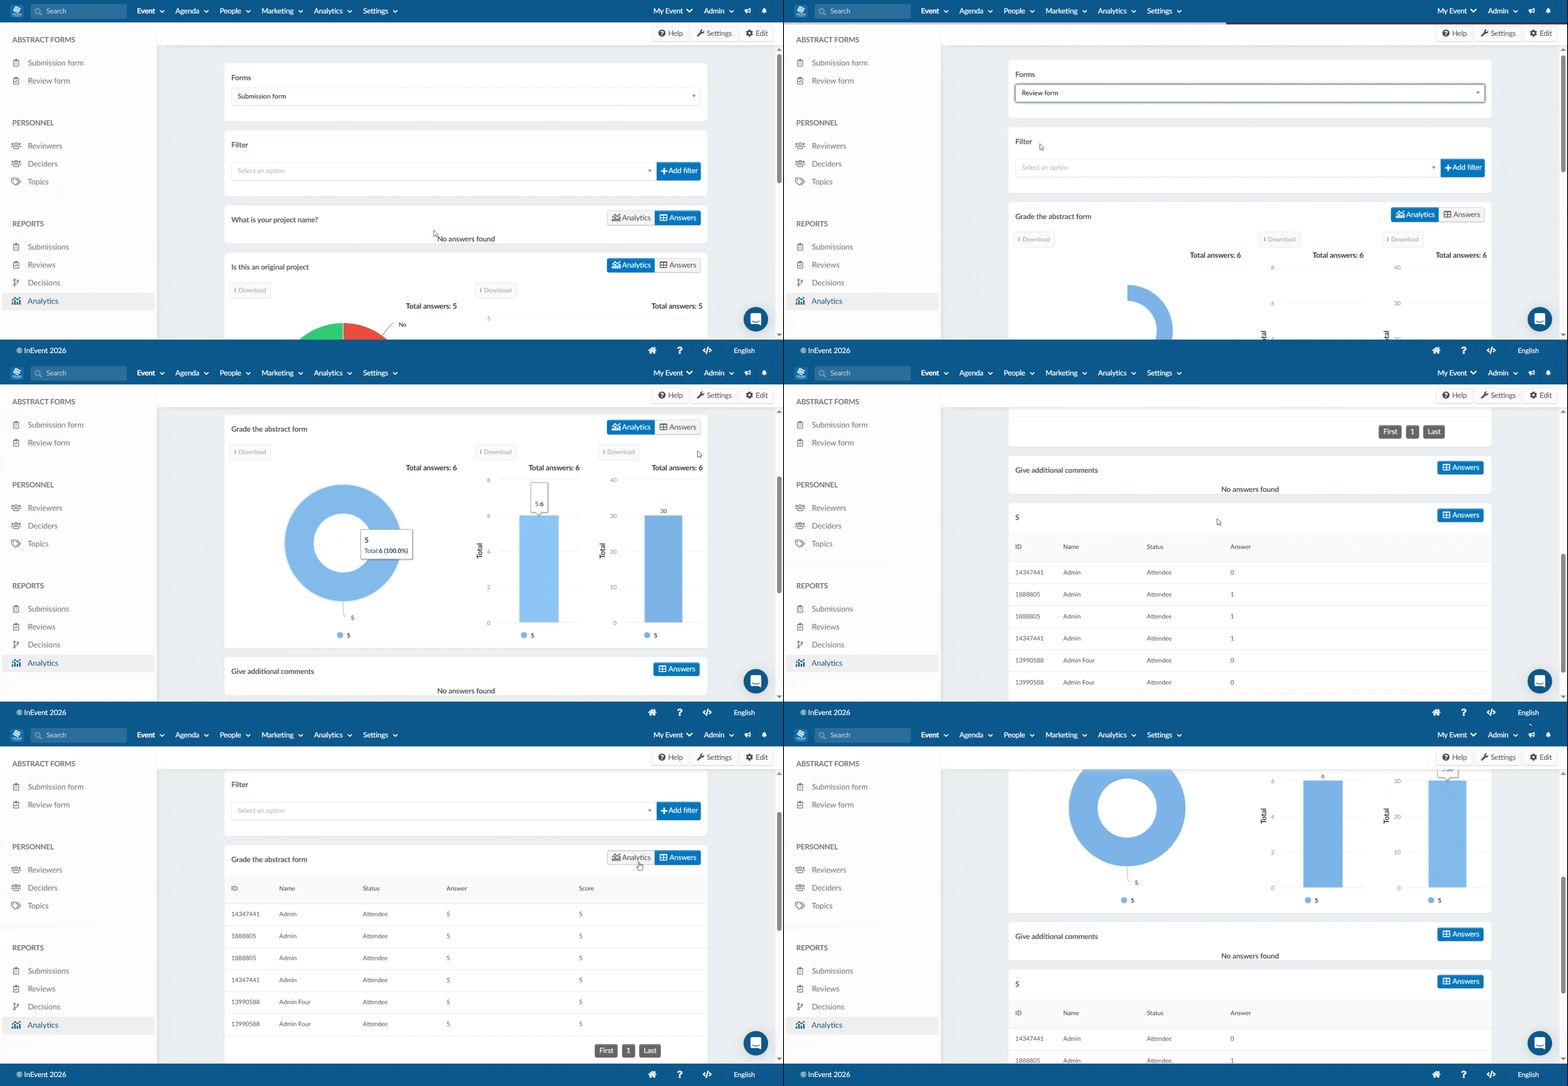
The Analytics tab provides a visual overview of the responses submitted through your forms.
- View form results: From the Forms dropdown, select either the Submission form or the Review form to view its results.
- View response breakdowns: Depending on the question type, responses are displayed under Answers as a list or under Analytics as a pie chart or bar chart.
Filter analytics
The Filter option allows you to narrow down your analytics to responses associated with specific Custom lists, tags, or tickets.
To apply a filter:
- Select Custom lists, tags, or tickets from the Filter dropdown.
- Click Add filter.
- Select the filter criteria you want to apply.
You can add multiple filters to further narrow down your results. To remove a filter, click the trash icon beside it.