Abstract Management
 Updated 2 months ago
by
Lorenzo
Updated 2 months ago
by
Lorenzo
The Abstract Management feature organizes submitted abstracts and facilitates the process of reviewing, approving and rejecting them. It also provides and displays data related to the submitted abstracts
Enabling the Abstracts tool
To enable the tool, navigate to Settings > Tools and locate Abstracts in the Registration section. Click on Edit and enable the corresponding toggle button. Once you have enabled this tool, navigate to Event > Abstracts to begin creating your abstract form.

It is also possible to disable the Abstracts tool directly from the Abstracts page. To do this click the Settings button at the top right corner of the page. A new window will appear, then toggle off Abstracts button under the Registration field.

Submission form
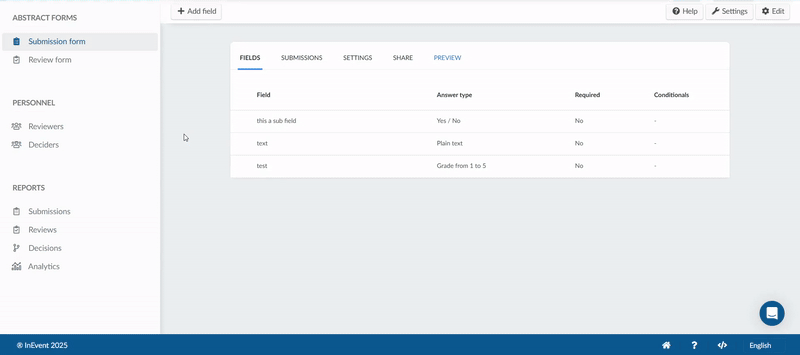
The Submission form tab allows you to create the abstract forms with the desired fields. It also contains all the submitted forms. You can adjust the settings, and you can also share and preview the form.
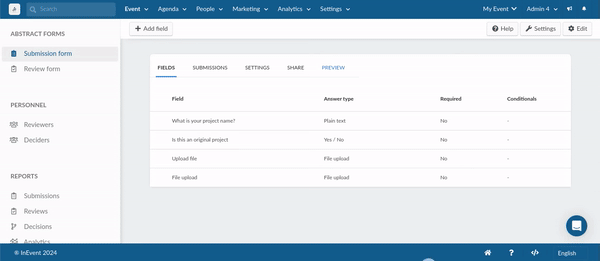
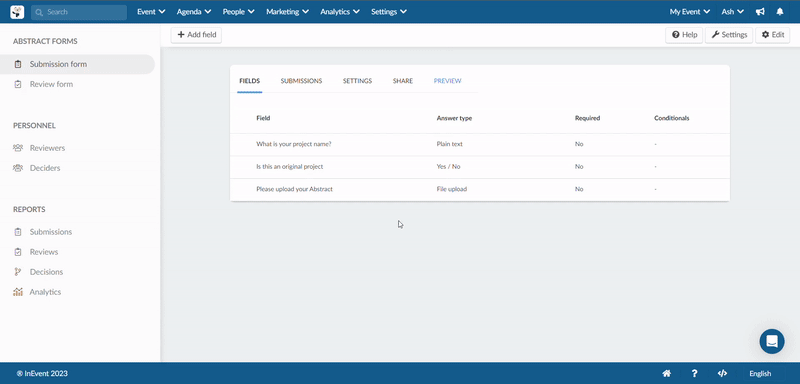
Fields
In the Fields tab, you can add fields.
Adding fields
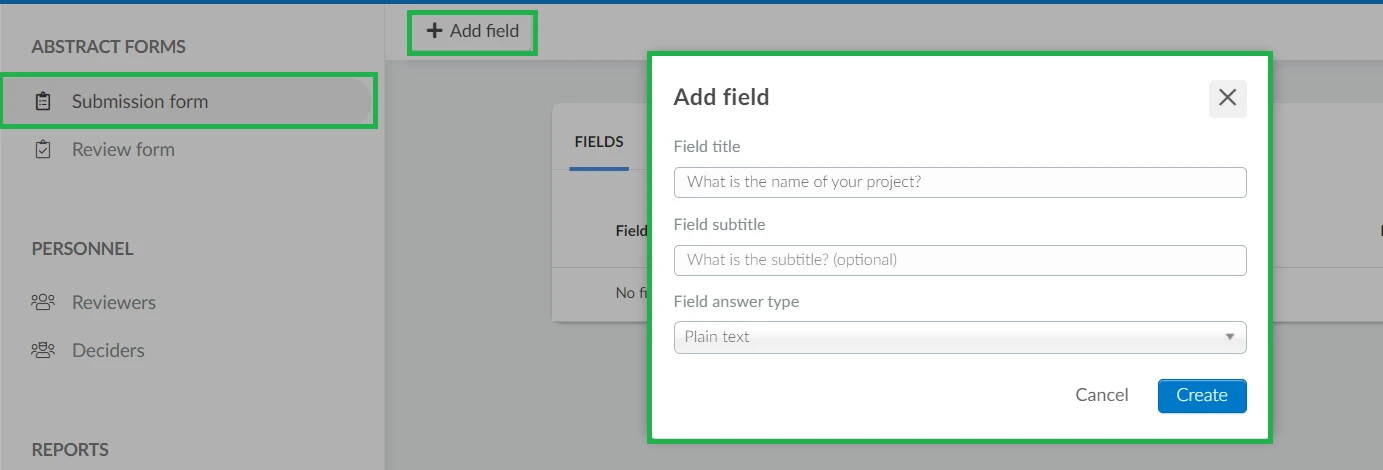
To add fields to the submission form, click on +Add field and enter the following information:
- Field title
- Field subtitle (optional)
- Field answer type
Submissions
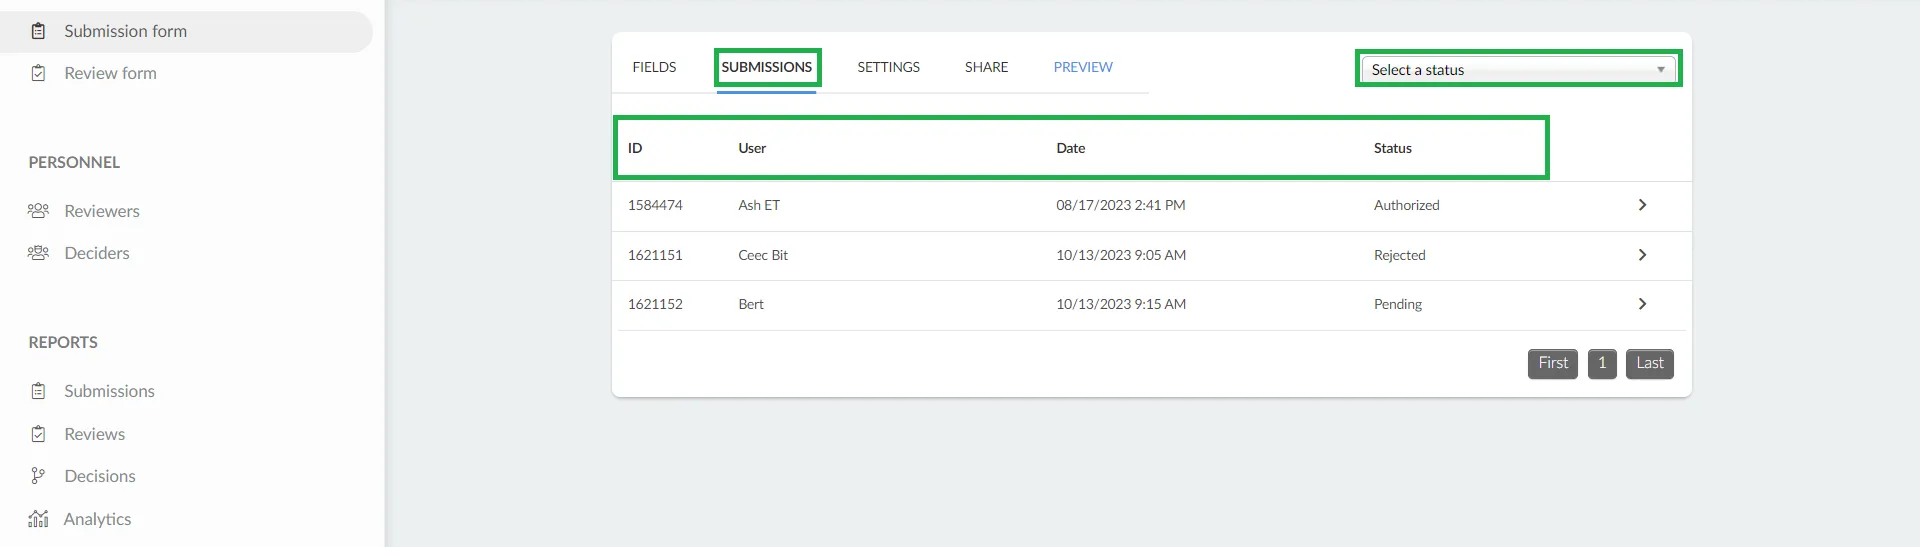
In the Submissions tab, you can view the submitted answers. On this page you will see the following:
- Submission form ID
- User: The name of the user who submitted the form.
- Date: The date and time of submission
- Status: The status of the submission form.
You can also filter submissions by status from the drop down menu Select a status which contains 3 options: Submitted, Authorized and Rejected.
Once you click on a submission, you can see the users who have submitted. Click on a user to see their answer to the form.
Downloading reports of abstract submitters
You can download a report of users who have submitted Abstracts by clicking on Edit and then Import. You will receive a notification that your file will be sent to your email once the process is completed.

The report will contain attendee related information such as: username, email, qrCode, nfc, eventID, personID, name, firstName, lastName, role, company, etc.
Settings
The Settings tab contains the following:
- Form unique link: The unique link of your abstract form will be displayed here. By clicking on it, the form will direct you to the My account tab in the Virtual Lobby. From there, you can navigate to the Abstracts tab (if visible) and view the abstract form.
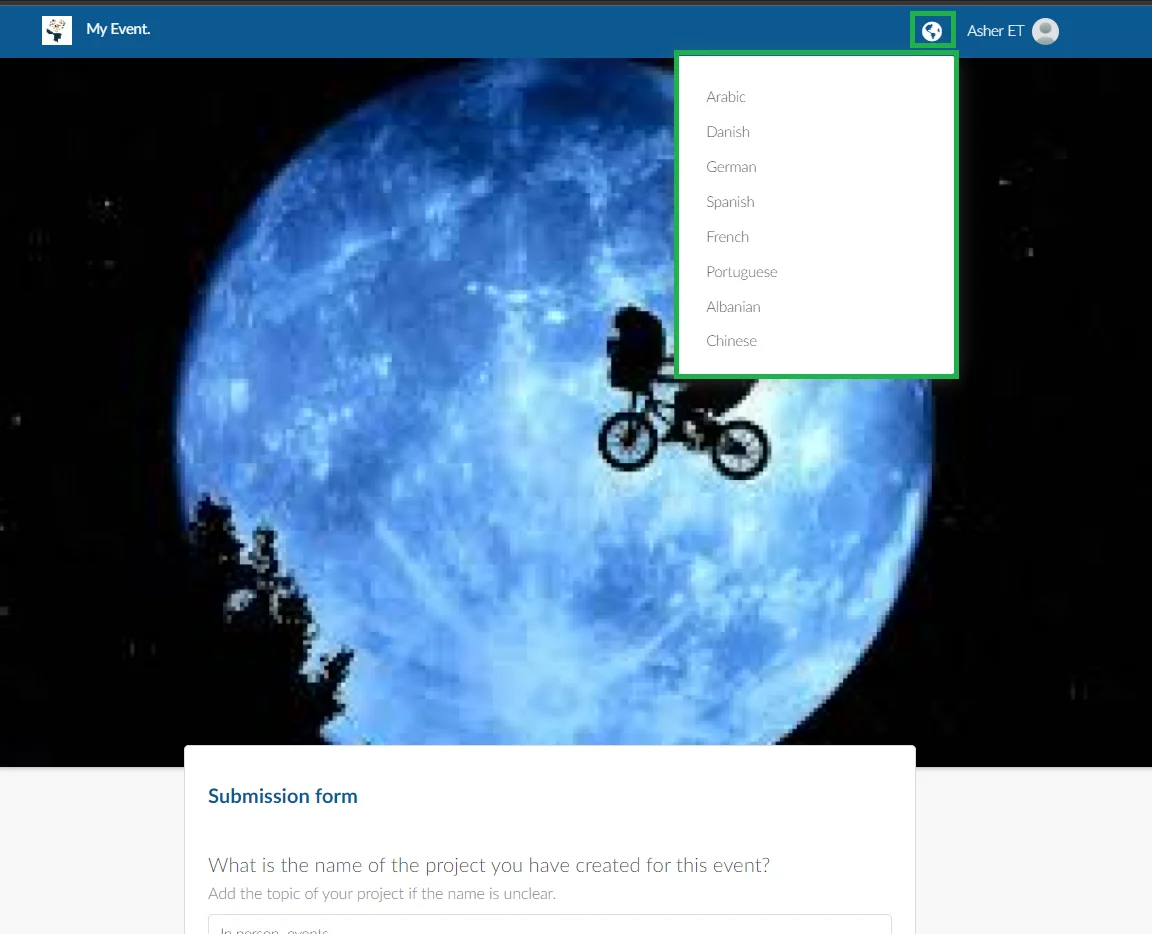
- Form title: In this field, you can modify the title of your form and add translations. To do this, simply click on the Edit button and make changes to your form name. Next, click on the translate icon, a Translation box will appear, select the language(s) you want from the Select a language drop-down field, click on Add translation and Save. The translation will be automatically generated.
- Subtitle/Disclaimer: Add a subtitle or a disclaimer to your form. You can use this field to specify any instructions which will appear at the top of the form. You can also add translations by clicking on the Translate icon and making your language selection from the Select a language drop down
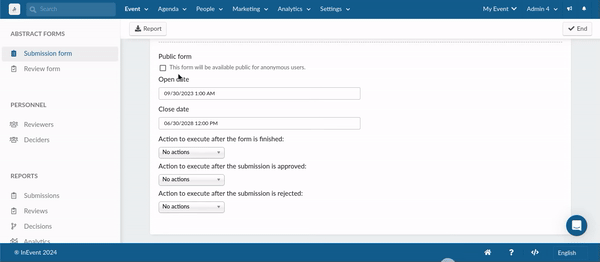
- Public form: By default, this tool is disabled. When enabled, it allows users to access and submit the abstract form without the need for registration. When disabled, users must follow the normal process, which requires registration.
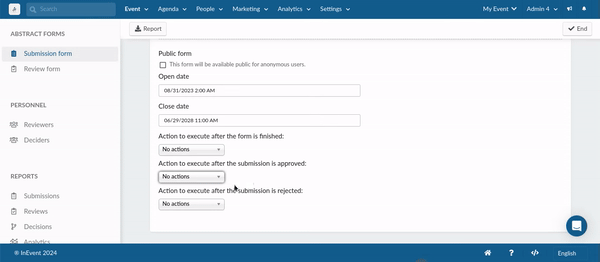
- Open date: Use the time selector to define the form's accessibility date - when it becomes accessible to users.
- Close date: Use the time selector to set the form's close date - when it becomes inaccessible to users.
- Action to execute after the form is finished: Set an automated action after form submission. To send automated notification emails following a form submission, select Send email in the first drop-down box and select the email to be sent, then click on the Add trigger button
- Action to execute after the form is approved: Set an automated action after the form's approval. To send automated notification emails following a form's approval, select Send email in the first drop-down box and select the email to be sent, then click on the Add trigger button.
- Action to execute after the form is rejected: Set an automated action after the form's rejection. To send automated notification emails following a form's approval, select Send email in the first drop-down box and select the email to be sent, then click on the Add trigger button.
If you choose Select the default field for the activity session title as the action to execute after submission is approved, you will see a second drop-down menu listing fields created with the plain text answer type for you to select from. The selected field will automatically become the title of the activity when a form is approved and an activity is created for it. This title can be further changed if needed.
If you choose Select the default field for the pre-recorded activity section as the action to execute after submission is approved, you will see a second drop-down menu listing fields created with the file upload answer type for you to select from. The selected file will automatically be used as the pre-recorded file if an activity is created upon the form's approval. This file can be further changed if needed.
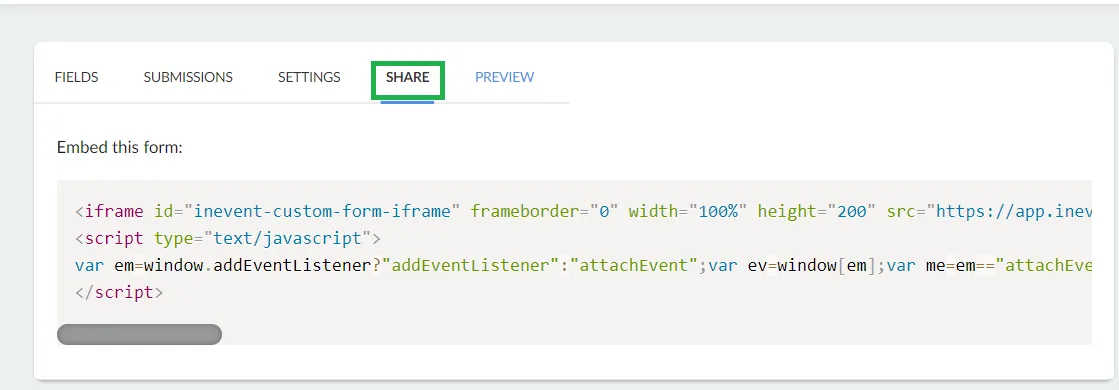
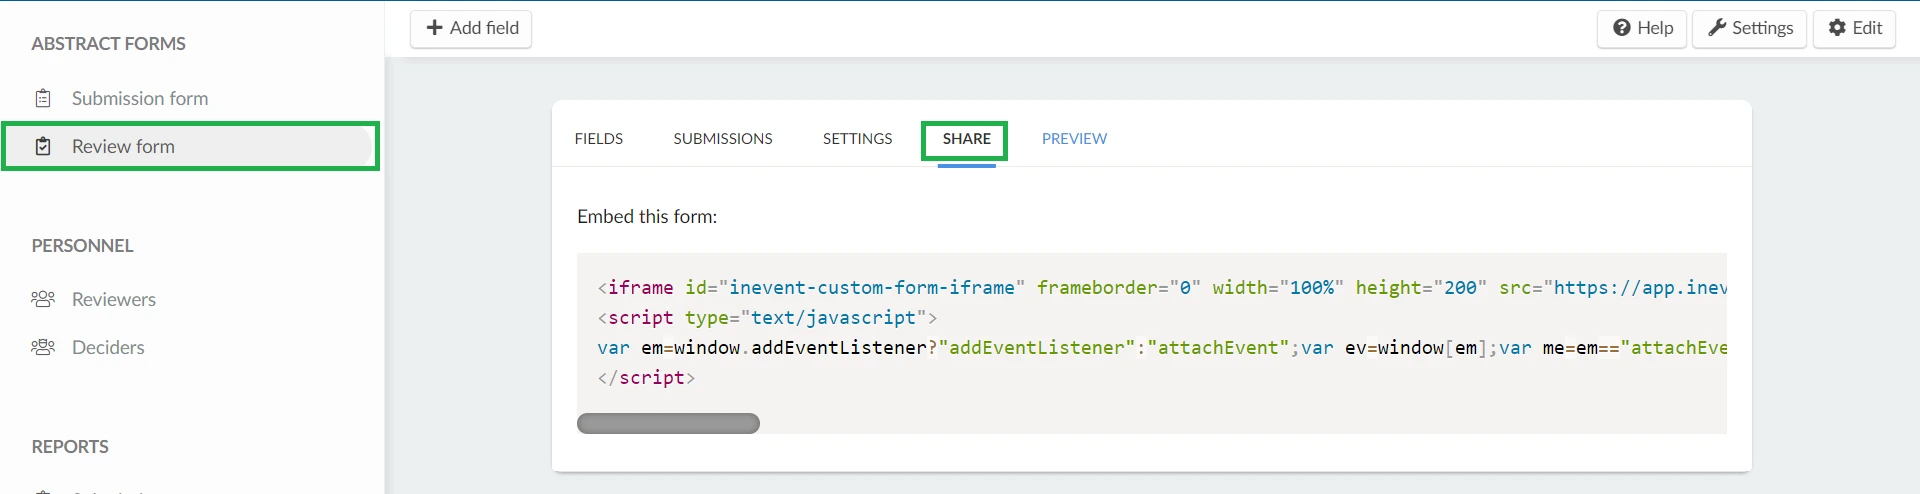
Share
Abstract forms can be embedded to an external website using its HTML iframe tag. To find the HTML iframe tag, click Share and paste the displayed code to the desired website.
Preview
To preview the Submission form, click on Preview and the form will be displayed in a new tab.
Review form
The Review form is used for Reviewers to give their opinions about the Abstract form submitted.
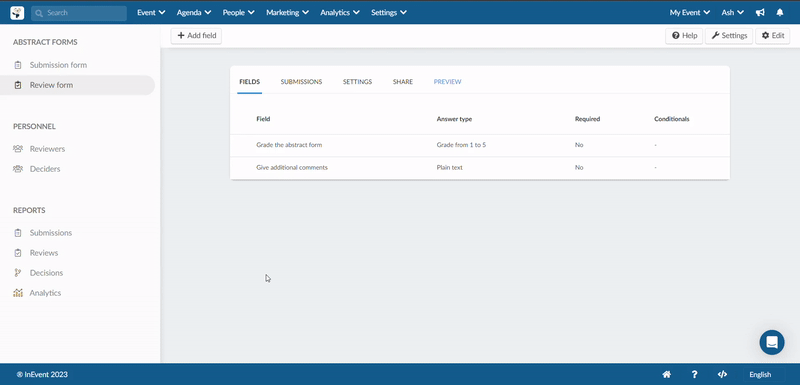
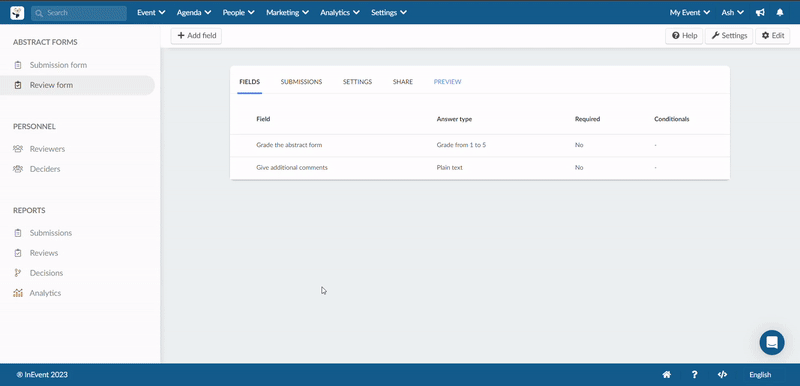
Fields
In the Fields tab, you can add fields to the review form.
Adding questions
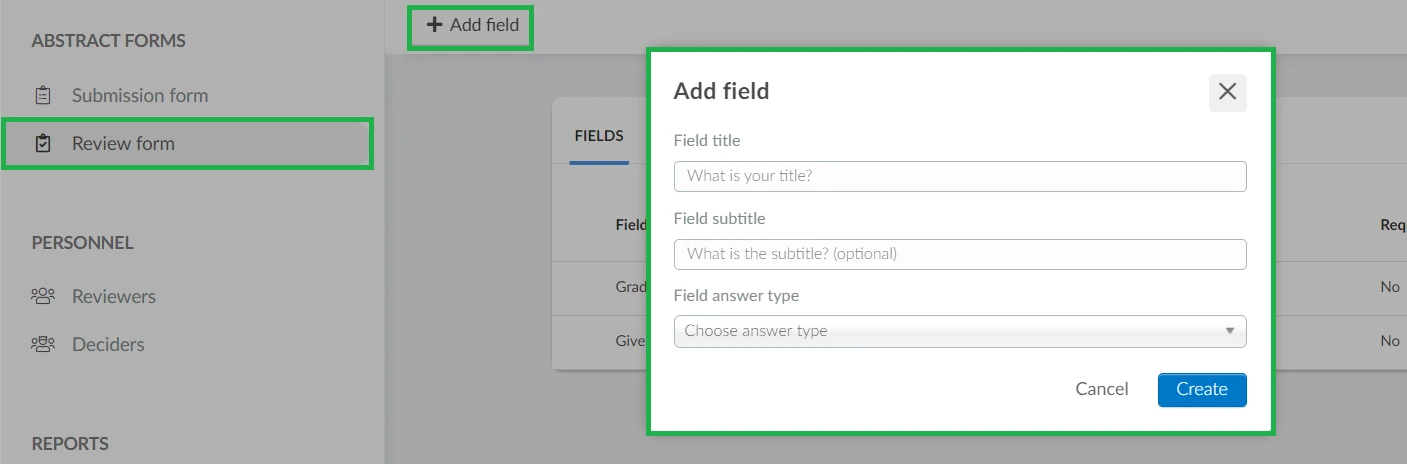
To add fields to the review form, click on +Add field and enter the following information:
- Field title
- Field subtitle (optional)
- Field answer type
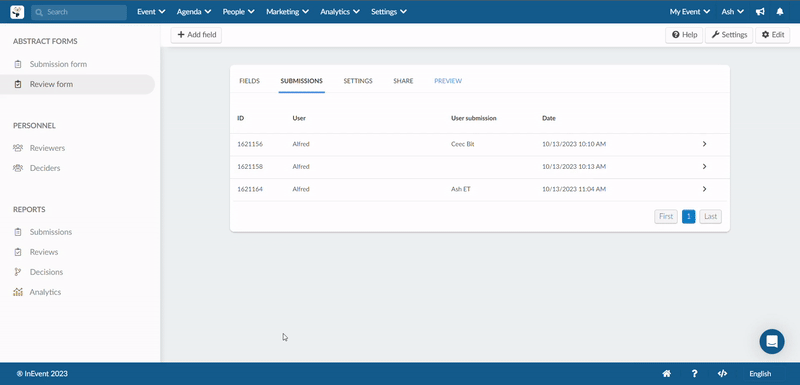
Submissions
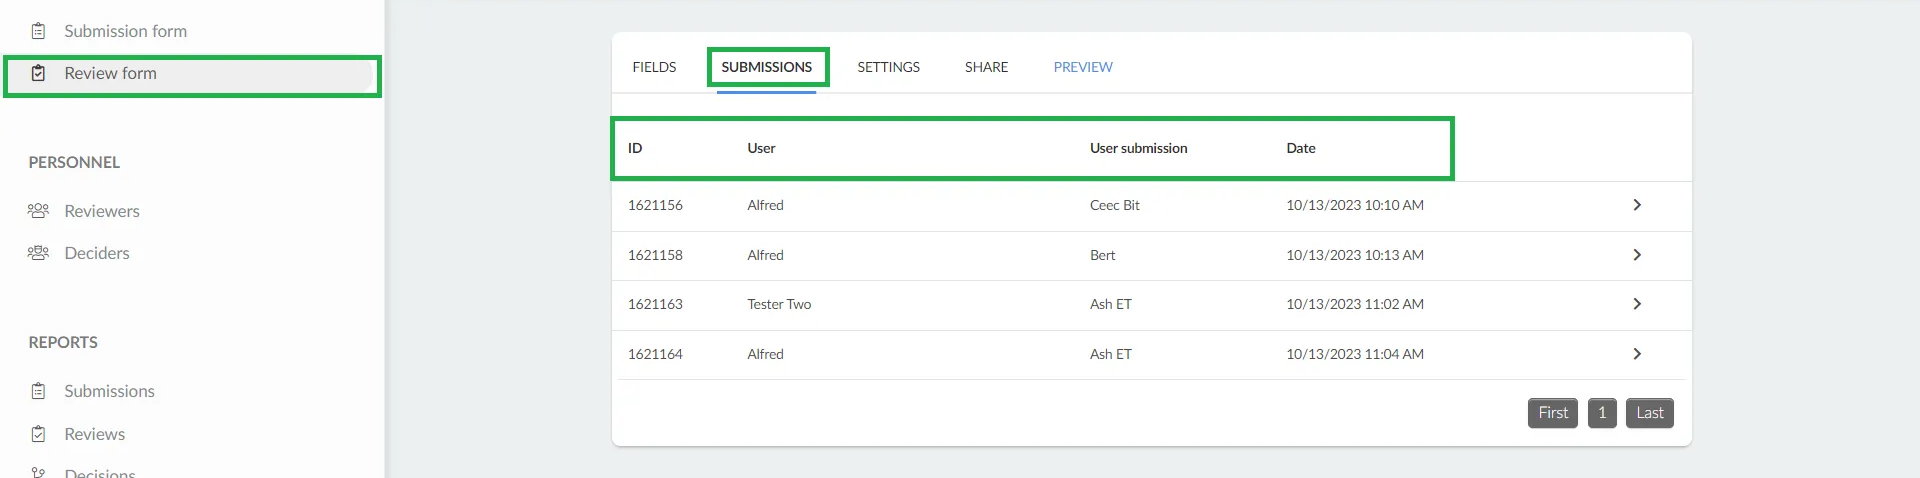
To view all the submissions of the review forms, click on the Submissions tab. It provides the
- Submission ID
- User: The user who submitted a review
- User submission: The user who submitted an abstract form.
- Date of submission: The date and time the review was submitted.
Once you click on a review submission, you can view the details of the submission responses, along with the information of the abstract form that was reviewed.
Settings
The Settings tab of the Review form is similar to that of the Submissions form. It contains the following:
- Form unique link: The unique link of your review form will be displayed here. By clicking on it, you will be directed to the My Account tab in the Virtual Lobby. From there, you can access the Review form if you are a reviewer by navigating to the Abstracts tab (if visible).
- Form title: In this field, you can modify the title of your review form and add translations. To do this, simply click on the Edit button and make changes to your form name. Next, click on the translate icon, a Translation box will appear, select the language(s) you want from the Select a language drop-down field, click on Add translation and Save. The translation will be automatically generated.
- Subtitle/Disclaimer: Add a subtitle or a disclaimer to your form. You can use this field to specify any instructions which will appear at the top of the form. You can also add translations by clicking on the Translate icon and making your language selection from the Select a language drop down
- Open date: Use the time selector to define the review form's accessibility date - when it becomes accessible to reviewers.
- Close date: Use the time selector to set the review form's close date - when it becomes inaccessible to reviewers.
- Action to execute after the form is finished: Set an automated action after the review form is submitted. To send automated notification emails following a Review form submission, select Send email in the first drop-down box and select the email to be sent, then click on the Add trigger button.
Share
Review forms can be embedded to an external website using its HTML iframe tag. To find the HTML iframe tag, press Share and paste the displayed code to the desired website.
Preview
To preview the Review form, click on the Preview tab.
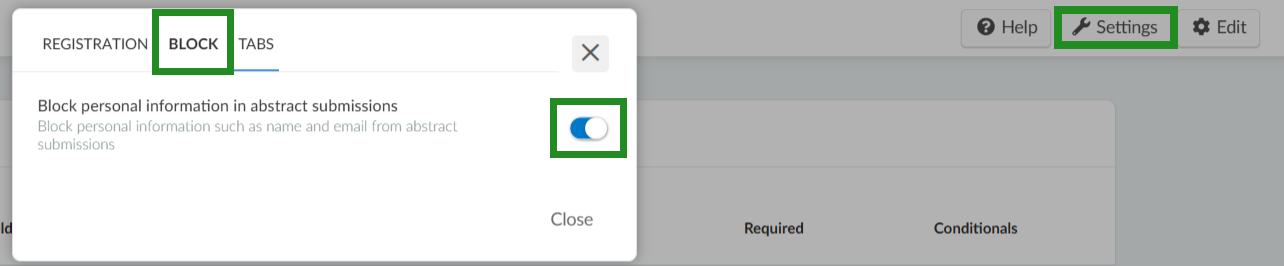
Abstracts tool Settings
To manage tools for the Abstracts feature, click the Settings button in the top-right corner of the Abstracts page. Tools are organized into three categories: Registration, Block, and Tabs.
- Registration
- Abstracts: From this section, you can control the activation or deactivation of the tool. When the Abstracts tool is toggled off from here, the Abstracts page will become invisible.

- Allow topics on abstract submissions: The feature allows organizers to define pre-set topic categories that submitters can select when completing an abstract submission form. Refer to this section for more information.
- Abstract review by topic: This feature allows reviewers and deciders to filter, organize, and evaluate abstract submissions based on their assigned topics. To learn how to assign topics and sub topics to reviewers and deciders, refer to this and this section respectively.
- Block
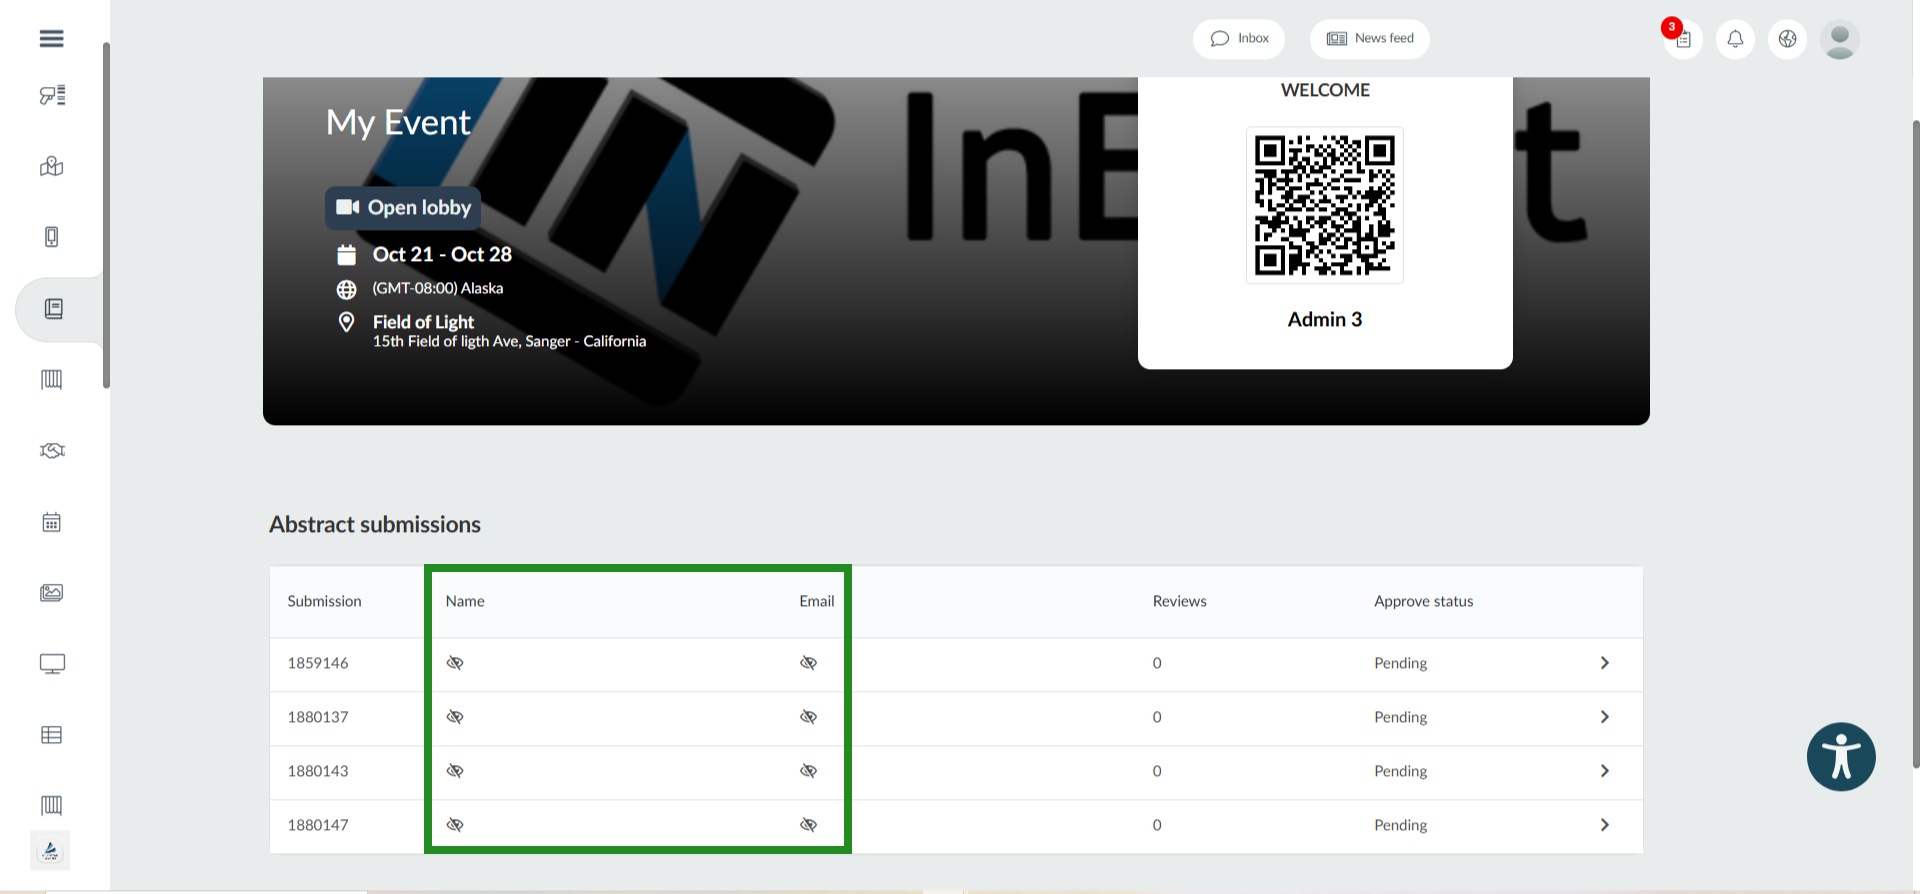
- Block personal information in abstract submissions: This feature allows you to control whether the personal information of abstract form submitters, such as name and email, is visible to Reviewers and Deciders, allowing you to keep submitters anonymous if desired. To enable this feature, toggle on Block personal information in abstract submissions; to disable it, toggle it off.
The users personal information such as name and email will not be displayed for Reviewers and Deciders in the list of submissions in the virtual lobby as shown n the image below:
- Tabs: In this section, you can control whether the Abstract tab is visible in the Web app. To allow Attendees, Reviewers, and Deciders to view the forms, ensure the Abstracts tab is visible. Toggle on Web app - Abstracts to make this tab visible in the Virtual Lobby; toggle it off to hide it.


Reviewers
After creating your review form, you need to add the Reviewers who will review the submitted abstract forms. To add a reviewer, simply click on the +Add reviewer button. Click Select a person and type the attendee name in the box. Select the attendee from the list of attendees that appear, then click on Create.


Weighted reviewers
If you enable the Weighting for reviewers tool, you can assign a weight value to each reviewer.
Weighted reviewers are useful when you want certain reviewers (e.g., senior reviewers or chairs) to have greater influence on the final decision. The weight assigned to each reviewer will directly affect the score given on the review form.
- Normal reviewers: submit evaluations, but no scores are generated.
- Weighted reviewers: their evaluations generate scores that reflect their assigned weight.
To add a weighted reviewer:
- Navigate to Event > Abstracts.
- Click on Settings in the top-right corner.
- Toggle on the Weighting for reviewers tool.
- In the left panel, select Reviewers under the Personnel section.
- Press the +Add reviewer button.
- Select a person by typing the attendee’s name in the search box.
- Assign a weight value to the reviewer.
- Click Create to save.
Weighted scoring
The Weighted scoring option allows you to score abstracts based on reviewer evaluations while giving more influence to certain reviewers.
By default, the Weighting for reviewers tool is disabled. When disabled, reviews are collected, but no scores are generated. When enabled:
- You can assign a specific weight to each reviewer.
- Scores are calculated based on the Grade 1–5 answer type on the review form.
- The score is determined by multiplying the reviewer’s weight by the grade they select.
- Example: weight 1 × grade 1 star = 1
- Example: weight 4 × grade 3 stars = 12
- Example: weight 4 × grade 5 stars = 20
- The system will automatically combine your weighted results to generate the final score.
Below is a score for abstracts reviewed by a reviewer with a weight of 2.
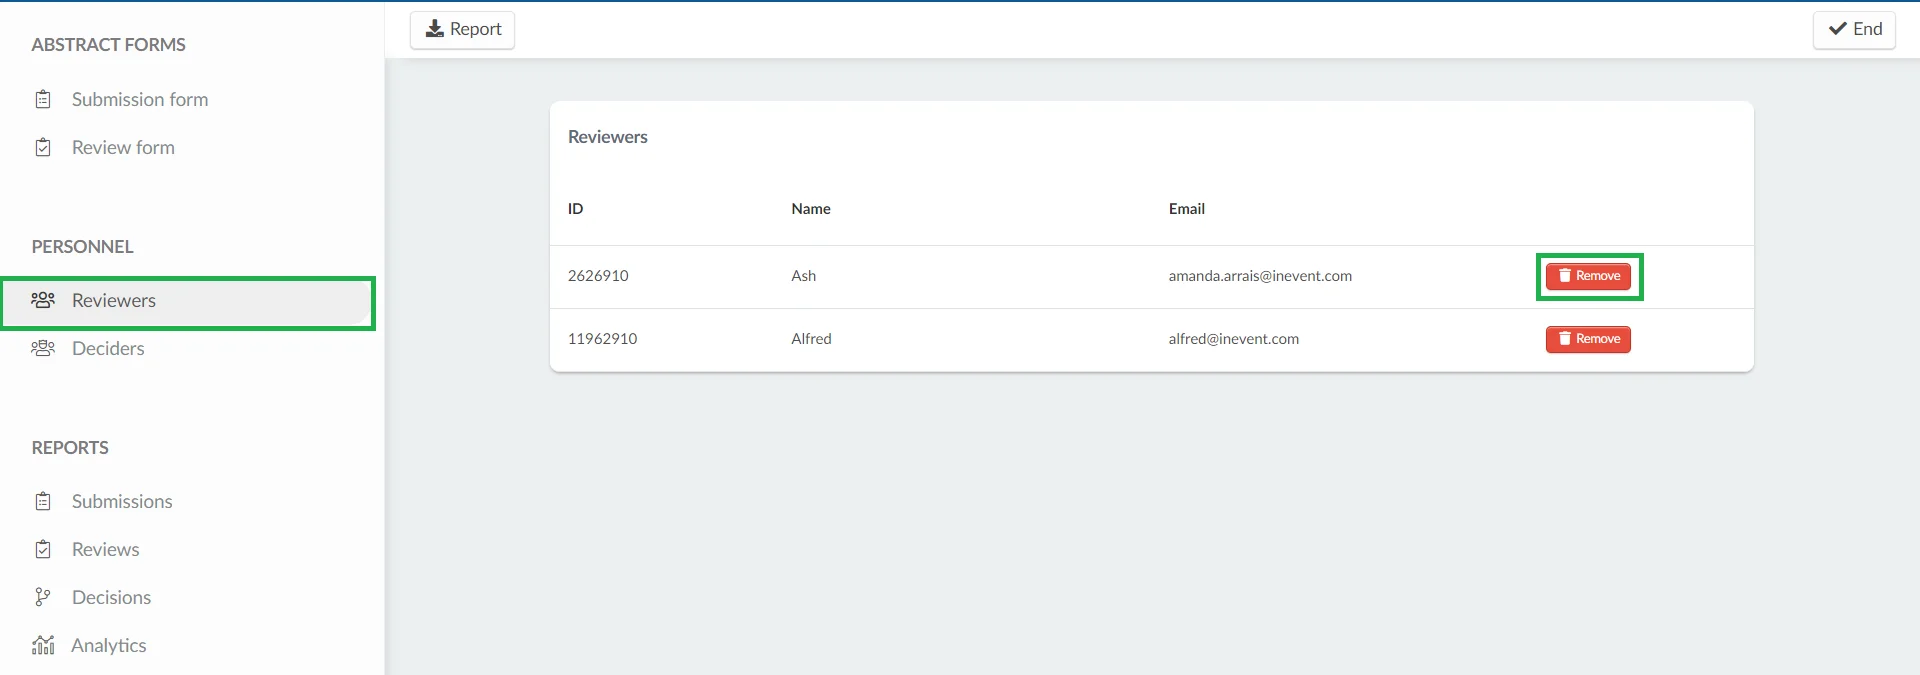
Removing a Reviewer
To remove a reviewer, simply click on Edit and then click the red Remove button beside the reviewer you wish to delete.
Once this is done, the user's Reviewer permission will be revoked and they will only be able to fill the abstract form from the Abstracts tab.
Deciders
Deciders make the decision to approve or reject the submitted abstracts after going through the reviews submitted by the reviewers. To add a decider, simply click on the +Add decider button. Click Select a person and type the attendee name in the box. Select the attendee from the list of attendees that appear, then click on Create.
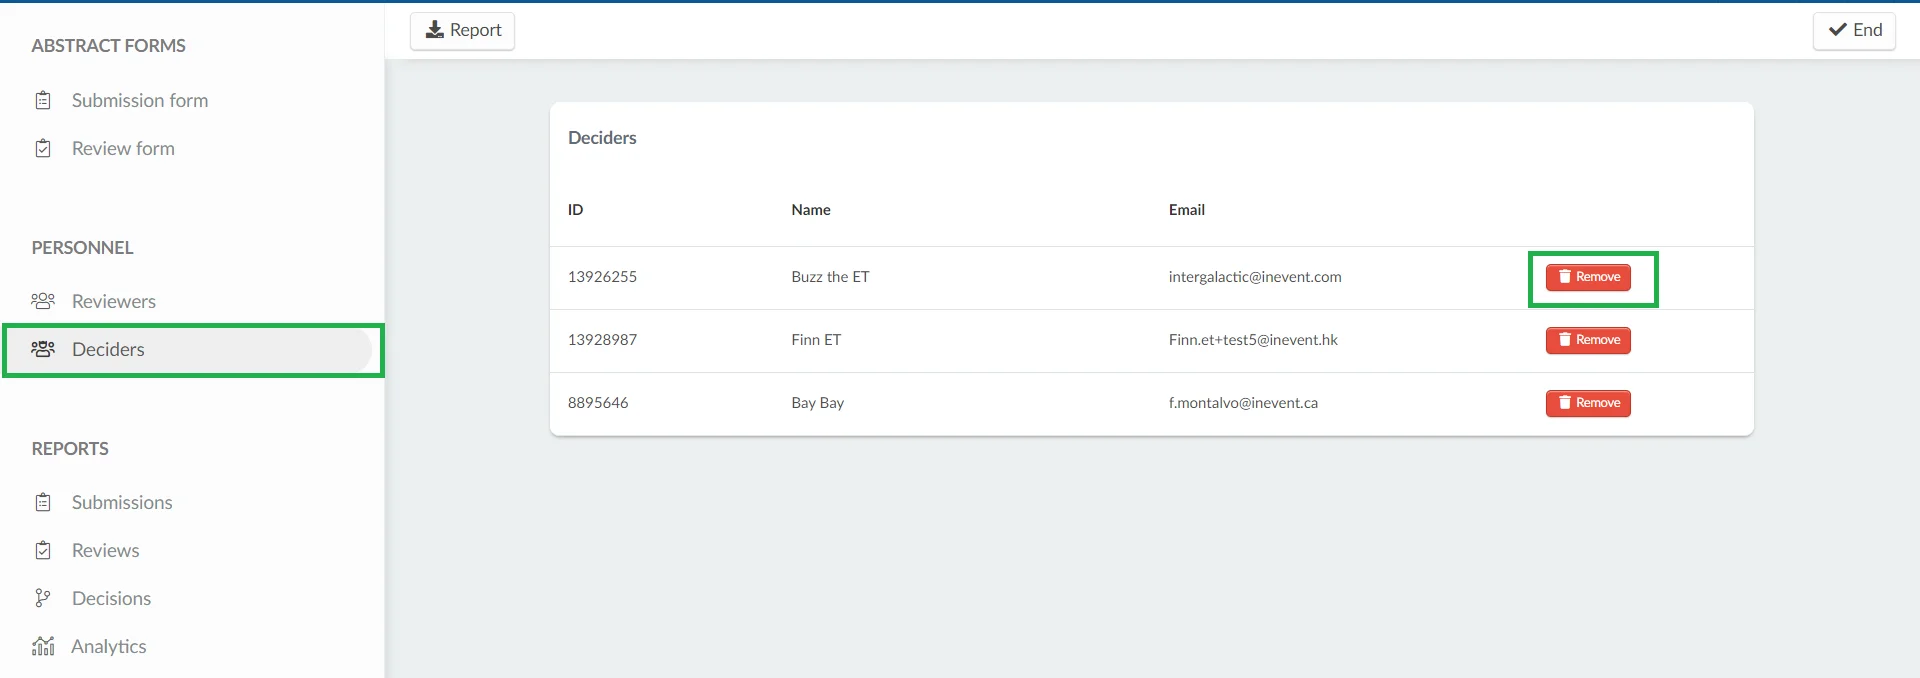
Removing a Decider
To remove a decider, simply click on Edit and then click the red Remove button beside the decider you wish to delete.
Once this is done, the user's Decider permission will be revoked and they will only be able to fill the abstract form from the Abstracts tab.
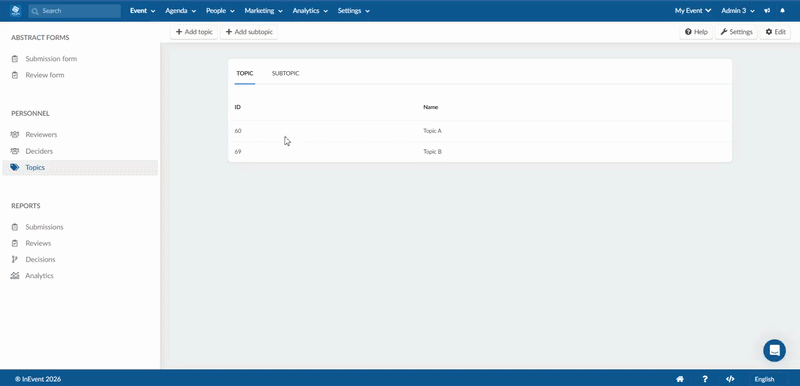
Topics
The Topics on abstract submissions feature allows organizers to define pre-set topic categories that submitters can select when completing an abstract submission form. This helps structure submissions, improve content classification, and streamline the review and approval process. By enabling topics, organizers can guide submitters to categorize their abstracts more accurately, making it easier for reviewers and deciders to evaluate, and manage submissions based on subject matter.
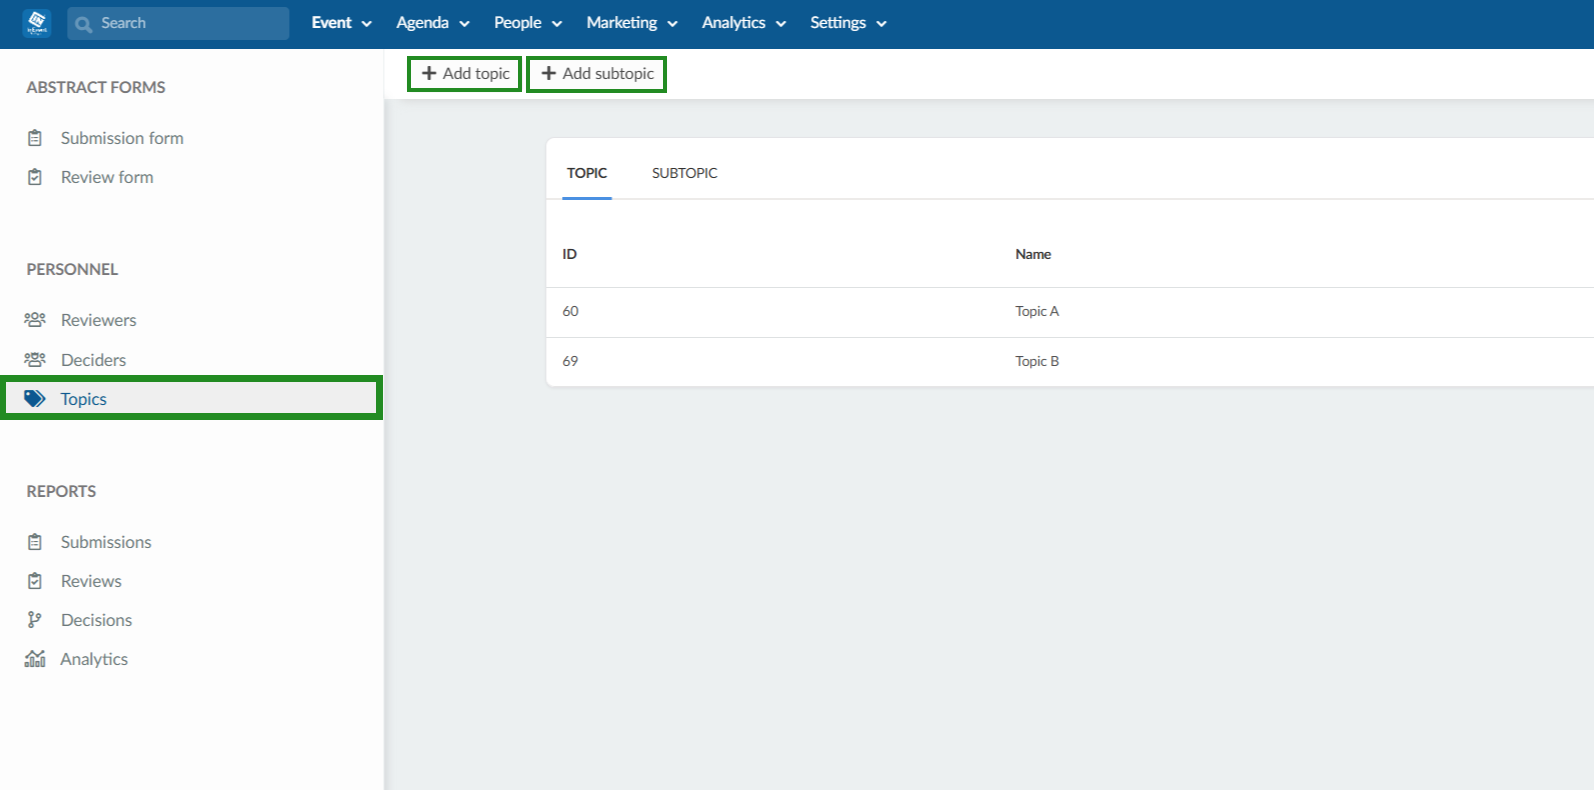
Once enabled, a new Topics tab becomes available under the Personnel section of the platform. The Topics tab allows event organizers to create, manage, and organize topics and subtopics that will be used throughout the abstract submission and review process. These topics and subtopics become selectable options within the abstract submission form.
Topic
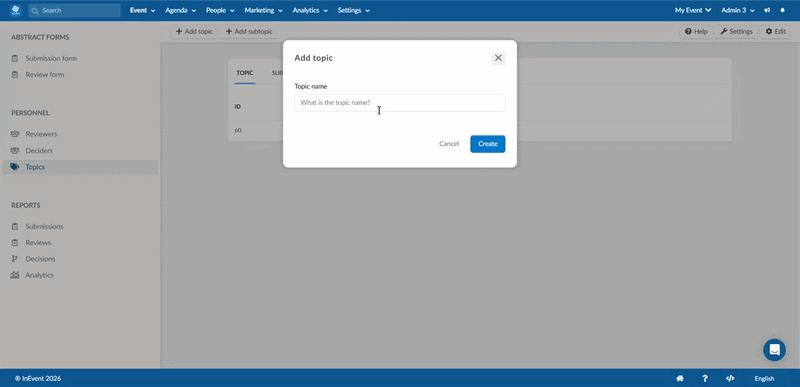
- Click on the Add topic button.
- Type down the topic name and press create to finish.
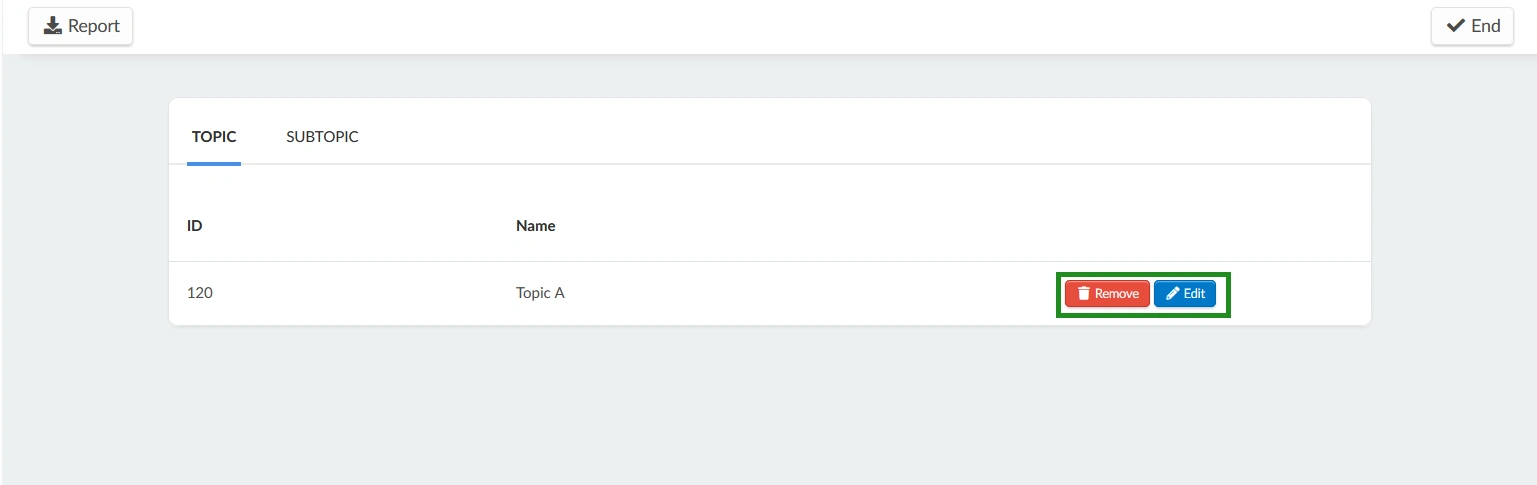
Editing or removing a topic
- Click on Edit
- Click on the Edit button of whatever topic you wish to Edit or click Remove if you wish to delete it
- Click End once you're done
Subtopic
- Click on Add subtopic.
- Type down the subtopic name and select its topic from the drop-down field.
- press create to finish.
Editing and removing a subtopic
- Click on Edit
- Click on either Edit or Remove depending on what you wish to do with the given subtopic
- Press End to finish and save your changes

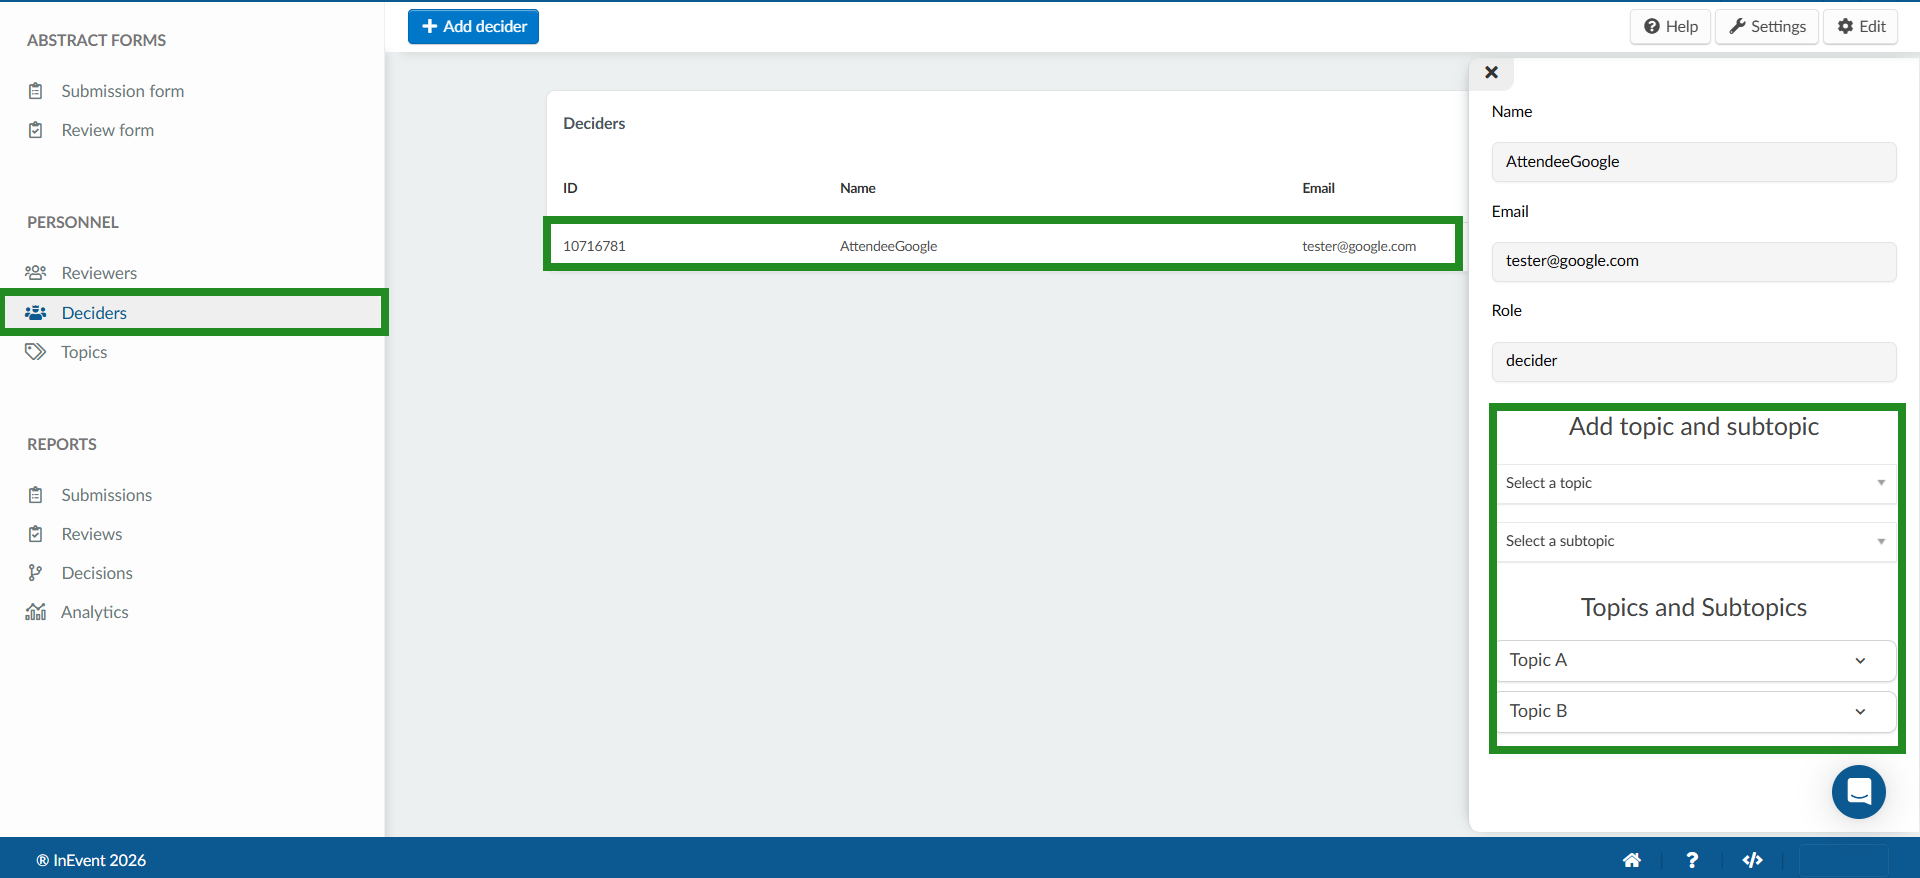
Assigning topics and subtopics to reviewers
You can assign topics and subtopics for reviewers when they go through the submission form. By enabling topic-based review, event organizers can quickly group abstracts by subject area, track, or theme, allowing reviewers to focus on the submissions most relevant to their expertise. This improves review accuracy, speeds up decision-making, and enhances collaboration across review teams.
To assign topics and subtopics:
- Click on a reviewer and their detail card will open from the right hand side.
- Click on edit and scroll down to see the topic and subtopic section.
- Select a topic and subtopic from the respective drop-downs.
- Click on blue add topic and subtopic button to finish.

The reviewer will be able to see the topics and subtopics during the submissions review in the web app as shown below.

Assigning topic and subtopic to deciders
Similar to how you can assign topics and subtopics to reviewers, you can also assign them to deciders. To assign topics and subtopics:
- Click on a decider and their detail card will open from the right hand side.
- Click on edit and scroll down to see the topic and subtopic section.
- Select a topic and subtopic from the respective drop-downs.
- Click on blue add topic and subtopic button to finish.
The decider will be able to see the topics and subtopics that were assigned from the backend during the submissions approval or rejection in the web app as shown below.
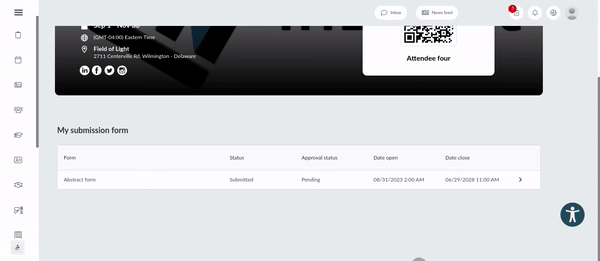
Filling the Abstract form
Once the Abstracts tab has been made visible, attendees will be able to see the Abstract form by accessing the Virtual Lobby and navigating to the Abstracts tab. The page will present the following details:
- Form: The name of the abstract form
- Status: The status of the form. Unfilled forms will show Pending, while filled forms will show Submitted.
- Approval status: The approval status of the form. If no decision has been made on the submission, it will show Pending, if it has been approved, it will show Approved, and if it has been rejected, it will show Rejected.
- Date open: The start date the form is made accessible for attendees.
- Date close: The closing date the form becomes inaccessible to attendees.
To fill the form, simply click on it and it will be open on a new tab, fill in the fields in the form and submit the form.
Attendees can easily modify their submitted abstract forms to make any necessary changes. To do this, simply click on the abstract form you previously submitted, make any adjustments or updates to the content that suit your needs, and then resubmit the form. This ensures that any new or corrected information is properly reflected in the final version of your submission.
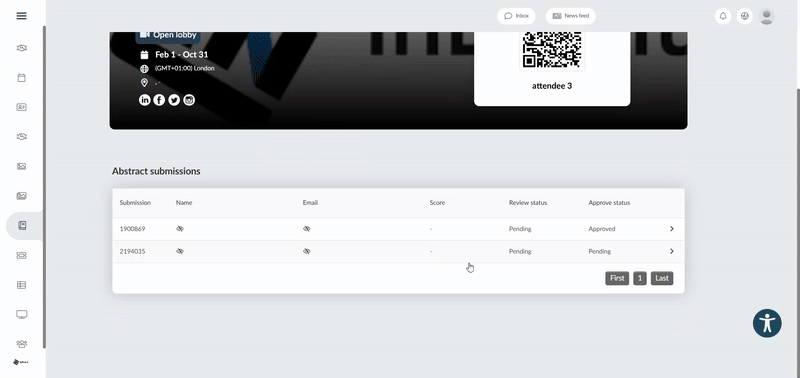
Reviewing the Abstract form submissions
If you are a Reviewer and you want to review the abstract submissions, go to the Virtual Lobby, and open the Abstracts tab. Here, you will see the list of abstract submissions you need to review. This page will show:
- Name: The name of person who submitted an abstract form.
- Email: Email address of the person who submitted an abstract form.
- Review status: The review status of the abstract form. Unreviewed forms will show Pending, and reviewed forms will show Finished.
- Approve Status: The approval status of the abstract form. Unapproved forms will show Pending, and approved forms will show Approved.
To review a submission, simply click on a submission, go through the submission, then click on the Open form review button. You will be directed to the Review form to provide and submit your review. Once this is done, return to the Abstracts tab, refresh the page, and the Review status will change from Pending to Finished.

After submitting a review, you can edit your submission. To do this, simply click on the reviewed form and make the necessary modifications and click on Save.

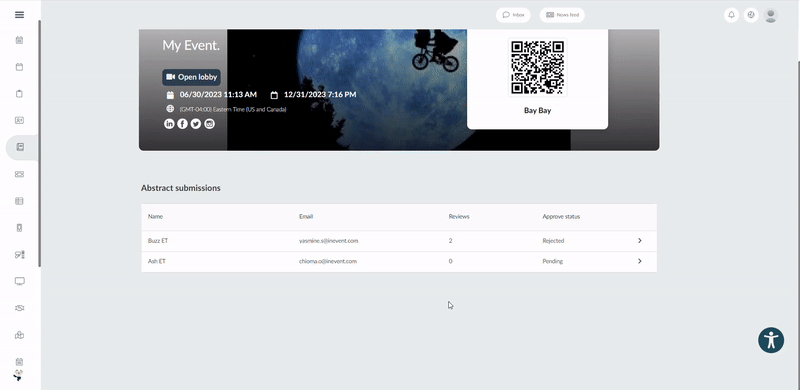
Approving or rejecting the Abstract form submissions
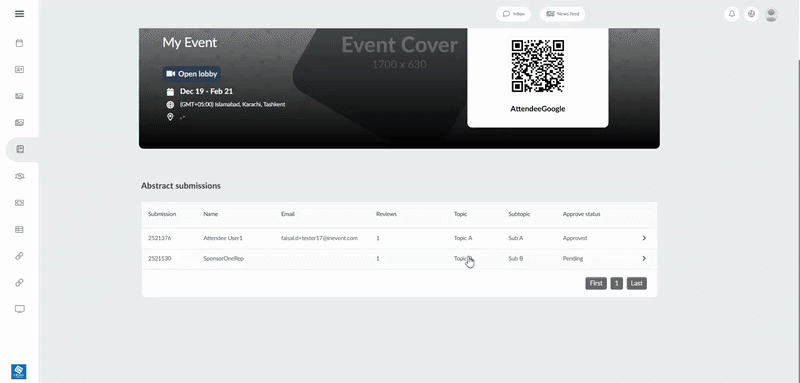
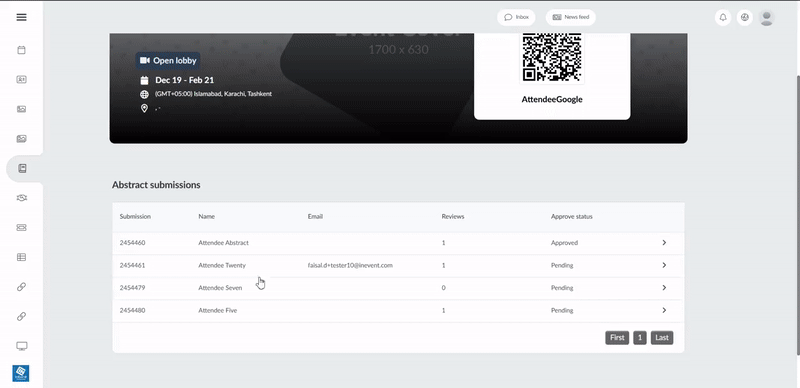
If you are designated as a Decider, your responsibility includes either approving or rejecting abstract form submissions, and viewing the submitted reviews. To fulfill these tasks, access the Virtual Lobby and navigate to the Abstracts tab. On this page, you will find a list of submissions that require your attention. The page will present the following details:
- Name: The name of the user who submitted the abstract form.
- Email: The email address of the user who submitted the abstract form.
- Reviews: The number of reviews conducted on the abstract form.
- Approval Status: The current status of the abstract form's approval. Forms will display Pending if a decision has not yet been made. Approved forms will show Approved, and rejected forms will display Rejected.
To approve or reject a submission, simply click on the form. On the left side of the page, you will see the submission's answers along with the Approve and Reject buttons positioned at the top of the form.
Reviews will be visible on the right-hand side of the page, providing details about the user who submitted the review, along with the date and time of submission. To go through a review, click on it, and the details of the review will be presented. Additionally, you can choose to view the reviews in various formats such as pie charts, bar charts, or as a list by clicking the Analytics button.
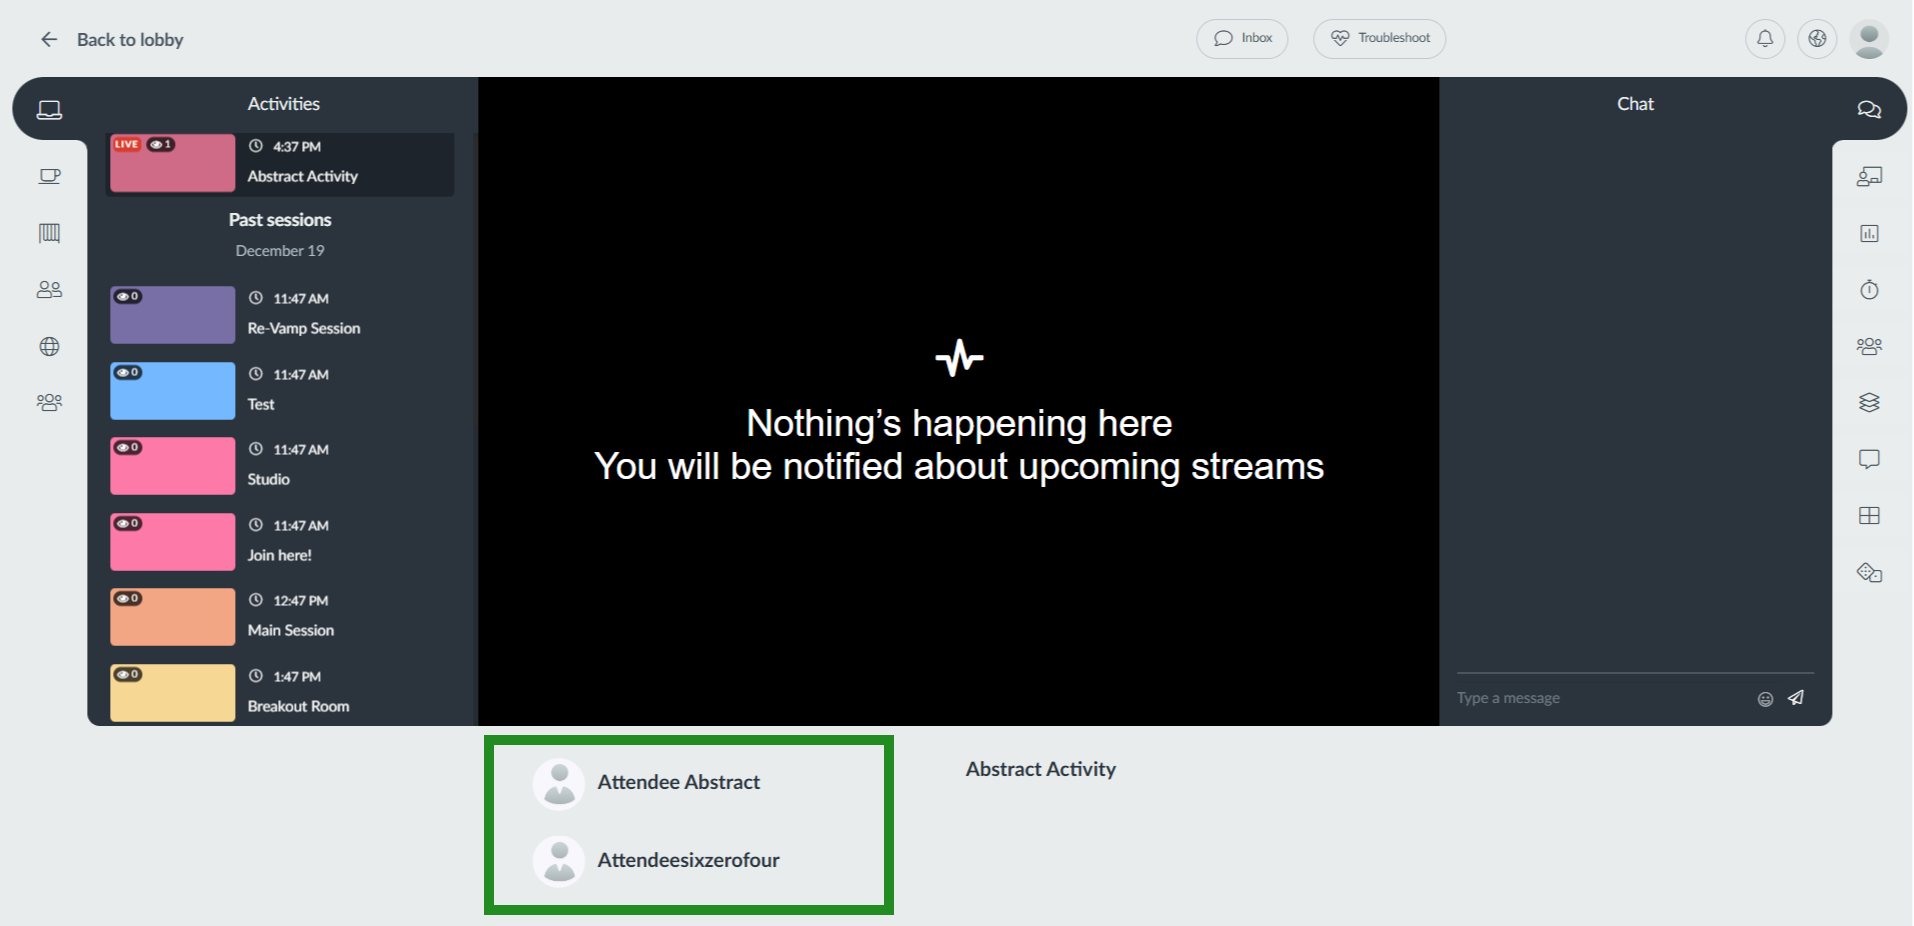
When approving an abstract, you will see a notification pop up asking you if you want to create an activity for the abstract submission. By clicking on Continue, a window will appear for you to enter the activity's title, as well as the activity's start and end date and time. Then click on Create to create the activity which will be displayed in the Virtual Lobby and as well as in the platform (backend).
In addition, after approving or rejecting an abstract form, the Approve status will be updated to display Approved or Rejected based on your action.
If you wish to modify your decision, you can do so by clicking on the form and making the required adjustments.
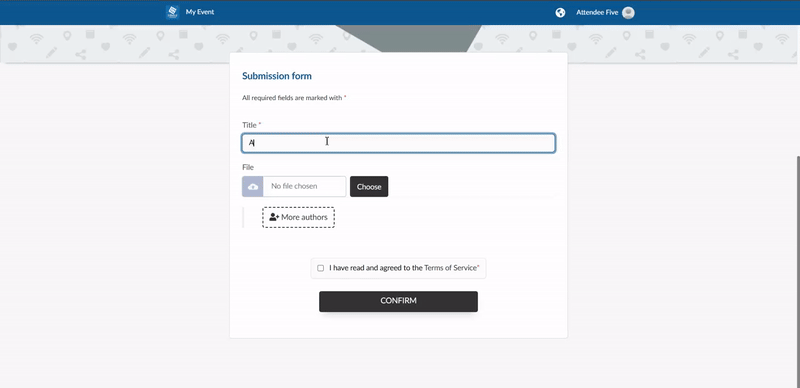
Submission Authors
If you enable the Submission authors tool, submitters can assign multiple authors to a single abstract submission. This is especially useful for academic, scientific, and collaborative submissions where more than one contributor needs to be credited and approved.
To enable the submission author tool:
- Navigate to Event > Abstracts.
- Click on Settings in the top-right corner.
- Toggle on the Submission authors tool.
After ensuring the tool is enabled, when filling out the Abstract submission form, the submitter will be able to add additional authors by clicking the user icon More authors within the form. This action opens an extra section where the submitter can provide the Name and Email address of each additional author. Multiple authors can be added by repeating this process, allowing full flexibility for multi-author submissions.
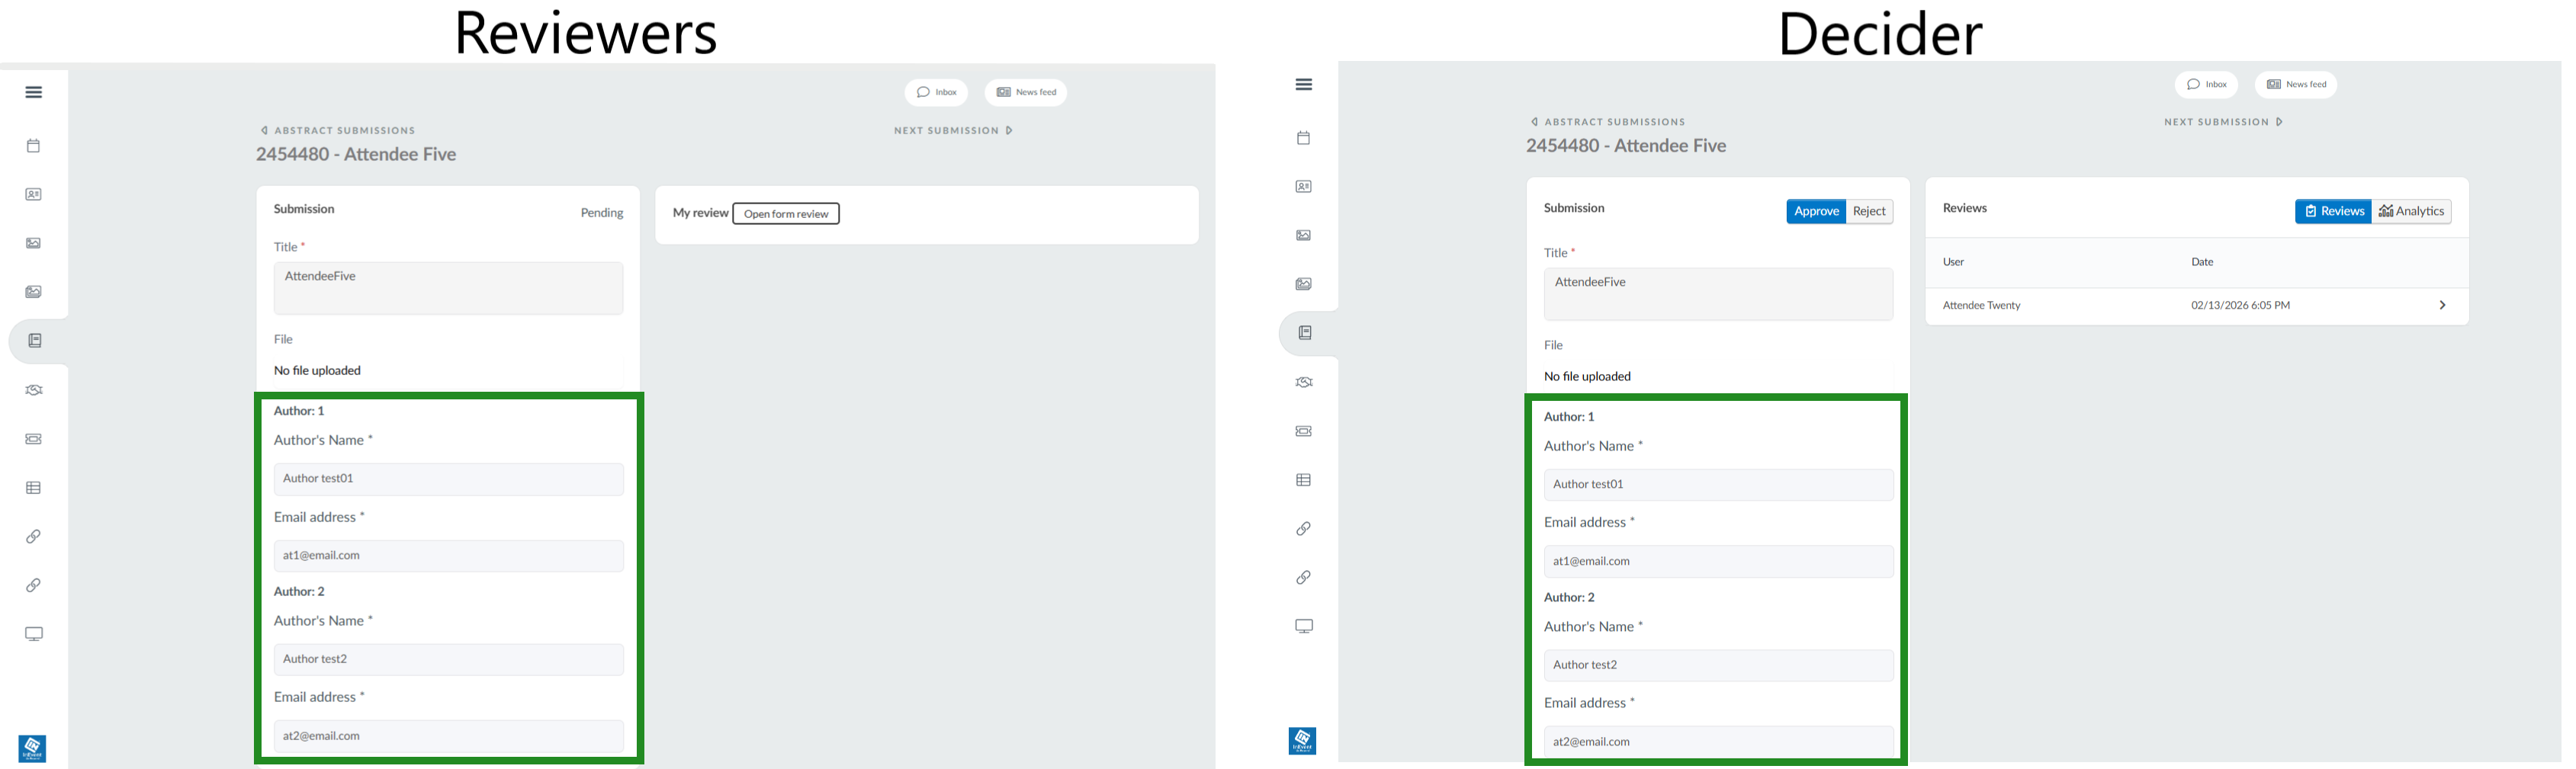
Once the abstract is submitted, all the listed authors will be visible to the reviewers and deciders once they evaluate the submission form as shown below respectively.
If the Submission authors tool is enabled, after approving an abstract form submission, the deciders will have the option to also include any files or authors related to the abstract form to the activity they wish to create. After entering the activity's title, as well as the activity's start and end date and time, they can check the boxes for addition of files to activity and addition of co-authors as shown below.
This ensures that every contributor is properly recognized and associated with the final activity session created from the abstract submission. The added authors will be visible with their contact information available.
Reports
Under the Reports segment, you will be able to view the reports on Submissions, Reviews, Decisions, and Analytics.
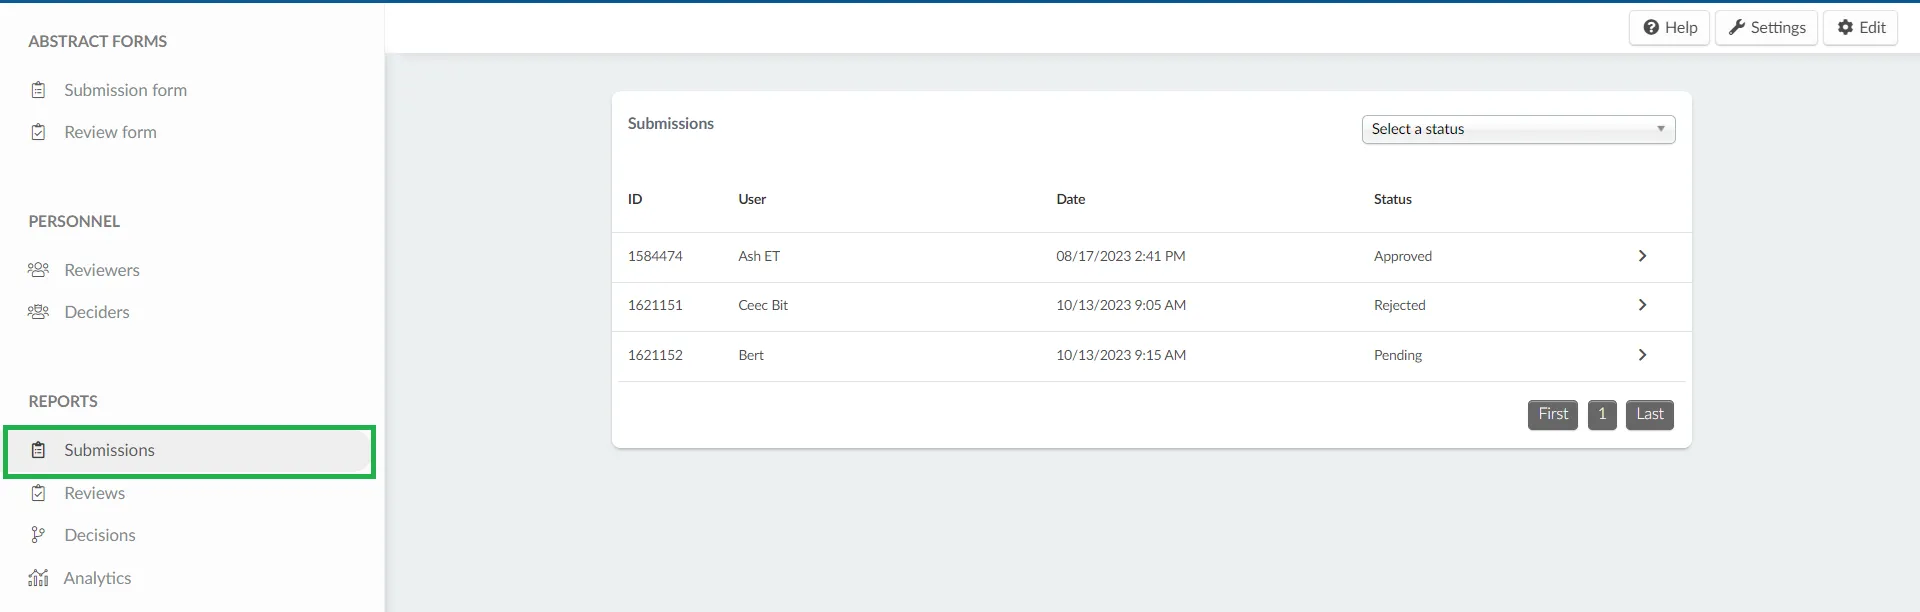
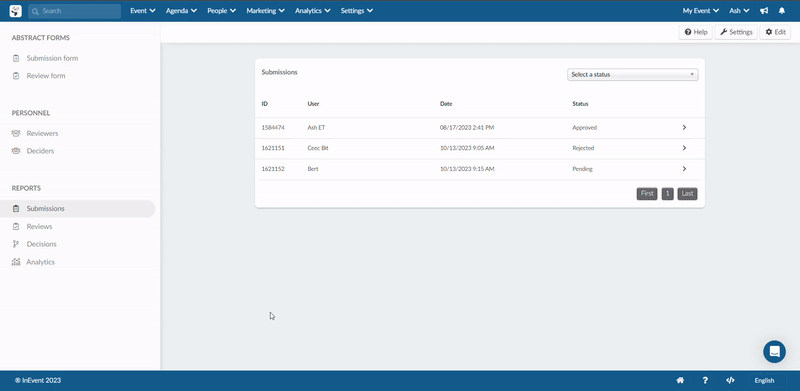
Submissions
In the Submissions tab you can view all the abstract form submissions.
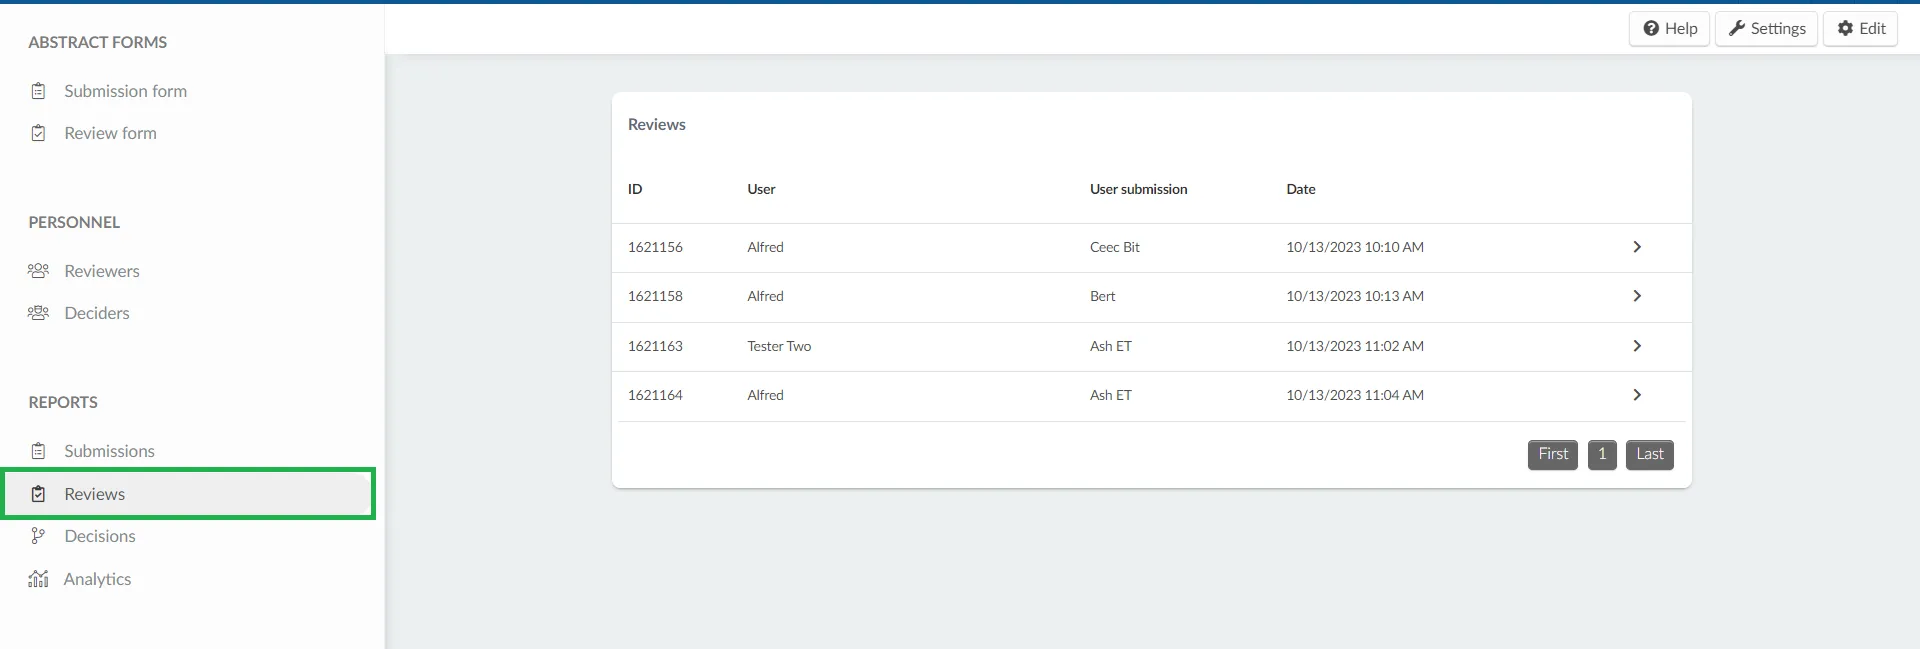
Reviews
In the Reviews tab you can view all the reviews made on the abstract form submissions.
Decisions
In the Decisions tab you can view all the decisions made on the abstract form submissions. This page will show:
- The Decision's ID
- User: The user who submitted the abstract form.
- Date: The date and time the abstract form was submitted.
- Status: The decision taken on the abstract form - Approved or Rejected.
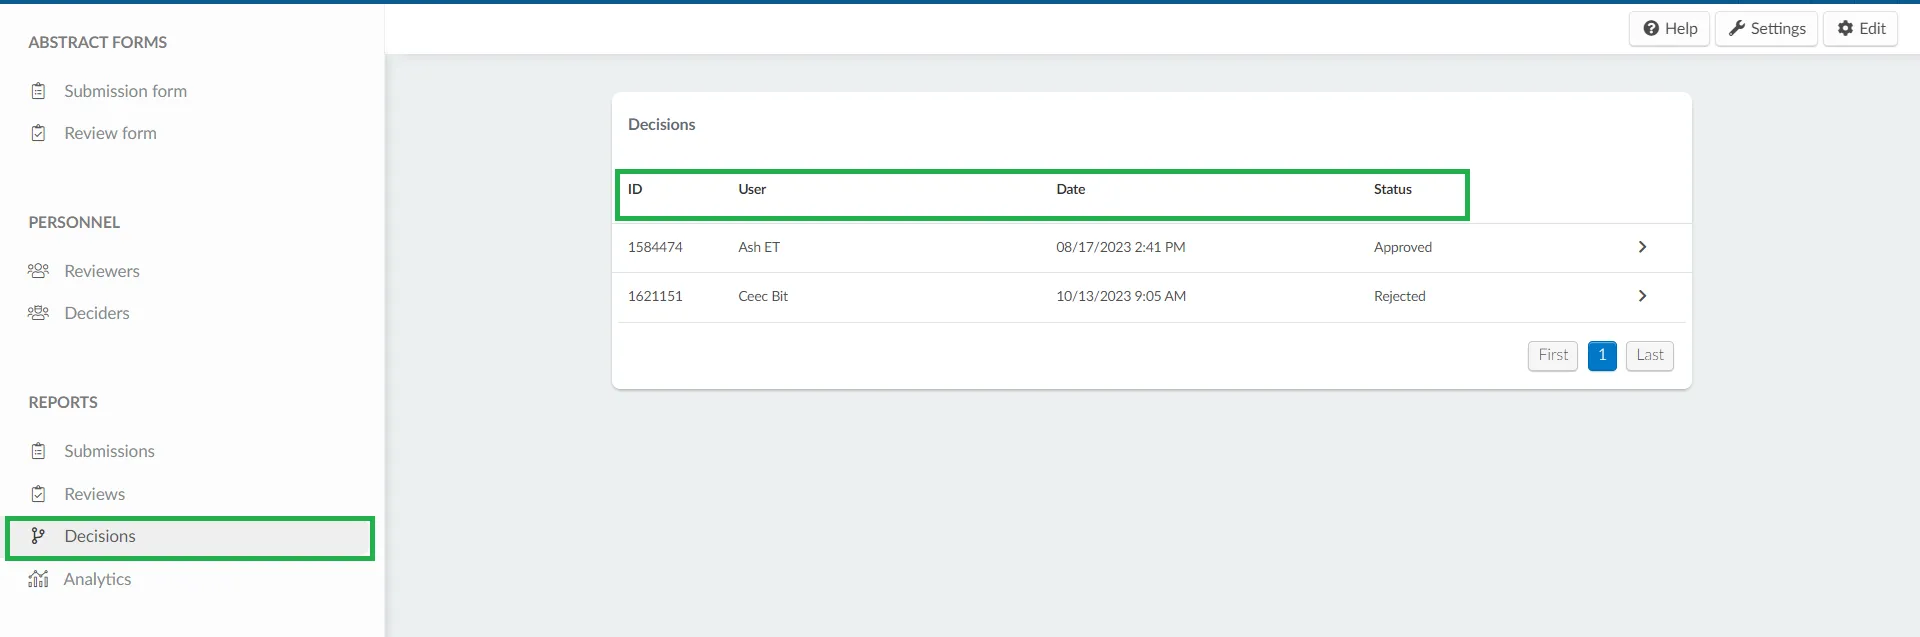
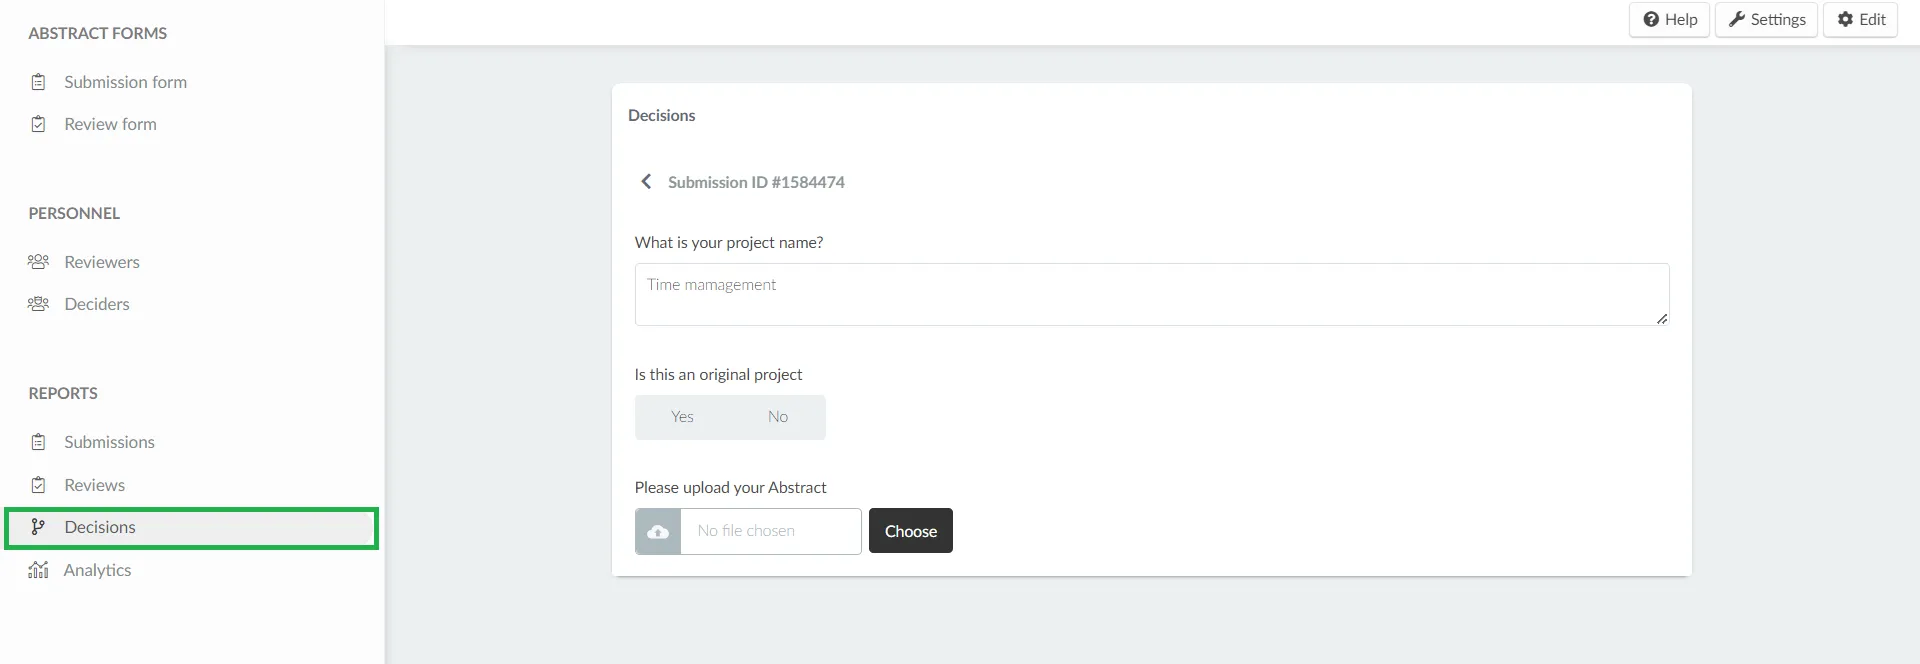
By clicking on a user's submission, you will be able to see the answers to the abstract form submission.
Analytics
The Analytics tab provides you with a visual display of all the answers to questions on your forms.
- From the Forms drop down menu, select the Submission form or the Review form and the results will be displayed. You can view the Analytics of some question answer types in form of Answers (list) or Analytics breakdown (pie chart, and bar chart).
- The Filter option allows you to filter your analytics in order to only see data associated with Custom lists, tags or tickets by selecting one of them from the drop down menu and clicking on the Add filter button. To delete a filter, simply click on the thrash icon beside it.
