Custom Email
 Updated 1 year ago
by
Faisal Durrani
Updated 1 year ago
by
Faisal Durrani
The InEvent platform provides you the ability to set custom email address and custom email name. This way, the InEvent system will send emails using the set email address and email name.
This article will guide you on how to set up your custom email address and custom email name.
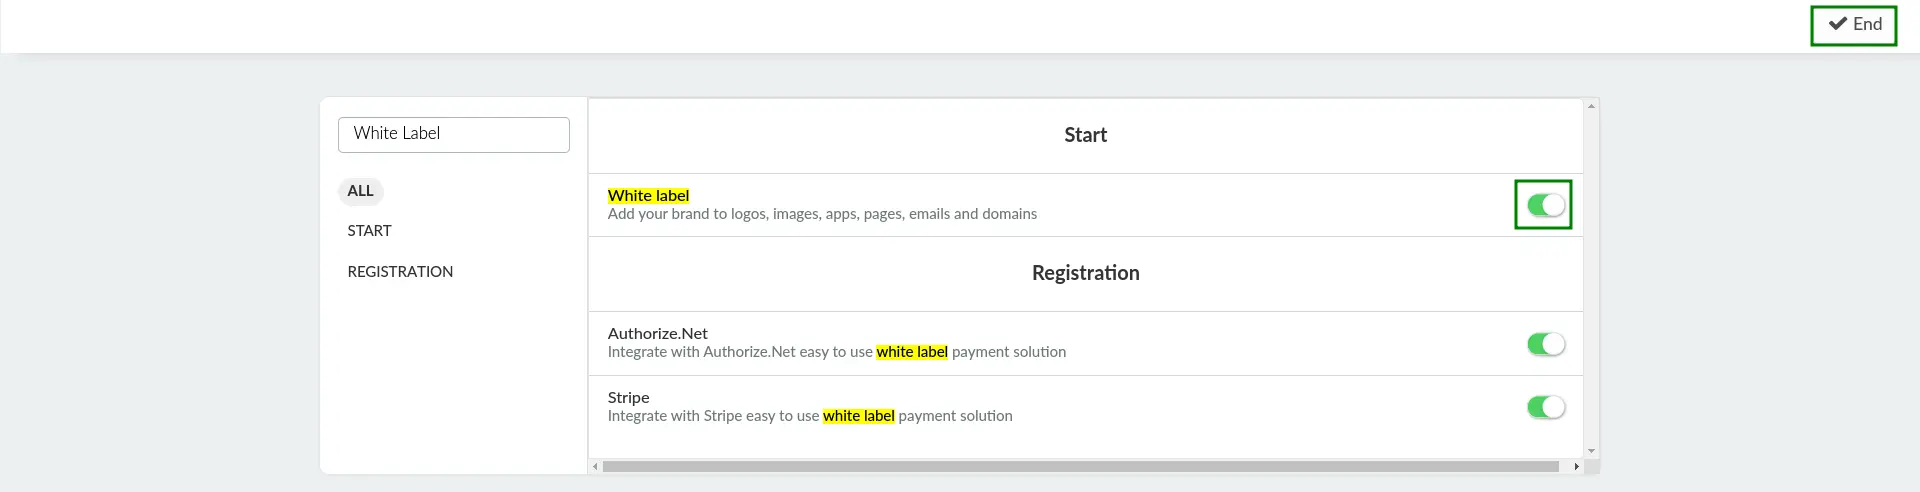
Enabling custom email address and custom email name
To enable the use of custom email address and custom email name, complete the following steps.
- Navigate to Settings > Tools from the Event level.
- Click on Edit on the top right corner.
- Click the White Label toggle to enable the tool.
- Press End to save your changes.
Once you have completed the steps above, you can start configuring your custom email address and custom email name.
Configuring custom email address and custom email name
To configure your event's custom email address and custom email name, follow the steps below.
Entering your custom email address and custom email name
- Navigate to Event > Details from the Event level.
- Click on Links & Domain.
- Locate the Custom email field.
- Click on Edit on the top right corner.
- Enter your desired Custom email address and Custom email name in the respective fields.
- Press End.
- Refresh the page.
After refreshing the Event details page, you will find the DNS records for DKIM and Return-Path that need to be entered in your domain's DNS configuration dashboard.

Adding DNS records for DKIM and Return-Path
After getting the DNS records for DKIM and Return-Path, you can enter the appropriate values to your DNS configuration dashboard.
- DKIM: Create a TXT-type record within your DNS configuration dashboard and enter the provided value/string.
DomainKeys Identified Mail (DKIM)
Spoofing is a type of email attack that forges the From address of an email message. A spoofed message appears to be from the impersonated organization or domain. DKIM detects when a message has been modified and when unauthorized changes are made to the message From: address. Without a DKIM setup, messages sent from your organization or domain are more likely to be marked as spam by receiving mail servers.
- Return-Path: Create a CNAME-type record within your DNS configuration dashboard and enter the provided value/string.
Sender Policy Framework (SPF) and Return-Path
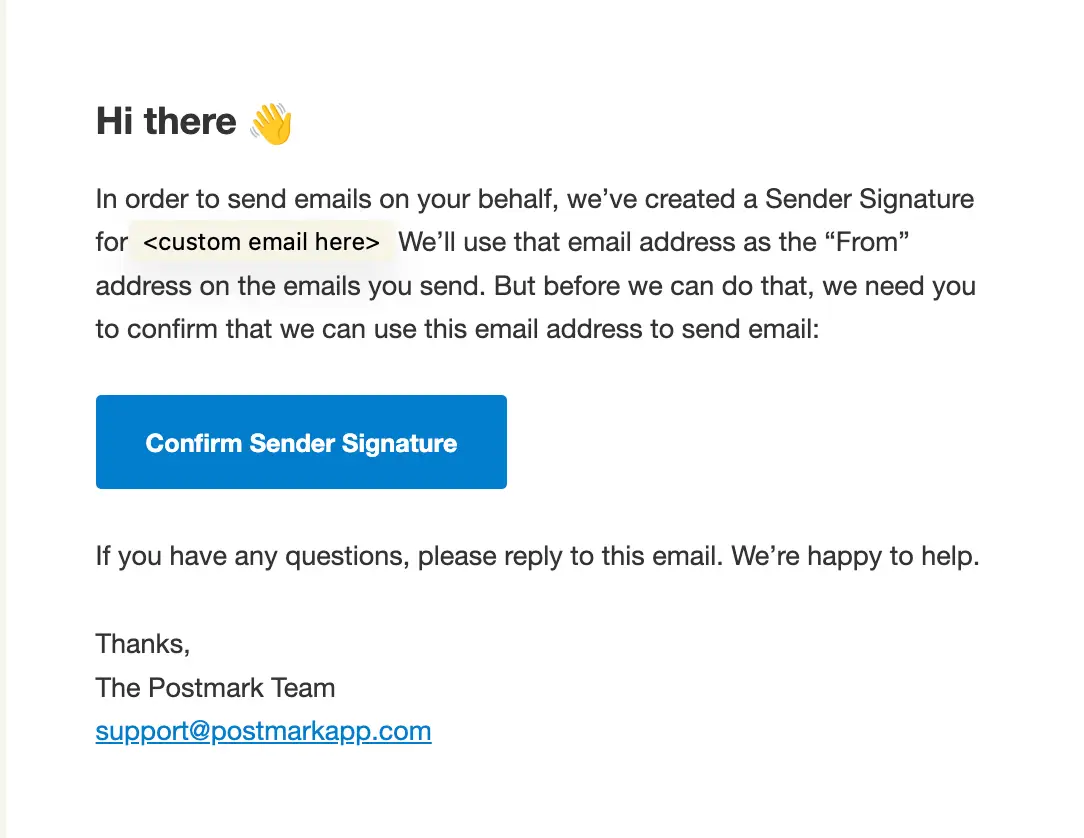
Once you have correctly added the DNS records for DKIM and Return-Path, the Postmark server (support@postmarkapp.com) will send a confirmation email to the custom email address. The email will ask you to authorize the newly added DNS configuration, as shown in the image below.
DMARC Domain-based Message Authentication, Reporting, and Conformance
Follow the steps provided to you by Postmark to confirm and authorize your configuration. After completing the authorization process, you can verify the status of your custom email address and custom email name status at InEvent.
Verifying your custom email address and custom email name status
Once you have completed the authorization process, you can verify or check the status of your custom email address and custom email name at the Event details page on the InEvent platform. A check icon will be displayed next to the Information icon under Custom email as shown below.
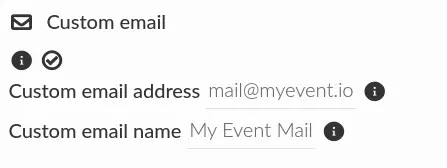
The check icon indicates that your custom email address and custom email name has been successfully configured at your event.
For example, if you have set up and used the address
mail@myevent.io for one event, you can also use information@myevent.io for your next event without reconfiguring DNS records.