Firewall configuration
Firewall is an essential software to ensure the security of a network connection by filtering inbound and outbound requests. By default, firewalls block all traffic that is not explicitly allowed. This restriction helps protect a network from unauthorized and possibly malicious access. However, it may also prevent users from making legitimate connections to resources at the internet. For example, you may be unable to successfully join sessions or fully load the InEvent Virtual Lobby. In that case, it is necessary to explicitly allow access to and from those resource by allowing connections with them within the firewall.
In this article, you will find information on allowing connections to resources used by InEvent.
Configuration for live chat support
InEvent offers 24/7 live chat support to assist users with the platform. However, if your network or firewall is blocking connections made to and from our live chat, you may receive the following error message when accessing it.
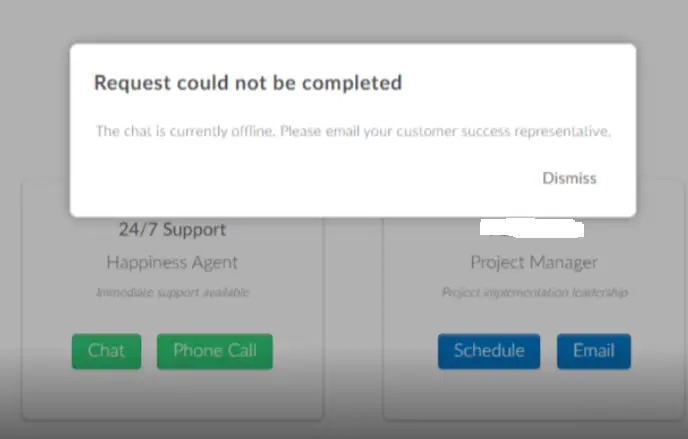
To prevent such error messages from appearing, and to ensure you can receive our 24/7 support, ensure that the required IP addresses are allowed for connections or are not blocked on your network.
Allowing connections with InEvent live chat IP addresses
In order to successfully allow inbound and outbound connections with the InEvent live chat, you may need to create new connection rules on your firewall software. To do so, follow the instructions provided below, using Windows Defender Firewall as an example.
- Search for Firewall & network protection in the search bar of your computer.
- Click on Advanced Settings.
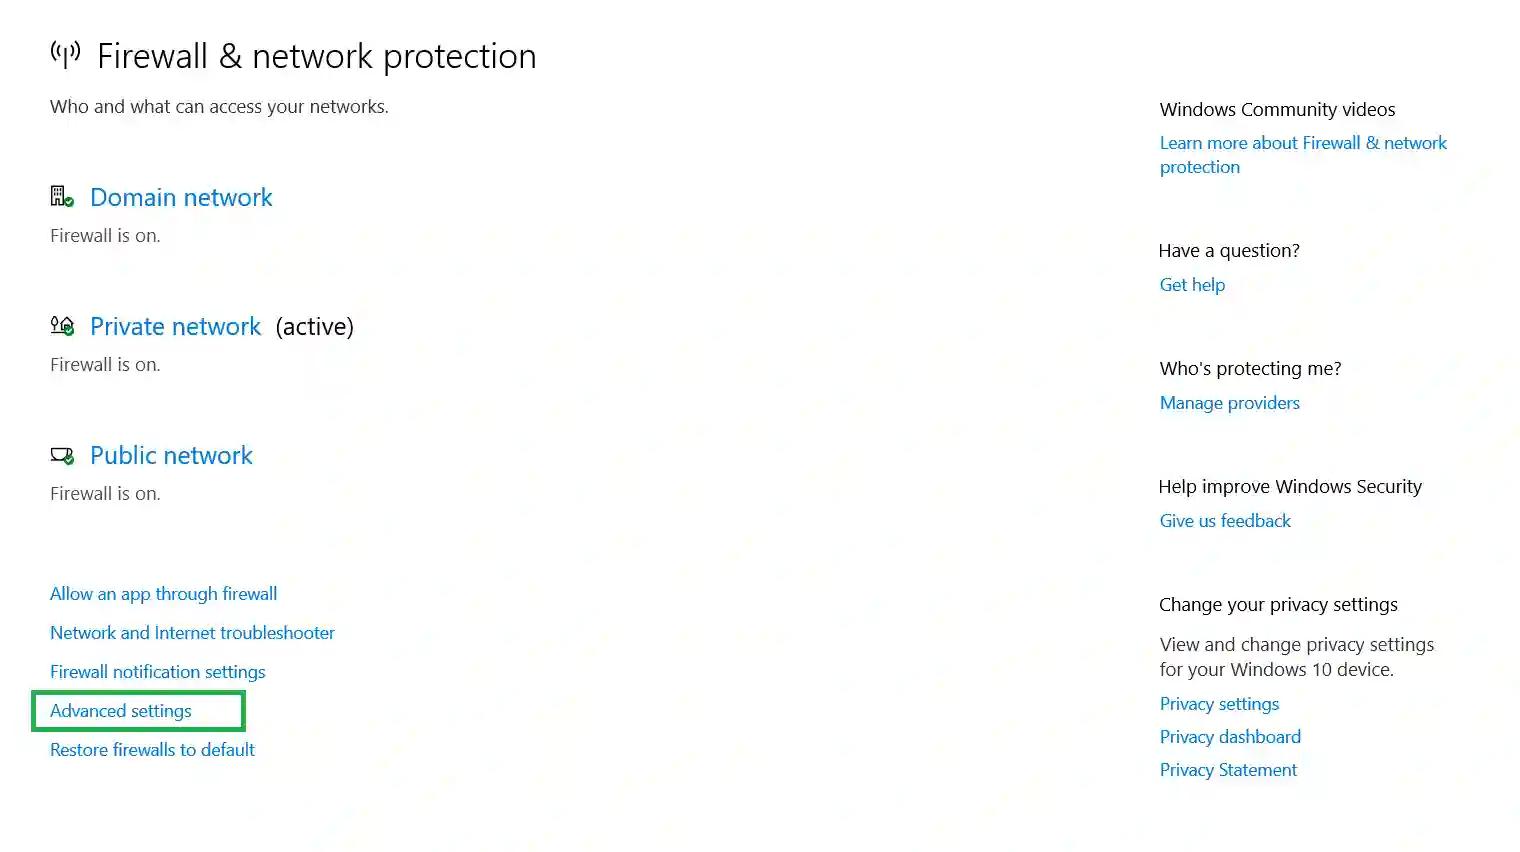
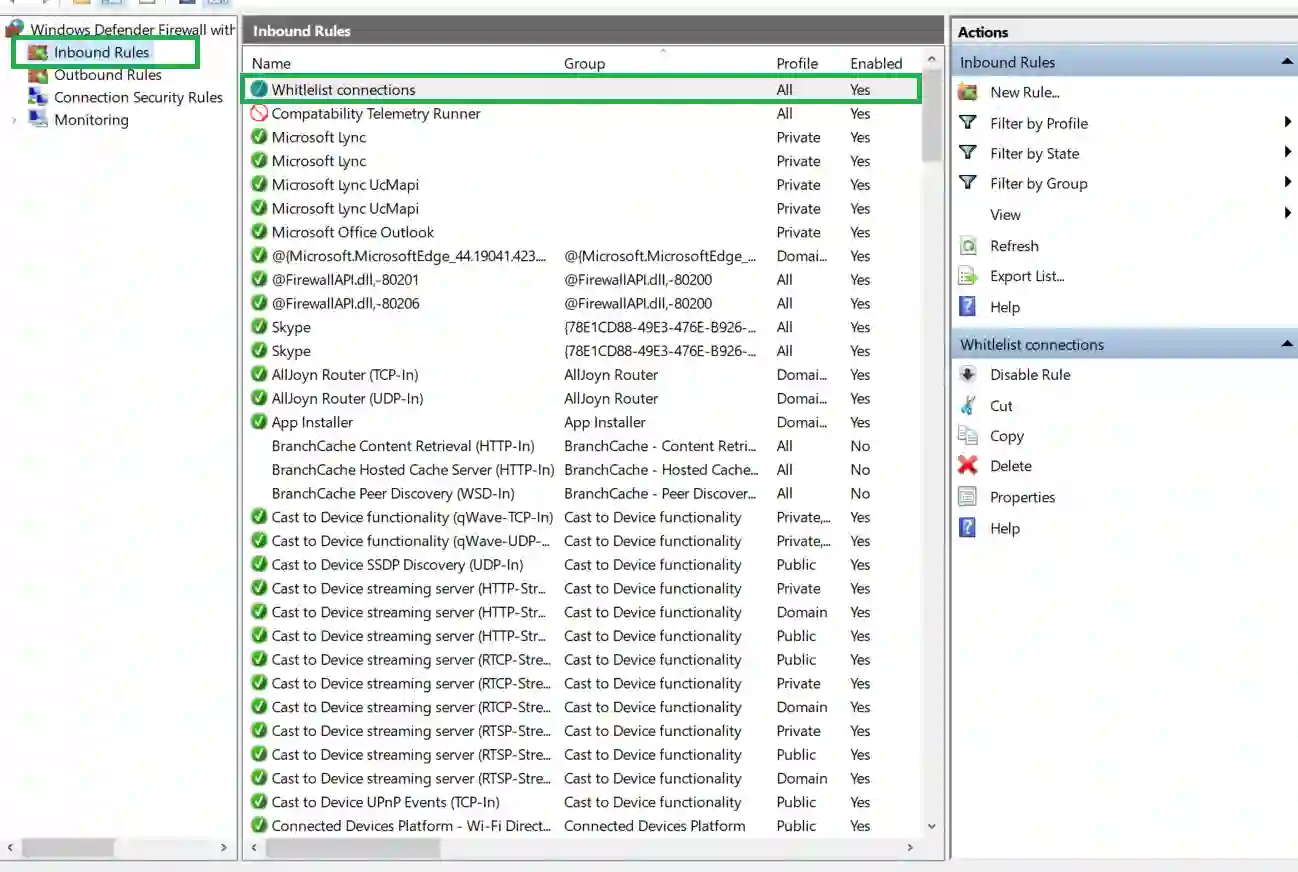
- Click on Inbound Rules on the left hand menu to configure inbound or incoming connection rules. To configure outbound or outgoing connection rules, click on Outbound Rules instead.
- Select New rule on the right hand menu.
- Select Custom as a rule type.
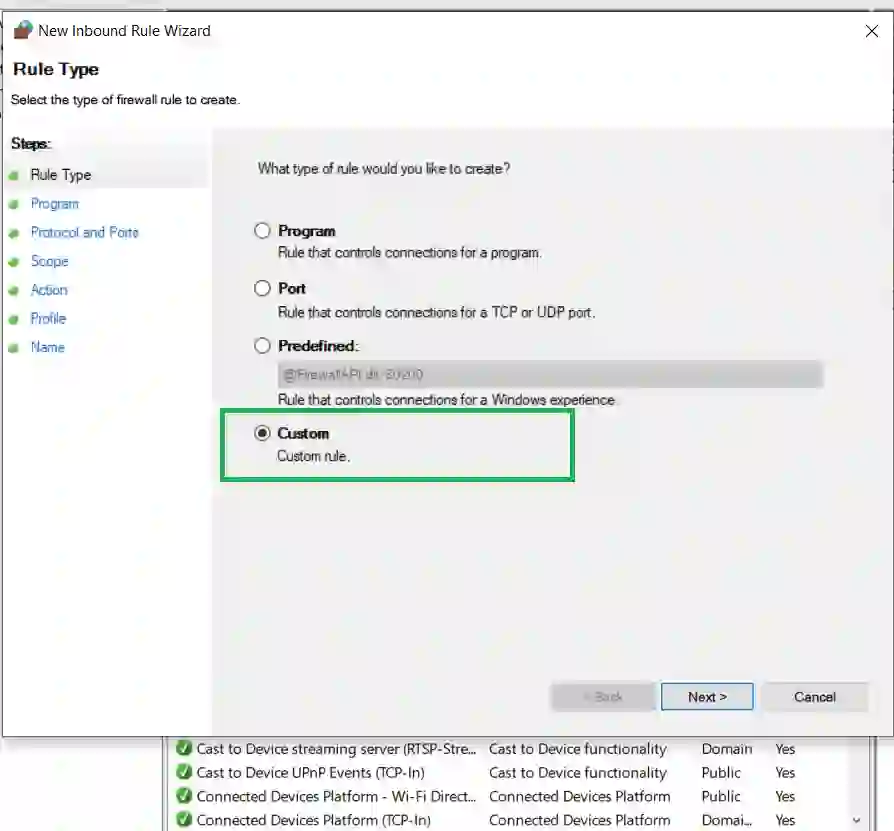
- Click the Next button until the IP address configuration page is displayed.
- Check These IP addresses and click the Add button.
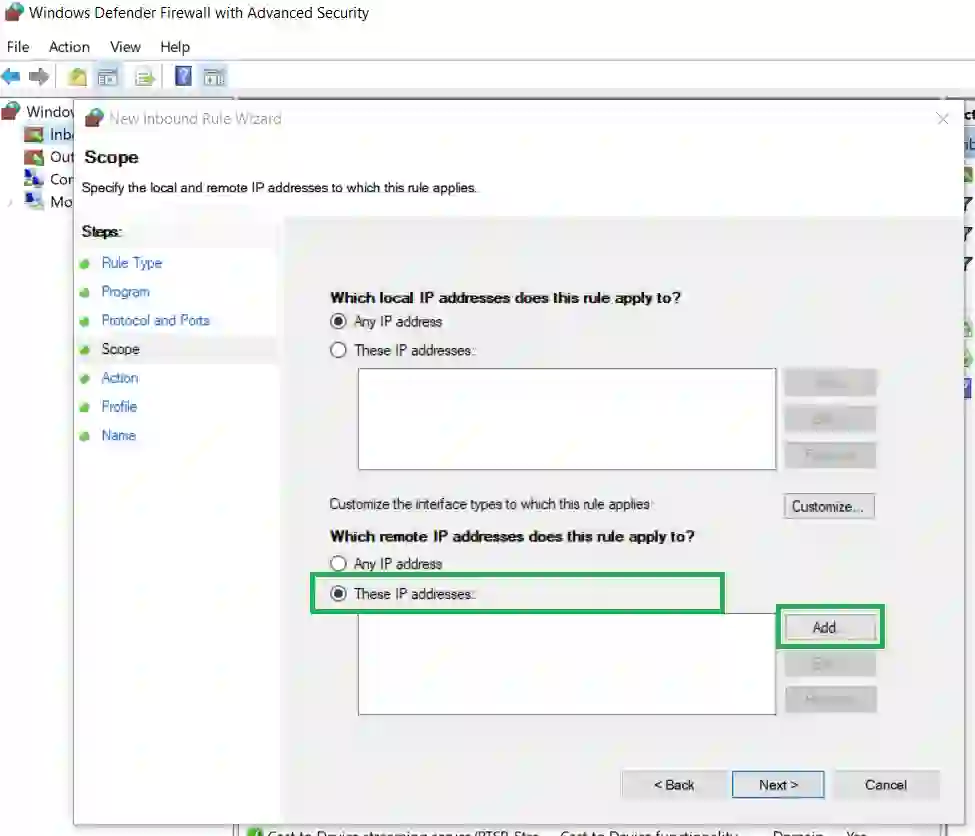
- Insert the following IP addresses used by our live chat:
34.231.68.15234.197.76.21335.171.78.9135.169.138.2152.70.27.15952.44.63.161
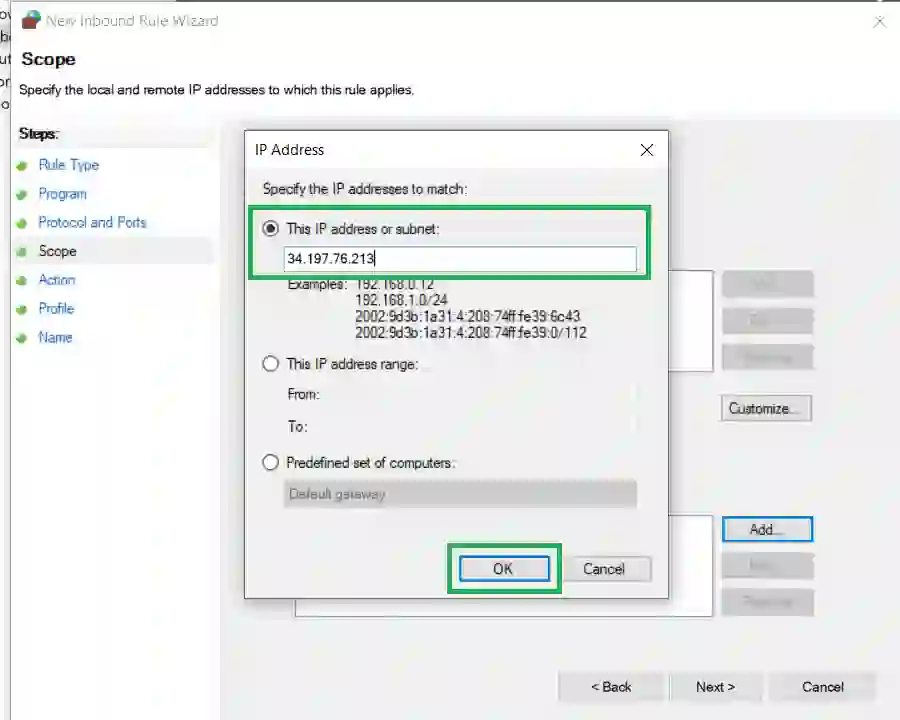
- Click Next.
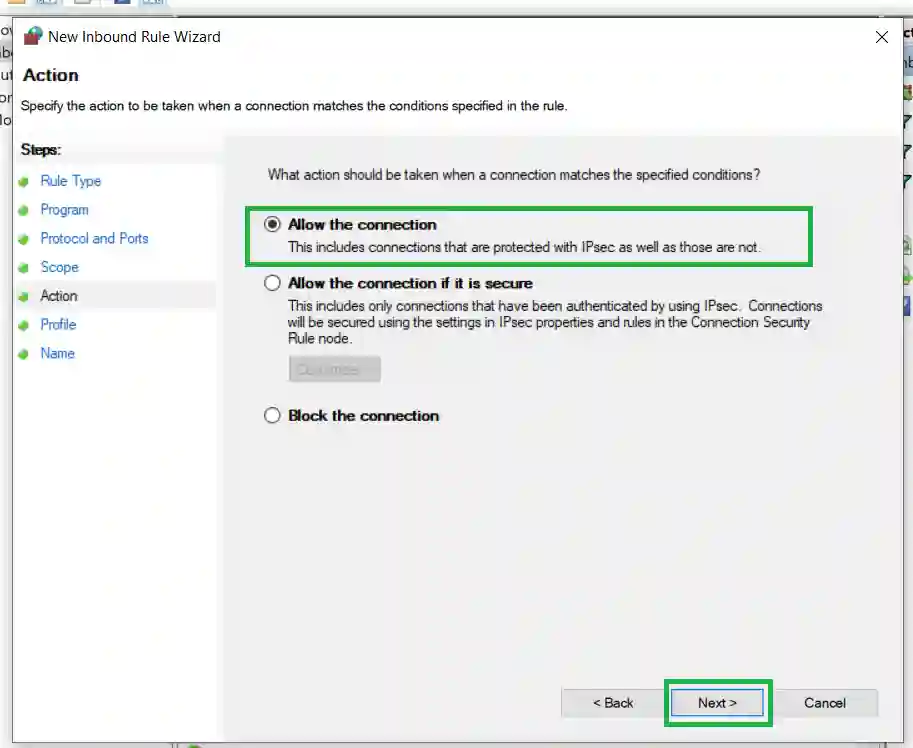
- Select Allow the connection and click Next.
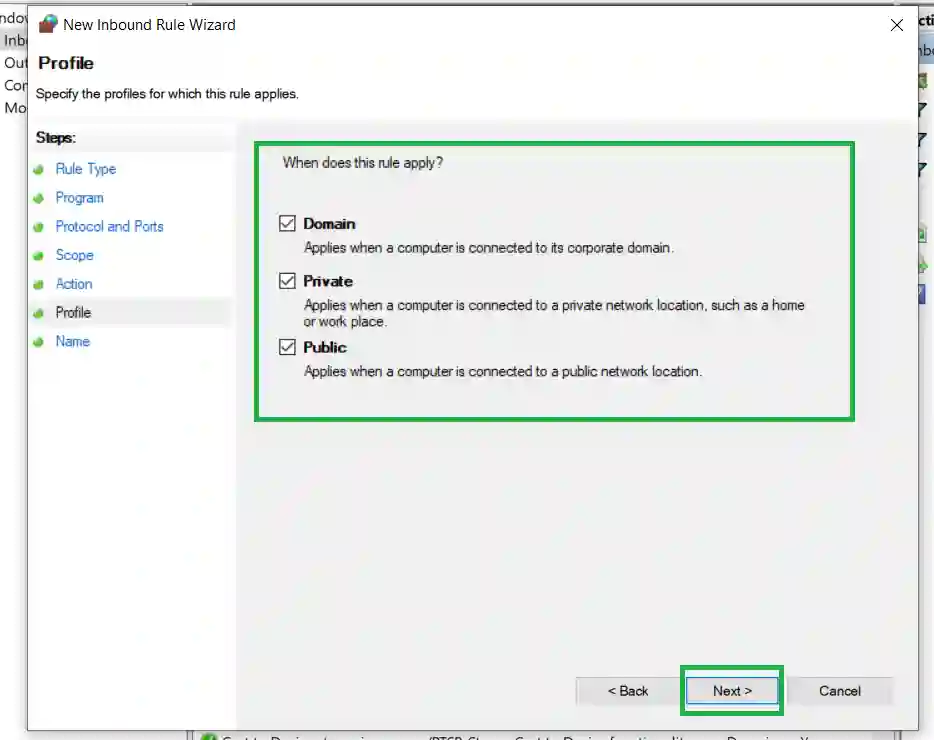
- Check all of the boxes so that the rule applies to all network types and click Next.
- Enter a name and optional description for the rule and click Finish to save your changes.
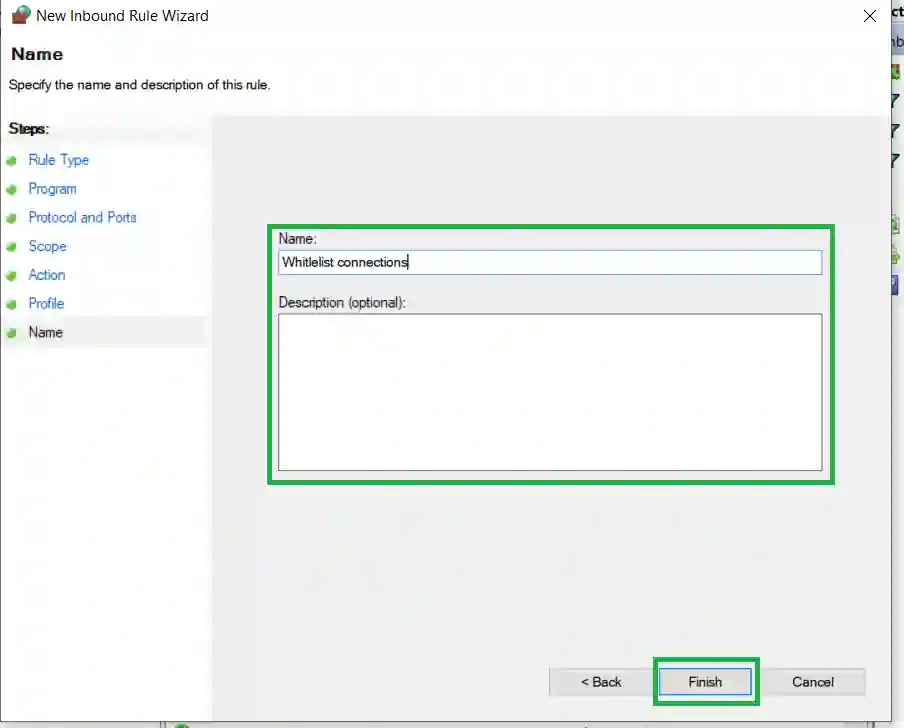
After completing the steps above, the newly created rule will be displayed under Inbound Rules or Outbound Rules.
Configuration for platform connectivity
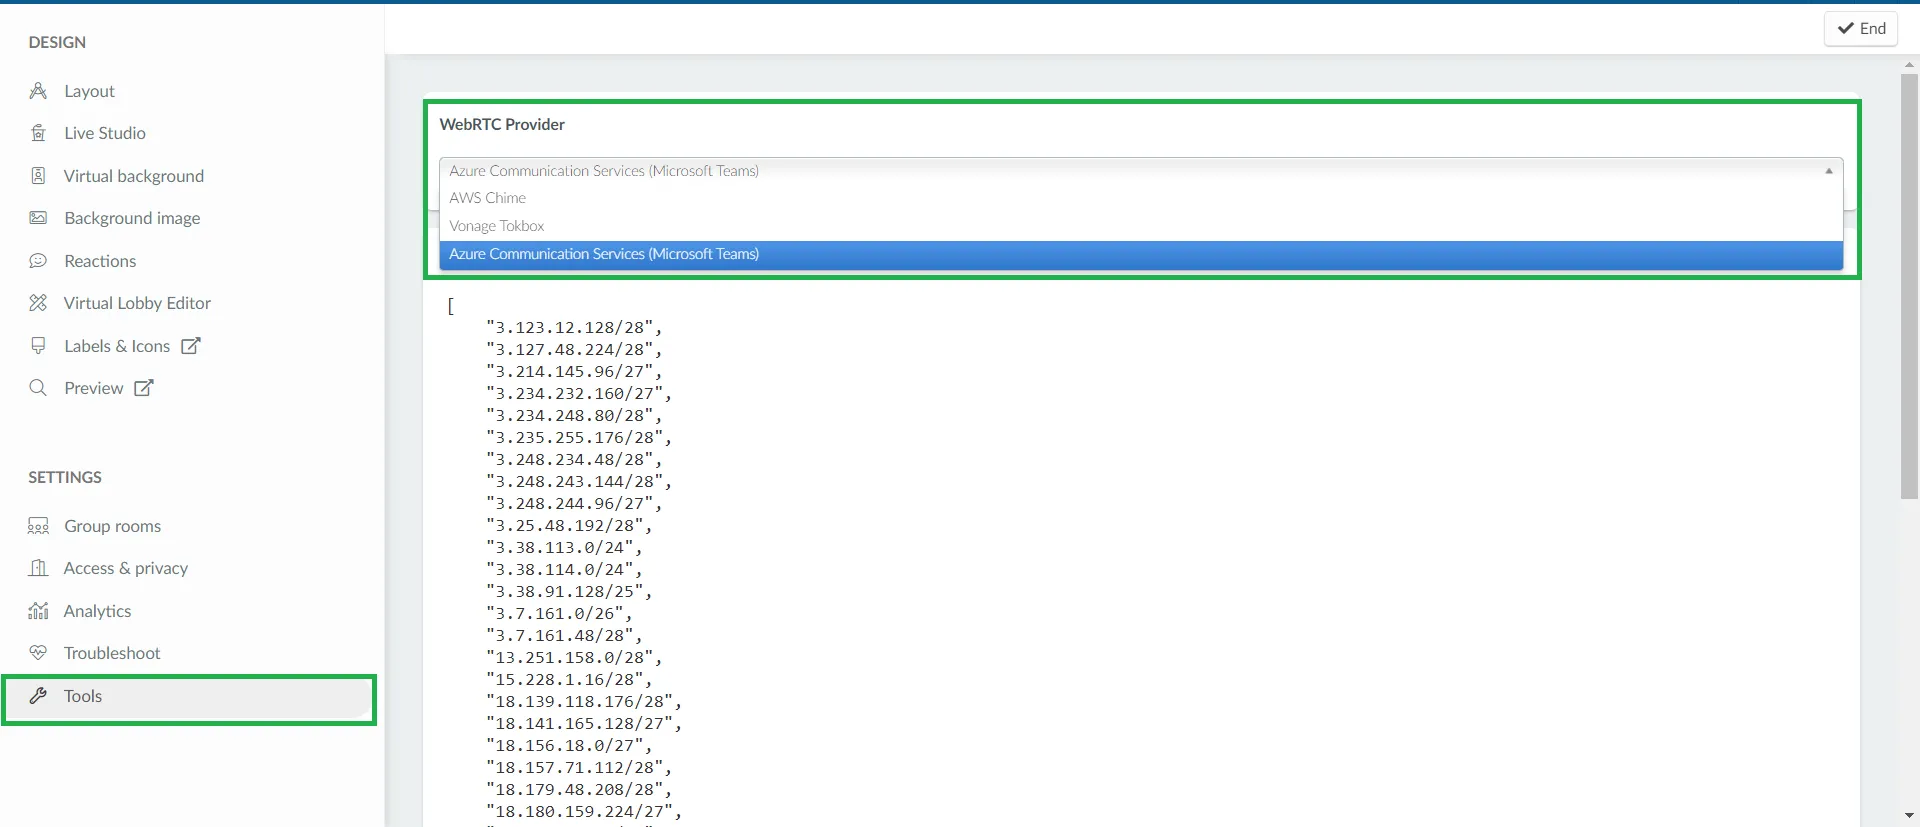
InEvent provides a complete list of IP addresses that are used for the Virtual Lobby experience. It may be necessary for you to explicitly allow these connections on your firewall or network to ensure full functionality. The list of IP addresses can be found by navigating to Event > Virtual Lobby > Tools.
In addition, you may also need to open the TCP ports as well as explicitly allow connections made to the destination domains included in the table below.
Protocol | Ports | Source | Destination |
TCP |
| All InEvent Users |
|
TCP |
| All InEvent Users |
|
TCP |
| Virtual Lobby Users |
|
Optionally, you may also want to allow connections with the following domains for streamlined HTTPS certificate verification:
ocsp.godaddy.comcrl.godaddy.com
Allowing connections with the domains above will prevent warnings from appearing in your browser's console. However, not doing so will have no impact on the Virtual Lobby experience.
Azure Communications Services
InEvent offers Azure Communication Services as one of our WebRTC providers. You will find the port availability usage requirements below. Ensure that these connection requirements are fulfilled for the service to work as intended.
TCP ports
ACS requires the following TCP ports to be open:
80(HTTP) and443(HTTPS) for signaling and web traffic3478for STUN (Session Traversal Utilities for NAT) traffic
UDP ports
ACS requires the following UDP ports to be open:
3478for STUN traffic3479-3481for TURN (Traversal Using Relays around NAT) traffic- A range of high-numbered dynamic UDP ports (typically
1024-65535) for media traffic (audio, video, screen sharing)
Vonage Tokbox
InEvent offers Vonage Tokbox as one of our WebRTC providers. Below are the connection details for Vonage Tokbox, including the protocol type, ports required to be open, connection source, as well as connection destination.
TCP port
Vonage Tokbox requires the TCP Port 443 to be open for HTTPS communication with Tokbox Services.
UDP ports
It is recommended for the UDP Port 3478 to be open to significantly improve audio and video quality. This port only allows inbound traffic after an outbound request is initiated, which ensures that external entities cannot send malicious data through this channel.
1025-65535.Allowing connections with Vonage Tokbox domains
You may need to explicitly allow connections with domains below:
*.tokbox.com: This ensures all subdomains of Tokbox can be accessed.*.opentok.com: This includes all subdomains of OpenTok.

