Using Webhooks on InEvent - API
 Updated 11 months ago
by
Amalia
Updated 11 months ago
by
Amalia
In this article, we will guide you through the steps to use Webhooks on the InEvent platform within the API space. Webhooks allow you to automate certain processes, such as sending data to external systems or triggering custom actions based on events within the platform.
What are Webhooks?
A Webhook is a mechanism that allows an application to send real-time information to other applications or services. It is essentially a URL that a third-party system can use to receive automated updates whenever an event occurs in another system. These updates contain information about the event that occurred, such as a new user registration or a ticket purchase.
Using Webhooks on InEvent
InEvent provides Webhook functionalities, which allow you to receive real-time notifications when certain events occur on the platform. For example, you can receive a webhook notification when someone enrolls or unenrolls from an activity in your event. You can also use these webhooks to trigger actions in other systems or to update your own internal systems.
Getting Started
To use Webhooks on InEvent, you will need to create a Webhook endpoint. A Webhook endpoint is a URL that InEvent will send your Webhook updates to.
After creating your Webhook endpoint (or URL), complete the following steps to integrate the Webhook with InEvent:
- Log in to your InEvent account.
- Click on the API symbol (</>) at the bottom right corner of your screen.
- Choose the Webhook option from the left panel.
Adding a Webhook to InEvent
You can add webhook events at the company level and event level.
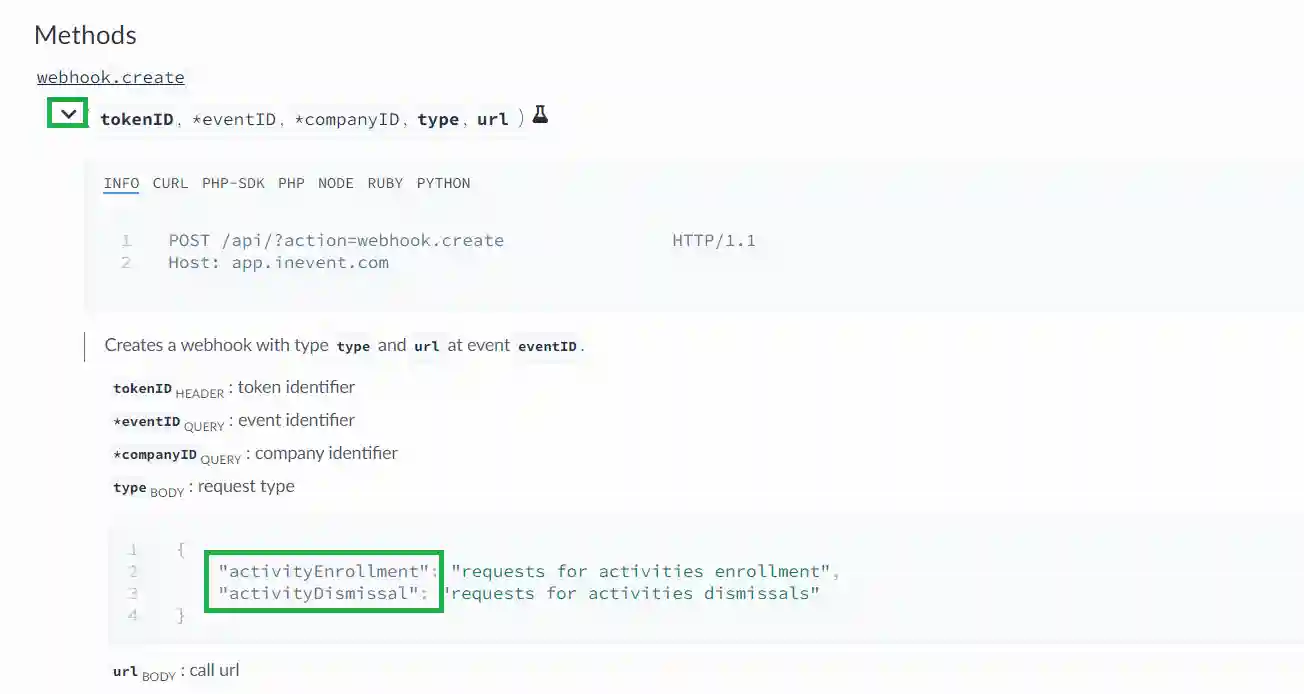
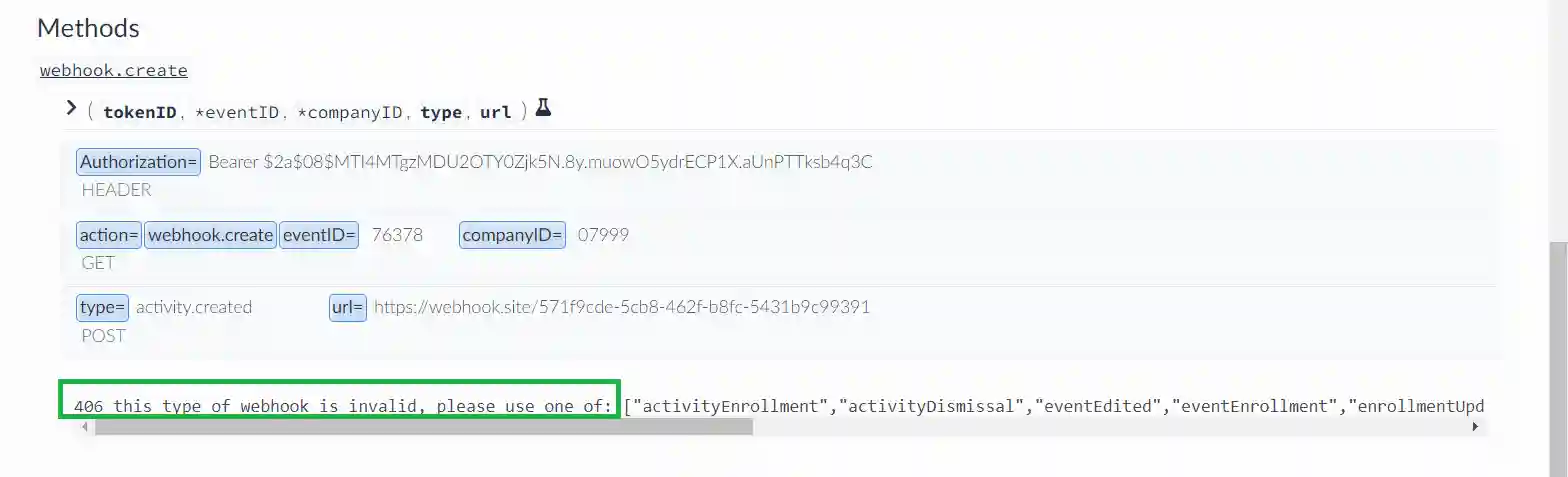
To add a Webhook to the platform, you can use the webhook.create method. This method takes in the Webhook endpoint URL and the request type as arguments.
To add a new Webhook to the platform, complete the following steps:
- Click on the beaker icon next to
webhook.create. - Enter your companyID or eventID
- For adding a company-level webhook, type
companyID=and enter the company's ID in the GET field. - For adding an event-level webhook, type
eventID=and enter the event's ID. Then, typecompanyID=and enter the company's ID in the GET field.
- Enter the request type in the type field.
- Enter your Webhook endpoint URL in the url field.
- Press the Enter button on your keyboard.
Editing a webhook
After creating a webhook you can change its request type using the webhook.edit method. To do this, complete the following steps:
- Click on the beaker icon next to
webhook.find - Enter your webhookID.
- Enter type in the Key field.
- Type in
value=and enter the new webhook request under the POST field. - Press the Enter button on your keyboard and the changes will be reflected.
Finding a previously added Webhook
To find a previously added webhook, complete the following steps:
- Click on the beaker icon next to the
webhook.findmethod. - Enter either your companyID or eventID.
- For company-level webhooks, type
companyID=and input the company's ID into the GET field. - For event-level webhooks, type
eventID=and input the event's ID into the GET field.
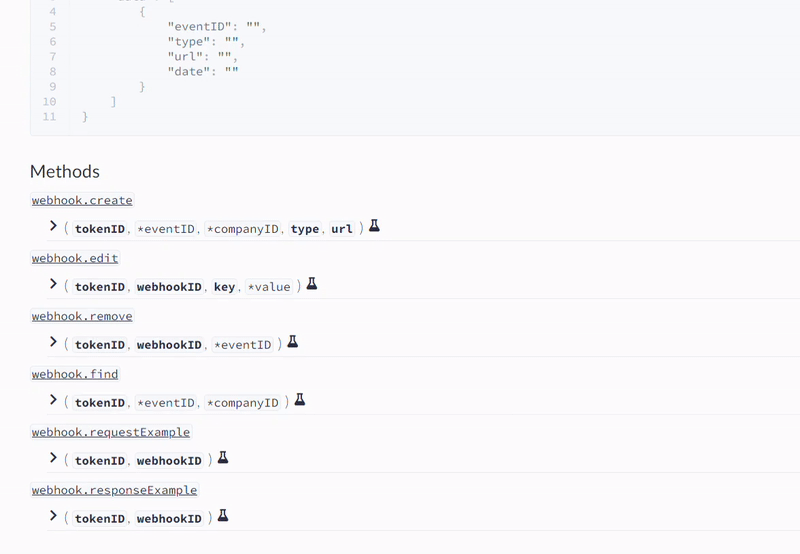
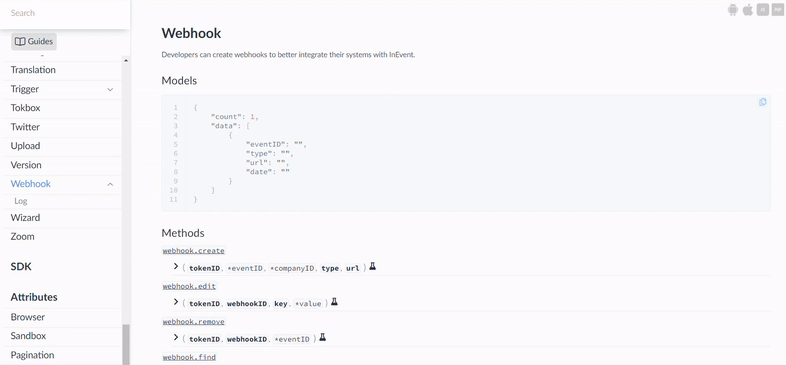
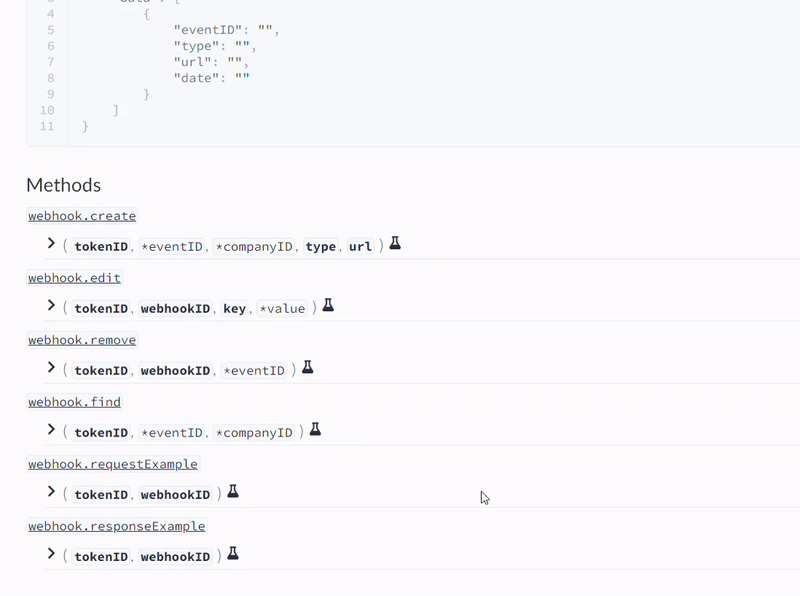
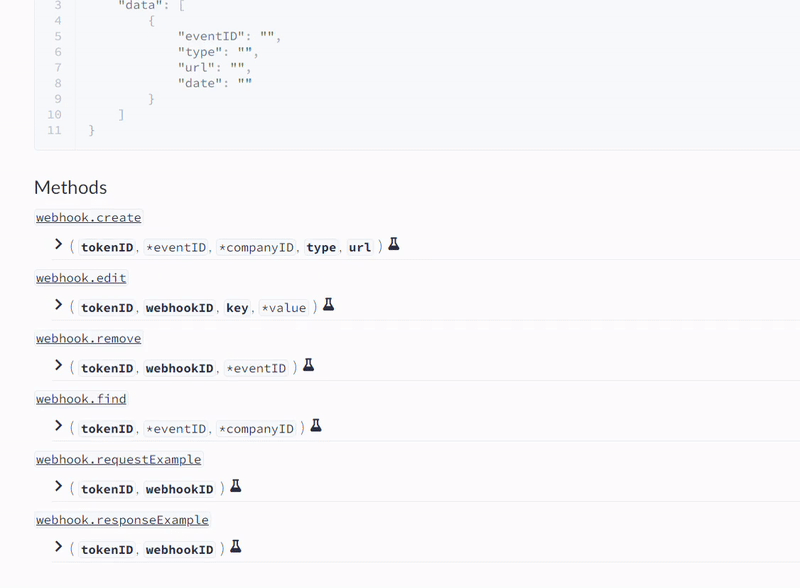
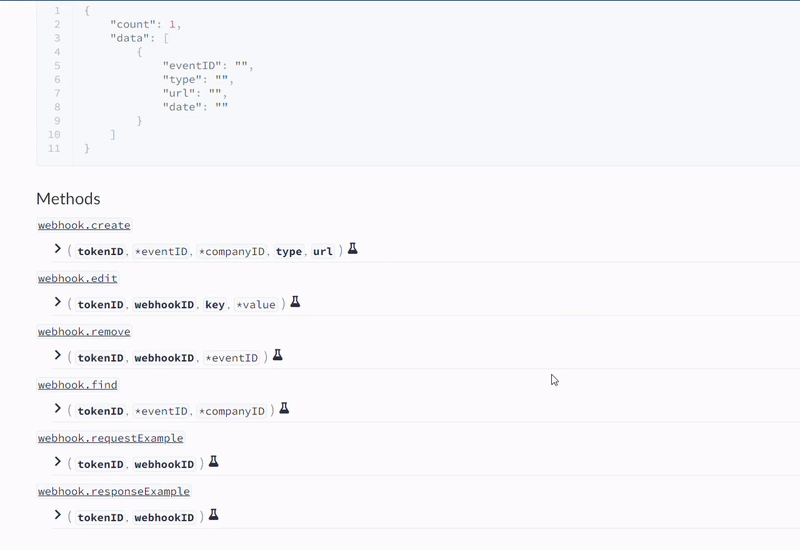
For each webhook, when using the webhook.find method, you will receive the following information in JSON format:
- WebhookID: This is the unique ID automatically assigned to the webhook by the platform.
- eventID: Your event's ID (automatically assigned by the platform).
- Company ID: Your company's ID.
- type: This field indicates the type of the webhook request.
- url: The webhook endpoint URL.
- date: This field represents the date when the webhook was created, stored as a
timestampinstringformat.
Removing a Webhook from InEvent
To remove a Webhook from the platform, complete the following steps:
- Click on the beaker icon next to the
webhook.removemethod. - Enter the WebhookID of the webhook you would like to remove into the WebhookID field.
json response.- Press the Enter button on your keyboard.

Checking Webhook Request and Response examples
To test your Webhooks, InEvent provides options for you to see examples of your Webhook requests and responses. The webhook.requestExample and webhook.responseExample methods allow you to see what your Webhook request and responses will look like in json format.
Both the webhook.requestExample and webhook.responseExample methods take the WebhookID as an argument.
To see your Webhook request and response examples, complete the following steps:
- Click the beaker icon next to any of the methods (depending on your use case).
- Enter the WebhookID into the WebhookID field.
json response.- Press the Enter button on your keyboard.
Viewing Webhook logs
Once a webhook event has been triggered, the information will appear in the webhook.find.log method.
To see the logs, complete the following steps:
- Click on Log at the left menu of the page.
- Click on the beaker icon next to the
webhook.find.logmethod. - Enter your company ID or eventID.
- For company-level webhooks, type
companyID=and input the company's ID into the GET field. - For event-level webhooks, type
eventID=and input the event's ID into the GET field.
A list of the webhook events that have been triggered will be displayed.