Whitelisting Intercom on your firewall
 Updated 10 months ago
by
Chioma Okenwa
Updated 10 months ago
by
Chioma Okenwa
Whitelisting Intercom on your firewall involves allowing specific network traffic from Intercom's services to pass through your firewall. This is typically done to ensure that Intercom's communication with your servers or devices is not blocked by your firewall's security settings.
If you discover that your firewall is constantly blocking or otherwise preventing you from accessing Intercom, you may want to whitelist your IP address. Firewalls are designed to keep malicious traffic out of networks. But legitimate traffic can get caught in the crossfire.
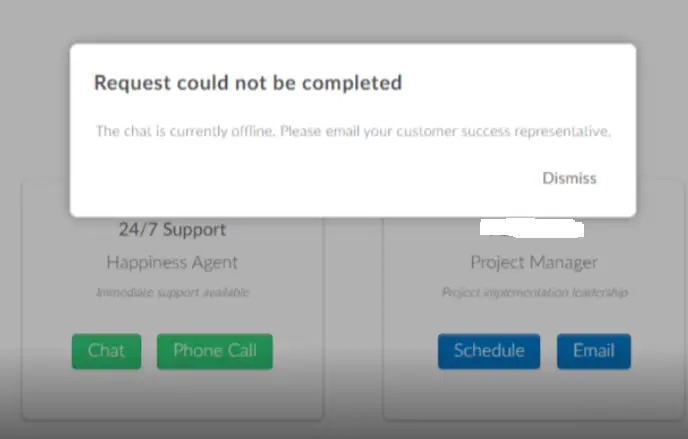
To access InEvent's 24/7 chat support, it's essential to make sure you've whitelisted Intercom to avoid receiving an error message when you click on Chat:
Whitelisting Intercom
Intercom supports IPv4 and IPv6 addresses. IPv4 addresses consist of four sets of numbers separated by periods, such as: 192.168.0.1, while IPv6 addresses, on the other hand, have a different format and are longer. They consist of eight groups of four hexadecimal digits separated by colons such as 2001:0db8:85a3:0000:0000:8a2e:0370:7334.
Configuring your firewall using Windows
To whitelist Intercom's IP addresses using, you need to create Inbound and outbound rules on your firewall that allow traffic to and from these IP addresses. Below are the steps to take, using Windows firewall as an example.
Creating an Inbound rule
To create Inbound rules, that will allow traffic from Intercom's IP address, follow the steps below:
- Search for Firewall & network protection in the search bar of your computer.
- Click Advanced Settings.

- Click on Inbound rules on the left hand menu.
- Select New rule on the right hand menu.
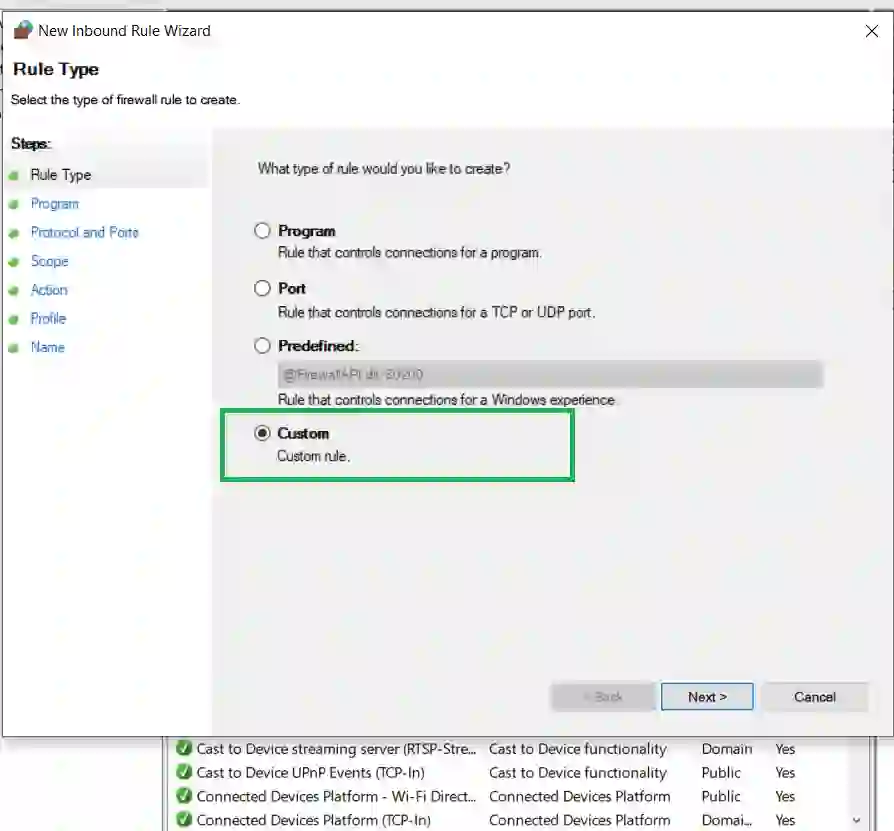
- Tick the Custom box as a rule type.
- Click the Next button till you get to the IP address page.
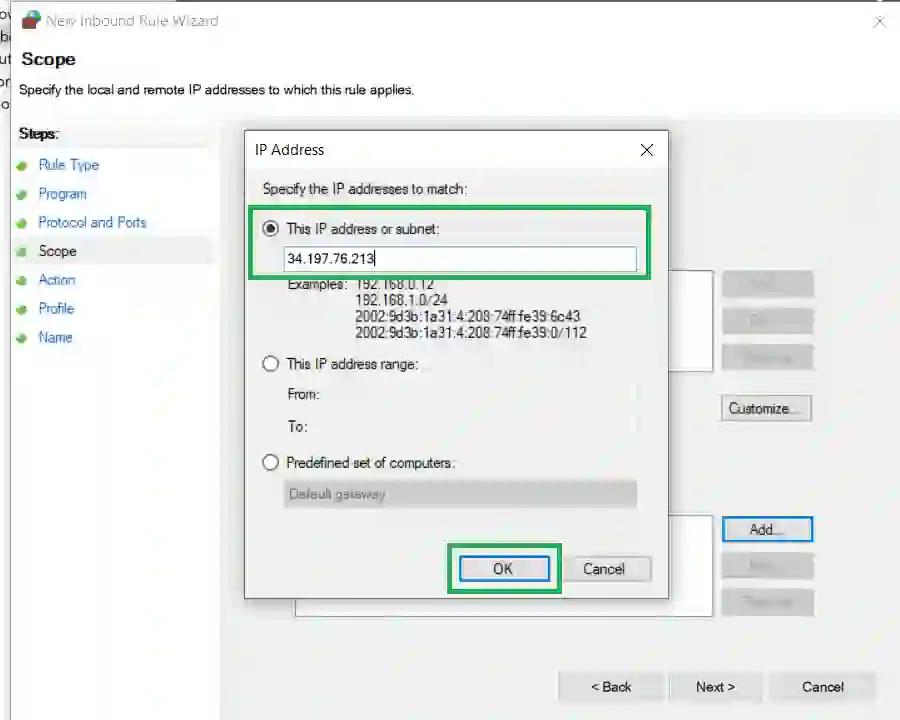
- Click on the These IP addresses box and click the Add button.
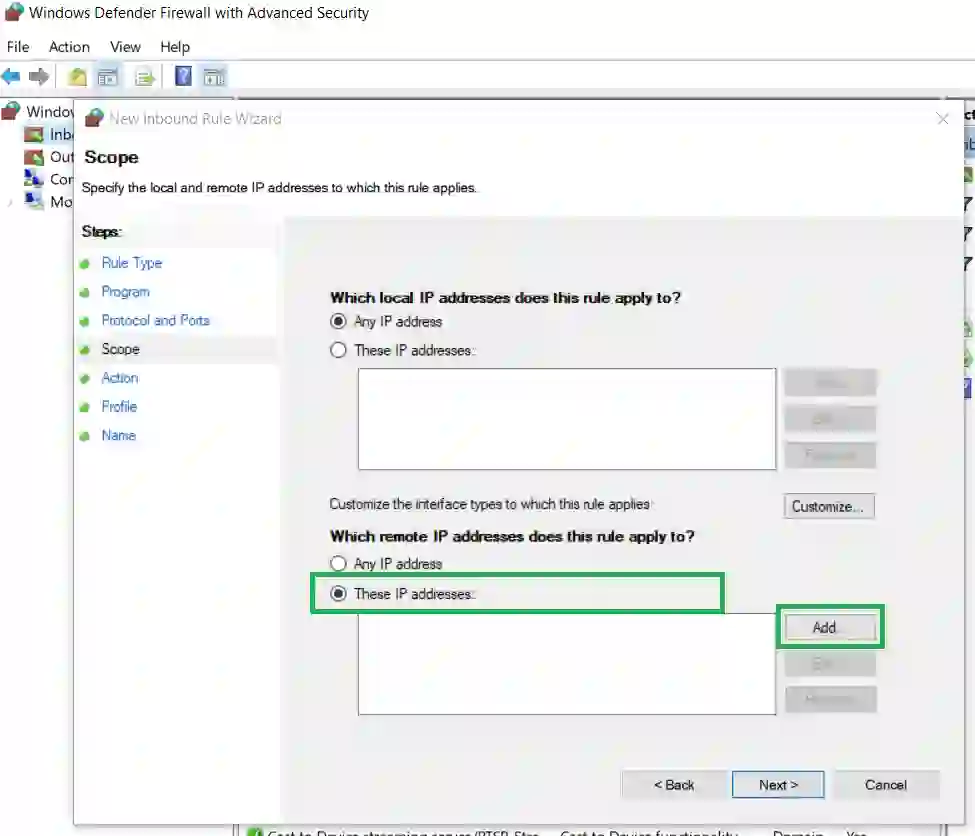
- Insert the IP addresses supported by Intercom such as:
34.231.68.152,34.197.76.213,35.171.78.91,35.169.138.21,52.70.27.159,52.44.63.161. Click on Ok.
- Click on the Next button.
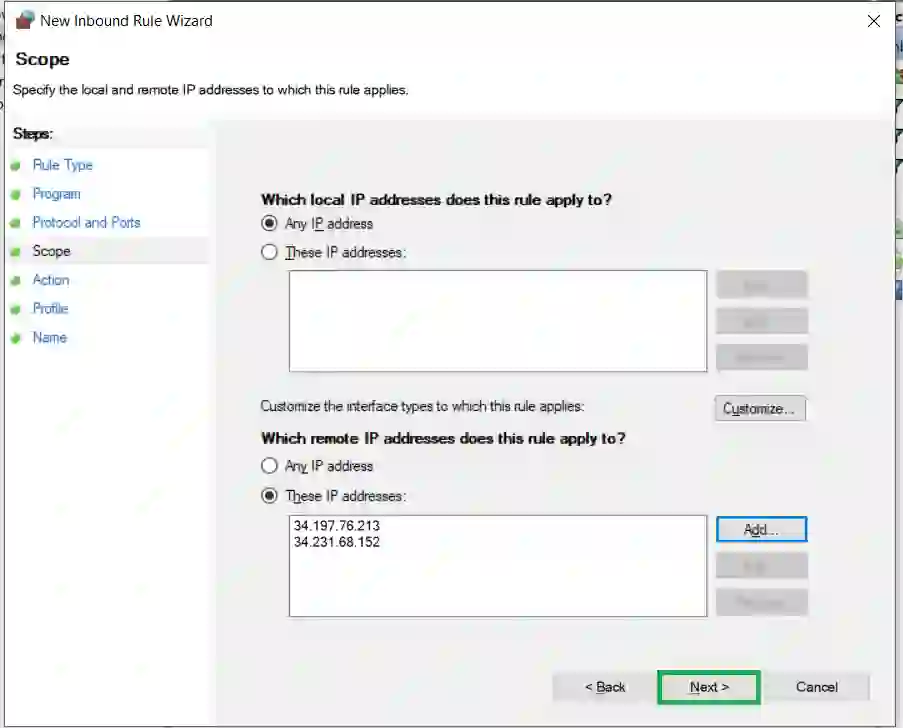
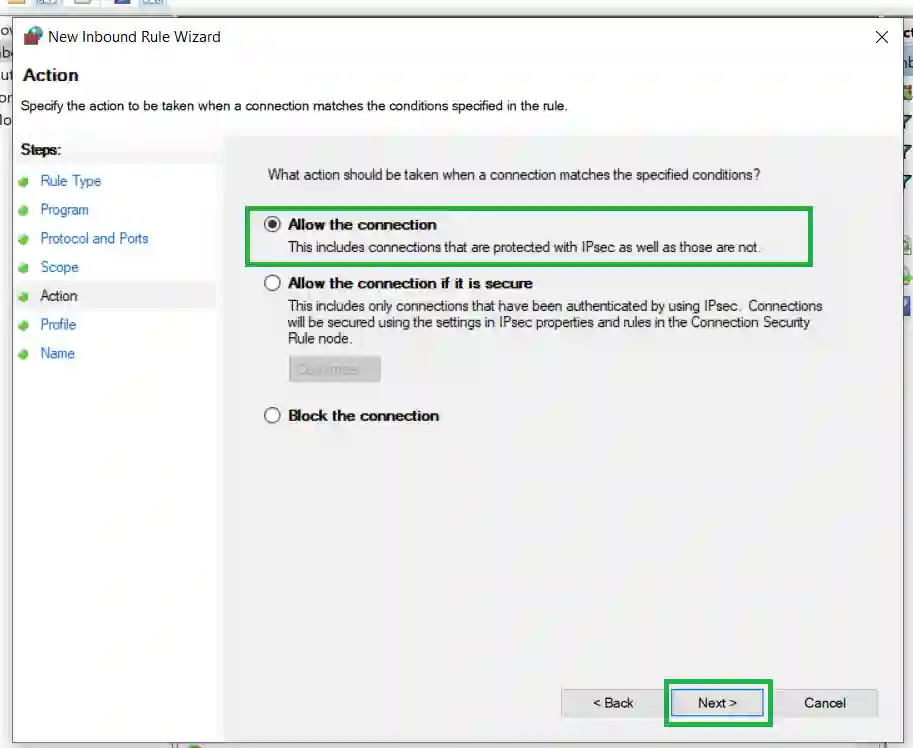
- To whitelist Intercom's IP addresses, select Allow the connection and click on Next.
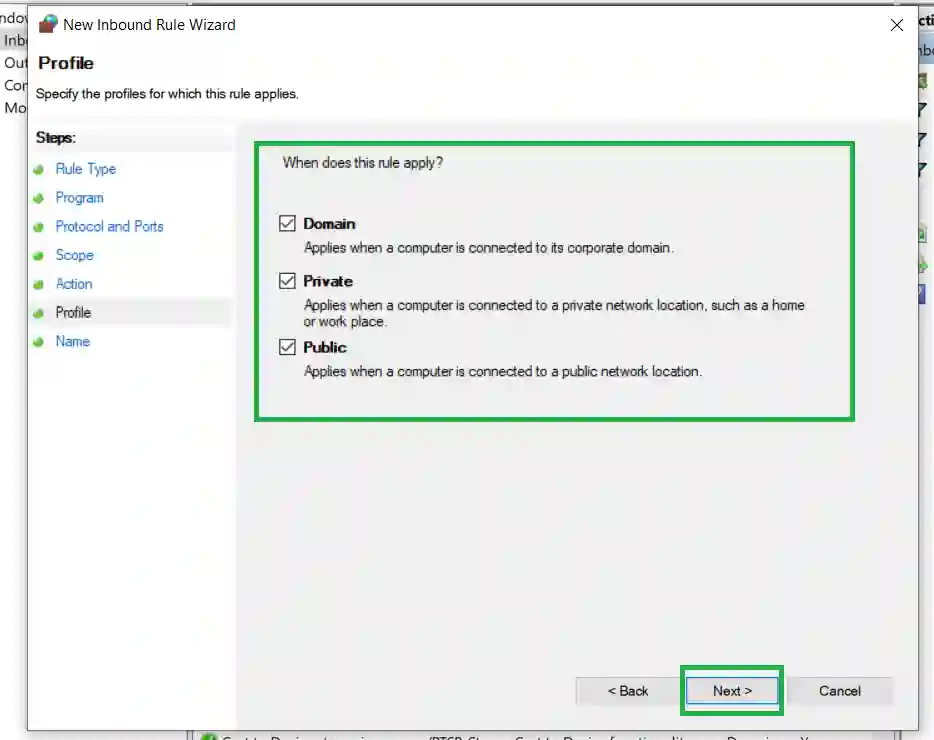
- Ensure to tick all the boxes for when the rule applies and click on Next.
- Click on Next.
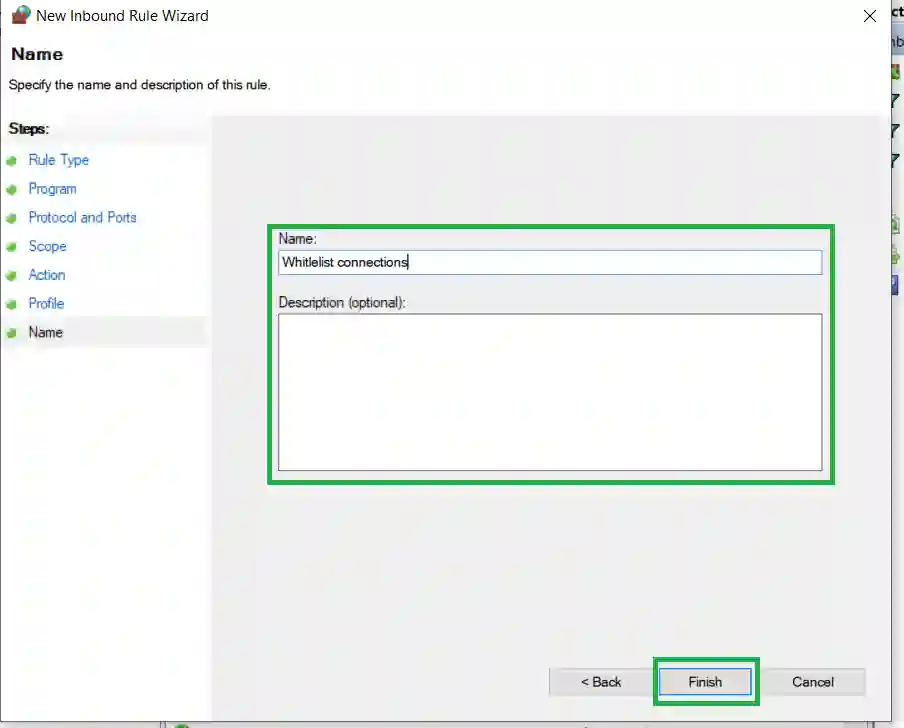
- Insert a name for your rule and a description (optional).
- Click Finish.
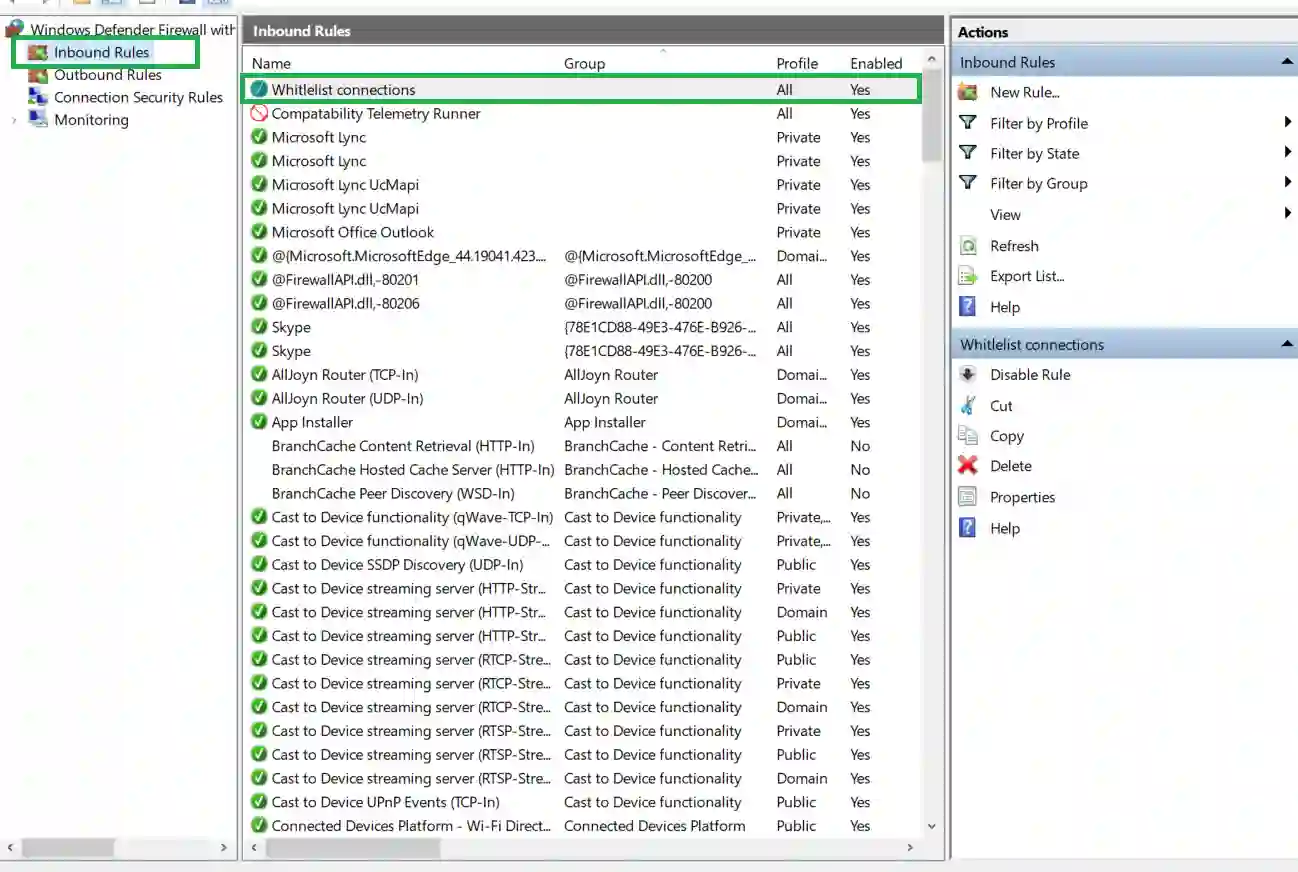
The new rule will appear at the top of the list under Inbound Rules.
Creating an outbound rule
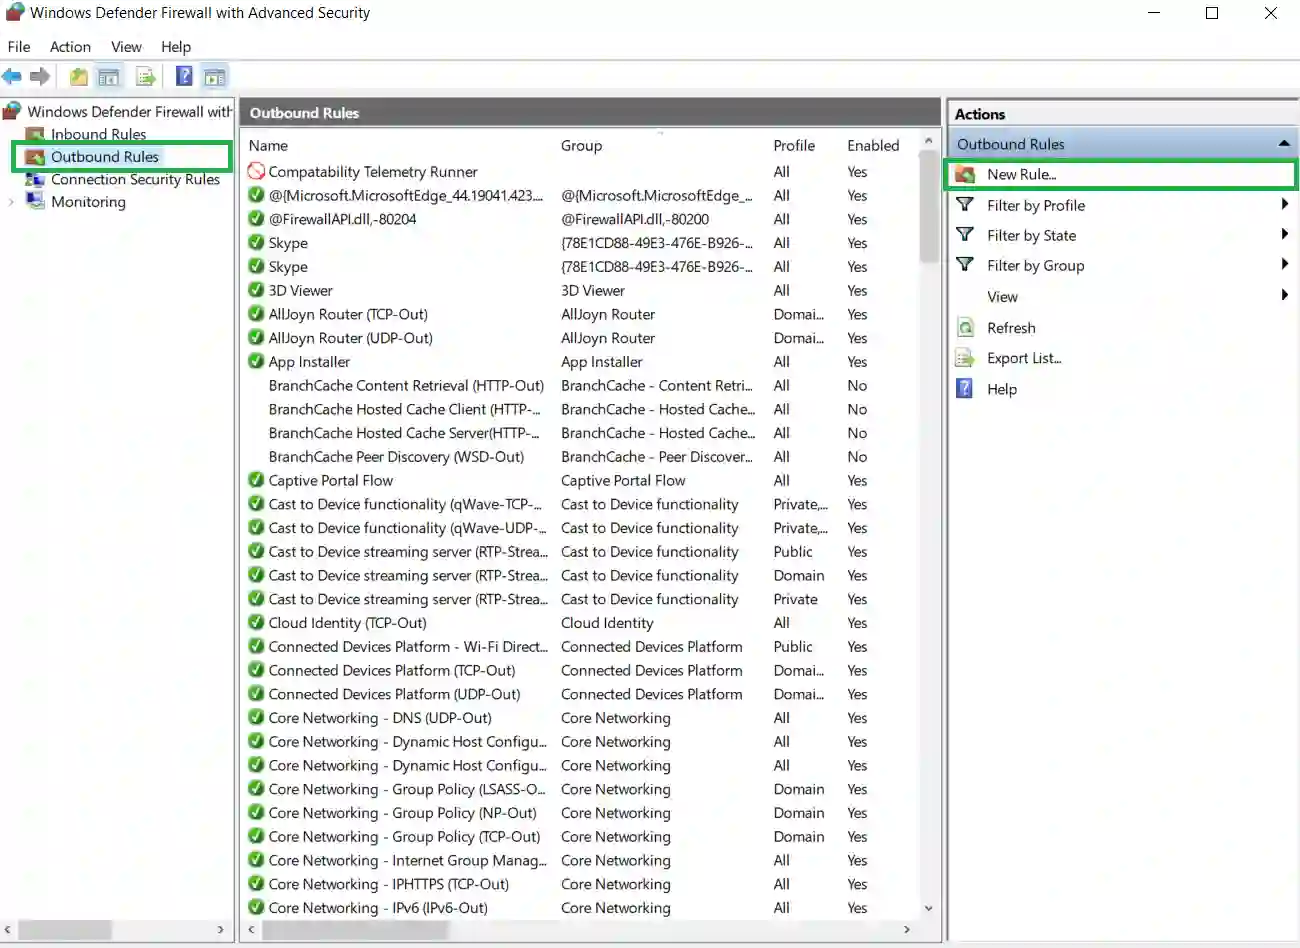
To create an outbound rule that will allows you connect to Intercom's IP address, search for Firewall & network protection in the search bar of your computer, click Advanced Settings and then click on Outbound rules from the left hand menu. Click on New rule at the right hand menu. Next, follow the exact same steps given above section to create a new outbound rule.
After creating these rules, you will easily be able to contact InEvent's 24/7 chat support.
Whitelisting intercom on your firewall for Macbook users
If you are using a MacBook, the approach for whitelisting Intercom on your firewall is distinct, as your built-in settings allow you to whitelist Intercom as an application rather than as a domain.
Therefore, we advice you to first download intercom as an application and then follow the steps below to whitelist it on your Firewall:
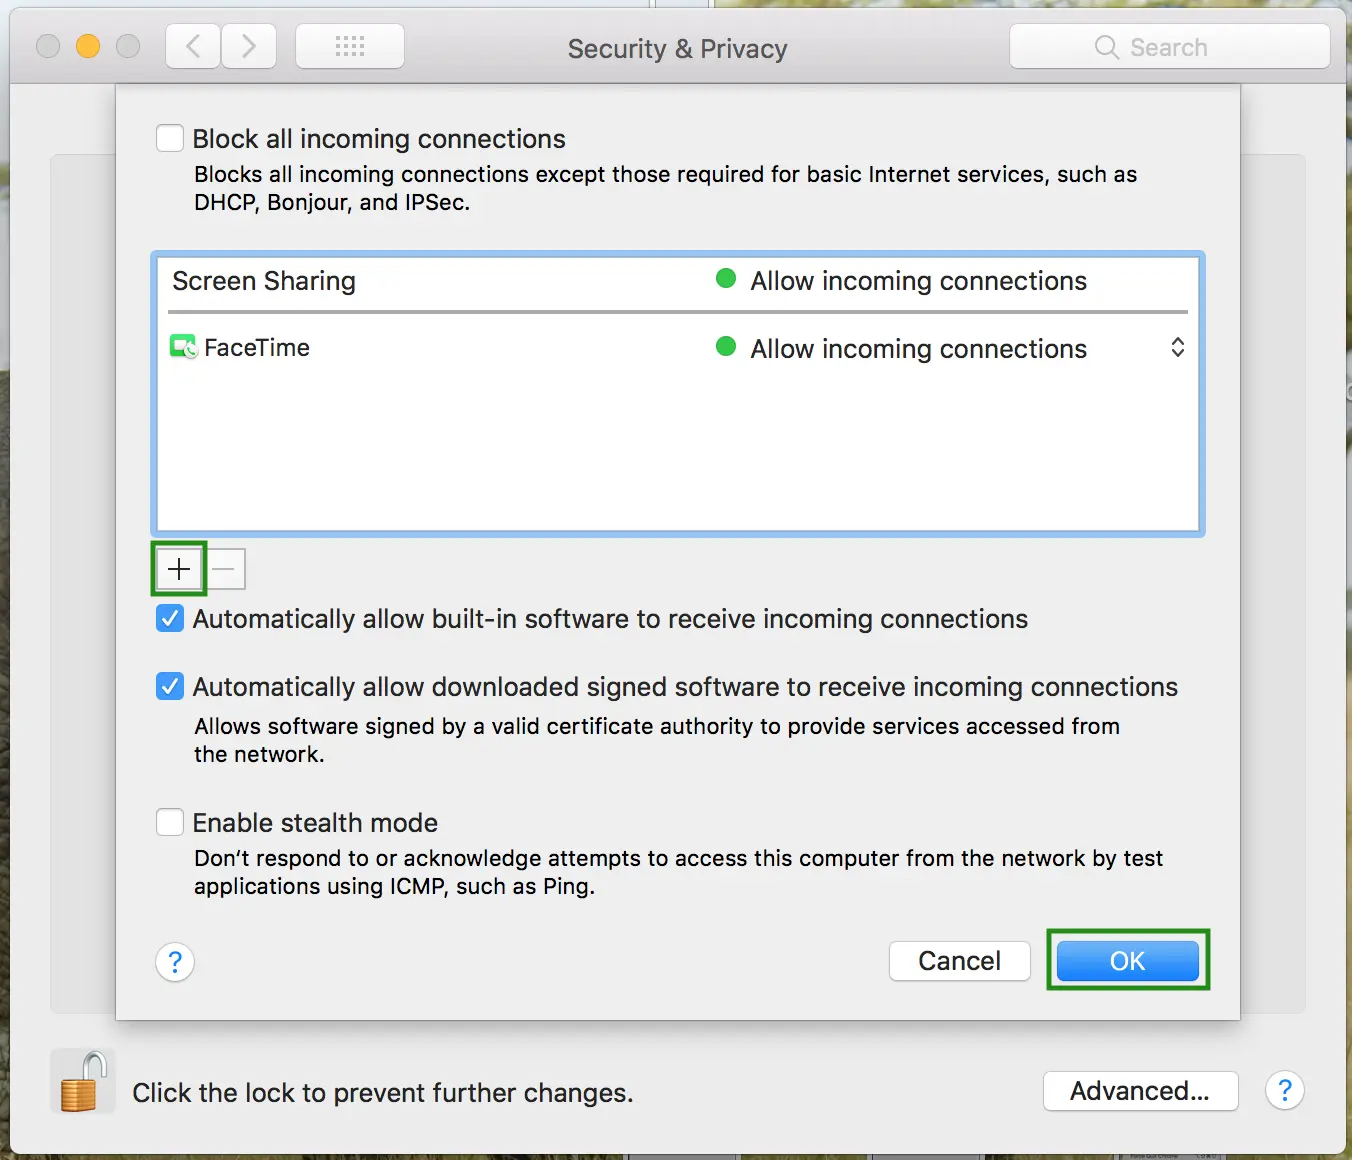
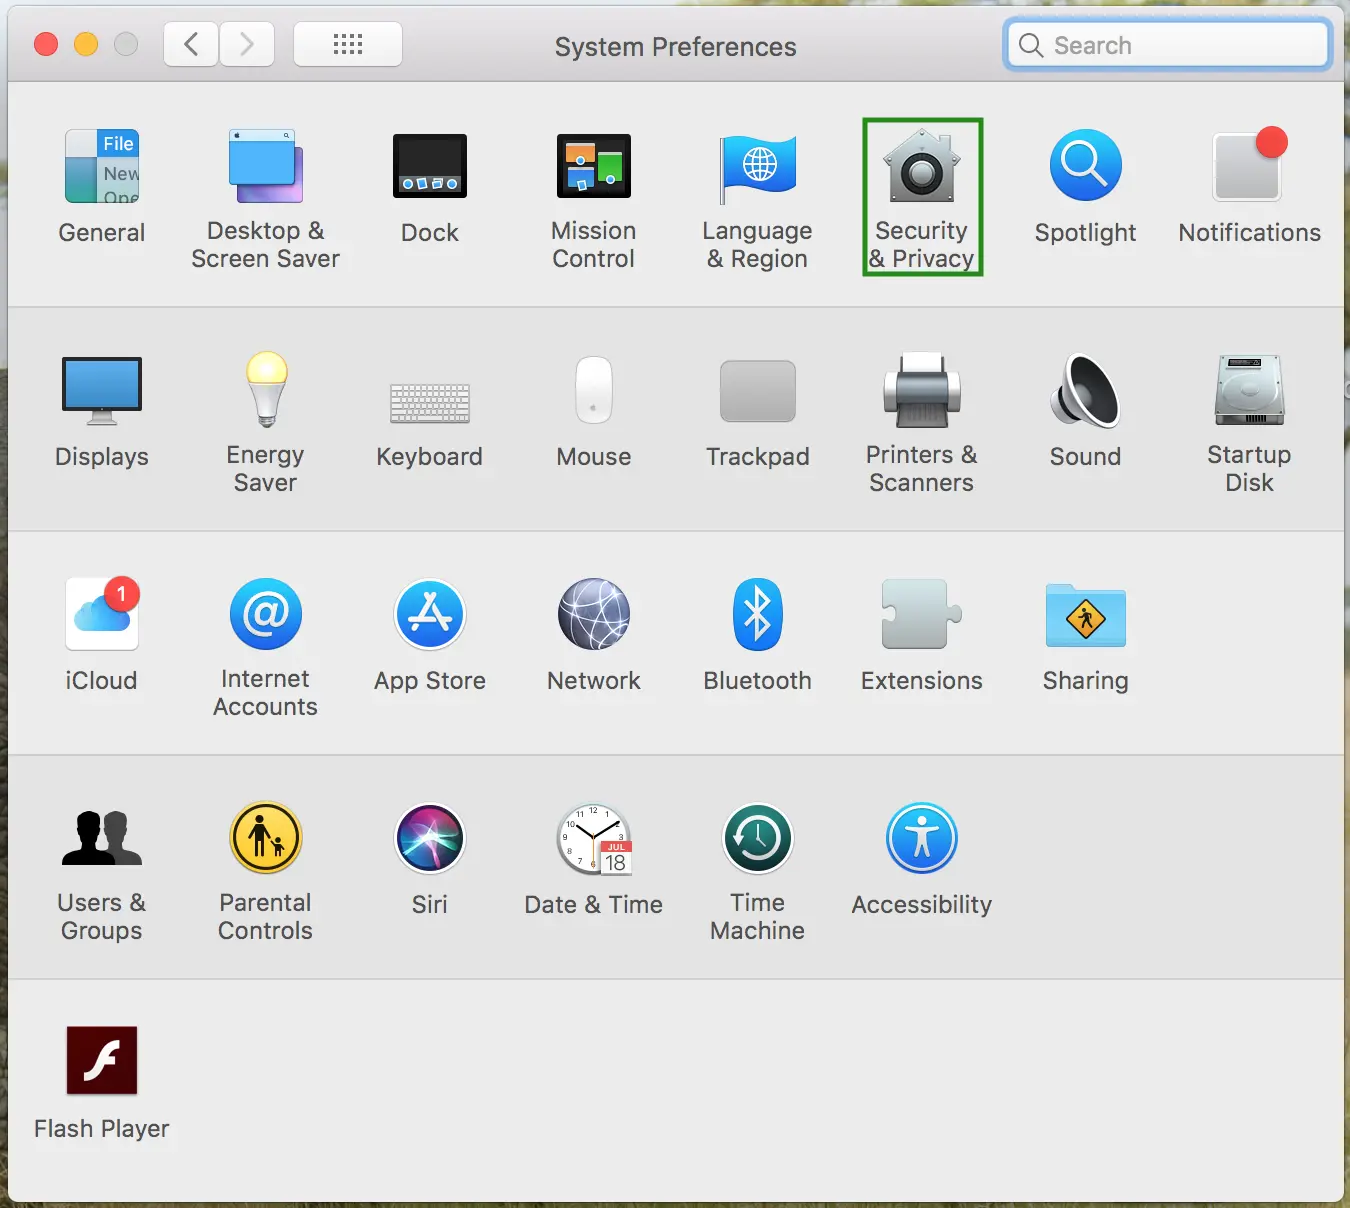
- Click on the apple icon at the left corner of the top menu and select System Preferences
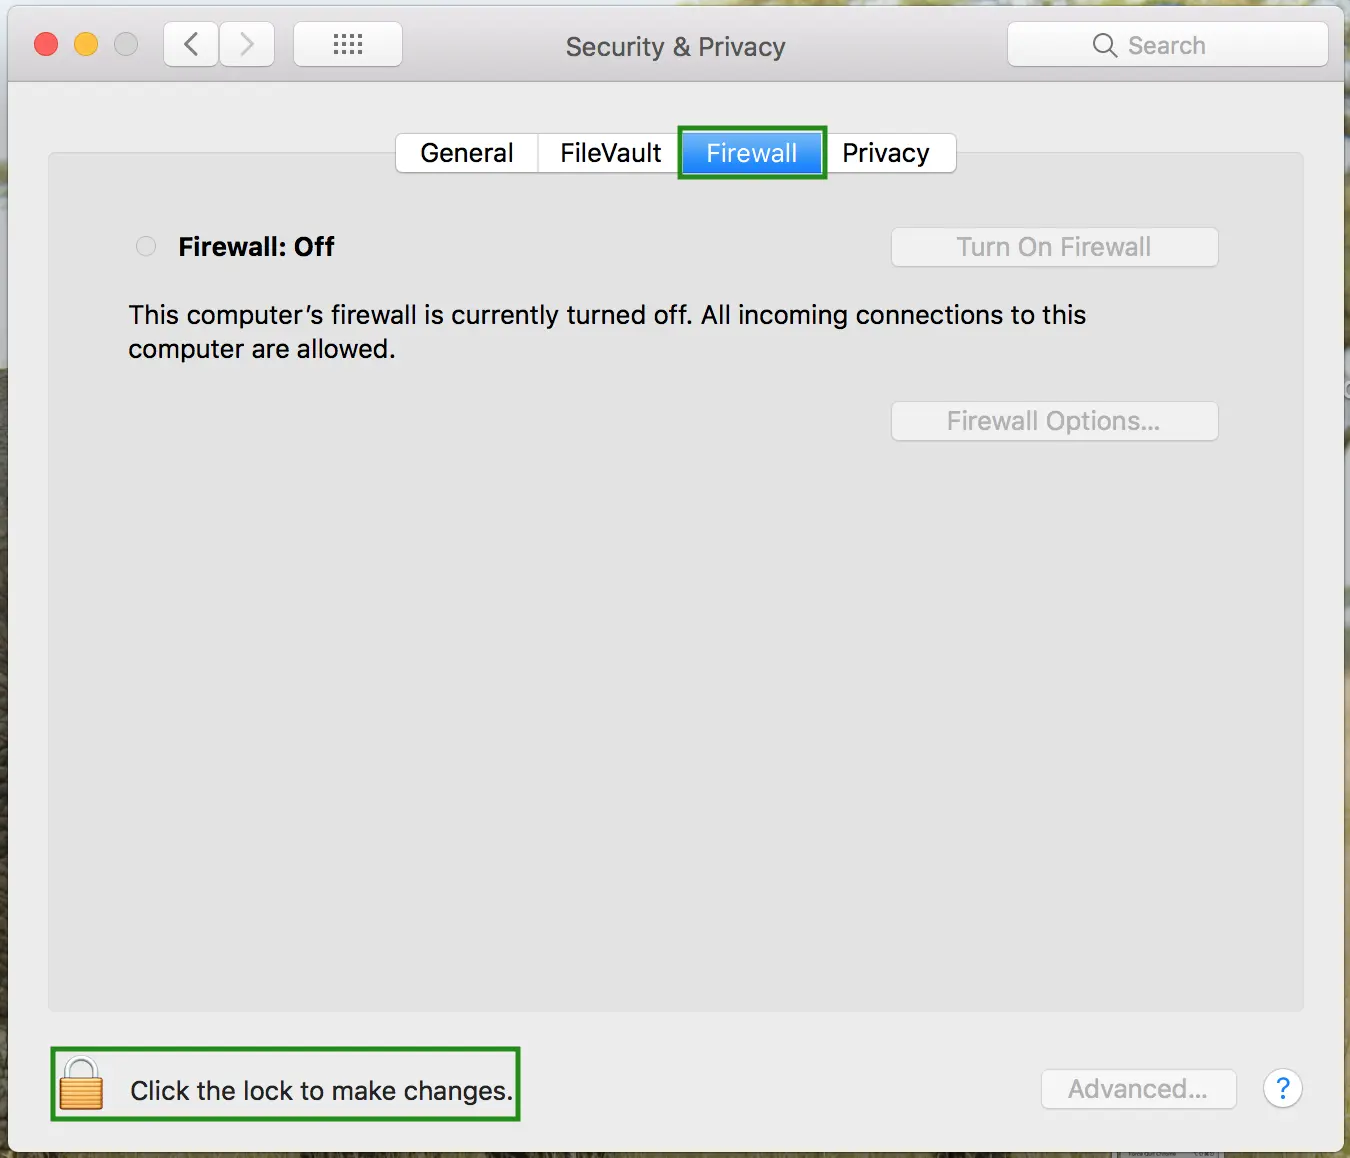
- Click on the dotted button at the left of the word System Preferences and then click on Security & Privacy.
- Click on the tab Firewall then click on the padlock at the bottom and enter the passcode of your laptop
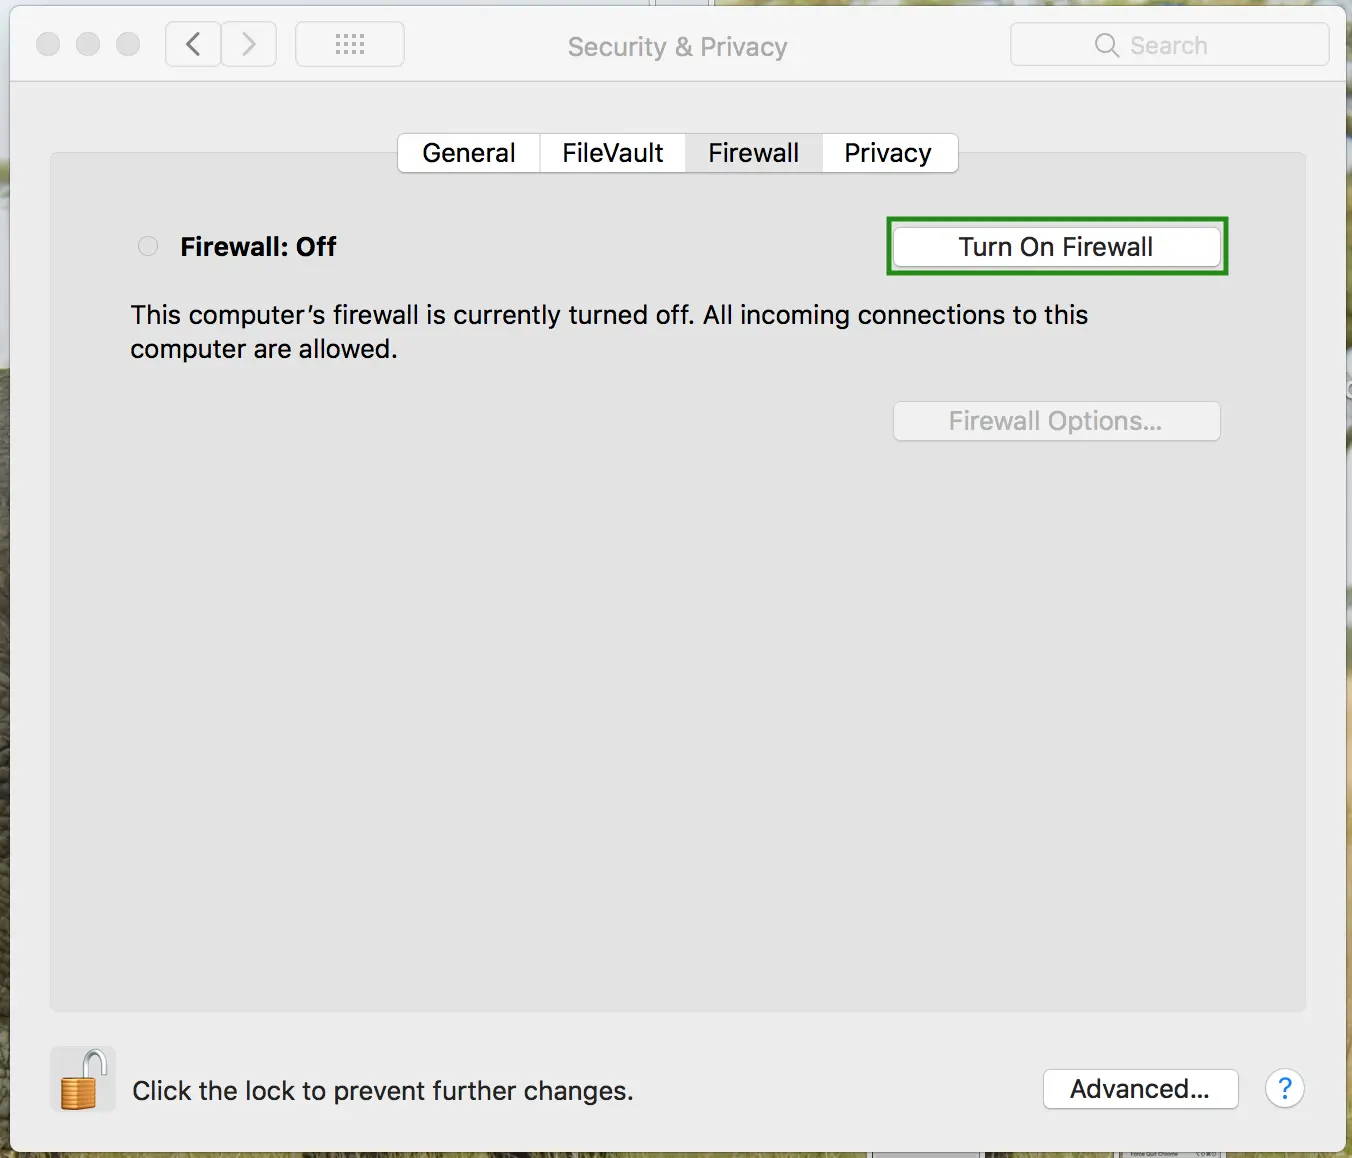
- Click on the button Turn On Firewall
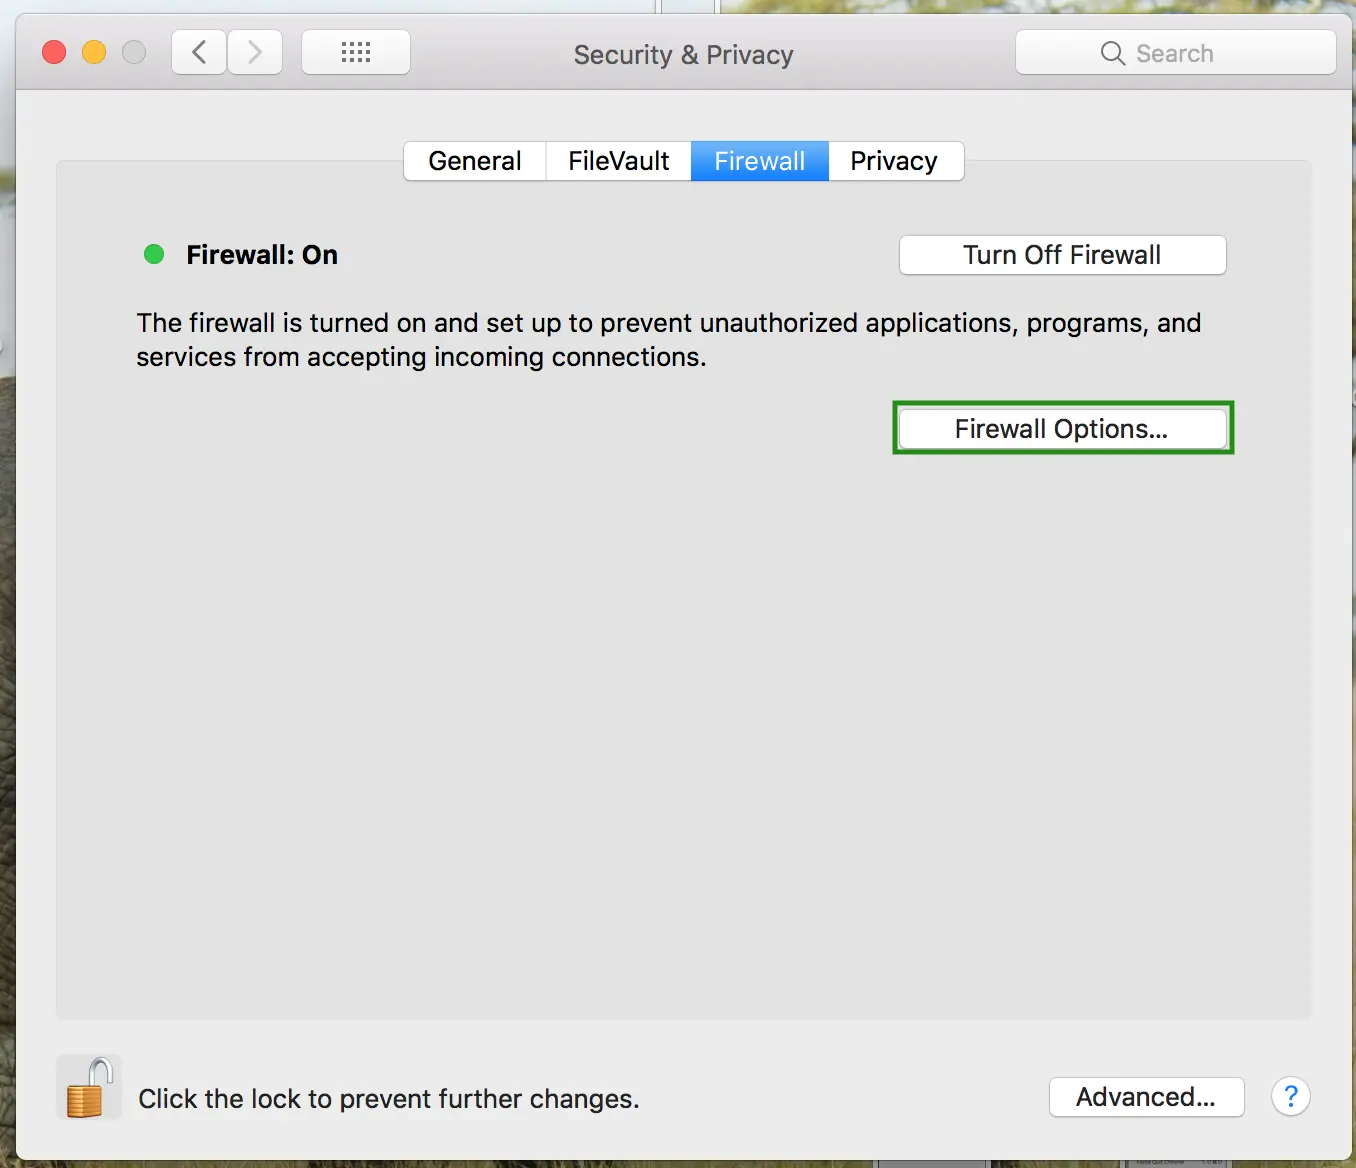
- Click on Firewall Options
- Click on the + button and add the Intercom application from your desktop then click on OK and click on the padlock to prevent further changes.