Issuing ticket purchase refunds
 Updated 4 months ago
by
Amalia
Updated 4 months ago
by
Amalia
This article will inform you on how to refund attendees' ticket purchase as an event organizer.
Configuring your event's refund policy
If you want to allow attendees to request refunds for their ticket purchase, you first need to configure your event's refund policy. To do so, follow the steps below.
- Go to Marketing > Tickets > Payments.
- Click on Policy from the left menu bar under the Payments section.
- Click on Edit at the top right corner of the page.
- Select your Refund policy using the drop-down box to disallow refund requests or to allow refund requests up to a certain period. The available options are as follows:
- No refund
- Until 1 day before the event
- Until 7 days before the event
- Until 15 days before the event
- Until 30 days before the event
- Press the End button to save your changes.
Events with restricted refunds
Event organizers may want to limit payment-related operation privileges to a select number of people. At InEvent, they can take advantage of the Company user teams and Permissions profile and customized access. This also applies to the refund feature. With the Restrict refund tool at the Company level and at the Event level, event organizers can restrict issuing refunds so that only authorized people are able to issue, approve, or reject refunds.

When the Restrict refund tool is enabled, refund options are only visible and accessible to company users or company users with refund-related privileges. Non-company users, including event staff and event administrators, will be unable to operate refunds. This is ideal or event organizers with strict finance protocols.
Enabling refund notifications for admins
If you want an admin to receive automatic email notifications when an attendee requests a refund, follow the steps below.
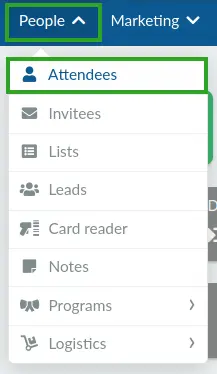
- Navigate to People > Attendees.
- Locate the admin profile which will receive refund request notifications.
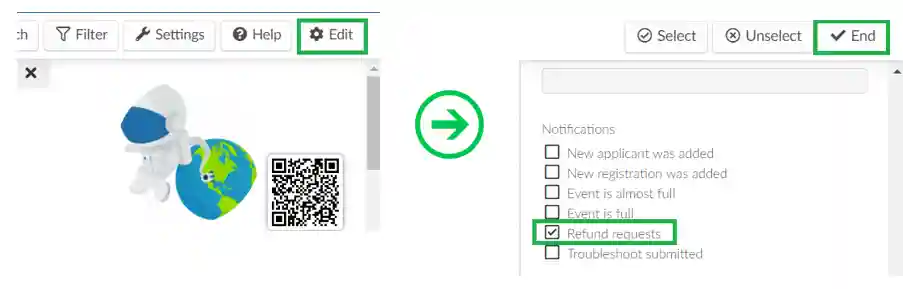
- Click Edit.
- Check the Refund requests box under Notifications.
- Press the End button to save your changes.
Approving or rejecting a refund request
When an attendee requests a refund for their purchase, you need to either approve or reject the refund request. To approve or reject a refund request from an attendee, follow the steps below.
- Locate the payment with AUTHORIZED Refund requested status in the Payments page.
- Click the blue open payment details button. The Payment details box will be displayed.
- Select Approve refund or Reject refund under Refund requested. A pop-up box will be displayed.
- Click Approve to finalize approving or rejecting the refund request.
After the refund request is approved, a Payment refunded! pop-up box will be displayed, as seen below.
Alternatively, after the refund request is rejected, a Payment refund rejected! pop-up box will be displayed, as seen below.
Issuing a payment refund
Event organizers can issue a refund for an attendee’s purchase even if it hasn’t been requested. To issue a refund:
- Go to Payments and locate the payment in the List page.
- Click the blue Open payment details button beside the payment.
- Locate Refund order in the Payment details pop-up window.
- Click Issue refund. A pop-up will appear with the following options.
- Invoice and pay.gov payments: Specify whether to issue a Full Refund or Partial Refund. If you select Partial Refund, enter the amount to refund. A message will confirm that all tickets remain valid.
- Other payment types: Only Full Refund is available.
- Click Refund on the Refund Order pop-up to finalize.
After completing the steps above, the Payment refunded! notification will appear.
Below is a GIF that displays the process of partially refunding an attendee.
Below is a GIF that displays the process of issuing a full refund.
The attendee will receive an email notification that their purchase has been refunded and they will be removed from the event.