Link Tracking (UTM)
 Updated 11 months ago
by
Chioma Okenwa
Updated 11 months ago
by
Chioma Okenwa
- How do I enable this feature?
- How do I create a UTM link?
- How do I track conversions in an external website?
- Adding converted leads to a list
By using the Link tracking (UTM) feature, you will be able to track the performance of campaigns and content.
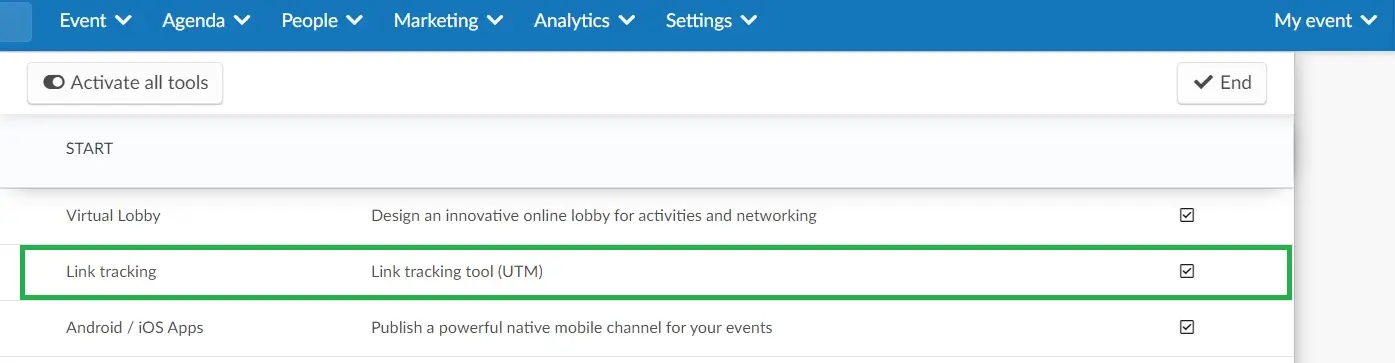
How do I enable this feature?
To enable this feature, press Settings > Tools > Edit. Under the Start section, you should set Link tracking to yes by checking the checkbox in the right.
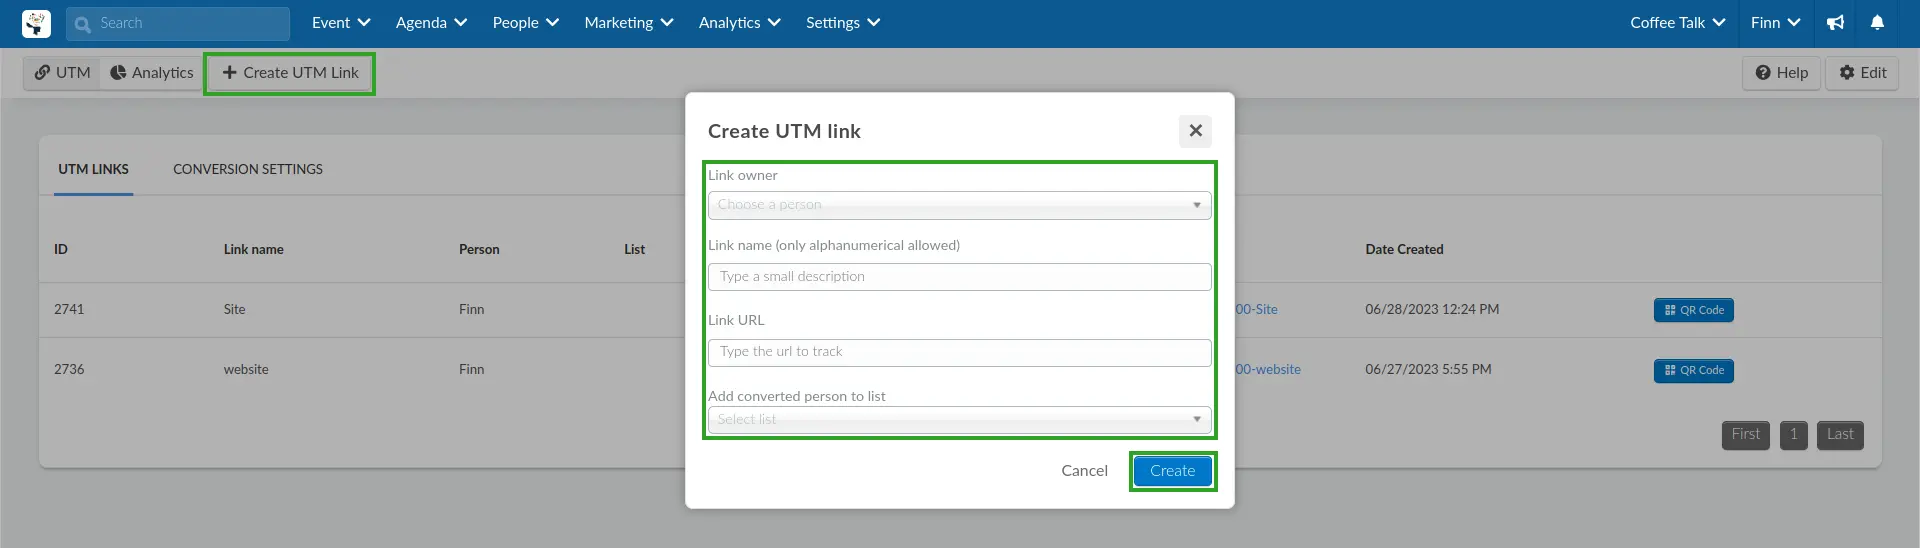
How do I create a UTM link?
To create a UTM link go to Marketing > Communication > Link tracking.
Then, follow these steps:
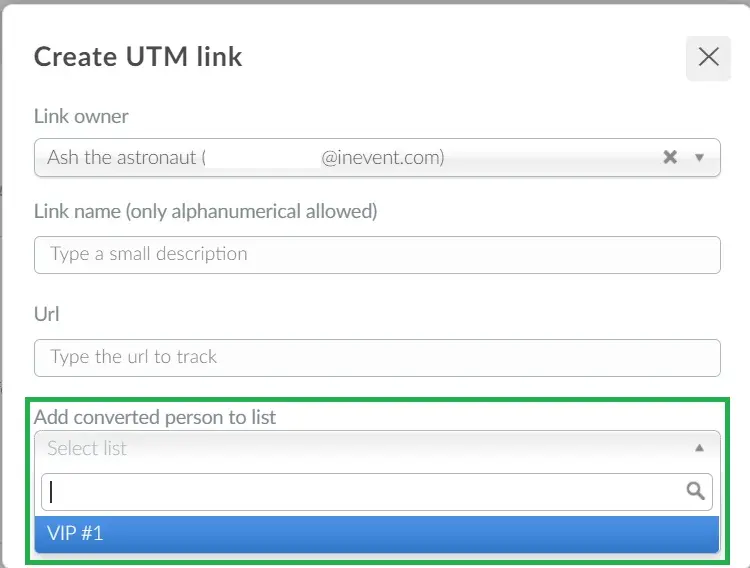
- Press the Create UTM link button located at the top left corner.
- Select a Link owner using the drop-down box.
- Type the Link name, which will be used as an identifier of your link. The name will also be used in the UTM link.
- Enter the link you wish to track in the Link URL field.
- Select the list to which converted persons will be added using the Add converted person to list drop down box (optional).
- Press Create.
How do I see all UTM links that have been created?
All UTM links that have been created can be viewed by clicking UTM > UTM Links in the Link tracking page.

This page displays all created UTM links along with the details, including the ID, link name, creator name, list to which converted persons will be added, and creation date.
Which link should I share with my attendees?
You should copy the trackable link available under Link, as shown below. Click on top of it and the link will be copied to the clipboard.
You can also download a QR code containing the trackable link to share with your attendees. To do this, click on the QR code button and a new tab will open with your QR code so you can download it.
How do I track conversions in an external website?
If your UTM links to an external website that embeds an InEvent form, you need to add a code snippet to your linked external website to ensure conversions are tracked.
Follow the instructions below to add the code snippet to your website:
- Navigate to UTM > Conversion settings in the Link tracking page.
- Copy the provided code snippet.
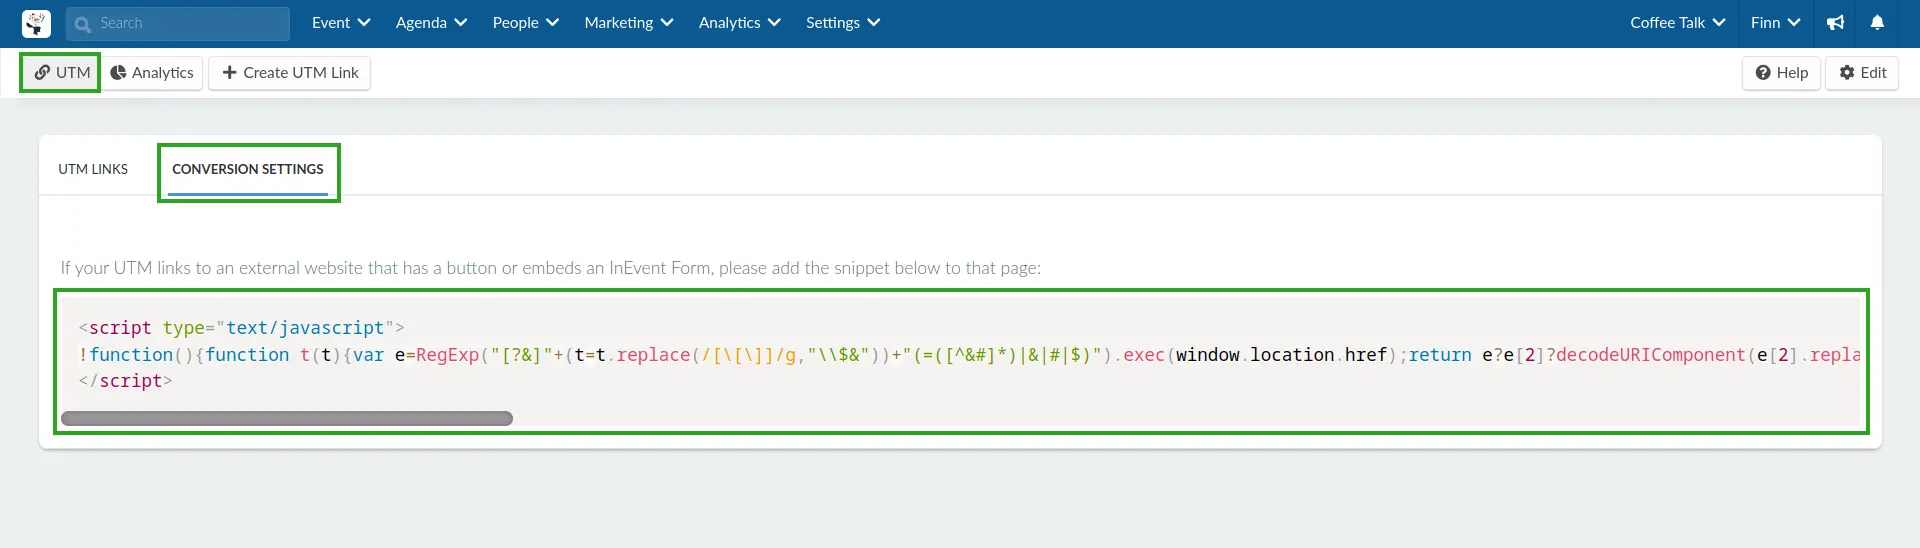
- Navigate to your website's code editor.
- Paste the code snippet into the
<body>element of your website's code.

- Save your changes in the code editor.
Once the code snippet above is added to your website, the UTM link that leads to your external website will track conversions.
Adding converted leads to a list
You can have people who access the registration form through the UTM link that you have created automatically added to a list once they register.
In order to add converted leads to a specific list, you should follow the steps mentioned in this section when creating the UTM link.
Then, select the custom list you'd like the lead to be sent to. In the example below, whoever registers in my event using the link I created, will be sent to the VIP #1 list.
If you wish to download the converted leads list as an Excel spreadsheet click here.
Analytics
To track the performance of your links, click on Analytics on the top left.
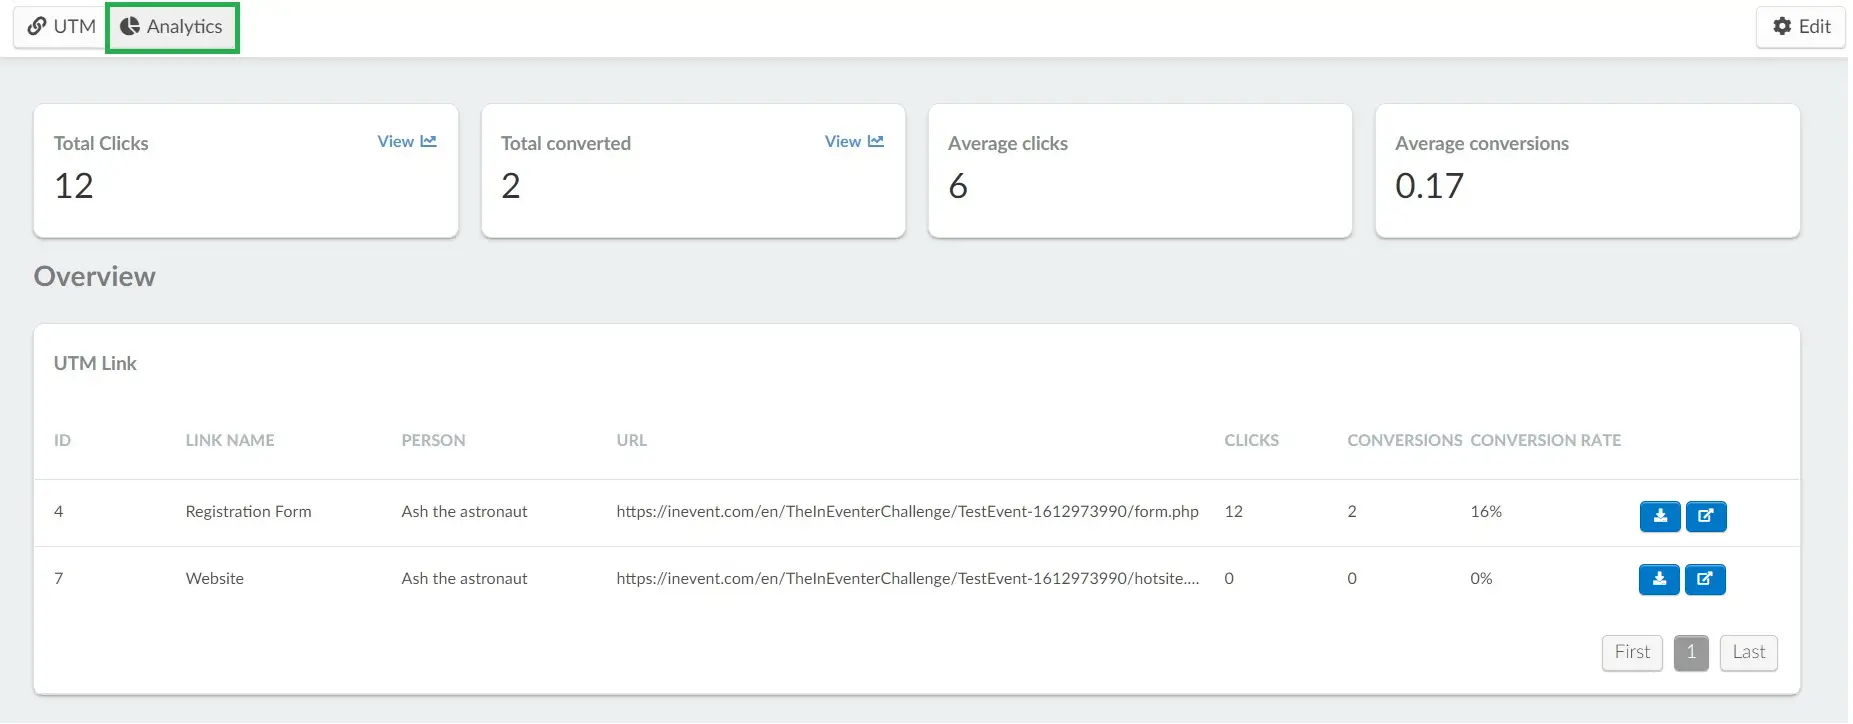
Overview
The main page contains an overview of the analytics. Here you will find your UTM links listed.
The information included in the table is:
- Total Clicks: counts the total amount of times people have clicked on the links.
- Total Converted: counts the total amount of times the people who accessed the links completed the desired action. For example, if you add a registration form link, it will count how many people completed their registration.
- Average Clicks: shows the ratio of link clicks. While Total clicks measure the rate of clicks on all links, average clicks will calculate its average.
- Average Conversion: shows the ratio of conversions. While Total converted measures the conversion of all links, the average conversion will calculate its average.
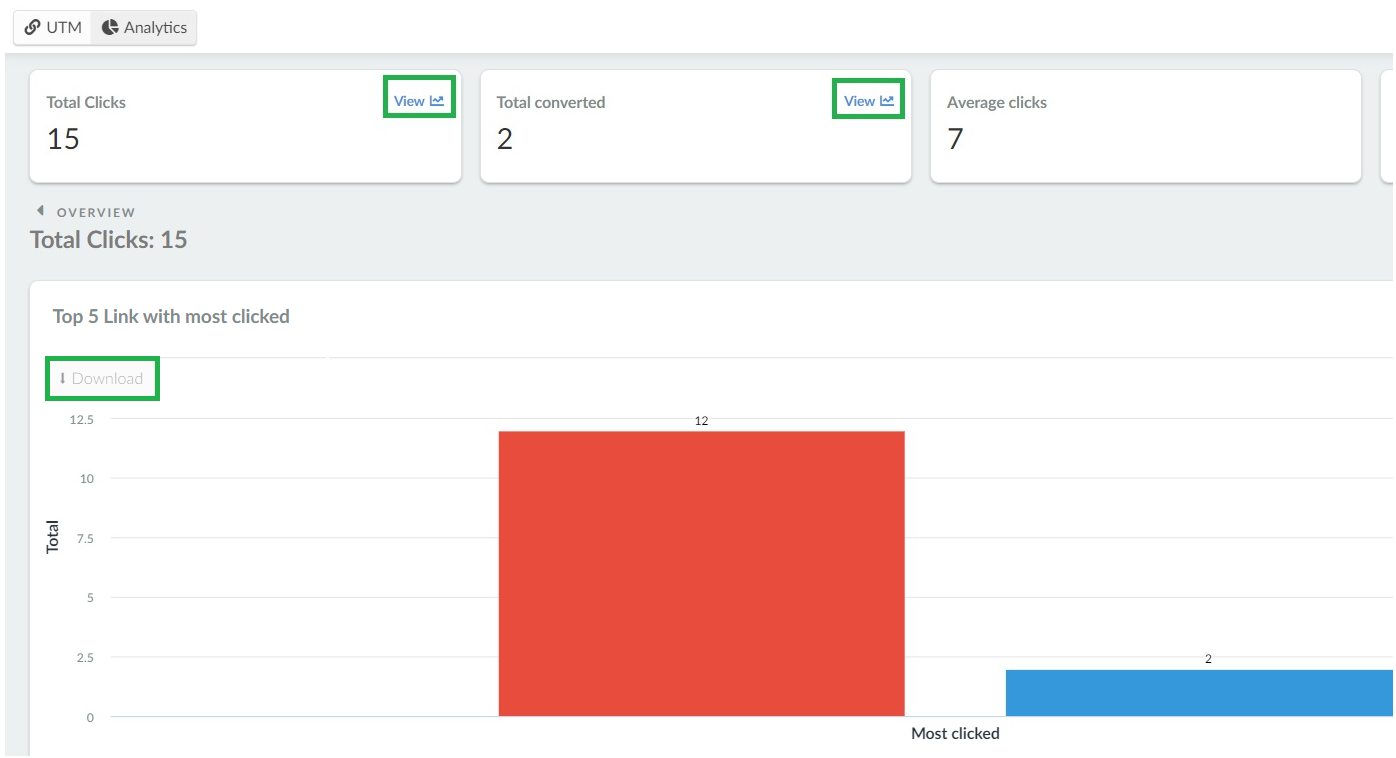
Total Clicks and Total Converted
If you click on the View button close to Total clicks and Total converted, you will be able to visualize the tracked data through bar charts and also download them.
Analytics per link
You can also click the Blue Button on the right of each UTM link to break down data by each link.
Downloading converted leads
On the Analytics page, you can also download a spreadsheet with the converted leads for a single UTM link and all UTM links.
Single UTM link
To download a spreadsheet report for a single UTM link from the Analytics page, click on the Download icon for the UTM link. A blue notification banner will be displayed at the top of the page. Once the spreadsheet is processed, it will be sent to your e-mail.
The spreadsheet will contain the following information:

linkID: UTM link identification number.linkName: UTM link identification name set by the user.linkCreator: Name of the UTM link creator.linkList: List to which a converted person will be added.linkUrl: Link to be tracked.utmClickID: UTM click identification number.personID: Converted person identification number.name: Converted person name.email: Converted person email.dateConversion: Conversion date and time.
All UTM links
To download a spreadsheet report for all UTM links from the Analytics page, click on Edit > Report. A blue notification banner will be displayed at the top of the page. Once the spreadsheet is processed, it will be sent to your e-mail.
The spreadsheet will contain the following information:
linkID: UTM link identification number.linkName: UTM link identification name set by the user.linkCreator: Name of the UTM link creator.linkList: List to which a converted person will be added.linkUrl: Link to be tracked.utmClickID: UTM click identification number.personID: Converted person identification number.name: Converted person name.email: Converted person email.dateConversion: Conversion date and time.
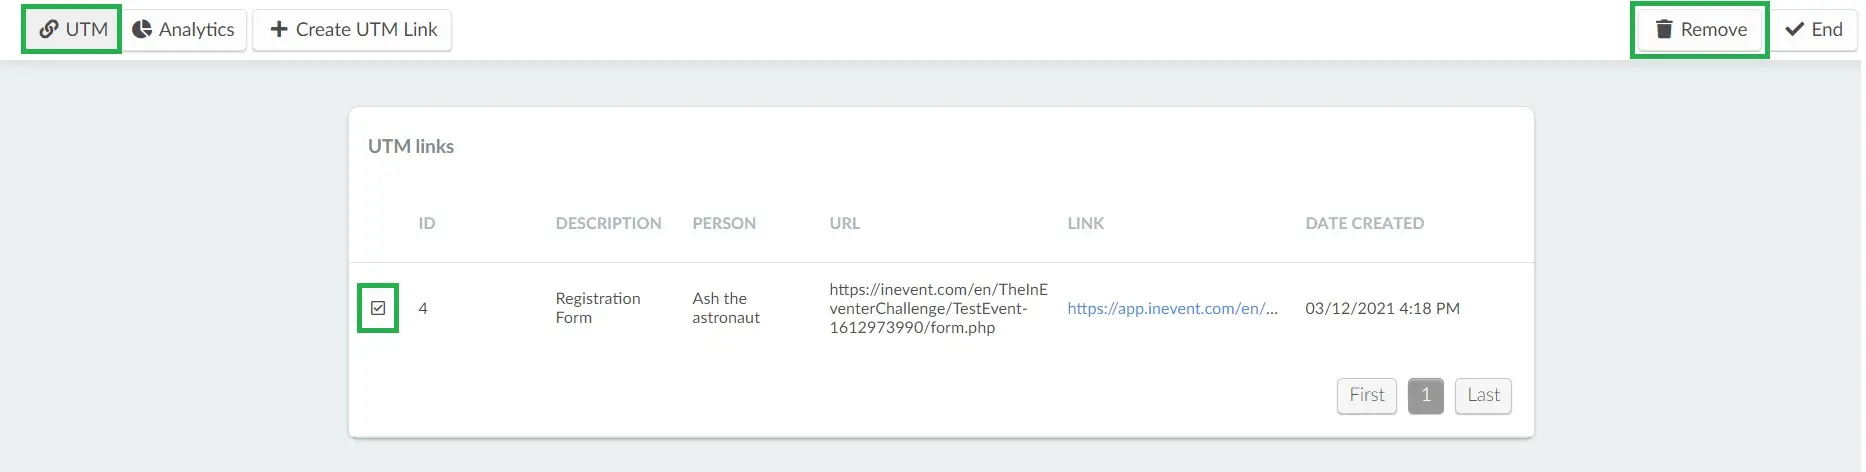
How do I remove a UTM link?
To remove a UTM link, press the UTM button in the top left > press Edit > check the checkbox in the left of the UTM link you would like to remove > press Remove in the top right.