InEvent Setup Guide: Quick start guide to create your event
 Updated 1 year ago
by
Chioma Okenwa
Updated 1 year ago
by
Chioma Okenwa
- Creating an event
- Configuring additional settings when creating your event
- Before you start adding content - Set event tools
- Event details
- Registration
- Creating tickets
- Link Tracking
- Adding people to your event
- Sponsors & Exhibitors
- Speakers
- Content
- Activities
- Interactions
- Event website
- Communicating about your event via email marketing
- Web app
- Virtual Lobby
- Customization
- Analytics
- Support
- Contacting your Project Manager to cover additional areas
- Dry run
Welcome to InEvent! To have the best experience possible, it’s important to set up your event correctly from the start. This quick guide will help you create and launch your first event in just a few minutes, so you can get up and running quickly and see your event live in no time.
Creating an event
The first step is to create your event. To do this:
- At the company level, select Events from the left sidebar menu, then click + New Event.
- Enter a name for your event. You can also select a template. Learn more about templates in our Templates article.
- When ready, click Create.
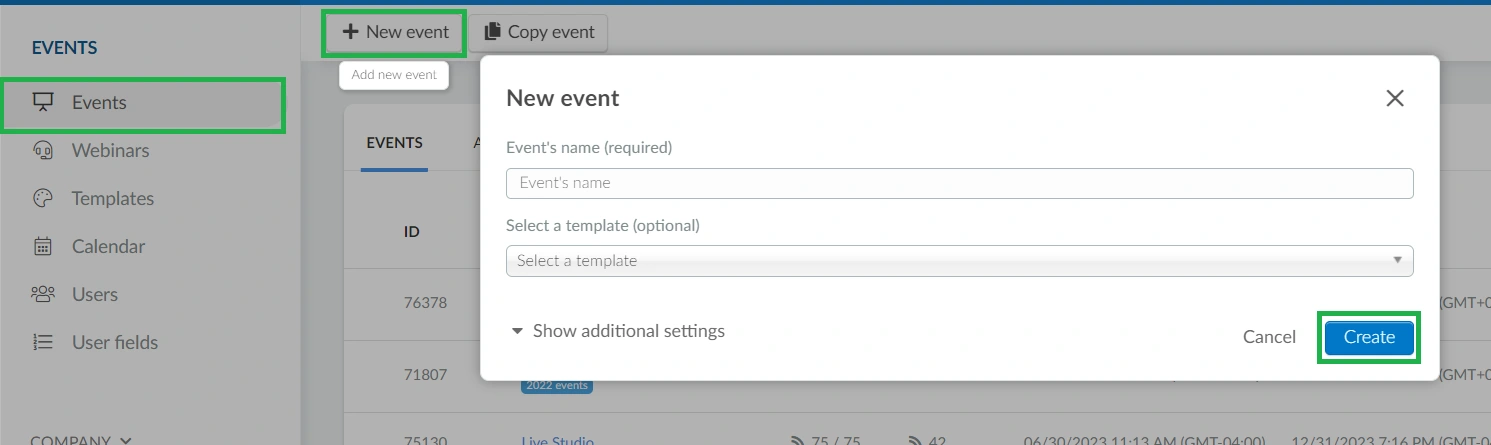
Configuring additional settings when creating your event
When creating an event, you can choose to configure more options right away by selecting Show Additional Settings in the dialog box. This lets you set up important details such as:
- Basic Information: Set your event name, choose a template, specify location and address, and set start and end dates to schedule your event correctly.
- Privacy Details: Decide if your event is public or private, enable or disable searchability, and select the event mode (Virtual, Hybrid, or In-Person). You can also define the event type as Invite Only, Free, or Paid.
- Event Cover: Upload a cover image to visually represent your event.
- Website Templates: Pick a template to create a branded event page.
Before you start adding content - Set event tools
Before adding content to your event, check and adjust the Tools available in your event: Go to Settings > Tools.
Here, you'll find pre-defined tools based on your plan, which you can enable or disable. Some features are available regardless of plan, especially under the Control, Block, and Extra sections. For details, see our [Set Event Tools article].
Once you’ve completed these steps, you’re ready to start setting up your event!
Event details
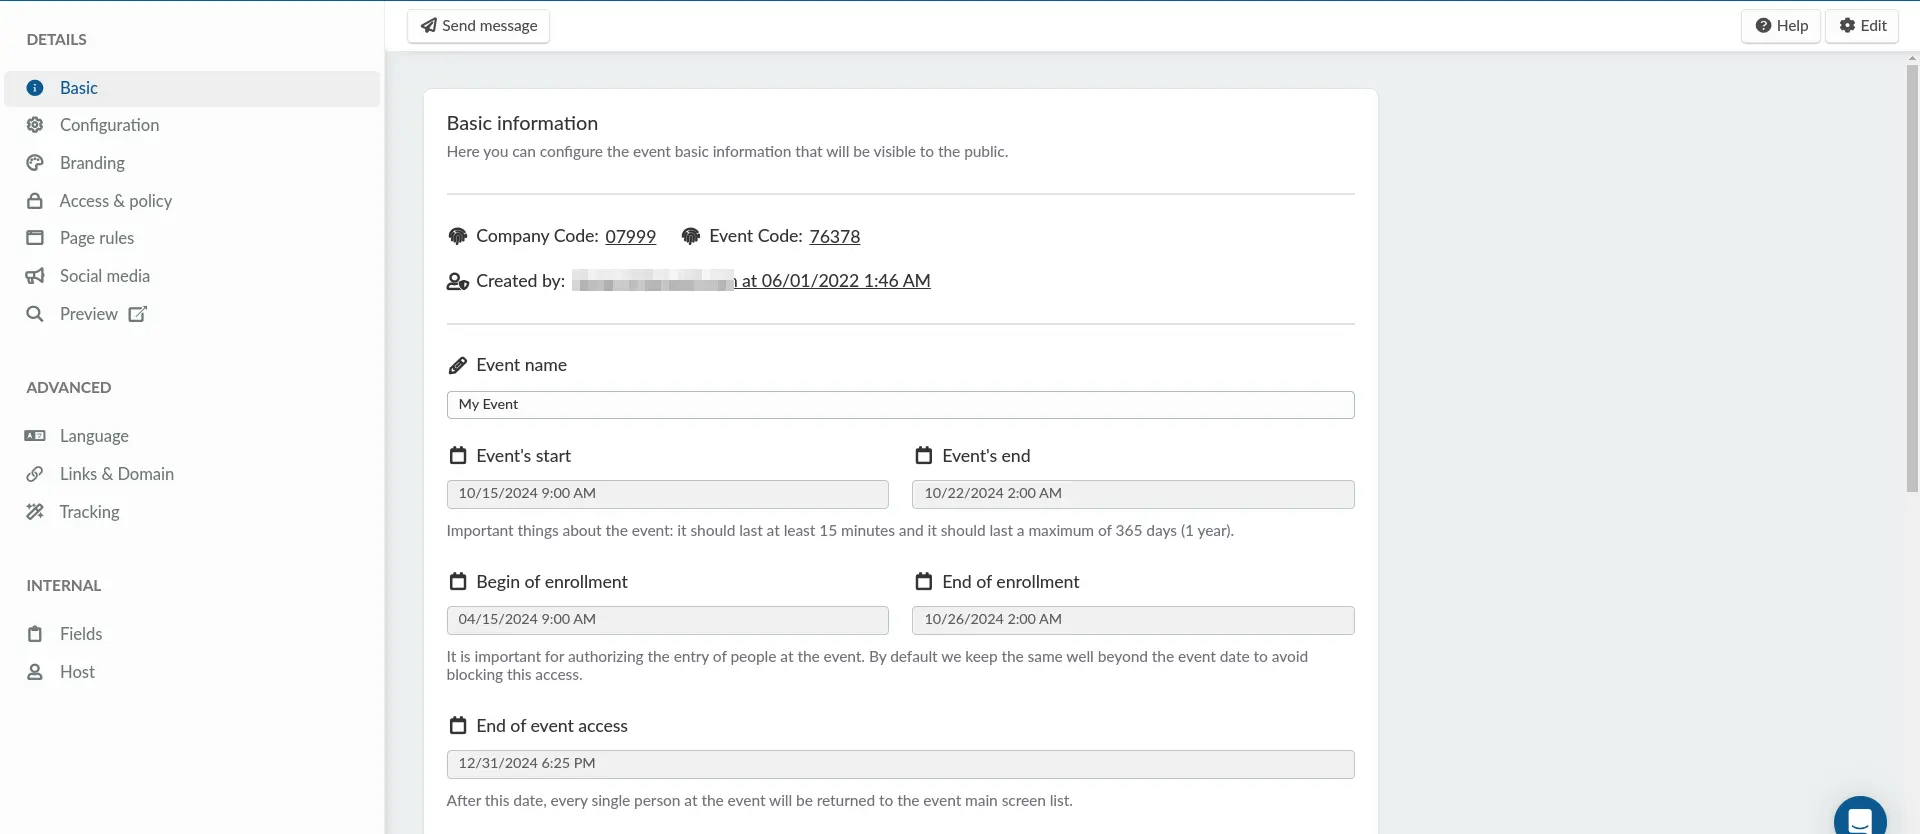
On the Event > Details page, you'll be able to configure the basic information on your events, such as:
- Add an event cover photo. (This image will also appear on your forms by default, but you can choose a different photo specifically for your forms if you prefer)
- Set your event's address
- Set your event mode
- Enter a general description
- Set your event's Time zone
- Set a Reply-to email address, etc.
Events must have a minimum duration of 15 minutes and cannot exceed 365 days.
For full information on your event details settings, please see the Event Details article.
Registration
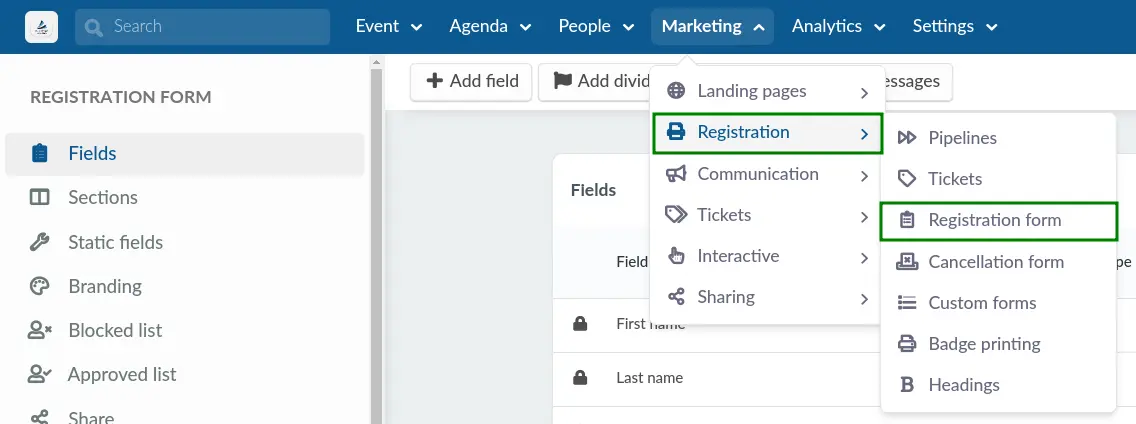
It's important to build your Registration form, as this is what people will use to register for your event.
To access it, go to Marketing > Registration > Registration Form. Here, you can:
- Add or remove custom fields
- Personalize the form’s design and content
- Share the form link with attendees
- View and manage registration submissions, etc.
For a step-by-step guide on configuring your Registration form, refer to the Registration form article.
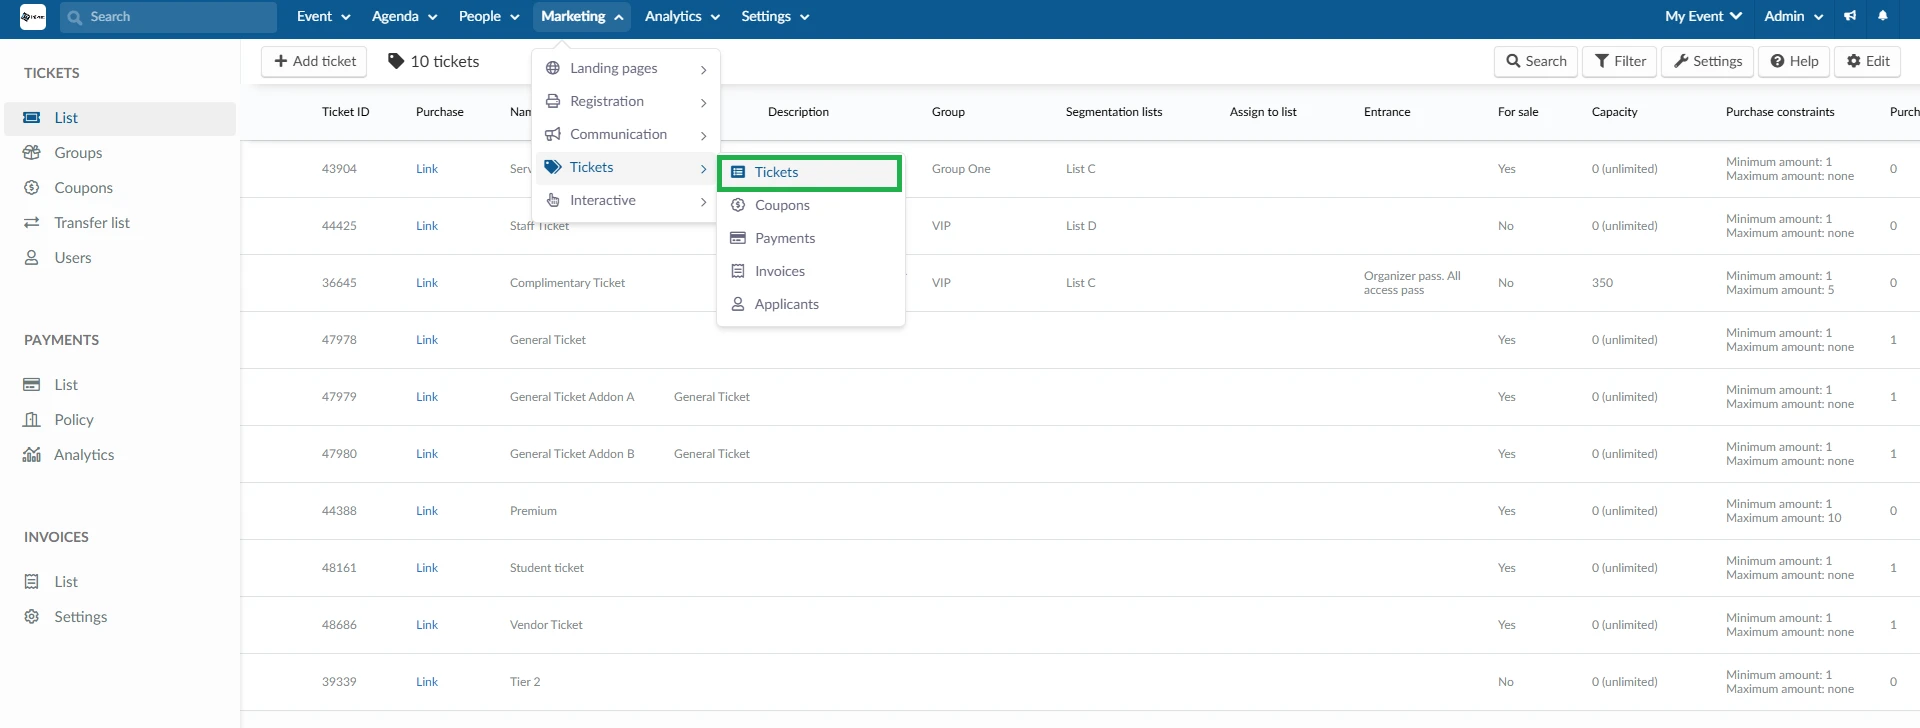
Creating tickets
If you’d like to sell tickets for your event, you can set them up on the Marketing > Tickets page.
To create tickets:
- Go to Marketing > Tickets > Tickets and click Add Ticket in the top left corner.
- Enter the ticket name.
- Set a ticket price, or leave it as $0.00 to offer it for free.
- To edit ticket details, click the ticket to open a panel on the right side, then click Edit in the top right corner.
To have your tickets embedded on the Registration form, make sure to enable the tools Ticket and Ticket requirements under Settings > Tools.
For a detailed walkthrough and additional ticket options, see our [Ticket Management article].
Link Tracking
With the Link Tracking tool, you can easily create UTM links to track where your event traffic is coming from, for example, LinkedIn, emails, or your website.
By setting up UTM links, you can:
- Generate unique tracked URLs for different sources or campaigns
- Assign a link owner (e.g., salesperson or admin) to keep track internally
- Automatically add people who register via that link to a specific list for follow‑up
- See analytics showing the number of clicks and conversions per tracked link
To get started, go to Marketing > Communication > Link Tracking. For full details and setup instructions, see our Link Tracking article.
Adding people to your event
Once your Registration Form is set up, anyone who registers through the form will automatically be added to your event on the platform.
In addition to this, event organizers can also manually add people to the attendee list. This means people can be added in two main ways:
- Self‑registration: Participants enroll themselves through the Registration Form.
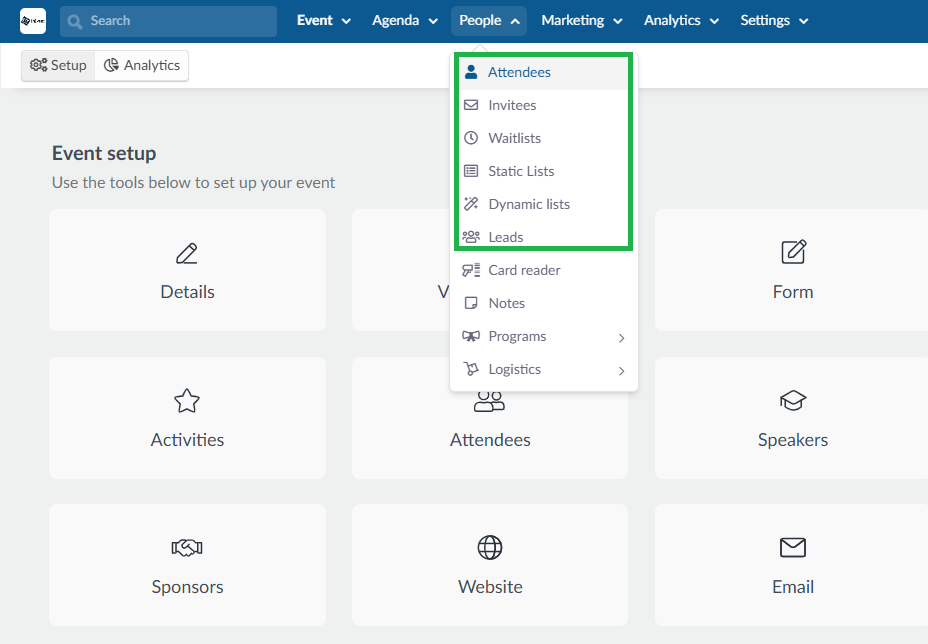
- Manual addition: Event hosts add people directly in the platform from the People > Attendees page.
Depending on your event settings, participants can appear in different categories:
- Attendees: All registered participants in your event will appear on the People > Attendees page. See the Attendees article for more details.
- Invitees: If hosting a private event and using the Invites feature, you can add invitees to the Invitees list. Learn more in the Invitees article.
- Leads: Track potential participants or prospects added as leads. See the Leads article for more information.
- Waitlist: Manage overflow when your event reaches full capacity. Refer to the Waitlist article for more information.
- Static lists: Segment users for targeted communication or special actions. See the Static list article for more information.
- Approval: Control who gains admission into your event. Learn more in the Approval article.
Sponsors & Exhibitors
You can add the sponsor and exhibitor companies supporting or showcasing at your event.
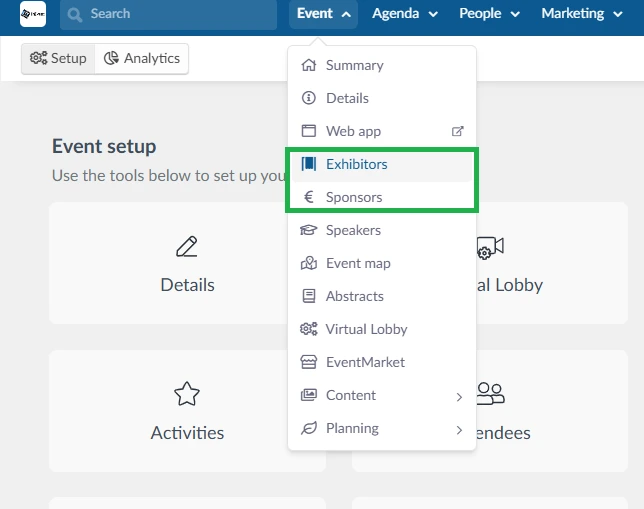
On the Sponsors and Exhibitors pages you can:
- Configure the sponsor/exhibitor company details, such as cover image, contact details, website information, etc.
- Assign a virtual room (for online or hybrid events)
- Create ads to promote exhibitors during your event.
See our Sponsors article for step-by-step instructions.
See our Exhibitors article for step‑by‑step instructions on setting up Exhibitors.
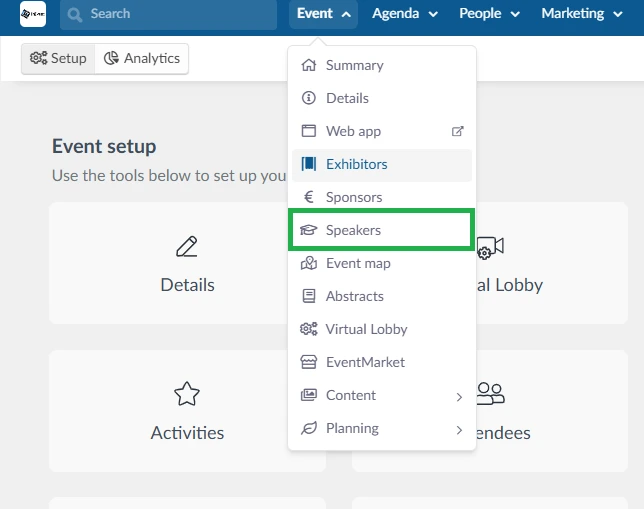
Speakers
Add the people who will speak at your event. Go to Event > Speakers to do the following:
- Create speaker profiles with name, photo, role, short bio, and optional links.
- Link speakers to agenda activities so they appear in your program.
Check the Speakers article to fully learn more about what's needed to add speakers to your event.
Content
This section helps you organize and manage what will be shown during your event. Event > Content is divided into four subareas (you can describe them here if you’d like — for example: files, presentations, media, and additional resources).
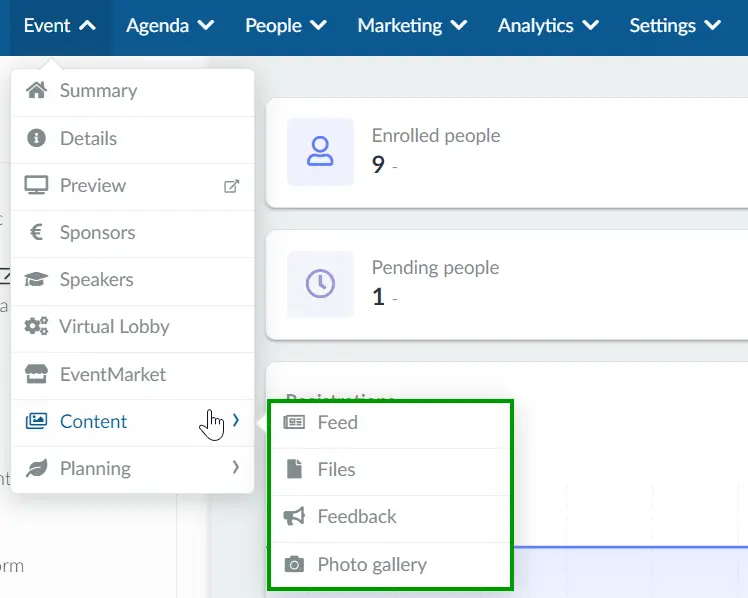
Please click on each heading to navigate to the relevant FAQ:
- Feed - A way of interacting with attendees with posts or by linking your social media accounts.
- Files - Place where you can upload files relevant to your event.
- Photo Gallery - Area to post photos related to the event
- Feedback - Place to create a feedback form related to the event as a whole.
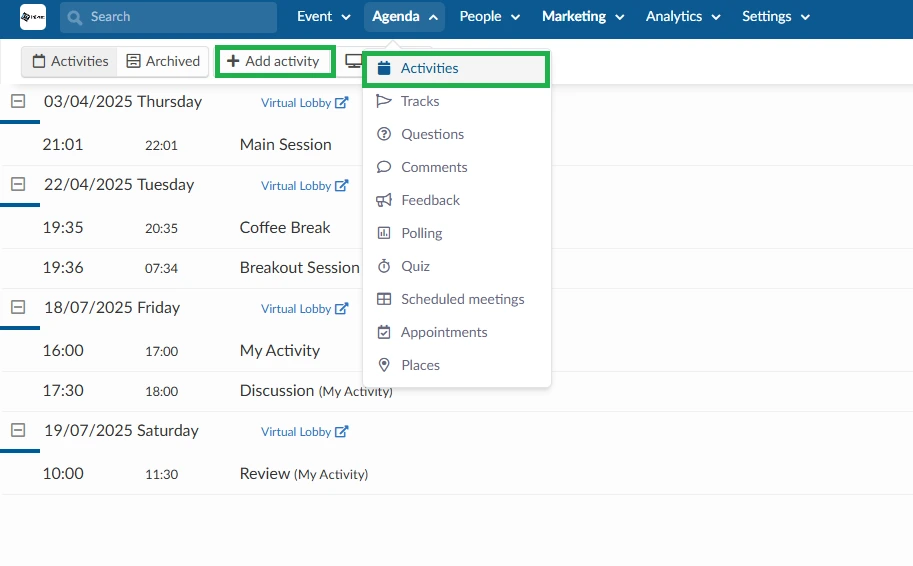
Activities
You can add sessions to your event, these can be either in-person or online. For online sessions, you can choose between live streaming, pre‑recorded content, or integrations with third‑party applications.
To add activities:
- Go to Agenda > Activities.
- Click + Add Activity to create a new session.
- After creating it, click Edit at the top right corner to modify details.
You can:
- Add a room cover image
- Edit the start and end times
- Add a description
- Configure the video mode for the room
- Set the capacity, etc.
For a full walkthrough, refer to our Agenda Management article.
Interactions
Now it's time to set up all features that include any type of interaction with your participants. That can be in the form of:
- Polling - Participants can answer polls in live sessions.
- Quiz: Participants can answer quizzes in live sessions
- Questions - People can send out questions in the Question tab in live sessions.
- Comments - Participants can send out comments with speakers and also interact with one another in the Chat tab in live sessions.
Gamification - A way of stimulating and engaging your participants in your event.
Event website
You can create a custom website for your event where attendees can view event details and register directly. There are two options available:
- Use the built-in Website feature with ready-made templates.
- Build your own website from scratch with the Landing Page website builder.

To get started, go to Marketing > Landing page > Website or Marketing > Landing pages > Landing page depending on which you are using and click Edit. Here, you can:
- Add sections with event information such as Speakers, Sponsors, Exhibitors, Event Map, Event Photos, Agenda, Embedded Registration Form, etc.
- Create custom sections to include any additional information you’d like.
- Switch between different templates to change the look and feel.
- Edit existing sections to update content or layout.
- Preview your website to see how it looks before publishing.
For a detailed guide on using the Website feature, see our Website article. If you prefer to build your website using the Landing Page feature, refer to the Landing Page article.
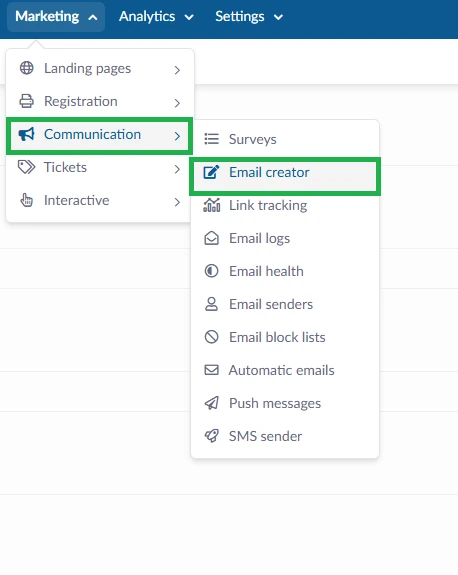
Communicating about your event via email marketing
You can use the platform’s Email Creator tool to keep participants informed about your event. This tool offers two main options:
- Automatic emails: Ready-made emails triggered by user actions — for example, the confirmation email sent automatically to registrants after they sign up.
- Custom emails: Emails you design yourself to share updates, reminders, or promotional content.
With the email feature, you can:
- Select specific user groups to target
- Create triggers and reminders
- Track email logs and view detailed statistics
- Customize design elements like text, banners, fonts, and colors
- Add media content, snippets, and more
To start using the Email feature:
- Navigate to Marketing > Communication > Email Creator.
- Click New email to create a custom email, or copy an existing one.
- To view or edit automatic emails, click on Automatic emails in your event.
Use the drag‑and‑drop editor to easily build your emails:
- Drag in sections like text blocks, images, buttons, and more.
- Edit text, change fonts, adjust colors, add banners, and insert media.
In addition to email, the platform offers other communication tools:
- Custom forms for gathering information
- Push messages for real-time updates
- SMS sender for text message notifications.
Web app
If you are hosting an In-person event, attendees can access the event through the Web. This app provides a virtual space where participants can view event information, interact with other attendees, and engage in scheduled activities.
To customize the attendee experience, go to Settings > Tabs > Web app to configure which tabs will be visible during the event. For more information, refer to our Web App article.
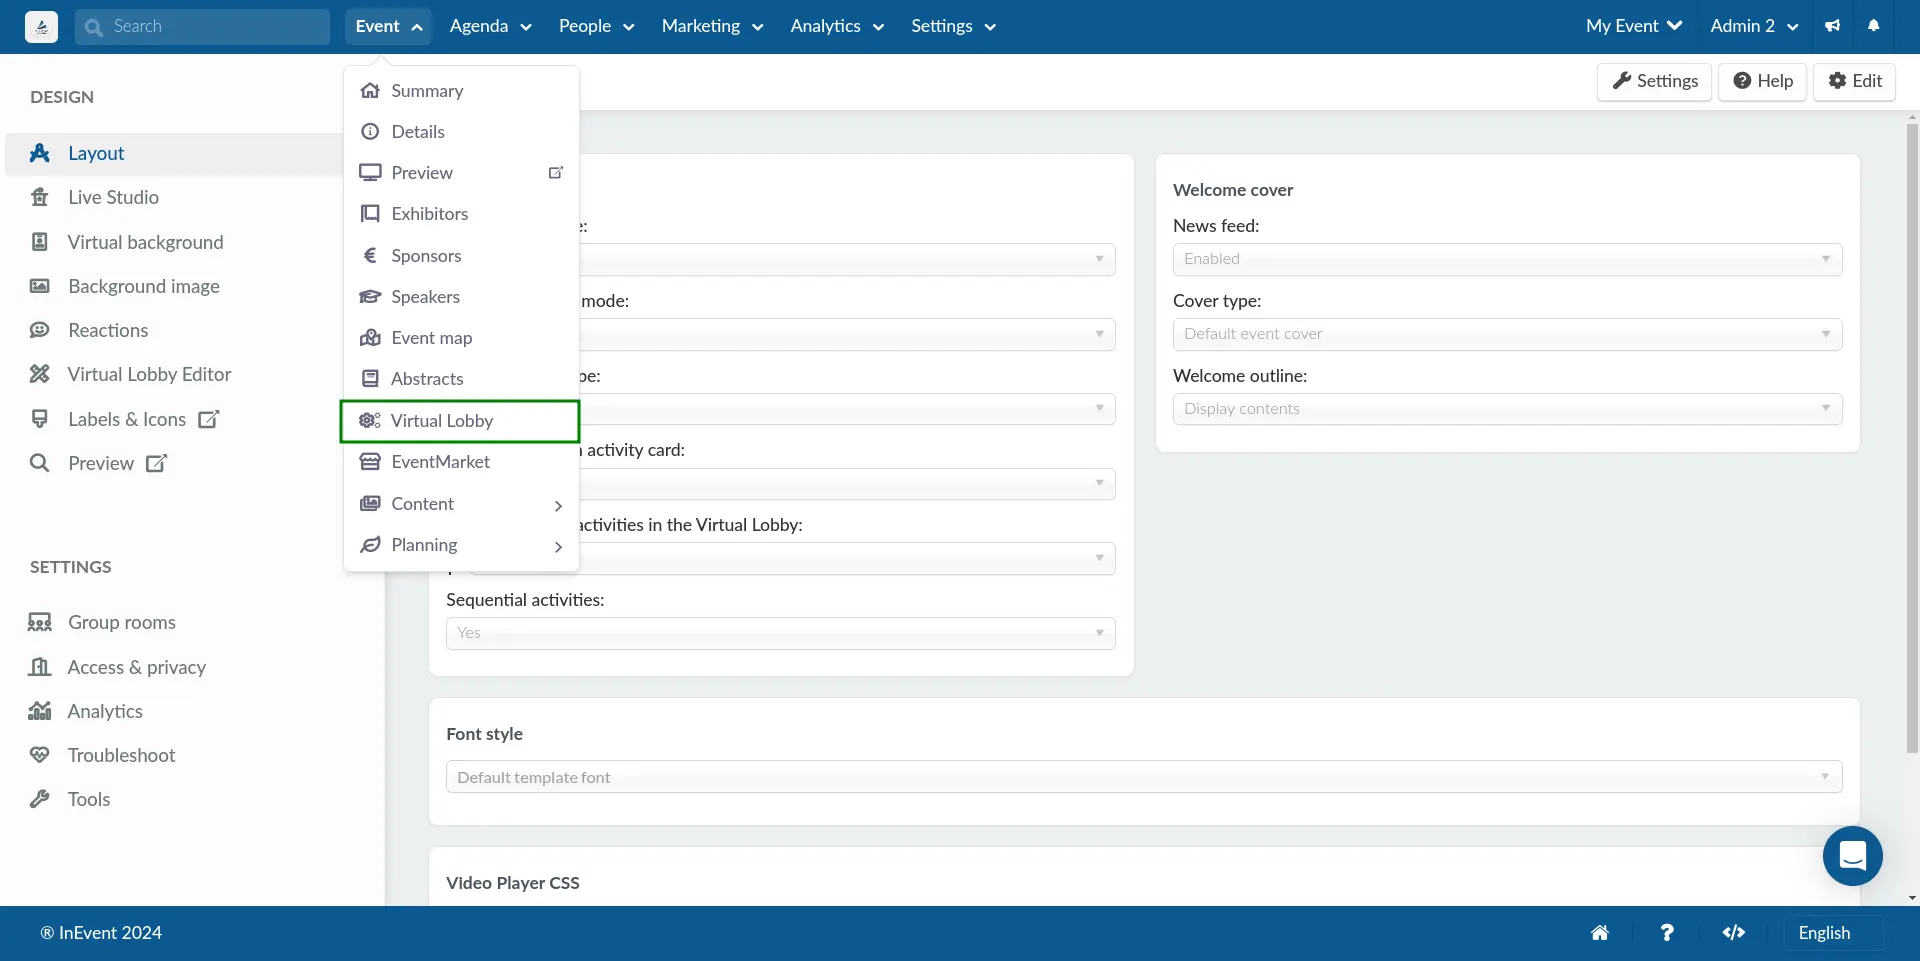
Virtual Lobby
If you are hosting a virtual or hybrid event, you should go to Event > Virtual Lobby to set up your preferences regarding room access, welcome card, networking, interactions among other options.
Refer to the Virtual Lobby article for more details in setting up your virtual event.
Customization
Once you’ve set up your event’s basic structure, you can start customizing it further. This includes using Tabs, Tags and Tracks, Headings, to tailor the event experience.
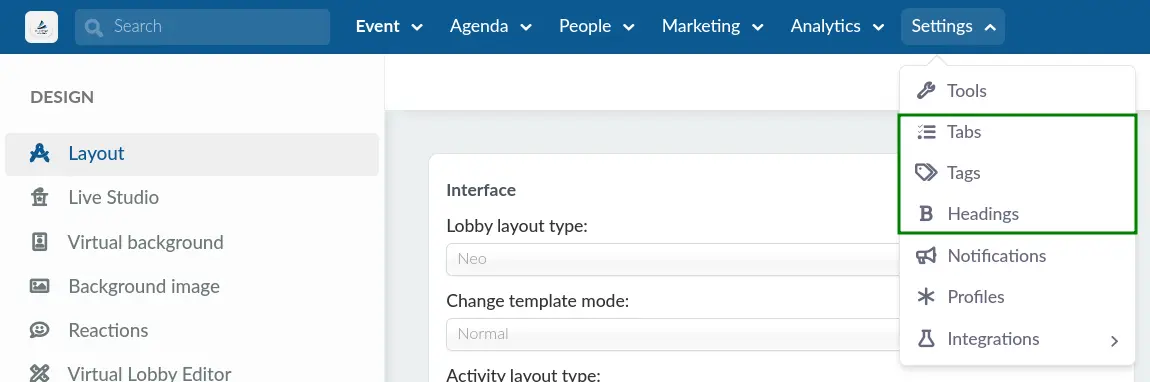
Please check each of the following bullet points to go to the respective FAQ:
- Tabs - Customize which tabs appear in your mobile app, web app and Virtual Lobby to match your event needs.
- Event Tags and Tracks - Organize your event content by adding tags and tracks, which can be applied to Speakers, Sponsors, Activities, and Attendees.
- Headings - Change default texts and messages that appear throughout your event to match your branding and tone.
Analytics
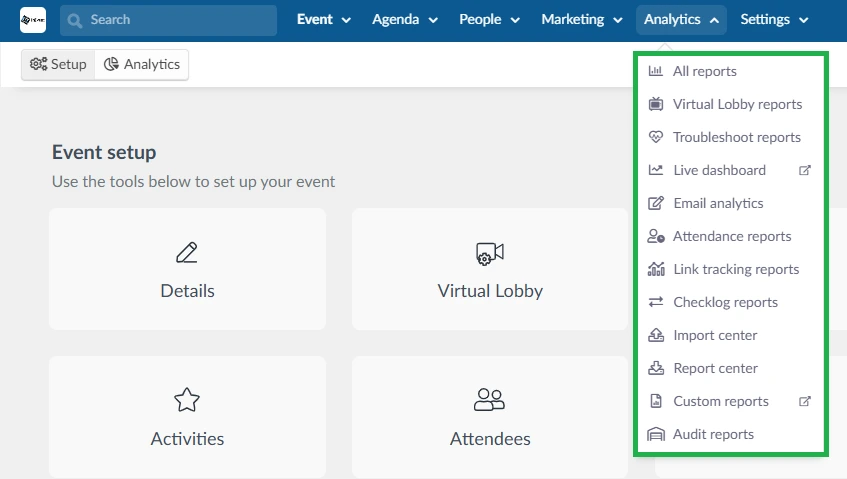
On the platform, you can access a range of analytical reports to help you track and evaluate your event’s performance. These include:
- Virtual Lobby reports
- Troubleshoot reports
- Live dashboard
- Email analytics
- Attendance reports
- Link tracking reports
- Checklog reports
- Import center
- Report center
- Custom reports
- Audit reports
For a detailed explanation of each report and how to use them, see our Analytics article.
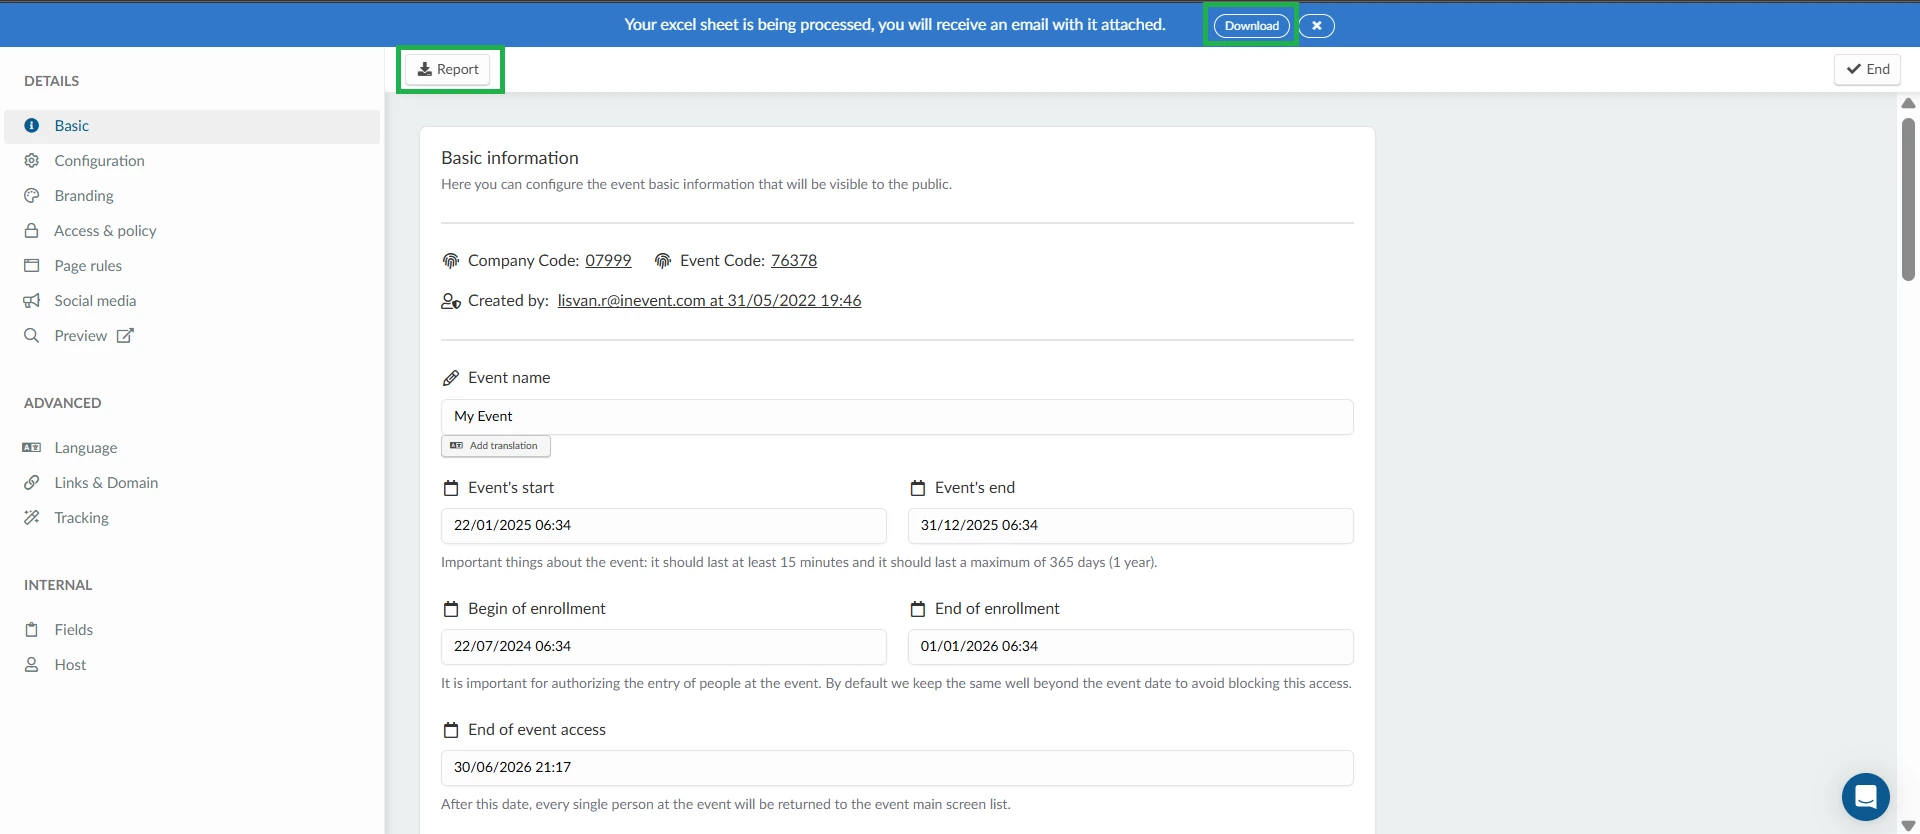
You can also extract an Excel report from most pages on the platform by clicking Export > Report.
For example, if you wish to download a full event report:
- Go to Event > Details.
- Click Edit.
- Then click Report.
The report will be sent to your email. Additionally, clicking Download in the blue notification banner will open the report in the All reports section under Analytics, where you can view and manage it.
Support
The InEvent FAQ is your best resource for how‑to guides, videos, and training, just type your keyword to find what you need! Visit the FAQ here.
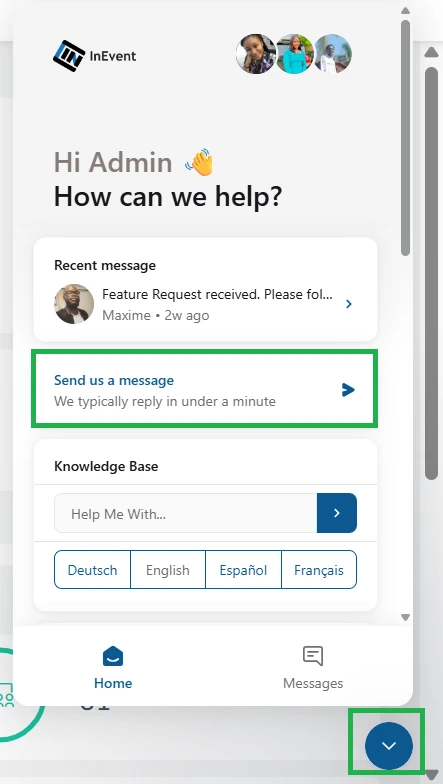
Additionally, you can always count on our 24/7 chat support team. Simply click the chat icon at the bottom corner of the platform and send your message. We typically respond within a minute.
Contacting your Project Manager to cover additional areas
If you prefer to have a video training guide on the platform, you can schedule a video call with your Project Manager and they will be able to put you through on any area you need clarity.
- Including virtual audiences
- Adding event photos, AI photo match
- Sponsors and Exhibitors
- Including engagement like polling, live questions, comments, quizzes
- Event maps and meeting locations
- Transportation Logistics
- Real-time communications like push notifications and text messages
- Creating additional forms for speakers and other groups
- Editing platform headings and tabs
- Analytics
Dry run
To avoid possible issues on the day of your event, it’s important for speakers, room hosts, and administrators to run through their permissions and presentations in advance as much as possible.
Also, test all equipment and internet connection speeds, and prepare backup plans where needed.
Tip If you run into minor issues, check that:
- You’re using a compatible browser - Google Chrome is advised.
- Your device meets the minimal technical requirements
- Your platform settings are configured correctly
For help, see our Troubleshooting guide.
And just like that, you’re ready! You’re all set to deliver an engaging, innovative online event experience.
After your event, don’t forget to check your Analytics to see how your event performed in terms of attendance, engagement, and more.