Events & Webinars Directory
 Updated 11 months ago
by
Bissen Ouesleti
Updated 11 months ago
by
Bissen Ouesleti
- How do I enable the directory for my event/webinar?
- How do I set up the directory?
- How can I create multiple directories?
- How do I access the website configuration?
The directory is a powerful tool for organizing and accessing information on all the events and webinars available to attendees. By gathering all the relevant data in one place, it makes it easy to navigate and find the information you need.
Additionally, the directory allows you to see page hits, highlight important events, and even customize the website domain to suit your needs. This makes it an essential tool for anyone looking to stay informed and engaged with the latest events and webinars. With the directory, you'll have everything you need to make the most of your experience, all in one convenient location. Overall it will help you to manage and stay updated with your events and webinars.
How do I enable the directory for my event/webinar?
To enable the directory, access the company tools by clicking Account > Tools, then towards the top right corner of the platform press the Edit button. Click on the Registration section and enable the toggle button beside the Directory tool. Press End to save your changes.
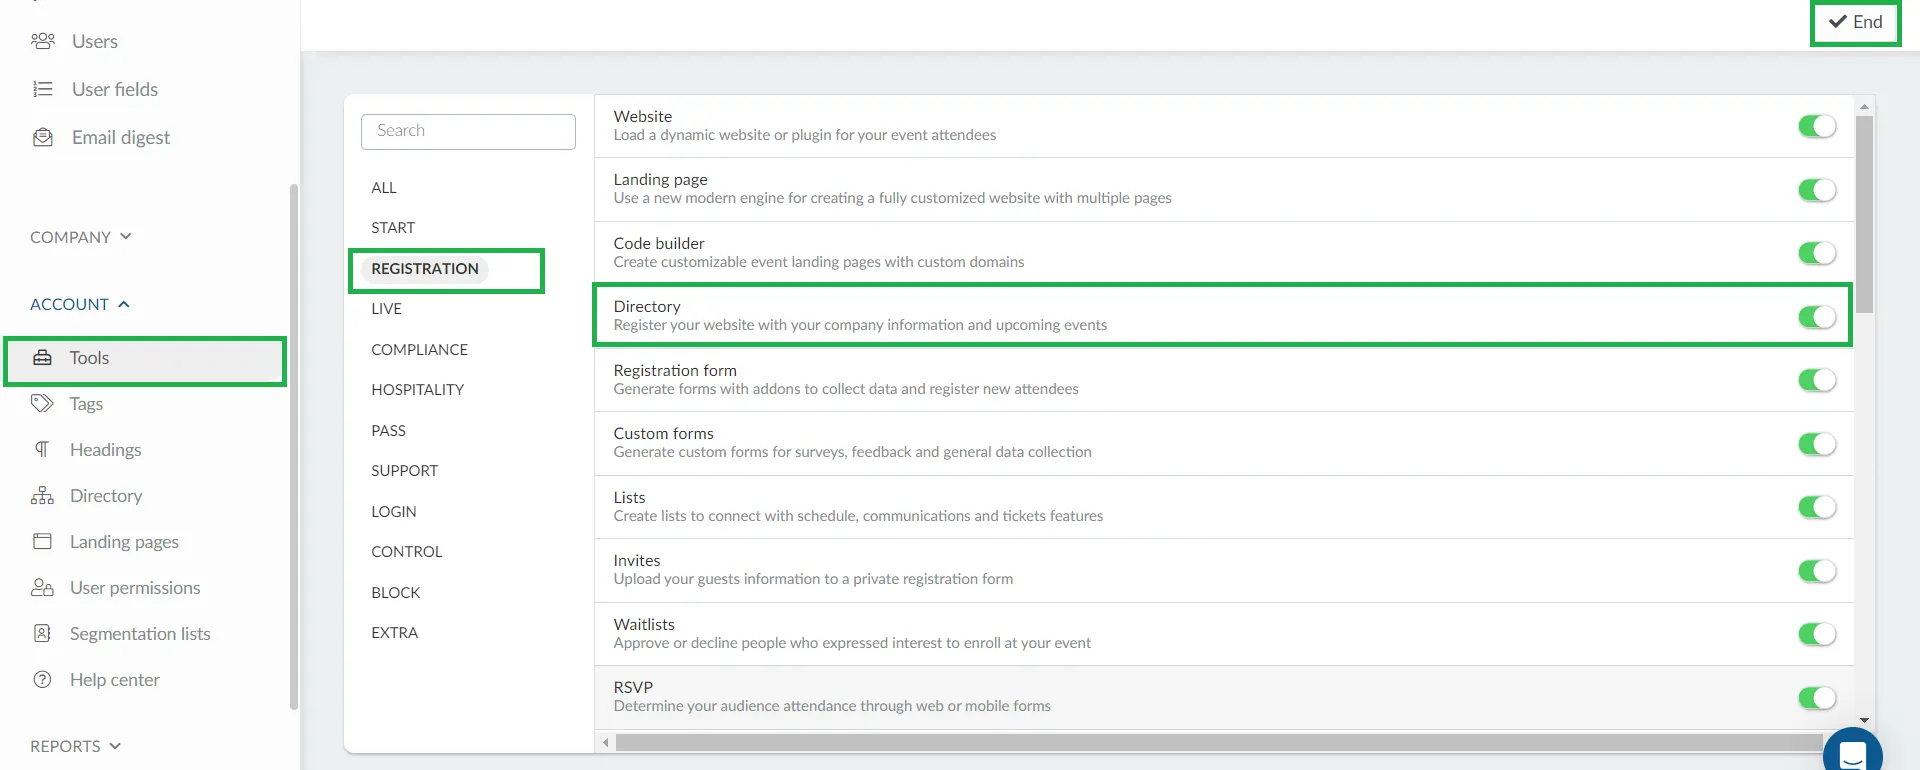
Click the End button in the top right corner to save the changes.
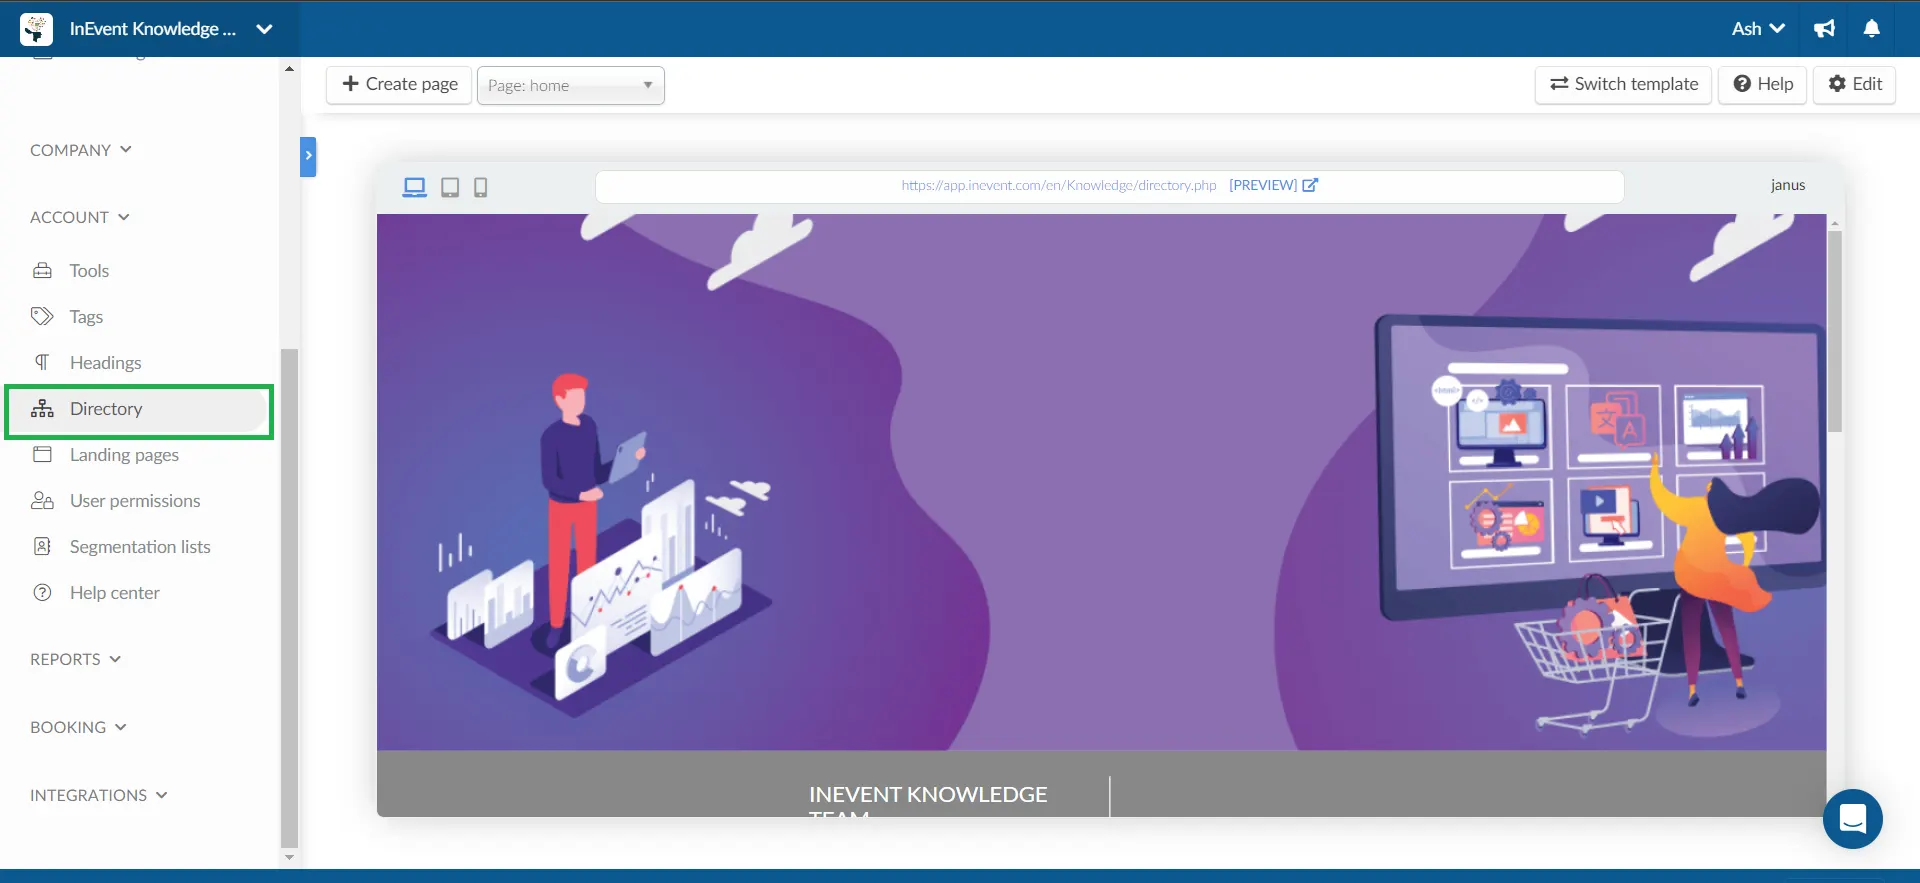
How do I set up the directory?
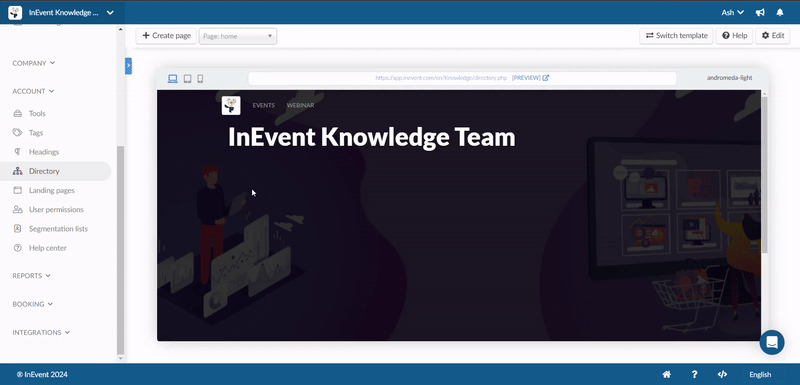
Once activated, a new tab named Directory will be available in the menu under the Account section. By clicking Directory you will be able to see all events from your company.
How can I create multiple directories?
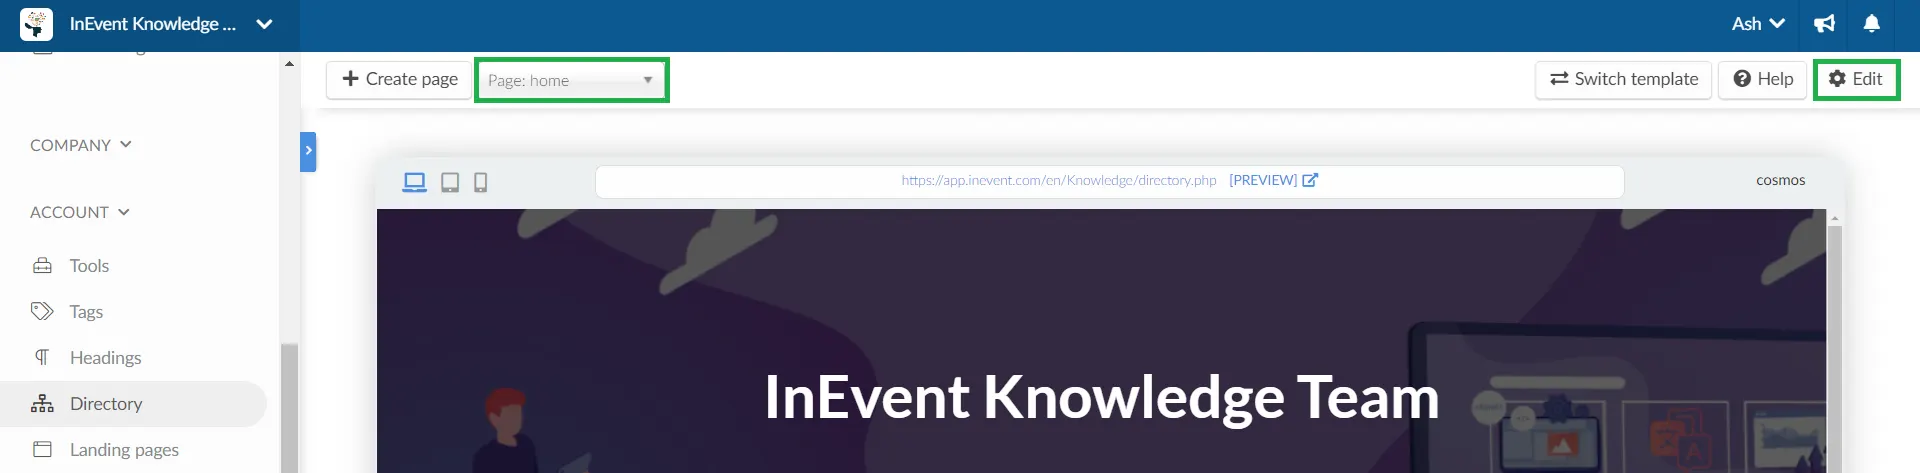
By default, the home page directory will be automatically created. To create more directories for your event, click on + Create page. Type the page name and click on Save.
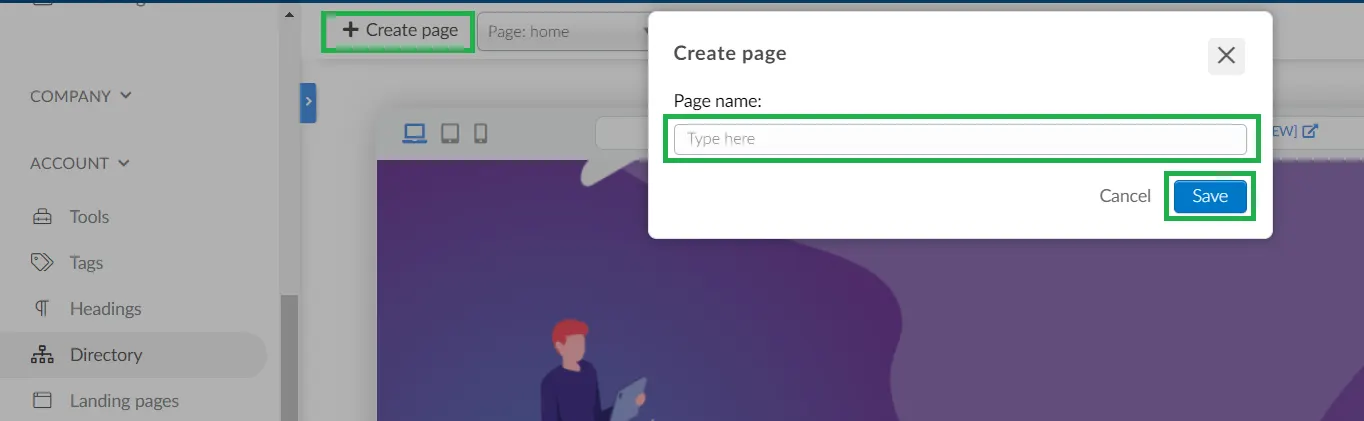
To switch from one directory page to another, click the dropdown bar next to the + Create page button and select the directory page where you want to make changes.

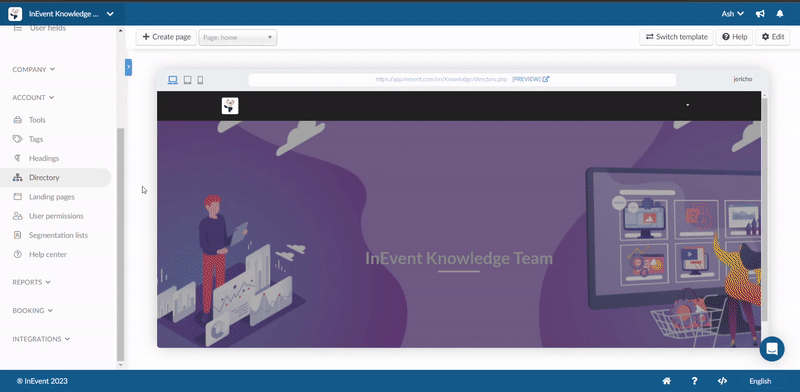
Now you can start adding sections and setting up your selected directory page.
How do I access the website configuration?
Click on the blue arrow (pull out) icon, on the left side by the scroll bar to open the Website configuration.

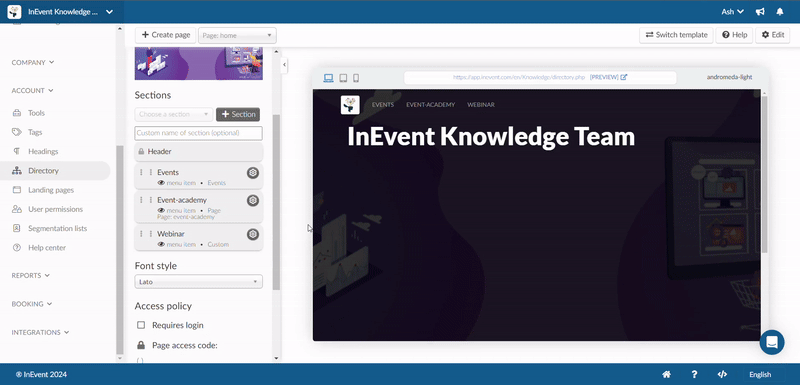
Adding sections
At the website configuration panel, you can add sections to your website in the form of widgets. To do this, follow the steps below:
- Press Edit.
- Under the Sections title, use the drop-down box to choose a widget.
- Press the blue + Section button.
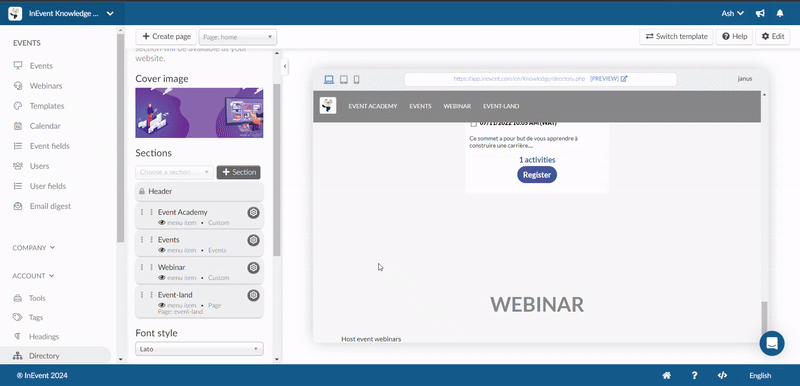
Events section
When you add the Events section to your directory, attendees will be able to do the following:
- Search for events by entering the event name or address in the search box:
- Filter events by selecting the checkboxes corresponding to the specific event modes you wish to view: Virtual/Online, Hybrid, or In-person. Additionally, you can refine your search by filtering events based on their dates using the options such as Next Events, Past Events, and Current Events.
- Select events using the Tag filter menu dropdown.
- View the events in List or Grid mode.
- See the ticket price of each event. If there are different ticket prices, it will display this from the smallest to highest range.
- See the number of activities in each event.
- Register for an event by clicking on the Register button.
Editing sections
- Changing the order in which the sections appear: You will need to drag the dotted icons next to the section's name.
- Hiding sections from the menu bar of the website: Click on Edit, then click on the settings icon next to the section's name and a pop-up window will open. Disable the Visible on menu bar option and press Save.
- Changing the section label: Click on Edit, then click on the settings icon next to the section's name and a pop-up window will open. Type the new name under the Section label and press Save.
- Deleting sections: Click on Edit, then click on the settings icon next to the section's name, and a pop-up window will open. Press Remove.
- Add content: Click on the custom section created and add content using the text box.
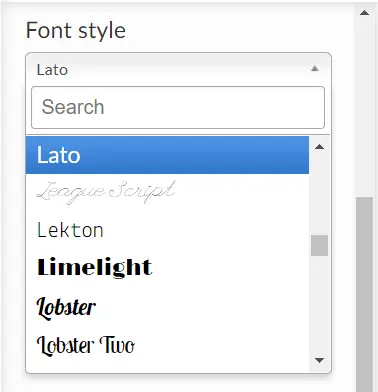
Font style
Also, on the Website Configuration tab, you can customize your website font style. To do so, under the Font Style section, click on the drop-down bar and choose the font that better fits your website.
Access policy
The directory Access policy provides two options that allow you to lock the homepage or other created pages of your directory from public view. The two options are as follows:
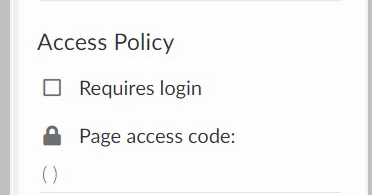
- Requires login
- Page access code
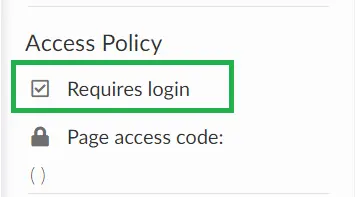
Requires login
If this option is enabled, people accessing your directory page must have previously registered for the event. They will be required to log in before they can access the event directory.
To enable this option, click on Edit at the top right corner of the page and tick the Requires login box on the left panel.
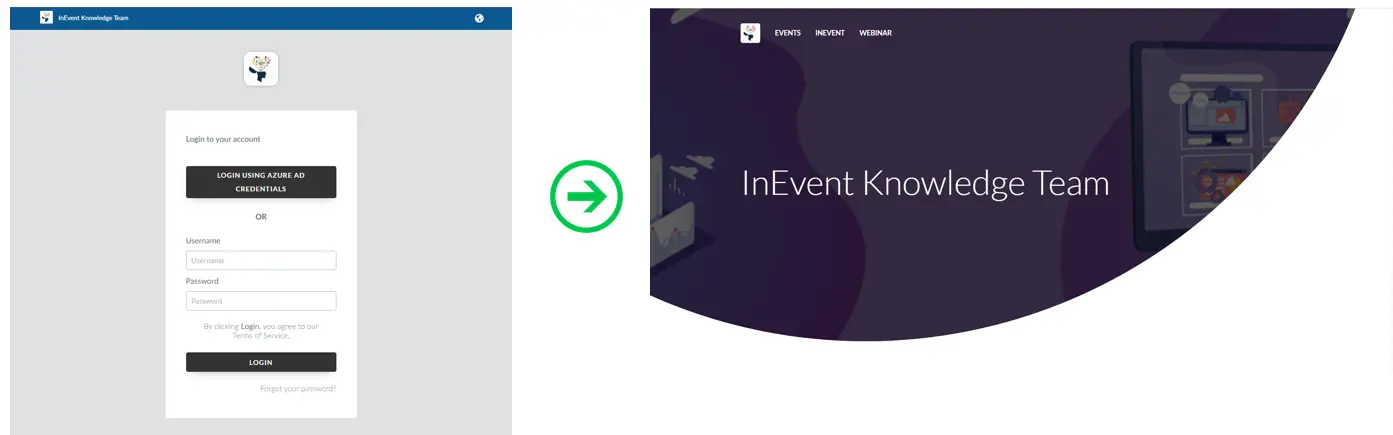
Once this option is enabled, people who try to access your directory will be directed to a login page. Once they enter their credentials (username and password), they will be taken to the event directory:
Page access code
With this feature, event organizers can secure directory pages with a four-digit passcode of their own choice. They can provide this code to individuals whom they want to grant access to the directory.
To activate this feature, click the Edit button located in the top right corner of the page, then enter the code in the Page access code field.
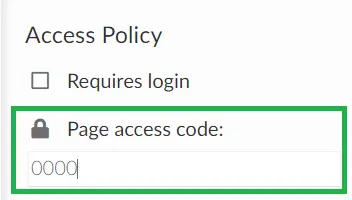
Once a code is inserted, the directory becomes automatically locked, and whoever tries to access the page will see the image below asking for a passcode to access the directory:
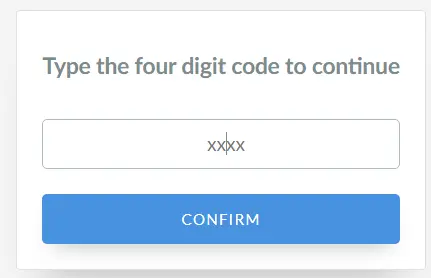
This can be used as a two-step verification process, ensuring that the restricted pages are only accessible to those who have the correct login credentials and access code.
Color
You can choose the color of your page by entering the hex code of the color you would like to have. You can ask Google what hex code represents each color. For example, blue is #0000FF.

Templates
Once inside the directory, you can change its template. Click on Switch template towards the top right corner of the screen to choose from the available templates.
How do I link directory pages to one another?
To link directory pages to one another, complete the following steps:
- Select a page from the dropdown bar next to the + Create page button.
- Press the Edit button at the top right of the page.
- Click on the drop-down bar under Sections.
- Choose the page you want to link from the Pages option in the drop-down.
- Press the blue + Section button.
- Press End to save changes.
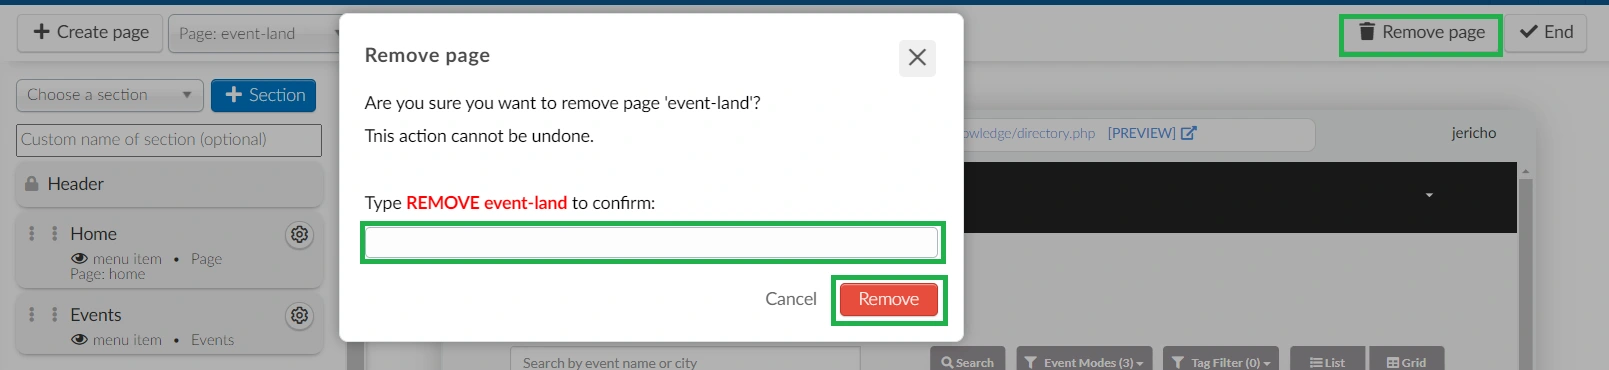
How do I delete directory pages?
To delete directory pages, complete the following steps:
- Select a page from the dropdown bar next to the + Create page button.
- Press the Edit button at the top right of the page.
- Click on the Remove page button.
- Type the red text in the pop-up window to confirm the removal of the web page.
- Press Remove.
- Press End to save changes.
Why are some of my events not displayed in the directory?
In order for events to be listed in the directory, they must be set to Public and Visible to everyone.