Integration with Paypal
 Updated 2 years ago
by
Amalia
Updated 2 years ago
by
Amalia
With PayPal integration, your attendees will be able to complete their ticket purchases using PayPal from the Registration form, Website, or My Account page.
This article will guide you on how to prepare and integrate your PayPal account with InEvent.
Setting up PayPal integration from the PayPal Developer Dashboard
To set up your PayPal account for integration with InEvent, complete the following steps, using the Sandbox mode as an example:
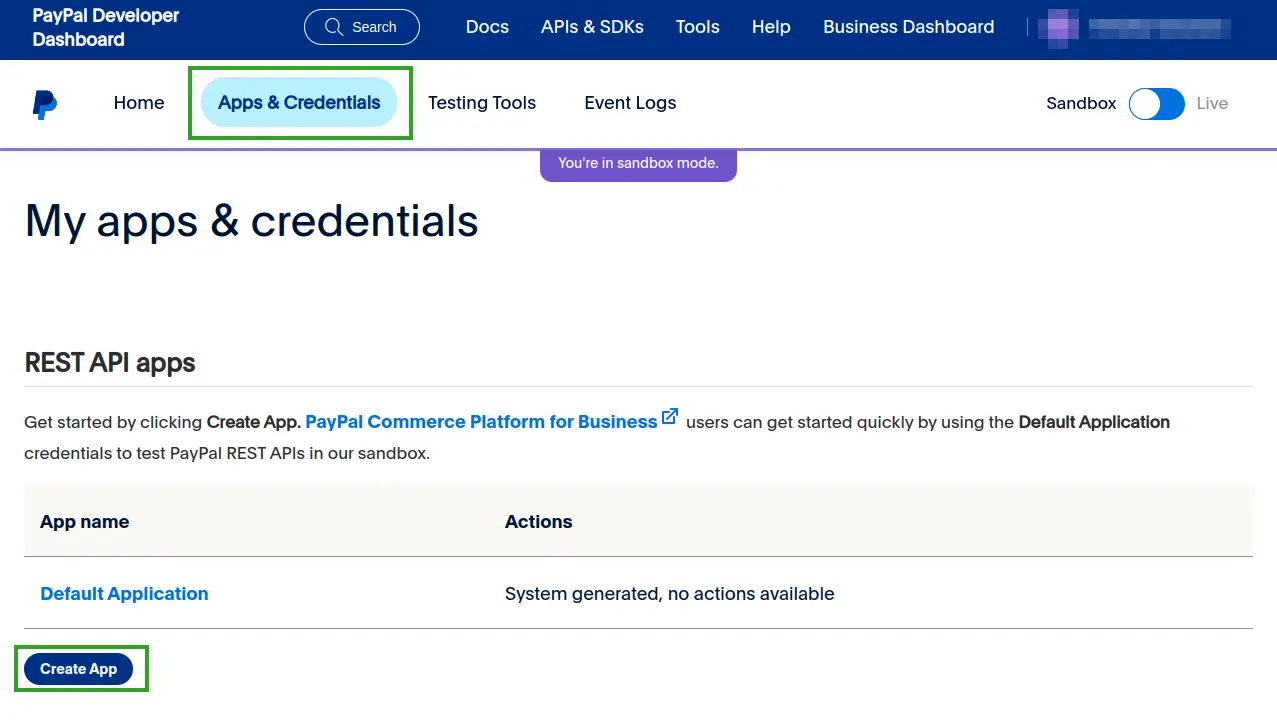
- Log into the PayPal Developer Dashboard.
- Navigate to Apps & Credentials.
- Click on Create App.
- Enter the details of your new app.
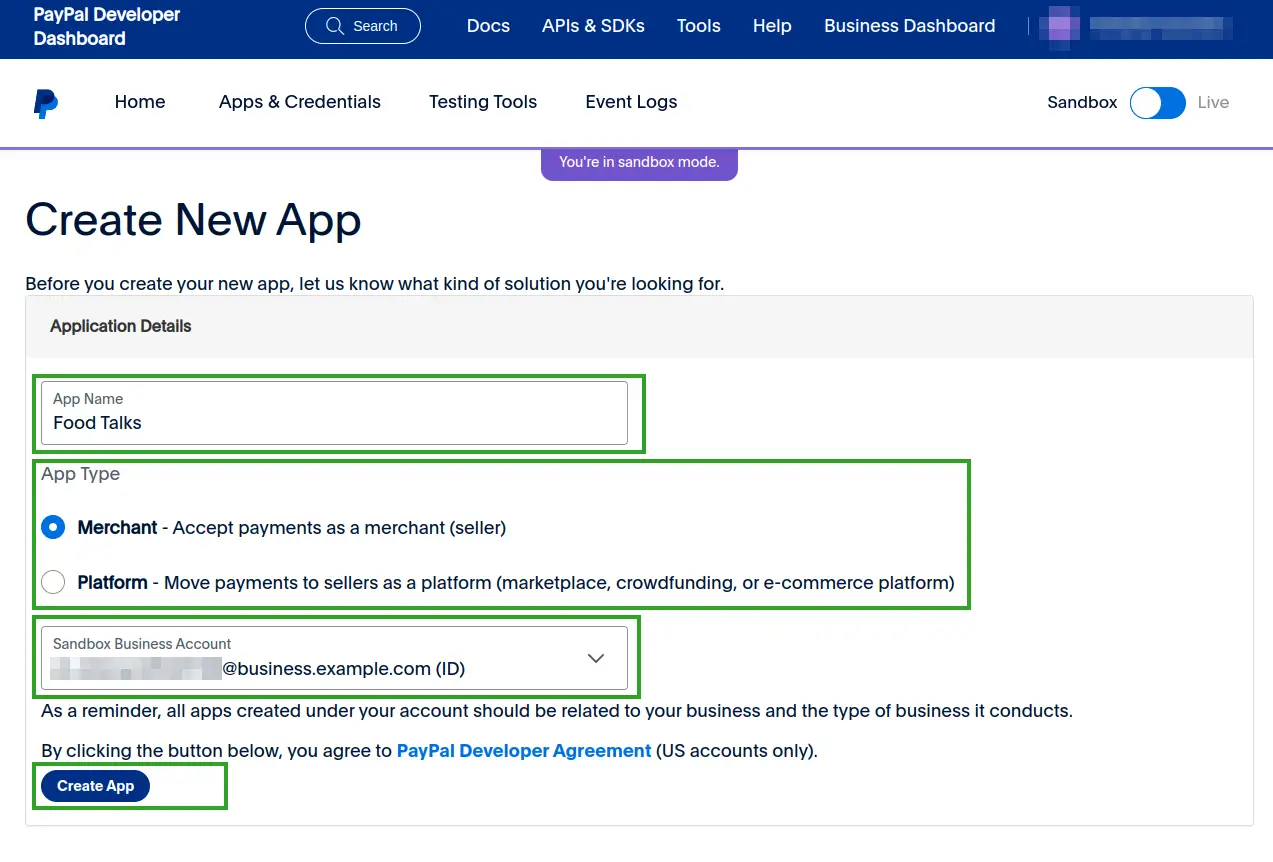
- App name: Identifier for your InEvent company or event name.
- App type: Type of your app. The available options are Merchant and Platform.
- Sandbox Business Account: PayPal Sandbox Business Account with which your InEvent company or event will be associated.
- Press Create App. You will be redirected to an overview page of your newly created app.
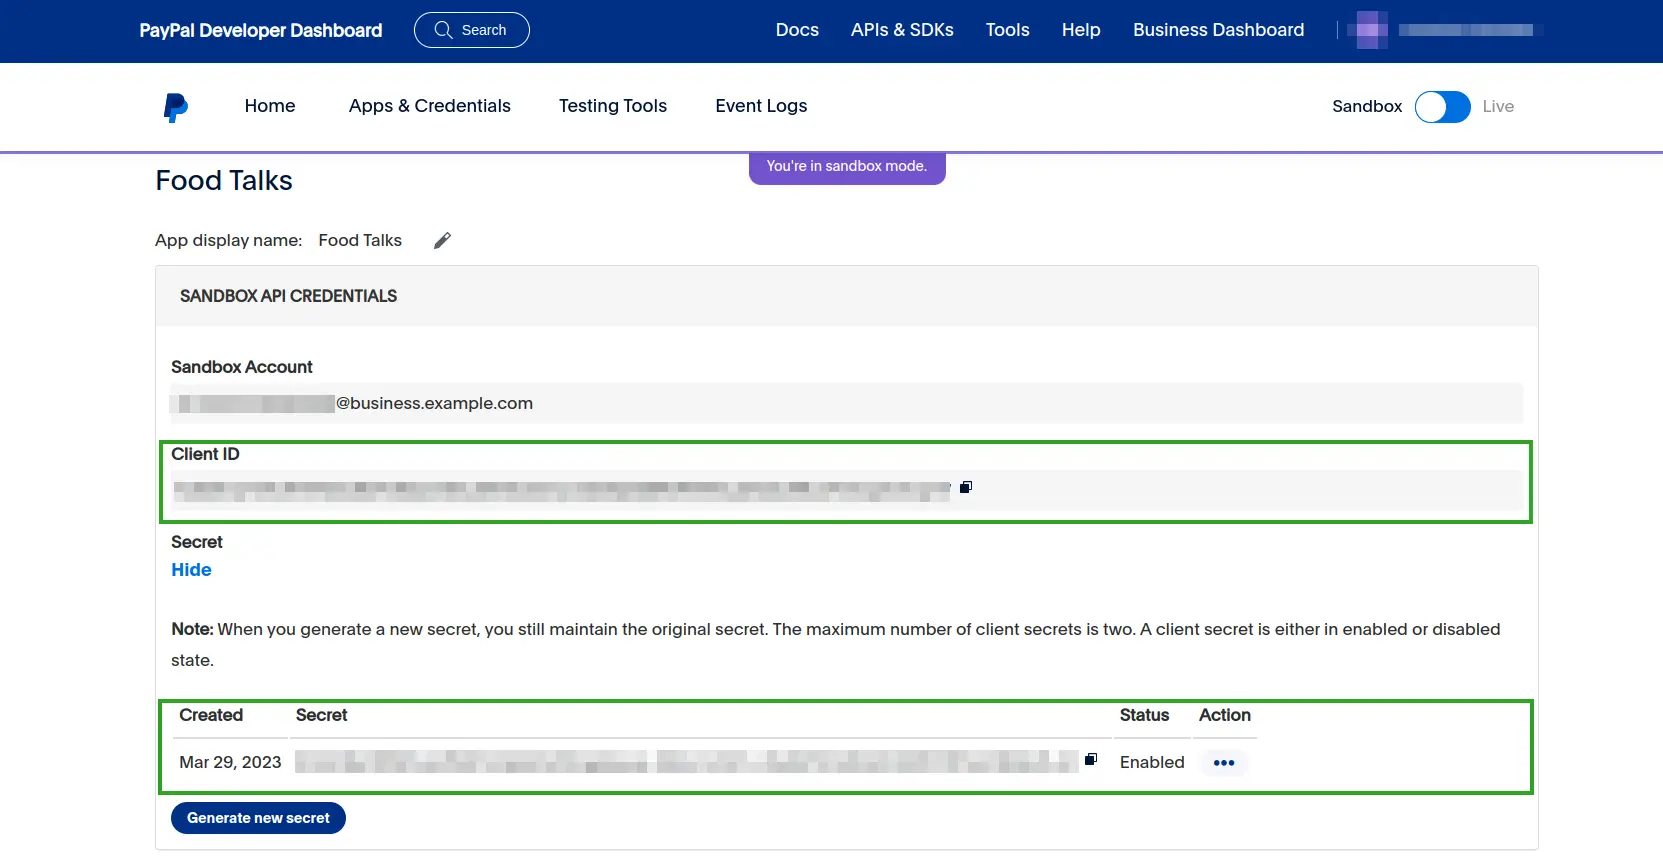
- Locate Client ID and Secret under Sandbox API Credentials. Copy these credentials as they are needed to configure PayPal integration with the InEvent platform.
Integrating PayPal with InEvent
Once you have finished setting up your app in the PayPal Developer Dashboard and collected the necessary credentials (Client ID and Secret), you can proceed to integrate PayPal with InEvent. To do so, follow the instructions below:
- Navigate to Integrations > PayPal from the Company level.
- Click Edit on the top right corner of the page.
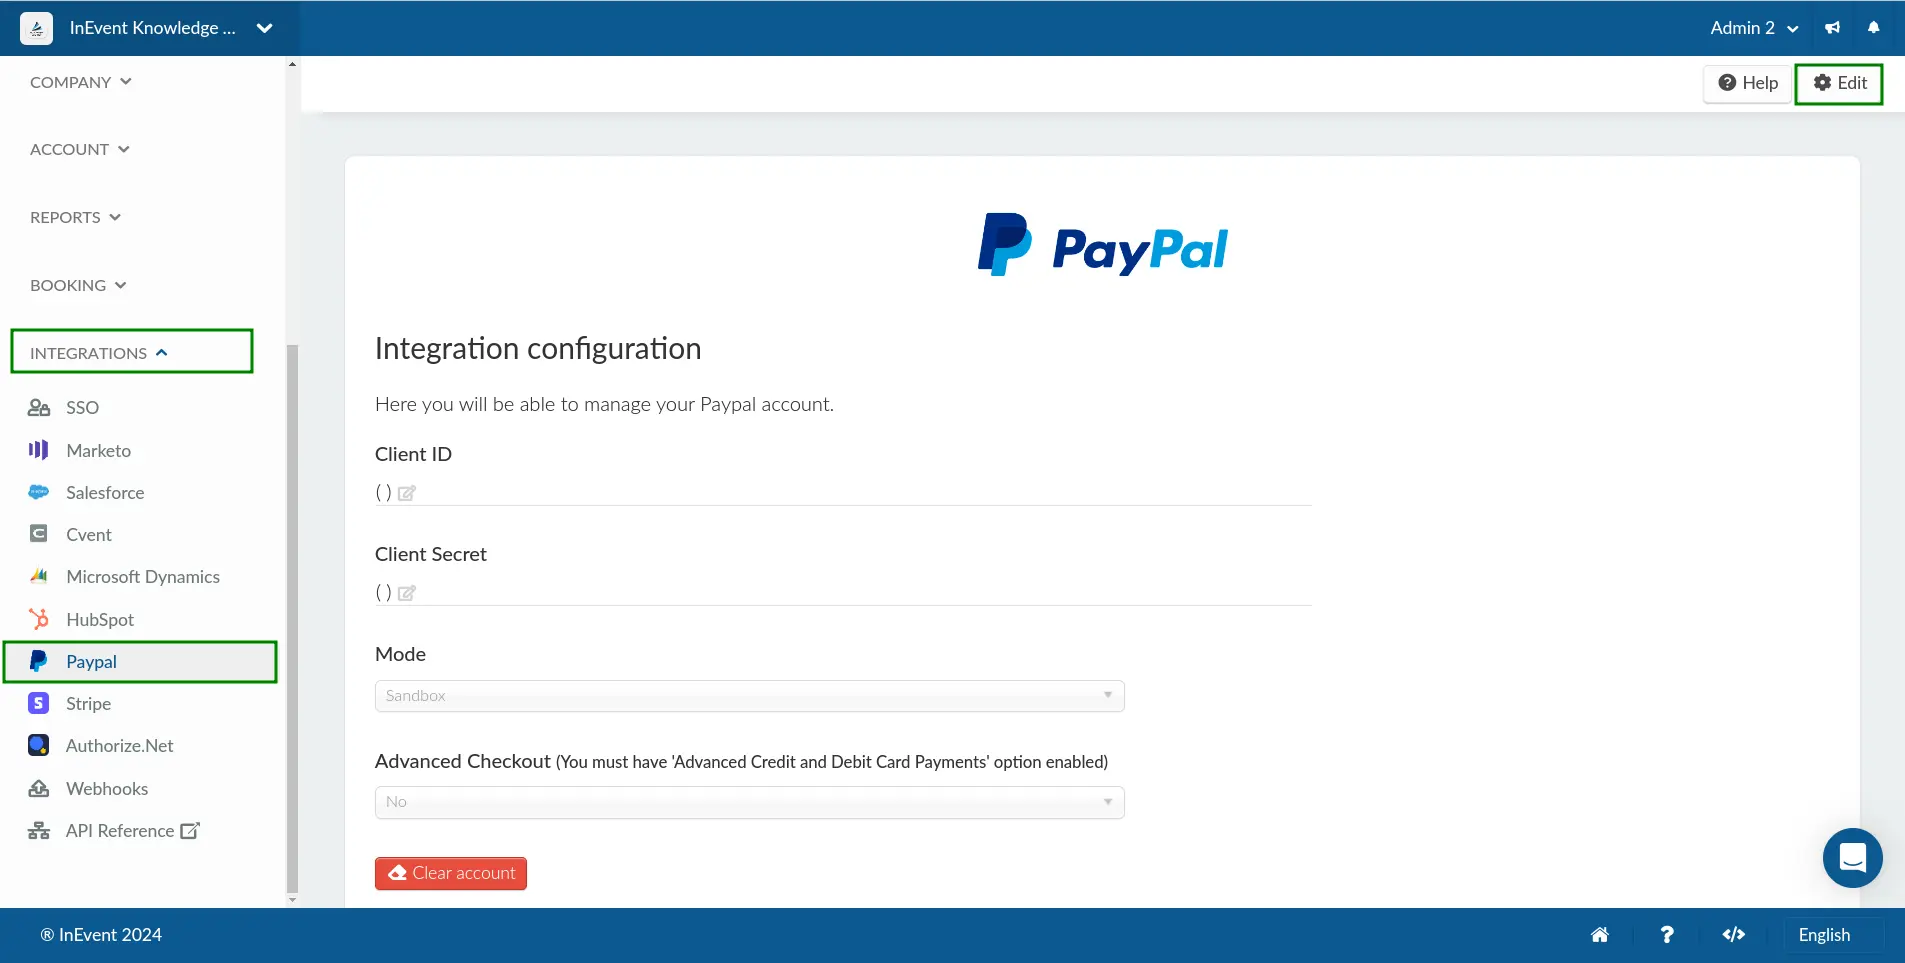
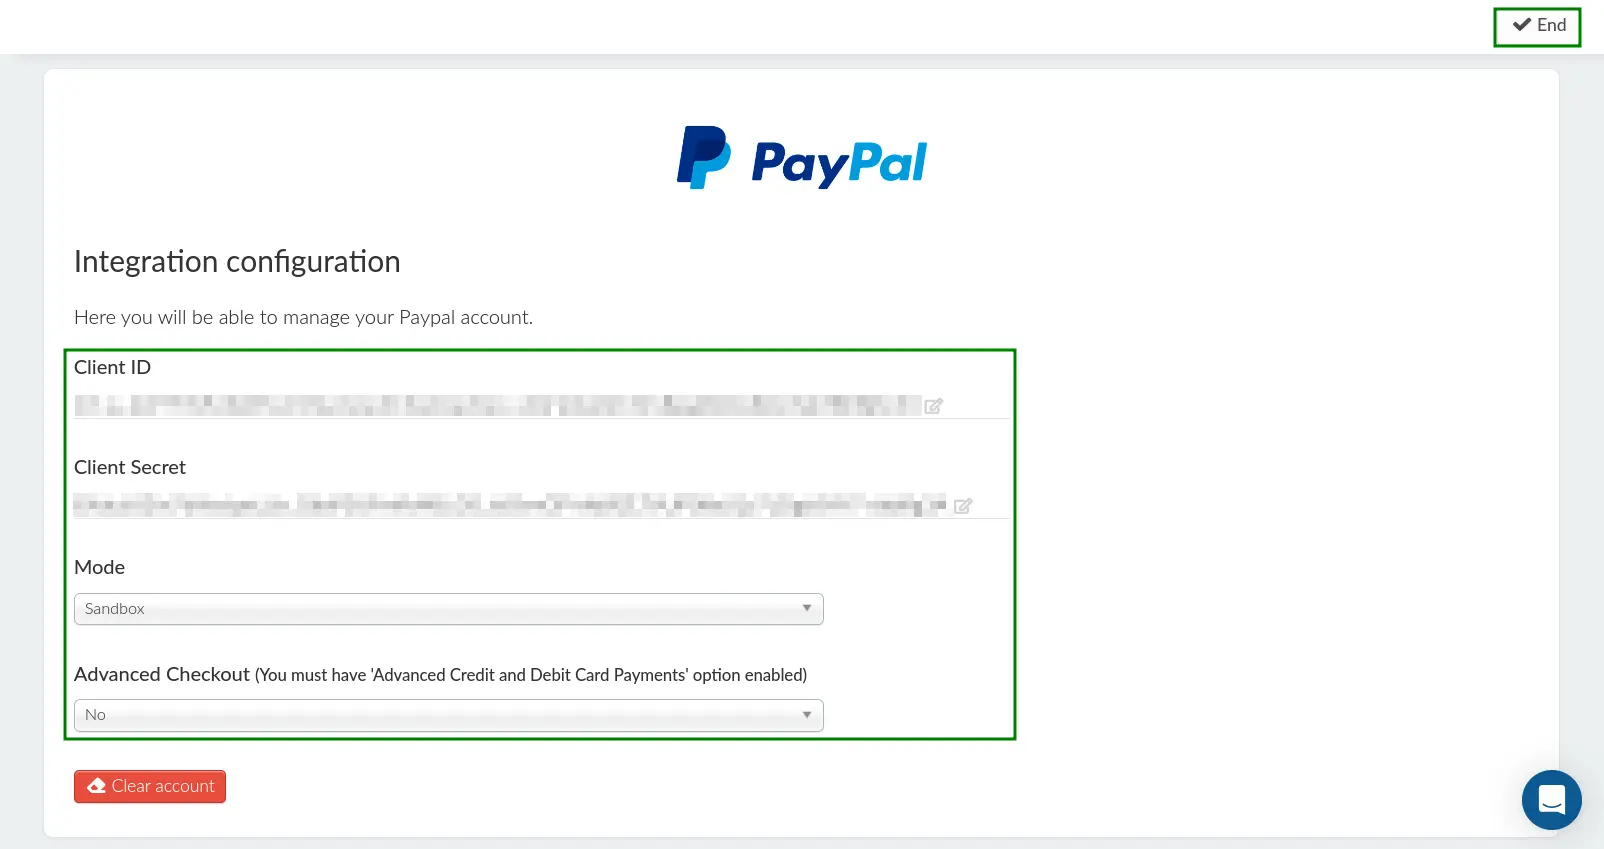
- Insert the parameters below into the corresponding field.
- Client ID (previously copied from your newly created PayPal app)
- Client Secret (previously copied from your newly created PayPal app)
- Select your PayPal application mode using the drop-down box under Mode. The available options are Sandbox and Production.
- Select whether or not to use PayPal Advanced Checkout.
When Advanced Checkout is set to Yes, users will be prompted to fill in their payment details directly on the Purchase form page and complete their purchase without being redirected to PayPal.
- When Advanced Checkout is set to No, users will be redirected from the Purchase form page to PayPal to complete their purchase.
- Press End to save your changes.
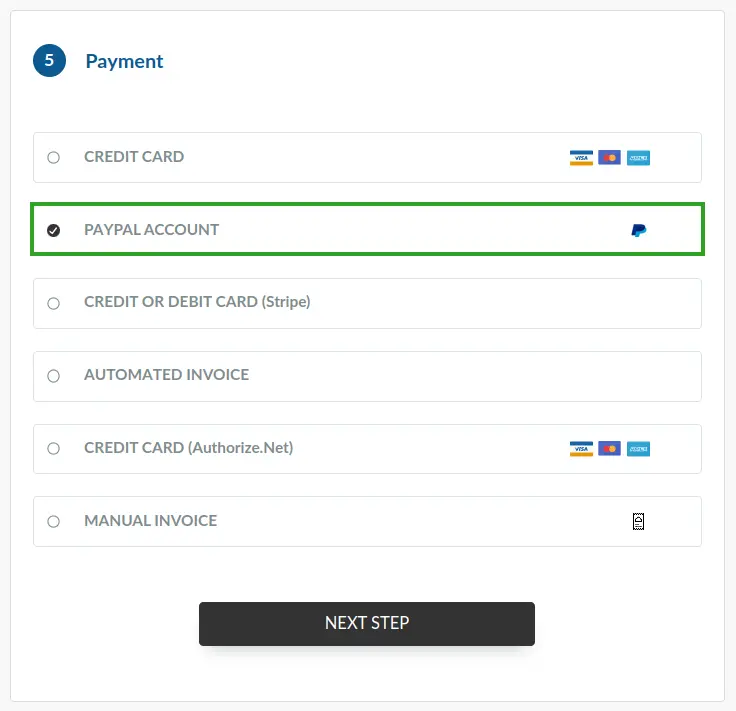
Once you have completed these steps, users will be able to select the PayPal Account payment method from the registration form, as shown below.
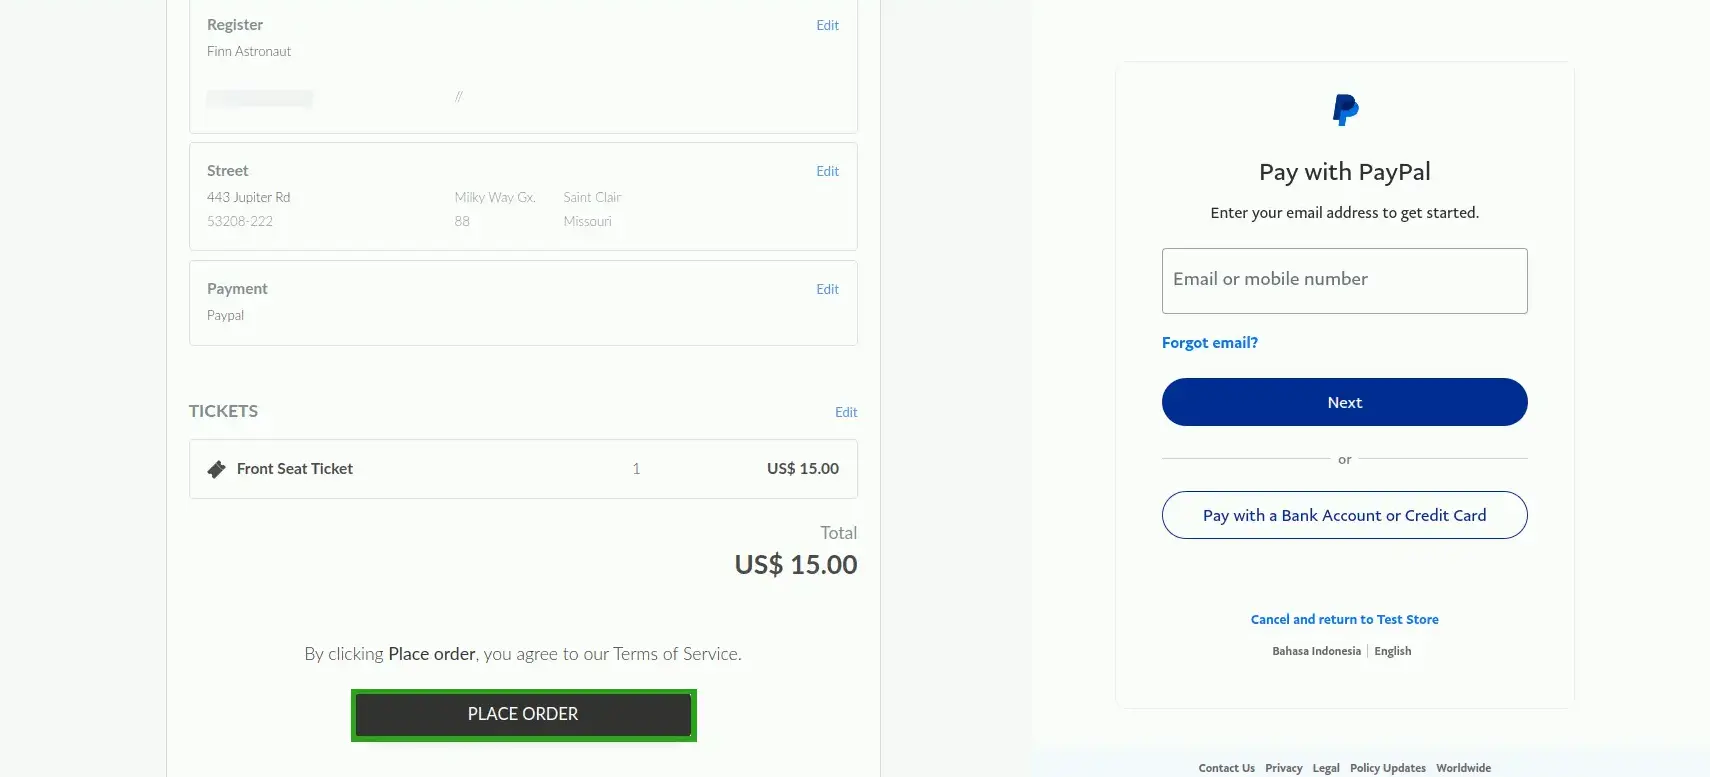
When PayPal Advanced Checkout is disabled, the user will be redirected to the PayPal page when they are ready to place their order, as shown below.
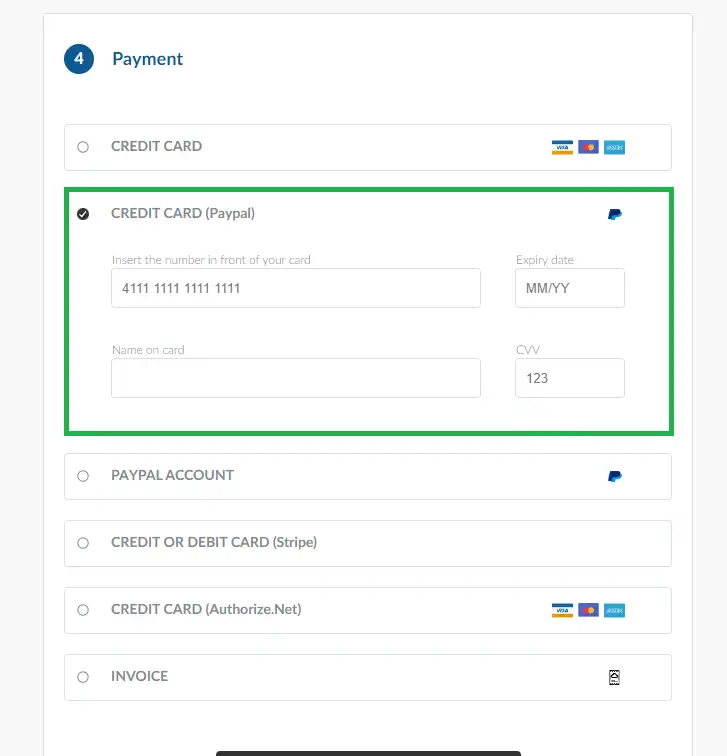
When Paypal Advanced Checkout is enabled, the user will see the Credit card (Paypal) option which allows them to make Paypal payments directly on the Purchase form without being directed to Paypal's page.
Currencies accepted by PayPal
For information on currencies accepted by PayPal, refer to the PayPal documentation on supported currencies.