RSVP Confirmation
With the RSVP option, you will be able to create a simple registration form where your invitee can confirm their presence with just one click.
How do I configure the RSVP option?
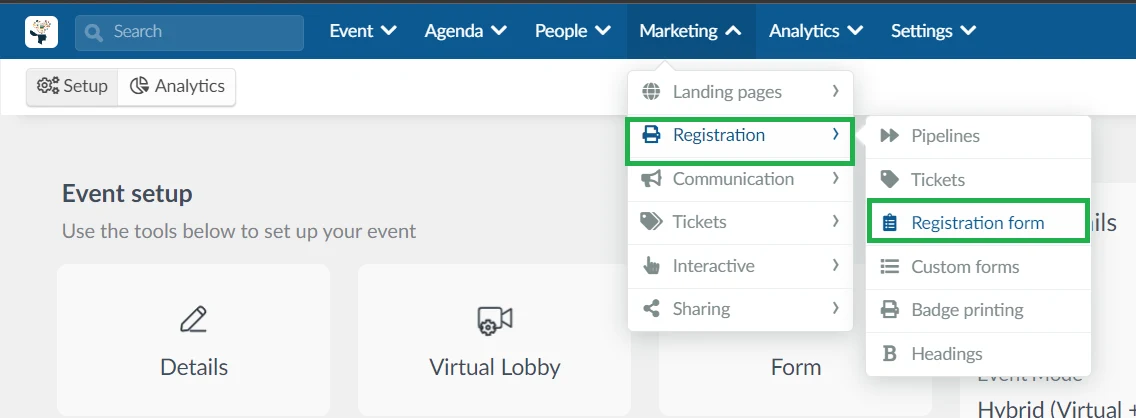
To configure the RSVP option go to Marketing > Registration > Registration form.
Then press the Settings tab and enable the toggle buttons corresponding to the RSVP and RSVP form tools.
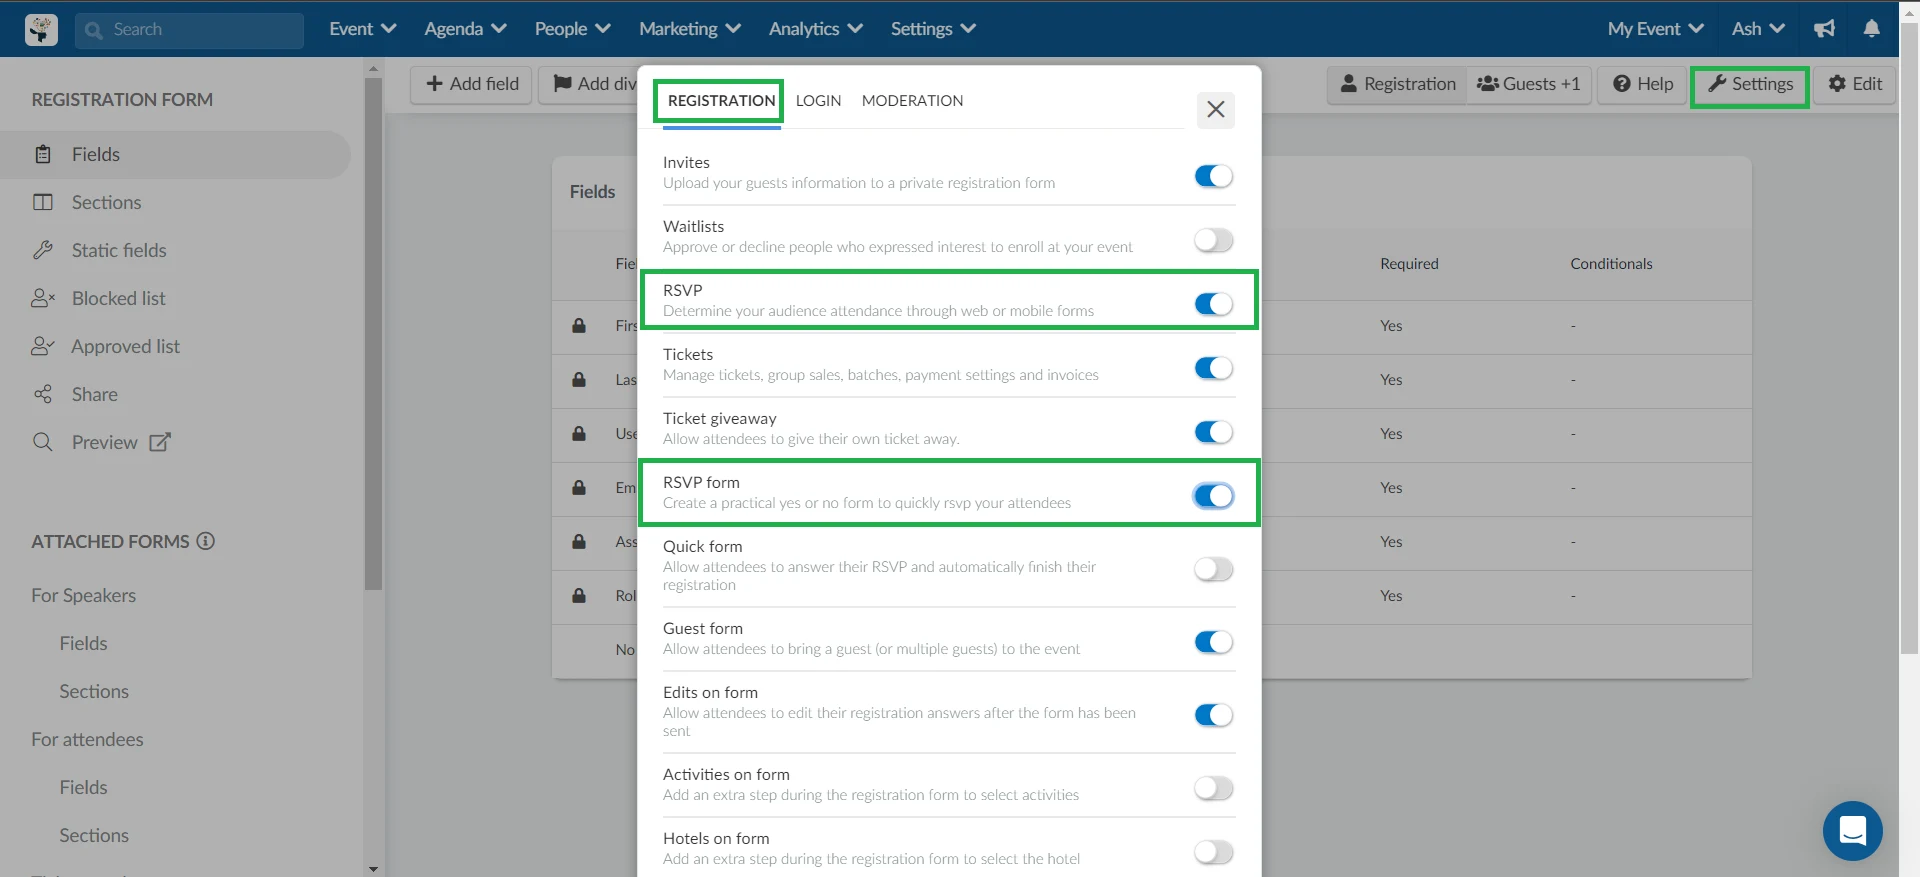
The option must be marked so that the attendee confirms their presence when they access the application form.
Where will my invitees confirm their presence?
When an invitee accesses the registration form and enters their registered email or username, the confirmation will appear as shown below:
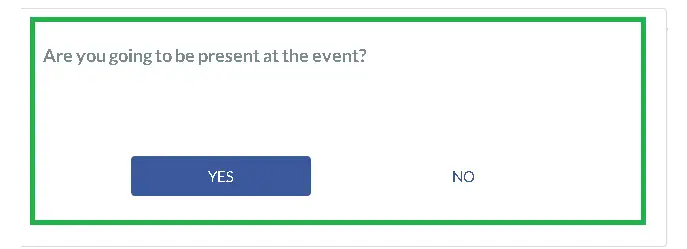
When an invitee confirms their attendance by selecting Yes, the registration form will be displayed for them to fill out and then enrolled into the event.
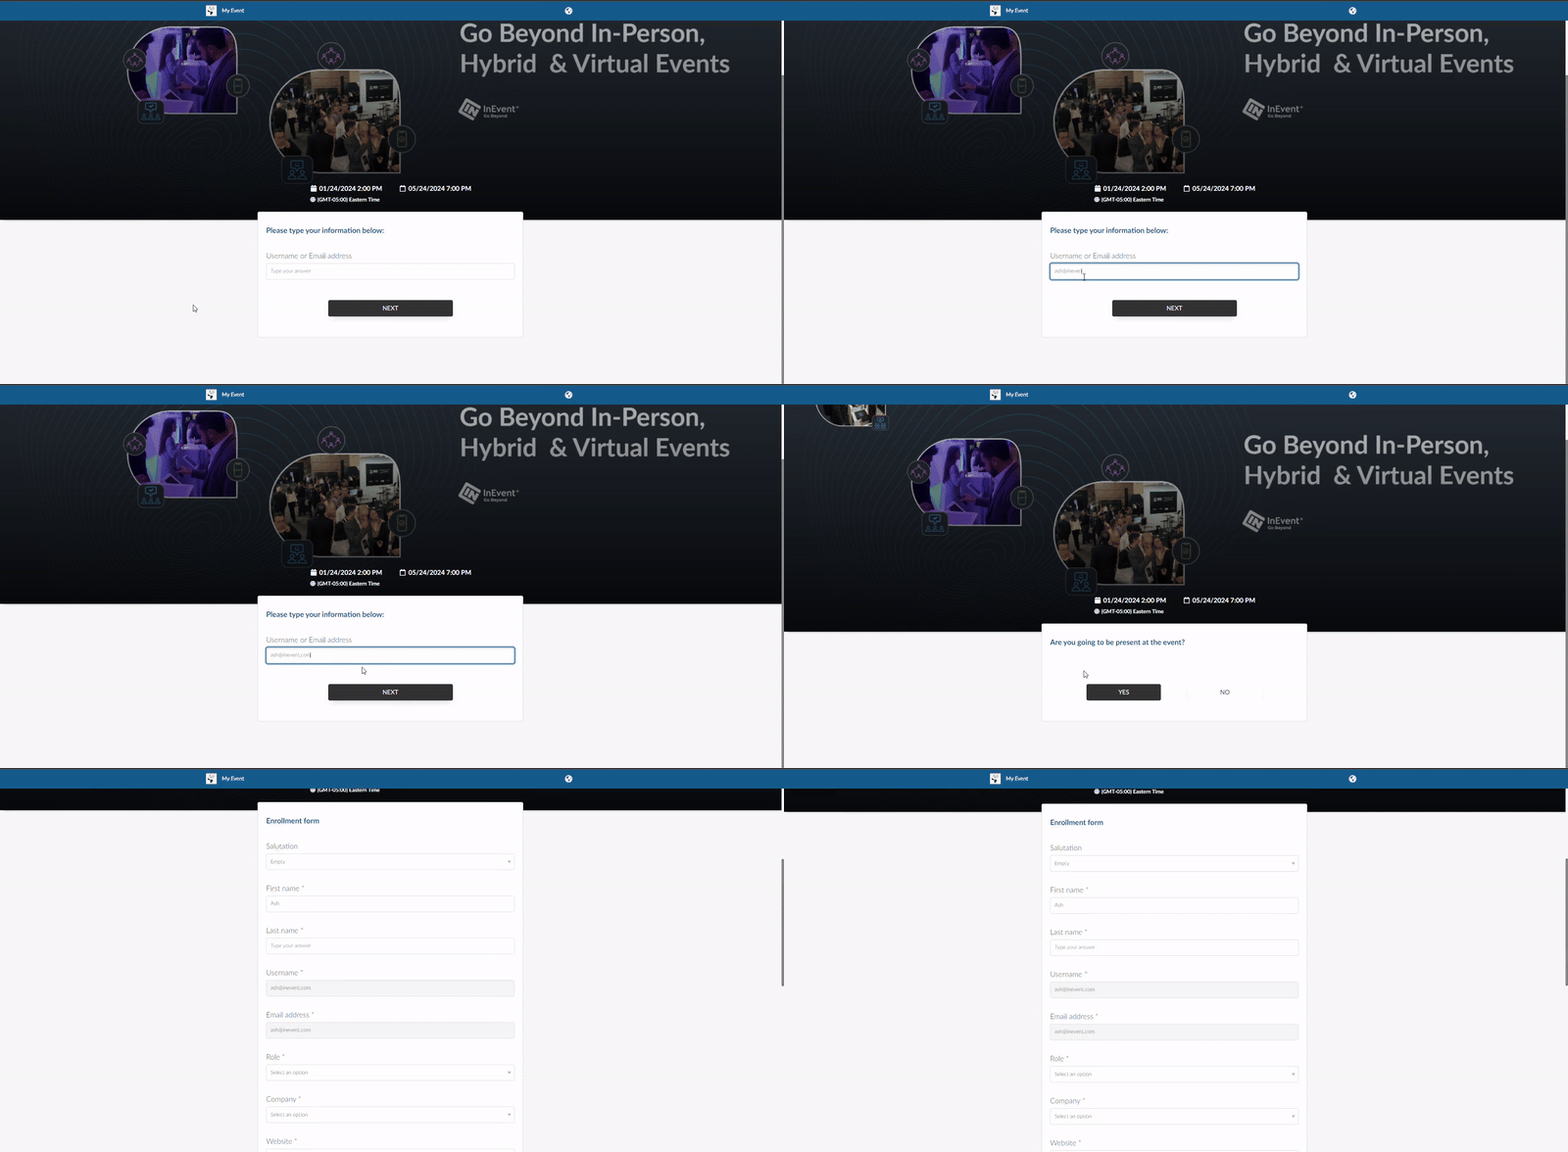
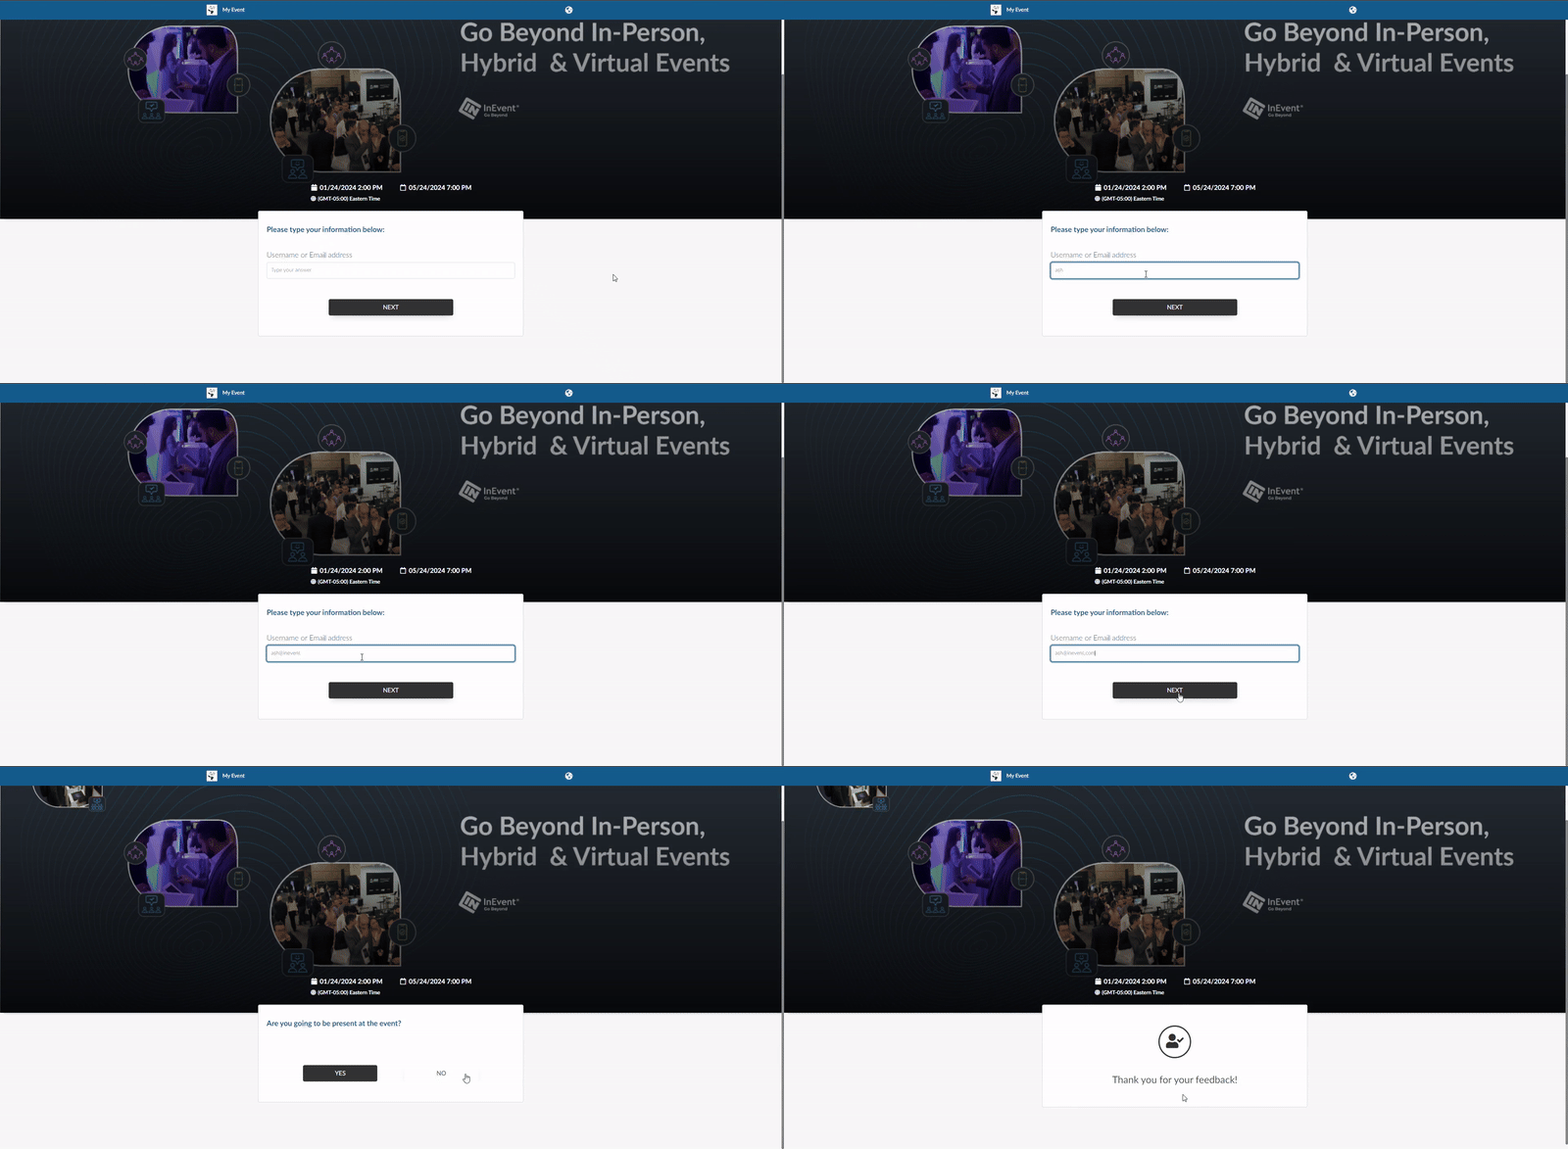
However, if an invitee declines their presence by selecting No, the registration form will not be displayed, and they will be unable to enroll for the event. They will see the message: Thank you for your feedback.
Where can I confirm who will be attending the event?
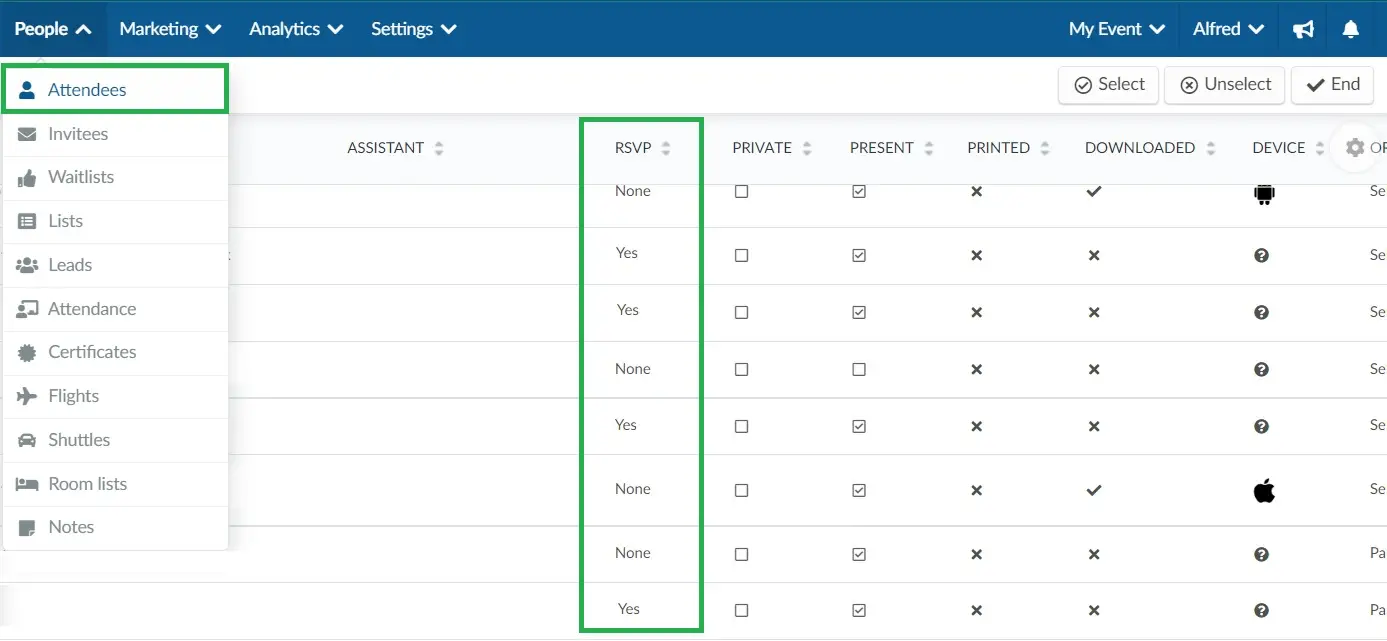
In the People > Invitees list, the RSVP status of invitees will be displayed under the RSVP column. Those who confirmed their presence and registered for the event will show as Yes, while those who declined will show as No. A None status will appear for those who have not yet confirmed their RSVP.

In the People > Attendees page, attendees who enrolled through the RSVP form will have their RSVP column status displayed as Yes.
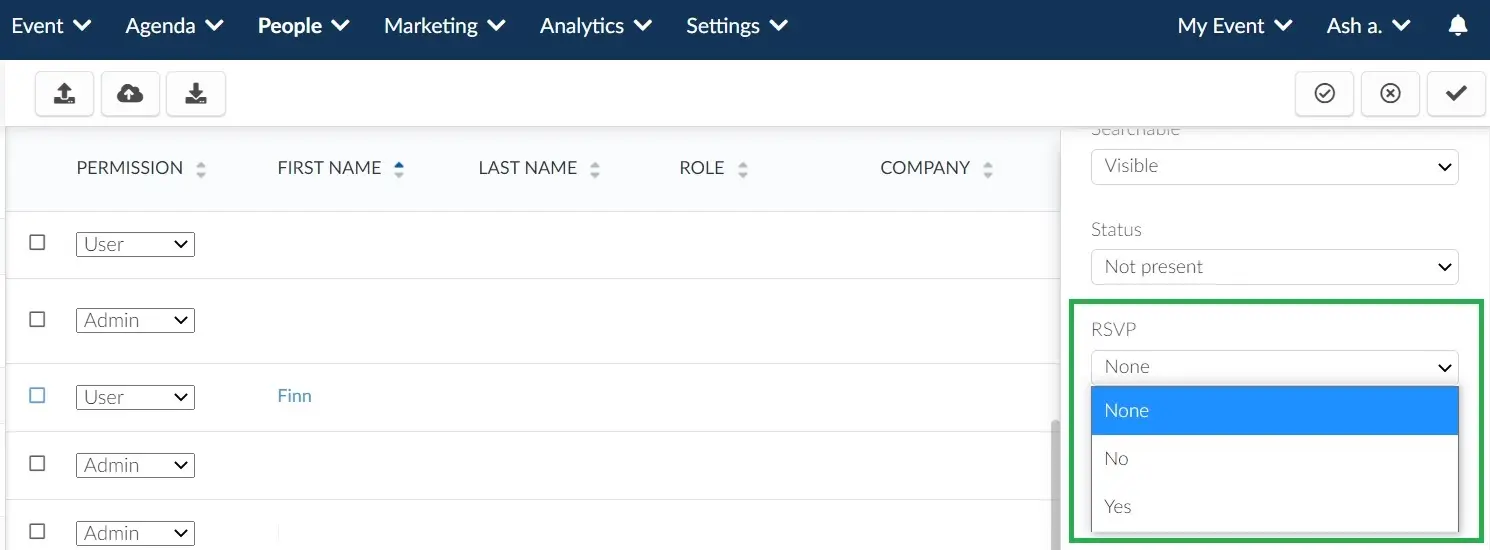
If you would like to edit one attendee RSVP information, select this attendee > press Edit > scroll down until you see RSVP > select Yes, No or None. Here is an example in the image below:
How do I generate a report with RSVP data?
You can export an Excel file with this information for better control by pressing the Edit button in the top right corner, then pressing the Report button at the top of the page.
