Registration Form Settings - Webinar
 Updated 11 months ago
by
Amalia
Updated 11 months ago
by
Amalia
When using the registration form you can collect important data from the attendees enrolled in the event.
This article intends to explain what each tool of the registration form setting does and how they will, individually or grouped, affect the form. Based on your event's need you can adjust it accordingly.
How can I edit my registration form settings?
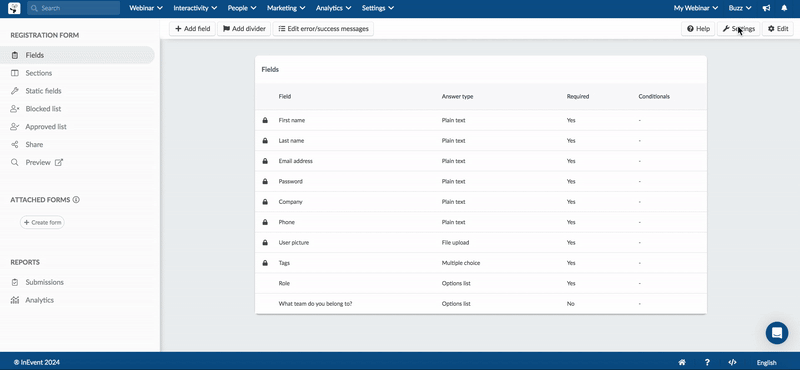
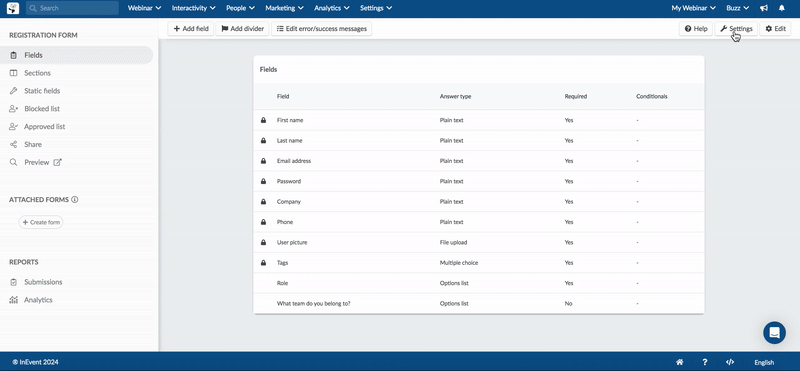
You can edit and configure your form's structure by going to Marketing > Registration > Registration Form. Press the Settings button located at the top right corner of the page. You can toggle the tools on and off using the button beside each one of them.

The settings tools are segmented into three groups:
- Registration
- Login
- Moderation
Registration
In the Registration section, you will see the below settings:
Invites
If enabled, a private registration form will be generated for your guests. For further information on Invites, refer to our Invitees article.
Waitlists
If enabled, guests will have to be manually approved in order to join your event. For further information on Invites, refer to our Waitlists and approval requirement article.
RSVP
If enabled, it will provide an RSVP option for your event. For further information on RSVP form, refer to the RSVP Confirmation article
Tickets
If you are planning to sell tickets in your Webinar, this feature must be enabled in order to have a Tickets page where you can create and manage the tickets, sales, payment settings and invoices. For further information on Tickets, consult the Ticket management article.
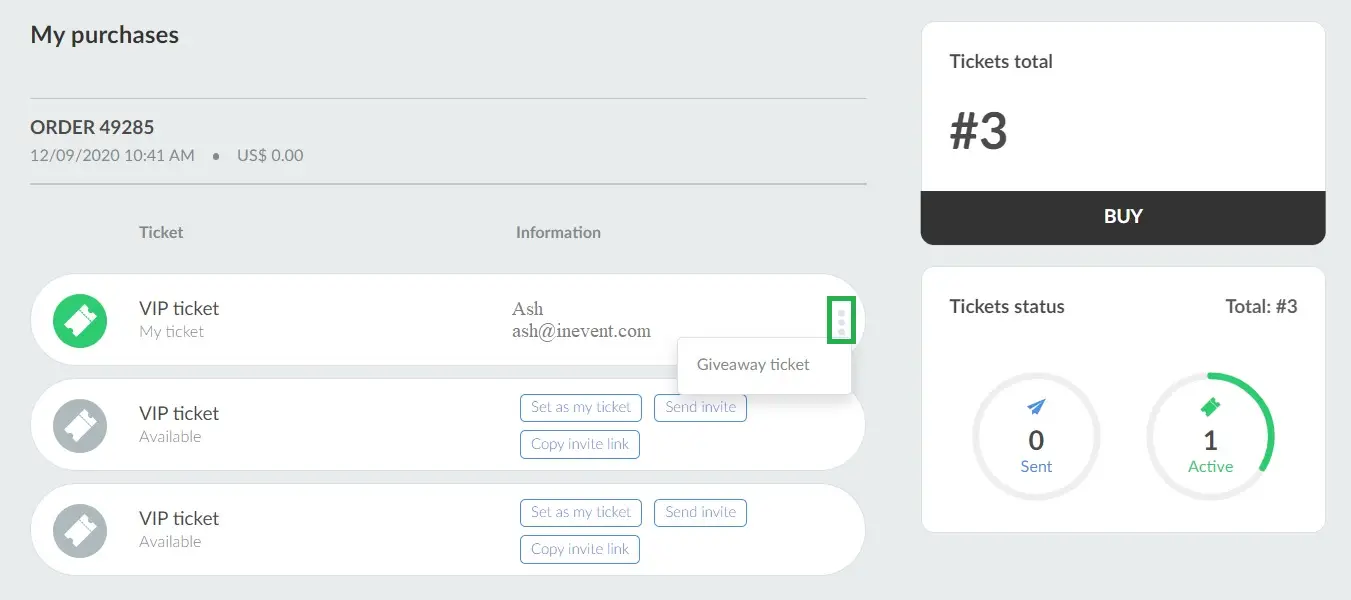
Ticket transfer
This option should be enabled if you want to allow the attendees to transfer their own tickets.
If Ticket transfer is enabled, the attendee will see three dots right by their ticket in My tickets.
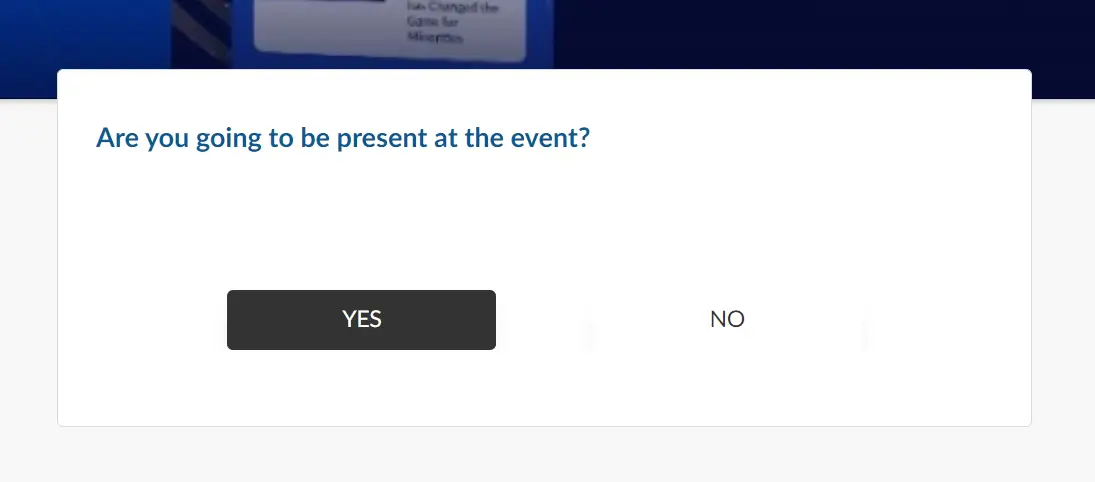
RSVP form
As this feature works alongside the Invite requirement, first the participants need to enter their username or email registered on the platform by the event organizer. Then they can access the RSVP form as shown below. For more information about this Yes or No form, click on RSVPs from your attendees.
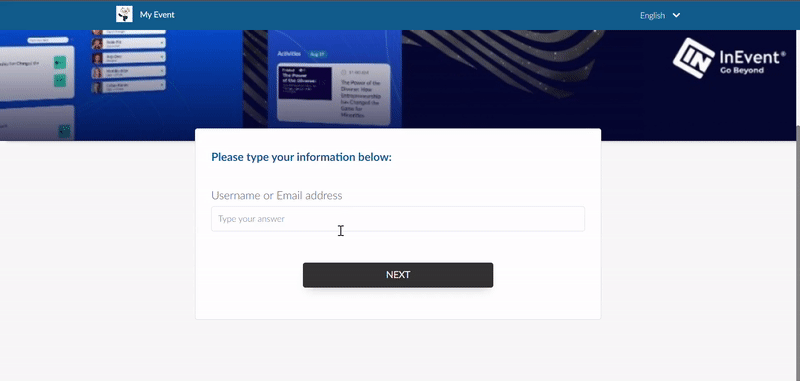
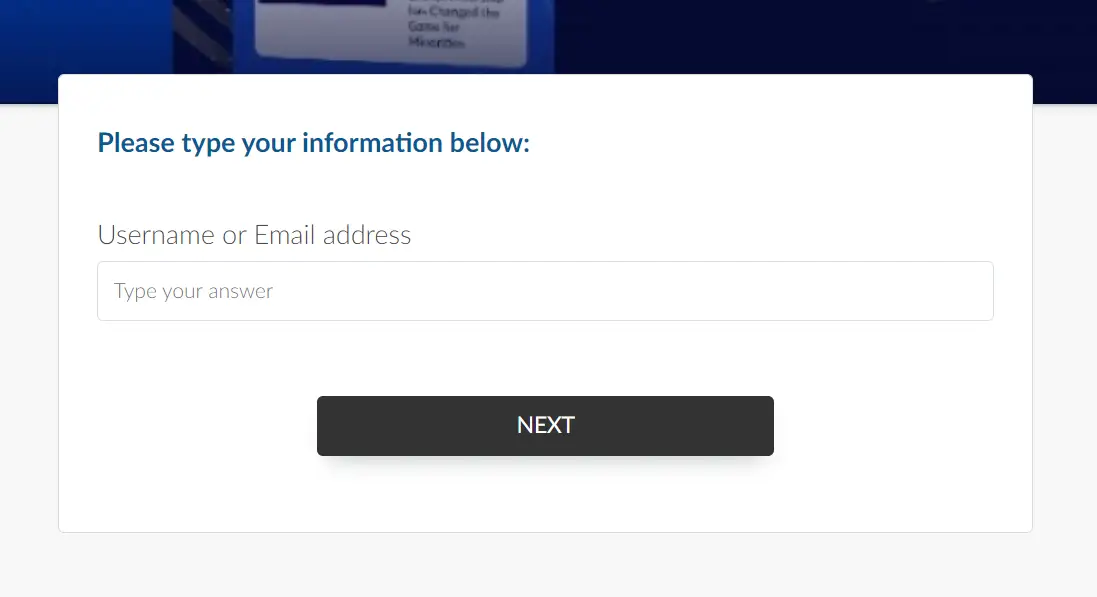
Quick form
Similar to the RSVP form, this feature works alongside the Invite Requirement. By activating it, you will allow your guests to enter only their username or email address and automatically finish their registration.
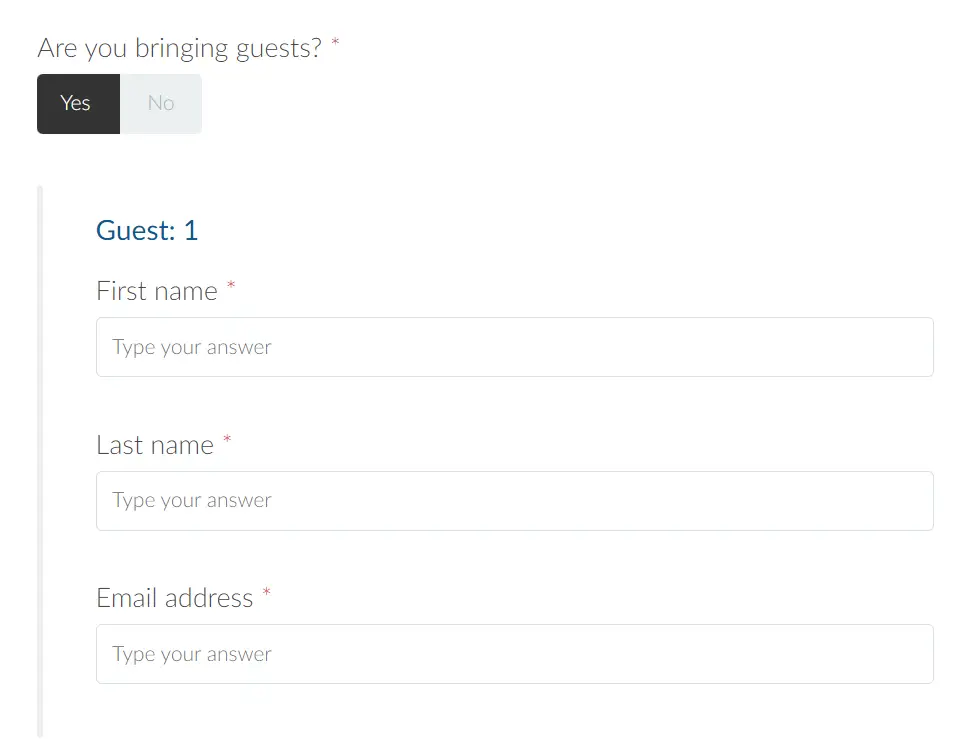
Guest form
This feature allows participants to bring a guest for the Webinar. There is no need for the guest to answer the registration form, their information can be entered by the participant.
Edits on form
When you enable this feature, it allows editing on form answers after it has been submitted. This action can be done on the My Account area by clicking on the Edit button.
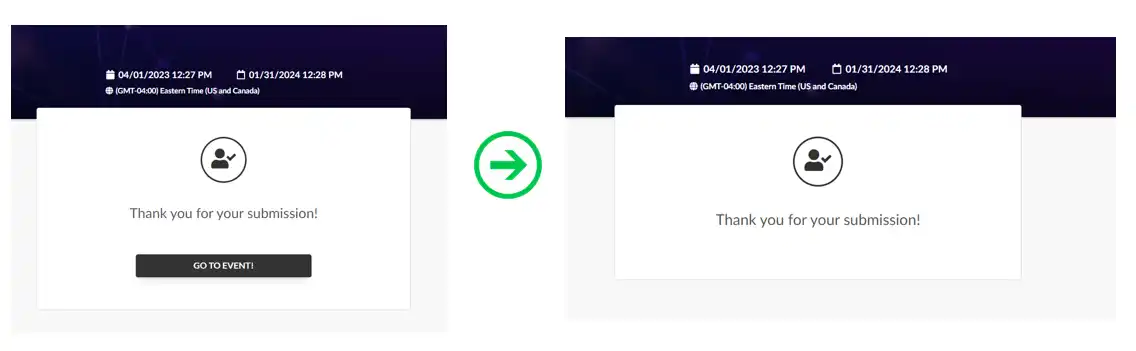
Registration without access
If enabled, users will not see the Go to event! button which gives users access to the event upon registration completion.
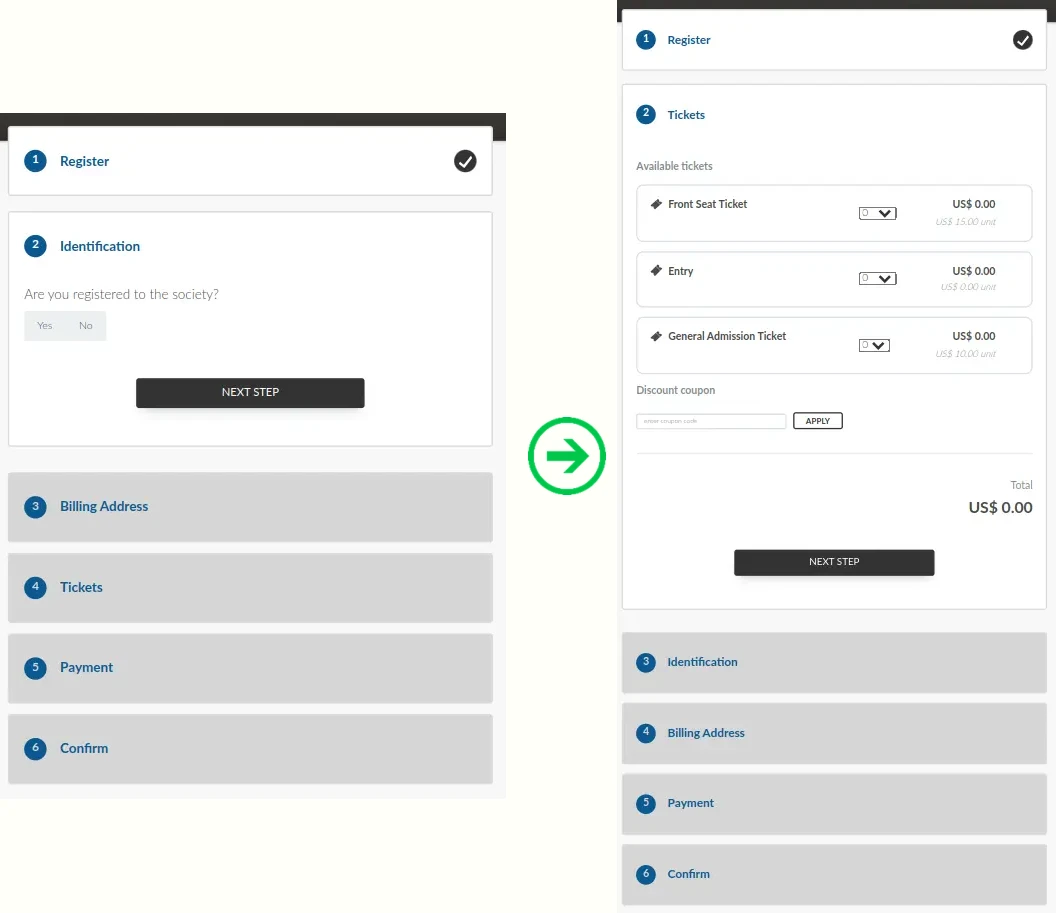
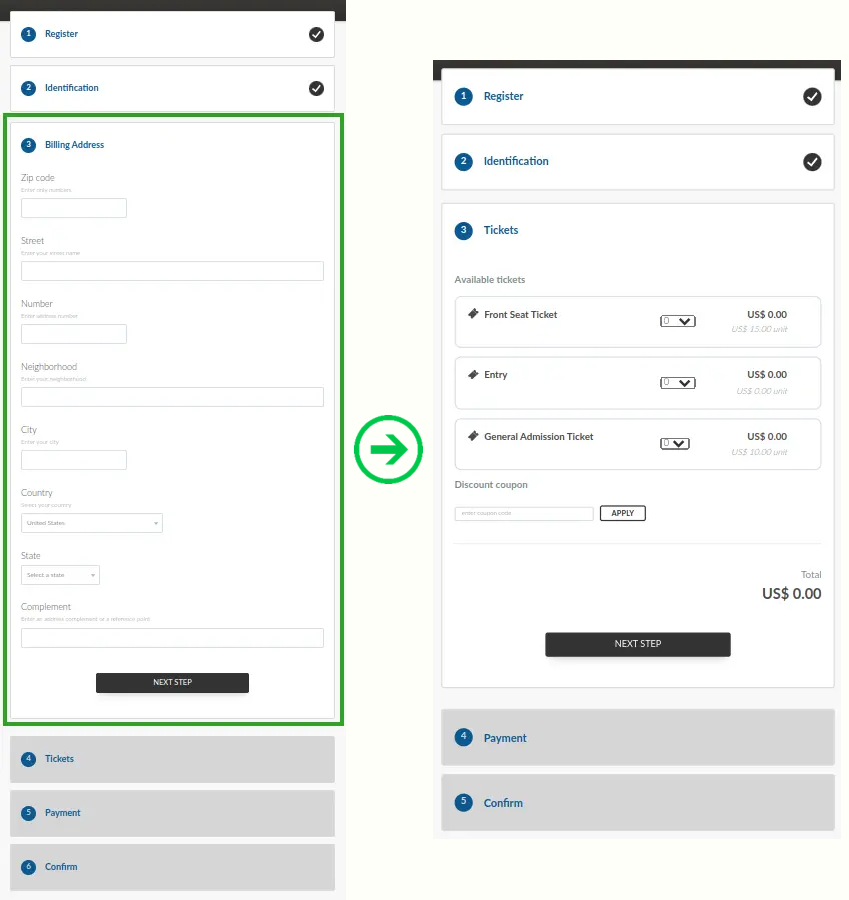
Display tickets before identification
If enabled, the order on the Purchase form will change to show the Tickets section before the Identification section.
Below is how the Purchase form looks with the Display tickets before identification option disabled on the left and with it enabled on the right.
Hide billing section
If enabled, participants will not be able to see the billing data on the Purchase form.
Below is how the Purchase form looks with the Hide billing section option disabled on the left and with it enabled on the right.
Login field
In the Login section, you will find the below settings:
Allow non-sso login
Allow users to login to event without SSO requirement. Click here for further information.
Mandatory SSO Auth
Users will only be able to log into the event through the single sign-on authentication. Click here for further information.
Auto register with SSO
Allow users who log in using SSO to be automatically registered to your event, even if they were not added to the event's list of attendees. Click here for further information.
Moderation
In the Moderation section, you will find the below tools:

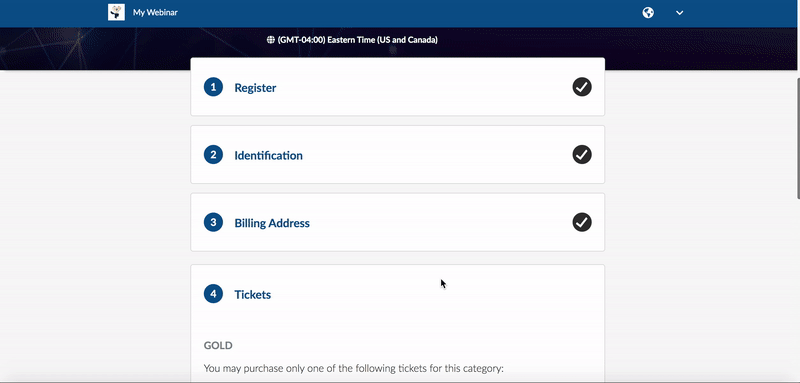
Ticket Requirement
Define if tickets are a requirement to enroll at this Webinar. When this feature is enabled, only participants holding a ticket will be able to attend the Webinar. This will add some extra steps during the registration process as displayed below:
Approval Requirement
When Approval Requirement is enabled, administrators must approve all attendee enrollment to the event. Once the user completes and submits the registration form, they will be placed on the Waitlist and will need to be approved by the admin to become an attendee.
Invite Requirement
Set that only guests with invites will be allowed to enroll at the event. If manual approval is enabled, guests will also have to be approved in addition to their invite.
Click here to learn how to add invitees to the platform.
Waitlist Requirement
When the Waitlist Requirement is enabled, guests are automatically added to the Webinar admission list when it has reached its full capacity, and their enrollment should be manually approved by admins.
Static field settings
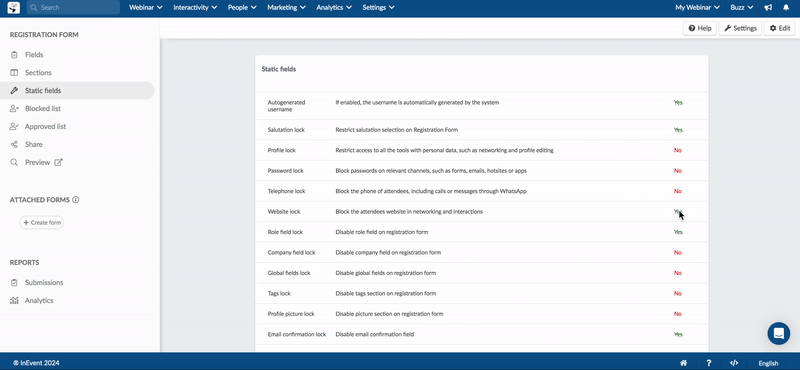
- Autogenerated username: If enabled, the Username field will not be on the registration form as the system will automatically generate a username for the registrant.
- Salutation lock: Restricts the Salutation field from appearing on the registration form. The Salutation field allows participants filling in the registration form to select the title they are addressed by. This lock is disabled by default and if enabled, the Salutation field will appear on the among the default fields.
- Profile lock: Restricts access to the visibility of a user's personal data in the Virtual Lobby. Click here for further information.
- Password lock: It will remove the Password field from the registration form.
- Telephone lock: It will remove the Phone field from the registration form
- Role field lock: Removes the Role field from the registration form.
- Company field lock: Removes the Company field from the registration form.
- Global fields lock: Removed the Global fields questions from the registration form.
- Tags lock: It will remove the Tags section from the registration form.
- Profile picture lock: It will remove the User picture field from the registration form.
- Disable password confirmation: It will remove the Confirm password field from the registration or purchase form.
- Block assistant email: Removes the Assistant email field from the registration form.
- Block personal emails: Blocks the use of personal email domains on the registration form.
If the Block personal emails tool is enabled, the following email domains will be disallowed on the registration form. Click the drop-down below to view them:
Blocked personal email domains
gmail.comoutlook.comproton.comaol.comzoho.comicloud.comhey.comyahoo.comgmx.commailfence.commail.comtutanota.comWhen participants try to register with any of the emails listed above, they will receive the following message:

You can see below the registration form fields that will be affected by these settings:

Are all general settings compatible with each other?
Some registration form settings are incompatible with each other due to conflicting behavior, and therefore should not be enabled together. To learn more about the compatibility of the Registration form tools, refer to this article.