How do I create multiple Terms of service for my forms?
It is possible to add multiple customized Terms of service to your Registration form, Purchase form or Custom forms at the Company and Event levels using the Headings feature.
In this article, we will be guiding you through the process.
Company level
At the company level you can change the default Terms of service heading to create multiple customized terms of service for the Registration form, Booking form and Custom forms for all events created within your company.
How do I add multiple Terms of service to my forms?
To add multiple customized Terms of service to your Registration form and Custom forms, follow these steps:
- Go to Account > Headings section at the Company level.
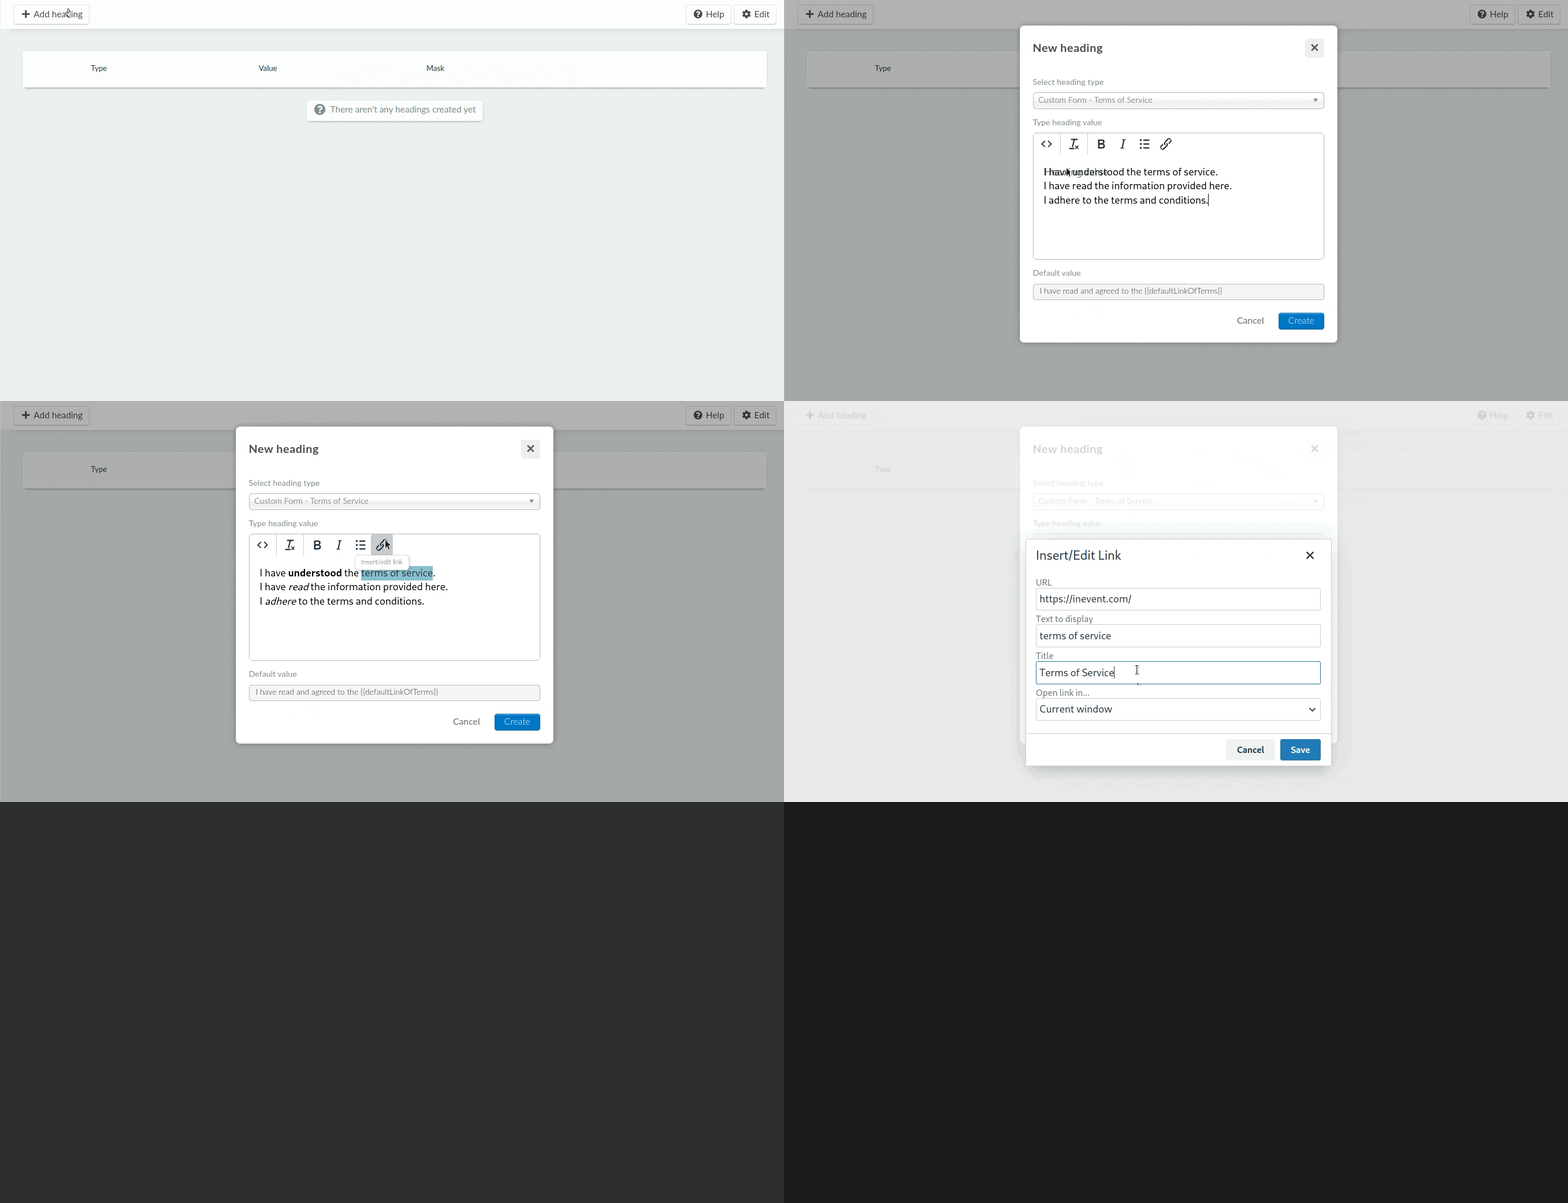
- Click on the +Add heading button, and a pop-up box will appear.
- From the Select heading type dropdown, choose the appropriate option based on the form you want to edit:
- For Registration forms, select Form - Terms of Service.
- For Custom forms, select Custom forms - Terms of Service.
- For Booking forms, select the Booking - Terms of service.
- A text box will appear where you can enter your desired heading values. You can add as many heading values as you need.You can format the heading values using options such as bold, italics, source codes, or clear formatting using the related icons in the text box.
- Highlight the specific part of the heading values you wish to hyperlink and click on the Insert/edit link icon.
- A new window will appear where you can paste the link, add a title, and choose whether the link should open in the current window or a new window.
- If you select new window, the Terms of Service will open in a new tab.
- If you select current window, the form page will be redirected to the Terms of Service page.
- Click Save and then Create to finalize your changes.

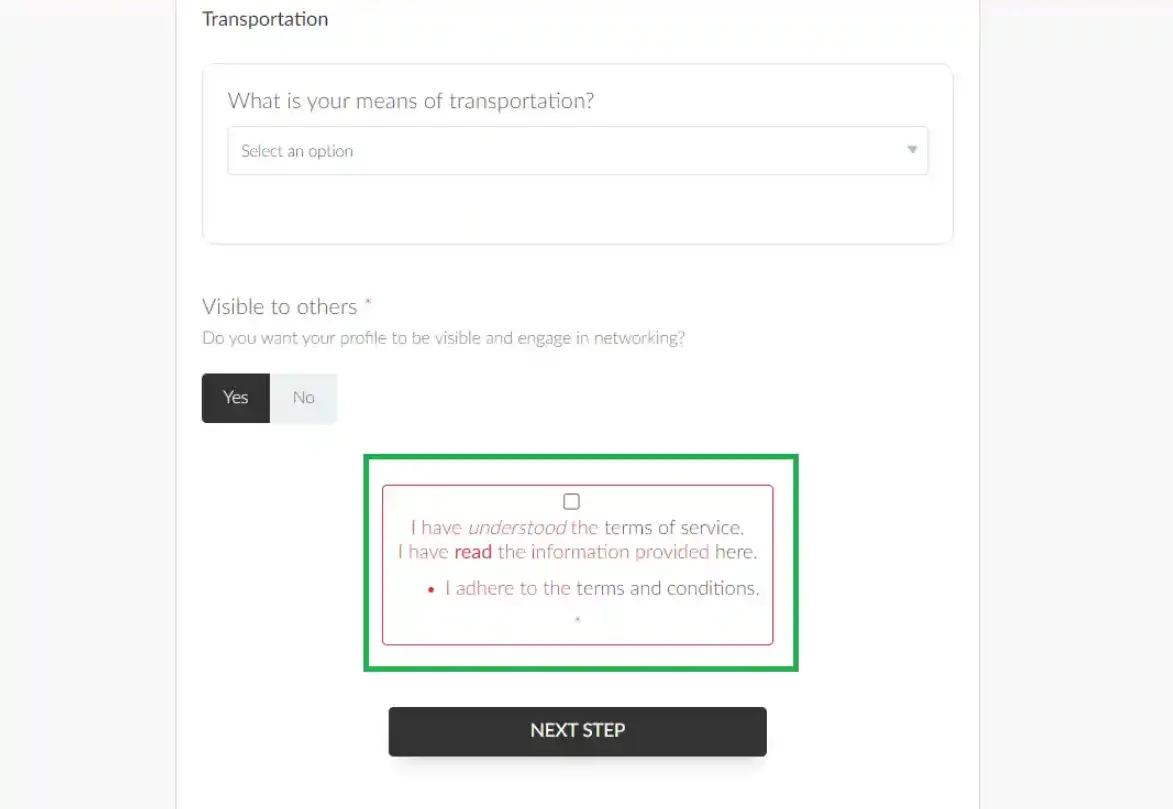
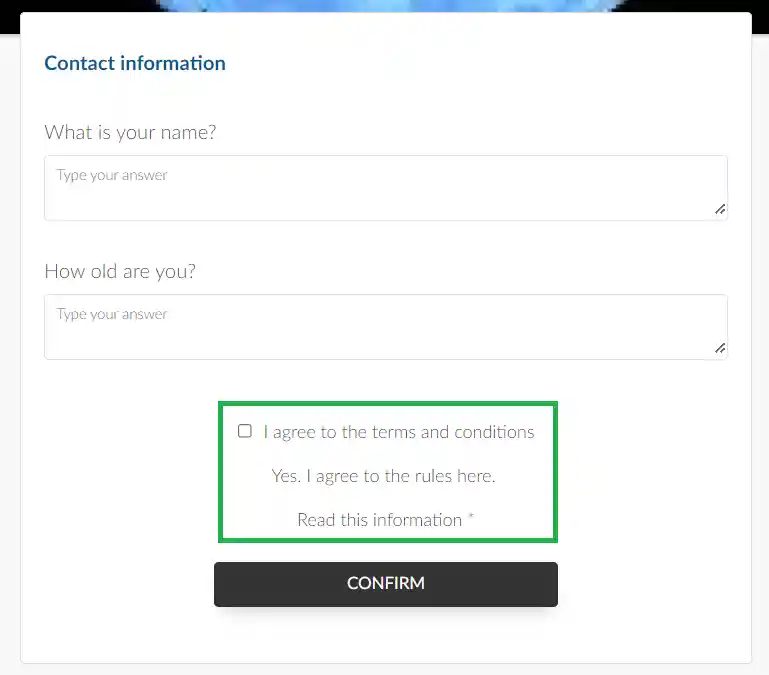
Below is an image of how the multiple Terms of service will appear on your forms:

Event level
At the Event level you can change the default Terms of service heading to create multiple customized Terms of service to the Registration form, Custom forms and Purchase forms for your specific event.
How do I add multiple Terms of service to my forms?
To add multiple Terms of Service to your forms (Registration form, Custom forms, and Purchase forms), follow these steps:
- Go to Settings > Headings from the Event level.
- Click the + Add heading button. A pop-up box will appear.
- From the Select heading type dropdown, choose the appropriate option based on the form you want to edit:
- For Registration forms, select Form - Terms of Service.
- For Custom forms, select Custom forms - Terms of Service.
- For Purchase forms, select Purchase form - Terms of Service.
- Enter the desired heading values in the text box. You can add as many heading values as you need.
- Highlight the specific part of the heading values you wish to hyperlink and click on the Insert/edit link icon
- A new window will appear where you can paste the link, add a title, and choose whether the link should open in the current window or a new window.
- If you select new window, the Terms of Service will open in a new tab.
- If you select current window, the form page will be redirected to the Terms of Service page.
- Click Save and then Create to finalize your changes.

Below is an image of how the created multiple Terms of service will appear on your form:

Can I edit or delete the Terms of service Headings?
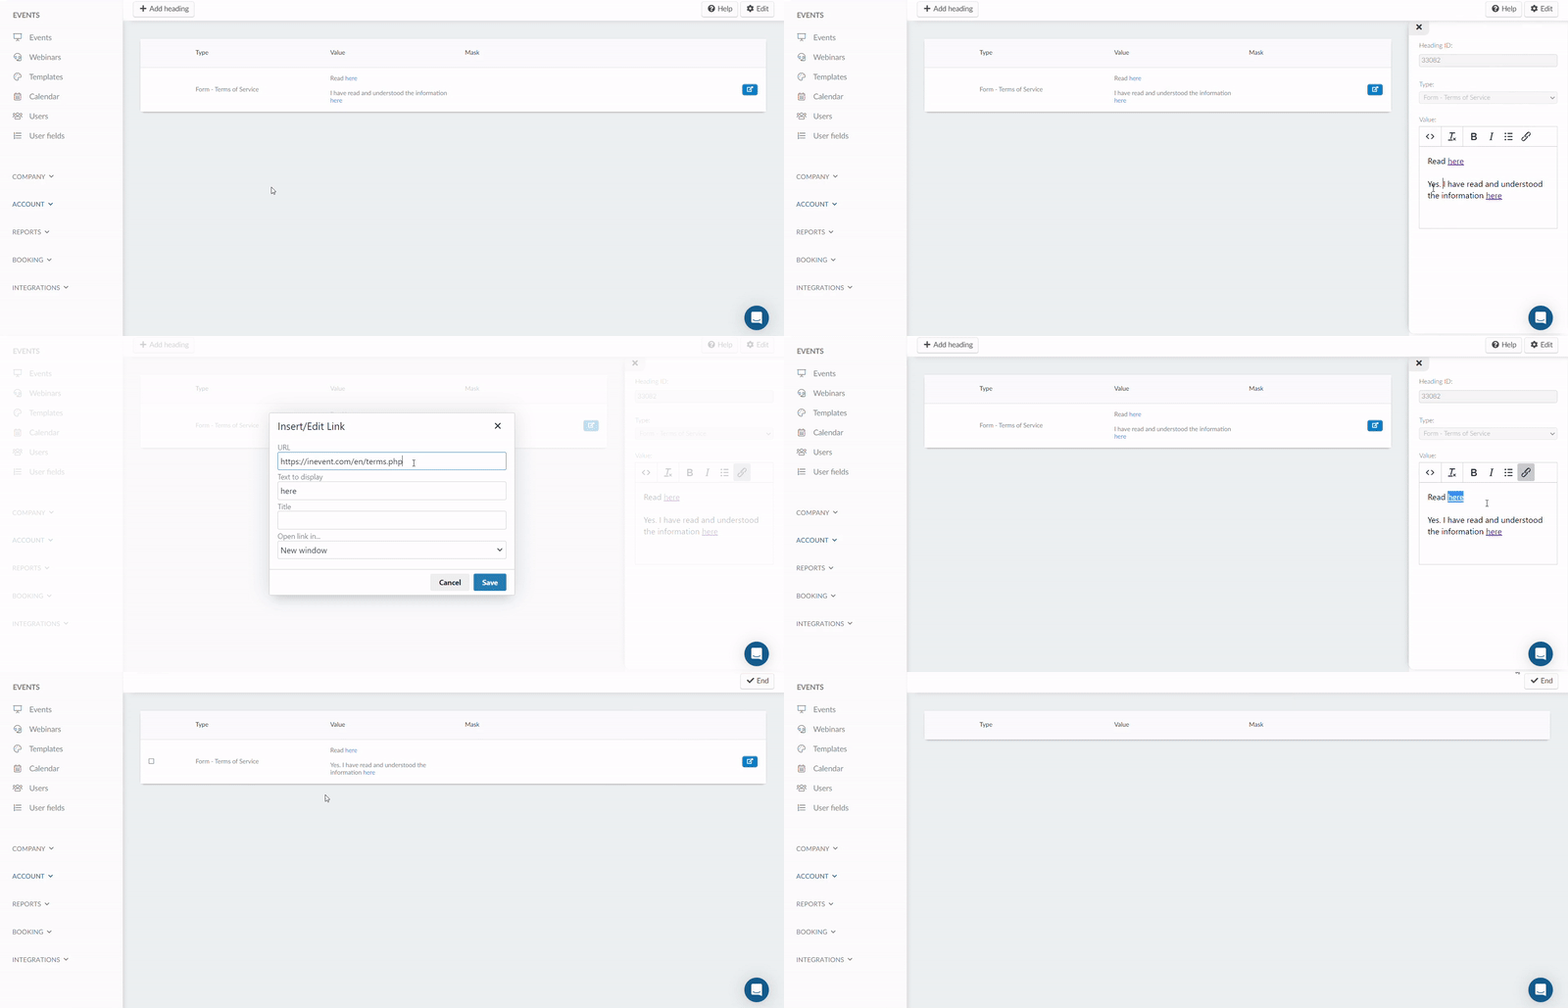
To modify a heading, click on the blue button to open a new window on the right. Make the changes needed and click End when you are done.
To remove the Terms of service headings you have created, simply click on the Edit button, then select the heading you wish to delete and press Remove.


