Website AI Assistant
 Updated 2 weeks ago
by
Faisal Durrani
Updated 2 weeks ago
by
Faisal Durrani
The Website AI Assistant is an intelligent tool that helps you create and customize your Landing Page using natural language prompts. Instead of manually building each section, you can ask the AI Assistant to generate new components, edit existing content, adjust layouts, and refine your page design.
Let's explore how the AI Assistant works, how it provides example prompts, and how you can use reference upload options to quickly build visually appealing and professional Landing Pages.
Enabling the AI Tool
To begin using Website AI, you need to enable the tool first. Follow the steps below:
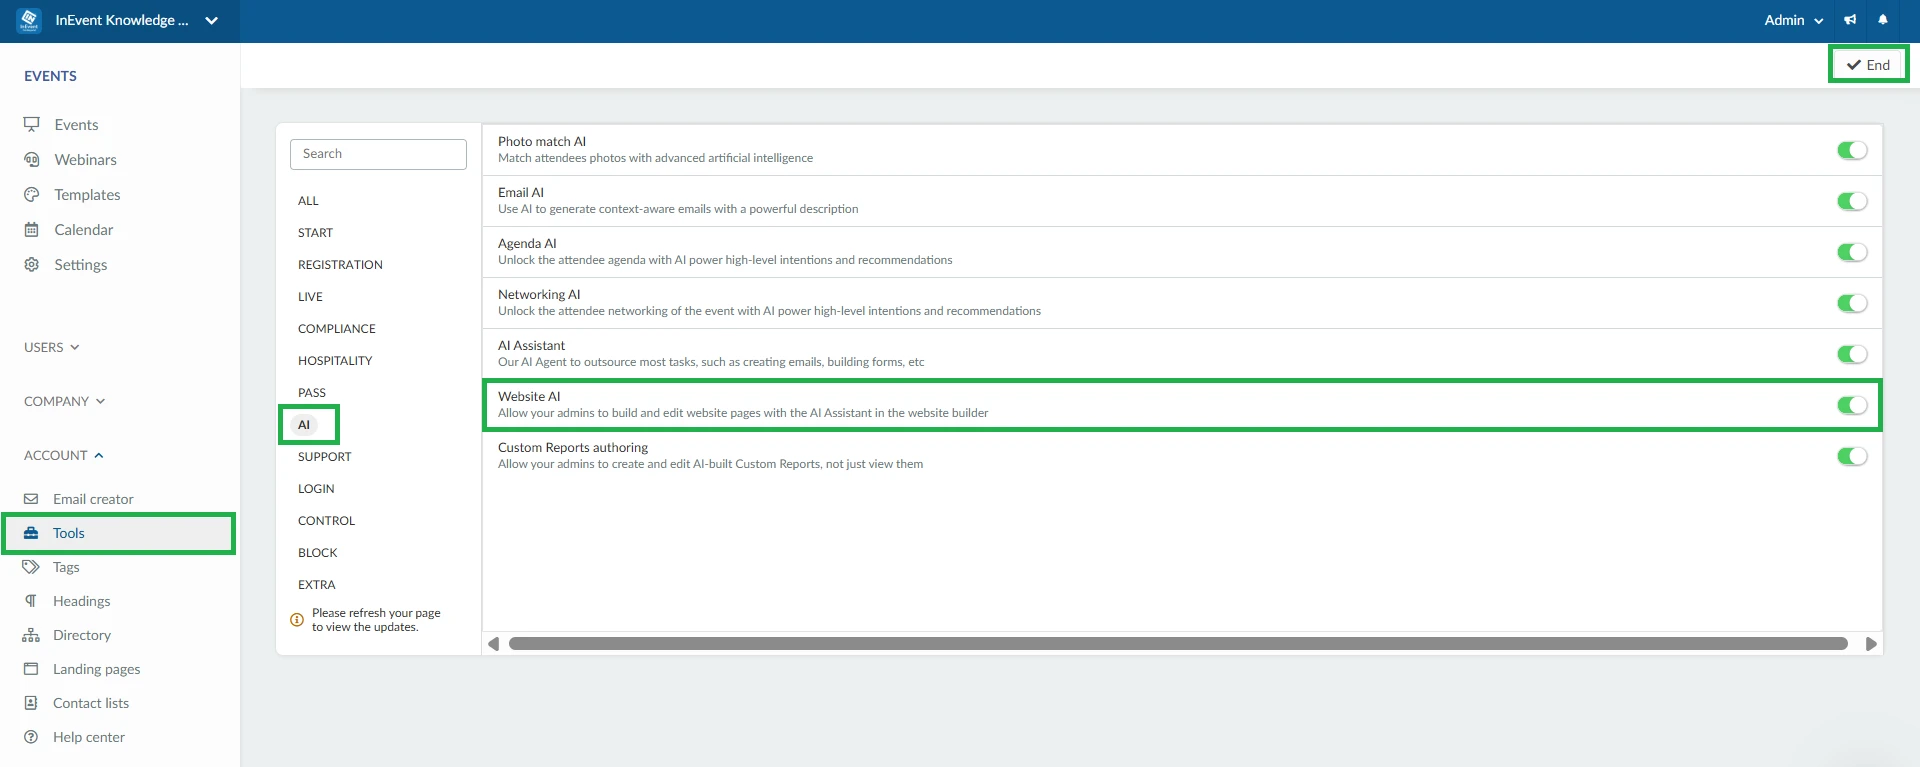
- Navigate to the Company level.
- Click Account > Tools.
- Click the AI section and locate Website AI.
- Click Edit and toggle the button on.
- Press End to save your changes.
AI Assistant
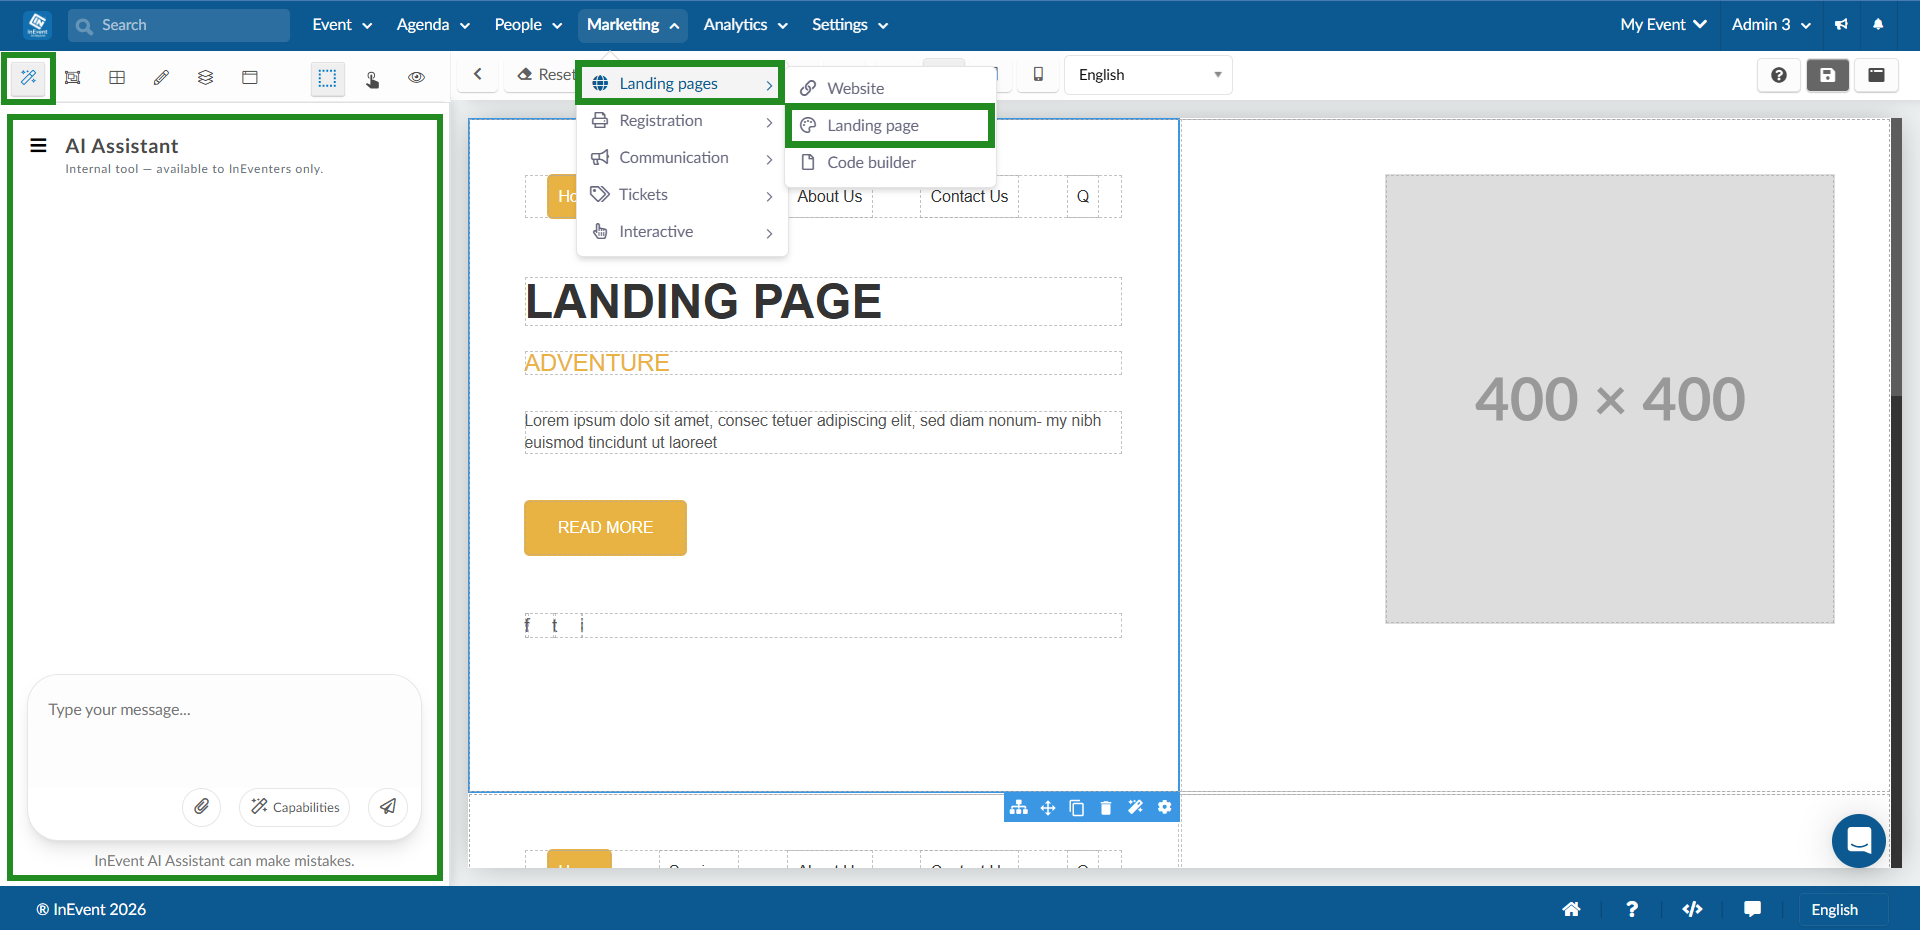
The AI Assistant appears as a chat panel where you can enter prompts, upload reference images, or provide a website URL to generate content based on your requirements. To access the AI Assistant, navigate to Marketing > Landing Pages > Landing page, and click the AI Assistant icon at the top left corner.
Creating a Landing page section using a prompt
To generate a section using AI:
- Navigate to AI Assistant.
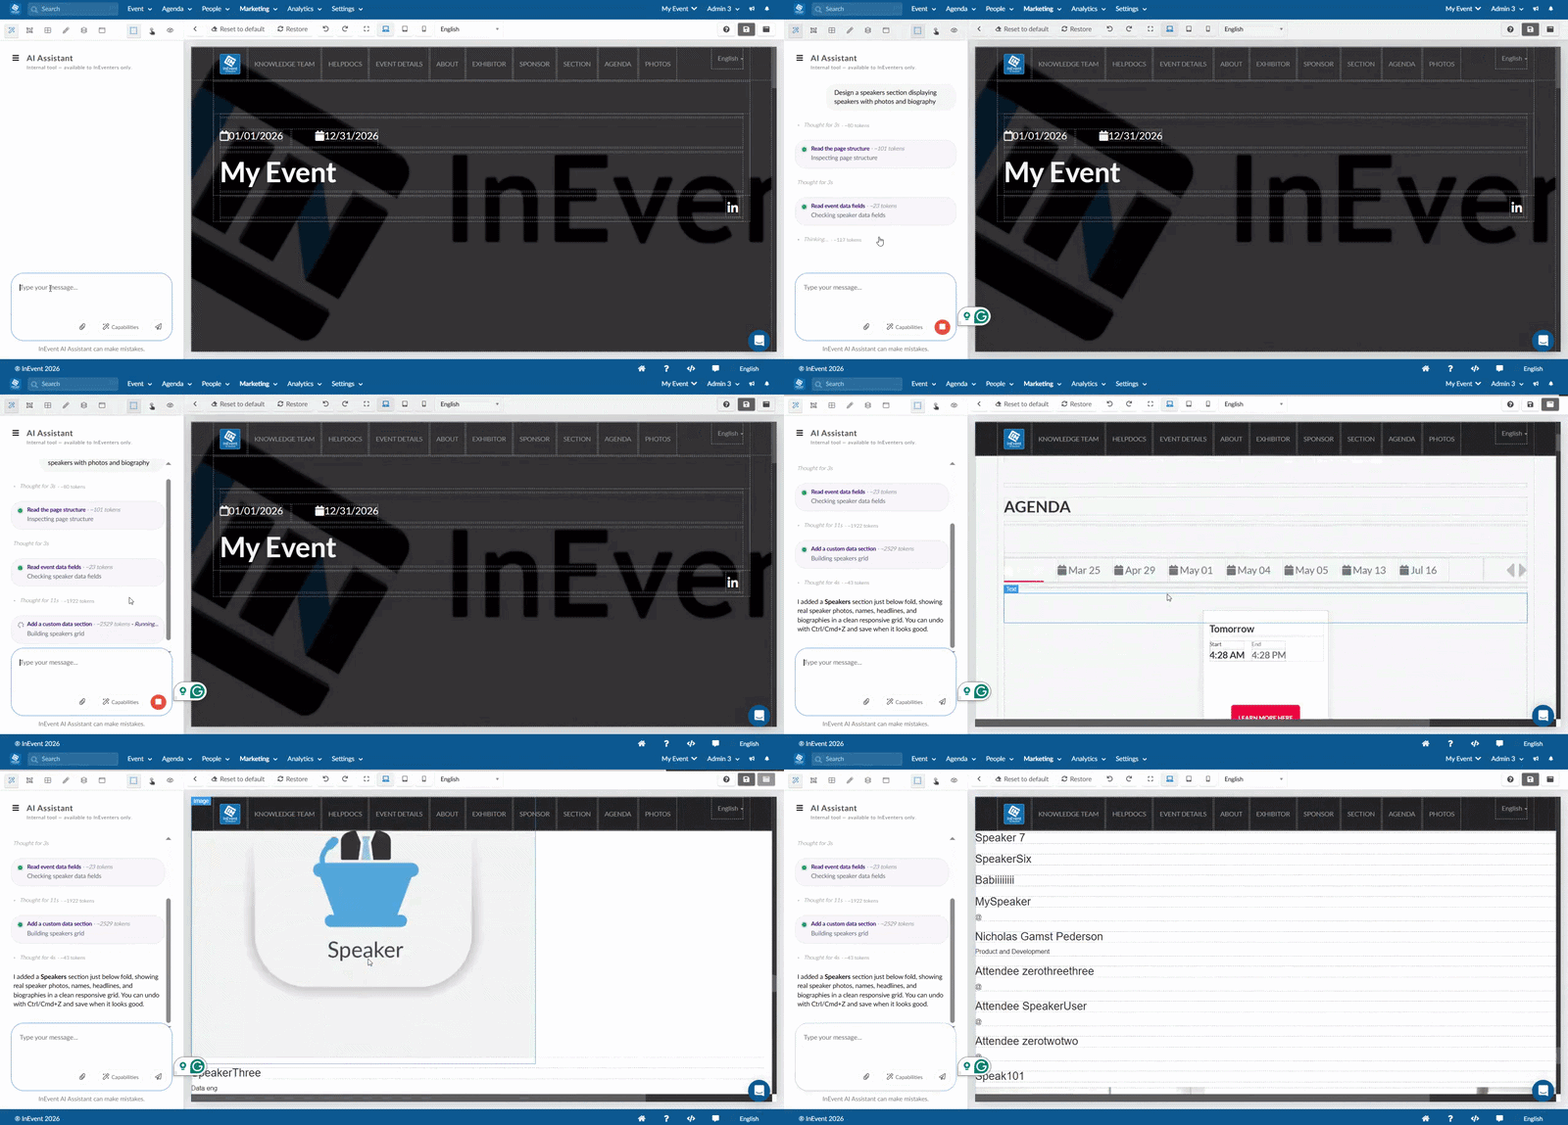
- Enter a prompt describing a section you want to create.
- Click the Send button.
- Review the generated content and make any necessary adjustments before adding it to your Landing Page.
'Create a hero banner for a technology conference with a title, subtitle, and Register Now button. '
'Design a speakers section displaying speakers with photos and biography '
'Design a registration section with a headline, event description, and Register Now button'
'Generate a sponsors section with Gold, Silver, and Bronze sponsor categories'
Replicating an existing website section
The AI Assistant can also generate a Landing Page section based on an existing design. There are two ways to provide a reference:
- Upload file: Select and upload an image of a website section you want to replicate. After image upload is complete, enter the prompt describing the section you want the AI to generate.
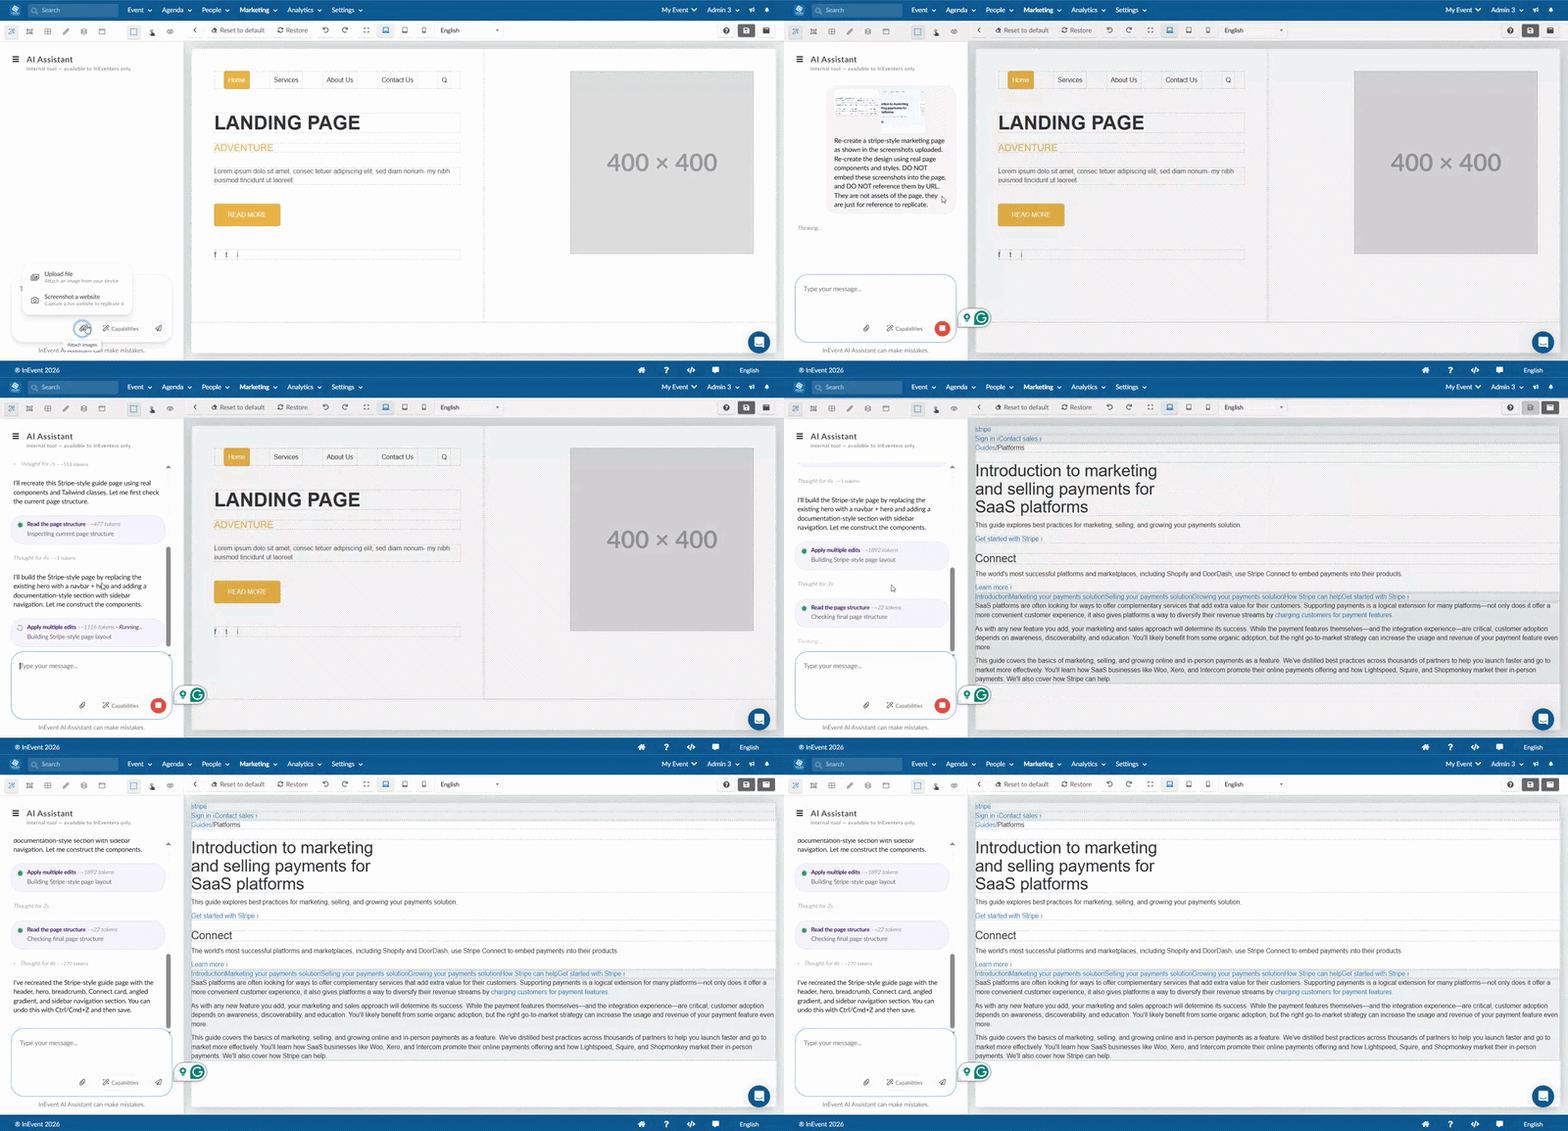
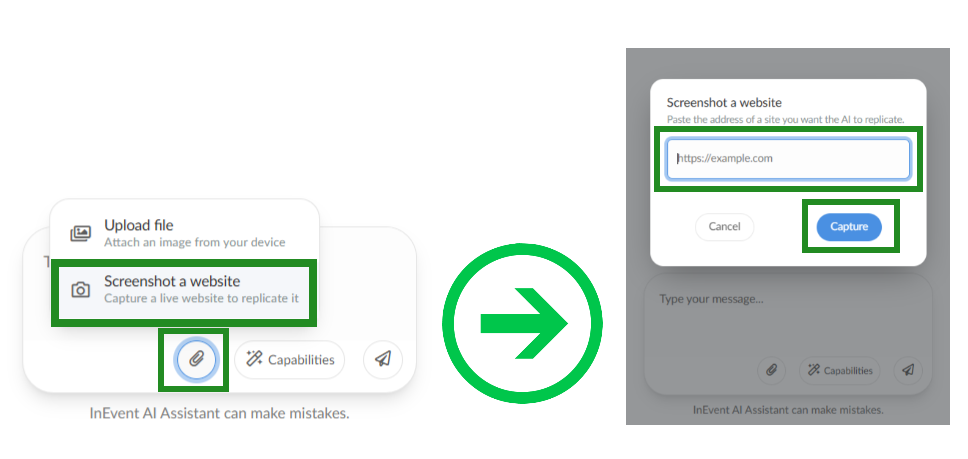
- Enter the URL: Provide the URL of the webpage containing the desired section. Select the Screenshot a website option from the AI Assistant. It will open a new window to paste the full URL address of the site you want AI to replicate. Paste the URL and click on Capture. The AI will capture a screenshot of the webpage and use it as a reference when generating a new section.
Best practices when using AI Assistant
To achieve the best results when using the AI Assistant:
- Describe the desired layout, colors, and content as clearly as possible.
- Specify the purpose of the section (for example, Hero Banner, Agenda, Sponsors, or Speakers).
- Mention any buttons or calls to action you want included, e.g., Register now, Book now, etc.
- Review the generated content before publishing your Landing Page.
Capabilities
The AI assistant contains a Capabilities button in the chat panel. The capabilities button provides a collection of predefined prompt examples to help you get started with the AI Assistant. Clicking the button opens a menu containing a list of common actions the AI Assistant can perform, such as editing existing components, adding new components, or analyzing the page structure.
Each prompt is accompanied by a brief description explaining what the action does. The capabilities menu serves as a guide for interacting with the AI Assistant, especially for users who are unfamiliar with prompt writing or want to explore the assistant's available features. You can use the provided prompts as inspiration and customize them with additional details to achieve more precise results.
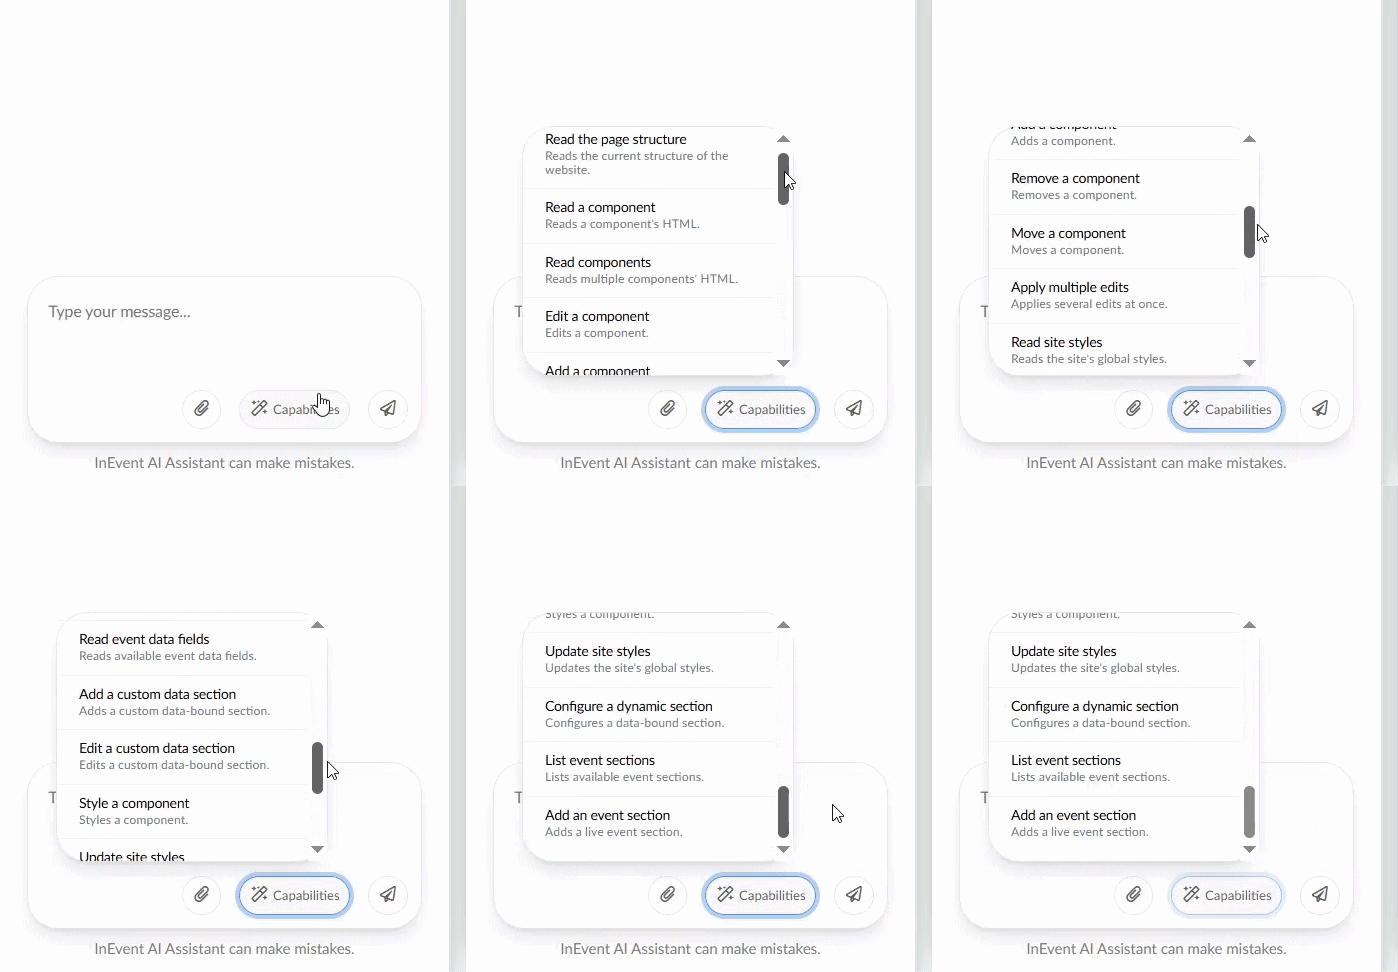
You can use the prompts shown in the scroll menu of the Capabilities button by typing the prompt in the space provided in the chat panel of the AI Assistant. Below are some examples of prompts from the capabilities button:
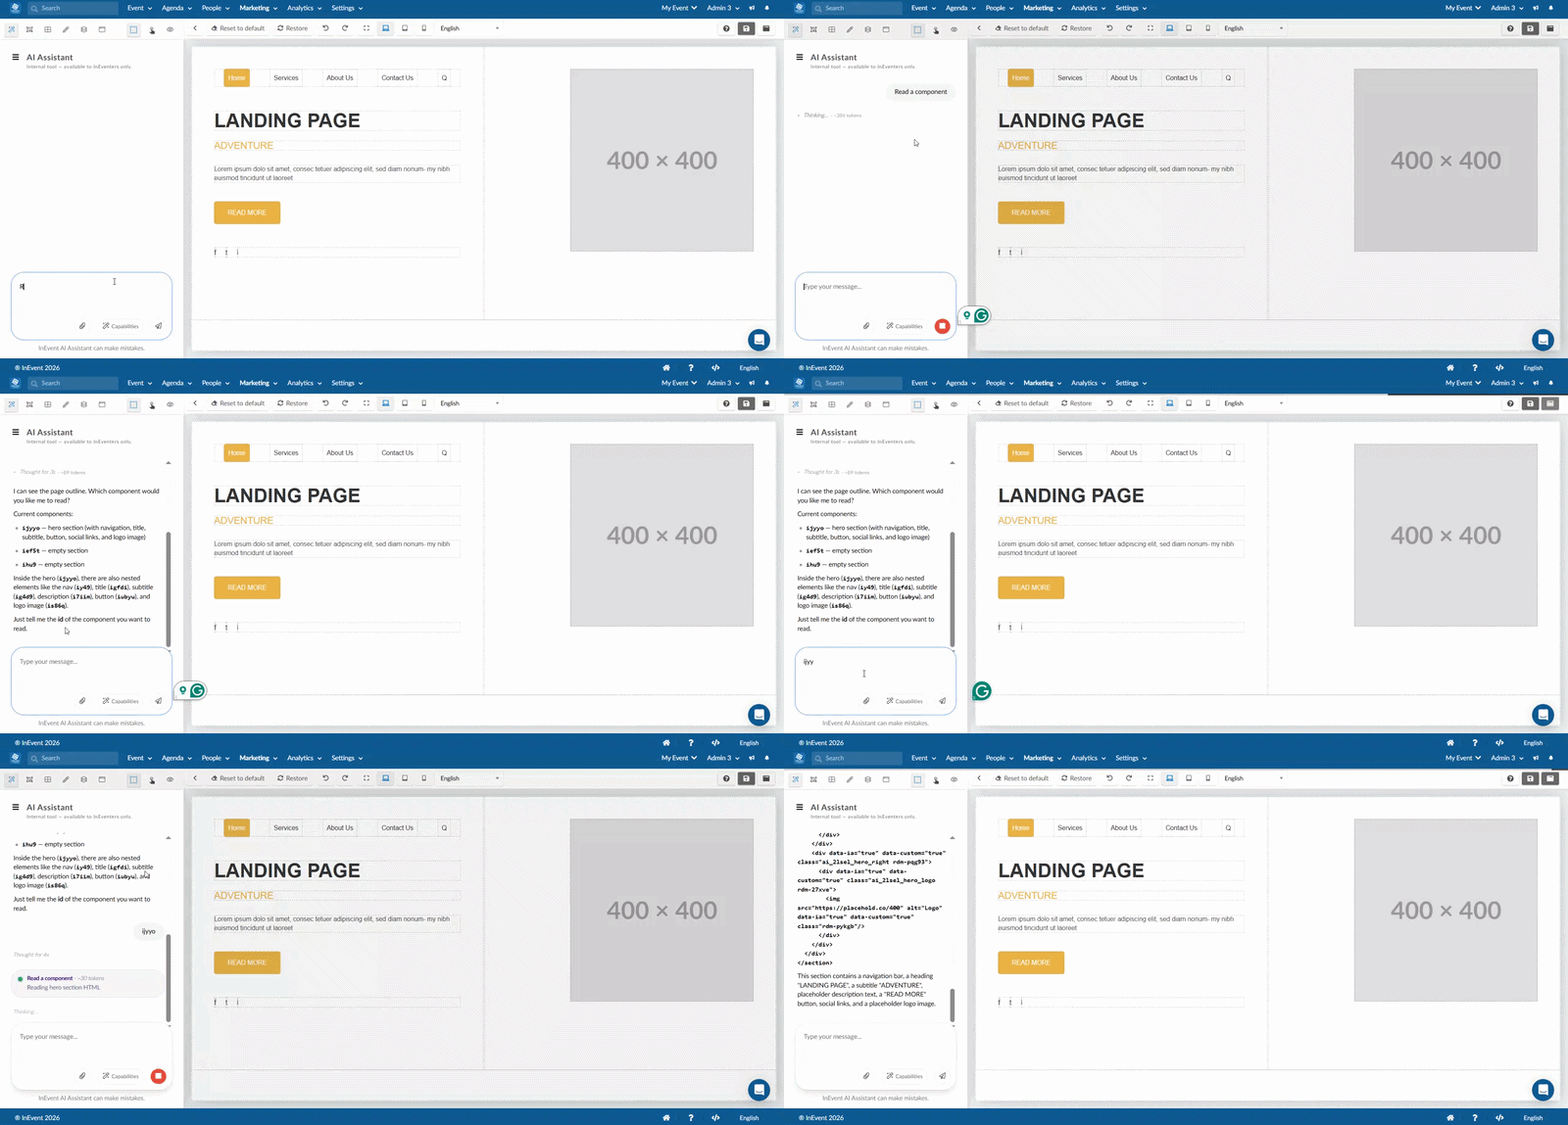
- Read the page structure: Analyzes the current Landing Page structure and identifies its existing sections and components. This helps you understand how the page is organized and make informed changes or improvements.
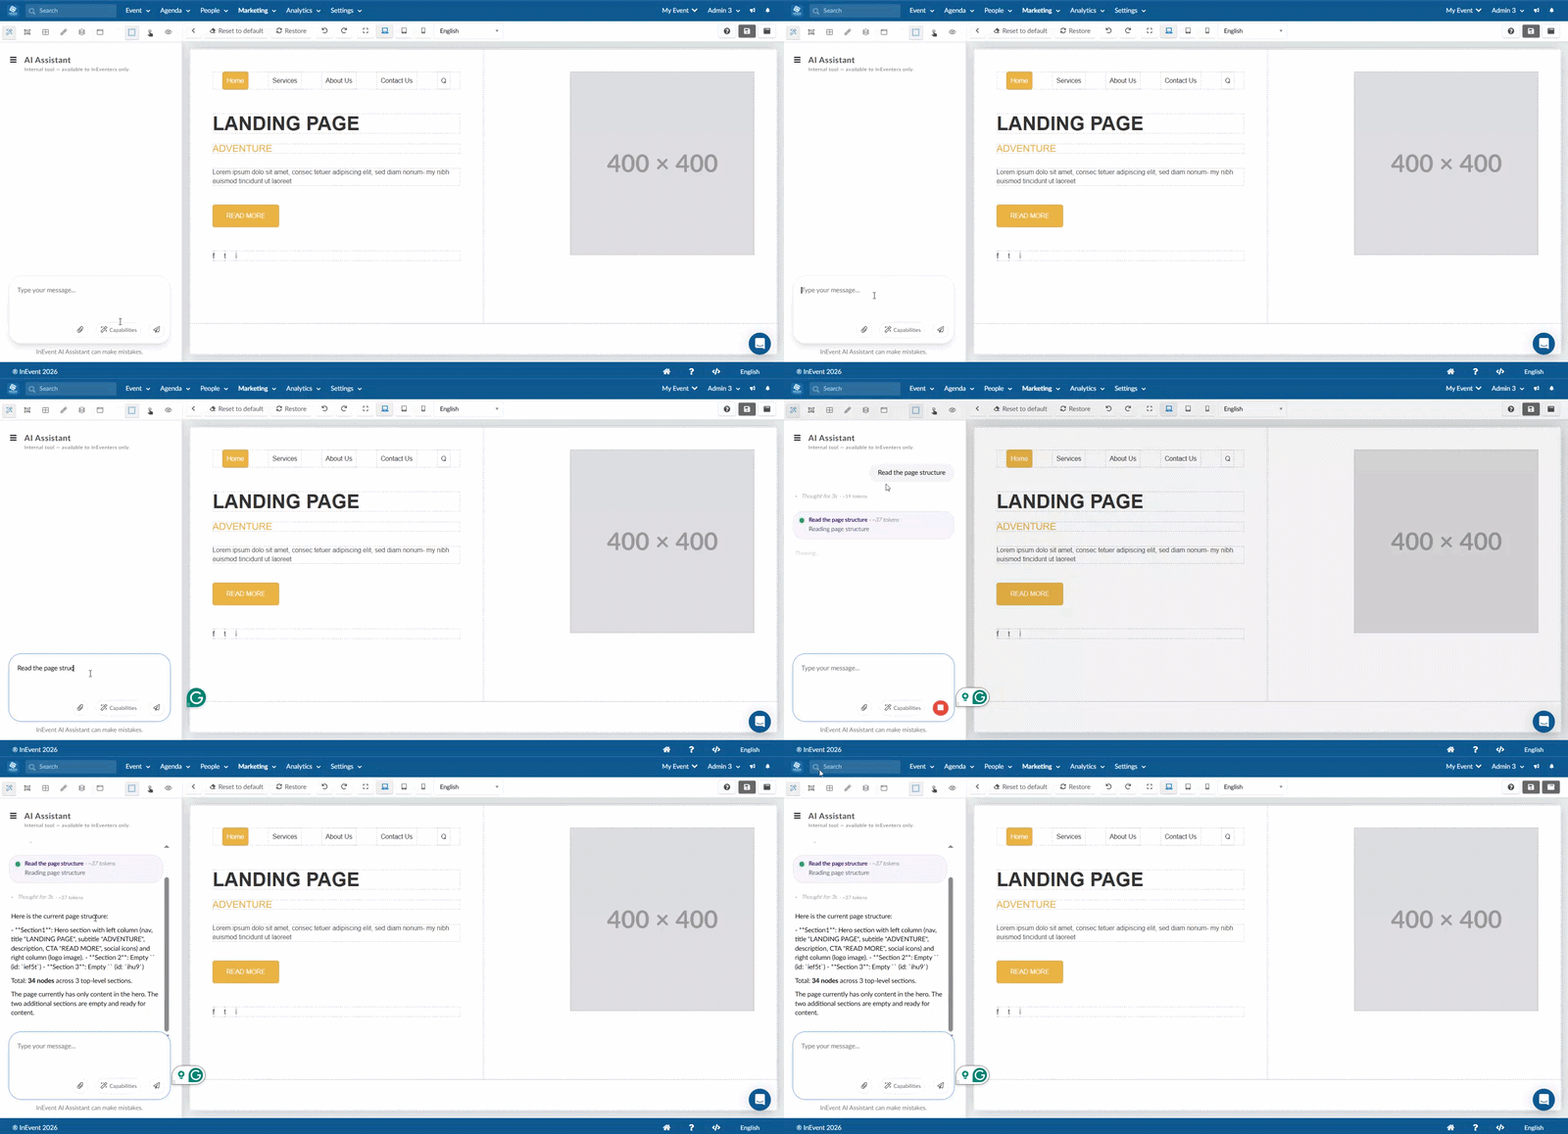
- Read a component(s): Analyzes a specific component on the Landing Page to understand its content, structure, and design. This allows you to review the component and make targeted changes or improvements.
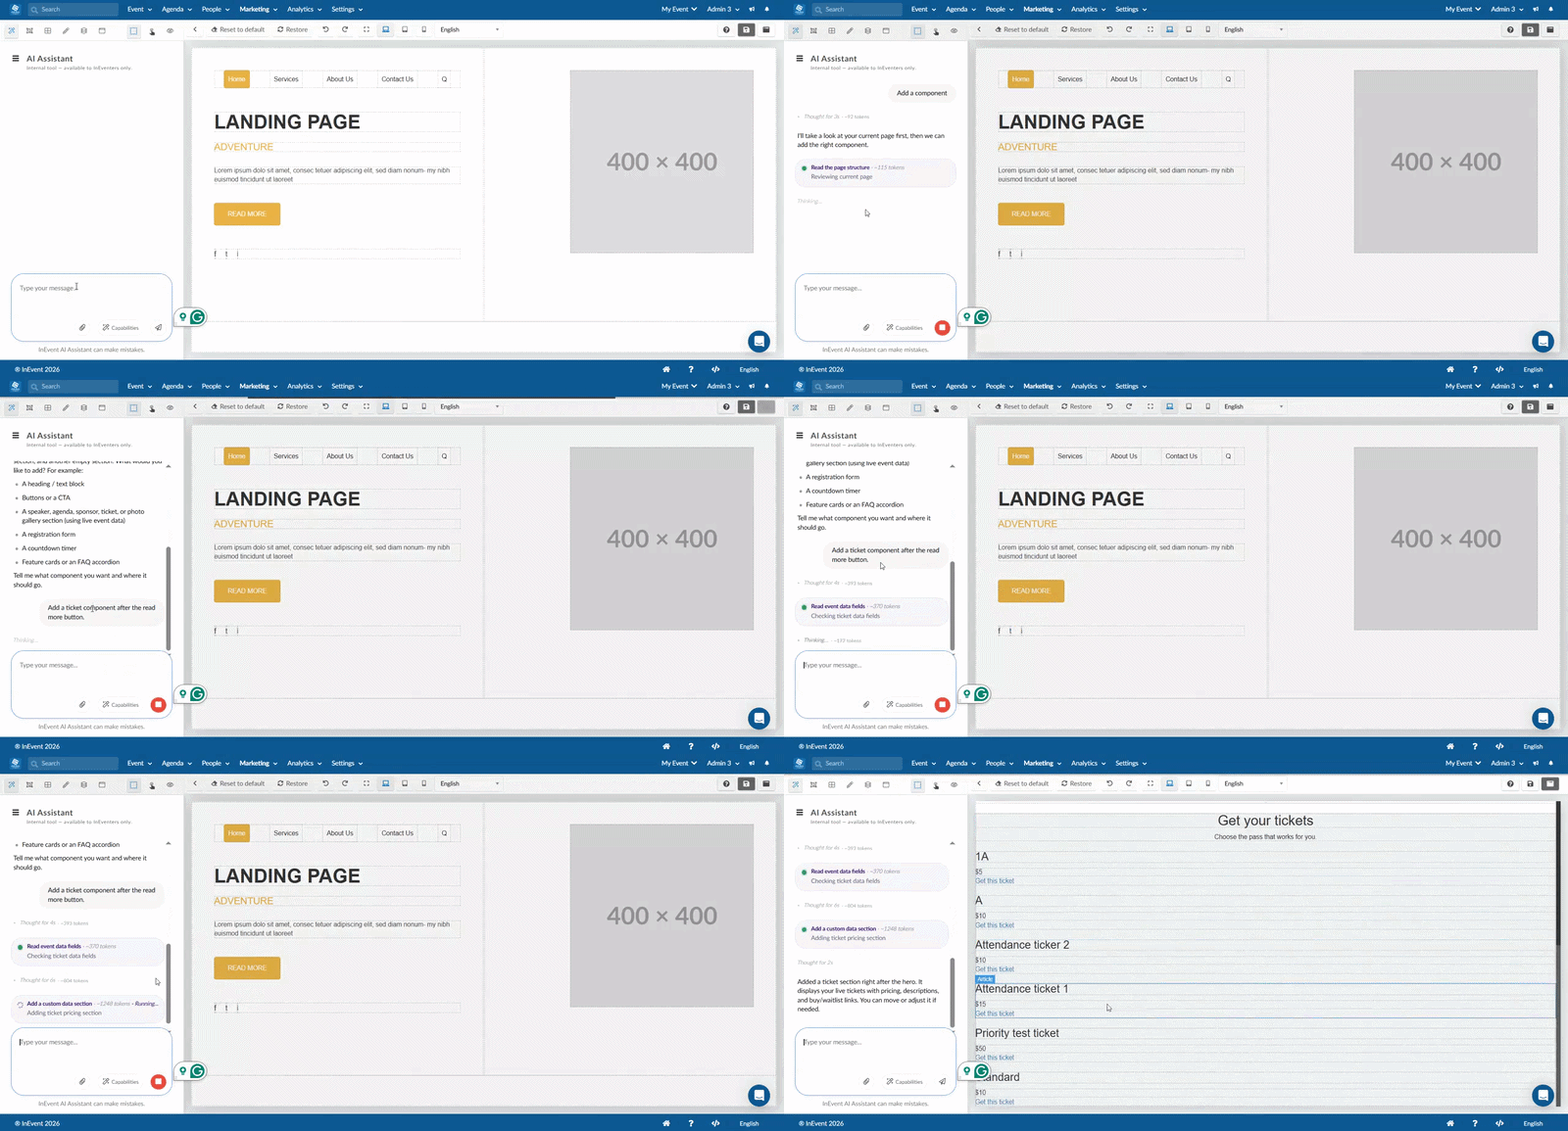
- Add a component: Creates and adds a new component to the Landing Page based on your instructions, such as a Hero section, speaker section, agenda, or contact form.
- Style a component: Applies your desired visual styling to an existing component, including colors, typography, spacing, layout, and other design elements.
Create a floating navigation bar with rounded pill-shaped edges, a dark navy background with indigo accents, subtle glassmorphism and soft shadows, and smooth hover transitions with a glowing active state.
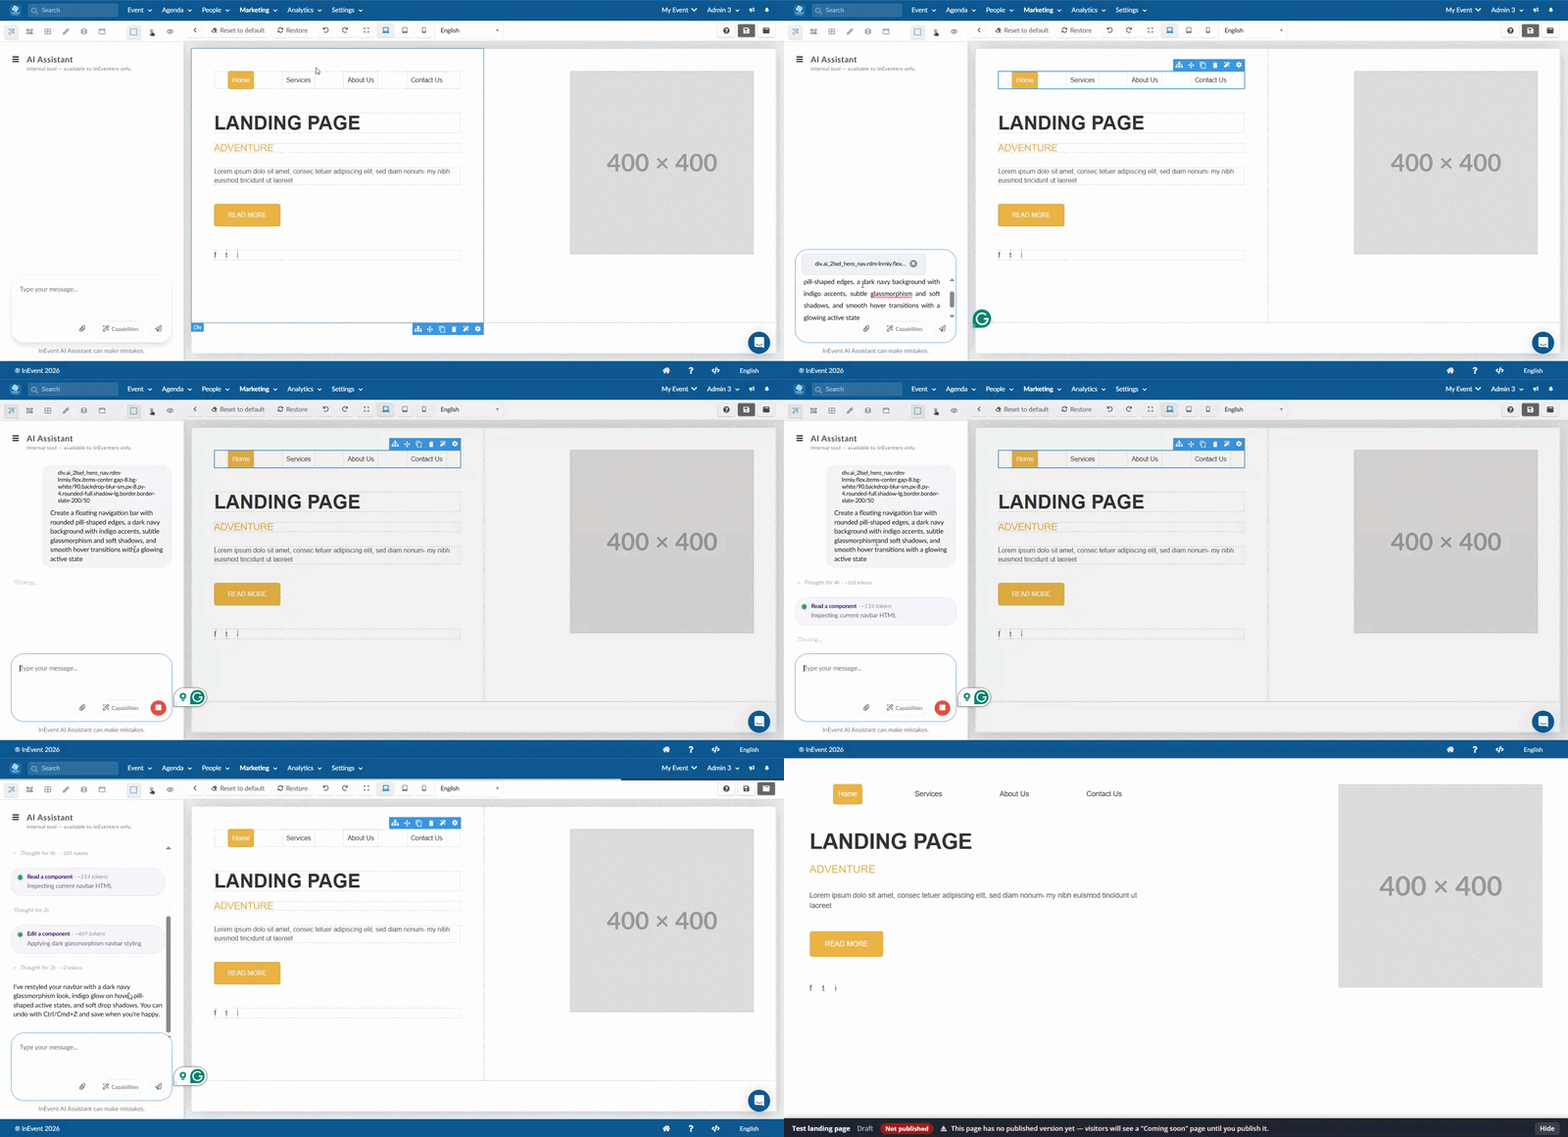
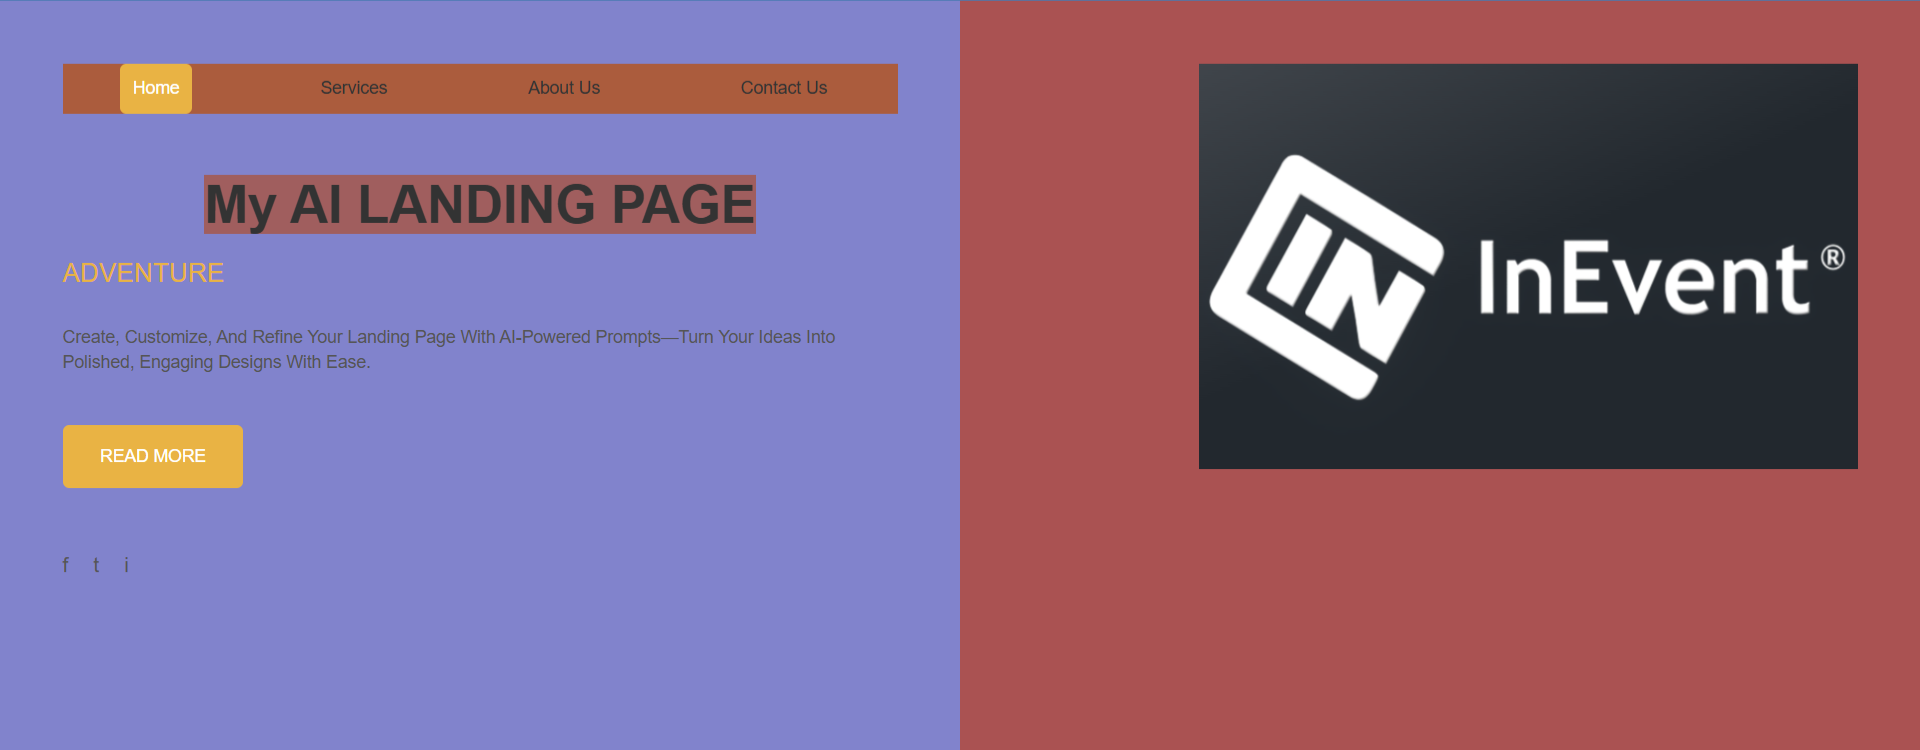
For better results, write clear, precise, and detailed prompts that specify the desired layout, colors, typography, content, and visual style. After the AI generates the content, review and refine the results by making necessary adjustments to elements such as colors, typography, spacing, images, content placement, and overall layout. Using AI-generated content as a starting point and refining it to match your requirements will help you create a more polished and effective Landing Page. Below is an example of a landing page created using the AI assistant. It contains minimal social media buttons and a bold main title with gradients.