Push Notifications
 Updated 3 weeks ago
by
Lorenzo
Updated 3 weeks ago
by
Lorenzo
A push notification is a message that attendees receive via their web browser or on their mobile phones. Push notifications can be general event announcements, a poll, a new request for feedback for a certain activity, or the event itself.
Push notifications can be delivered to your user's device (mobile or desktop), but these notifications can only be sent to users who have opted-in to receive them.
Sending push notifications to all attendees
There are two ways to send push messages to all your attendees:
Event > Details page
In the Event > Details page, follow these steps:
- Click the Send message button at the top left corner of the page.
- Write your message in the text box that appears.
- To insert a hyperlink, click on the Insert/edit link icon. A new window will open for you to paste the URL, add a title, and choose whether the link should open in the current window or a new window.
https://www.inevent.com- Click Save.
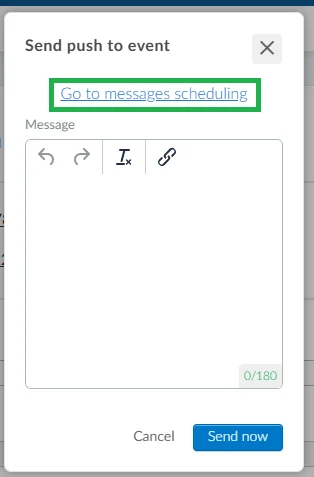
- Press Send now to instantly send the message to all your attendees.
After you press Send now, you will receive a message informing you that your message has been sent successfully.
If you don't want to send the message instantly and would like to schedule it for later, you can click on Go to message scheduling and follow the steps provided in the How do I schedule a push notification for all attendees section.
Marketing > Communication > Push messages page
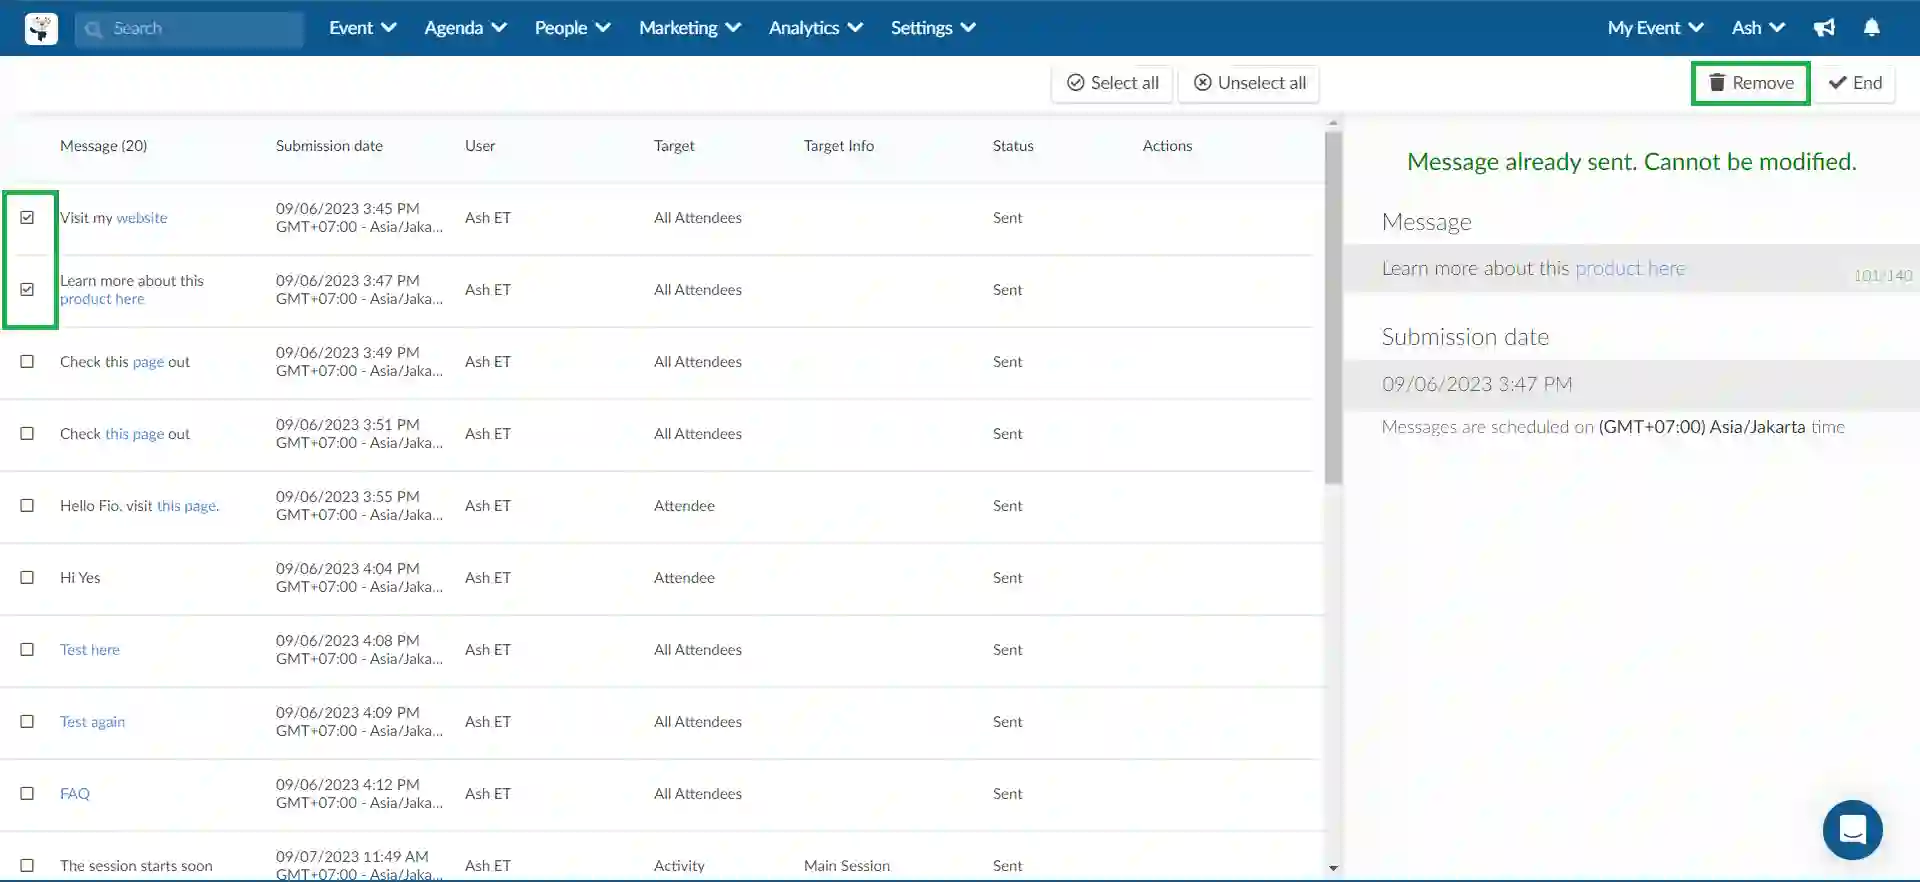
In the Marketing > Communication > Push messages page, you will find a list of all push messages sent from different parts of the platform. The dashboard will contain the following information:
- Message: The push message
- Submission date: The date and time the push message was sent.
- User: The name of the admin who sent the push message
- Target: Who the message was sent to: All attendees, single attendee, activity, list.
- Target Info: Shows the name of the list the push message was sent to.
- Status: Shows if the message has been Sent or is Pending. A status will read pending if it is a scheduled message.
- Actions: Shows the action taken.

You can send messages with each participant's name, email, role or company. To include these fields, simply insert the parameters as dynamic content, such as:
- {{first-name}} is replaced by the person's first name
- {{last-name}} is replaced by the person's last name
- {{name}} is replaced by the person's full name
- {{email}} is replaced by the person's email
- {{role}} is replaced by the person's role
- {{company}} is replaced by the person's company
To send a new push notification to all attendees, click on + Create message in the left-hand corner. A text box will appear for you to write your message. You can insert hyperlinks, undo or redo changes, as well as clear formatting using their respective tools. Once you're done making your customizations click on Send now.
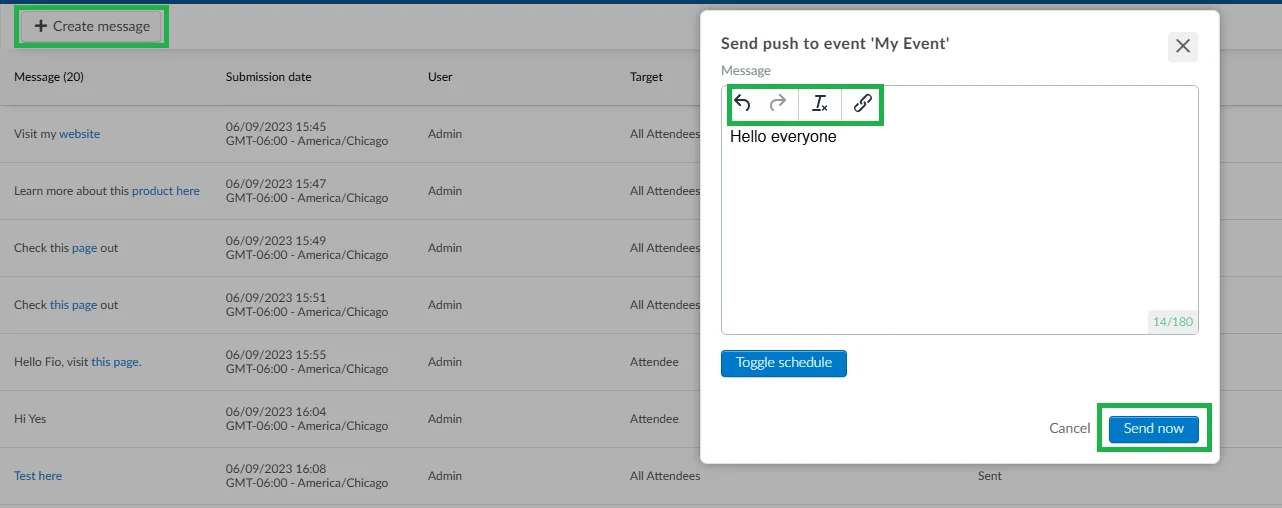
After you press Send now, you will receive a message informing you that your push notification has been sent successfully.
If you prefer to schedule your message to be sent at a later time, refer to the How do I schedule a push notification for all attendees section.
Scheduling a push notification for all attendees
If you prefer to schedule your message to be sent at a future time, click Toggle Schedule, select the time and date from the date selector that appears once you click on the Submission date field. Click on the Schedule button once you are done.
Notifications will be scheduled in line with the time zone you have selected for your event.
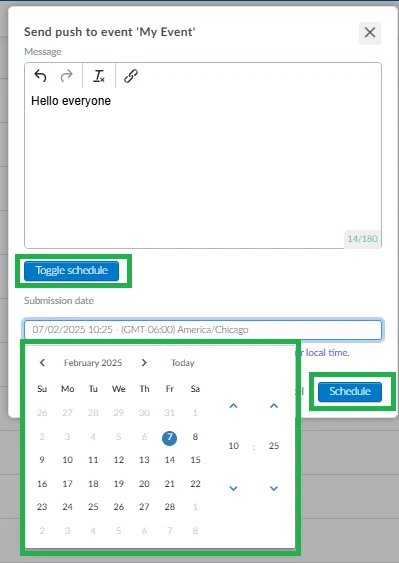
After you press Schedule, you will receive a message informing you that your push notification has been scheduled.
Editing scheduled push messages
It is possible to edit a scheduled push message. Push messages already sent cannot be modified. To edit a push message follow these steps:
- Locate the scheduled push message and click on it. A new window will appear by the right side of the page.
- Click on Edit.
- Make the changes you wish to make to your message. You can edit the message, as well as change the submission date, or you can click the Send now button to instantly send the message.
- Press End to save your changes.
Deleting a push notification
Push notifications that are already created can be easily deleted. To do so, complete the following steps:
- Click Edit from the Push messages interface.
- Check the box next to the push notification(s) you wish to remove.
- Click Remove.
After completing the steps above, the push notification will be removed from your event.
Push notification to attendees in an activity
To send a push notification to the people participating in a specific activity, go to Agenda > Activities. Select the activity you'd like to send the notification to on the left side of the screen, and allow the panel to open on the right.
In the Details tab, scroll to the bottom of the page, and click Send message.
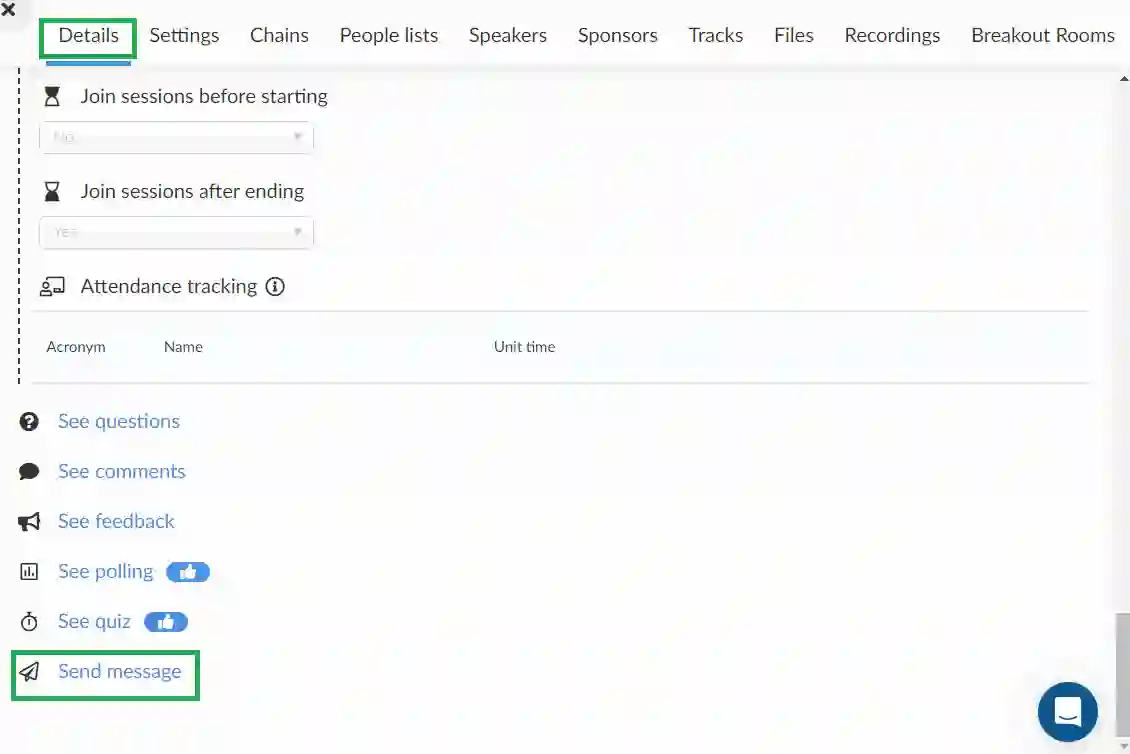
The same pop-up will appear to allow you to write and send/schedule your notification.
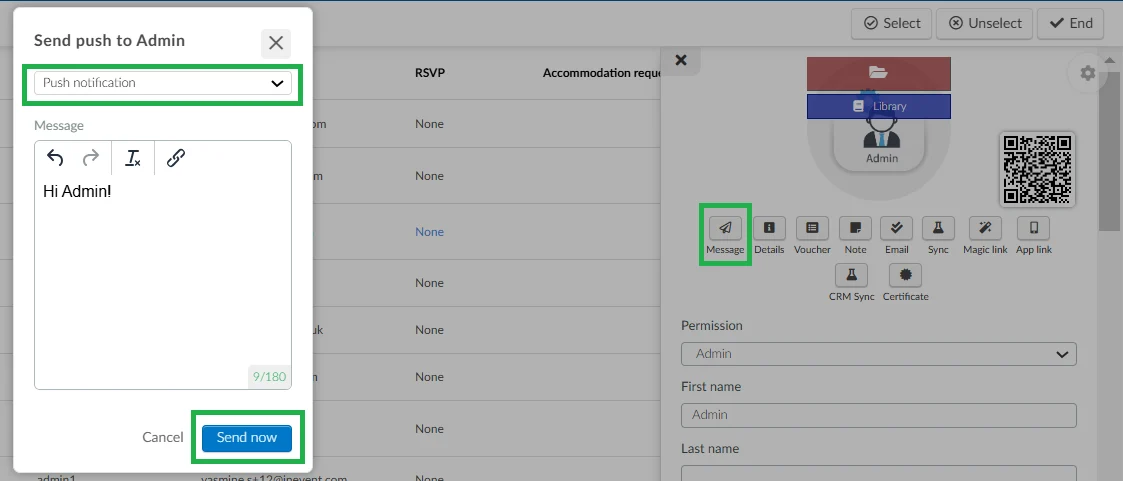
Individual push notification for attendees
To send a push notification to a single attendee, follow these steps:
- Go to the attendees' list under People > Attendees page.
- Select the attendee you would like to send the message to.
- Click on the Message icon, and a text box will appear.
- Write your message in the text box.
- You can insert hyperlinks, undo or redo changes, as well as clear formatting using their respective tools (optional).
- Click Send message.
Push notifications to specific lists
To send push notifications to specific lists, follow the steps below:
- Go to Marketing > Communication > SMS Sender.
- In the upper left corner, use the drop-down menu to select the list that should receive the push notification.
- Press the button Send push and a text box will appear.
- Write the message you want the list to receive.
- You can insert hyperlinks, undo or redo changes, as well as clear formatting using their respective tools (optional).
- Click on Send now to send the message instantly to your list.
If you would like to schedule the message to be sent at a later time, click the Toggle schedule button and follow the steps given in the How do I schedule a push notification for all attendees section.
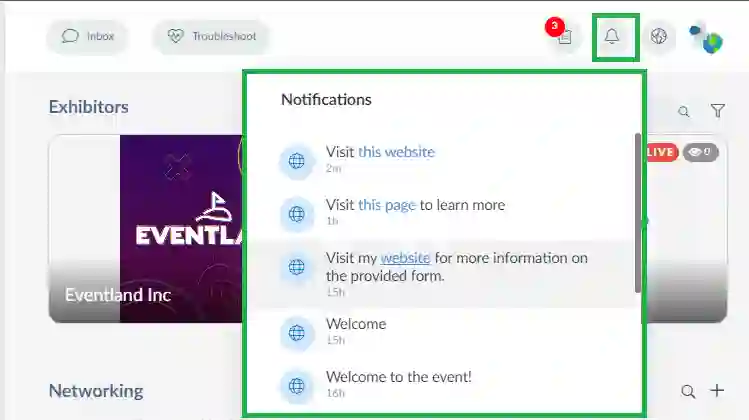
Notifications' display in the Virtual Lobby
When the notification is delivered, it will appear in the top right corner of the Virtual Lobby, just like a browser notification, regardless of where attendees are within the platform.
If the push message contains a hyperlink, attendees can easily click on the link to be directed to the associated page.

Attendees can also consult all the messages received during the event through the Notification Center by clicking on the bell icon as displayed below:
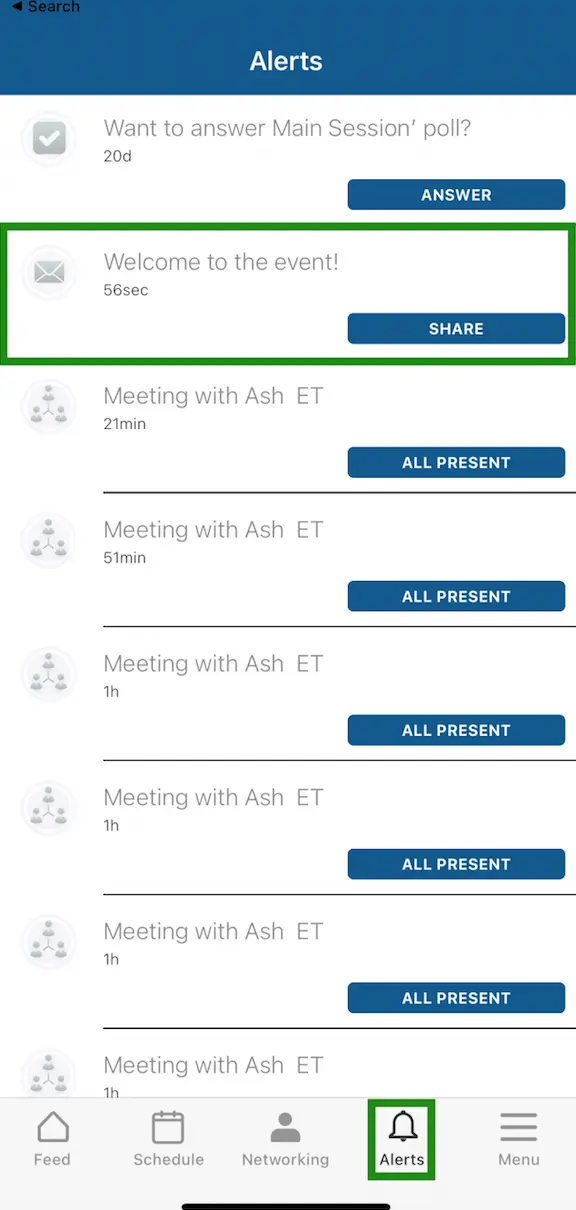
Notifications' display in the App
Push message notifications will appear as pop ups for attendees in the app. The pop-up will only disappear once attendees press Cancel or View.
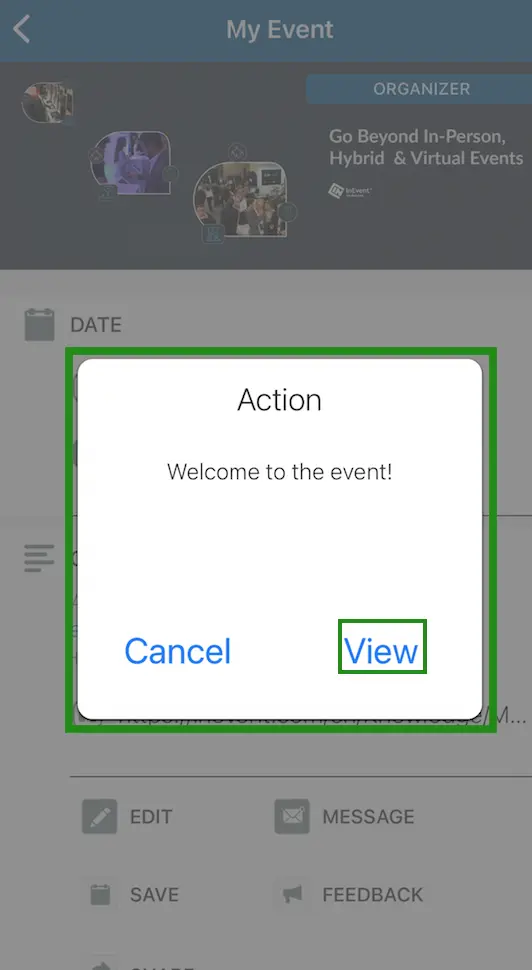
If attendees click on View they will be directed to the Alerts page where they can view all notifications.