Cancellation form
 Updated 11 months ago
by
Amalia
Updated 11 months ago
by
Amalia
In the InEvent platform, it is possible to provide users the ability to cancel their registration to the event through the Cancellation form. Once an attendee files a cancellation form, they will be removed from the attendee's list from People > Attendees.
Attendees can view the Cancellation form from their My Account tab, and submissions can be viewed in the exported to a spreadsheet document.
How do I enable this tool?
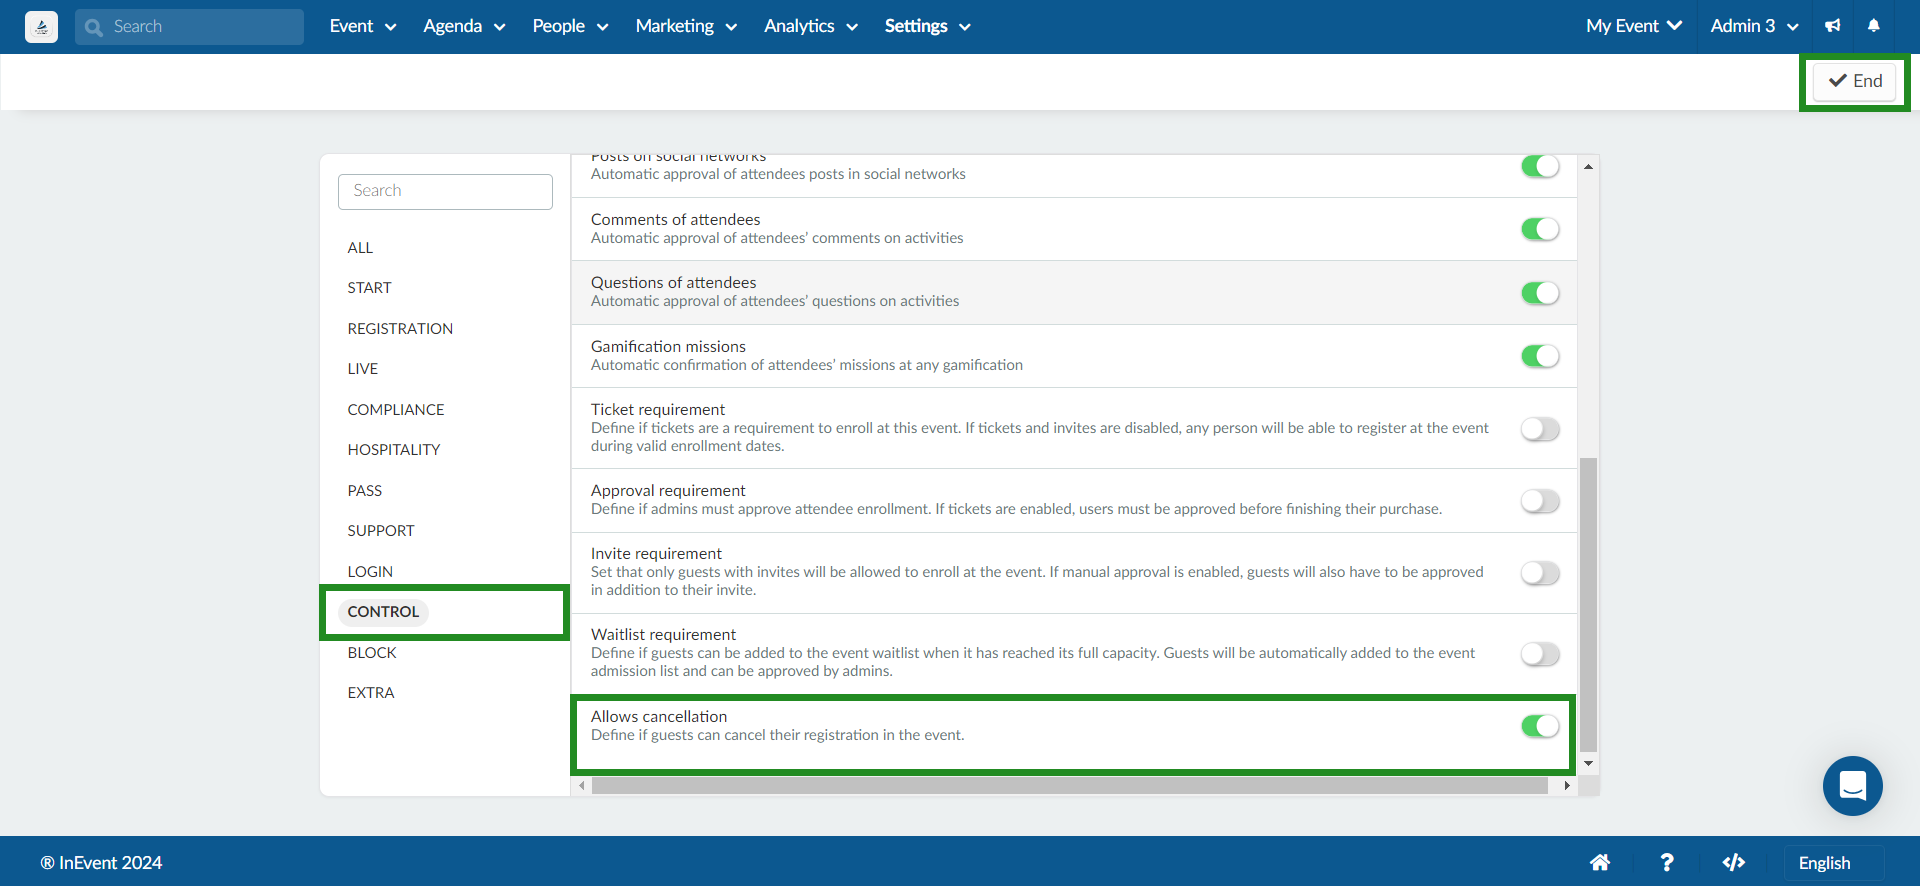
It is required to enable the Allows cancellation feature in the Event tools before using it. To enable Allows cancellation, complete the following steps:
- Navigate to Settings > Tools.
- Locate Allows cancellation under Control section or type in Allows cancellation in the search bar.
- Click Edit on the top right corner of the screen.
- Toggle on the button beside the Allows cancellation box to enable the feature.
- Press End to save changes.
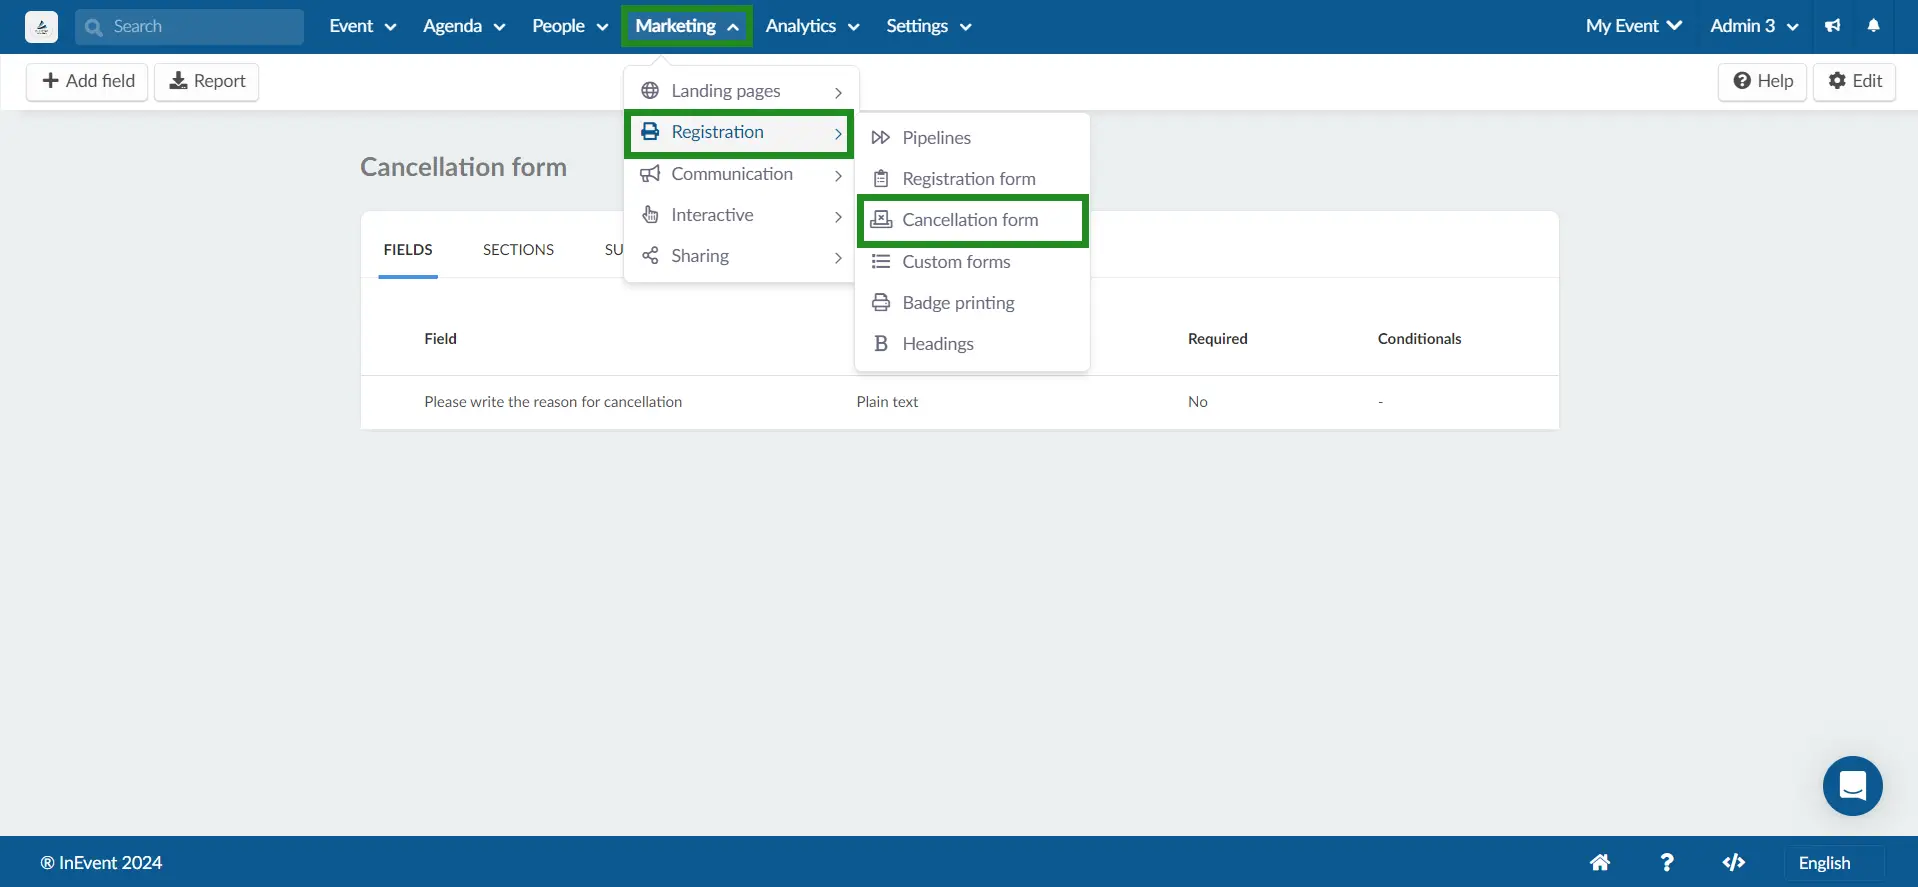
Creating the Cancellation form?
To create the cancellation form, navigate to Marketing > Registration > Cancellation form.
Fields: How do I add fields to the form?
By default, there will be a field created on the cancellation form. If you want to add more fields, follow the instructions bellow:
- Click Add field. A pop-up box will appear.
- Enter your field title or question.
- Choose an answer type from the drop-down menu.
- Press Create.
Sections
Sections allows you to separate fields of your cancellation form into their own group. Sections makes the form look neat and organized, as you can group similar fields on your form. You can also add titles and subtitles to better describe each section.
How do I create form sections?
In addition to creating form fields or questions, you can also create form sections and group your cancellation form fields. To create form sections, follow the steps:
- Click the Section tab.
- Click on Edit.
- Enter the section name in the text box.
- Click on New Section.
- Press End to save changes.
Once you have completed the steps above, you can proceed to modify your section details, such as adding a description, configuring its Conditional rules, or creating its own dedicated page.
How do I edit my sections?
After your section is created, you can click on Edit within the Sections tab and modify the following attributes:
- Name: Modify the name of your form.
- Description: Add a description of your form.
- Conditional from: This field is relevant when setting sections as conditionals. Refer to this article to learn more.
- Conditional option from: This field is relevant when setting sections as conditionals. Refer to this article to learn more.
- Dedicated page: When set to Yes, the section and fields attached to it, will be shown on a separate page in the Cancelation form when you click on Next. When set to No, the section will appear within the form's first page. Refer to this section to learn more.
- Add translations: You can add translations to your Name and Description fields. To learn how to add translations, refer to our information on adding section translations.
How do I rearrange sections?
After creating sections, you can reorder the section's placement. To do so, follow the steps below:
- Click on Edit within the Sections tab.
- Click and hold the drag handle button of your target section.
- Drag and drop the section to the desired placement.
- Click End to save your changes.
After completing the steps above, your sections will be reordered and the attached fields will be displayed following the set order of the sections.
How do I add fields to my section?
After creating sections, you can group fields under your sections. To do so, ensure you have created fields and proceed with the steps below:
- Select the field you wish to group under your section.
- Click on Edit.
- Select the target section using the Section drop-down menu.
- Click End to save your changes.
How do I remove a section?
You can remove a section by following the steps below:
- Click on Edit within the Sections tab.
- Locate the section you wish to remove.
- Click on Delete section. A confirmation pop-up box will be displayed.
- Click on Remove to confirm.
- Click on End to save your changes.
Submissions: How do I view submitted forms?
To view forms that have been submitted, click Submissions.
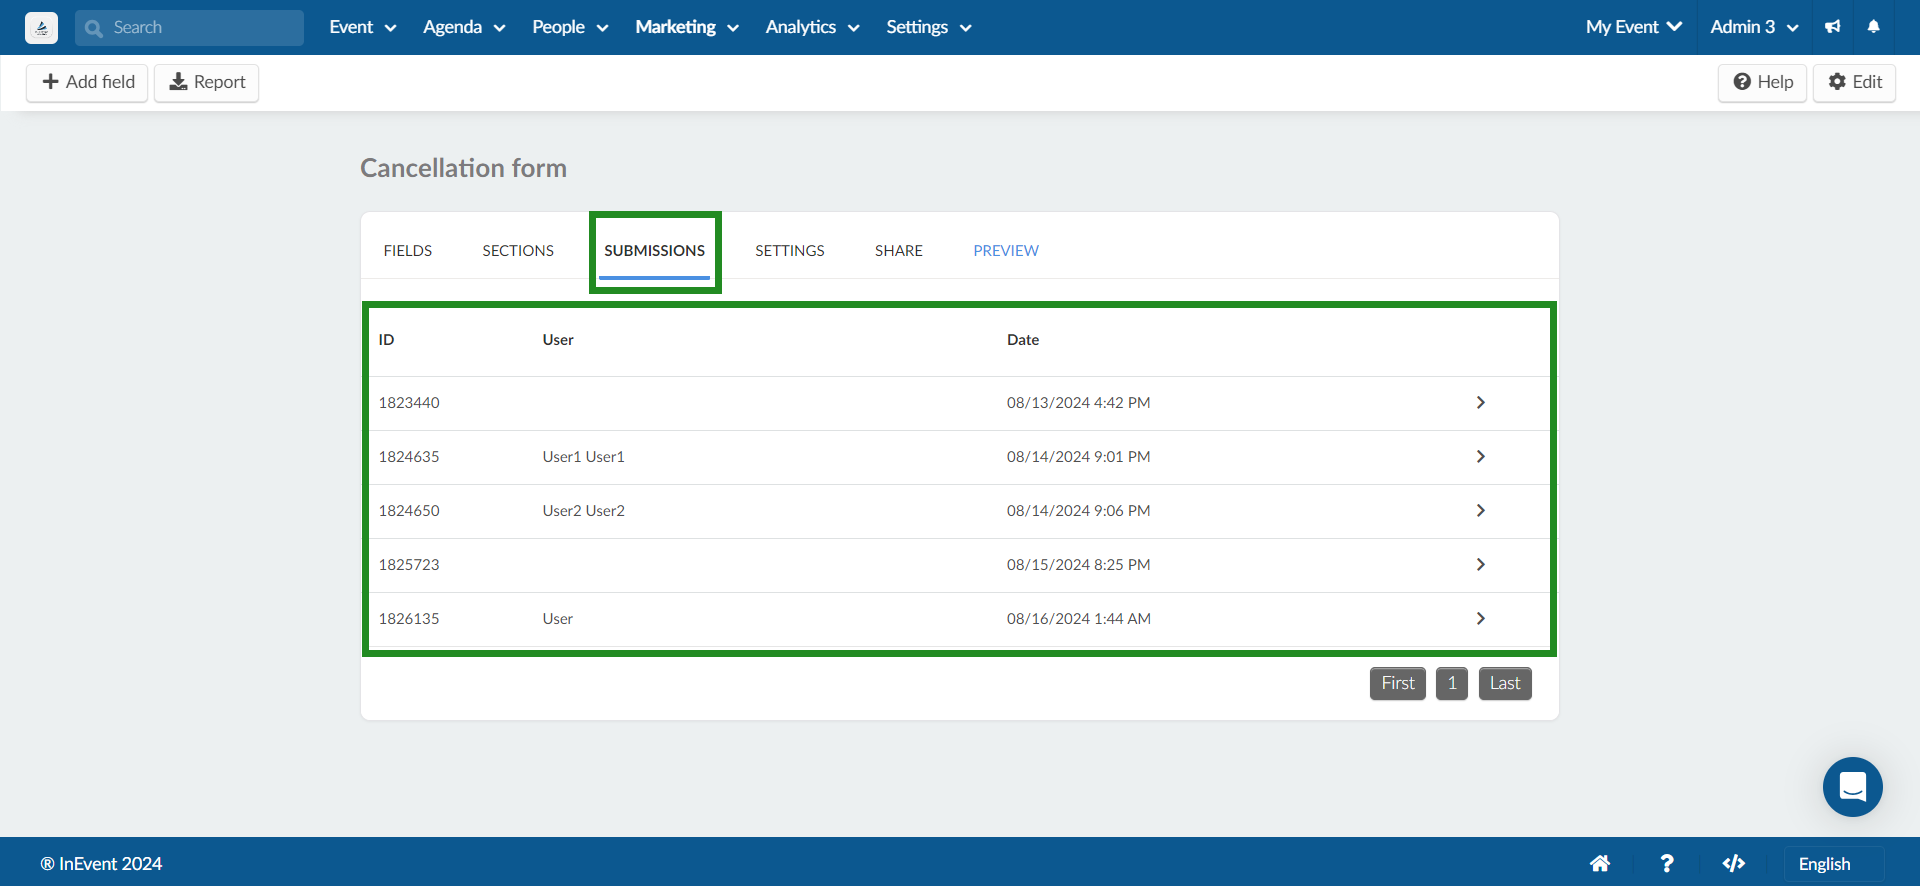
Click on a user's submission to view their answer to the form.
How do I extract submitted forms data from the platform?
Submitted forms can be extracted into a spreadsheet format and sent to your email address. In order to do so, click on a form and click on Report.The platform will notify that your requested report is being processed. It will be sent to your email once done.
Settings
You can configure your cancellation form by clicking Settings. The available options are listed below:
- Form title: Modify the title of your form, as well as add a translation.
- Subtitle/Disclaimer: Add a subtitle to your form or a disclaimer. You can use this field to specify any instructions which will appear at the top of the form. You can also add a translation.
- Action to execute after the form is finished: Set automated action after form submission. To send automated notification emails following a form submission, select Send email in the first drop-down box and select the email to be sent., then click on Add trigger.
Preview
To view your cancellation form, select Preview. Your cancellation form will be opened in a new tab.
Where can attendees access the cancellation form?
The attendees can access the cancellation form from the My Account area. For further information, refer to our article on Attendee Center.
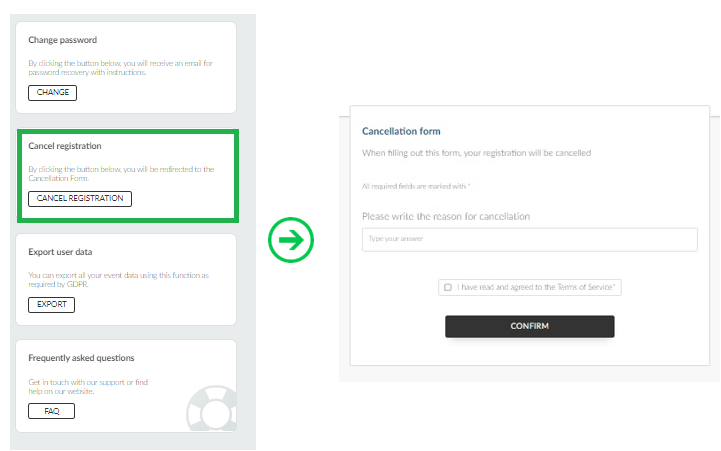
Once a user fills and submits the cancelation form, they are removed from the event.
How can I share my forms?
You can easily share your cancellation form using the Preview link.
Other than sharing the cancellation form link, you can find different options on how to share your cancellation form with your attendees:
- Text message
Cancellation form links can be shared using the Text message feature. To add your cancellation form link to a text message, make sure to use a URL shortener tool so the link fits in the 140 characters limit.
For further information, refer to our article on Text message: sending SMS messages to your attendees.
- Push messages
A push notification is a message that attendees receive via their web browser or mobile app. To add your cancellation form link to the push message, make sure to use a URL shortener tool so the link fits in the 140 characters limit.
For further information, refer to our article on Push Notifications.
You can send your cancellation form link via email to all event attendees or to predetermined lists of attendees.
For further information, refer to our article on Custom Email.
- Website
You can create a tab to share your cancellation form or simply paste it to any existing section.
For further information, refer to our article on Website.
- Custom tabs
You can create a tab in the Virtual Lobby or mobile app that will redirect your attendees to your cancellation form.
For further information, refer to our article on Tabs.
- News feed
The News feed feature can be used to share files or information about your event. You can use this feature to share your cancellation form link.
For further information, refer to our article on News feed.
- Activity description
Cancellation form links can be shared or embed through the Activity description, which will be displayed to all attendees participating in the activity.
For further information, refer to our article on Agenda management.
- Virtual Lobby Chat
Attendees are able to use the Chats feature to interact during the session. As an administrator, you can pin a message with the link to your cancellation form.
For further information, refer to our article on Interacting with attendees during your virtual activities.
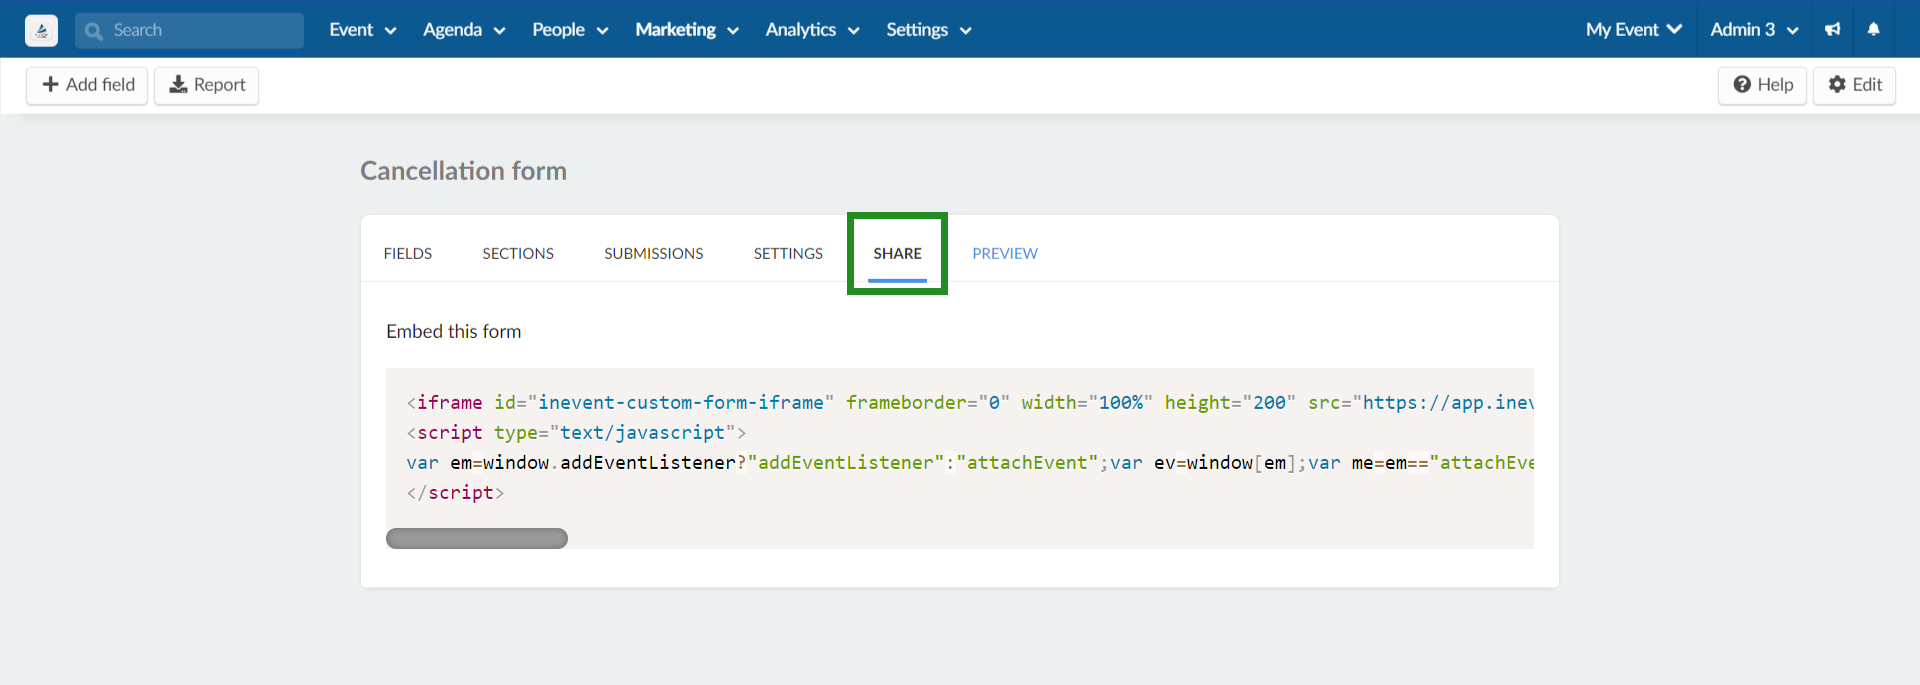
- Embed an iframe to an external website
Cancellation forms can be embedded to an external website using its HTML iframe tag. To find the HTML iframe tag, press Share and paste the displayed code to the desired website.
Cancellation list
You can view a list of cancellations under People > Cancellations with details such as the person ID, username, email, date of cancellation, status, etc.
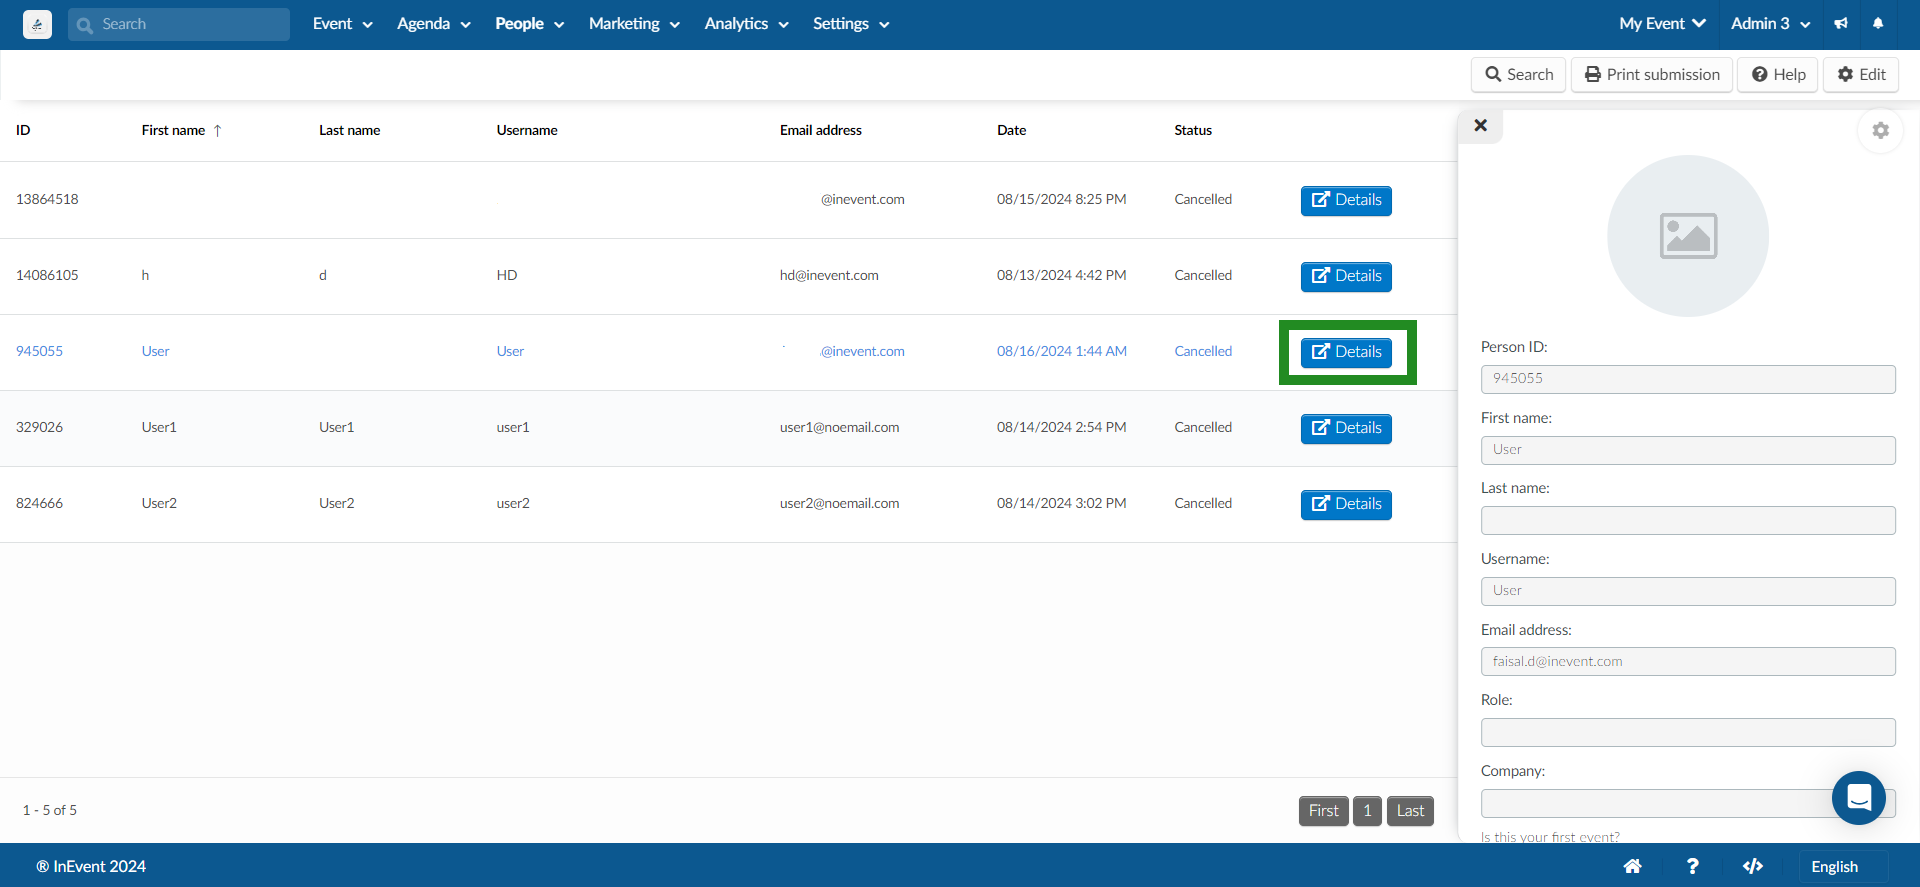
You can extract a report of the list by clicking on Edit > Report. The platform will notify that your requested report is being processed. It will be sent to your email once done.

How will the Cancellation email look like?
The user will be able to receive a cancellation email, confirming their registration has been cancelled. Refer to our article on Confirmation email and other automatic emails for more information.