Badge printing & Access control (Session scanning) with NFC
- Logs
This process allows your attendees to swipe their QR code, synchronize their NFC band and then print their badge. This process will count as a check-in to the event.
We will then use session scanning to check in/out of activities and check out of the event by using NFC bands. The attendee will simply touch their NFC band on the back of the tablet to check in/out of activities and to check out of the event itself.
Logs
You will then have a full check log to view who checked in to the event and which attendees used their NFC bands to check in and out of activities and who checked out of the event.
The log will show the name and email address of the attendees, which activity they checked in/out of, Who checked the attendee in/out, and the time, dates, and type of check.
- Badge printing: Reader for badge printing > check-in to event > Scan QR code > Synchronize NFC band > print badge
- Access control (Session scanning): Check-in to activity (using NFC band)
- Access control (Session scanning): Check-out of activity (using NFC band)
- Access control (Session scanning): Check-out of the event (using NFC band)
Tools and settings required for this process
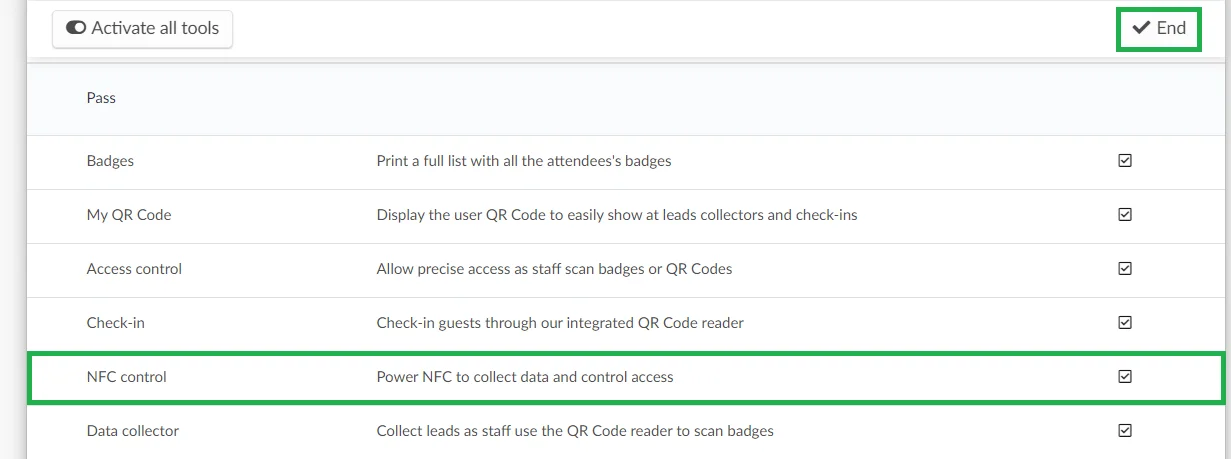
Go to Settings > Tools > scroll down to the Pass section > click Edit > check the NFC Control box > Click End.
Go to the event > click on Marketing > Registration > Badge printing. Click the click here button in the warning at the top of the page, and your page will be redirected. Once redirected, click Edit and scroll down to the bottom of the page and check these 2 settings are set to Yes
- Should print badge after NFC sync? - Yes
- Should check-in after printing badge? - Yes
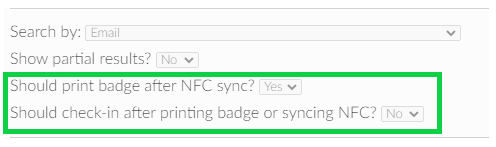
Click End to save your changes.
Create your logins for Badge printing and Access Control (Session scanning)
Create "Checklog" profiles in the list of Attendees, and with the profiles, log in to the app so that it is possible to use the Print, Activity check-in/check-out, and Event check-out function.
To do this, access the path People > Attendees > Add Person > Create a profile > Change permissions to Checklog.
Stations
Set up the badge printing station
You will need badge printing stations to check in to the event, synchronize NFC, and print the badge.
To learn how to set up your printer via WIFI or Bluetooth click here.
To learn more on badge printing click here.
Set up the session scanning stations
You will need session scanning stations for:
- Check In to Activity
- Check out of Activity
- Check out of Event
To learn more about Session scanning click here.
Test and practice the process:
Login to your Checklog profiles through the app on the Tablets
Check-In
- Log in to the app using a checklog profile and choose the event.
- Using the tablet go to the print section and choose: Reader for badge printing.
- Click Check-in.
- The attendee will scan their QR code.
- You will then be asked to sync the NFC band.
- Take a new NFC band and hold it to the back, center of the Tablet to sync.
- Give the NFC band to the Attendee.
- Click Print to print the attendees' badge.
Check in to Activity
- Using the tablet go to the Activity section and choose: Reader for activity check-in.
- Choose an activity.
- In the top right corner of the tablet, click on the "3 vertical dots" Icon and Toggle NFC.
- Ask the attendee to touch their NFC band to the back, center of the tablet to check in.
Check out of an activity
- Using the tablet go to the Activity section and choose: Reader for activity check-out.
- Choose an activity
- In the top right corner of the tablet, click on the "3 vertical dots" Icon and toggle NFC
- Ask the attendee to touch their NFC band to the back, center of the tablet to check out.
Check out of the event
- Using the tablet, go to the Event section and choose Reader for event check-out.
- In the top right corner of the tablet, click on the "3 vertical dots" Icon and toggle NFC.
- Ask the attendee to touch their NFC band to the back, center of the tablet to check out.
Manual check-in
To learn how to manually check-in attendees using the platform click here.
Check log
To View all the check-in/out data, navigate to Analytics > Check log reports.
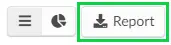
To view or download an excel report of the check log, click on the Report button on the top left corner:
Then, click on the Download button in the blue banner:

After you click on Download, you will be redirected to the All reports dashboard, where you can view the report by clicking on the blue View button or download the report by clicking on grey button with an arrow icon:

Below is the excel report with the following NFC data you will find:
Guidance for promoters
To view tips for your promoters using session scanning click here.