Access Control: Session scanning
 Updated 3 days ago
by
Lorenzo
Updated 3 days ago
by
Lorenzo
With the session scanning (access control), you will be able to manage, control, and give access to each participant in your event. Every attendee will have their own QR Code, which improves your access control and reduces any possible fraud in your event.
This article intends to teach you how to use the session scanning feature to check attendees in and out of the event and activities.
Technical Requirements
- Internet: Minimum of 1 Mbit per reading device.
- Hardware: Samsung Tablets, as well as smartphones iOS 13.0 or most recent, and Android 8.0 or most recent.
- Software: InEvent Kiosk app installed on the scanning device. For further information, refer to the InEvent Kiosk app: Guide for event organizers article.
Session scanning preparations
There are some preparations required to ensure QR scanning & checking in of attendees progress smoothly, namely enabling the Access control tool and preparing an operator account with Checklog permissons.
Enabling the Access control tool
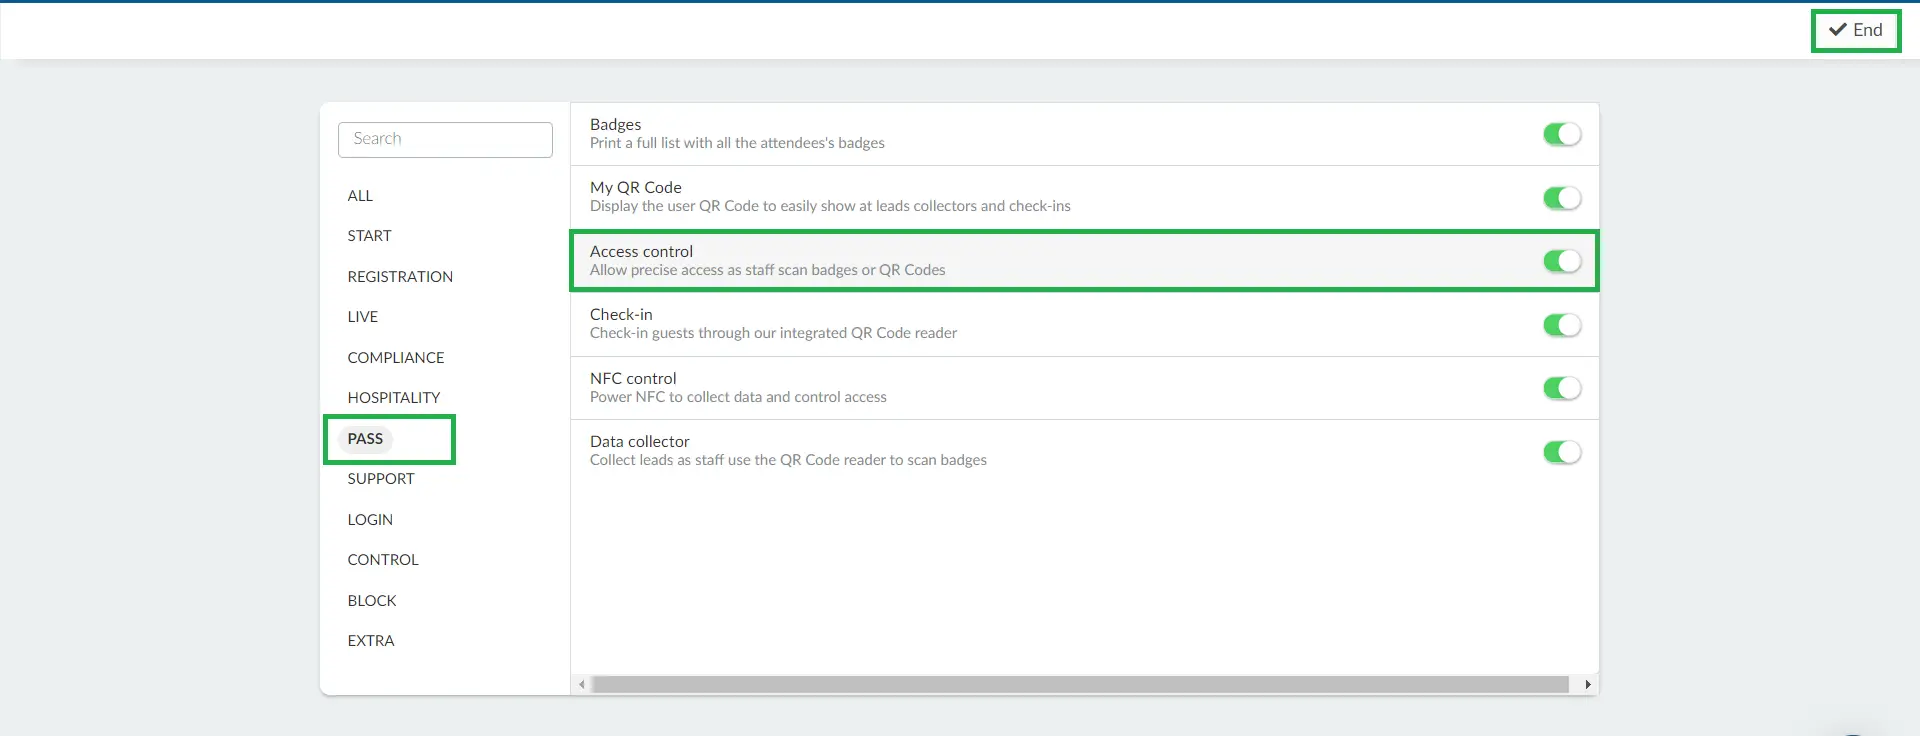
Navigate to Settings > Tools at the Event level and click on the Pass section. Then, press Edit, and toggle the button corresponding to Access control. Press End to save the changes.
Access control as log: Allowing multiple attendee QR code scans while checked in
By default, attendee QR codes can only be used for checking in into the event once. In order to use the QR code for checking in again, the attendee must first be checked out of an event. This is recommended for event administrators who prefer stricter entrance flow, as this does not allow scanning the same QR code multiple times while the attendee is still checked in to the event.
In events where attendee entry is not restricted based on check-in status, event organizers can allow the same attendee QR code to be scanned multiple times, even if the attendee is already checked in. This can be done by enabling the Access control as log tool at the Event level.
Creating an operator profile with Checklog permissions
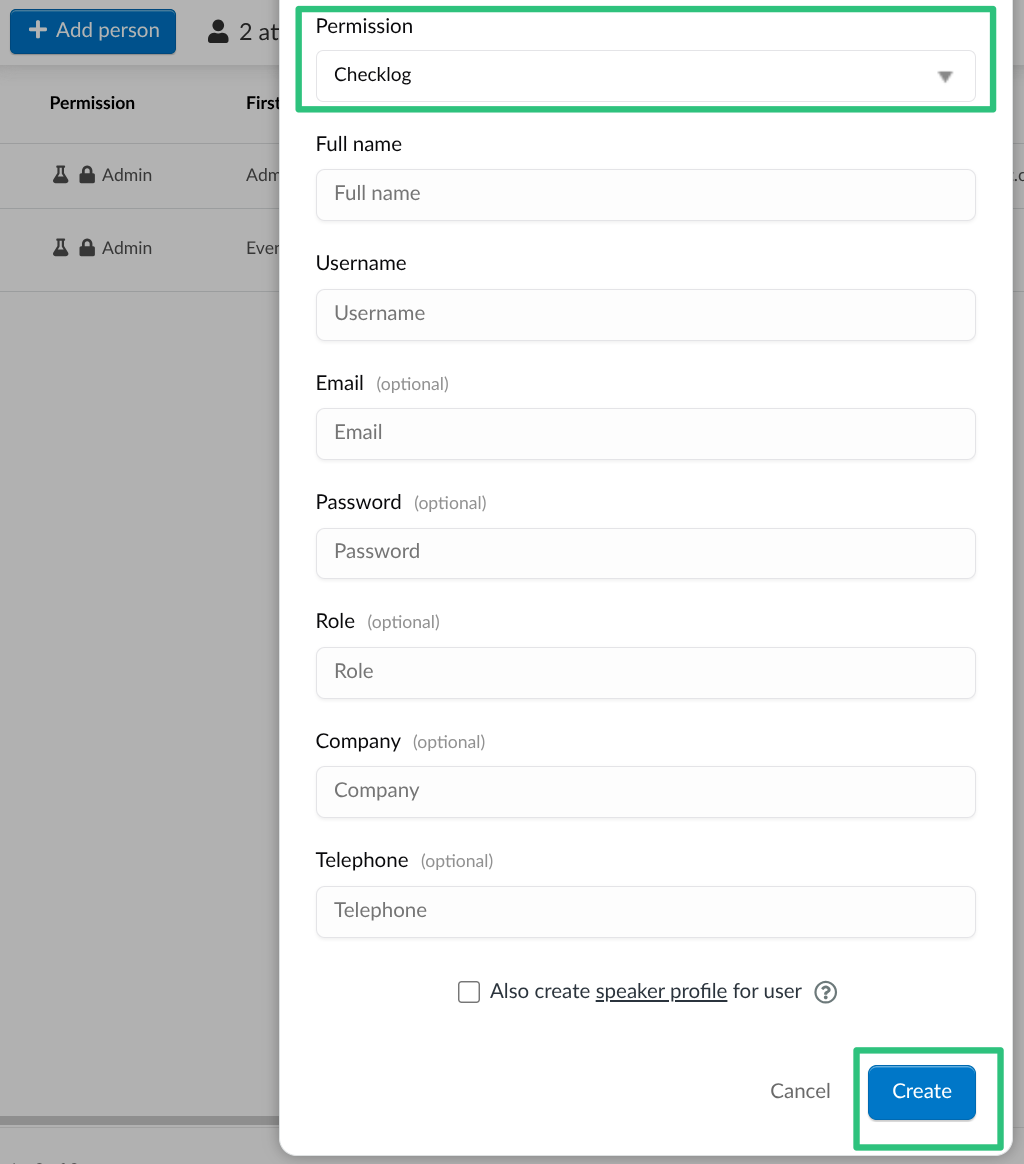
Creating a profile with Checklog permissions is simple and easy. Navigate to People > Attendees at the Event level. Click the + Add person button and select Checklog using the Permissions drop-down menu. Complete the rest of the fields as needed, and click Create.
Session scanning in the InEvent Kiosk app
After completing the preparations above, you can proceed to install and log in to InEvent Kiosk, an optimized and streamlined app to ensure smooth check-in process for your events and sessions.
This section will guide you on how to use the InEvent Kiosk app for scanning attendees into your event and into event sessions.
Scanning the QR codes
To begin scanning attendee's QR codes, navigate to Action > Access Control on the mobile app.
Regardless of the QR code scanning settings, the checklogs will have the following options when scanning a QR code:
- Check-in for event: Controls the entry for the entire event.
- Check-out for event: Controls the exit for the entire event.
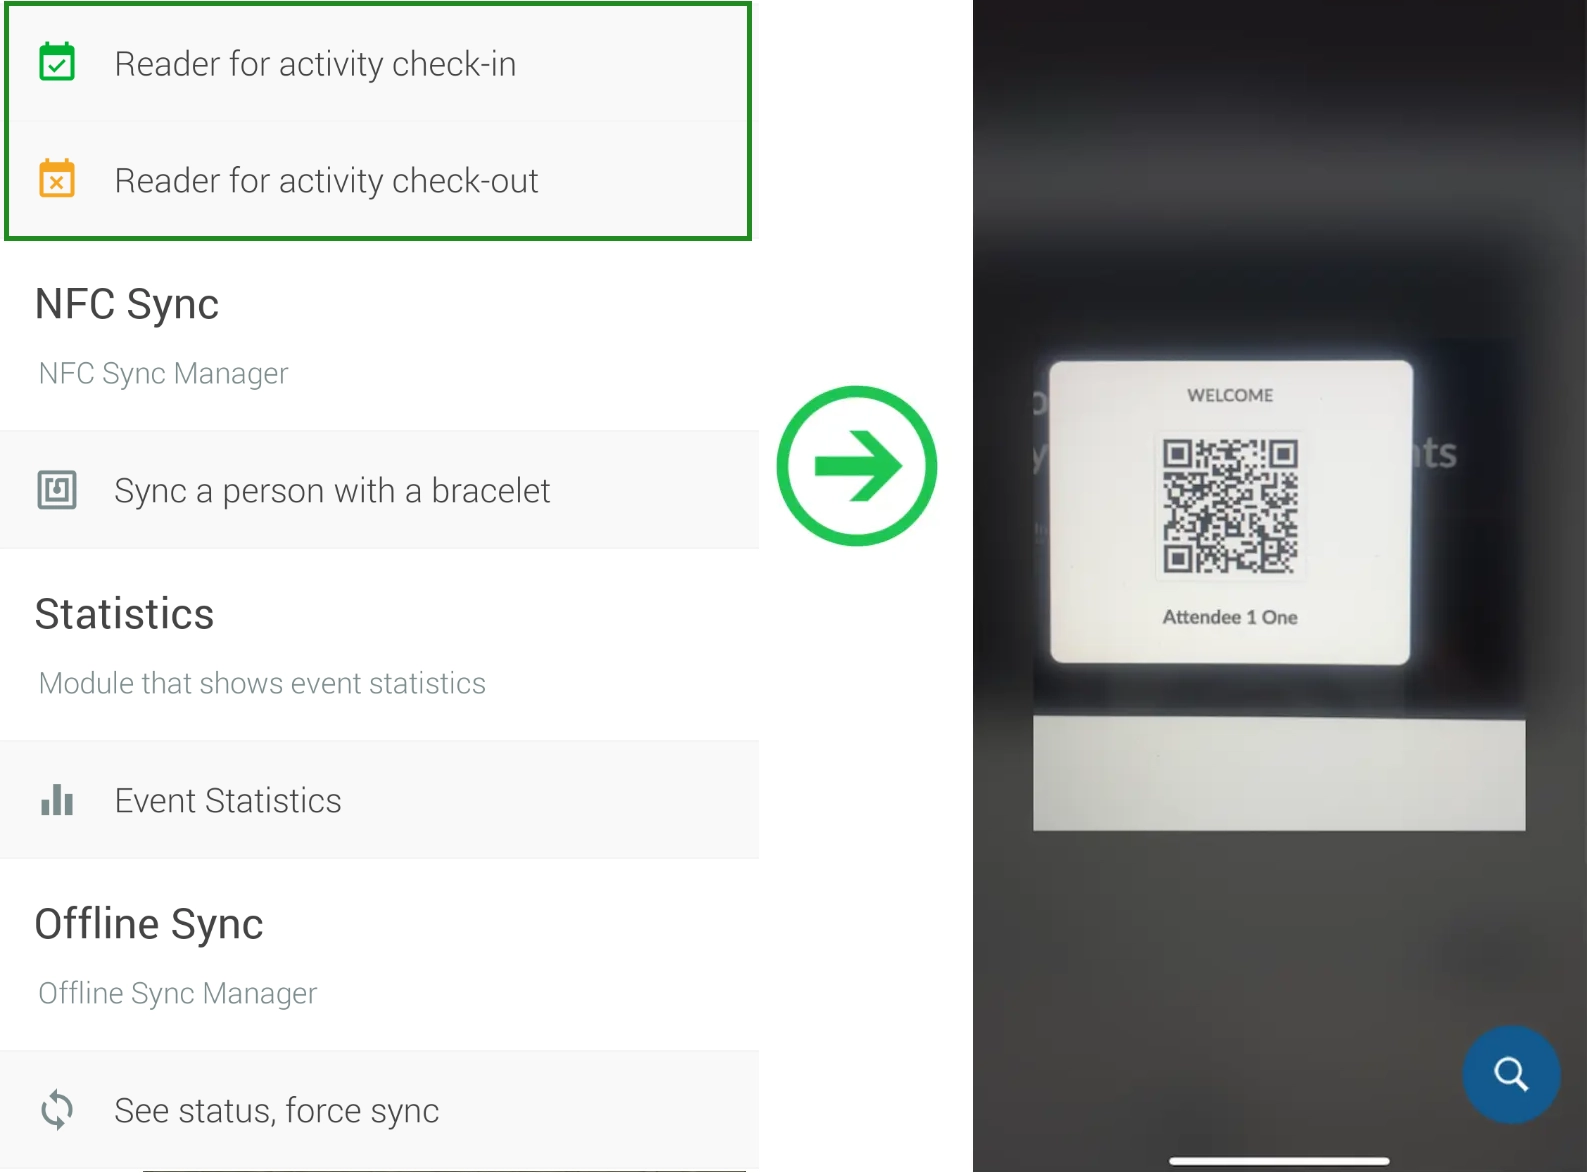
- Check-in for activity: Controls entry for a specific activity or session. This option should be used at the entrance of the room.
- Check-out for activity: Controls exit for a specific activity or session. This option should be used at the exit of the room.
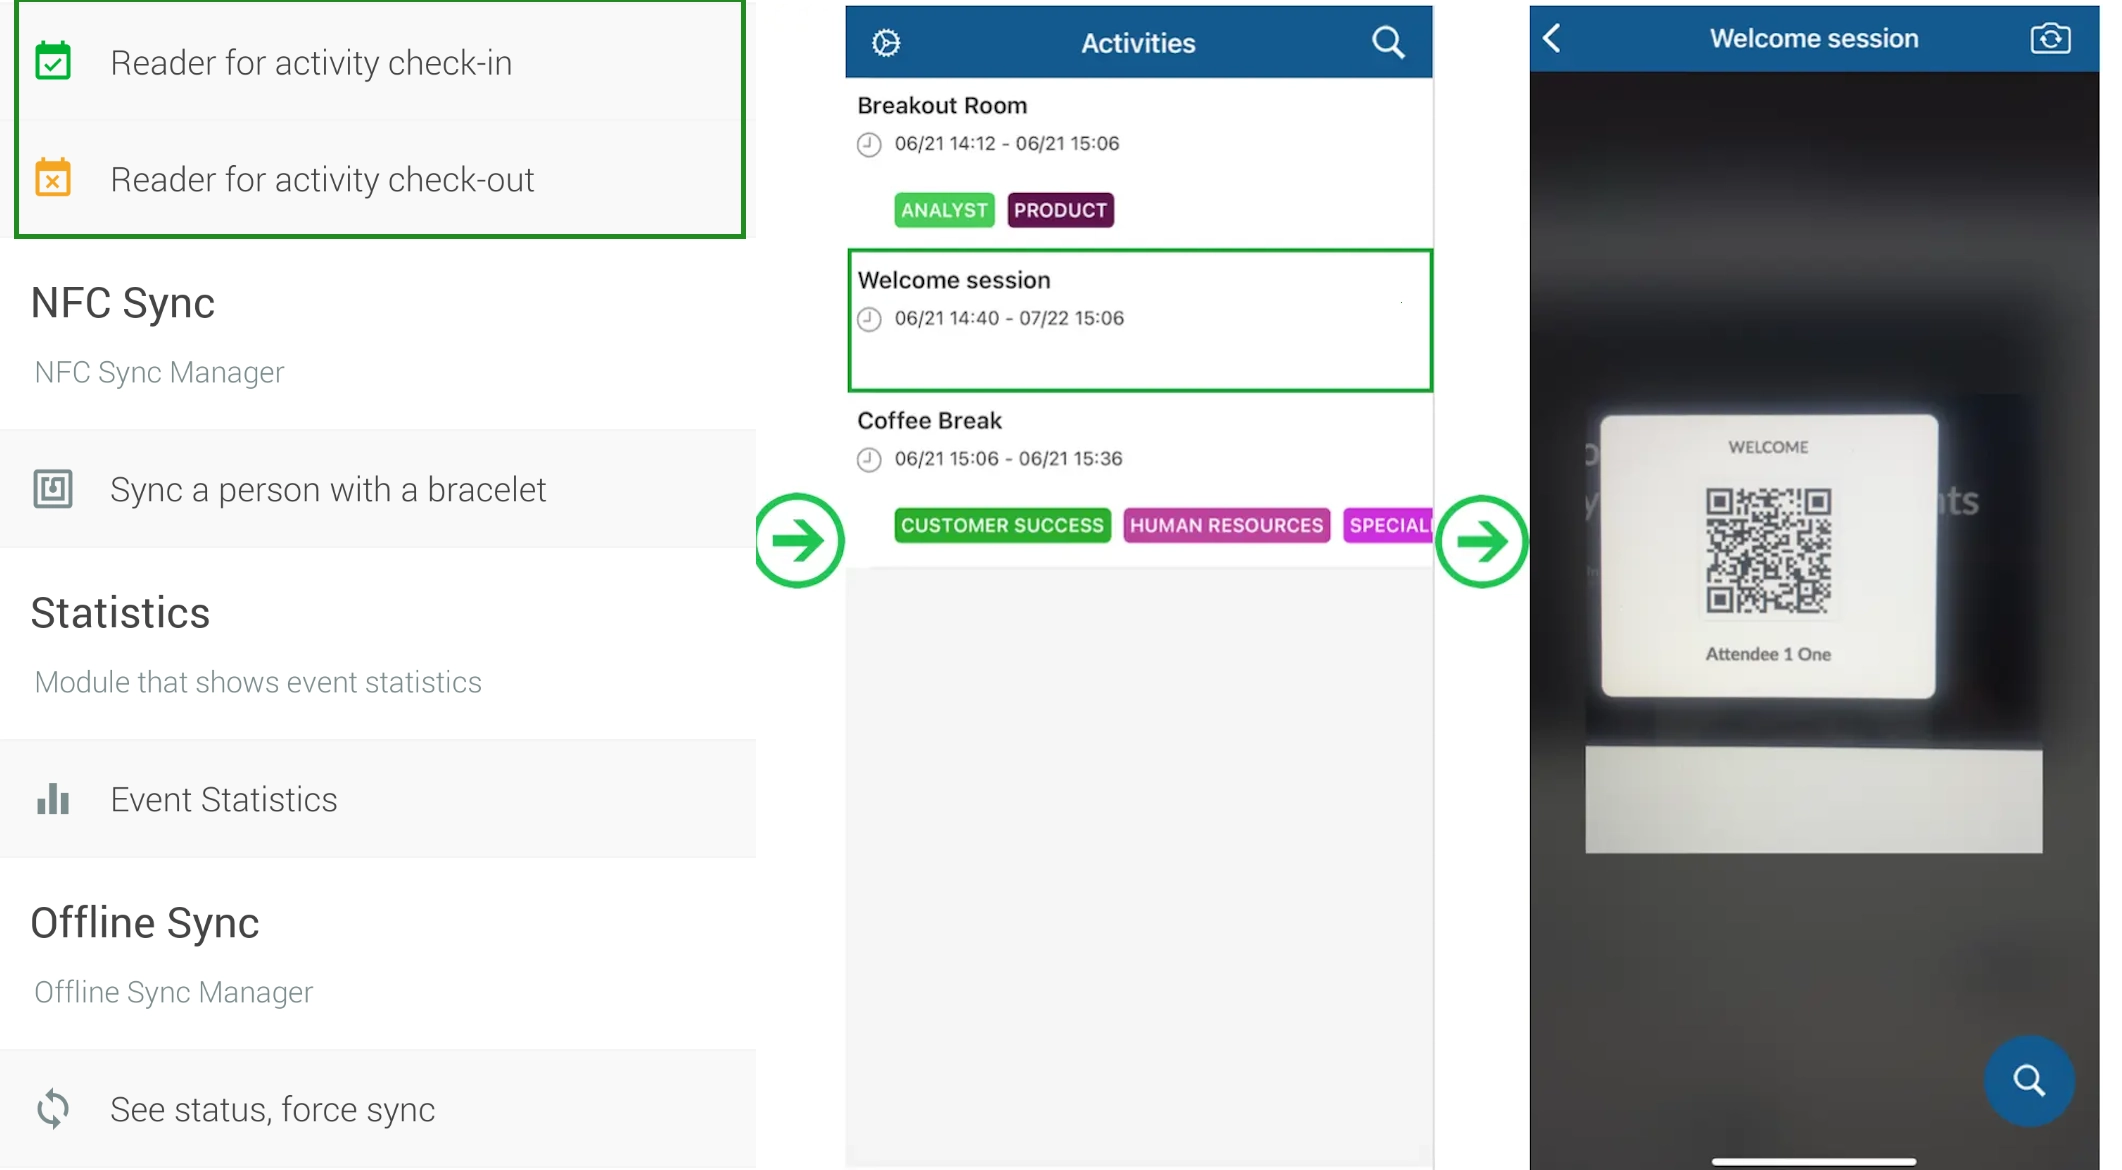
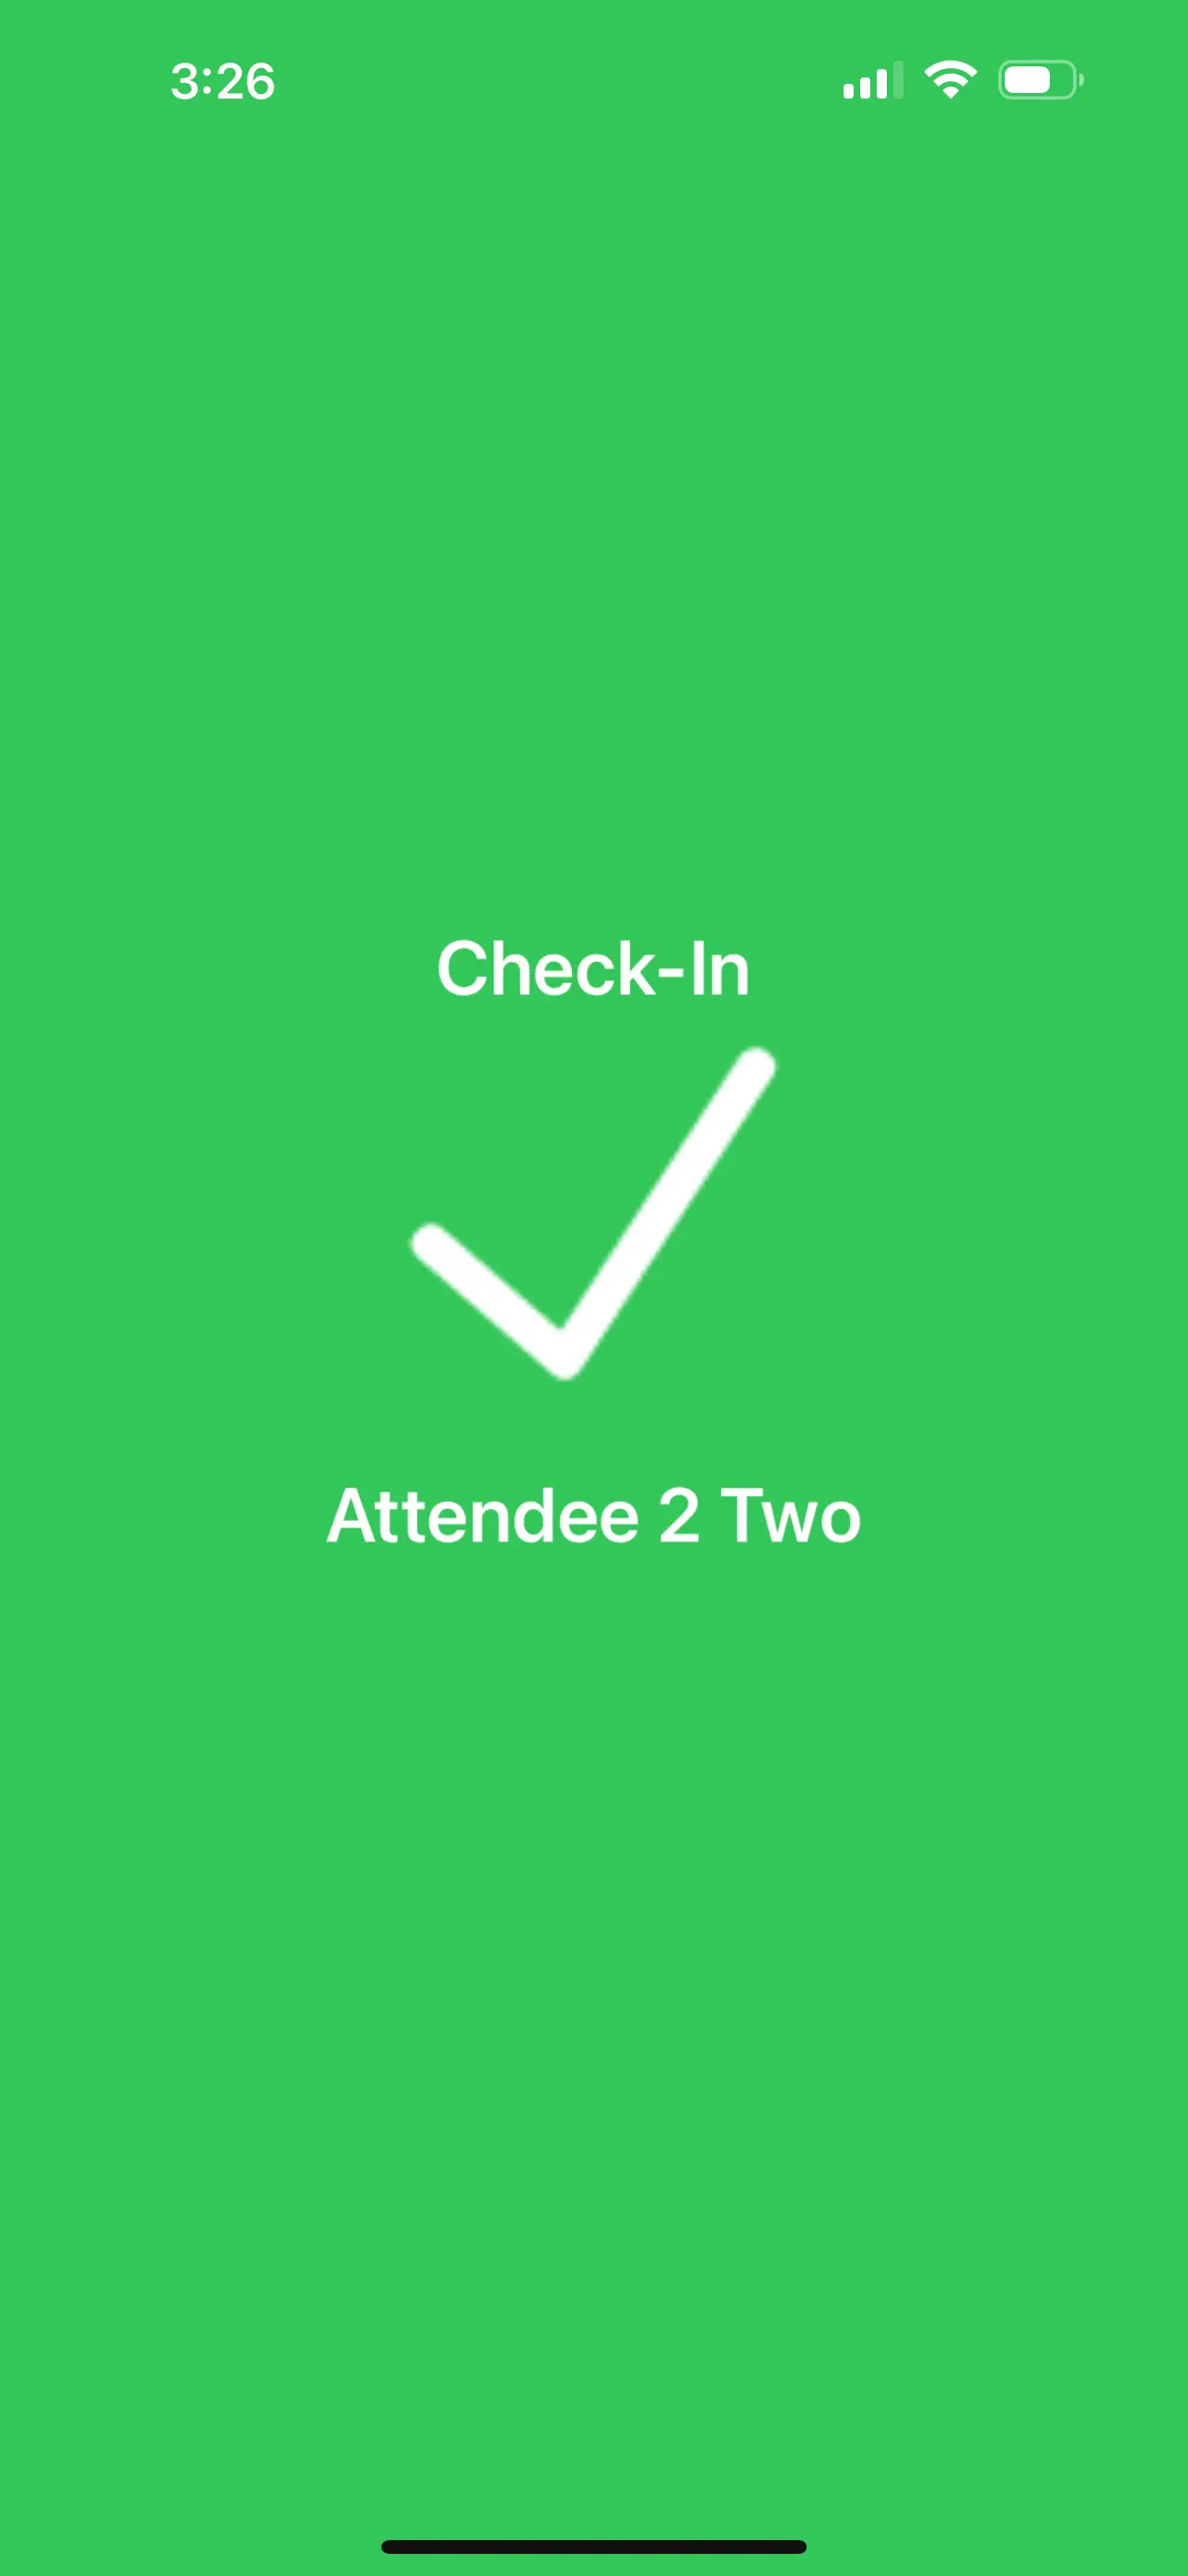
After scanning the QR code, you will see one of these confirmation screens:
- Green: This is a positive confirmation of input, which means that the attendee is authorized to check-in or check-out enter the event/activity. The attendee's name will also be displayed.
- Red: This color represent negatives. It means that the QR Code has already been read or that the participant does not exist among attendees or is not authorized to enter that session or event.

Checking-in/out attendees
Other than checking in attendees using their QR codes, you can also check attendees in from the Guest list (if using iOS). Here, you can also review the check-in status of your attendees directly from the Android and iOS versions of the mobile app.
Android app
You can check your attendees in through the Manual option by following the steps below:
- Tap on the three dots icon on the top right corner of the QR code reader.
- Tap Manual. The Presence list will be displayed, showing the name of your attendees and their check-in status.
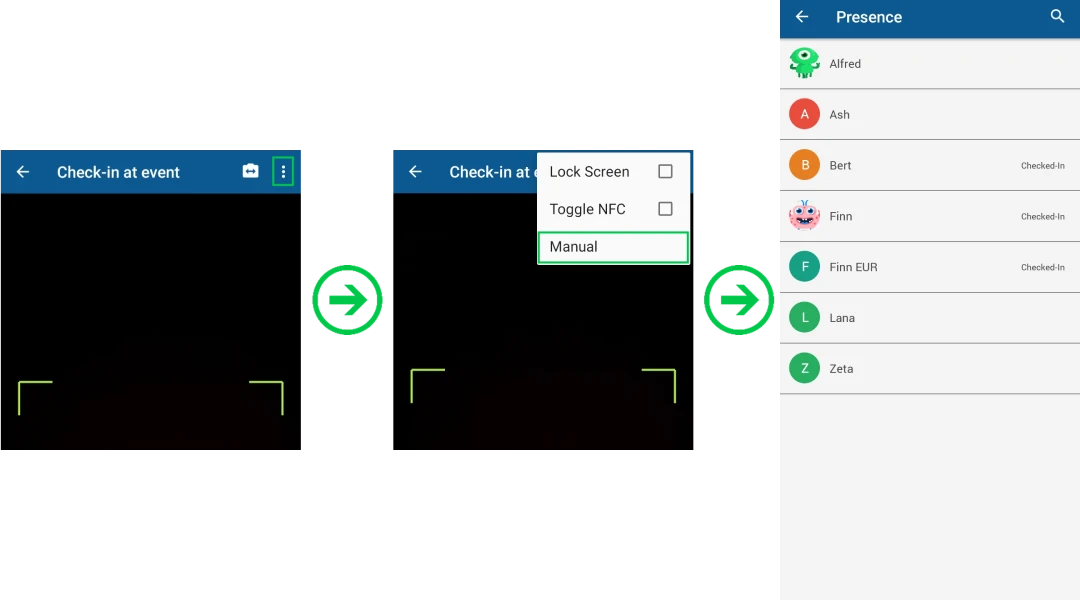
- Tap on the attendee you want to check-in/out and confirm.
After completing the steps above, the attendee will be checked-in/out to your event or activity.
iOS app - self service and manual
You can check your attendees in on the IOS app either manually or via self service.
- Self service: To check in/out via self service, follow the steps below:
- Tap on Self service option after choosing to check in/out your attendees in the Event or in an Activity.
- You will see the option to Scan QR code or Search.
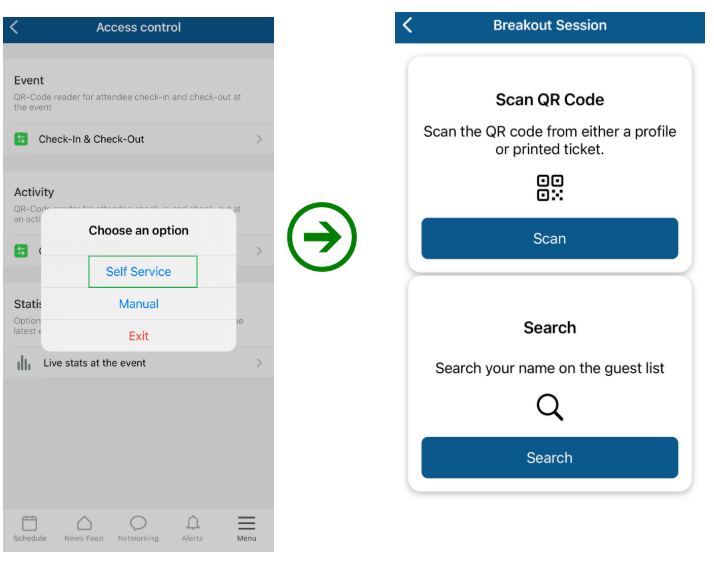
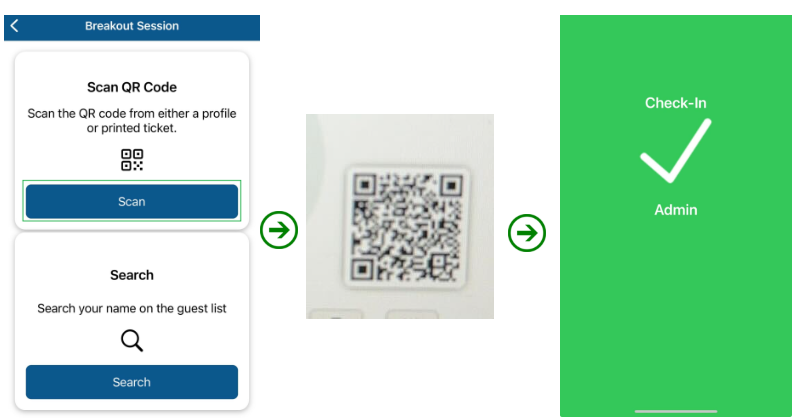
- To scan a QR code, click on Scan and then scan the attendee's QR code to check in/out the attendee.
- To use the Search option, click on Search, and then enter the name of the attendee in the search box. This will display the attendee in the Guest list, as well as their check-in status.
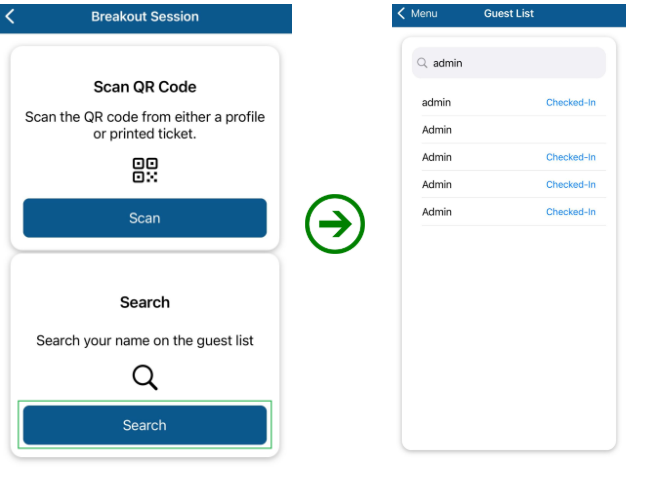
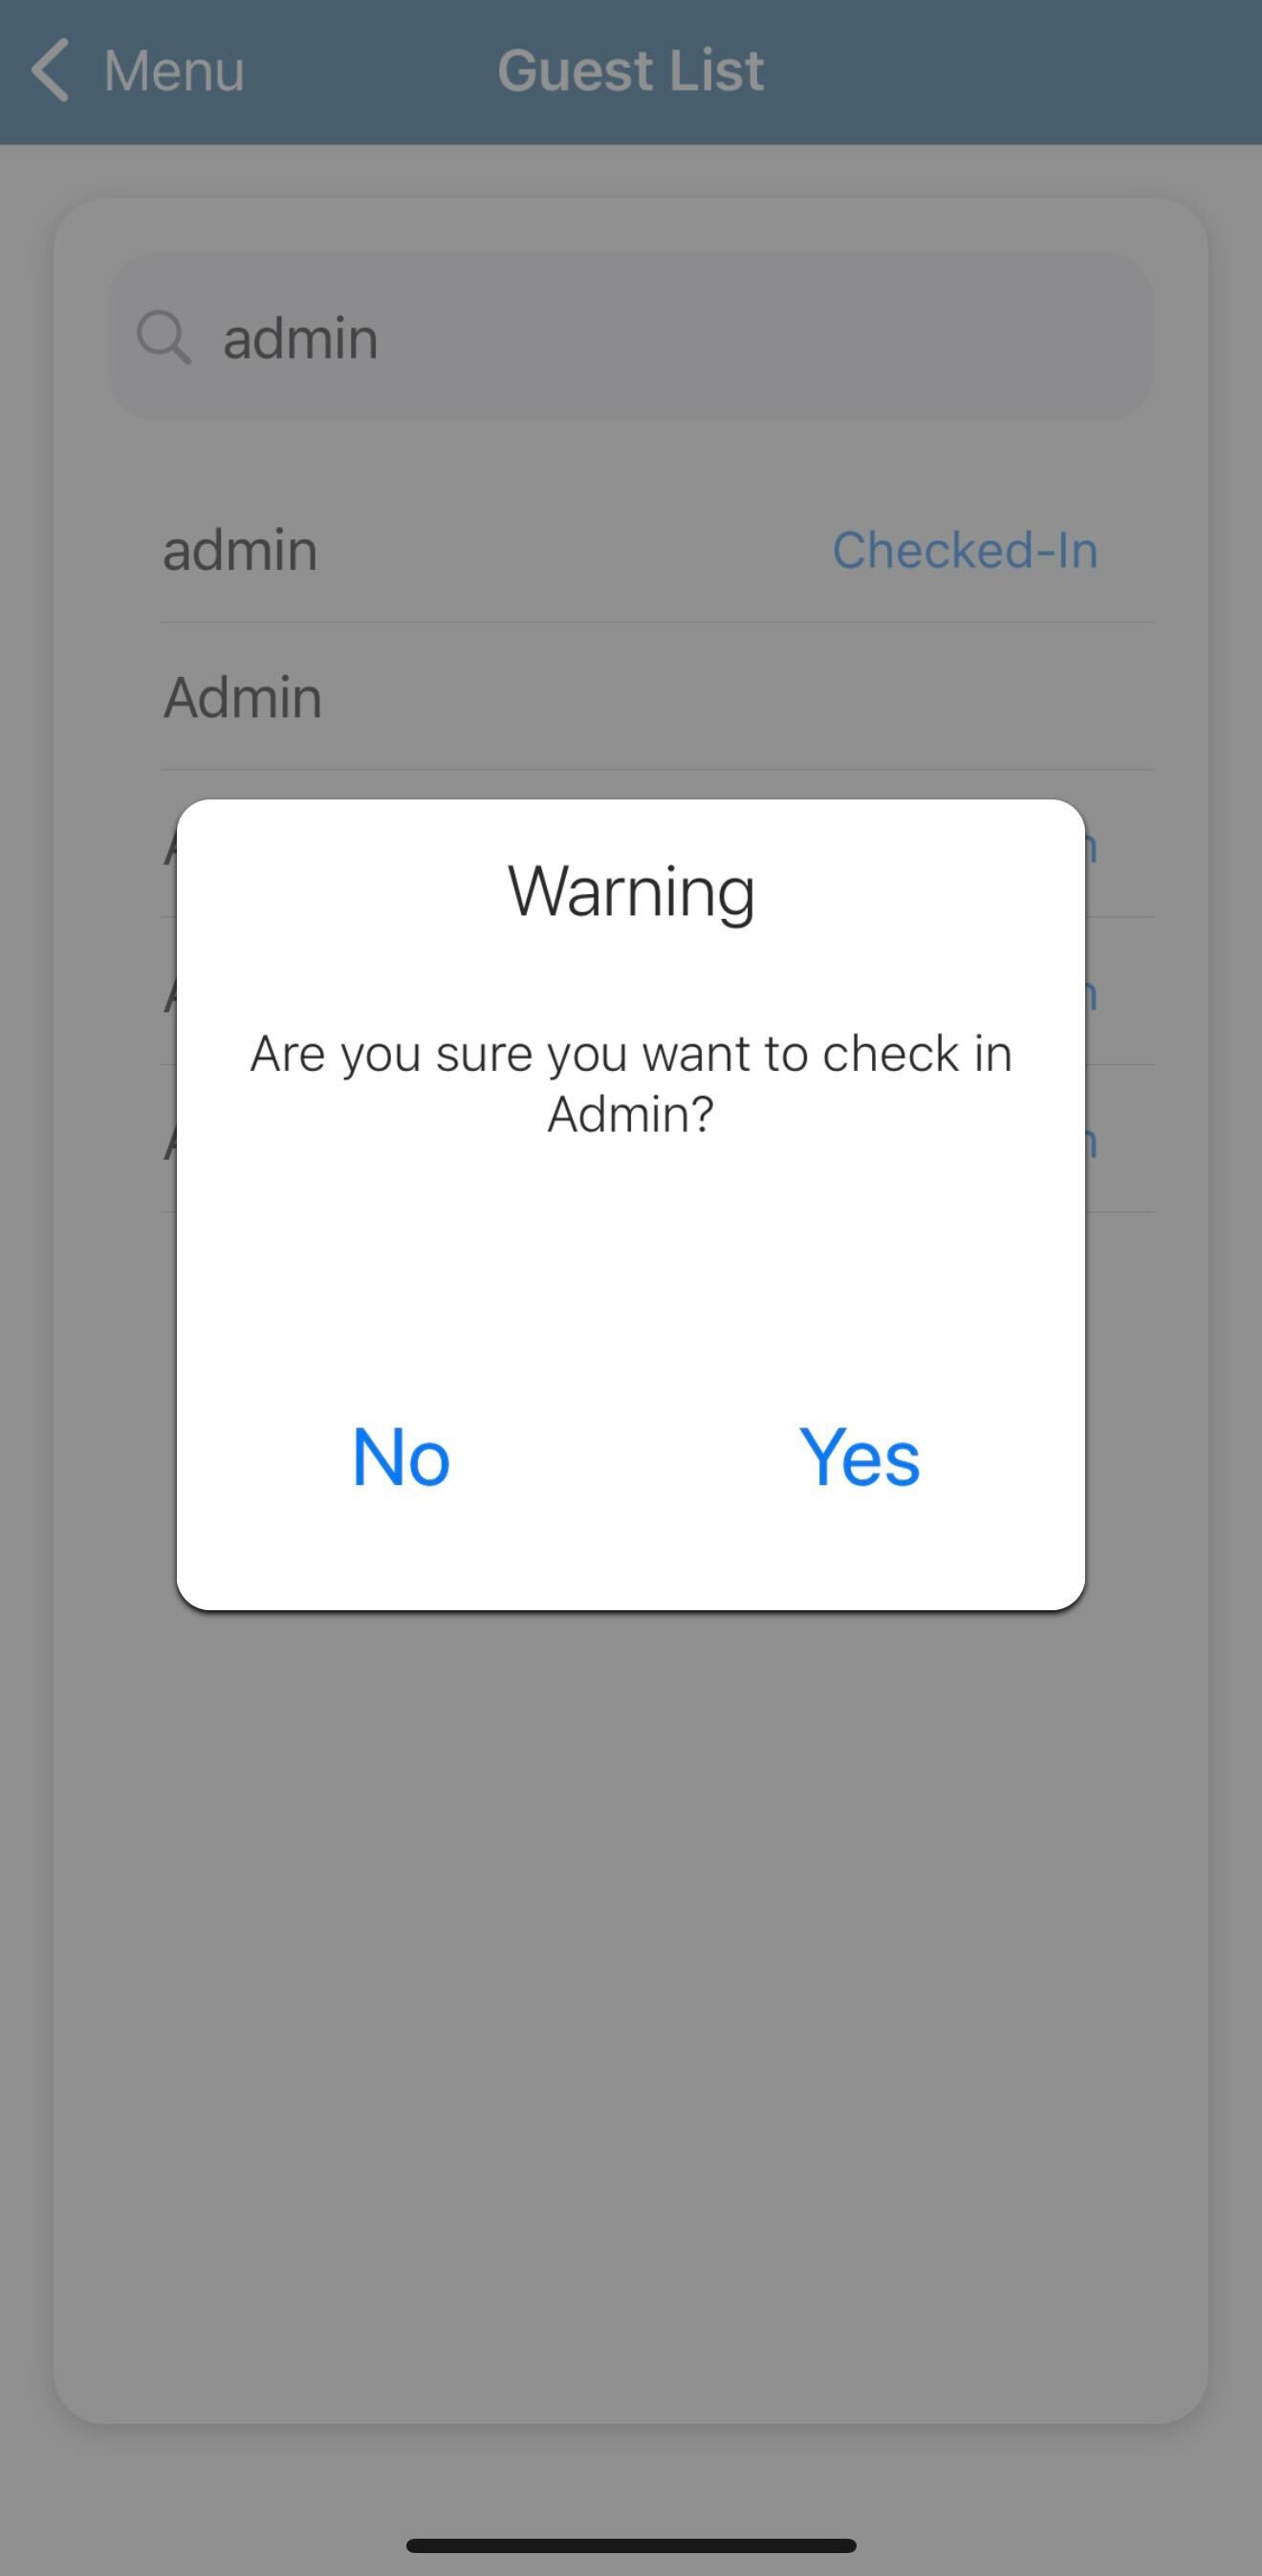
- To check-in/out an attendee, click on their name and a confirmation window will appear for you to confirm the check in action.
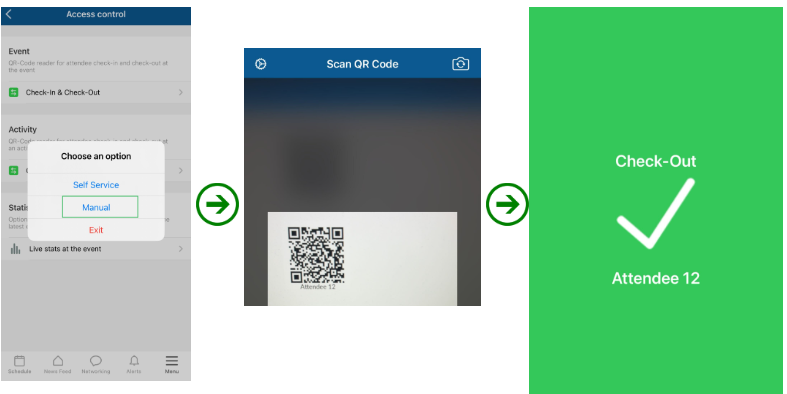
Manual: If using the Manual option, you will have only the option of scanning the attendees' QR codes to check them in/out of the activity or event:
Scanning blocked users
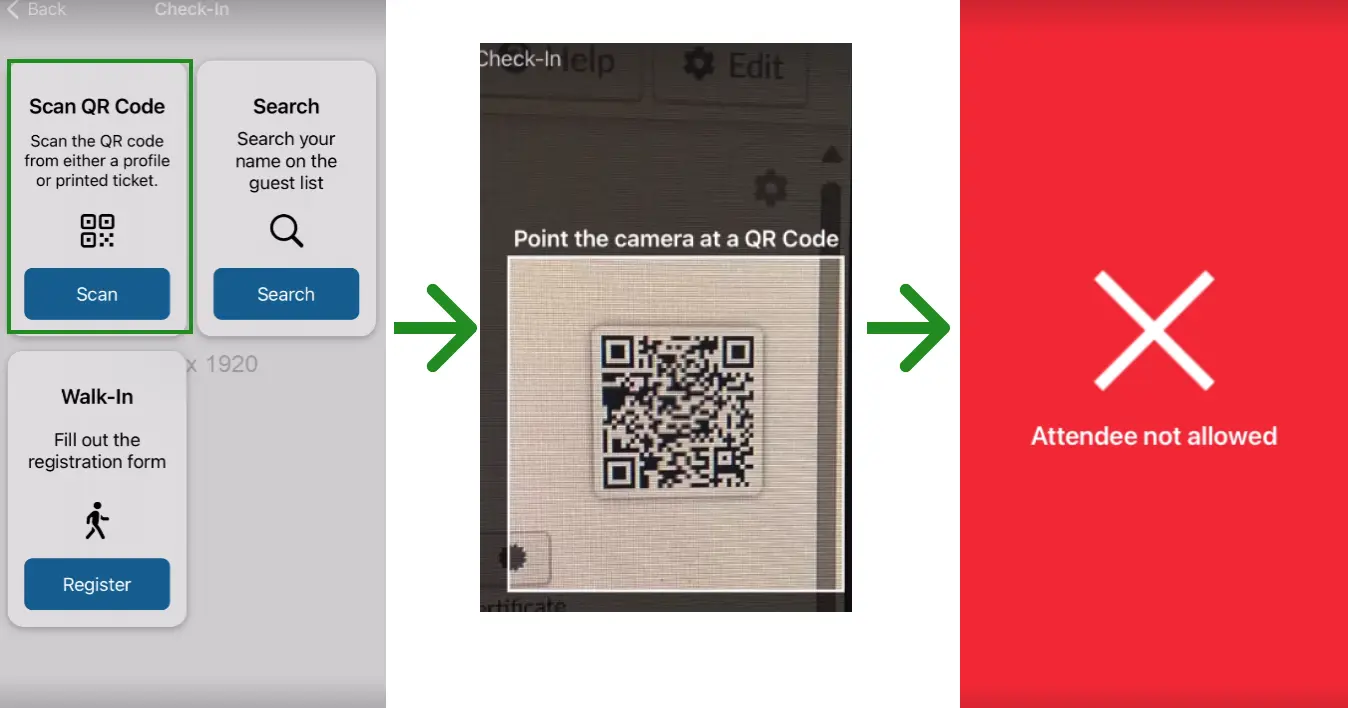
Attendees who have been added to the Check-in block list will still be visible within the attendees list. However, they cannot be successfully checked in to the event.
When scanning blocked users who do not have permission to check in, you will encounter the error message below:
Reading Stats
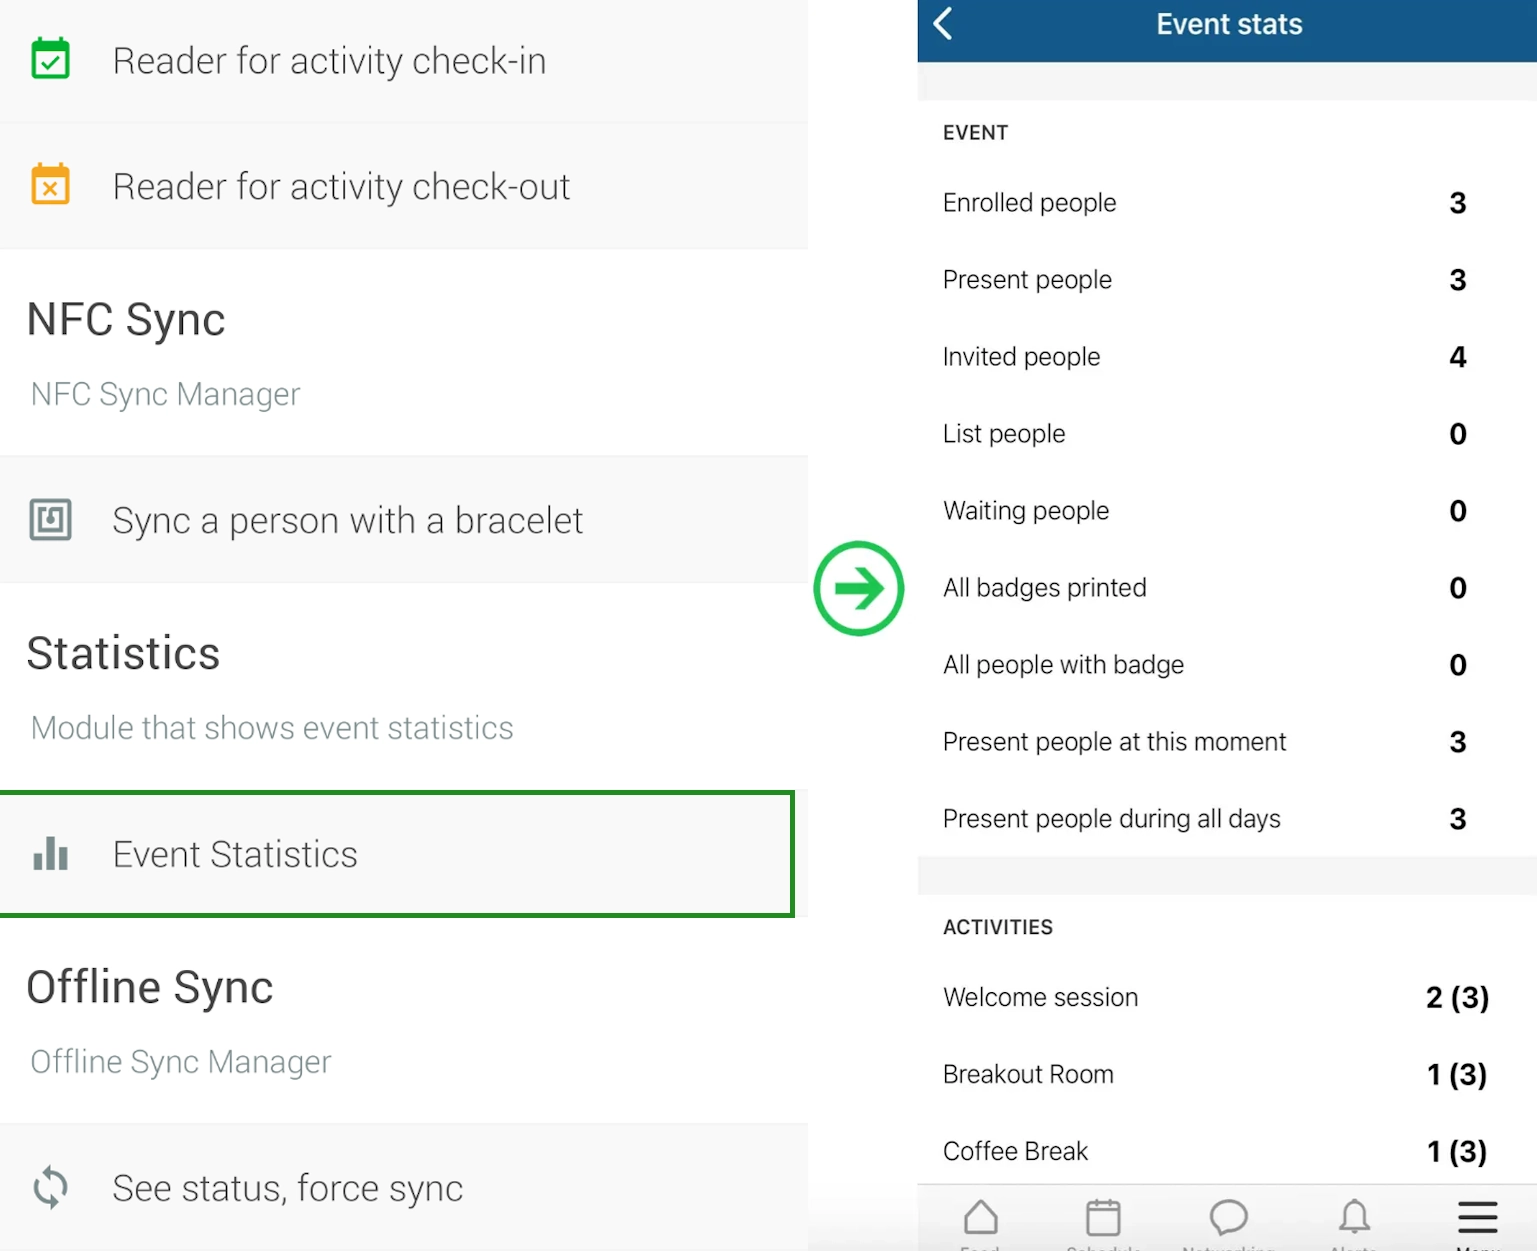
You can track total numbers via the app or platform.
- Mobile app: Click the Live stats at the event button and you will see how many attendees had their badges read (by activity and total event).
- Live Dashboard: On the web platform, go to Analytics > Live Dashboard and you will be able to keep track of the total number of badges read (consider total check-in readings at the event) and the total number of live people, who consider only the badges read that did not check out at the event. For further information, refer to the Live Analytics article.
Offline sync
Extracting a detailed report
Navigate to Analytics > Checklog reports.
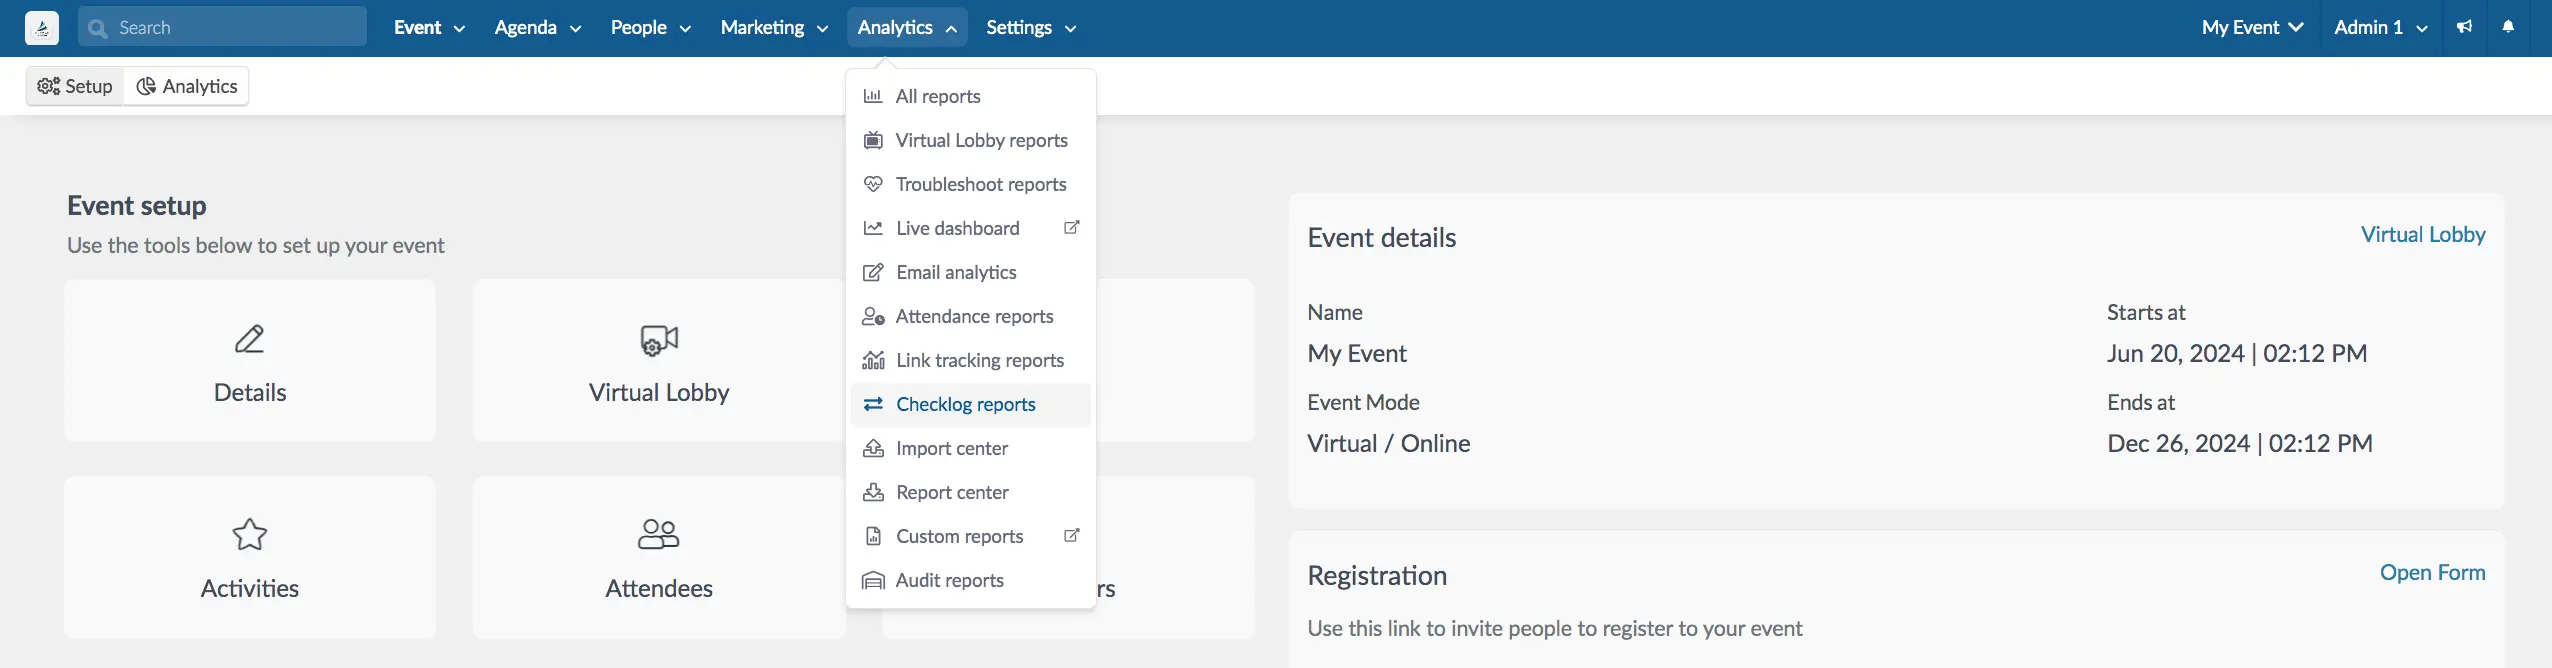
Refer to the Checklog reports article for further information on check log reports.
Performing Session scanning per day
To perform Session scanning per day in your event, we recommend creating invisible activities in your calendar, such as: Day 1, Day 2, Day 3. It is a very useful strategy to gain control of the daily information of how many participants went to the event. Every day, you can check all attendees in and out. By doing so, you will be able to know how many attendees attended each day of the event.
To have invisible activities, you will need to disable Visible for attendees in the activities details.
Devices one profile can access simultaneously
Refer to the list below to see the maximum number of devices you can be logged into simultaneously per account or privilege type.
- Company administrator: 5 devices
- Event administrator: 2 devices
- Checklog: 1 device
- Sponsor: 1 device