Company images
 Updated 7 months ago
by
Chioma Okenwa
Updated 7 months ago
by
Chioma Okenwa
Company images create credibility and strengthen your brand. Moreover, it is the first point of contact to start connecting with your customers.
This article intends to show you how to upload the main icon, the store icon, and the splash image to your account.
What are the company images?
There are four company images:
- Main Icon: This icon is mandatory and will be displayed across all links within your company's platform, including forms, hot sites, log in page of the app, and the Virtual Lobby. It typically appears in the upper left corner of the platform interface and serves as the icon for your application on participants' cell phones. Its dimensions are
1024 x 1024 px by px.
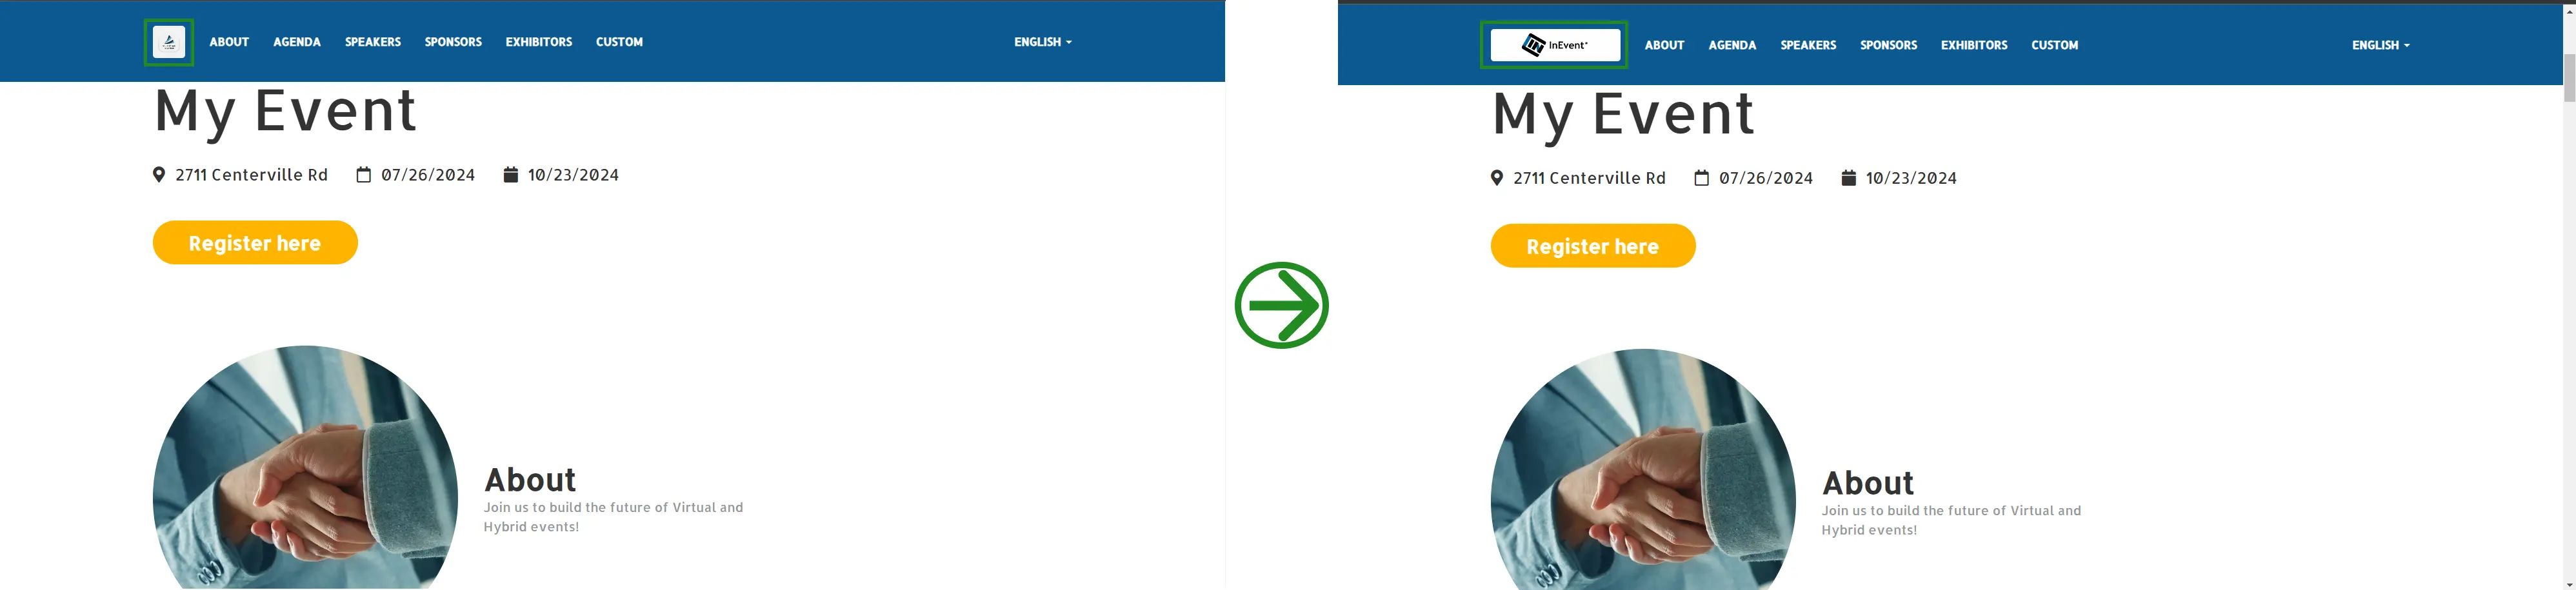
- Main Icon (rectangular): This allows you to add a rectangular image. When added, it replaces main icon displayed in the top left corner of the company's website and landing pages. Its maximum dimensions are
Anyx1024 (px by px).
- Store Icon: This is the icon that will be viewed by participants in the Apple and Google Play stores. If it is not filled in, the main icon will be used for this purpose. Its dimensions are
1024 x 1024 px by px. - Splash Image: Also known as launch screens, this image provides a simple initial experience while your mobile app loads. Its dimensions are
1800 x 2400 px by px, with360 pxbleed on all four edges.
How do I upload these images?
To upload the company branding and mobile app images, follow these steps:
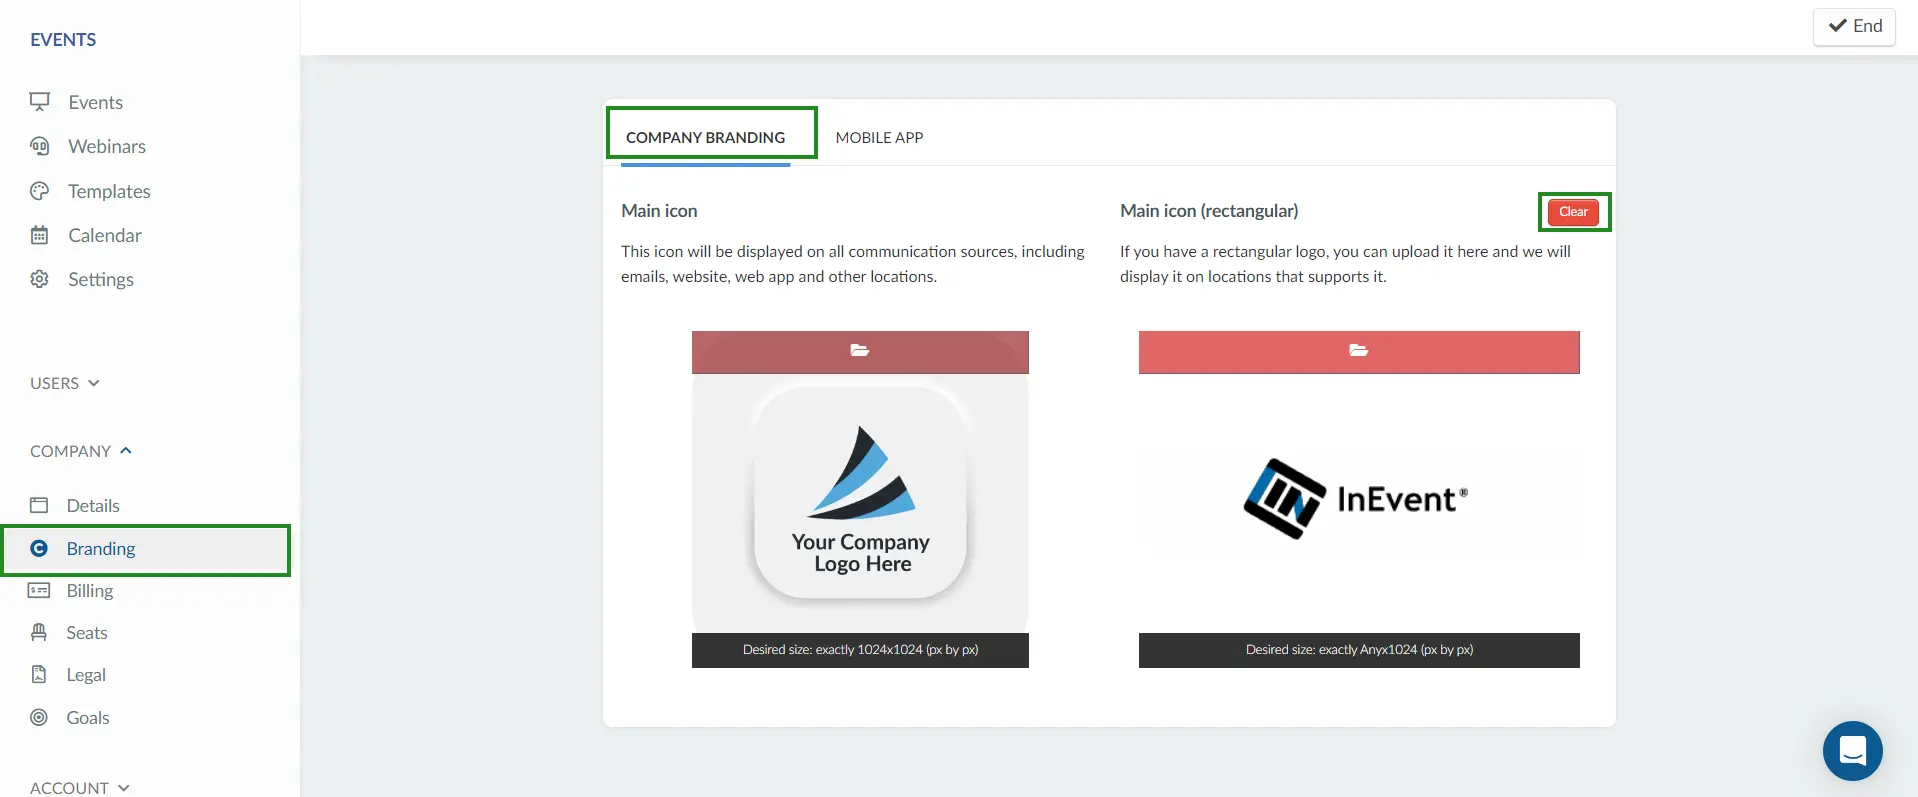
- Go to Company > Branding.
- Click on Edit.
- Click on the red folder icon to upload the Main icon and Main icon (rectangular) images under Company branding. You can remove the Main icon (rectangular) image by clicking on the "Clear" button.
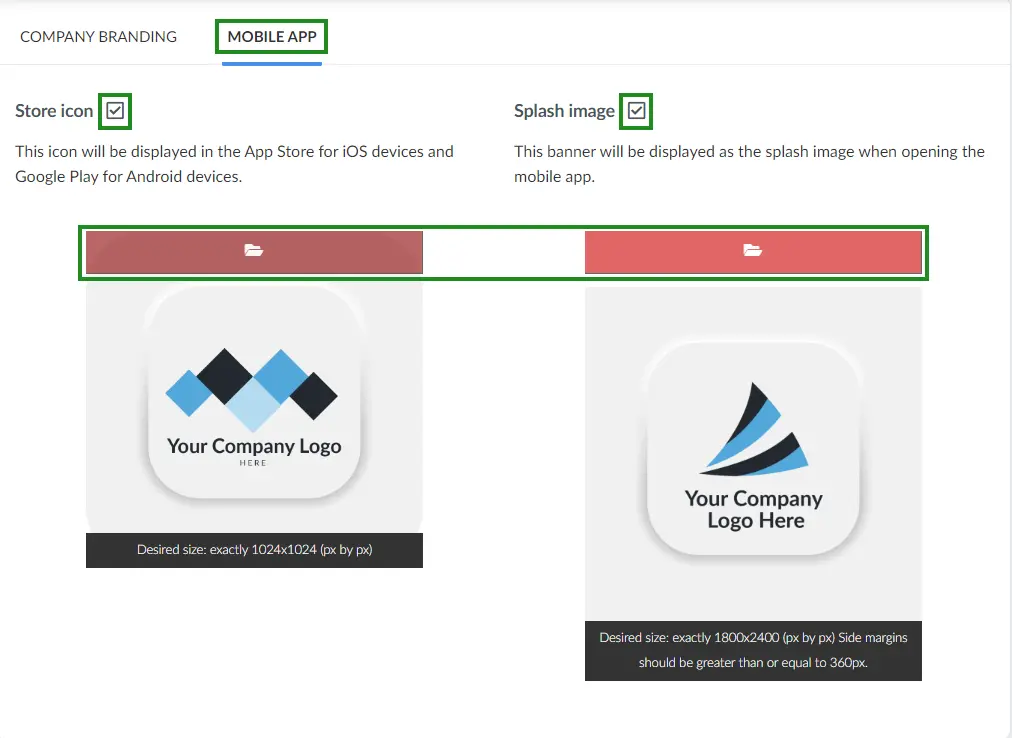
- Next click on Mobile app.
- Tick the checkboxes next to Store icon and Splash image to enable them.
- Click the red folder icon to upload the Store icon and Splash image.
- Once you've uploaded the images, press the End button in the top right corner to save the changes.
After uploading the Main Icon (rectangular), it replaces the Main icon (standard) image predominantly positioned at the top left corner of the company's website and landing pages. This is illustrated in the website example below, using the callisto template:
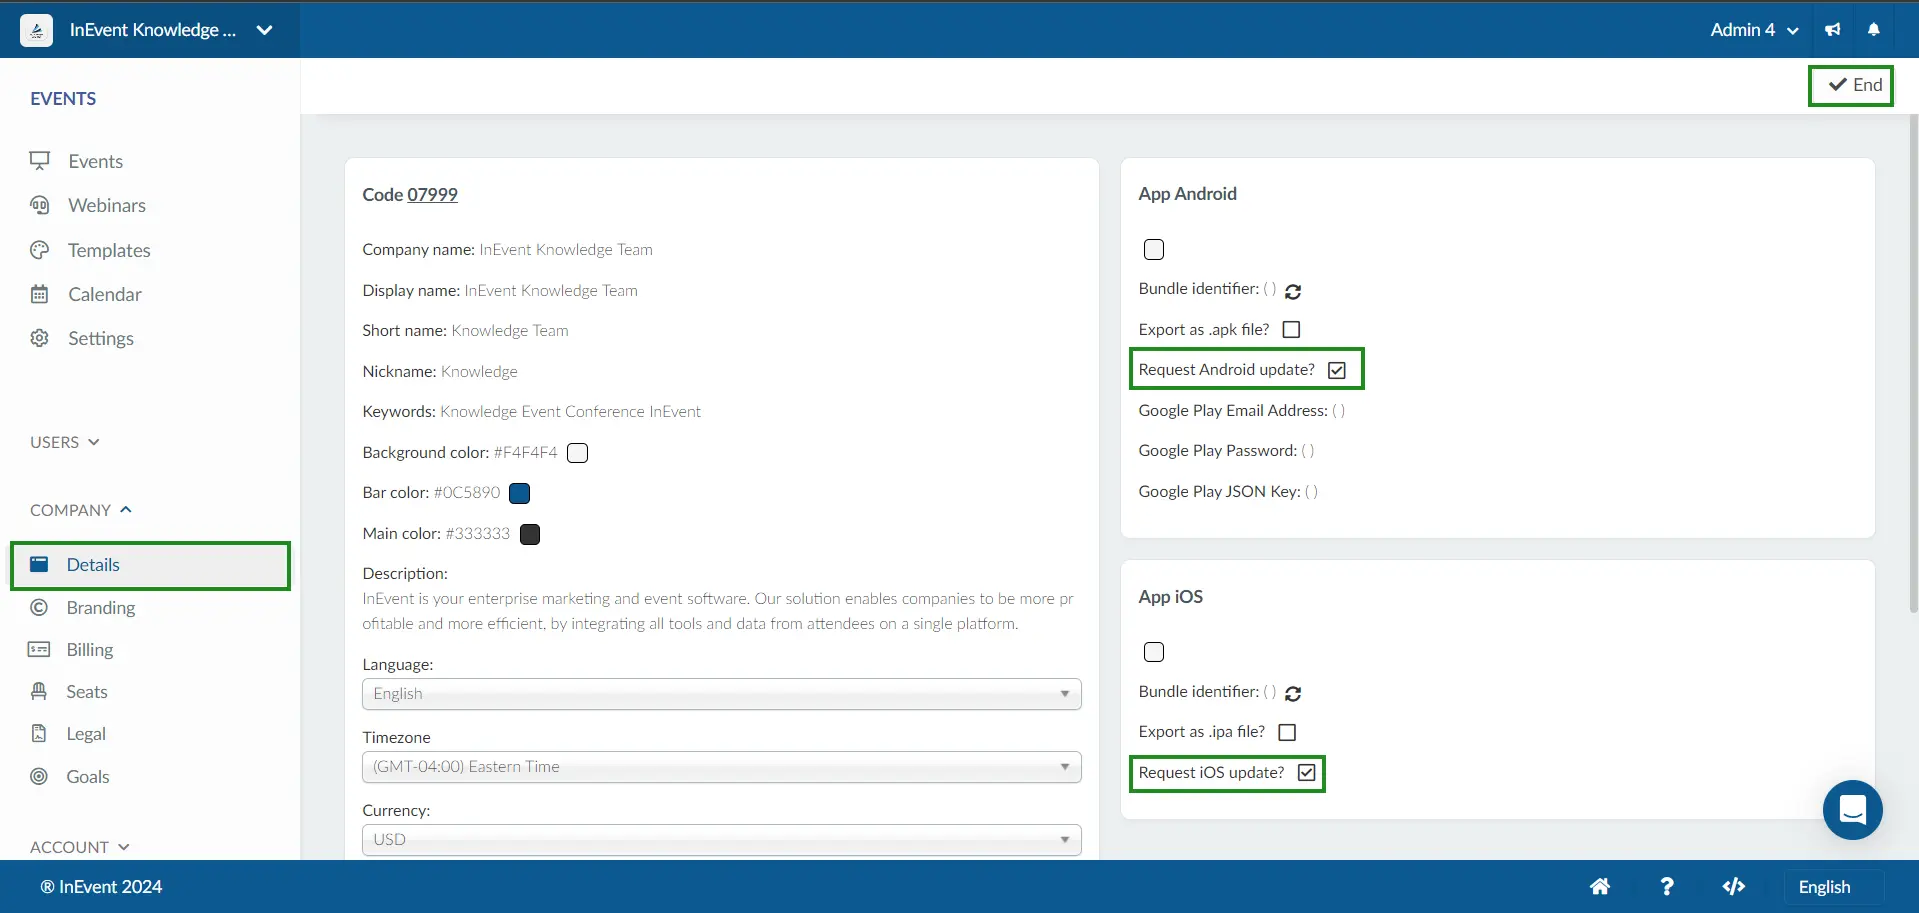
I made a change to one of the company images. Will it be reflected in the app automatically?
No. If an image is changed (company main icon, store icon, or splash), you must request an app update so that the change is reflected in the app. To do so, click Details under the Company section. Press Edit and tick the checkboxes Request Android update? and Request iOS update? Press End to make changes.
The update can take up to 5 business days.