App customization
In the process of creating your event mobile app, you can personalize it so it strengthens your branding and also meets the needs of your audience. You will be able to create a unique layout powered for your attendees' experience, set up the app name and icon image as well as order and label the app's tabs.
What you can customize on your app
When it comes to the mobile app, InEvent offers you two options depending on the plan you have purchased: you can use either the InEvent App or publish your own app. The customization options will depend on which option you have chosen.
App's name and description
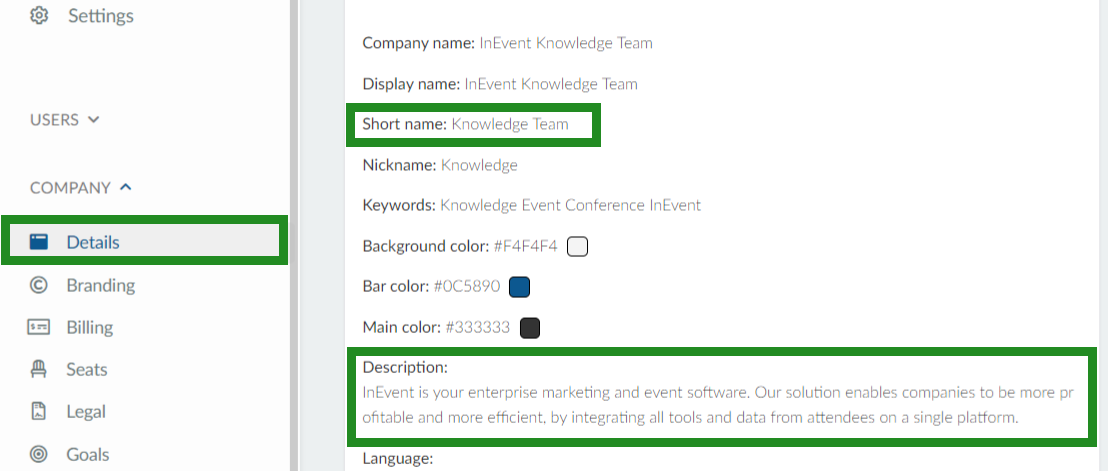
On the company details, you will be able to define your app's name and the description that will be displayed on the app stores.
Write the name you would like to be displayed on the app store under Short name.
Color theme
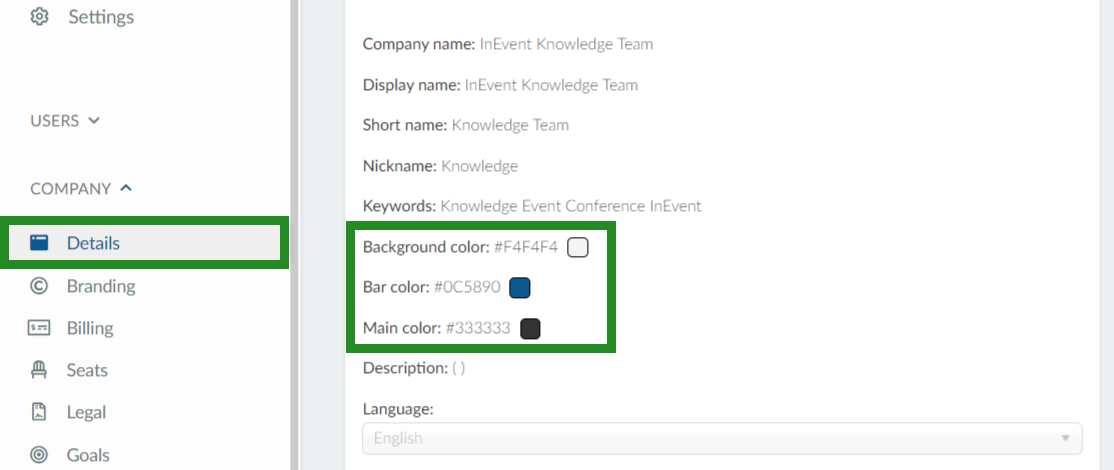
Also on the company details page, you can define the apps color theme by defining its background color, bar color, and main color:
- Background Color: It defines the background color for your app.
- Example: #FFFFFF
- Bar Color: It defines the bar color in your app.
- Example: #1576BC
- Main Color: It defines the main color of your app.
- Example: #42589C
App images
The app images can create credibility and strengthen your brand. Moreover, it is the first point of contact to start connecting with your customers.
You will be able to customize these images from these two sections:
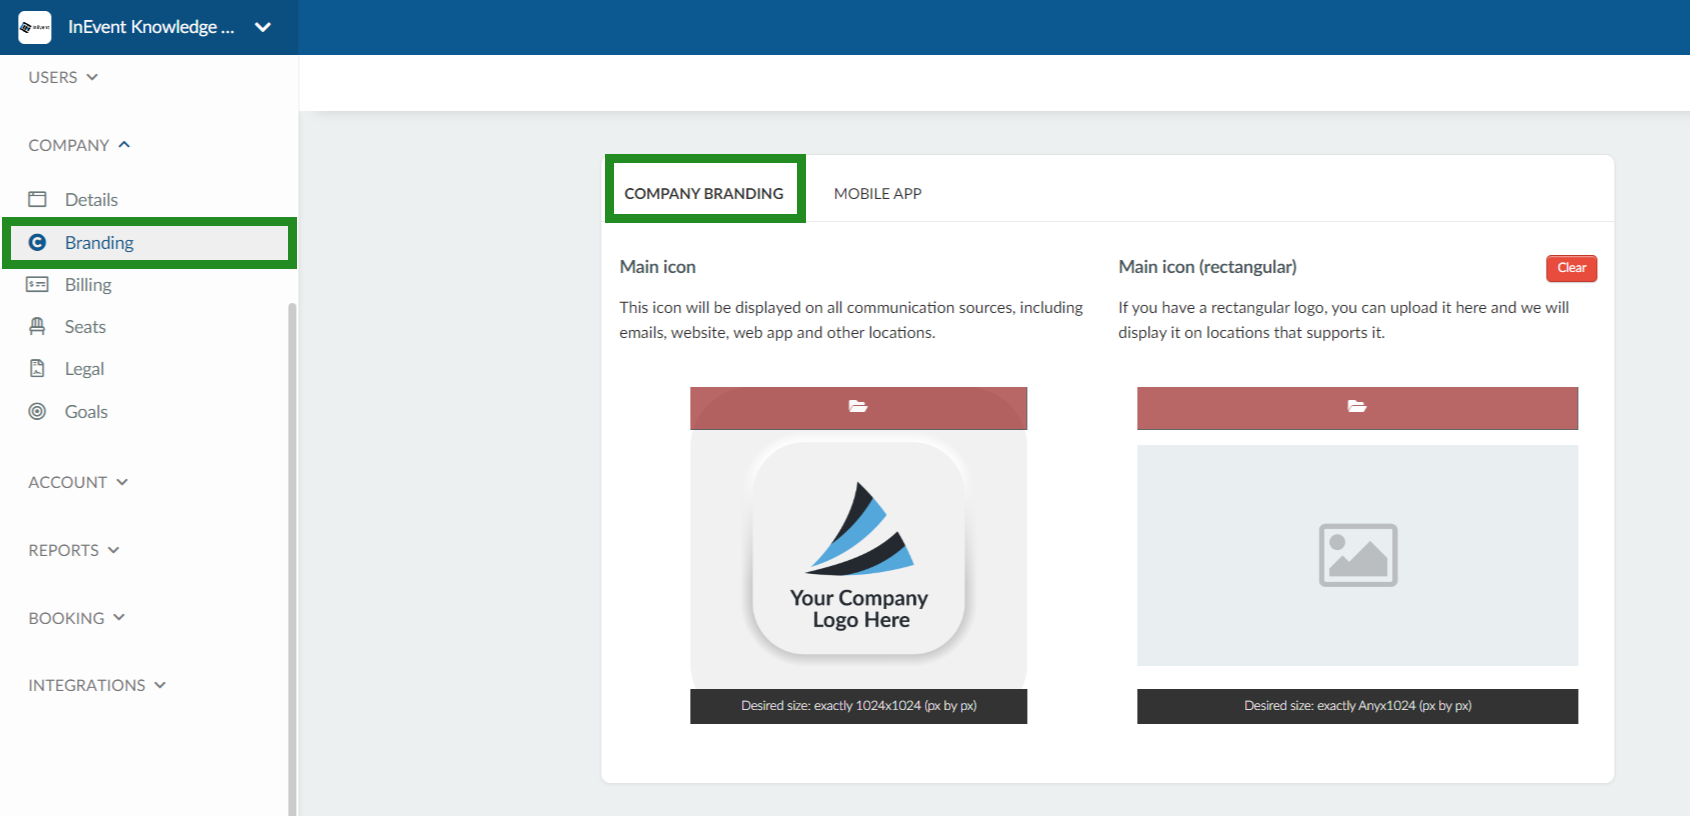
- Company Branding: This includes main icon and the main icon (rectangular).
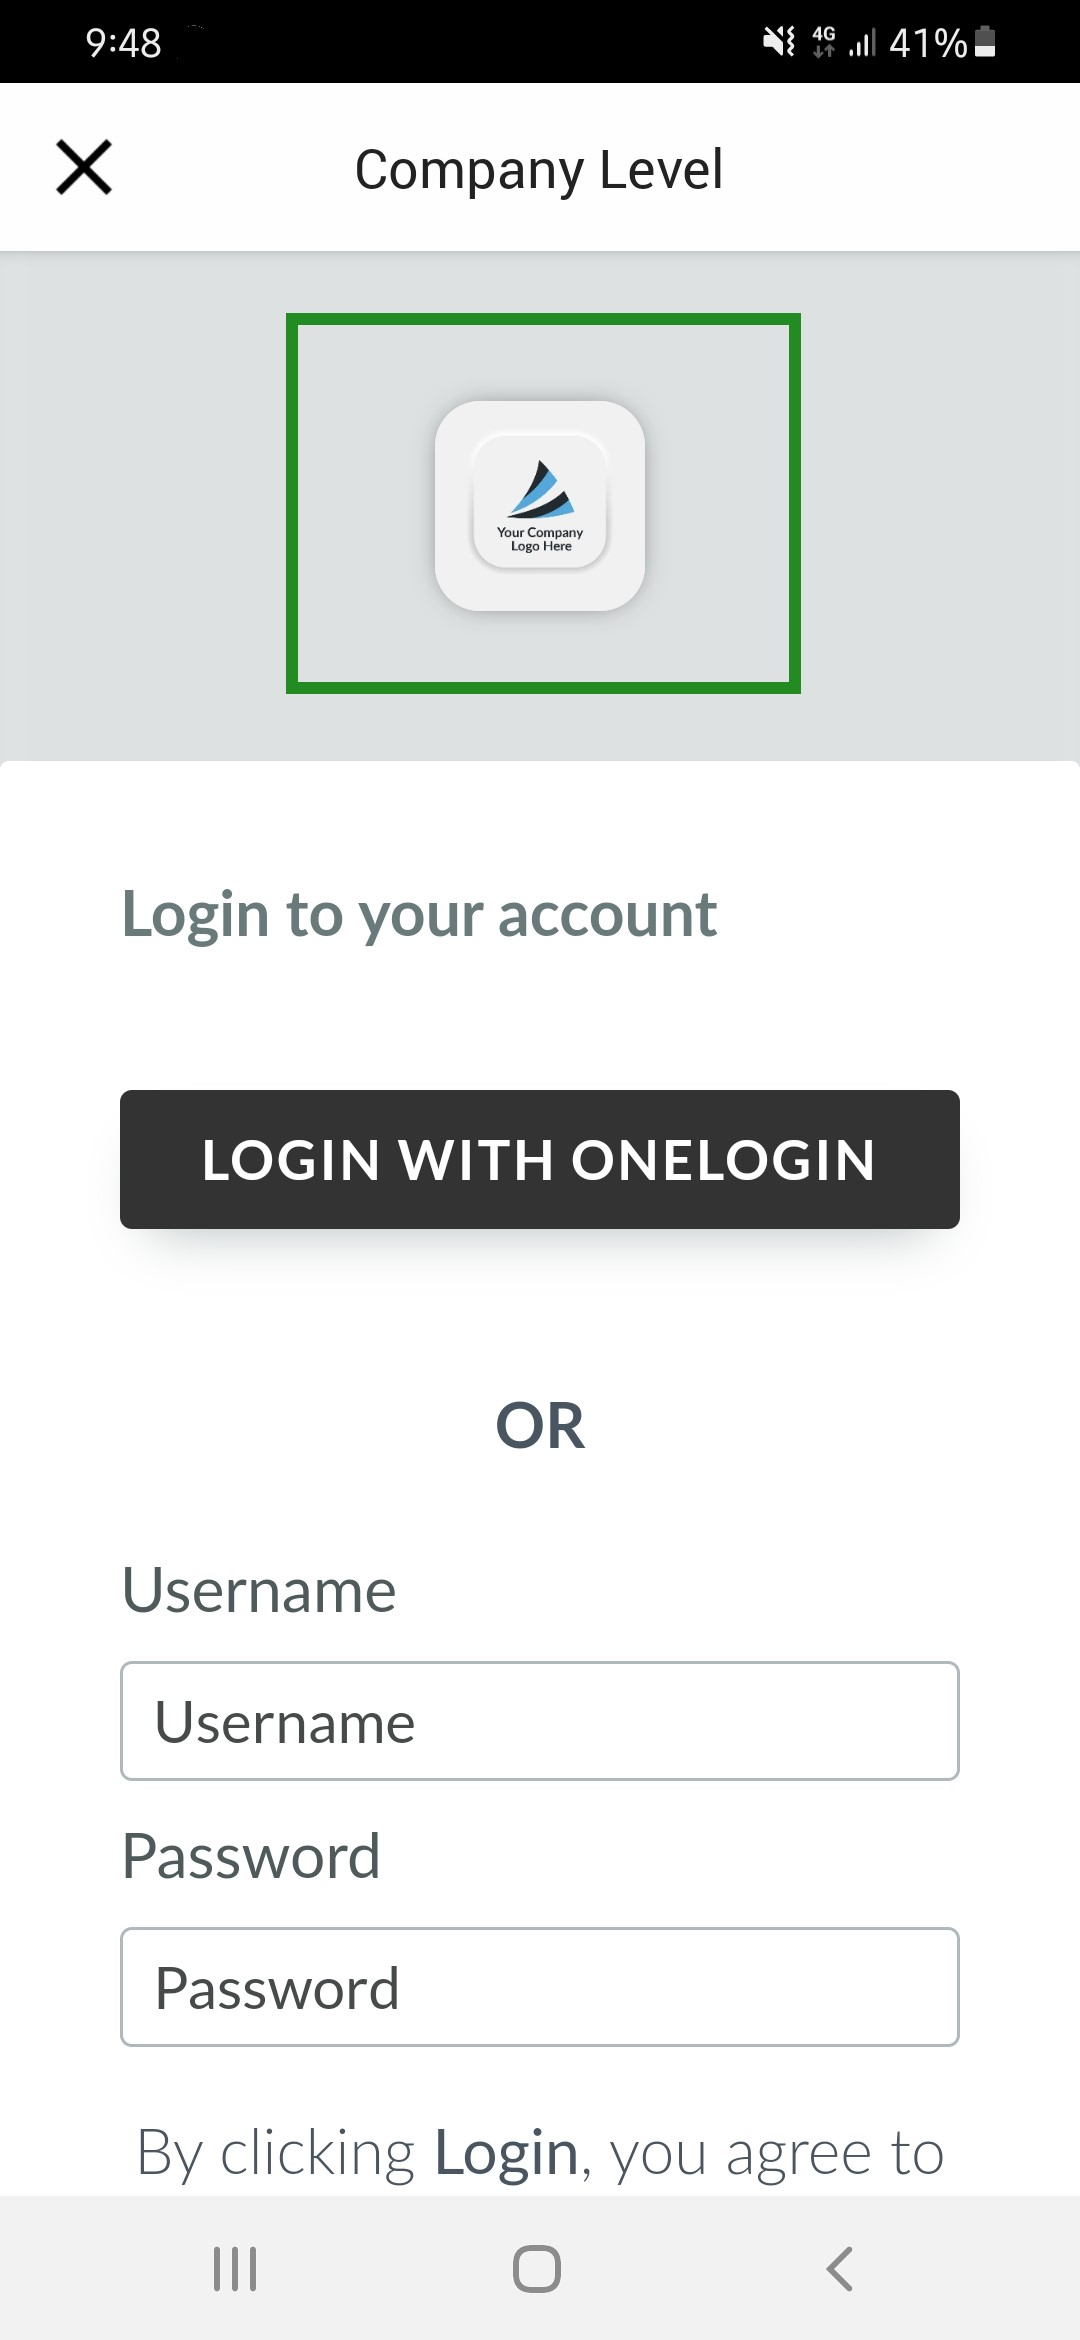
- Main Icon: The image uploaded as the main icon will be displayed on the login page of the mobile app, and on all communication sources, including emails, website, web app and other locations.
- Main Icon (Rectangular) - If in case you have a rectangular logo, you can upload the image here and it will replace the main icon.
Below is an example of the mobile app with the main icon displayed on the login page:
- Mobile App: This includes the store icon and splash icon images.
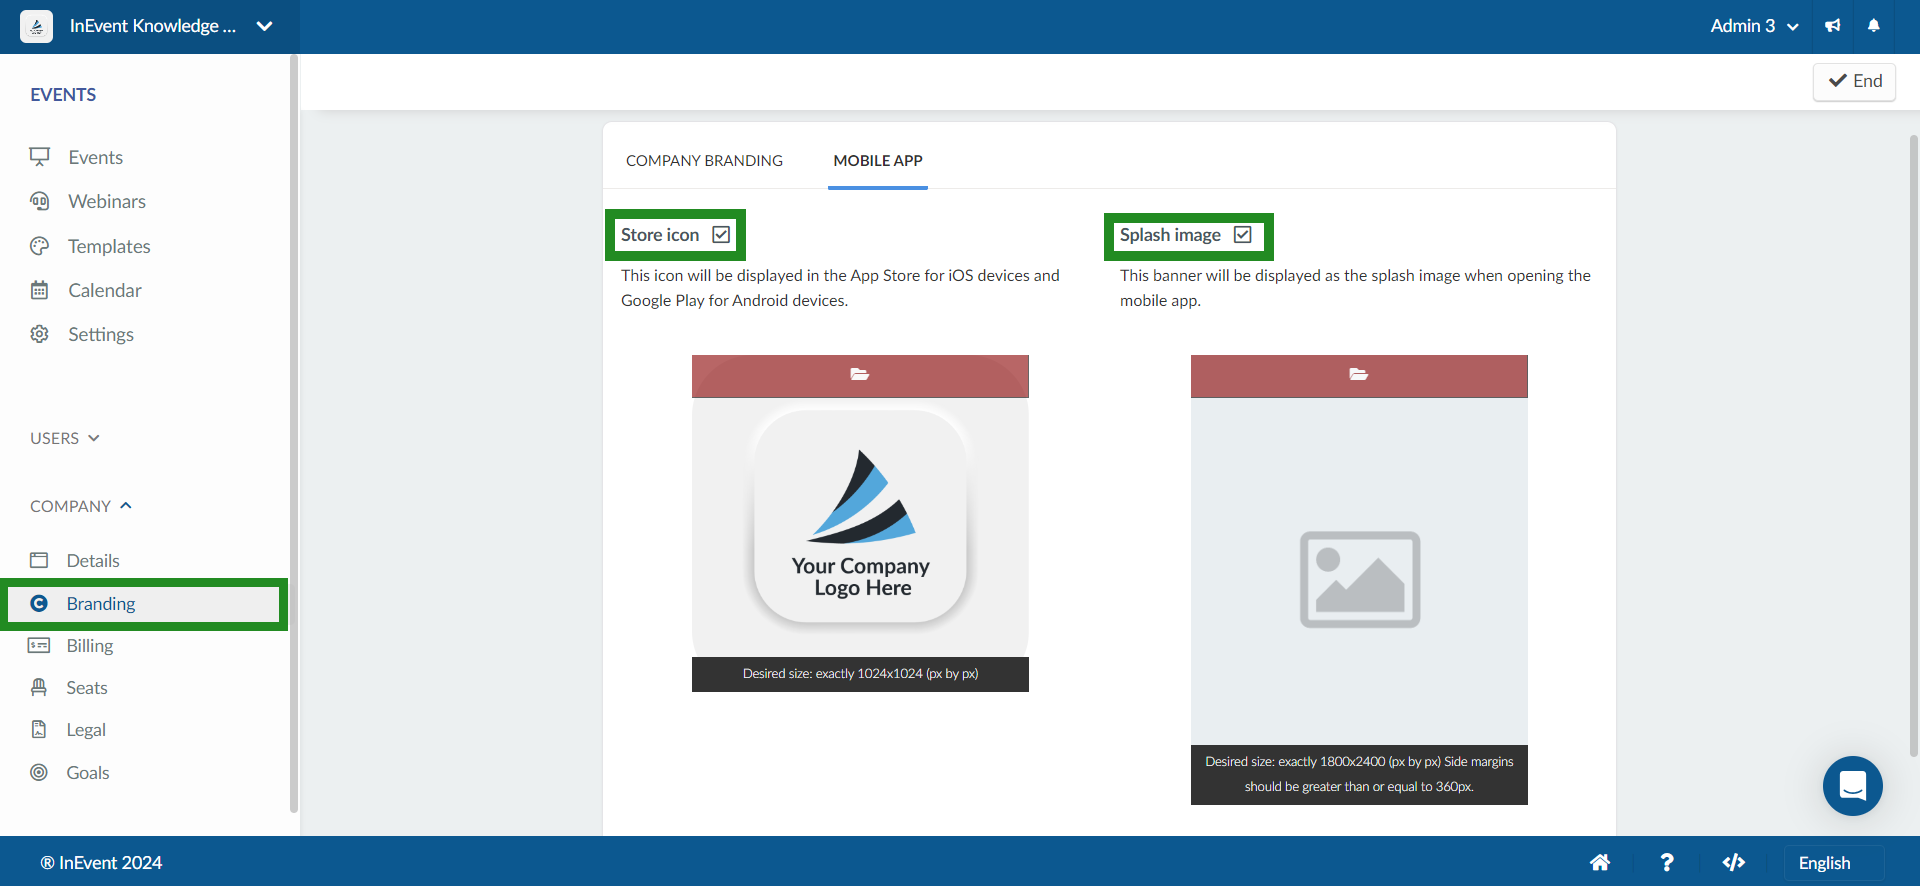
- Store Icon: The image you upload as the store icon is the one that will be displayed in the app stores and will also appear as the app icon on users' devices after downloading. The recommended size is 1024x1024 px.
- Splash Image: The splash image is the opening image for when you access the application. The desired size for the splash image is 1800x2400 (px by px) Side margins should be greater than or equal to 360px.
To upload your desired images, on the company level, click on the Branding > Mobile App. Then, press Edit in the upper right corner and then click on the red button with a folder icon.
Refer to the Company images article for further information on images for the app.
Tabs
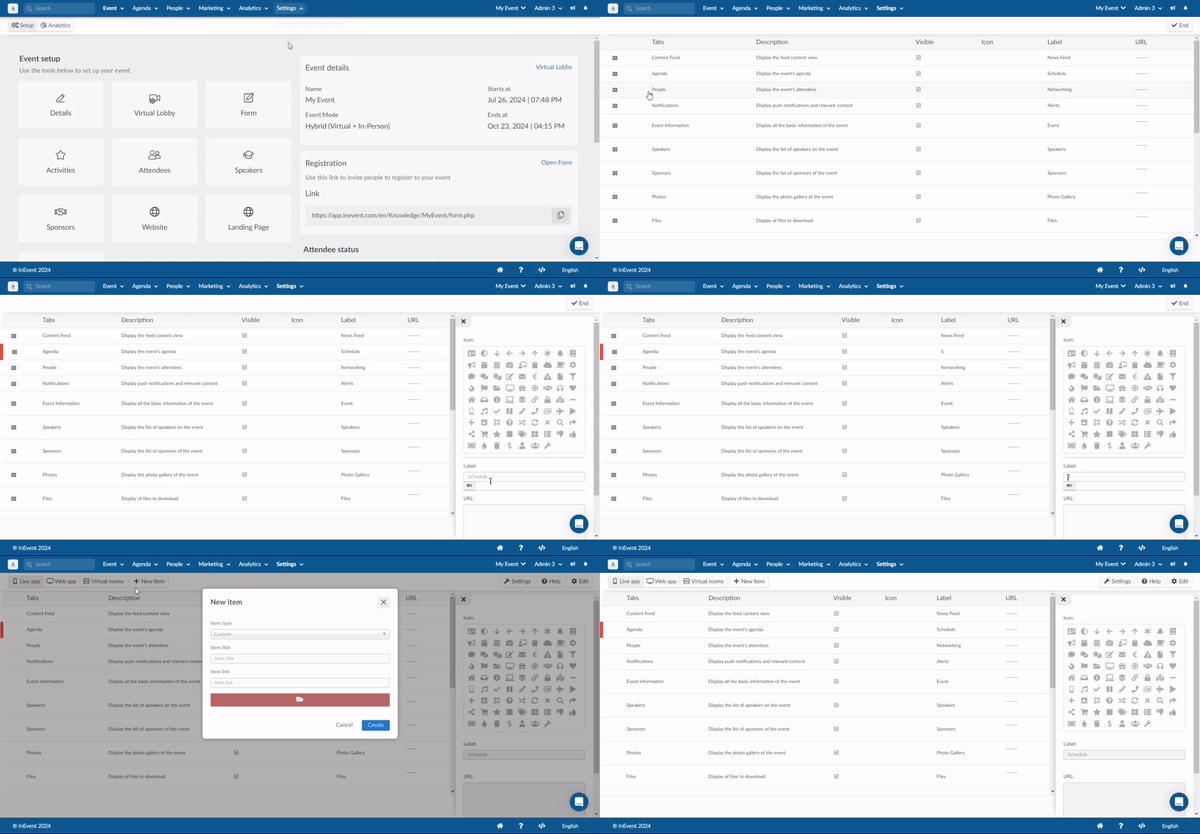
You can customize the title of the tabs as well as create new tabs and edit their order of presentation on the mobile app.
Access the Tabs page by clicking on Settings > Tabs. At the top menu on the upper left, select App. On this page, you will be able to customize and create tabs for the app. Refer to the Tabs article to learn how to do so.
Default text
You can also personalize the mobile app standard messages and fields according to the needs of your event.
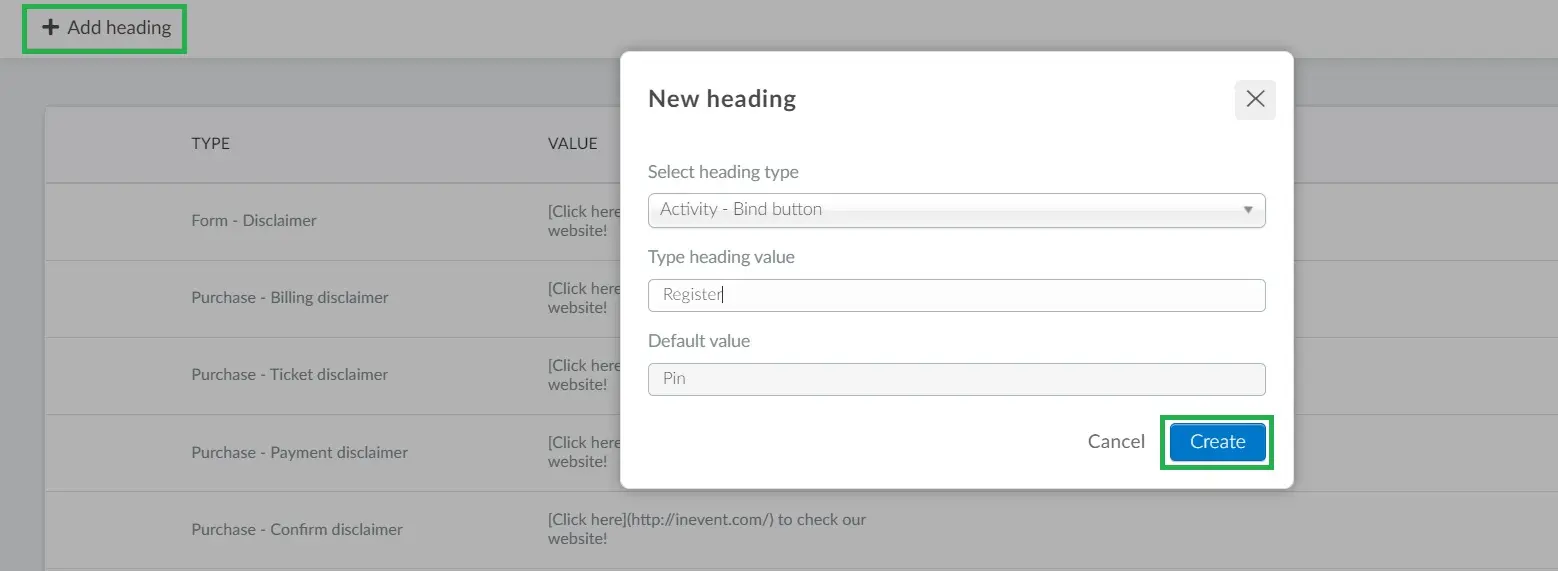
For example, in the app's agenda, the default text for participants to enroll in activities is Pin. If you wish to replace Pin with Register, you should go Settings > Headings > and click on the button +Add Heading.
A new window will open for you to choose the default text you want to change. On the Select heading type drop-down bar, you should select Activity - Bind button, and under Type heading value you should write Register. Then, press Create.
The changes should be reflected on the app instantly.
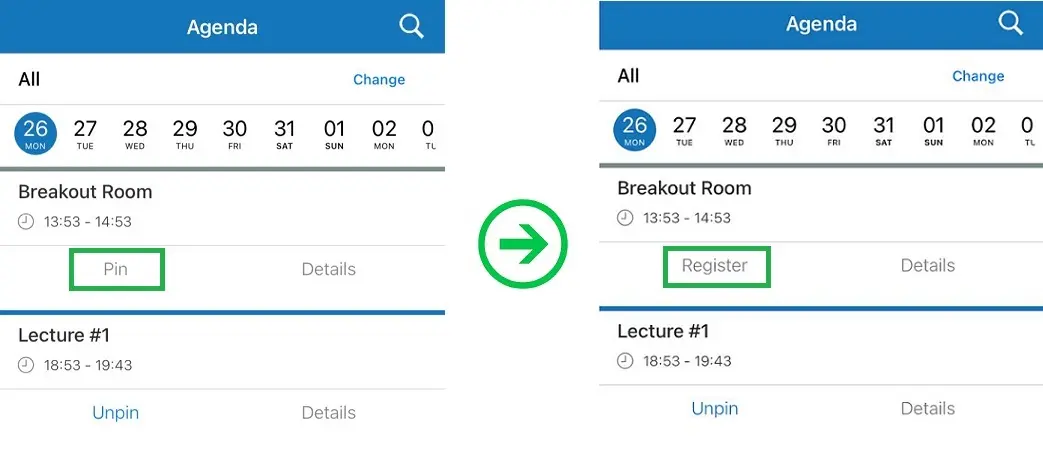
Refer to the Headings article for further information on how to change the app's default text.
Headings
You can customize some of the default headings in your app. To do this simply access the Headings feature at the company level from the Company > Account > Details page or access the page from an event by going to Settings > Headings. You can edit headings such as App - Login name, Login username, Login password, App Download - Title, etc.

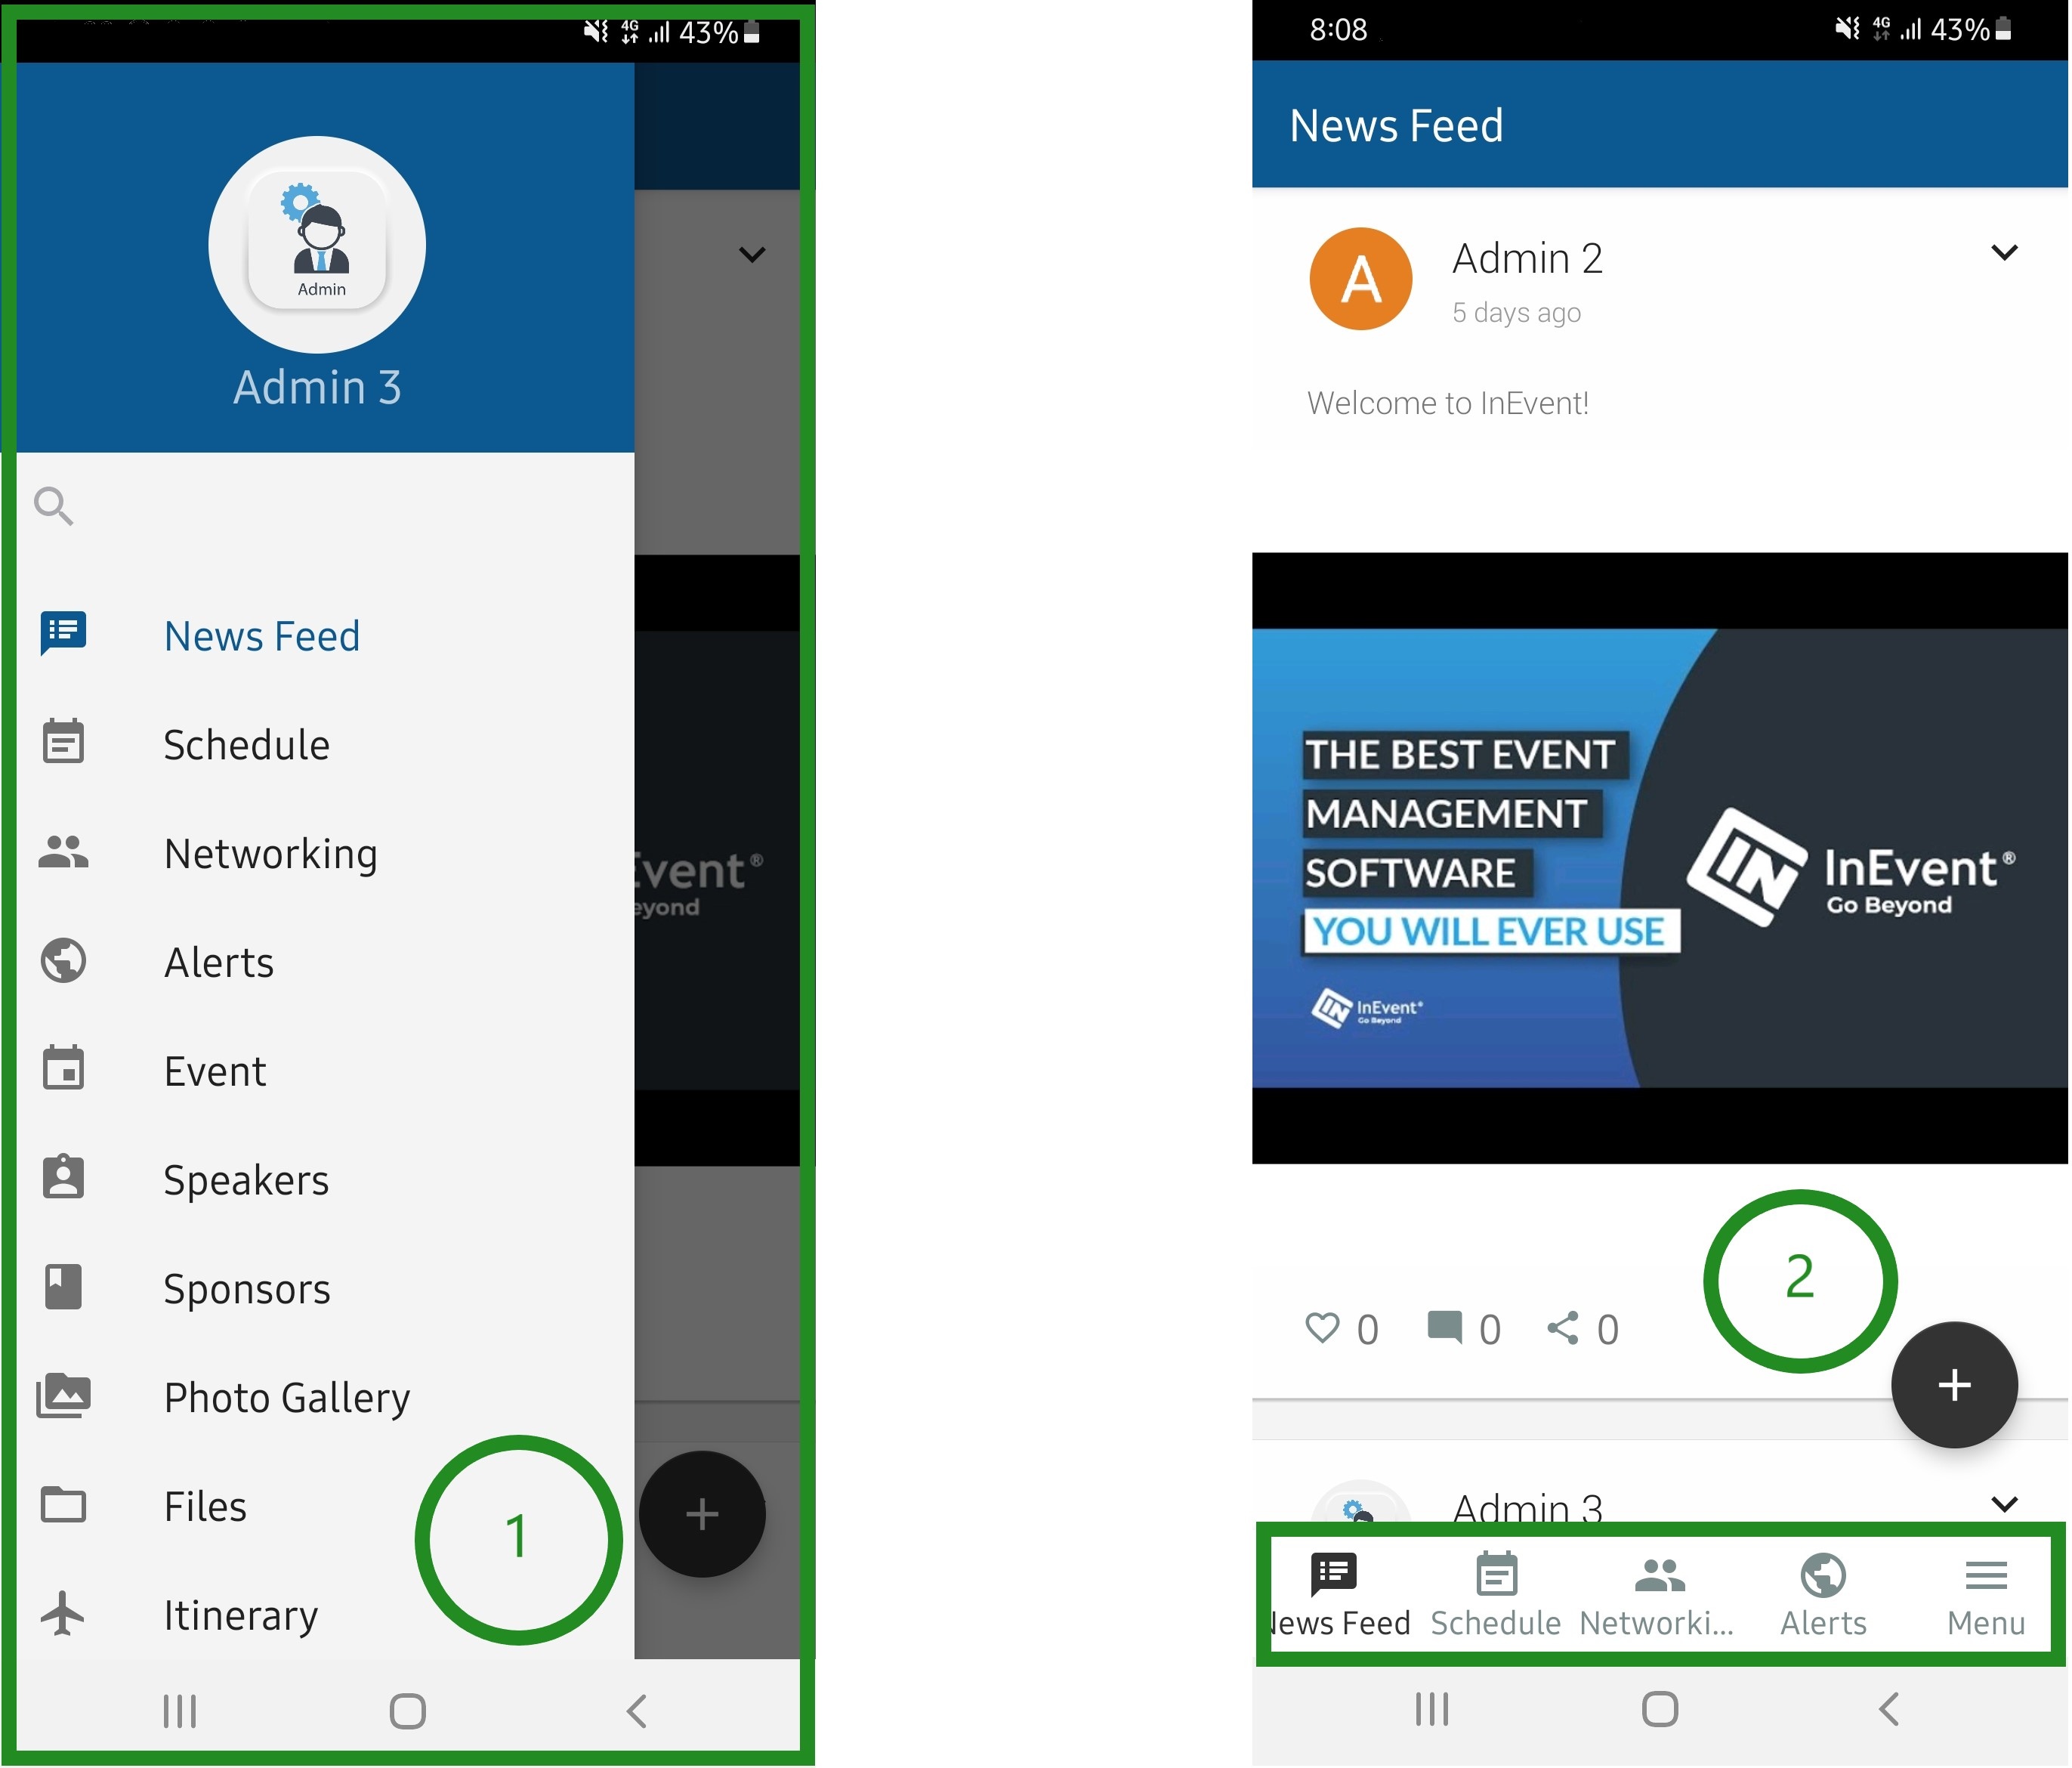
Navigation Bar
You can personalize your navigation in the mobile app for Android by enabling or disabling the Navigation Mode Selector. This allows you to choose either the Navigation Drawer or the Bottom Navigation Bar as your preferred navigation method in the app. To do this, go to Settings > Tools, and under the EXTRA section, toggle the Navigation Mode Selector on or off to switch the menu bar.
