Card Reader
 Updated 1 year ago
by
Amalia
Updated 1 year ago
by
Amalia
With InEvent's Card reader, it is easy to capture information about participants and other leads during your events. With the card reader, you can scan participants' business cards and automatically send the information to the platform for follow-up after the event.
Additionally, event organizers can rate and qualify leads or add extra information as needed after the scanning process is complete.
Enabling the Card reader feature
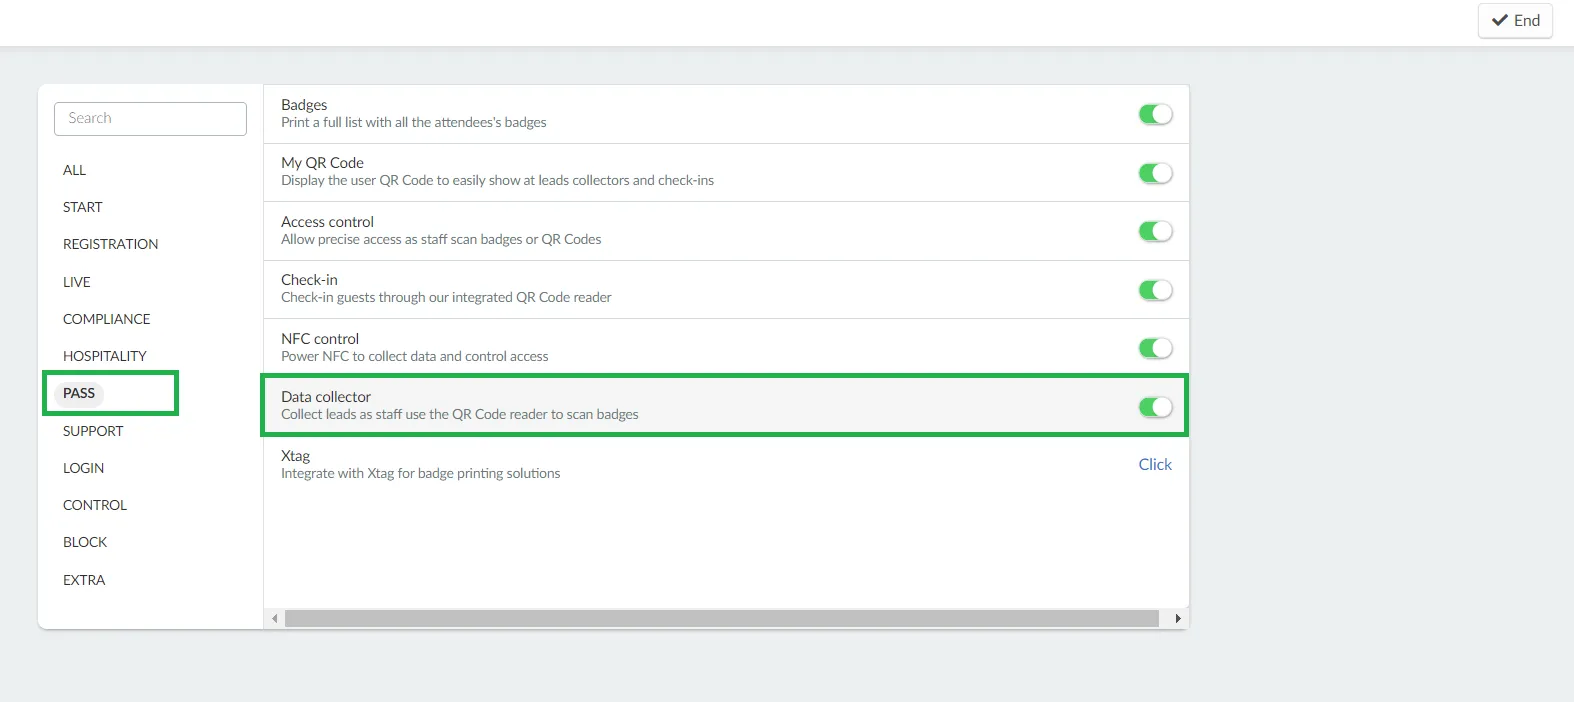
To set up the Card reader feature for your event, you first need to enable the Data collector tool.
To enable this tool, go to Settings > Tools > Pass. Click the Edit button and locate the Data collector tool. Toggle the corresponding button to turn green. Once done, press End to save your changes.
After enabling Data Collector from the Tools page, you also need to ensure that the feature is visible from the Virtual Lobby of your event.
To make the feature visible from the Virtual Lobby, go to Settings > Tabs > Web app. Press the Edit button at the top right corner, and make the Card reader tab visible (as shown below). Press End to save your changes.
Configuring the Card reader
To configure the Card reader, navigate to People > Card reader. Here, you will be able to access three options from the left panel:
- Leads
- Fields
- Preview

Leads
The Leads page displays the list of leads that have been captured during your event with the use of the Card reader. Each lead will be described with the following pieces of information, as captured from their business cards.
- ID: An automatic id assigned to each lead on the InEvent platform.
- Scanned by: The name of the person who captured the lead.
- First name: The lead's first name.
- Last name: The lead's last name.
- Email: The lead's email address.
- Role: The lead's role.
- Company: The company the lead works for.
- Telephone: The lead's phone number.
- Website: The lead's website address.
- Date: The specific date and time that the lead was captured.
Fields
With the Fields tab, you can add and manage custom fields in addition to the default fields that are present on the Card reader.
Adding custom fields in the Fields tab
To add a custom field, complete the following steps:
- Click on the +Add field button at the top left of the page.
- Enter the Field title and subtitle in the resulting dialog box.
- Choose a Field answer type from the drop-down. A list of all available Field answer types can be found here.
- Press the blue Create button.
Deleting custom fields from the Fields tab
To delete custom fields from the fields tab, follow the steps outlined in our article on Custom field configuration.
Preview
The preview option on the left panel provides event organizers with a direct link to access the Card reader. Clicking on the Preview option will direct organizers to the Card reader tab, which is located within the Virtual lobby Attendee center.
Using the Card reader
The Card reader feature works by using an Optical Character Recognition (OCR) artificial intelligence. This artificial intelligence easily scans and reads the text images from business cards, and automatically converts the visual data on these cards into editable text contents. Event organizers can then use the text contents in filling out the Lead retrieval forms.
Card reader in the Virtual Lobby
After accessing the Virtual Lobby through a mobile phone browser, complete the following steps to scan your lead information into InEvent with the Card reader:
- Click the menu icon at the top left of your screen.
- Select the Card reader option from the left panel.
- Click the green Scan button at the lower part of your phone screen. (You will see a pop-up asking you to grant InEvent access to your camera and microphone, click Allow.)
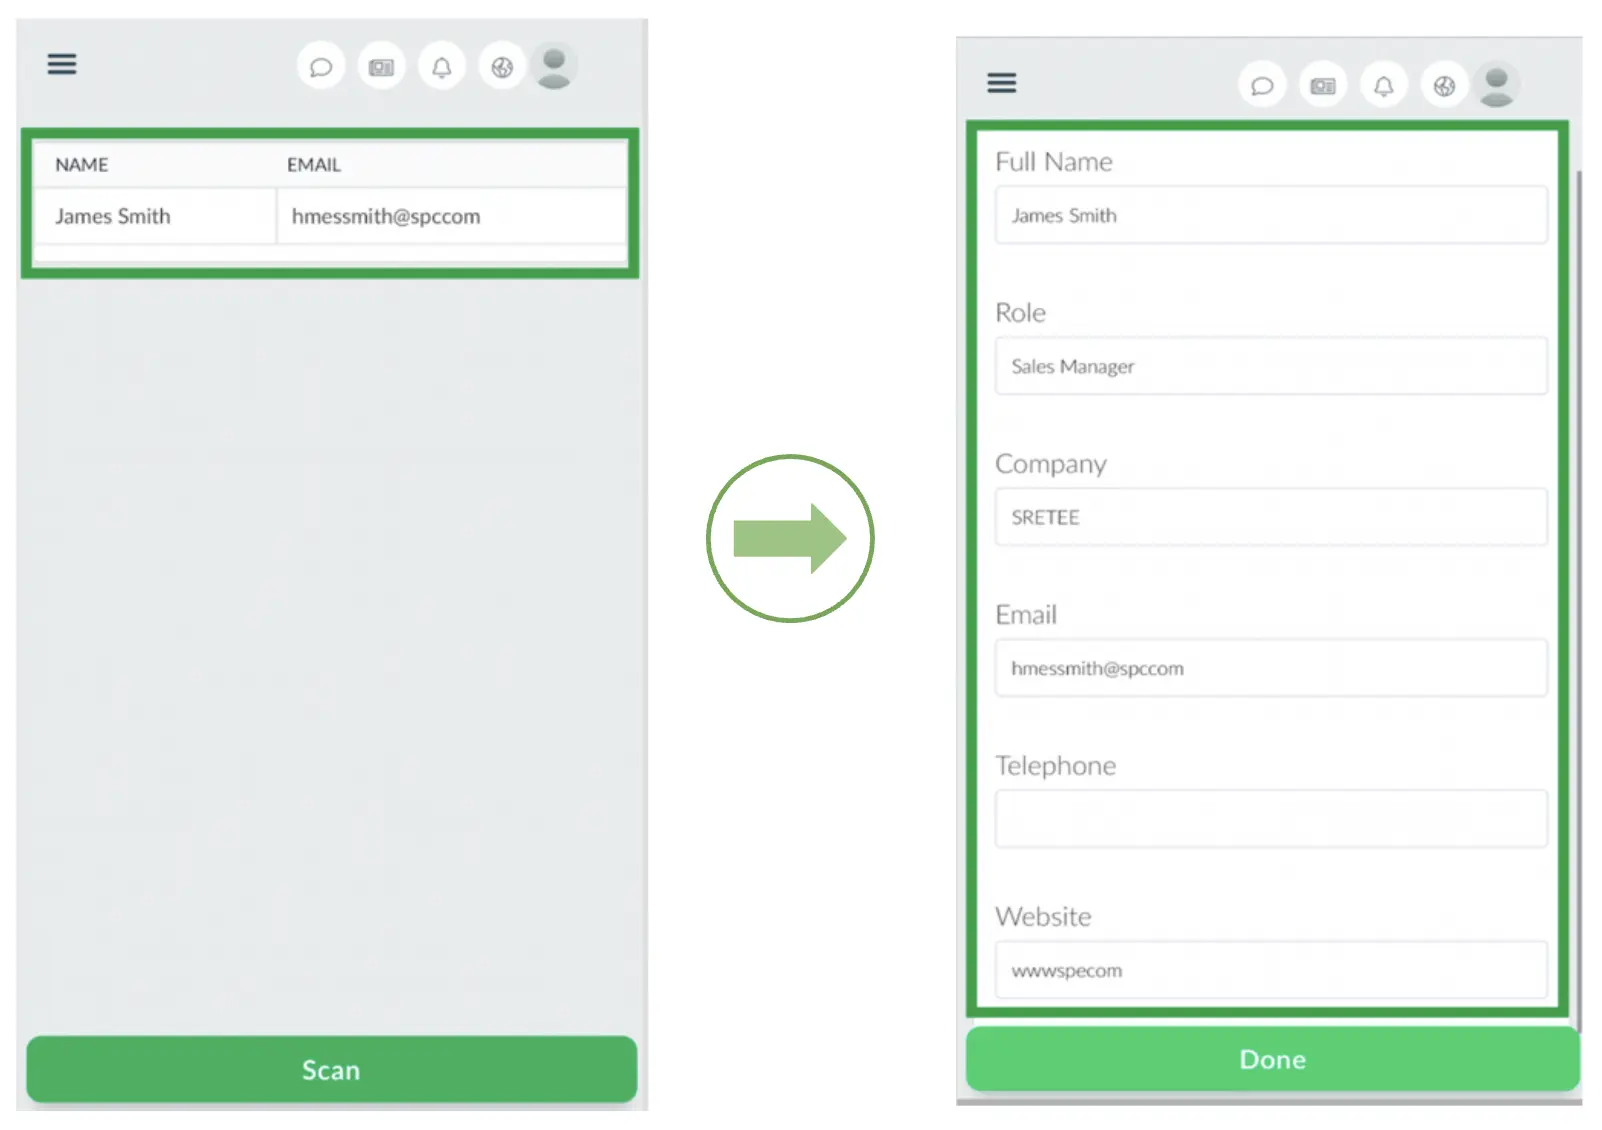
- Center the business card information within the camera frame and click on Capture.
- Make further edits to the lead information from the next screen, and add responses to custom questions (if present).
- Press Done to save your changes.
All lead information from previously scanned business cards will be available under the Card reader tab on the Virtual Lobby. You can click on each lead and further edit each captured detail, as shown below: