Configuring custom fields for forms
 Updated 4 days ago
by
Lorenzo
Updated 4 days ago
by
Lorenzo
- Adding new fields to forms
- Editing fields
This article will show you how to add, edit or remove fields or questions from forms, as well as how to set up the answer types in order to gather general information about the participants.
We understand that forms can be created for various purposes, and that's why we'll show you how to configure fields on registration forms, feedback forms, and custom forms.
Adding new fields to forms
The process to add new fields to forms will be the same for the different types of form offered by InEvent:
The only difference will be how to access the page in order to create these fields.
Registration Form
The standard registration form includes default fields such as name, e-mail address, username, password, role, and company information.
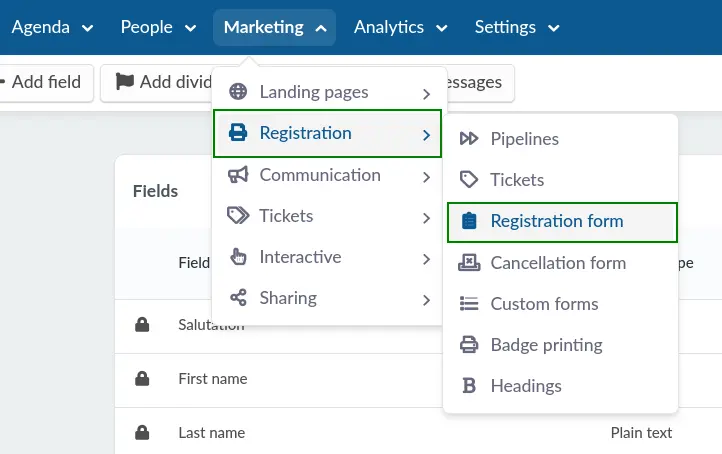
To add new fields or questions to your form, go to Marketing > Registration > Registration form, click the + Add fields button in the top left corner
Feedback form
The feedback form will vary depending on which type of survey will be conducted.
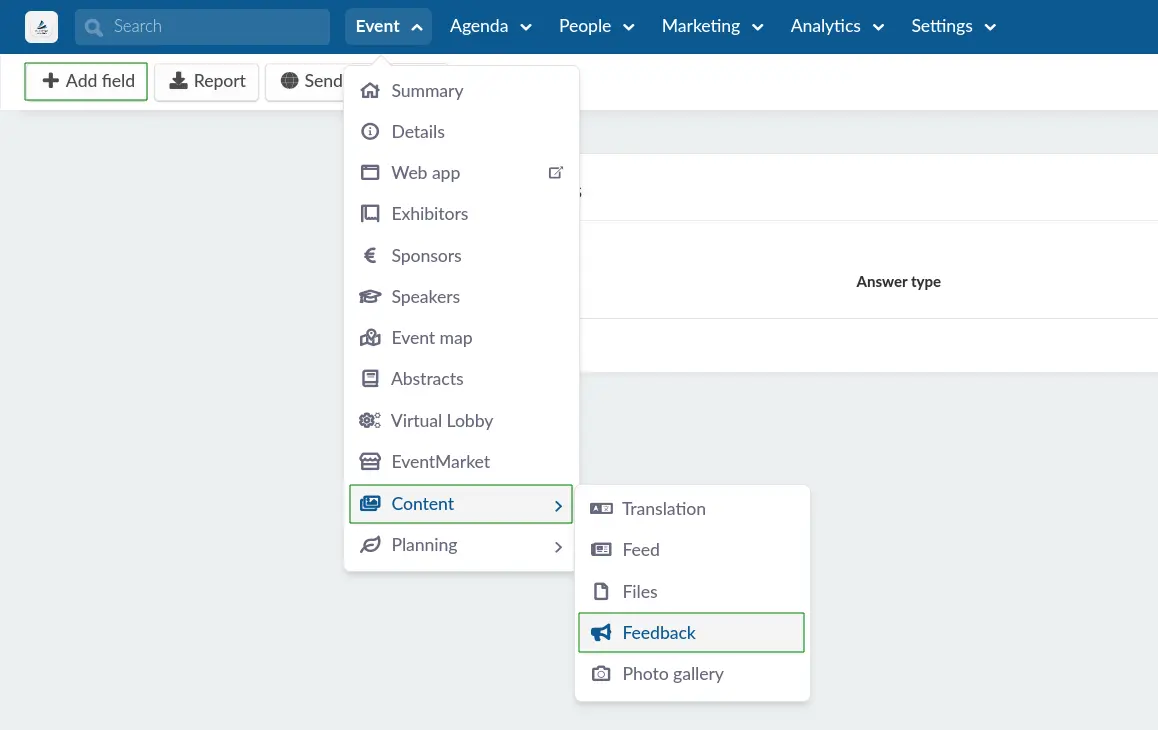
- Event feedback: Navigate to Event > Content > Feedback.
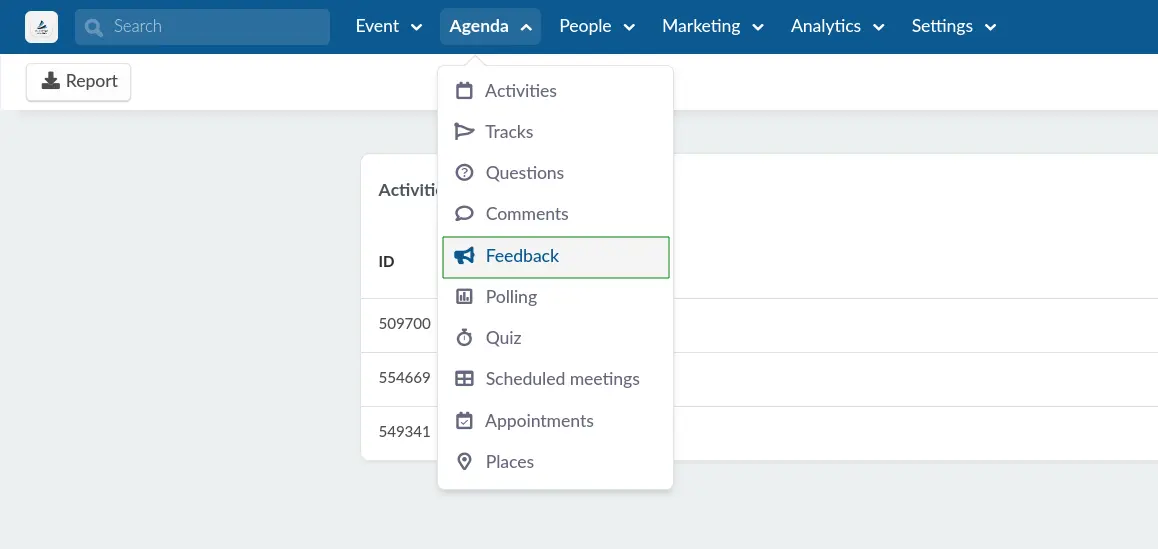
- Activity feedback: Click on Agenda > Feedback. Then, select an activity.
- Sponsor feedback: Navigate to Event > Sponsor. Then, select an existing sponsor. Within the Details tab, locate the Ask for feedback when leaving checkbox. Click on Edit, check the box, and click on the Edit button next to it. You will then be directed to the associated feedback page, where you can configure it as needed.
- Exhibitor feedback: Navigate to Event > Exhibitor. Then, select an existing exhibitor. Within the Details tab, locate the Ask for feedback when leaving checkbox. Click on Edit, check the box, and click on the Edit button next to it. You will then be directed to the associated feedback page, where you can configure it as needed.
Custom Form
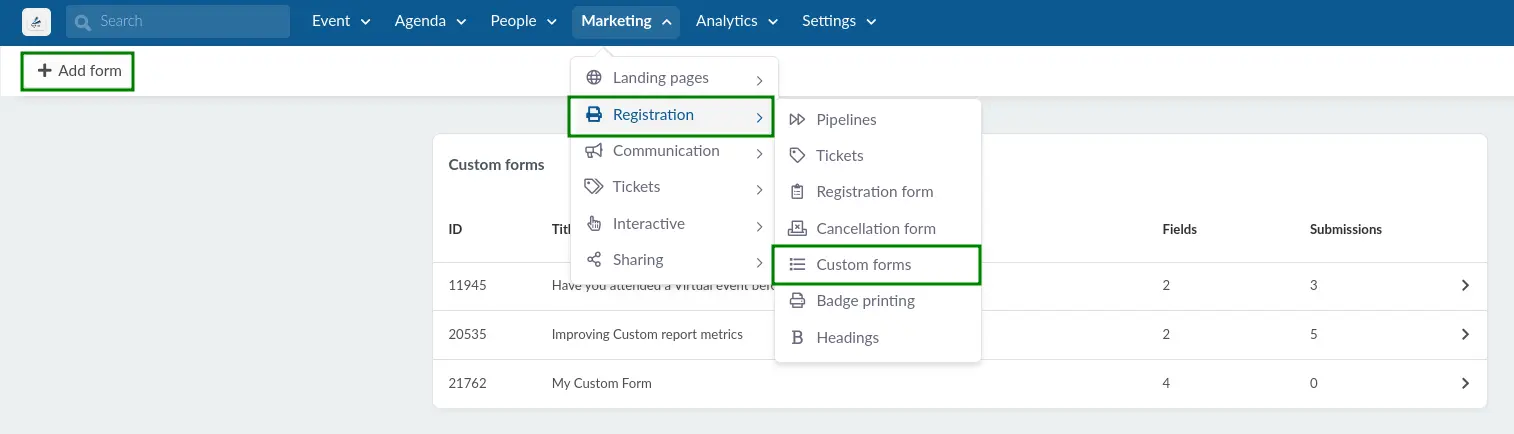
To add new fields to custom forms, you need to navigate to Marketing > Registration > Custom Forms> +Add Form. Once you create the form, you will see the +Add field button in the upper left corner.
Abstract form
To add new fields to the Abstract form, you need to navigate to Event > Abstracts. Choose the section you want to add a field to - Submission form or Review form and click on the +Add field button in the upper left corner.

Booking forms
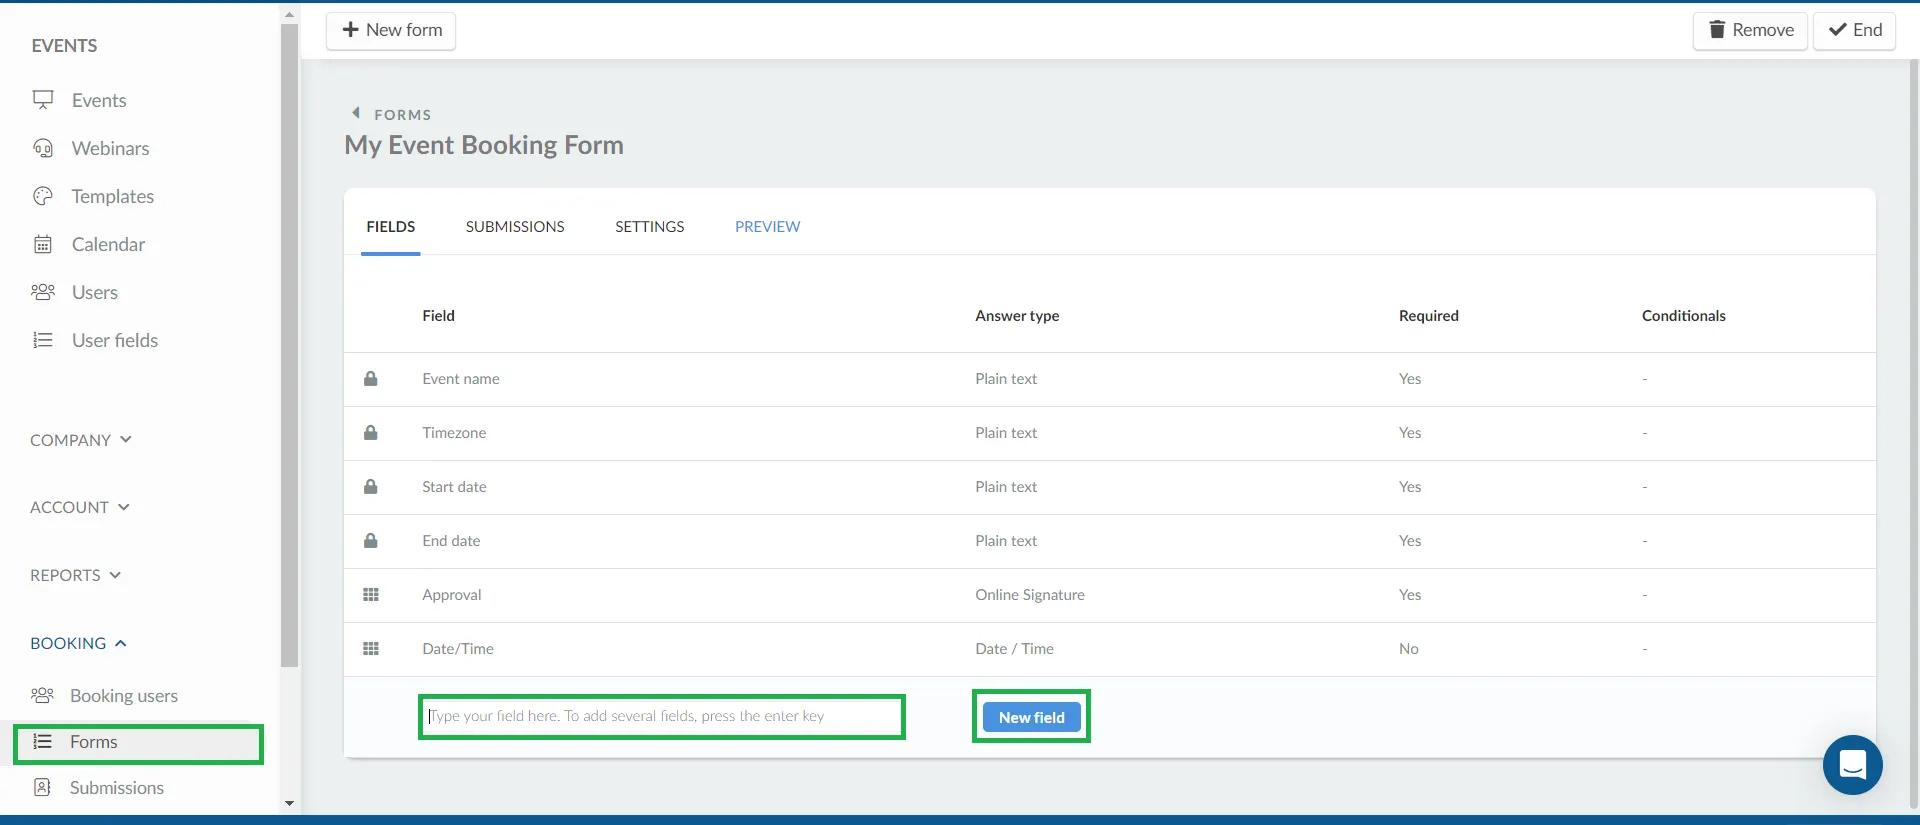
To add new fields to the Booking form, you need to navigate to Booking > Forms at the company level. After creating a custom form or an event booking form, select the form and click on the form, click Edit and enter a new field in the New field section. Click on the New field button to register the newly created custom field.
Editing fields
Answer types
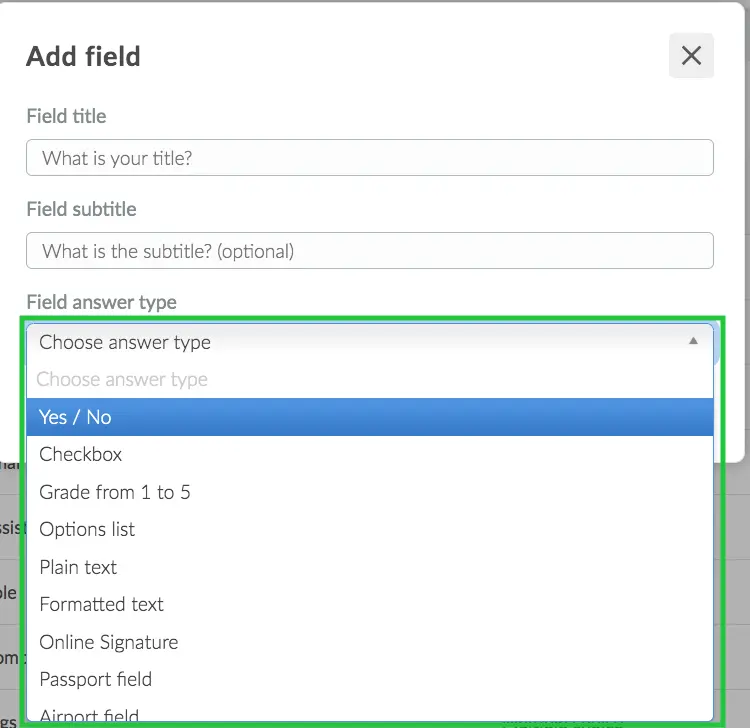
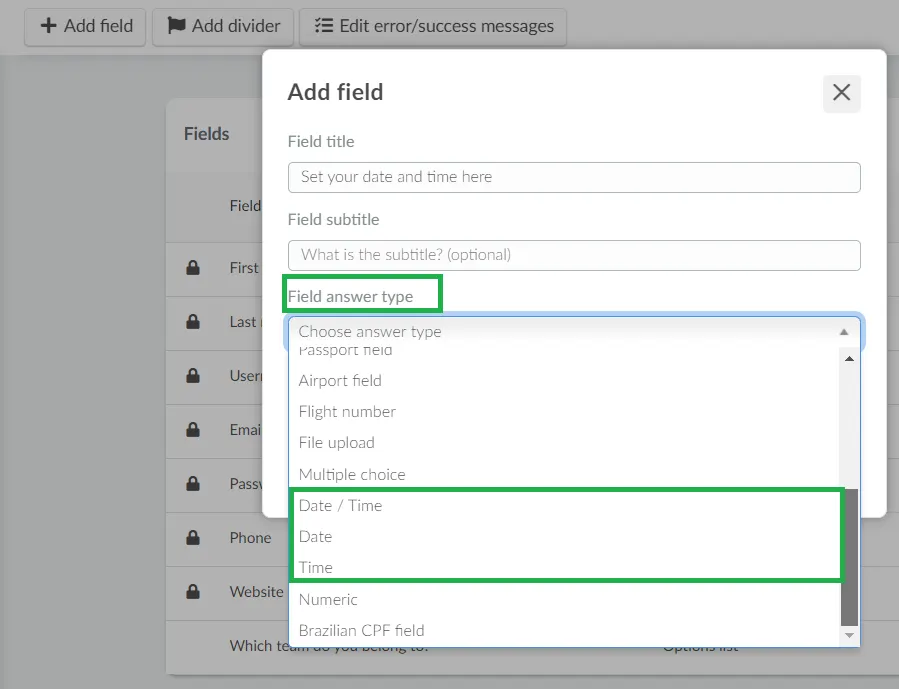
After adding fields to any of the above listed pages, you will need to choose the Answer Type from a list of options using the drop-down box.
- Yes or No: Attendees must choose between Yes and No.
- Checkbox: Attendees should tick the checkbox to answer the field.
- Grade from 0 to 5: Attendees should choose a number from 0 to 5.
- Options List: Organizers can set several options for the attendee to choose from (not multiple choice).
- Plain Text: Displays a text box for attendees to reply with a response.
- Formatted text: allows attendees to submit word-style formatted texts.
- Online Signature: Displays a box for attendees to add their electronic signature.
- Passport field: Within the standard international passport structure, attendees must enter the official ID.
- Airport field: Allows attendees to enter airport names/codes and they will appear immediately.
- File upload: Attendees must attach the desired file, requested by the organizer.
- Multiple choice: Organizers can set several multiple-choice options.
- Date & Time: Attendees can choose a date and time from the calendar.
- Date: Attendees can choose a date from the calendar.
- Time: Attendees can choose a time from the calendar.
- Numeric: Attendee can only enter numbers in this field, with a limit of 9 digits. If your type of answer requests more than 9 digits, use the answer type Plain text.
- Multiple Grades: Organizers can set multiple questions with different answer typesAttendees can provide ratings by clicking on the stars, which will turn yellow for multiple fields instead of just one field.
Online Signature
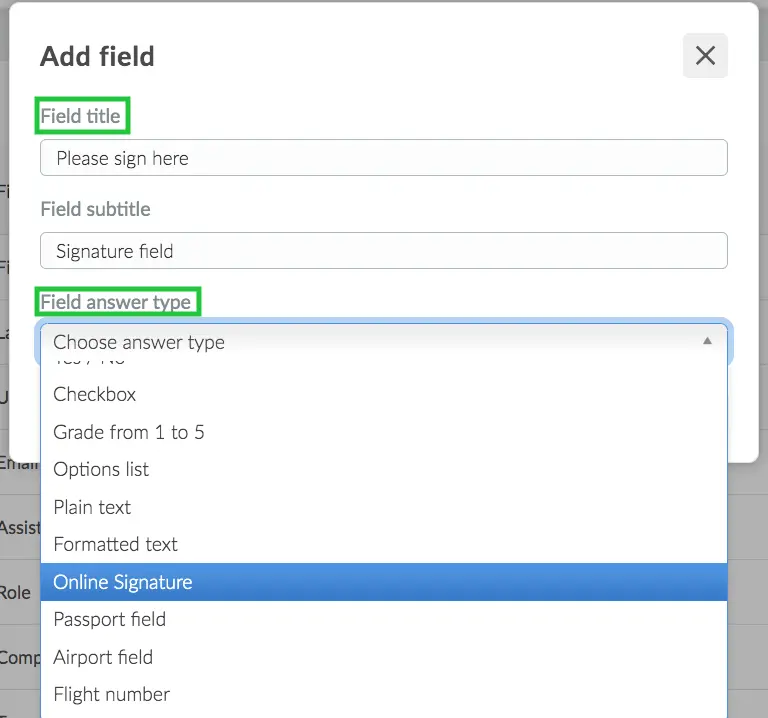
You can ask participants for their signatures on registration forms, custom forms, and booking forms. To add a signature box to each form, click on +Add field, enter your Field title, then select Online signature as the answer type from the drop-down menu:
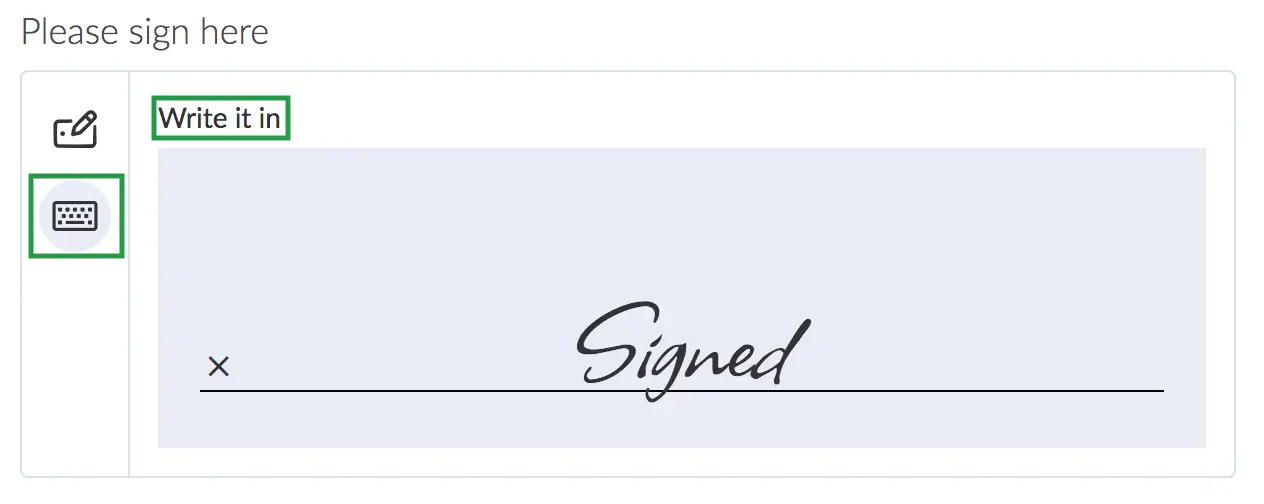
The form will now display a box for the participants to place their signatures. Participants can enter their signatures in one of the following ways:
- Draw it (with a mouse) by clicking on the pen icon.
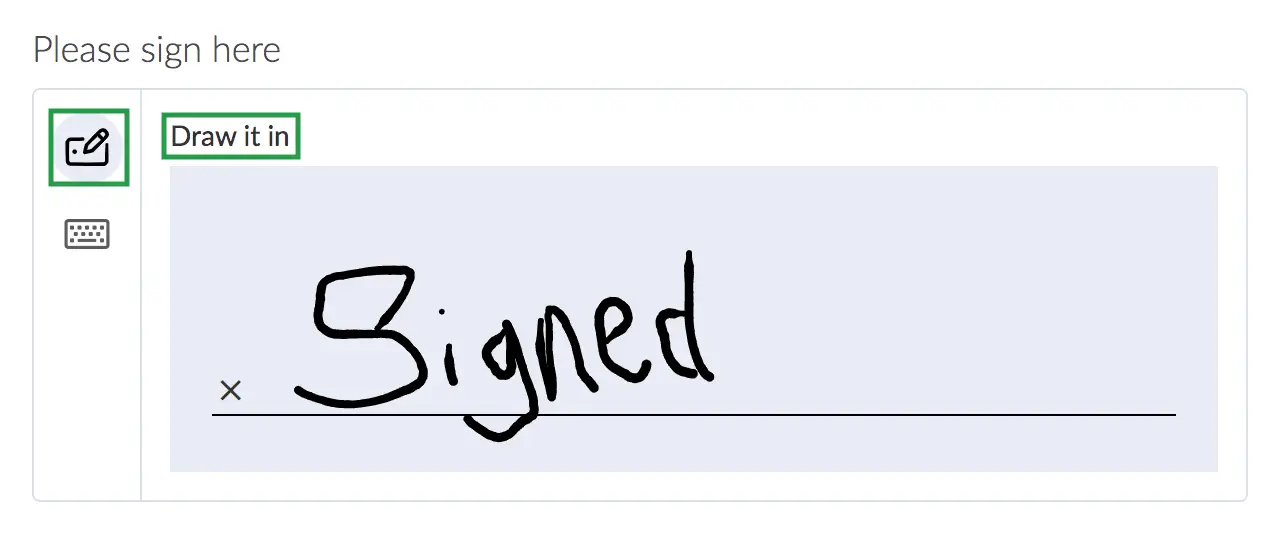
- Type it by clicking on the keyboard icon.
Date/Time, Date, and Time answer types
Using the Date/Time, Date or Time answer types is useful for time related questions on your forms.
When selecting any of these answer types, you can set a default value and also set a minimum value and maximum value which will restrict users to the date or time set in these fields.
- Setting the default value, minimum value and maximum value (optional)
The gif below shows how to configure these settings for the Date/Time, Date and Time answer types.

When a user is filling the form, they will be restricted to selecting a date/time, date or time fields based on the configuration of the minimum and maximum value by the organizer.
- When using the Date/Time answer type, the unavailable dates will appear faded. A warning note will appear when users try to select a time different from what has been set by the organizer on the minimum and maximum value field.
- When using the Date answer type, the unavailable dates will appear faded.
- When using the Time answer type, users will not be able to select a time outside of what has been configured by the organizer in the minimum and maximum value field.
Options List
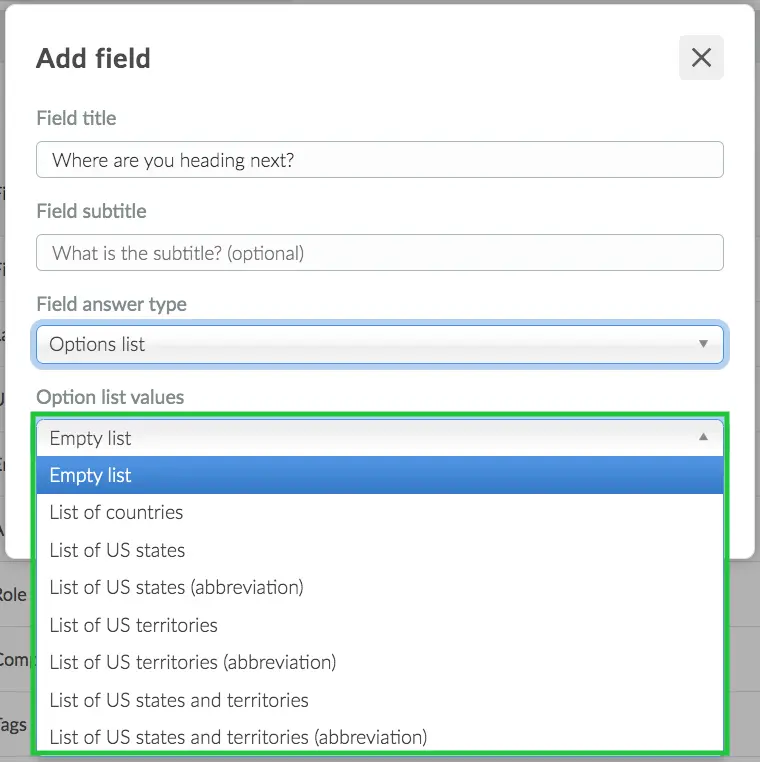
When selecting the Options list as the answer type, there are a few preset options to choose from. Among them is the Empty List for you to add your own catalog.
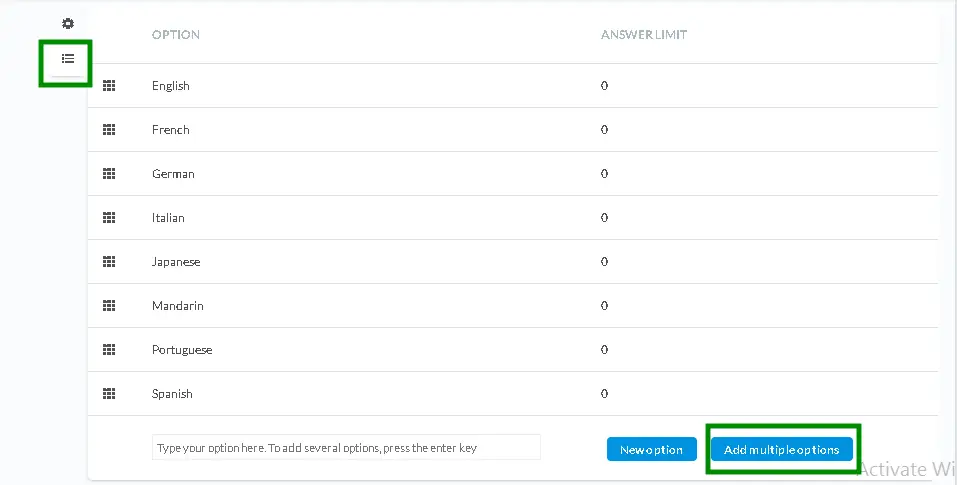
- Adding your list
When selecting Empty list, on the field page click on Edit then select your question. Then, press the bullet point icon (outlined in the image below), and click the blue Add Multiple Options button
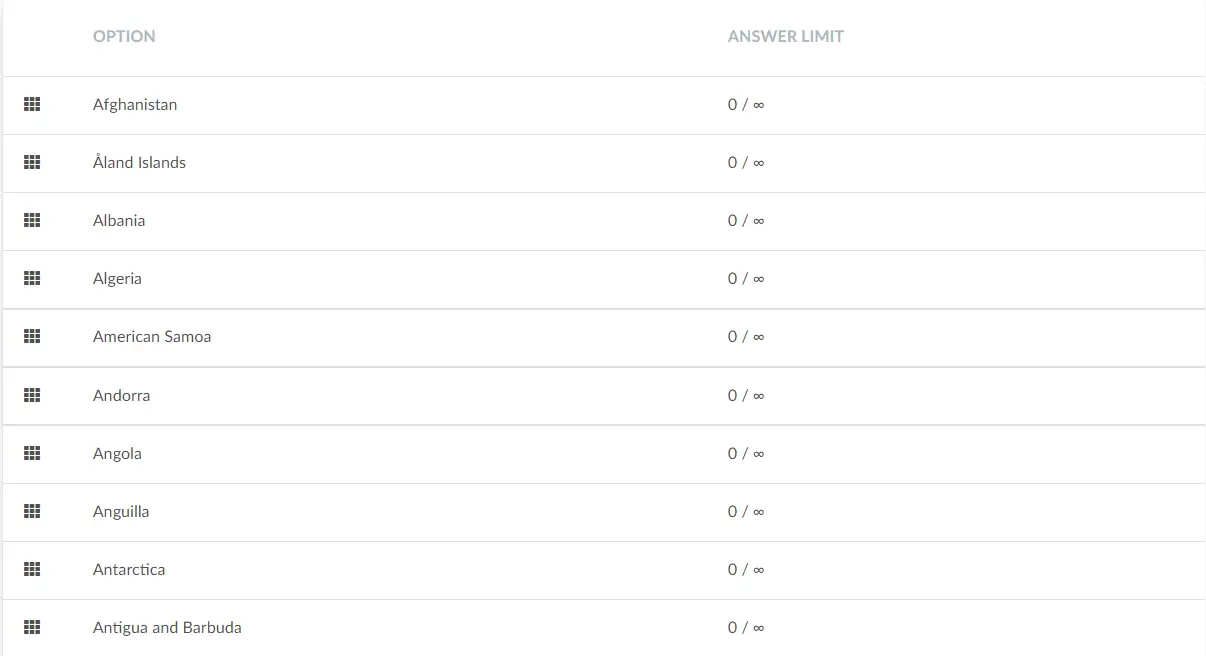
- Presets option list
You can also select one of the preset options such as List of countries, List of US states, List of US states (abbreviation), List of US territories, List of US territories (abbreviation), List of US states and territories, and List of US states and territories (abbreviation). And the Options list will show a list of countries according to the option selected:
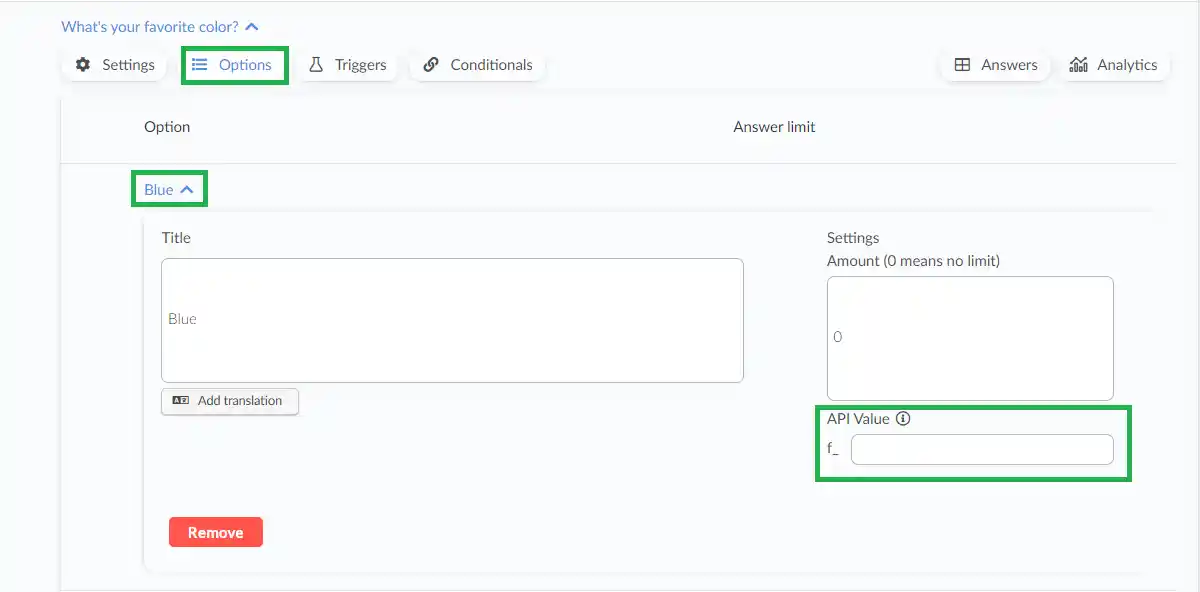
When using the Options list answer type, you can apply custom API values to the option(s) in the API Value box.
Multiple Choice
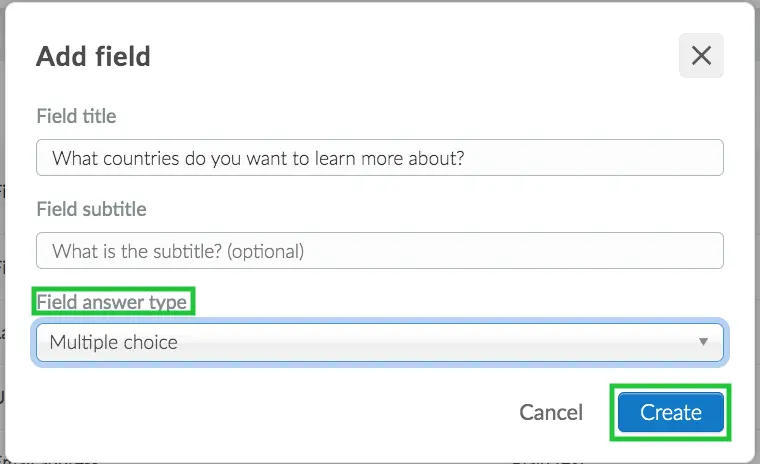
To create a multiple choice field, write your question in the Field title field and then select Multiple choice from the drop down menu of Field answer type and click Create.
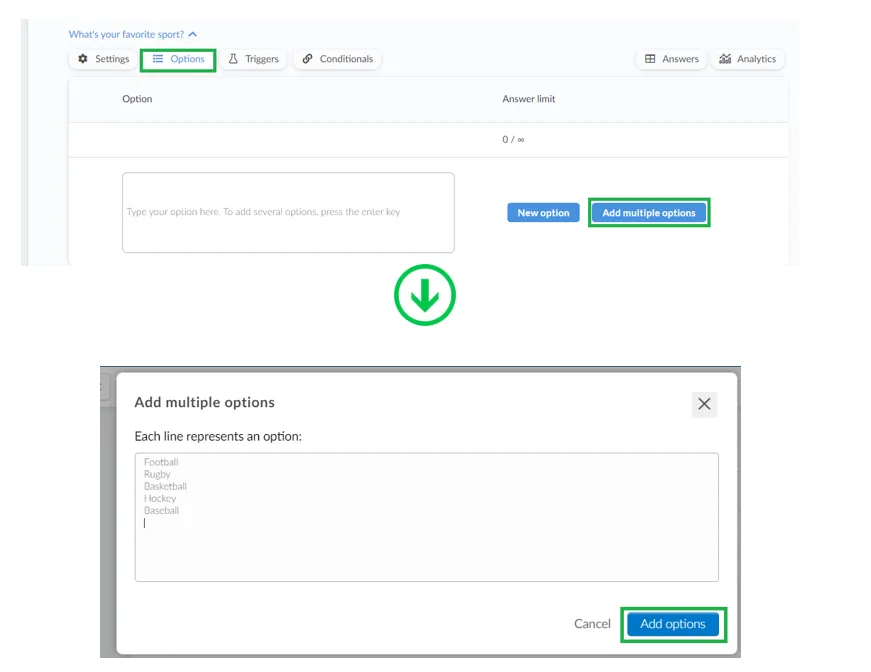
Similarly to the Option list answer type, you have to add your options in your field. After you have clicked on the Edit button and clicked on the field, click on options then on Add multiple options. Type your options while pressing on the Enter button of your keyboard between each option and click on the Add options button once you're done.
The options are now created. To learn how to change their order, refer to the section on rearranging fields.
When using the Multiple choice answer type, you can apply custom API values to the option(s) in the API Value box.
In addition, there are options to define the minimum and maximum number of choices required on the form.
- Minimum number of choices required
When creating a multiple choice field, you can set a minimum amount of required selection, to do so, click on Edit and then type the number in tab shown below and then click End to save changes. If you set the number to 0, there will be no limit.
- Maximum number of choices required
When creating a multiple-choice field, you can set a maximum number of selections allowed. To do this, click on Edit, enter the desired number in the tab shown below, and then click End to save changes. If you set the number to 0, there will be no maximum limit, and users can select as many choices as they wish.
0 is selected, users will be able to click Select all options below the available field answers. To disable Select all options, set the maximum number to a different value.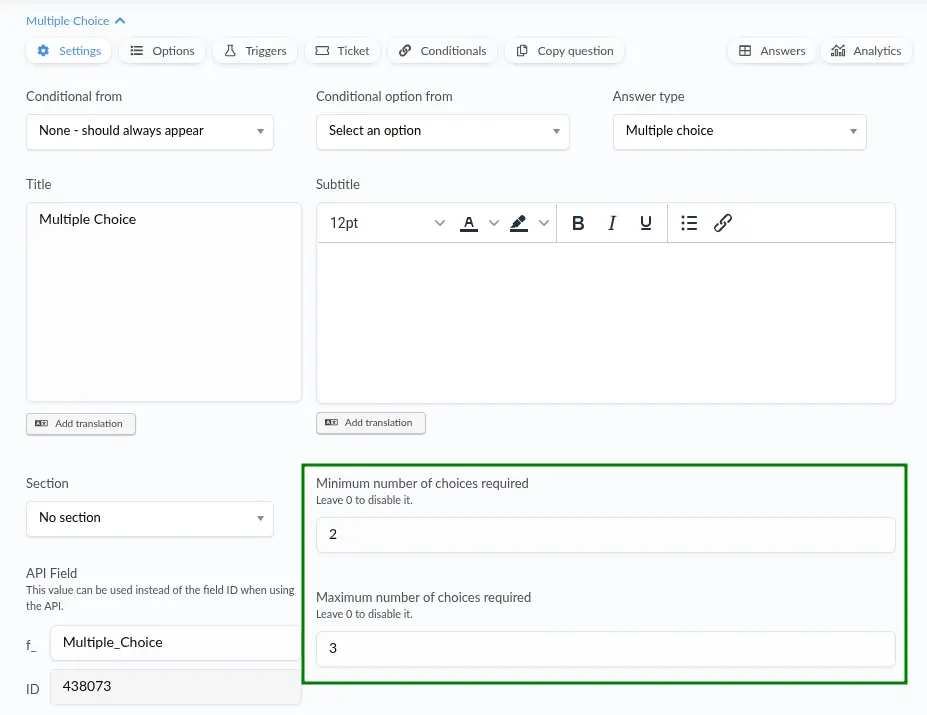
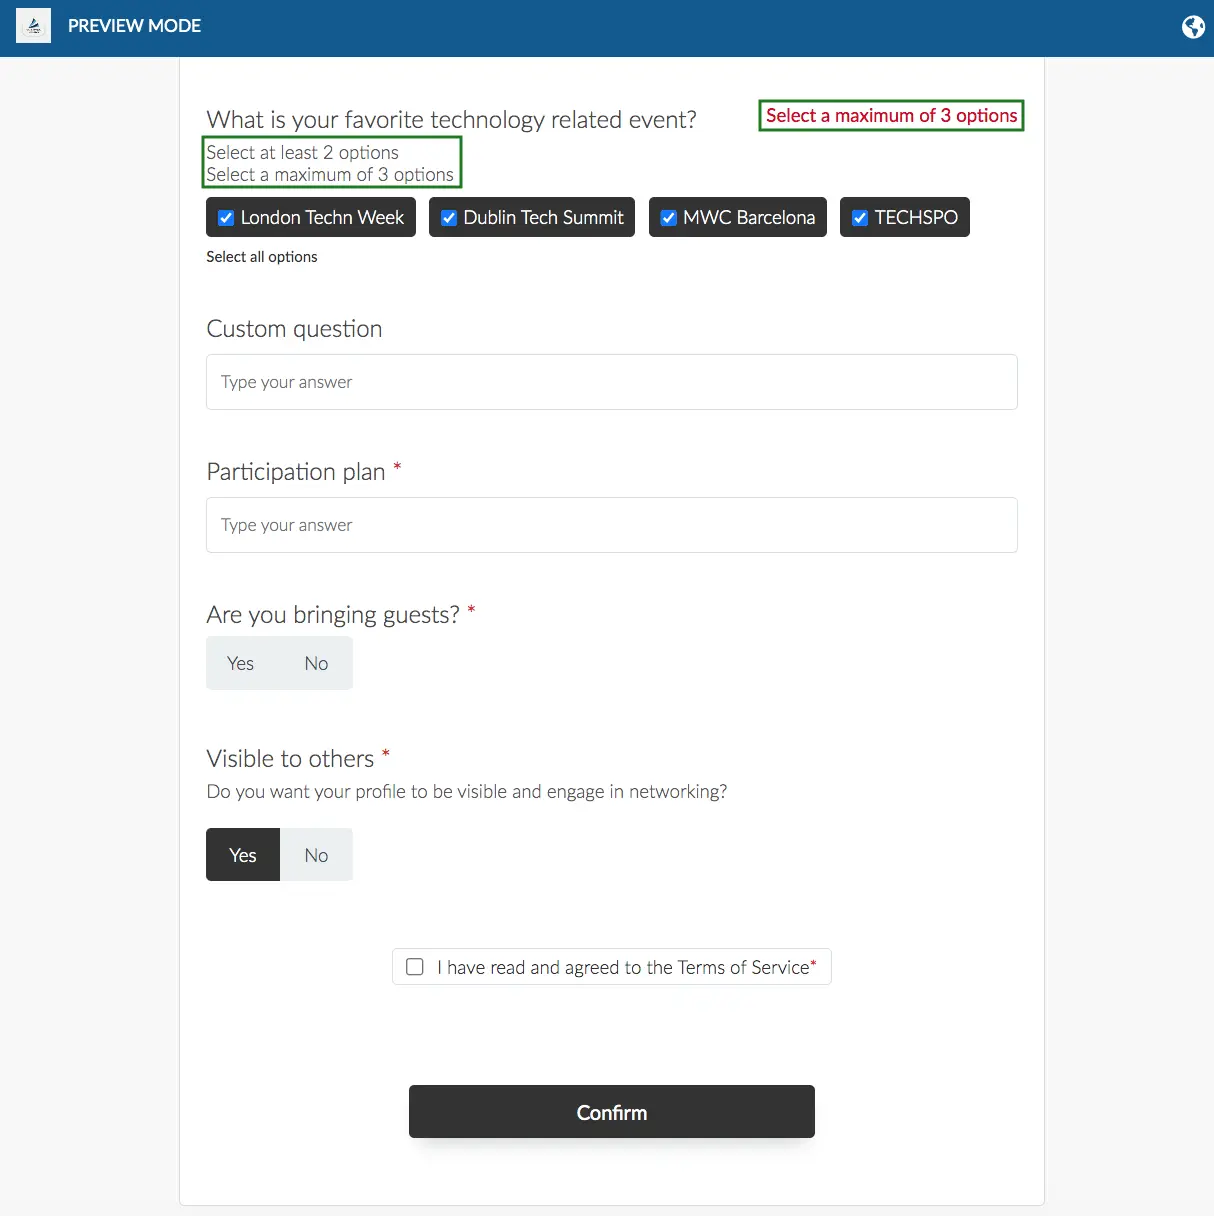
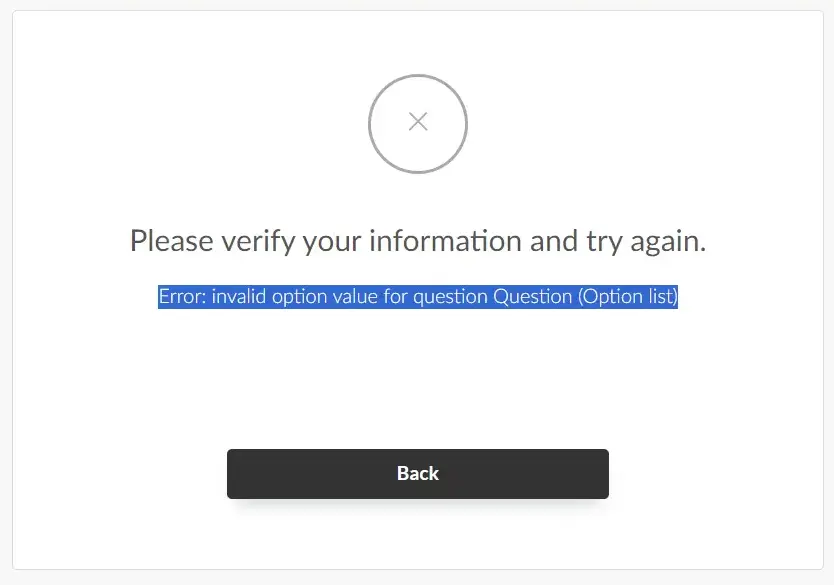
The minimum and maximum number of required answers will be displayed on the registration form, right above the selectable answers. If the user selects fewer or more than the required minimum or maximum choices, an error message will notify them of the correct range. The user will also not be able to proceed with the Registration form or any other form until the specified number of choices is selected.
- Select all options for multiple choice questions
When the Maximum number of choices required value is set to 0, Select all options will be clickable below the available field answers. This allows attendees to select all available options with one click. To disable Select all options, set the maximum number to a different value.

Multiple Grades
The Multiple Grades option allows you to create and add multiple subfields using the Grade from 1-5 answer type. Follow these steps to create a Multiple Grades field:
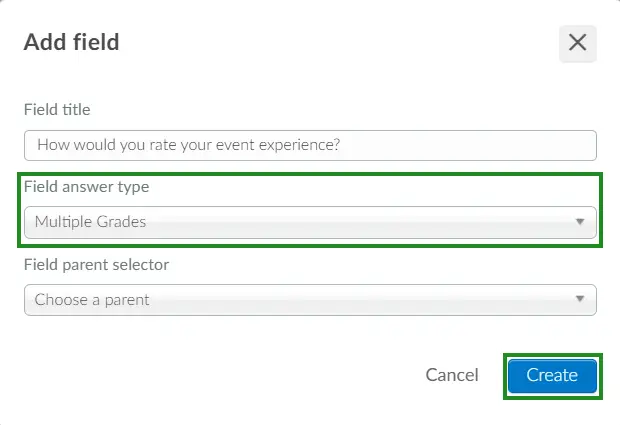
- Write your question in the Field title text box.
- Select Multiple Grades from the Field answer type dropdown menu and click Create.
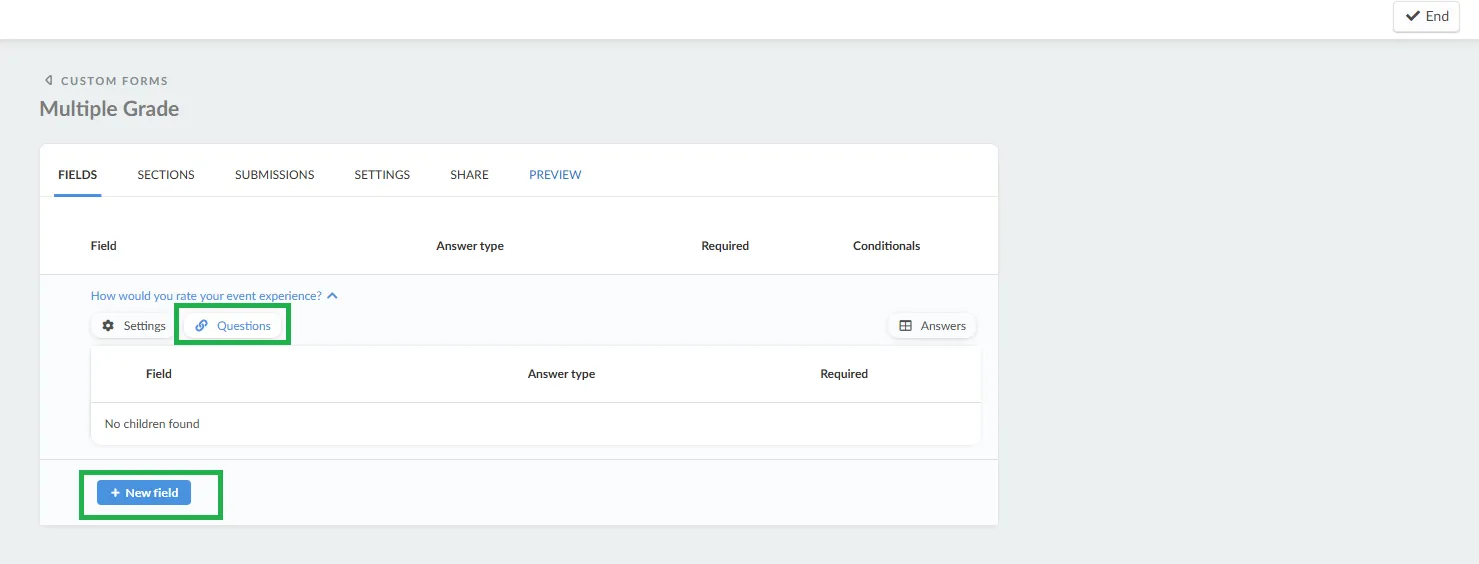
- Select the created Multiple Grades field and click on its Questions tab.
- Click Edit, then New field to add your subfields.
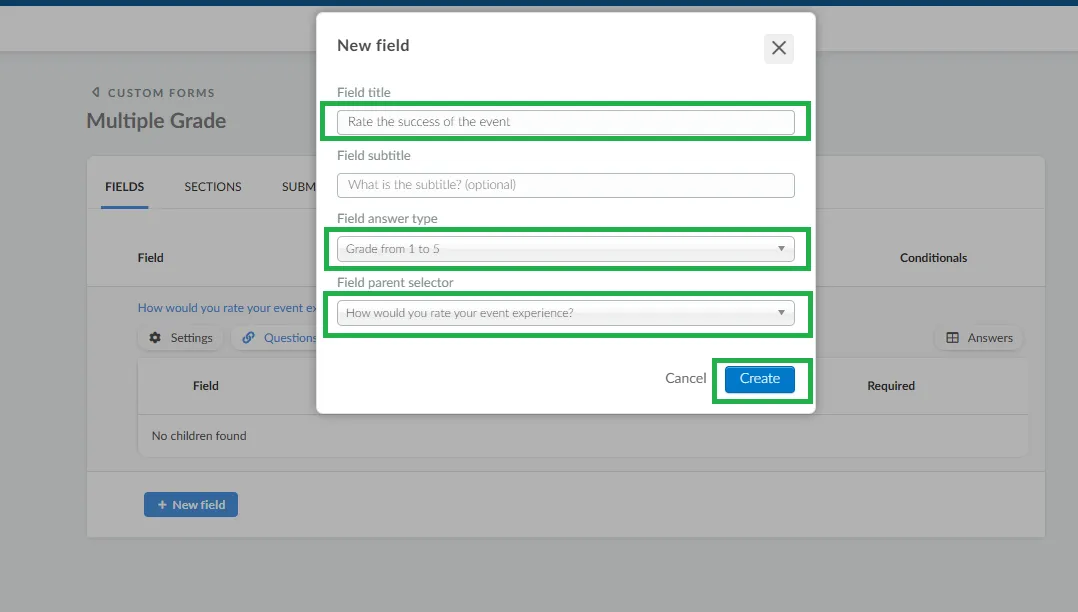
- Enter your subfield question in the Title field.
- Choose Grade from 1-5 as the answer type for each subfield.
- Select the Multiple Grades field as the parent from the Field parent selector dropdown.
- Click Create when done.
Once you are done creating your questions, you can proceed to preview you form.
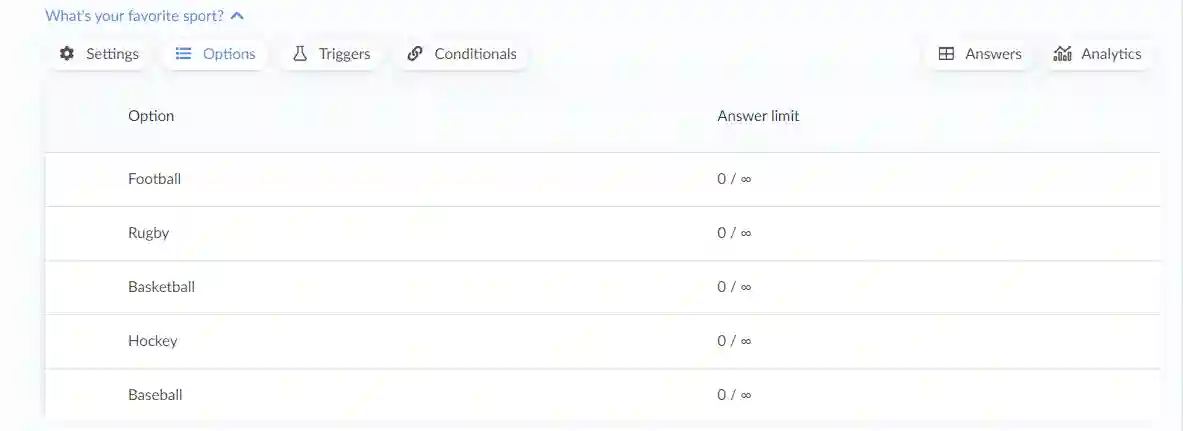
Editing an answer option
To edit an option you have added in your multiple choice or options list answer type, click on the Edit button and then click on the option. Once you do so, you will be able to change the option's title, set an answer limit for the option under the Settings field or remove the option you have added in the multiple choice or the option list question by clicking on the red Remove button.
You can also add a translation by clicking on the Add translation button, select a language from the language dropdown and click on the blue Add translation button, then click Save. The added language(s) will be available in the Virtual Lobby for attendees to select from.
In this case, the participant needs to re-fill the updated form and submit it again.
Creating fields with a default answer
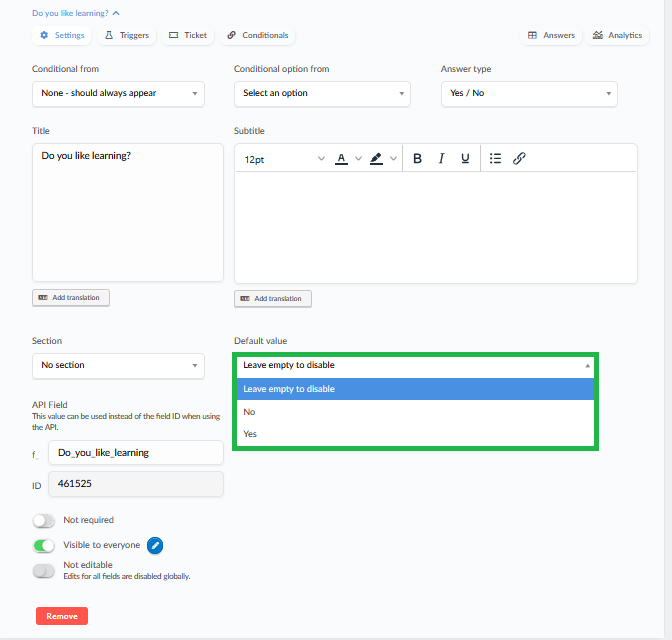
Fields can be configured to have a default or pre-populated answer. To do so, follow the steps provided below.
- Select the target field.
- Click Edit.
- Enter the Default value.
- Click End.
Once the steps above are completed, the field will be pre-populated with the configure answer in forms.
Conditional fields
You can create conditional fields when using the Yes/No, Options list, Multiple choice or Checkbox answer type. For further information, refer to our article on Conditional fields.
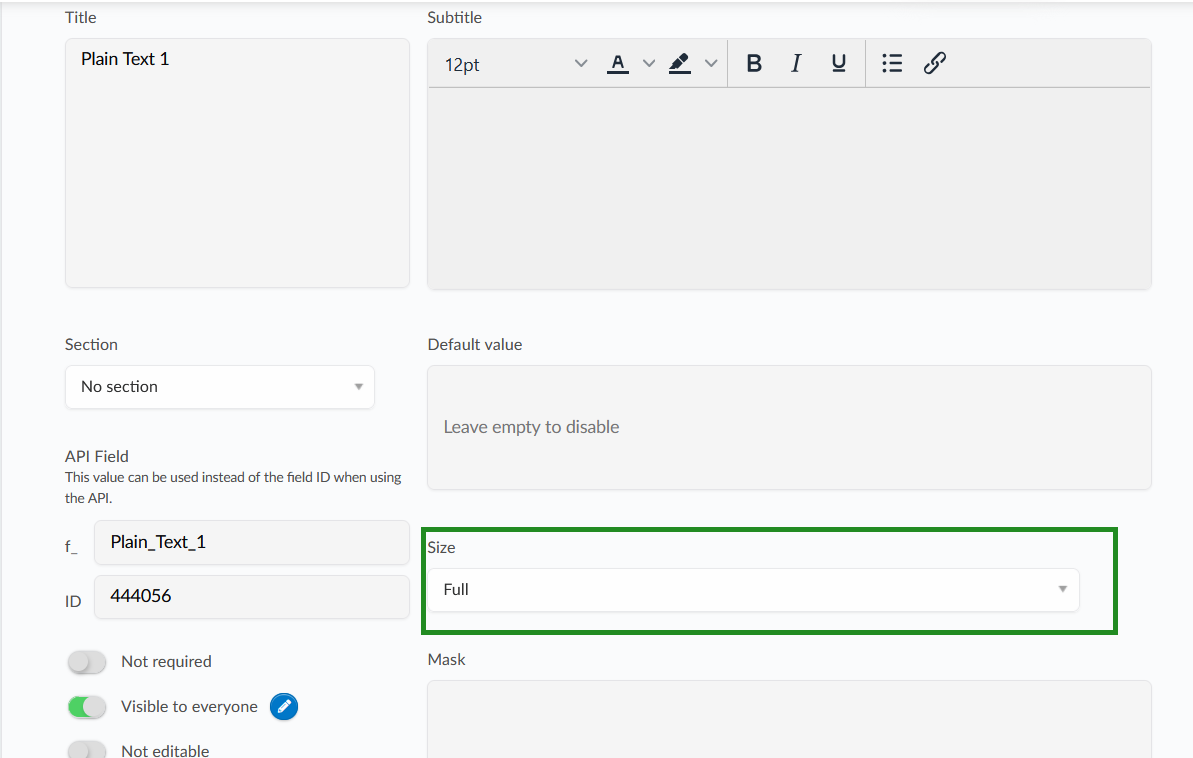
Size
This option allows you to dictate whether the Custom field will take up full space in the Form or fit either Half or Container. This is mainly used for the Questions per line option for the Form Editor. Half size is the smallest possible space taken, while Container allows the Custom field to fit as much as it needs to.
API Field
When custom fields are created, the platform automatically creates an API field name for the custom field. The field name is automatically generated from the custom field title.

Saved answers in custom fields
Custom fields within events can share the same API label. When a user registers for an event and completes these custom fields, their responses are stored and associated with the corresponding API labels. If that user later registers for a different event using the same user account, any custom fields with matching API labels will automatically pre-populate with the user's previously saved answers. This ensures consistency and simplifies the registration process for returning users.
Below is a GIF displaying two event fields in different events with the same defined API label.
Below is a GIF displaying the saved answers being pre-populated during registration.

Required and Visible fields
Having a required field means that the attendees will need to answer that field to be able to advance through the form.
To define if a field will be required or not, press the Edit button, click on the desired field, then tick or untick the checkbox corresponding to Required.
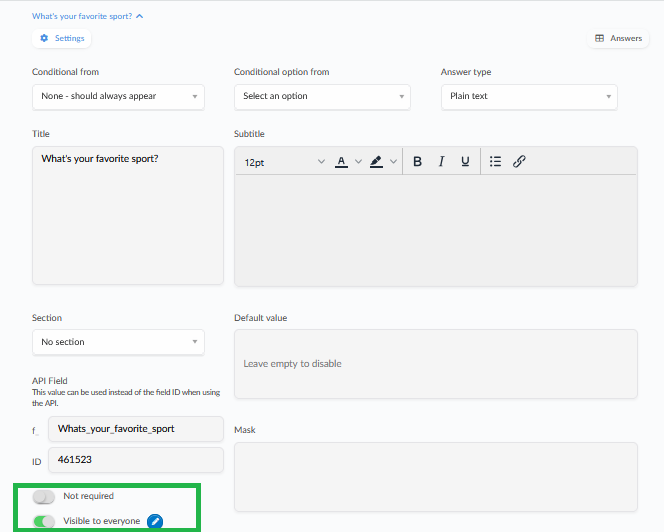
Visibility based on domain
The blue button next to the Visible to everyone checkbox lets you define which domains can see the custom field. By default, the field is visible to everyone, but once you add allowed domains (e.g., .gov, .com, .jp), only users with email addresses from those domains will be able to see the field. Click Save after entering the domains.
You can also block domains from seeing the field at the same time. The added domains to the Blocked domains list will be unable to see the field specified once they enter their email address.
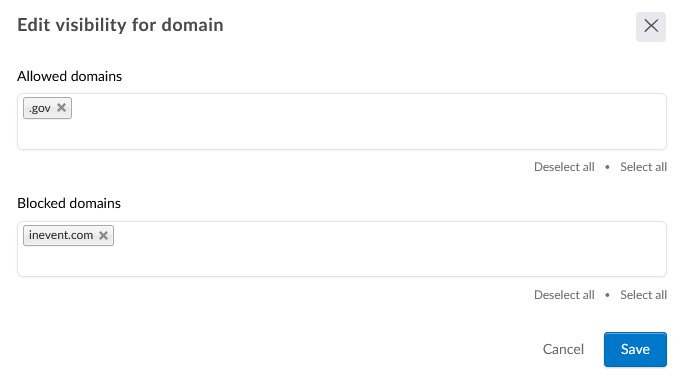
Once saved, the number of allowed domains and blocked domains will be displayed beside the Visible button.
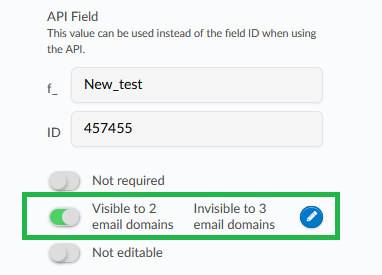
Only users who enter an allowed email domain in the email field will see the custom field. In the GIF below, the custom field “Is this your first event?” only becomes visible when an allowed domain is entered (inevent.ca).
Invisible identification
If you decide to make the field invisible, as an admin, you can still see that question at My Account tab. To make it easier, there is an invisible icon sign before the question and after between brackets a sentence that says this question is invisible.

When the Approval requirement feature is enabled, invisible fields will be visible from the Approvals page as well as the Applicants page. Admins can take advantage of invisible fields to add application status, review status, and approval or rejection decisions before finalizing the attendee's approval or rejection at the event.
Rearranging field order
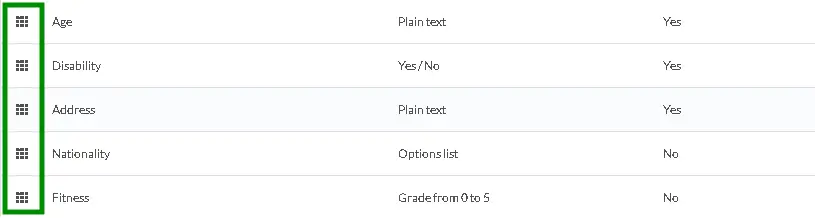
To rearrange the order of the fields, hover your mouse over the squares next to the custom field and drag the squares up or down, to place the fields into order.
Using Triggers with form fields
When using the Options list, Yes/No, Checkbox or Multiple choice field answer type, you can segment your attendees into different lists based on the answer they provide using the Trigger function. To do so, ensure you have created lists and follow the next steps below:
- Click on the field created with any of the above mentioned answer type.
- Click on Triggers.
- Click Edit on the top right corner.
- Select the List that should be triggered based on the expected answer using the drop-down box.
- Click on End to save the changes.
Once an attendee chooses an answer option when filing the form, they will be added to the List linked to the answer on the platform.
Using username masks
When creating new field of the Plain text answer type, you can insert a username mask in order to keep the answers under the desired format.
For example, you can ask for the attendee's birthdate and insert a username mask to make sure the input data follows an MM/DD/YYYY format.
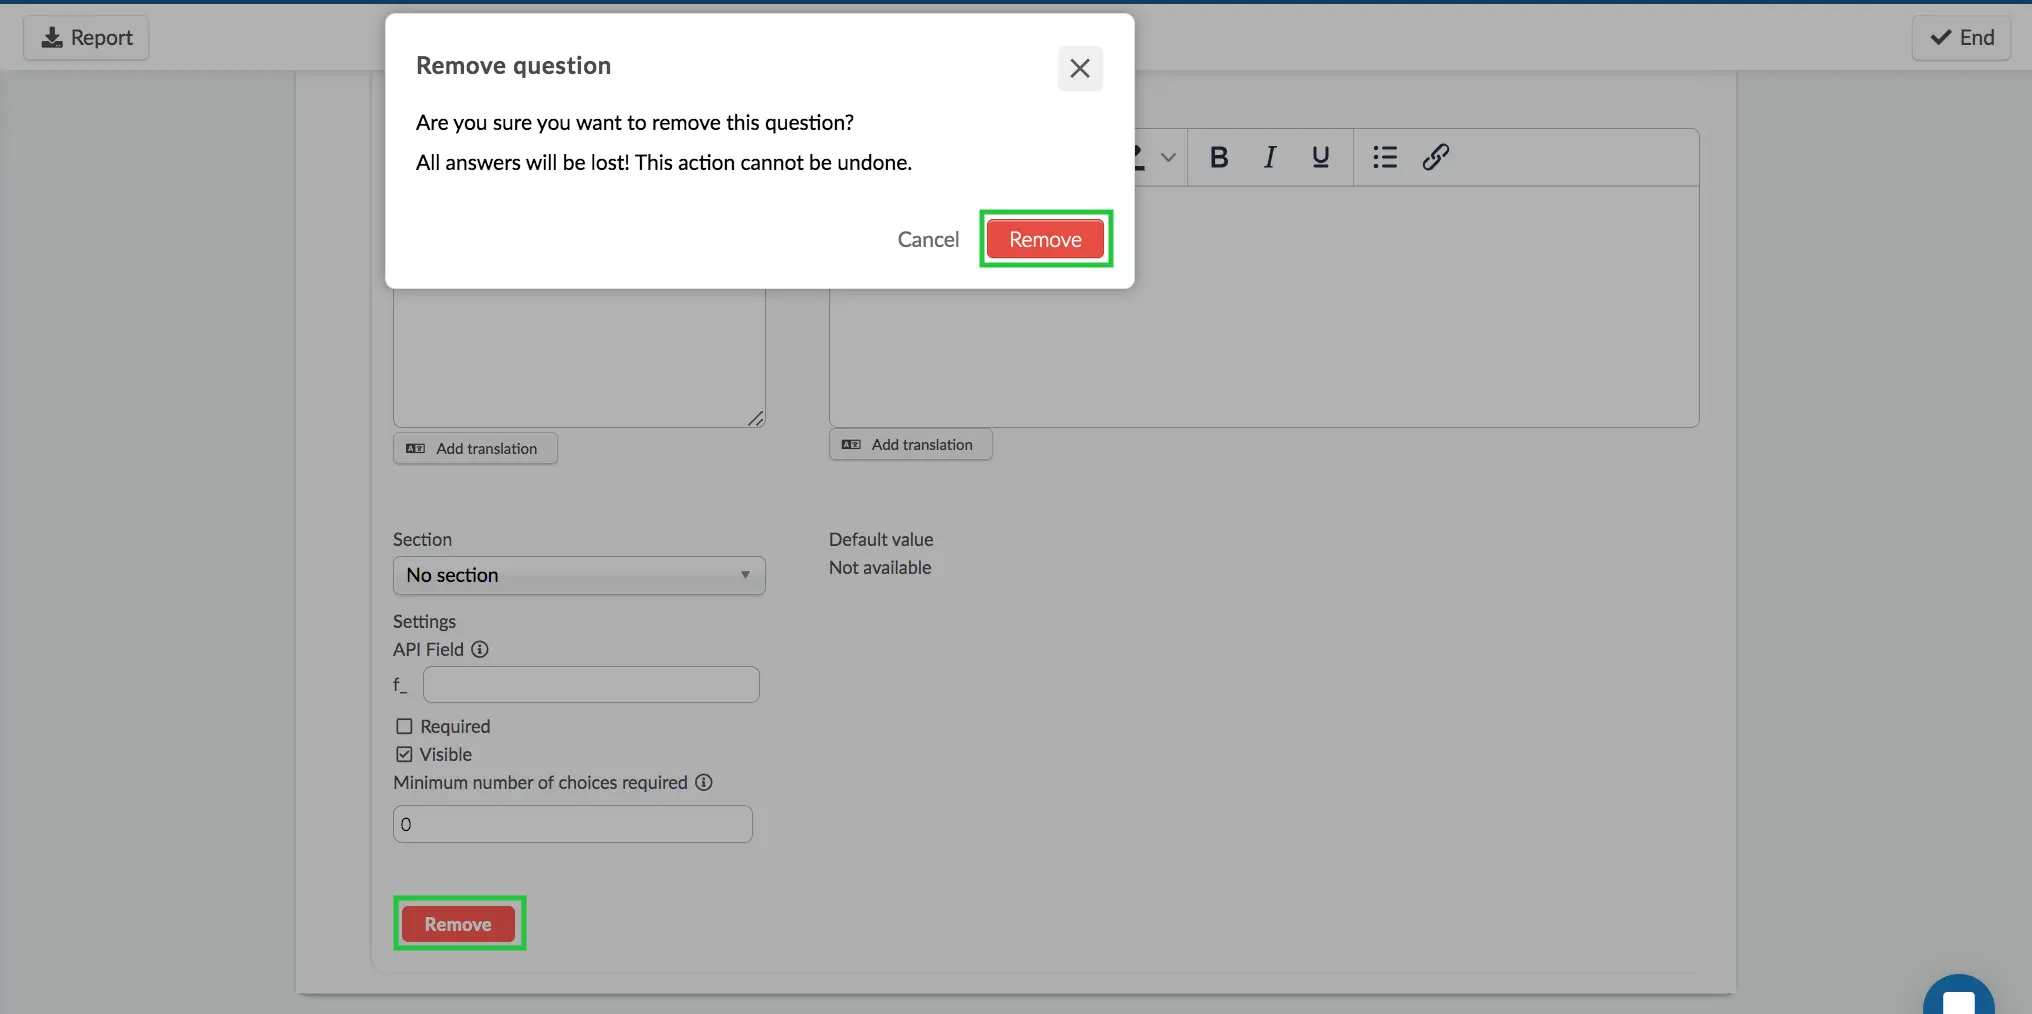
Deleting form fields
To remove a field, please click on it, then on the Edit button (top right corner of the screen). The Remove field will show up, allowing you to delete the selected question. Click on it and then click Remove on the window that pops up. To save this change, please click End.