Badge printing via Macbook
Our badge printing software allows participants to print their credentials by QR code reading, or by searching for their name, email, or other search parameters. Printing usually takes from 3 to 7 seconds.
How do I register the Checklog profile?
First, you need to create a Checklog profile in the list of attendees, and with that profile, log in to the app so that this user can read QR codes. Click here to learn how to register the checklog profile.
Credential setup: configuring the badges
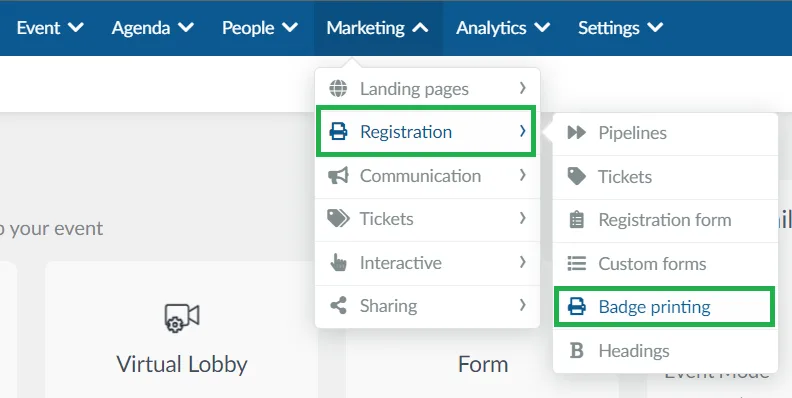
To configure the badges that will be printed, go to Marketing > Registration > Badge Printing.
Printing badges on my Macbook
When printing badges on a MacBook, you have two methods: the Print now via Marketing > Badge printing> Print now or printing via the People > Attendees page. The Print now option is recommended for its efficiency, especially for bulk printing.
Print now
To print your badges via the print now option, follow the steps below:
- Navigate to Marketing > Badge Printing > Print now.
- Click on the print icon next to the attendee entry on the page.
- The Print badge pop-up box will be displayed. You can choose to Print or Download the badge.
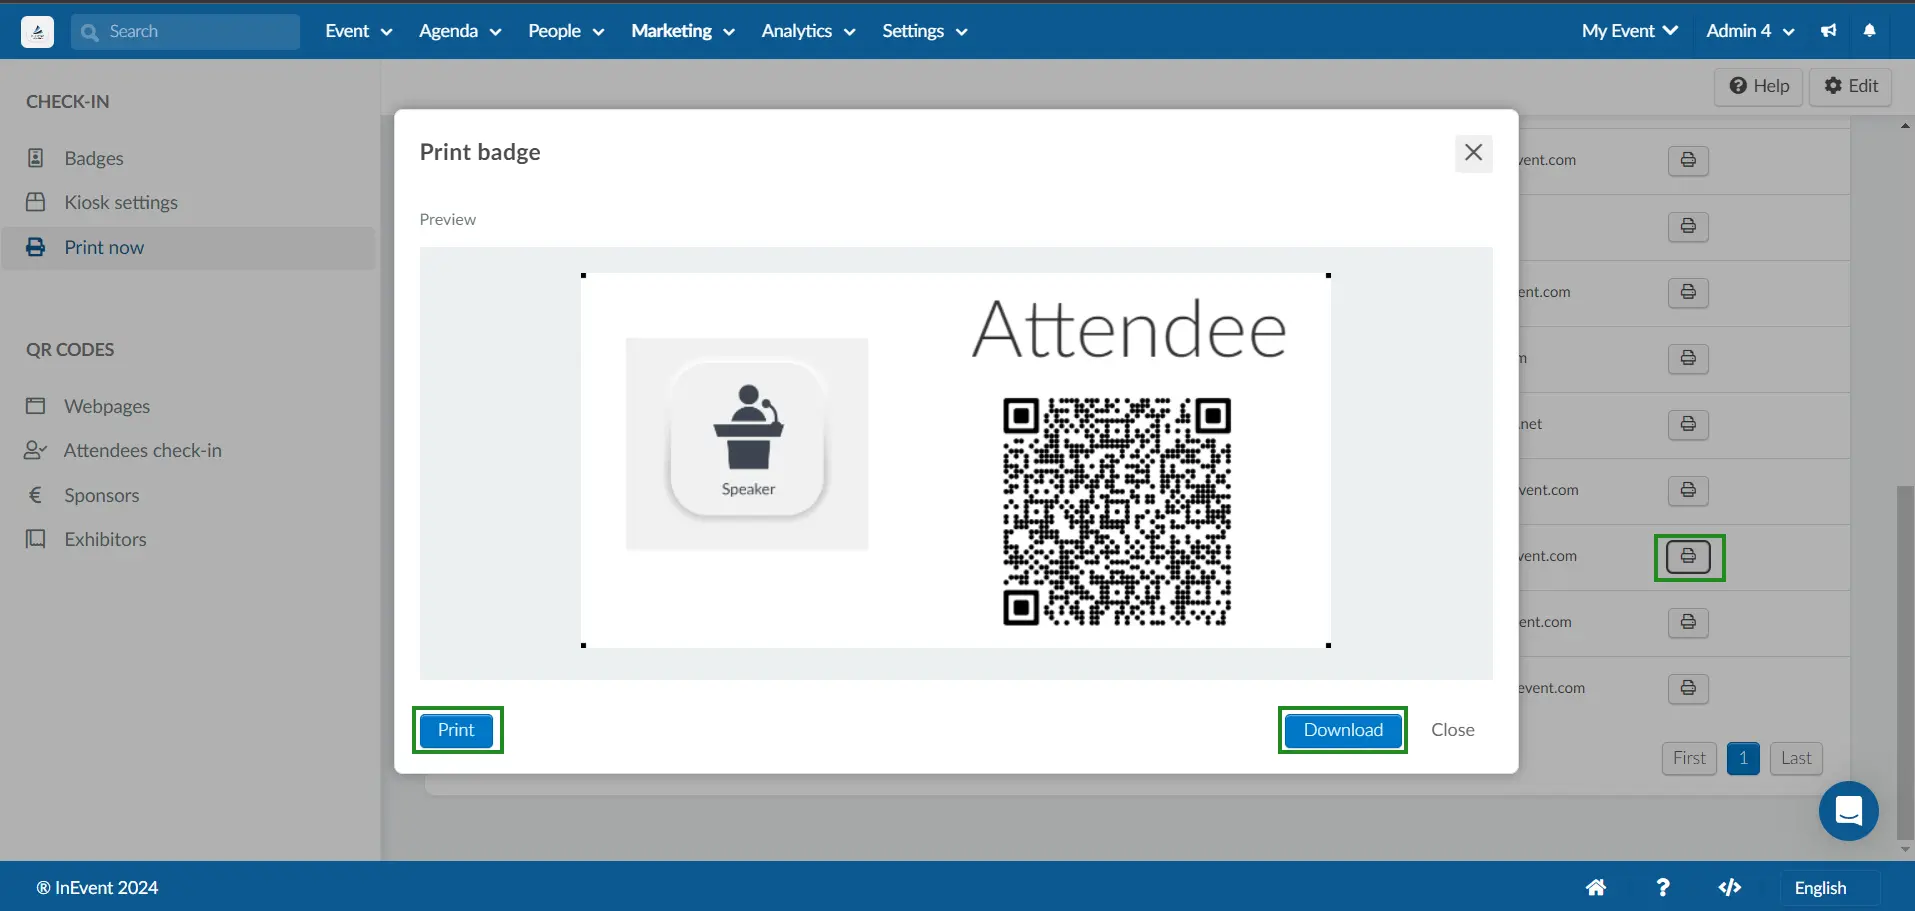
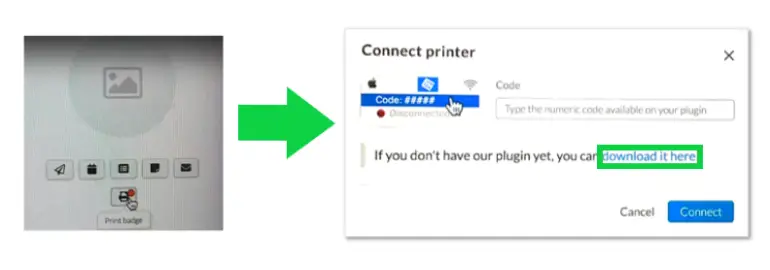
- Click on Print. The platform will attempt to connect to the InEvent printing plugin.
- If you do not have the plugin installed, you will be prompted to download and install the plugin. Click on download it here.
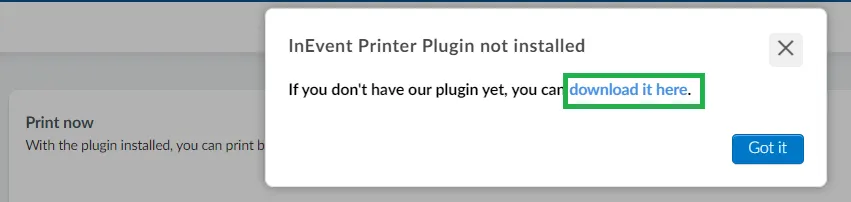
You will be redirected to your web browser where you can add the plugin to your browser.
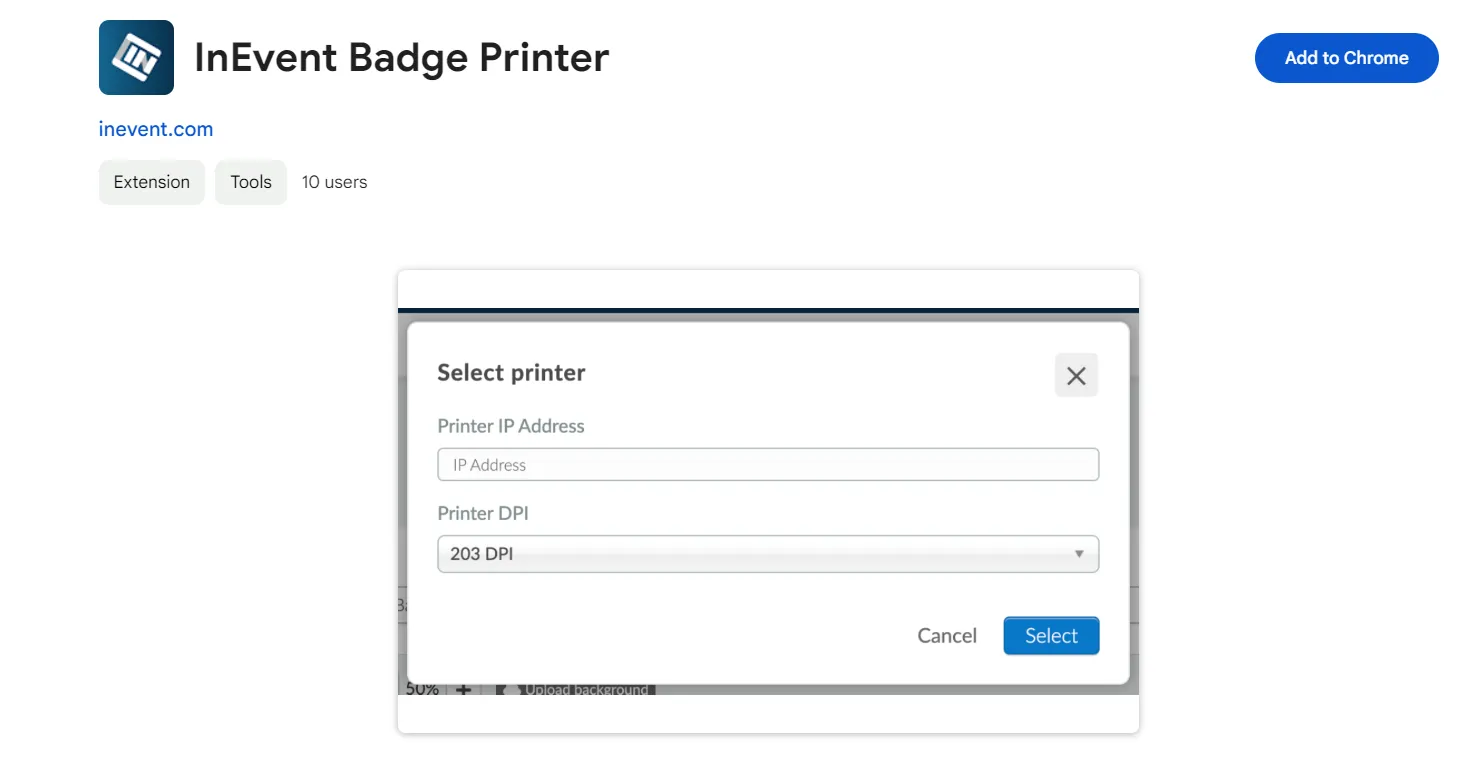
- Refresh your page and click on the Print button again. You will be prompted to:
- Enter the IP Address if the badge is connected to a Brother Printer.
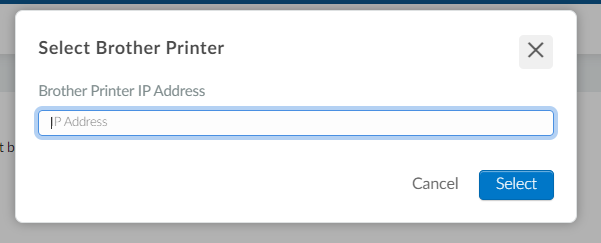
- Press Select and the attendee's badge will proceed to be printed.
Printing your badge via the attendees' page
To print via the attendee page, you must search for the attendee (People > Attendees) and click on their name. In the side editing window that opens, click the print icon (it will have a red ball).
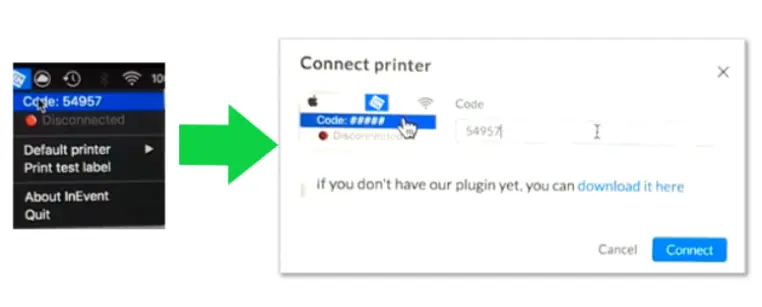
Then download the plugin
After installation, You might not necessarily see a pop-up window, due to Apple's restrictions, but you should see the InEvent icon in the top bar on the right of your screen. Click on the InEvent icon to get the numeric code. Enter the code in the Connection window as instructed, and click Connect.
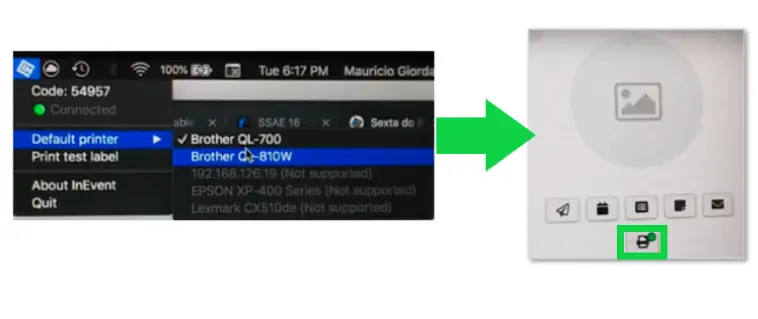
The connection is complete when the ball color on the print icon turns green. After connecting, you can choose which printer will print the participant's credentials. Click on the participant's name again and click on the print icon to print the badge.
Pre-printing or bulk printing badges for all or multiple attendees
There are two methods to print badges for multiple attendees at once. The first method is through the Print now option, accessible via the Badge Printing dashboard under Marketing > Badge printing > Print now.
The second method is through the People > Attendees page. By selecting attendees through the Edit button and clicking on print badges. To print your badges using the following methods, follow the steps outlined below:
Bulk printing via Print now
To print multiple badges at once, follow the steps below:
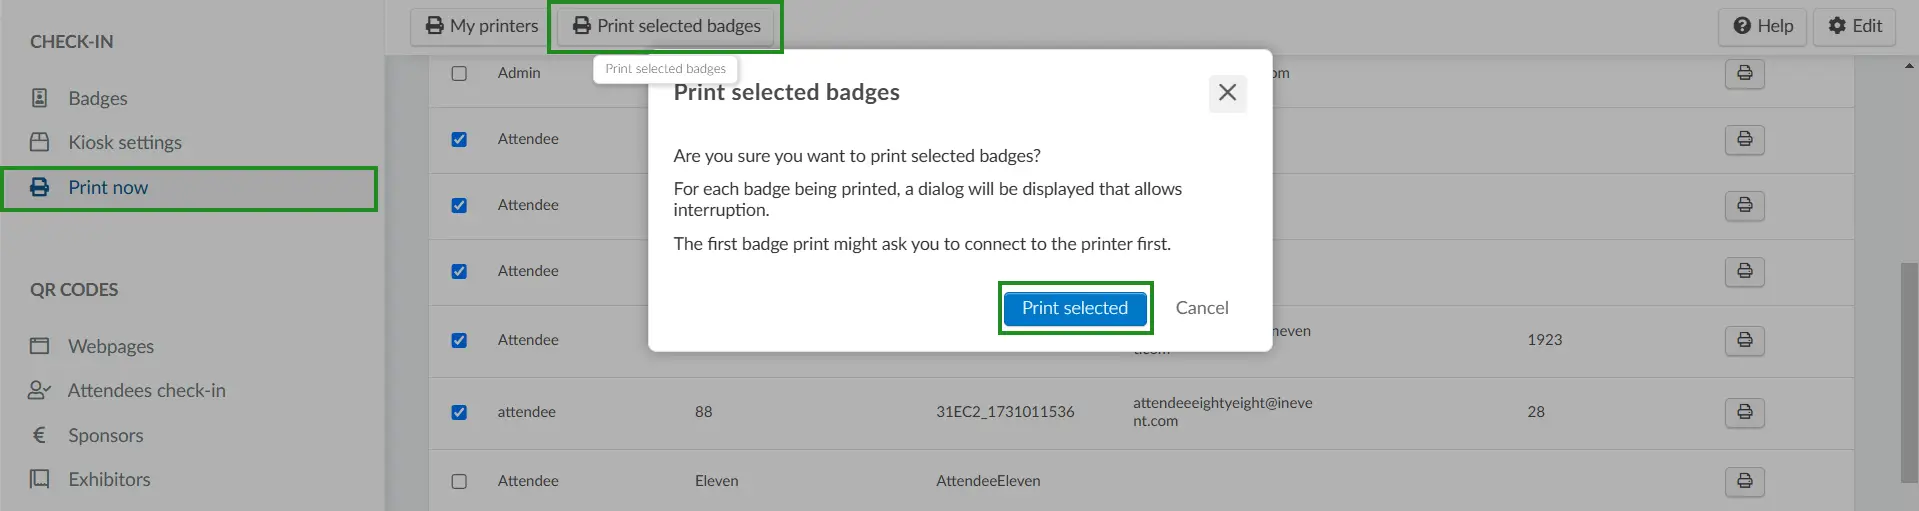
- Navigate to Marketing > Badge Printing.
- Select the Print now section.
- Tick the checkboxes corresponding to the attendees whose badges you want to print.
- Click on Print selected badges.
You will see a print selected badges pop-up box confirming whether you want to proceed with printing the selected badges.
- Click on Print selected to proceed with printing your badges
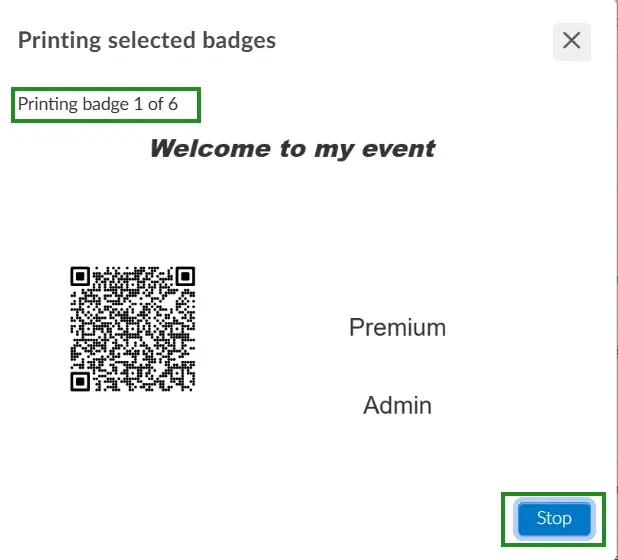
To cancel the badge printing process, simply click Stop in the dialog box.
Bulk printing via the attendees' page
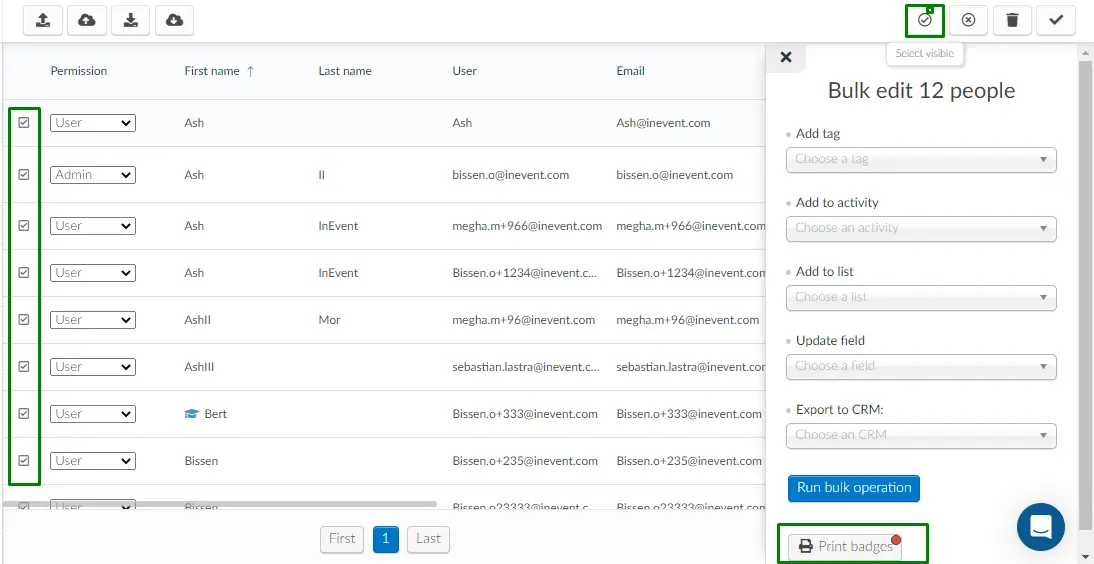
- Navigate to People > Attendees.
- Click on Edit and then Select, which will place a check next to all users, allowing you to end them in bulk. You will then see a Bulk Edit № People screen on the right of your browser, at the bottom of this screen select Print Badges.
- To finish printing the badges please follow the steps at the beginning of this article.
The printer connected to the Macbook has stopped printing, how do I proceed?
This can occur for some reasons, mainly because of internet swing. If you find that the printer that is connected to your Macbook is no longer printing, follow this simple step-by-step:
- Unplug the Macbook printer USB.
- Go to the Macbook settings.
- Click printers.
- Note that the Brother printer in the list will be red. In the lower corner, you will see a + and - sign. Select the Brother printer and delete it from the list by clicking the - button.
- Plug the printer back via USB cable into the Macbook, it will automatically be added to your list of printers, and it will be green.
- Go back to the platform on the attendee screen and press the F5 key to refresh the page.
With this step by step, the printer will return to normal operation.