Accreditation for Android
 Updated 4 weeks ago
by
Caleb Kotey
Updated 4 weeks ago
by
Caleb Kotey
Our accreditation software allows participants to print their credentials by QR code reading, or by searching for their name, email, or other search parameters. Printing usually takes from 3 to 7 seconds.
Technology Requirements
The technical requirements for accreditation vary depending on the format it will have at your event. It can be either self-service or with the support of promoters at each credential printing station.
Check out the possibilities below:
Type of accreditation | Auto-service | Accreditation with promoters |
Printer |
For more information on how to configure Wireless Direct, refer to Brother's guide on their website.
Refer to this section to see the printers' supported labels. |
Refer to this section to see the printers' supported labels. |
Hardware | Smartphones running Android 8.0 or later | Mac OS X 11.0 or later, with the following browser specifications: Chrome V 40 (or later)- Mozilla Firefox V 7 (or later)- Safari V 9 (or later) |
Internet | 0.5 MB per printer | 0.5 MB per printer |
Voltage | 110 V (Connect up to 2 printers in the same outlet) | 110 V (Connect up to 2 printers in the same outlet) |
Number of Promoters | 1 for every 3 accreditation stations | 1 per accreditation station |
If the voltage supply in your country is higher than what your printer requires, you can consider using a voltage converter to regulate the power. By taking these precautions, you can ensure that your printer operates safely and effectively.
How do I register the checklog profile?
First, you need to create a Checklog profile in the list of attendees, and with that profile, log in to the app so that this user can read QR codes. Click here to learn how to register the checklog profile.
Enabling the Badges feature
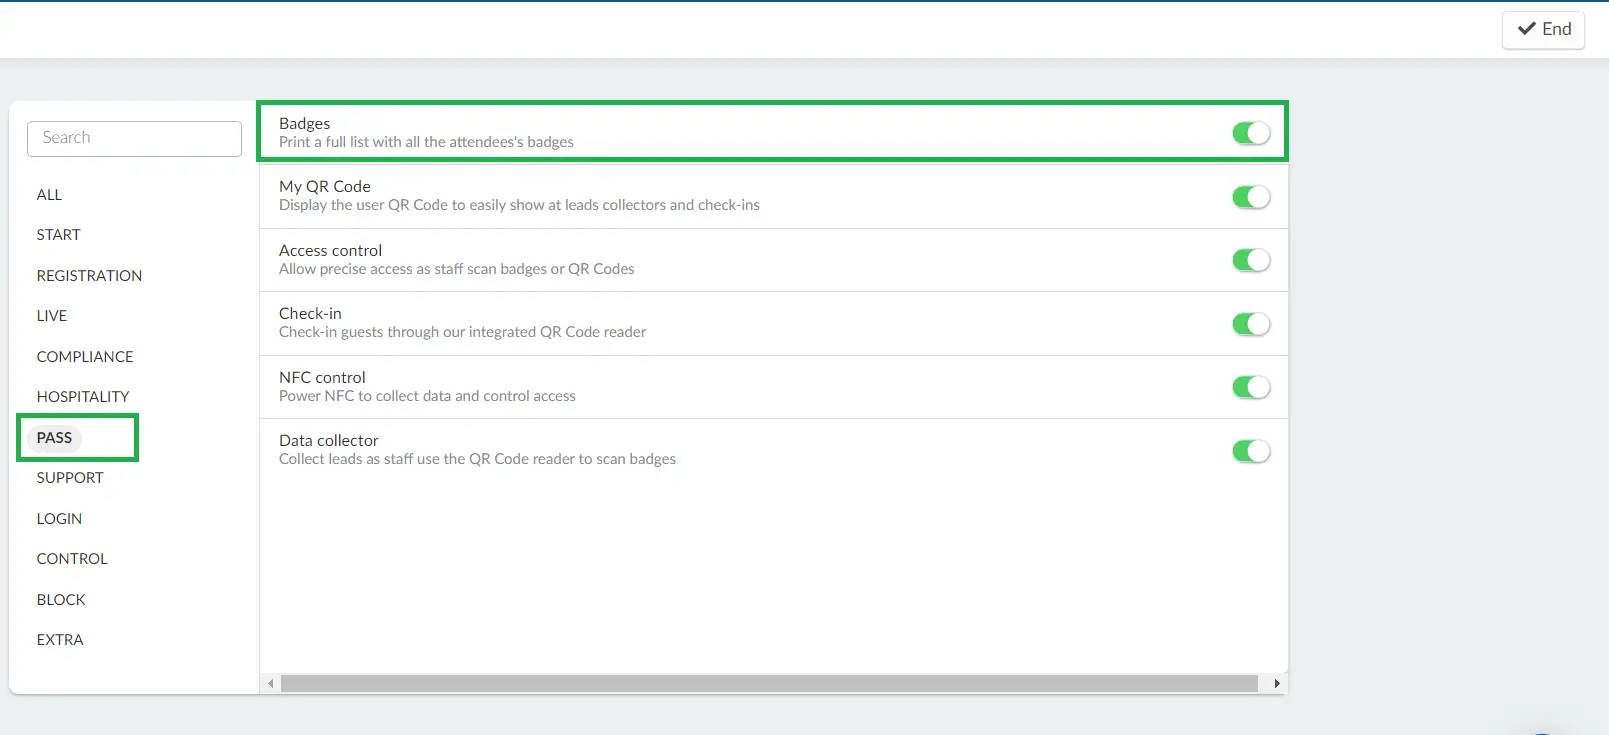
Click on Settings > Tools > Pass section. Click Edit and toggle on the button corresponding to the Badges tool.
Credential setup: configuring the badges
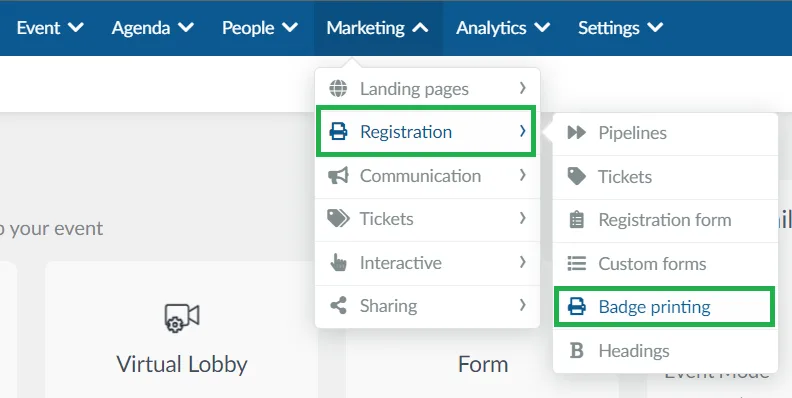
To configure the badges that will be printed, go to Marketing > Registration > Badge Printing.
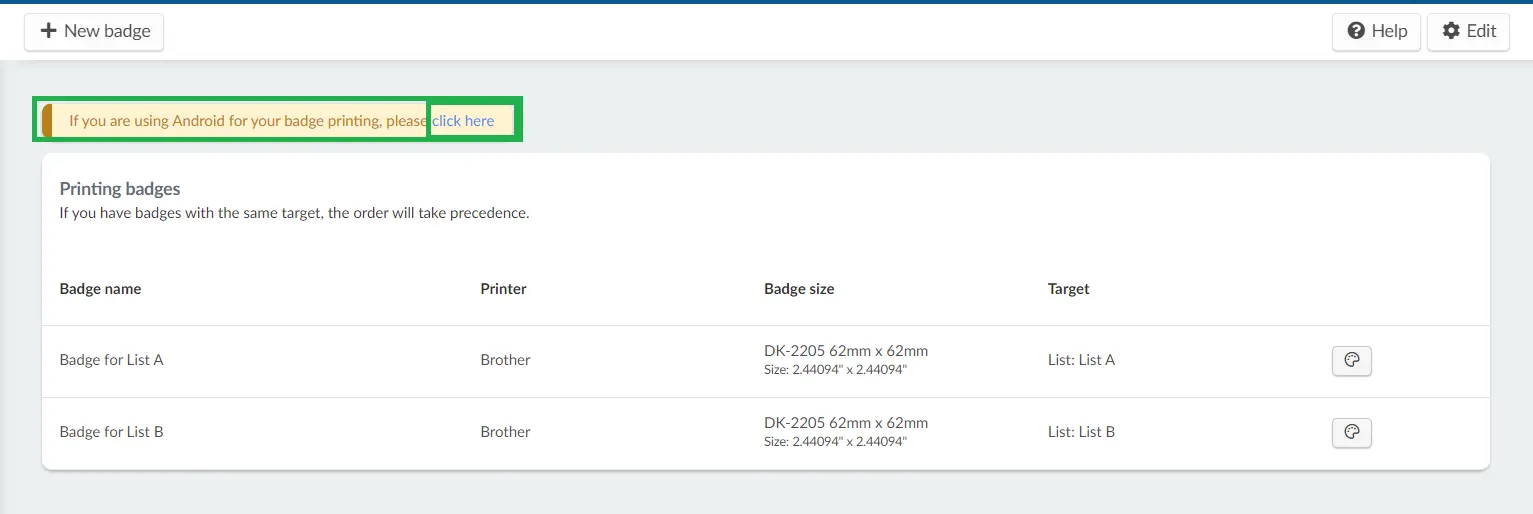
If you are using an Android device, press the click here button that appears in the yellow note and you will be directed to the respective page for Android badge configuration
Setting the background image
To set the background of your self-accreditation tablet, complete the following steps:
- Press Edit on the top right corner of the screen.
- Select the orientation of your background image. The available options are as follows:
- Landscape: The image size should be exactly
1920x1080px. - Portrait: The image size should be exactly
1080x1920px.
- Click the red upload file button to select and upload your background image.
- Press End to save your changes.

Setting the label type
There are 30 label templates that you can choose from. They vary in dimension, title and subtitle, and whether or not there is a QR code.
Under Title, Subtitle, and Extra, you will find the fields from your registration form to compose your credential information. Therefore, if you want content different from the default options, you must configure the registration form beforehand.
Setting up the badge details and accreditation behaviors
- Alignment: Set whether the text lines are Left, Center, or Right aligned on the credential. This alignment does not affect the position of the QR code.
- Caps- Lock: Set whether the contents of the credential will be all in caps-lock or will be as filled by the participant/organizer.
- Has form: If you want your attendee to submit the registration form on the tablet, leave the Yes option selected.
- Maximum print cap per attendee: Define how many credentials each attendee can print.
- Search by: Choose the search parameter that your attendee will use in self-accreditation. If you want an option other than the attendees' Email, Name or email, or User, you must first configure the registration form.
- Show partial results: If set to Yes, the system will return the 10 results linked to that search, whether complete or not. If No is set, the system only returns a result that is exactly the same as the search parameter.
- Should print badge after NFC sync: If set to Yes, a badge will be printed after an attendee synchronizes their NFC band.
- Should check-in after printing badge or syncing NFC: If set to Yes, the attendee will be checked-in once their badge is printed. You can also activate this option by clicking on the Settings button in the top right corner of the page and enabling Check-in post NFC.
Click here for further information on accreditation and access control with NFC.
Performing the accreditation via tablet
This section will guide you on performing the accreditation using a tablet or mobile phone running Android. To do this, you will need to have Checklog or Admin permissions.
Selecting a printer for badge printing on the InEvent app
Without a selected printer, you will not be able to print badges and check in attendees.
To select a printer, follow the instructions below:
- Log in to the mobile app.
- Go to Accreditation and press the Kiosk mode for badge printing.
- In the No Printer dialog box, click on Select.
- Enter the passcode of your company and press Submit.
- On the Kiosk mode settings page click on Select Printers.
- Choose your printer and click OK in the pop-up window
After completing the setup, your selected printers will appear at the bottom of the Kiosk Mode Settings page.
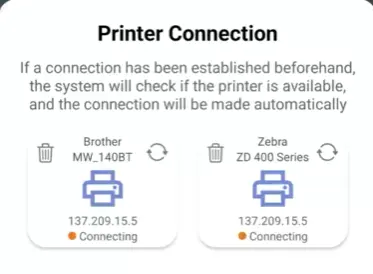
After setting up your printer, you can proceed to print badges using Kiosk mode for badge printing.
Printing badges using the Kiosk mode
Follow the instructions below to start printing badges using the Kiosk mode:
- Log into the InEvent app with Checklog/Admin profiles.
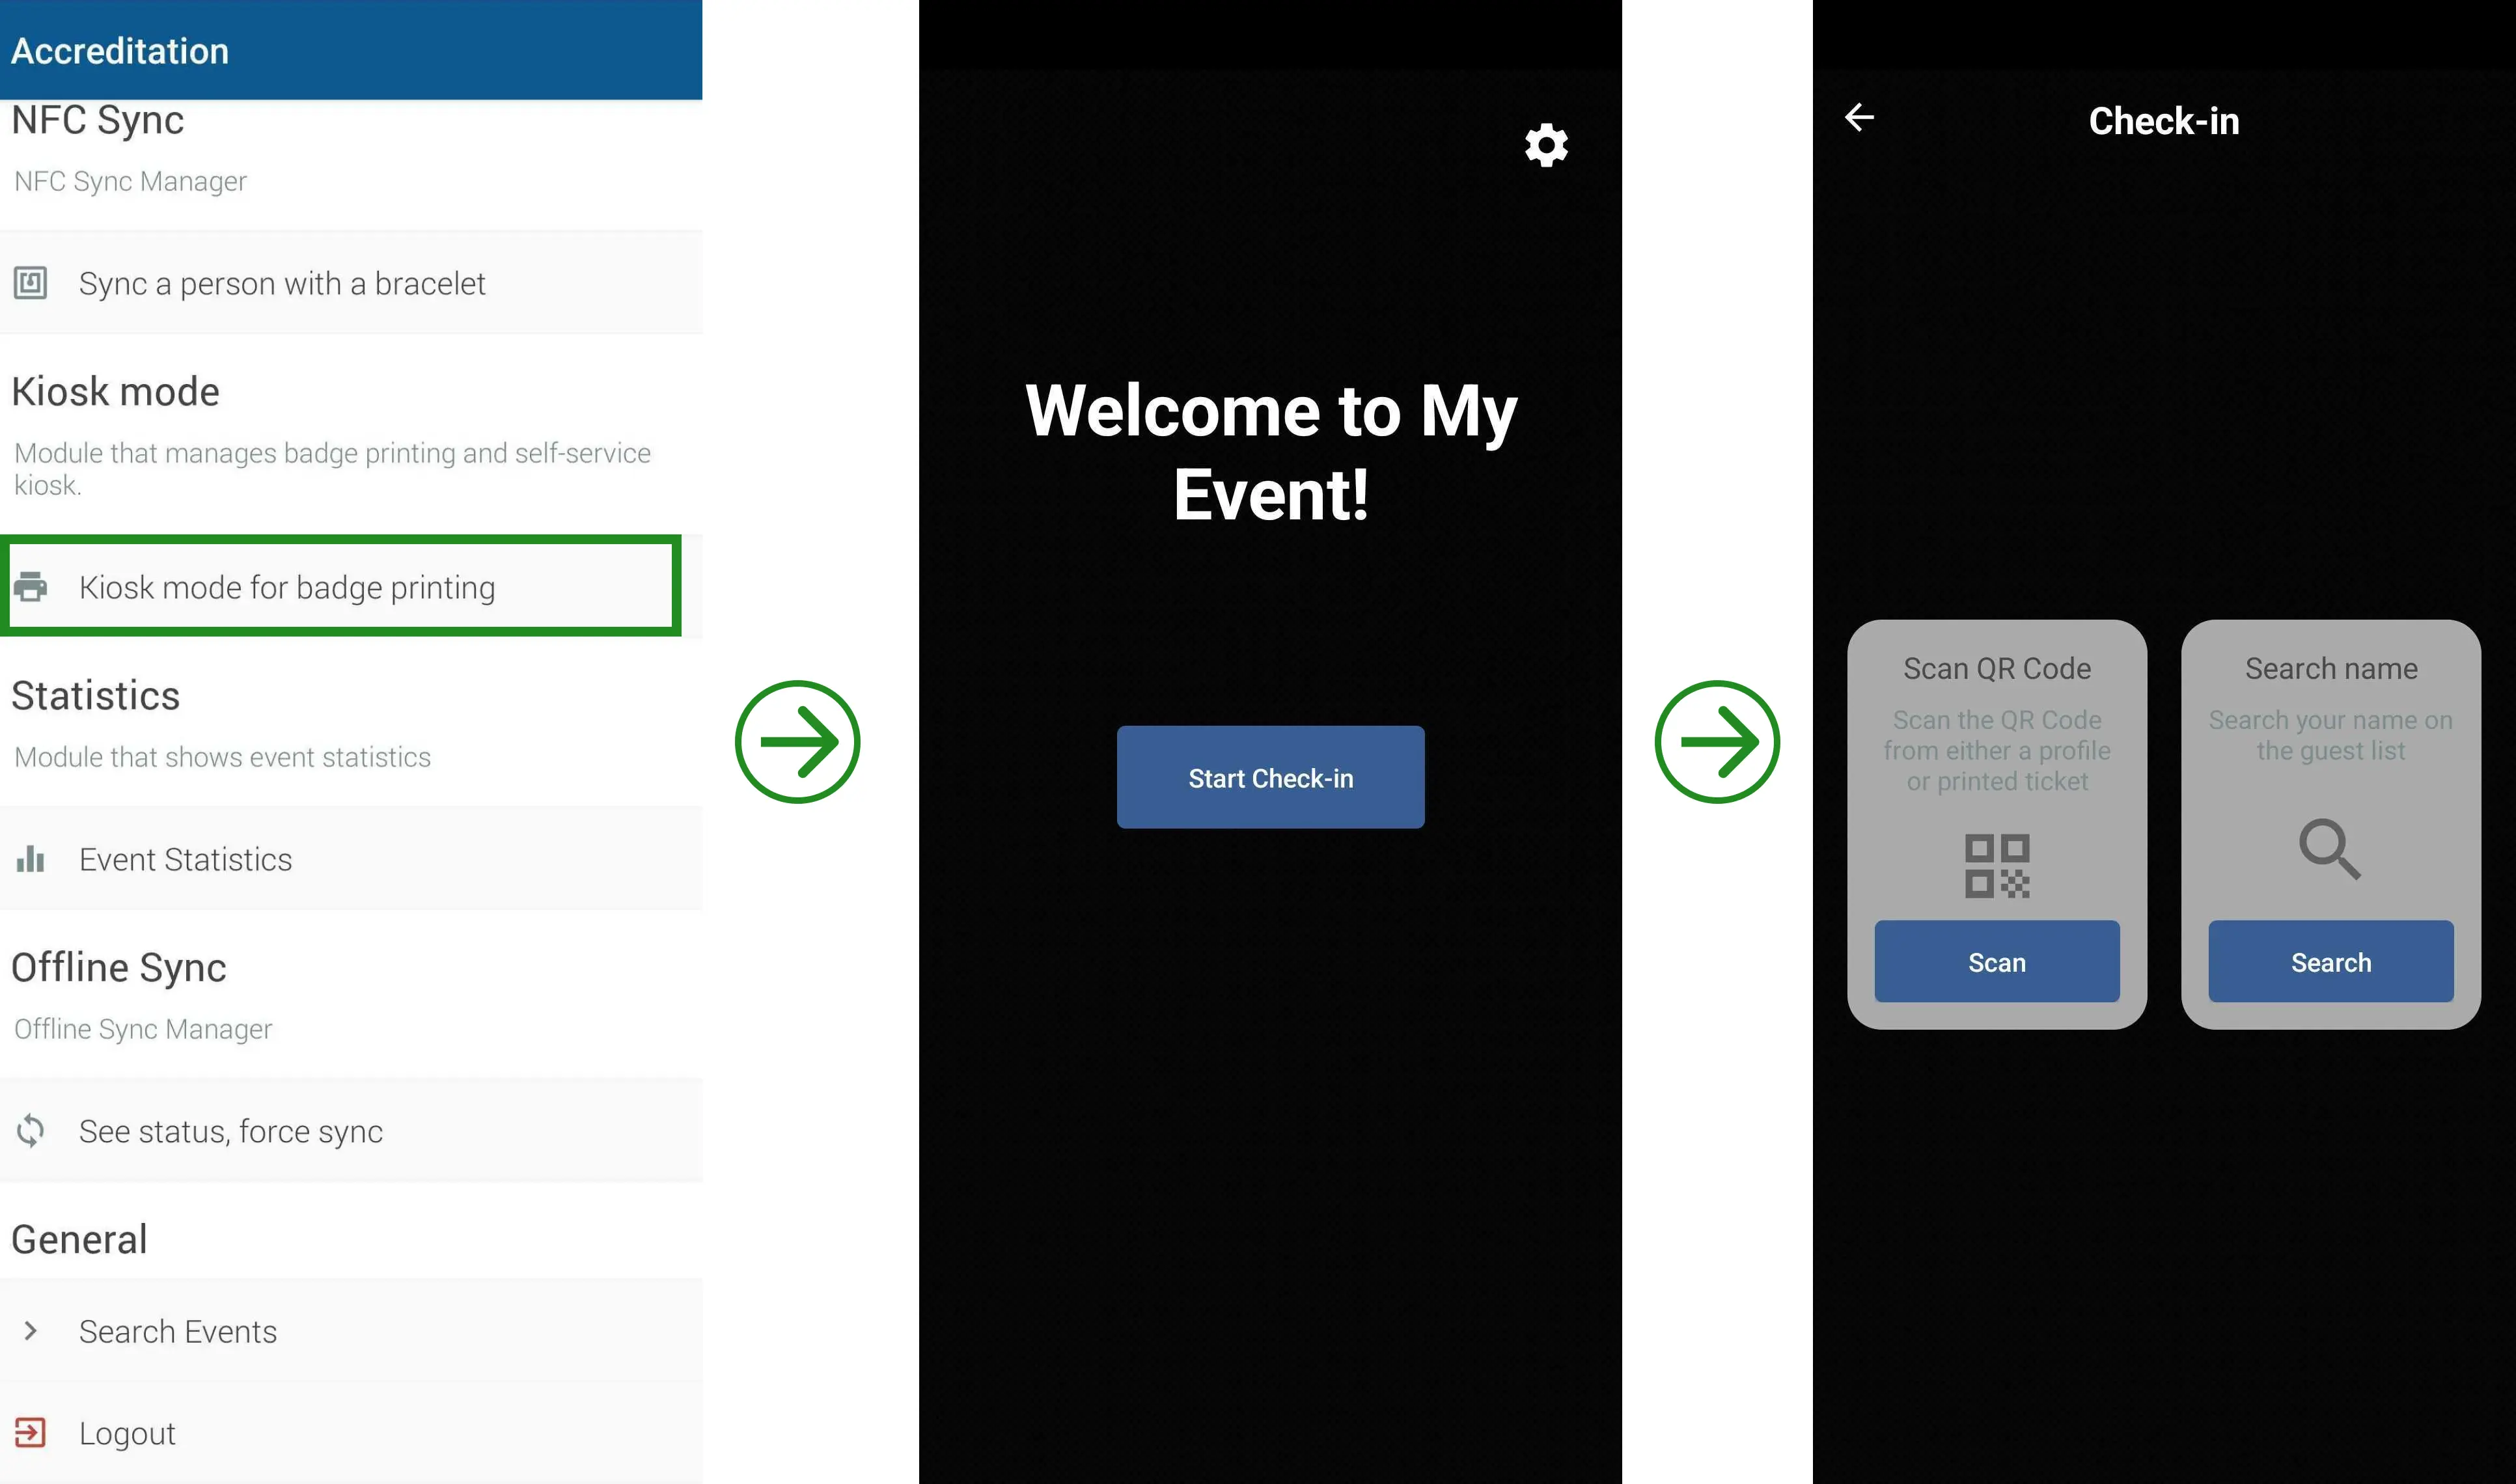
- Go to Accreditation and press the Kiosk mode for badge printing.
- Click on Start Check-in.
- On the check-in page, you will have the option to.
- Tap on the Scan button under Scan QR Code to start scanning and printing attendees' QR codes/badges.
- Select Search to manually search for the attendees.
Troubleshooting
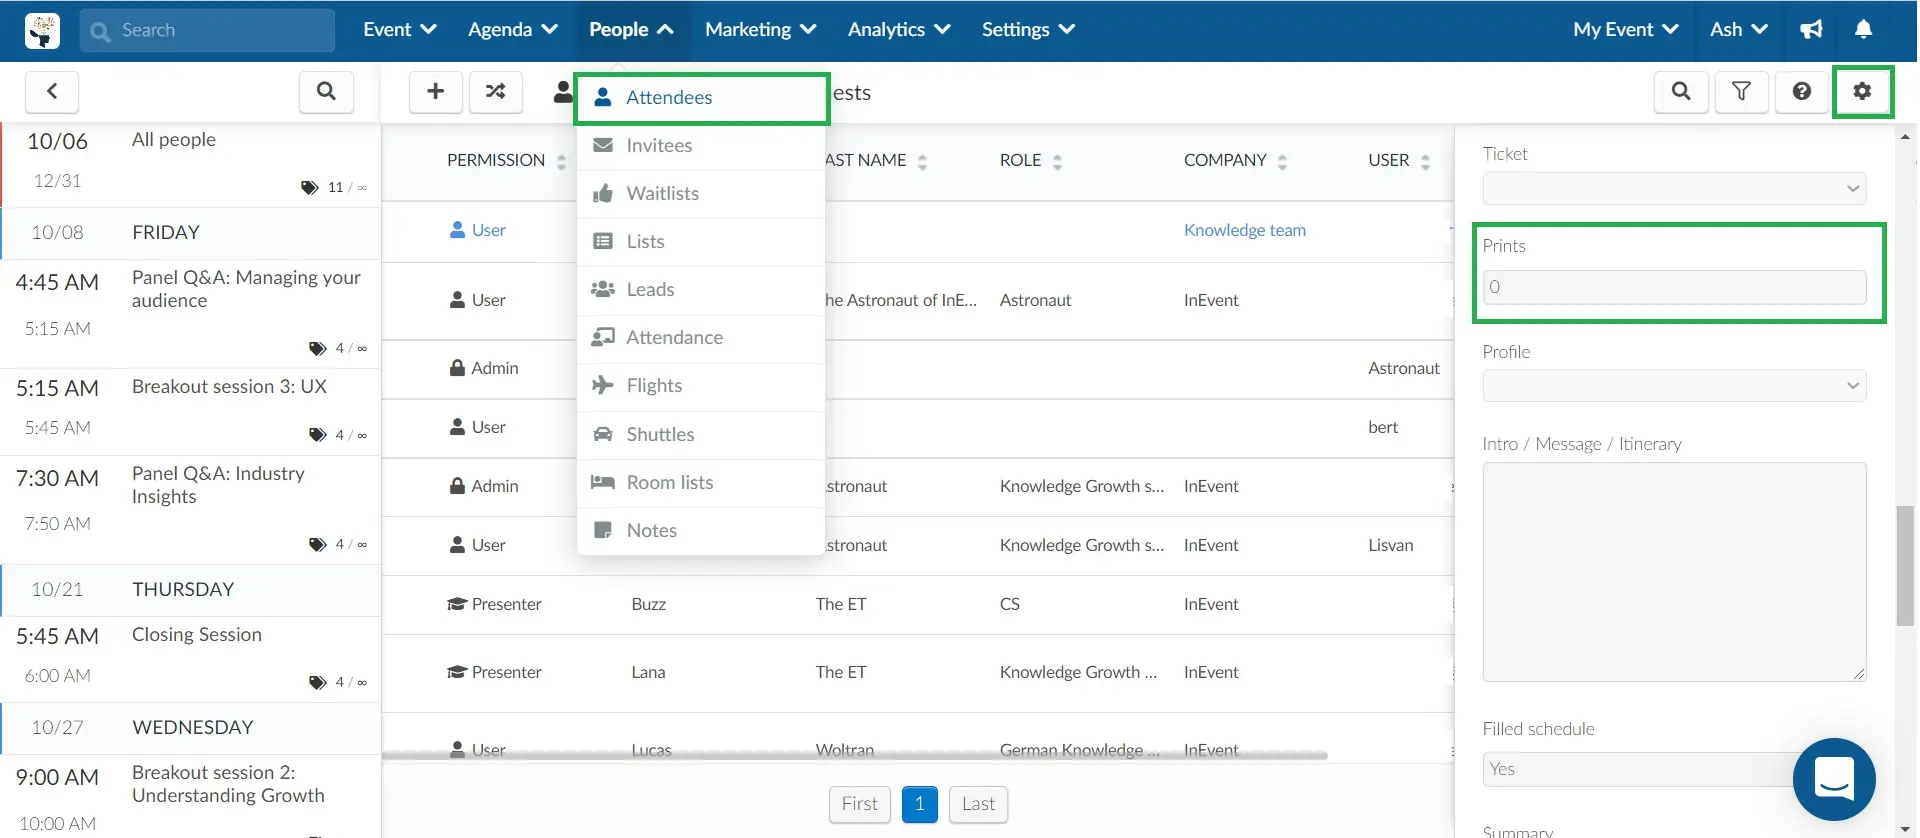
In general, information changes occur on the Attendee list screen (People > Attendees). On this page, you can add new attendees and their information, edit other attendee credentials and also reprint credentials.
See below the most common troubleshooting cases:
- New Subscribers: To register new attendees follow these instructions. Make sure you fill out the credential fields correctly, then click the print icon.
- Reprint credentials: In the list of attendees (People > Attendees), search for the attendee, and then click Edit. In the editing side window, scroll down to the Print item. Zero the item and click End. Now, click the credential print button.