Guest form
You can allow the event attendees to bring guests and decide which guests' information should be retrieved in the registration process.
This article intends to show you how to enable and use the guest form.
Enabling the Guest form tool
You can enable the Guest form tool by completing the steps below:
- Navigate to Settings > Tools.
- Locate the Guest form tool under the Registration section.
- Click on the Edit button.
- Toggle on the corresponding button to enable the tool.
- Click on the End button to finalize.
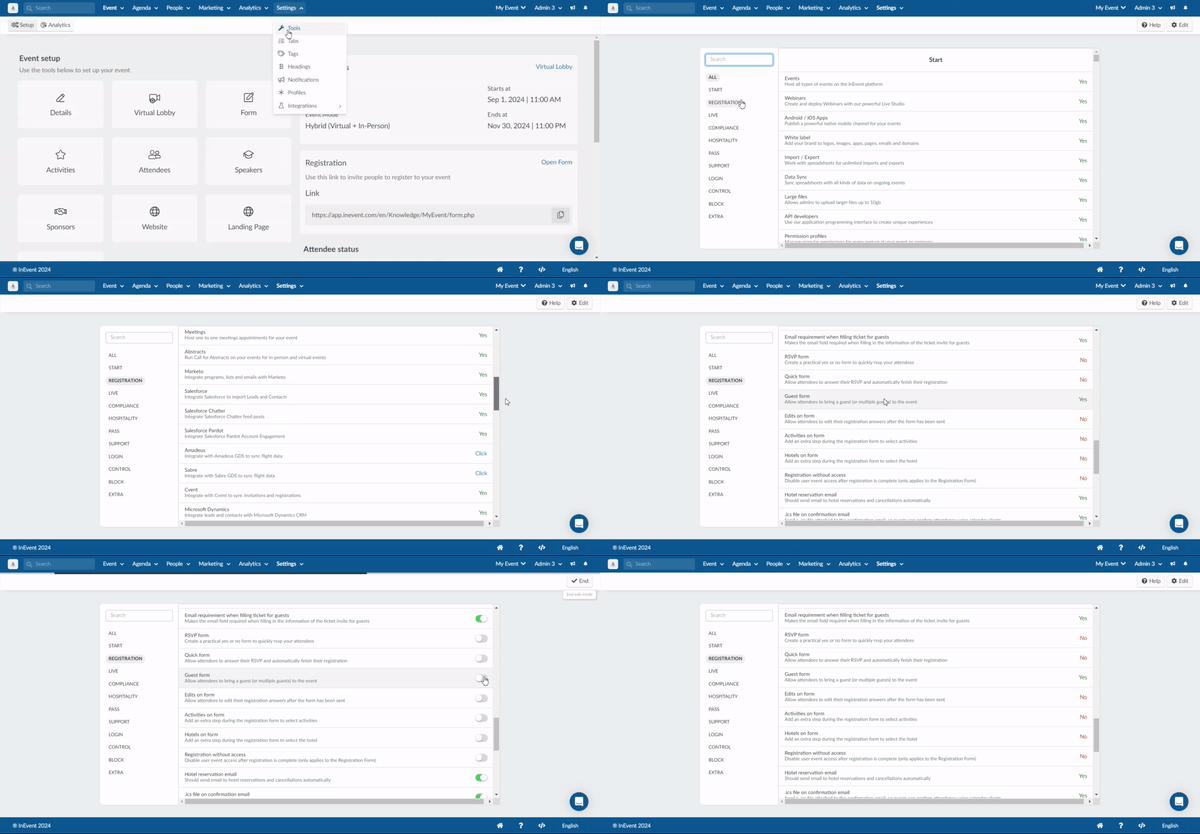
Accessing the Guest form
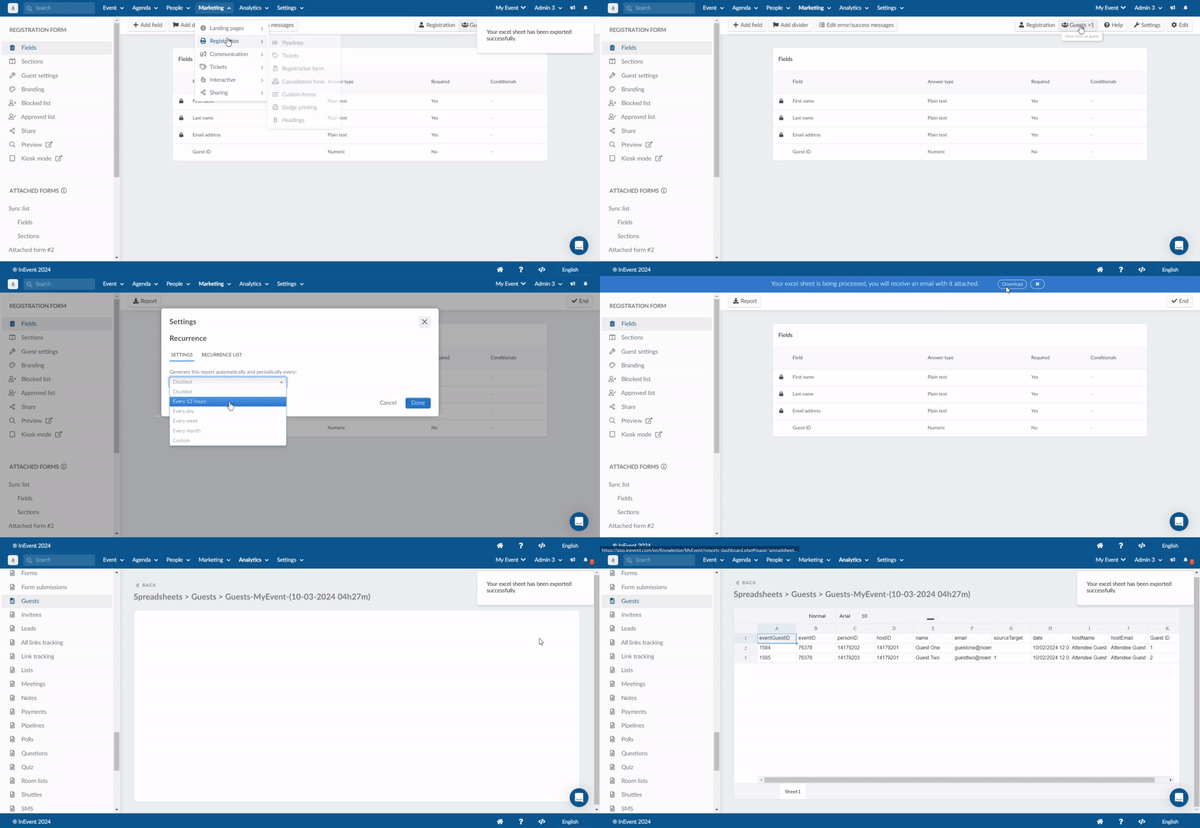
After enabling the Guest form, you can access it on the platform by navigating to Marketing > Registration > Registration form and clicking on Guests +1 on top of the page.
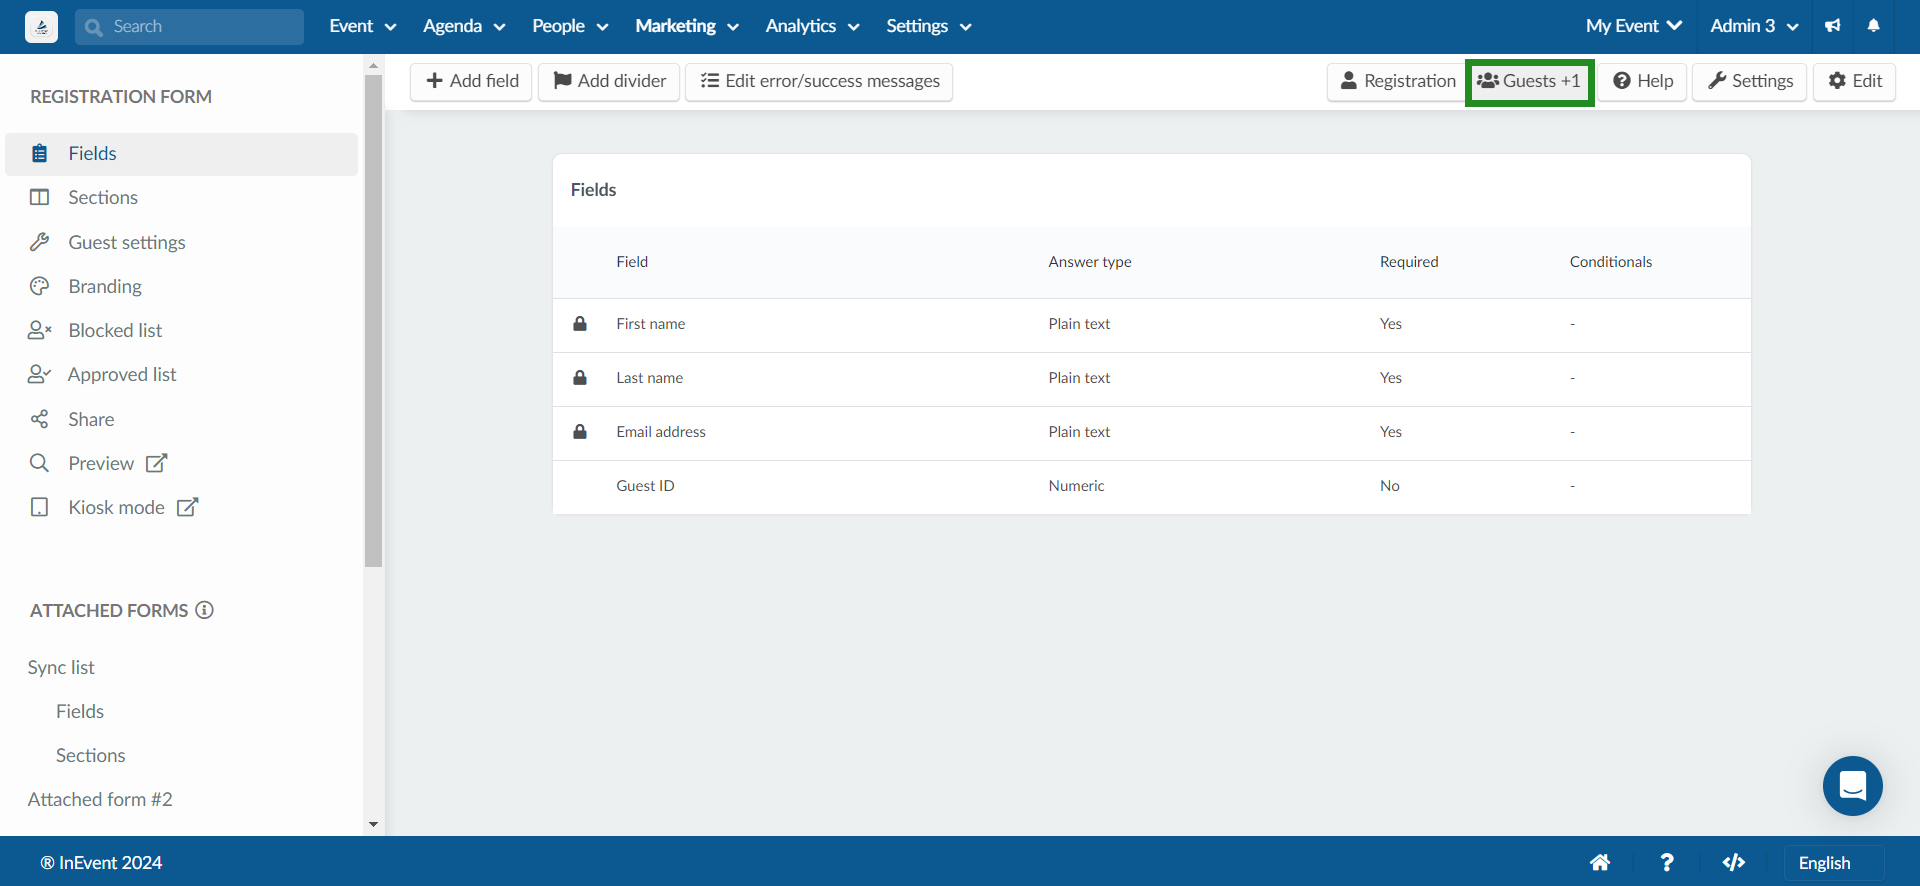
Guest form fields
By default, the Guest form contains three default fields: First name, Last name, and Email address.

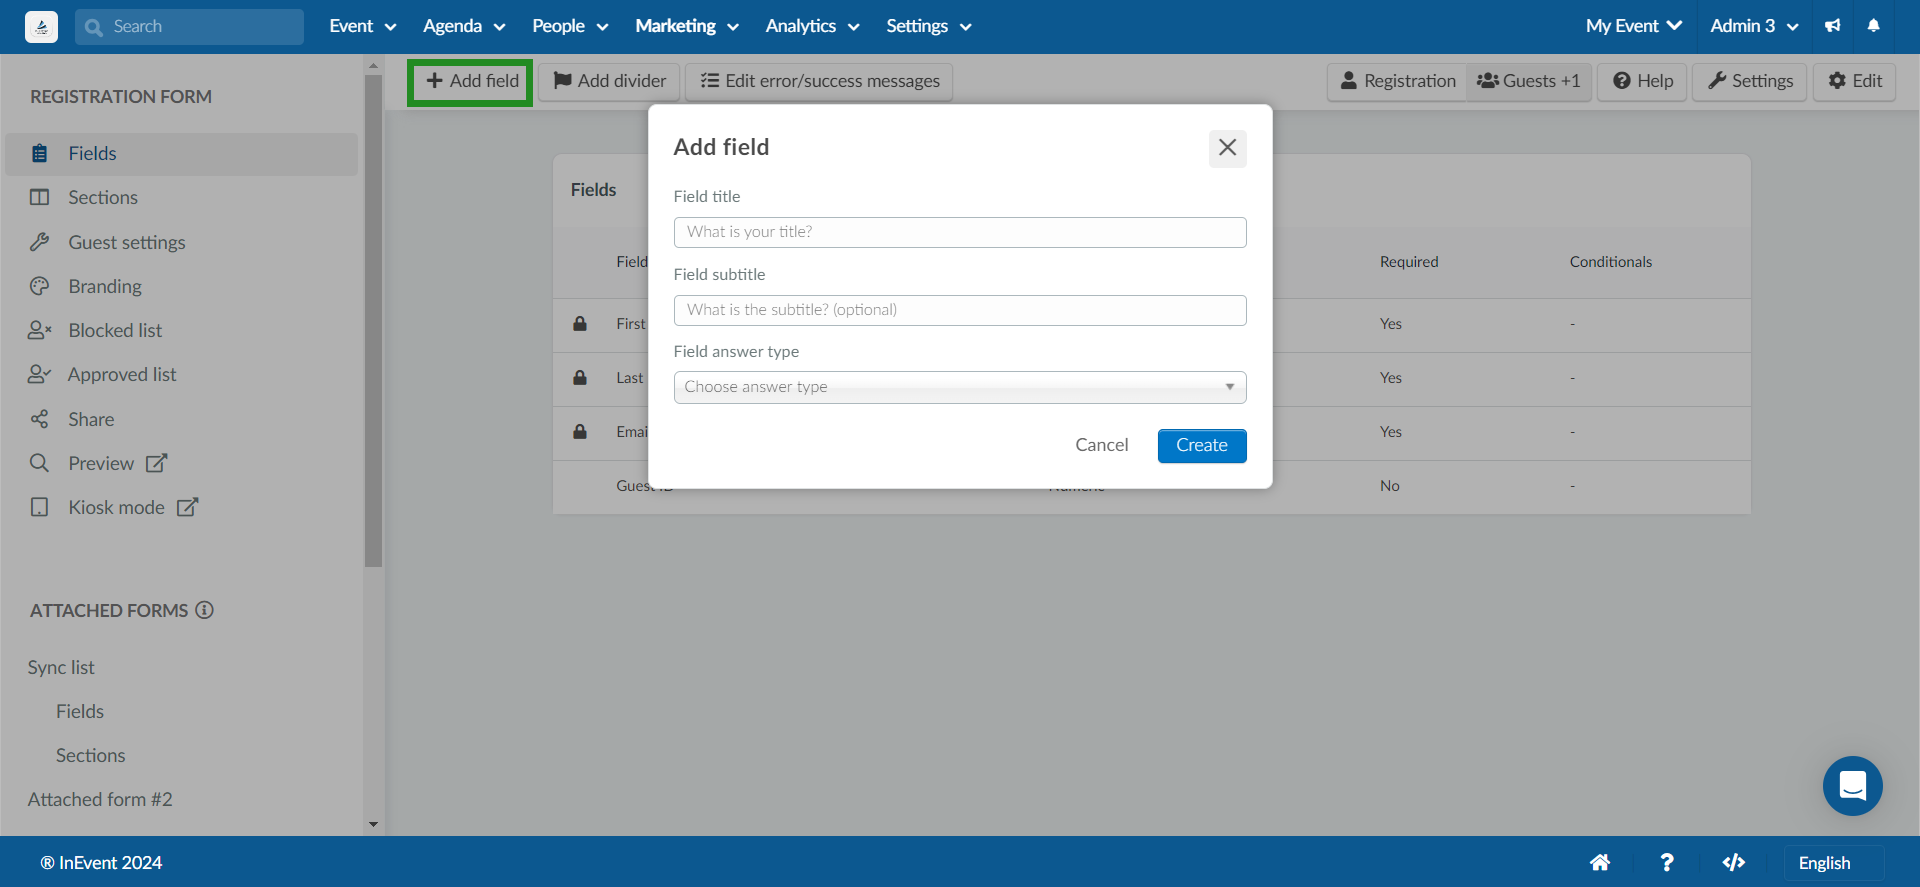
You can add custom questions to the Guest form by clicking on + Add field.
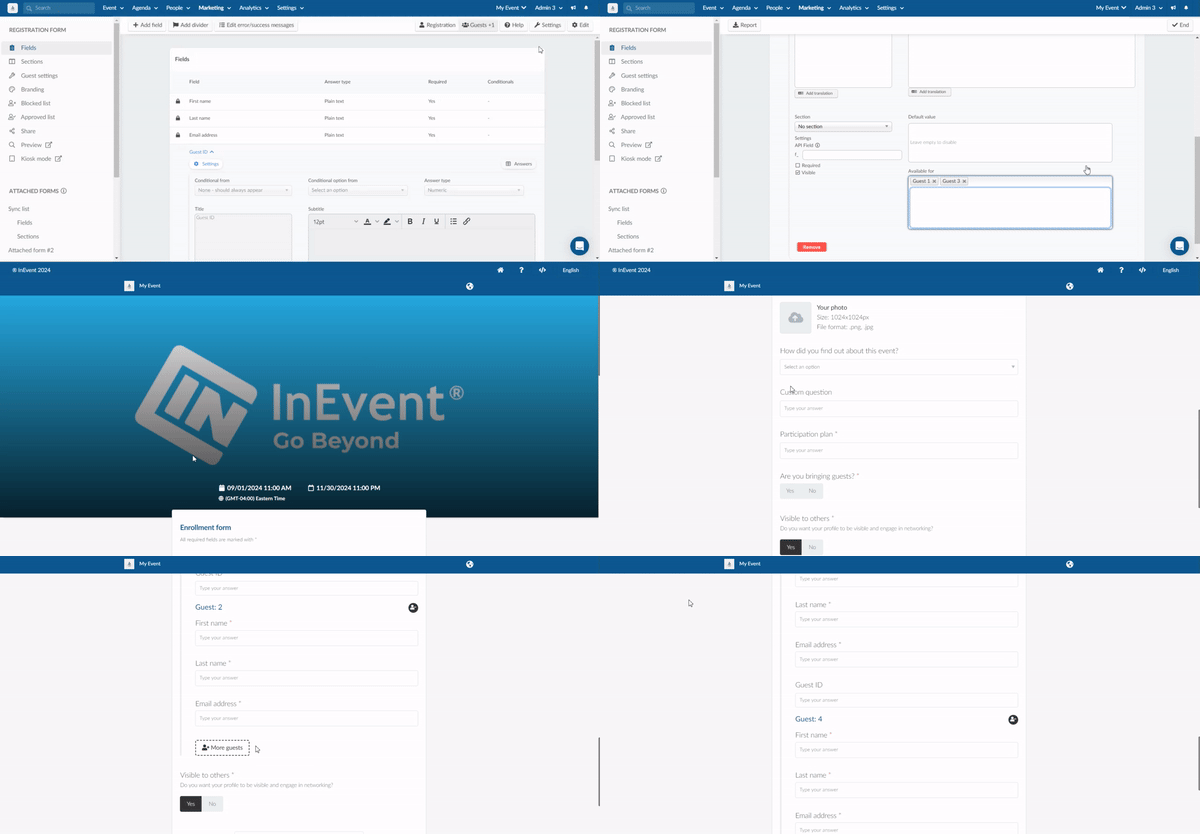
Additionally, after creating fields, you can modify or customize them as well. For a more tailored and effective interaction between guests and hosts, after creating the fields, you have the ability to have questions targeted for specific guests using the Available for box. Follow the steps below:
- Click on the available for box.
- Select the guests from the list that the question is targeted towards. You can select multiple guests if necessary.
- Press End to save changes.
The question will now only appear to those specific selected guests during the form-filling process.
Displaying the Email address field in the Guest form
The Email address form will not be visible on the Guest form if the Guests email tool is not enabled. You can enable the Guests email tool by completing the steps below:
- Navigate to Settings > Tools.
- Locate the Guests email tool under the Registration section.
- Click on the Edit button.
- Toggle on the corresponding button to enable the Guests email tool.
- Click on the End button to finalize.
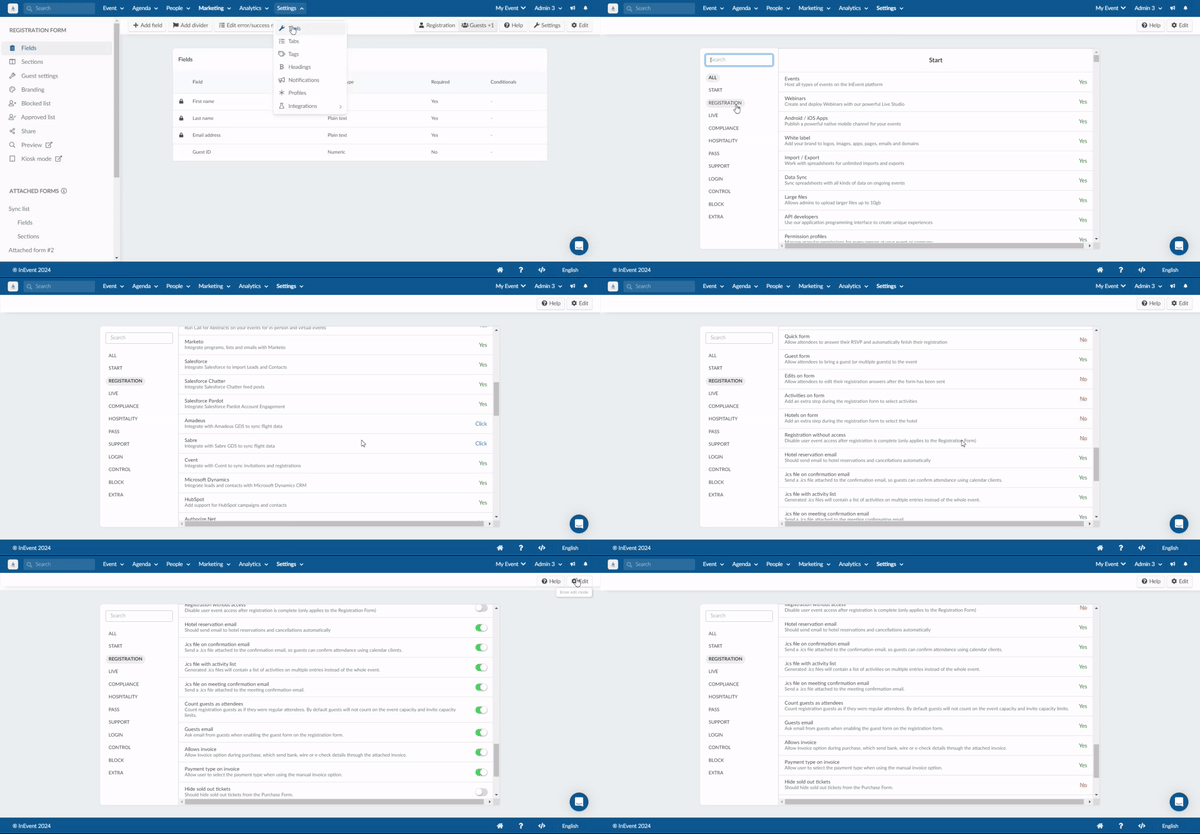
Once you have completed the steps above, the Email address field will be visible in the Guest form.
Defining the maximum number of guests
You can define a limit on how many guests your attendees can bring. To do so, follow the instructions below:
- Click on Guests +1 from the Registration form page.
- Click on the Guest Settings tab under Registration form.
- Click on Edit.
- Enter the maximum number of guests your attendees can bring.
- Click on End to finalize.
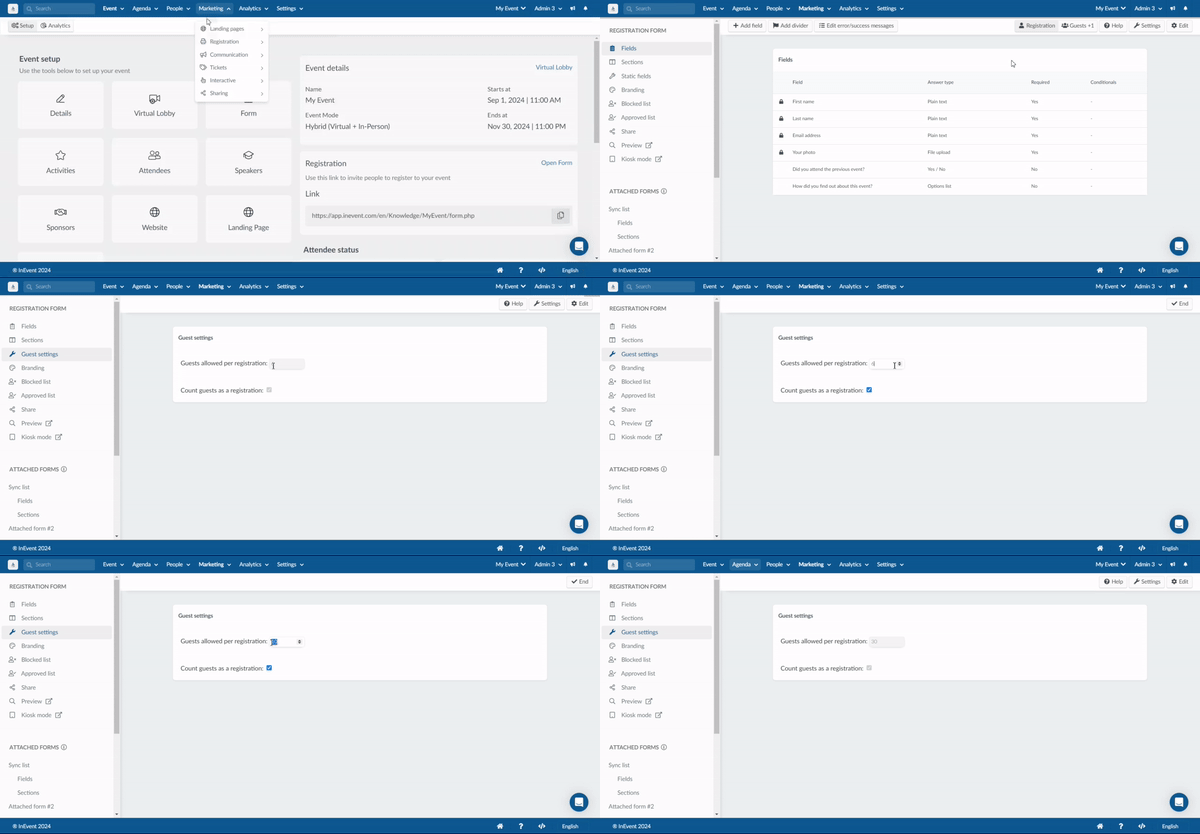
Count guests as a registration
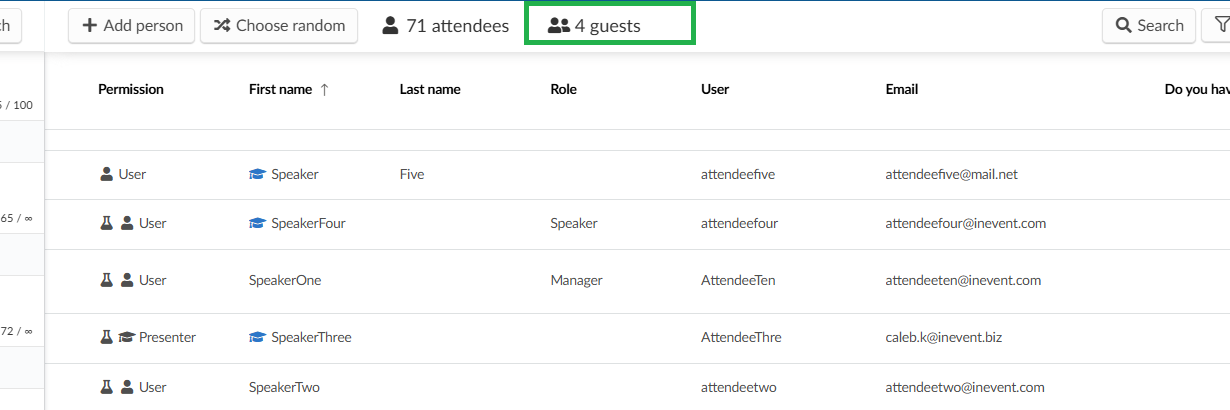
When enabled, guest counts will be displayed in the People > Attendees page.

The guest count will appear as shown below:
Reviewing Guest form submissions
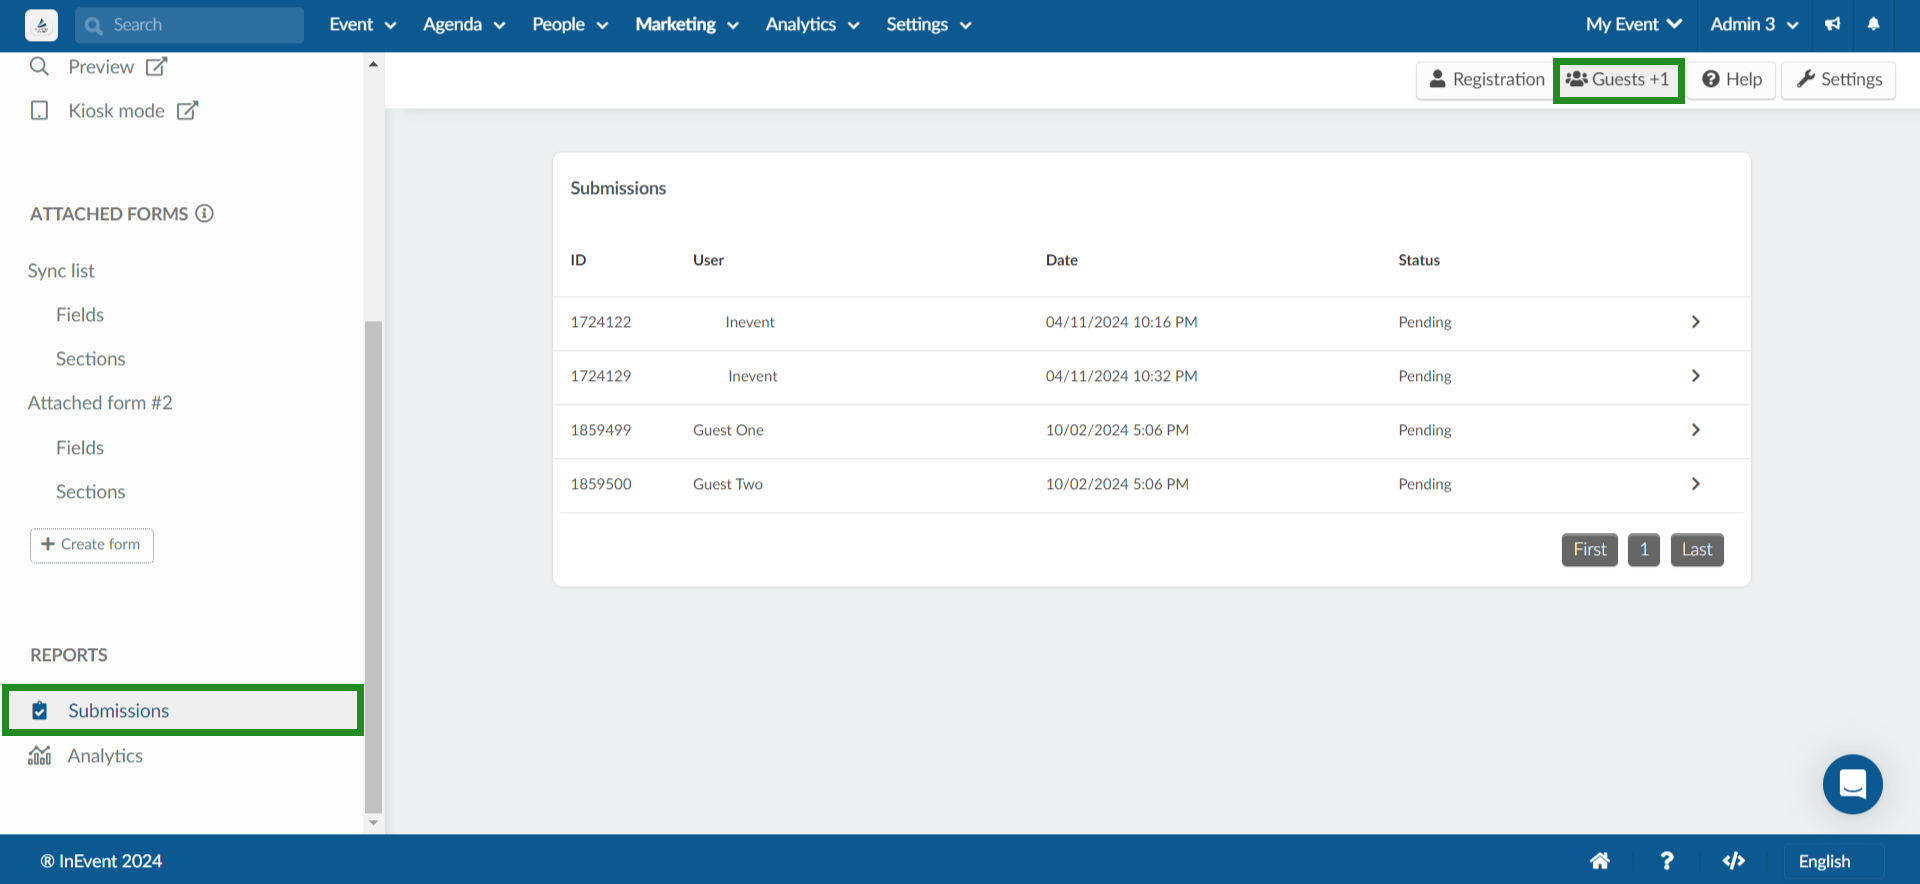
You can see Guest form submissions by navigating to Submissions on the Registration page and clicking on Guests +1. Click on the submission to see the form answers.
Generating Guest form submission reports
You can generate Guest form submission reports by clicking on Edit > Report. You will be asked whether you want the report to be generated automatically and periodically every 12 hour, every day, every week, every month or custom setting. If you do not wish to automatically generate report according to any of these plans, select disabled from the list and click on done. A blue notification banner will be displayed at the top of the page. Once the spreadsheet is processed, it will be sent to your e-mail.
Additionally, information of guests - name and email, can be gotten from the People > Attendees page, by generating a custom report and adding the Guest column. Refer here for more information.

