Managing Attendees
 Updated 1 month ago
by
Faisal Durrani
Updated 1 month ago
by
Faisal Durrani
This article intends to help you manage the attendees' list of your event. You will be able to filter, search, and edit all their information.
Editing an attendee's information manually
Profile details
To see the attendees' information, go to People > Attendees. On this page, you will see everyone that has registered for your event and all their profile details.
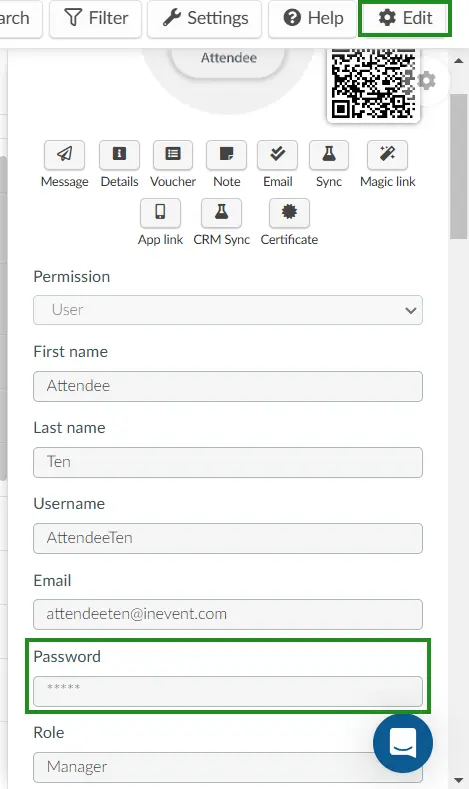
If an attendee’s information needs to be modified, including their password, click on an attendee, a screen will appear on the right side with the attendee's information. Press Edit in the upper right to enable modification by the event administrator. To view all the information, simply use the scroll bar to scroll down the page.
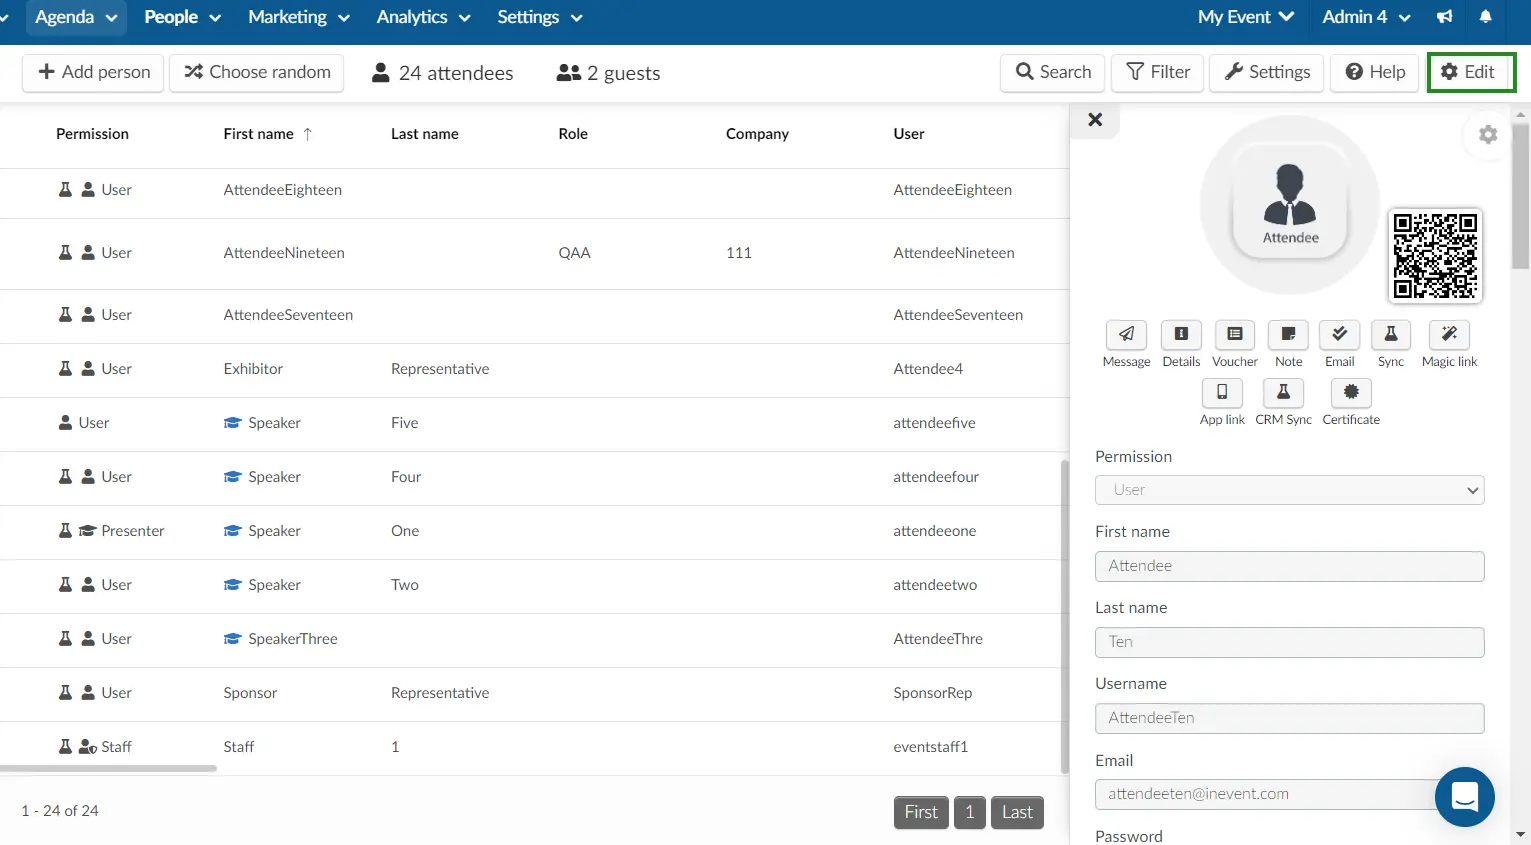
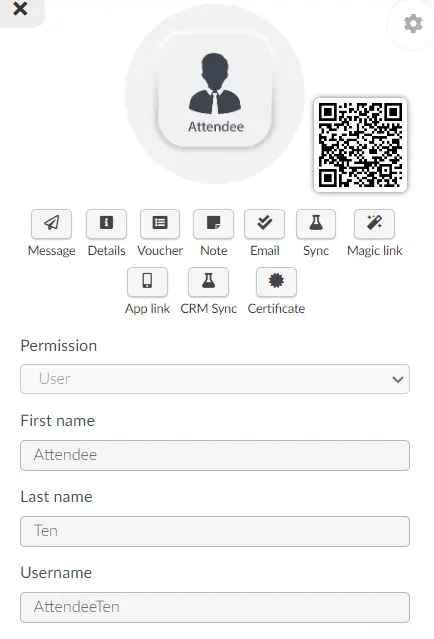
Under the attendees' profile picture which attendees can add by themselves under their My Account page, you will see some buttons:
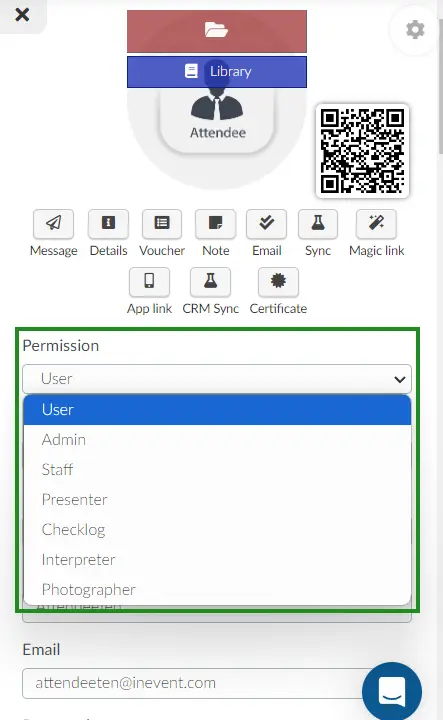
Permission
There are 6 types of permission for a participant in the event. To learn more about the different permissions, refer to the Permission levels for attendees article. To change the permission, click on the drop-down and select your desired option.
Message
By clicking on Message, you can send a push notification to this specific attendee. Refer to the Push Notifications article for further information.
Details
By clicking on Details, you will be taken to a new window which will show the attendee's basic profile information. You will also be able to see the activities this attendee has enrolled in, the polls answered, and the list(s) they have been added to.
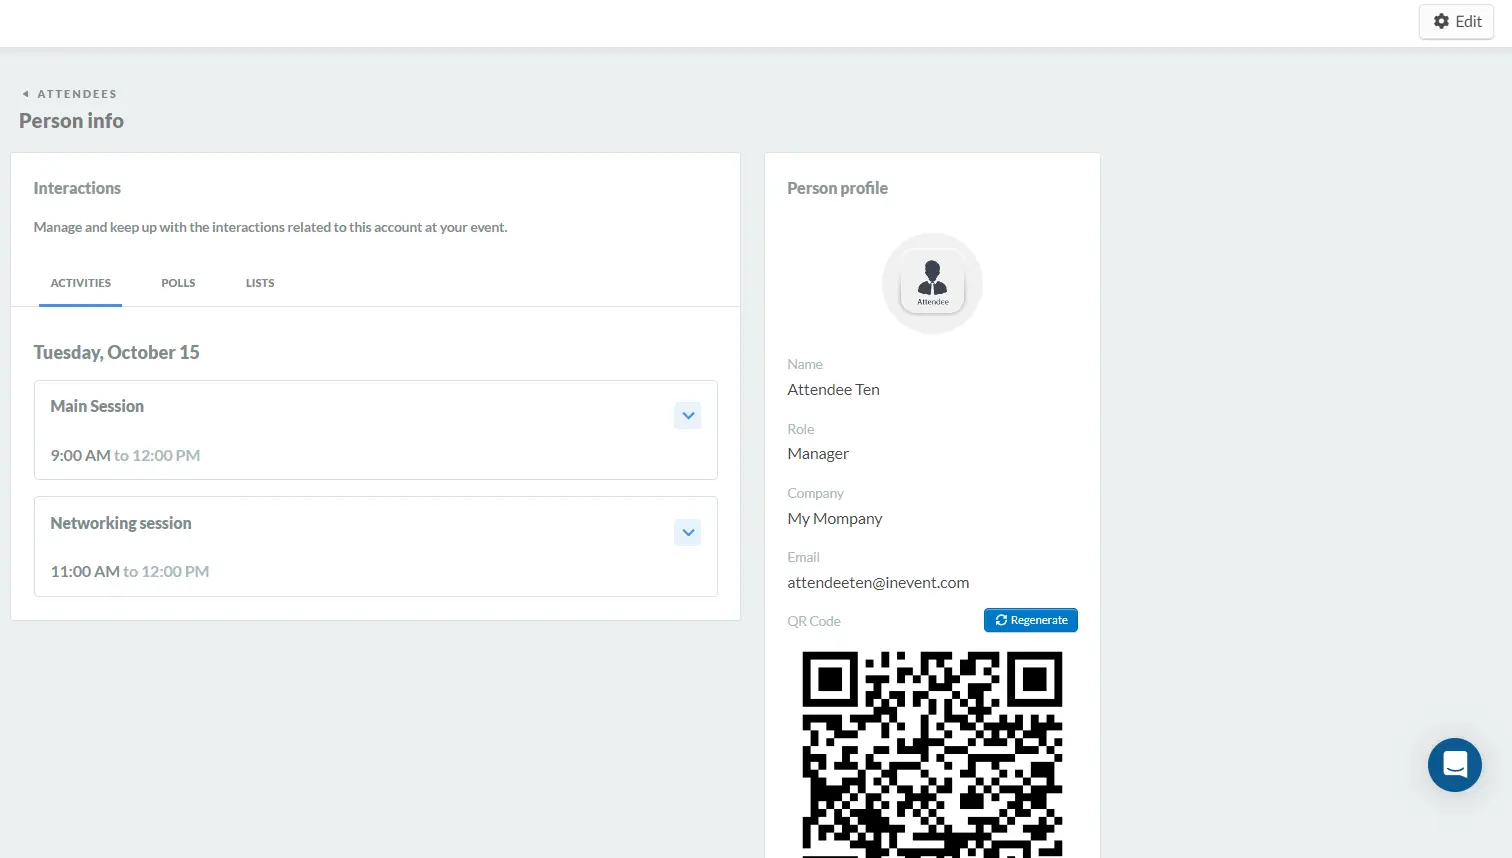
By clicking on the Edit button at the top right corner, you will be able to both add more activities and remove activities, as well as add and remove the attendee from lists.
To add an activity to an attendee, click on the +Add activity button under the Activities tab. Next, click on +Select an activity button and select the activity you want to add, then click on the + button.
To remove an activity, click on the arrow beside the activity you wish to remove, then click on the Remove button below the activity.
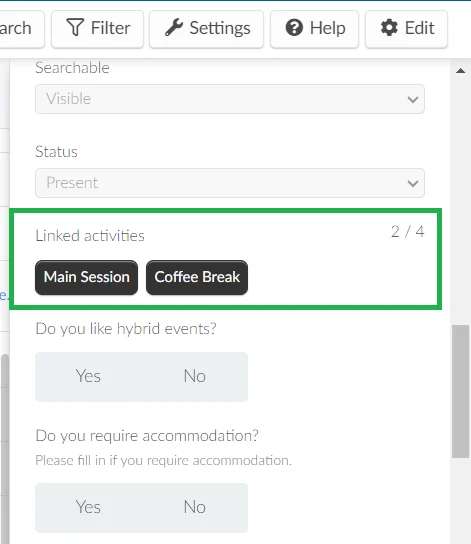
You can also view the activities the attendee is enrolled in on their profile, by scrolling down to the Linked activities field. Here, you will see the names of the activities they are enrolled in, along with the count of the enrolled activities over the total activities available in the event.
To add the attendee to a list, click on the +Add list button under the Lists tab. Click on the +Select a list button and choose the list from the drop down and select the list you want to add, then click on the + button.
To remove the attendee from a list, simply click on the Remove button beside the list you wish to remove the attendee from.
Voucher
Information about QR codes, flights, shuttle, etc. can be viewed by clicking on the attendee's voucher. Access the Digital Ticket Voucher article for further information.
Note
Click on the Note button if you wish to enter important notes about event attendees and check them out whenever you want. Refer to the Notes article to learn more about it.
By pressing the Email button, you will resend the confirmation email to that specific attendee. After clicking on the button, you will see a pop-up asking if you are sure you want to resend the email for this person. Press Ok confirm it.
Refer to the Confirmation email and other automatic emails article for further information on the confirmation email.
Sync
the sync button allows you to automatically sync attendee data with Salesforce. When clicked, this button transfers attendee information directly to your Salesforce account.
Magic link
By pressing the button that says Magic link, the link will be copied so you can paste it and re-send it to the attendee. Refer to the Magic link article for further information on the magic link.
App link
Upon clicking the App link, the link will be copied so you can paste it and re-send it to the attendee. when attendees click on the link they will be automatically redirected to the InEvent app and taken directly to their account without the need to manually log in.
CRM Sync
By clicking this button, all relevant attendee information such as names, emails, and other engagement metrics can be exported to a file format that can be uploaded or synced with a CRM system.
Certificate
By clicking the certificate button, you have the ability to preview, download, or print a certificate for the attendee.
Speaker
By clicking on Speaker, you can convert an existing attendee into a speaker. A confirmation message will appear asking if you would like to create a speaker profile for the selected attendee. Once confirmed, a speaker profile will be automatically created and linked to the attendee's profile.
Extra information
On the Attendees' page, there are other columns with information that you can easily check by using the scroll bar to the right.
The first column contains the information provided by the attendee while filling the registration form or by the admin while adding the attendees to the event from the platform, such as name, role, company, email, etc. The others will display the following information:

- RSVP: It displays whoever confirmed their presence at the event by answering the RSVP form.
- Custom Registration form questions: If you have one or more custom questions added to your Registration form, each questions will appear here as a column.
- Private: The participant will not be visible for interactions.
- Present: It informs if users have joined at least one activity online or checked in at an in-person event.
- Printed: It shows if the attendees had their badge printed for accreditation.
- Downloaded: It displays whoever has downloaded the App.
- Device: It indicates if the user downloaded the app using an Android or IOS device.
- Origin: There are four different types
- Self: The attendee registers via the registration form
- Panel: When the attendee is added manually
- Excel import: When attendees are added via spreadsheet
- Admission: When the applicant is approved from the Waitlist
- Ticket: It shows which ticket the user purchased
- Ticket amount: Shows how many tickets an attendee currently has.
- Language: Based on a cascading model, the platform takes into consideration first the user language, then the event, and lastly the company language to send out emails.
- Browser: It tells from which browser the attendee is connecting to the platform, such as Google Chrome, Mozilla Firefox, Internet Explorer, etc.
- OS: It informs which operating system the user is using for ex Windows, Macintosh, Linux etc
- Tags: It displays the tags that are linked with the attendee
- Lists: It displays the list the attendee has been added to
- Enrollment: The date and time the user became an attendee
- Updated: It shows the last time the attendees' information was updated, either by the admin or the participant via My Account.
Bulk editing activity, tags, lists, and other fields
Scrolling down, you will see more fields that can be edited on the right-hand side menu of an attendee.
You will be able to:
- Add tags to a group of people
- Send them to a custom list
- Enroll them in an activity
- Update other fields
To do any of the actions listed above, click on Edit, and select the desired group by ticking the checkboxes to the correspondent attendees.
Next, choose the action that will be done (Add tag, Add to activity, Add to list, Update field).
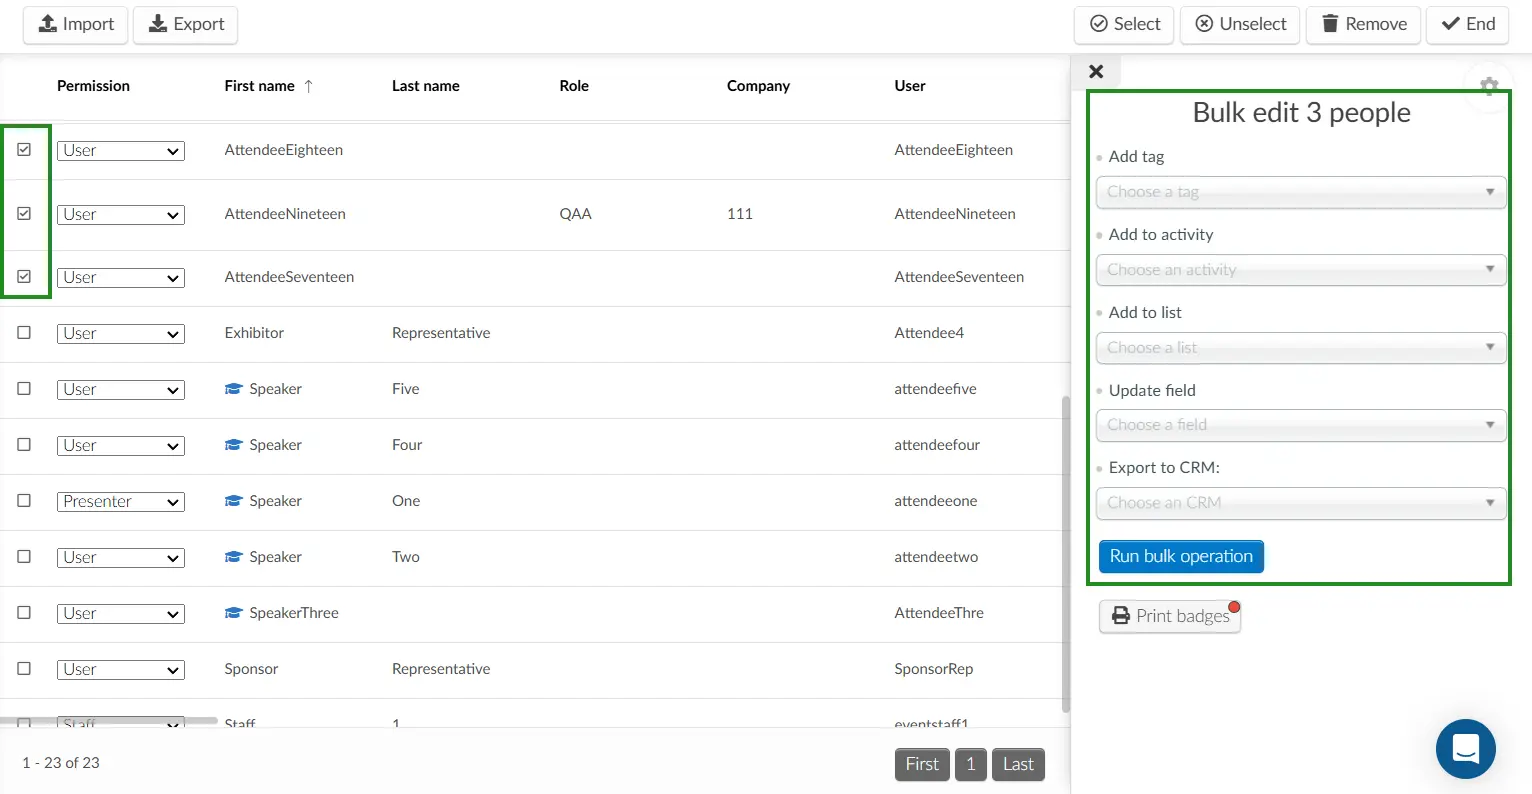
If you are adding a tag to attendees, or adding them to an activity or list, you should go ahead and press Run bulk operation and then confirm by pressing Run on the pop-up window.
If you are updating a field, once you select the field that should be edited, you will have to define what should be the new value under With value.
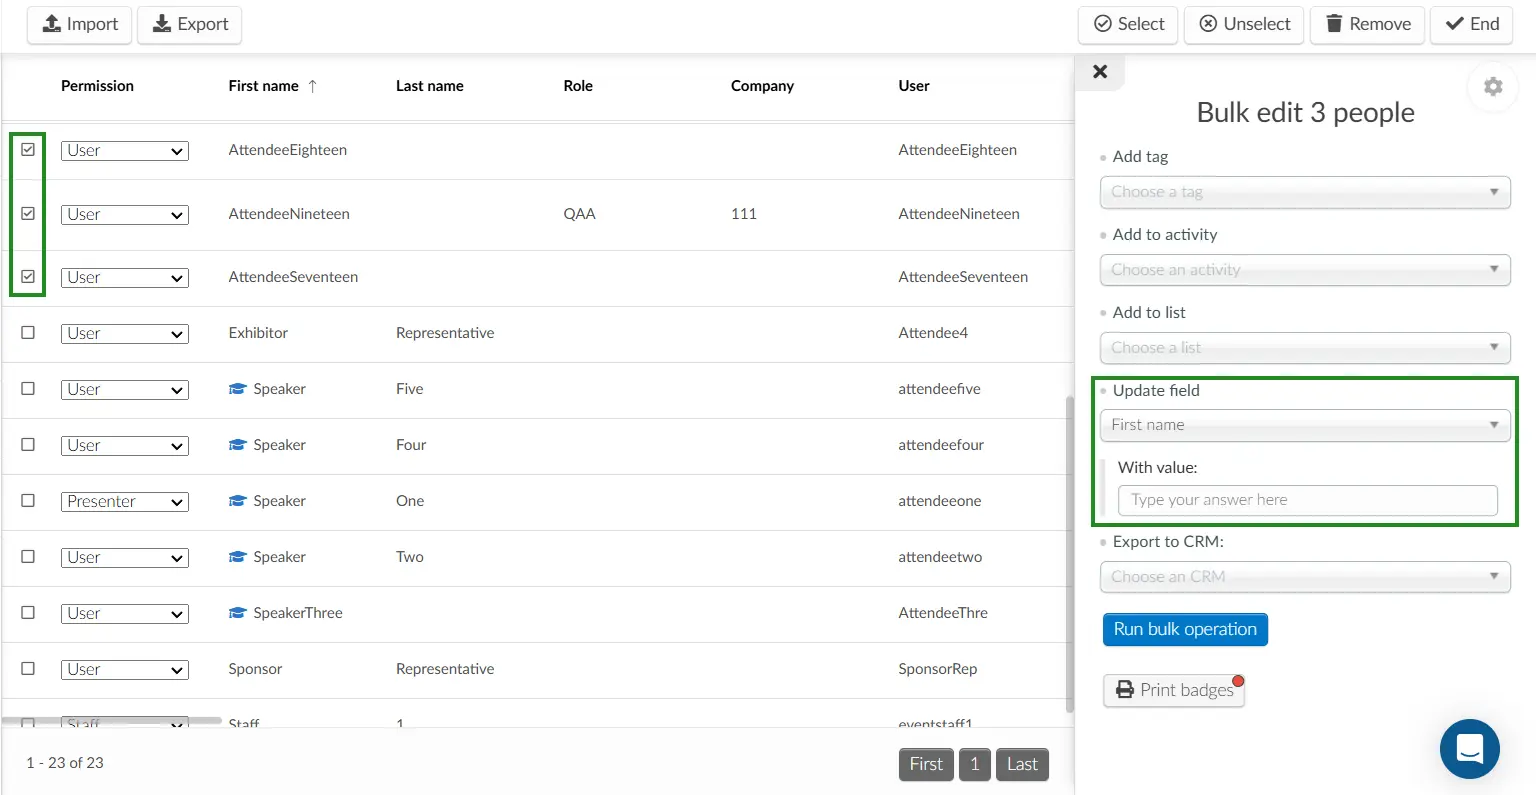
Then, click on Run Bulk Operation, and press Run.
Editing an attendee's registration form answers
As an event admin, you can edit the answers to custom questions submitted by attendees. To do this simply click on an attendee to open their profile on the right side of the page, then scroll down till you see the registration form custom questions. Click Edit and make the changes. Click End to save the changes.
Attendee Tags
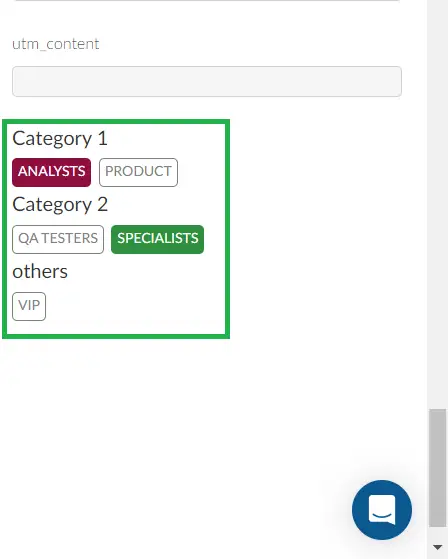
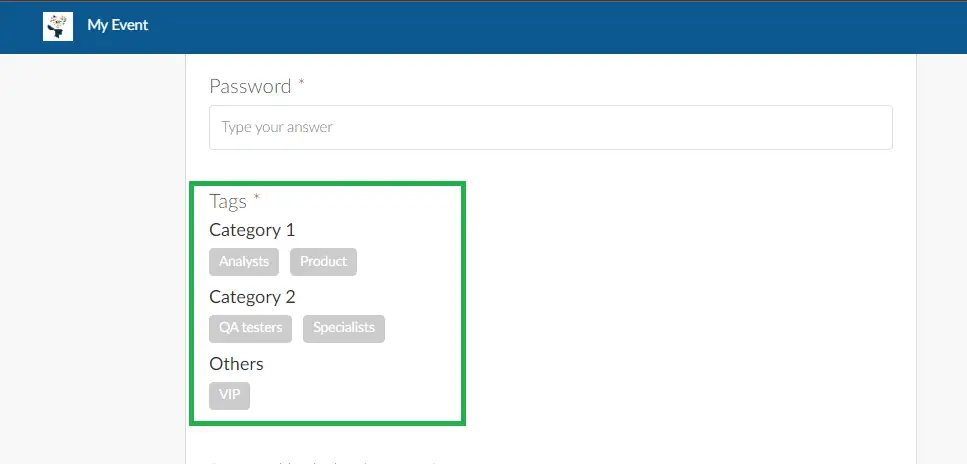
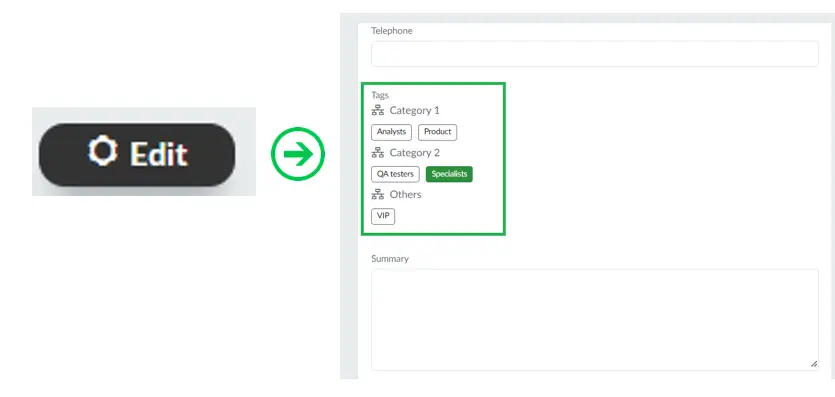
As an event admin, you can add tags to attendees from the Attendee's page. Click on an attendee to open their profile on the right side of the page, then scroll down to the end till you see the Tags. You will find the tags grouped in their respective categories (if created), and uncategorized tags will be grouped under others. To attach a tag to an attendee, click on Edit and select the desired tag. The tag will change to its tag color once selected.
Attendees can also add tags themselves when filling the registration form by clicking on the desired tag.
Or by going to the My Account tab when in the Virtual Lobby. Just click on Edit at the top right of the page, scroll down to the Tabs field and choose the desired tags, and then click End.
Assigning tickets to Attendees
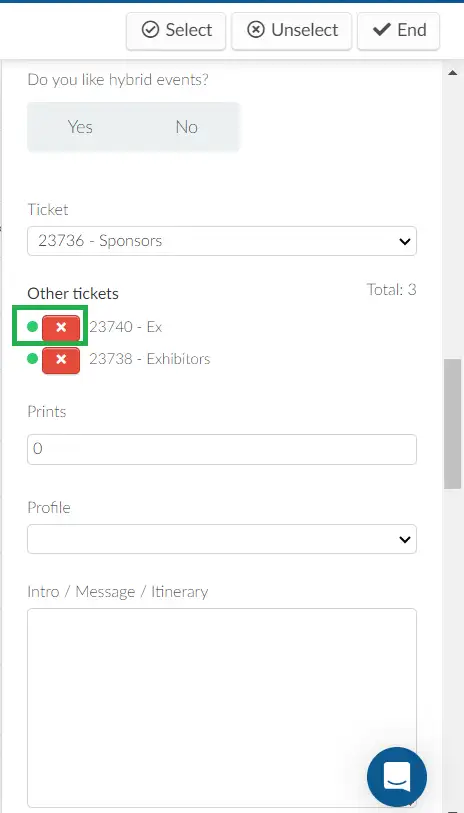
As an event admin, you can also assign tickets to attendees from the Attendees' page. To do this, simply click on an attendee to open their profile on the right side of the page, then scroll down till you see the Tickets section. Click on Edit and select the ticket you want to associate to the attendee from the dropdown.
To delete a ticket, simply click on the red x icon beside the ticket.
Understanding UTM fields on the Attendee Report
UTM fields help track how attendees reached the event registration page. They’re automatically captured when someone accesses your registration page using a link that includes UTM parameters, and they can be viewed from the Attendees report.
The UTM field definitions are:
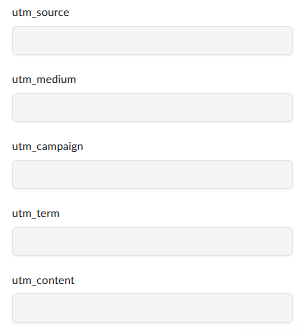
- utm_source: Identifies where the traffic came from (e.g. LinkedIn, newsletter, partner site).
- utm_medium: Identifies the marketing medium (e.g. social, email, cpc).
- utm_campaign: Identifies the campaign name or promotion (e.g. summer_launch, Q4_webinar).
- utm_term: Used for paid search keywords.
- utm_content: Used to differentiate variations of ads or links.
These fields are automatically generated and cannot be modified.
Creating and using UTM links
You can create UTM links directly from the Link tracking page. Once created, you can share the link or embed this link in your website. Refer to the Link tracking article to learn how to.
When an attendee clicks a registration link that contains UTM parameters, InEvent automatically records those values and links them to the attendee’s profile once registration is submitted.
Once a registration is submitted, the UTM data appears in the Attendees report under the utm column. However, the values are not displayed in plain text. Instead, InEvent encrypts them, so the report will show a long combination of letters and numbers instead of the actual source or campaign name.
Filtering attendees
Refer to the Filtering attendees article to learn how to filter attendees.
Sweepstakes
To randomize attendees throughout the event, click Choose Random on the upper left side. The chosen one will appear in black on the screen.

Changing a participant's password
Click on Edit and enter the new password in the corresponding field.
Remember that when you reset the attendee's password, the attendee will not receive a confirmation email with the new one. This must be sent externally (off the platform).
The attendees can also recover their passwords by themselves. Access the Recovering your password article to learn all the available options.
Settings
You can control all the platform tools that are relevant to attendees directly from the People page by clicking the Settings button at the top right corner. A pop up box will appear and you will see the tools segmented into different fields - Start, Registration, Live, and Block. You can enable or disable a tool by toggling on or off the button beside the tool.

Preventing the personal information of participants from being displayed
To prevent certain information from being displayed, you need to access the Tools page on the platform, scroll down until you find the Block section, and click on Edit.
Now, you can select which information will be visible in the profile of each attendee. Mark the checkbox of each functionality and confirm by clicking on End.
Blocking interactions between participants
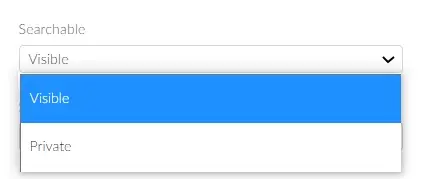
To block the interactions between attendees of the event, simply click on the desired attendee. In the new window that appears on the right, scroll down to the Searchable field. Click on the drop-down menu and select Private. This will make the attendee invisible to other attendees, blocking interactions.
Refer to the Networking guide for event organizers article to learn how the attendees' visibility will affect their networking options in the Virtual Lobby.
Exporting attendees' report
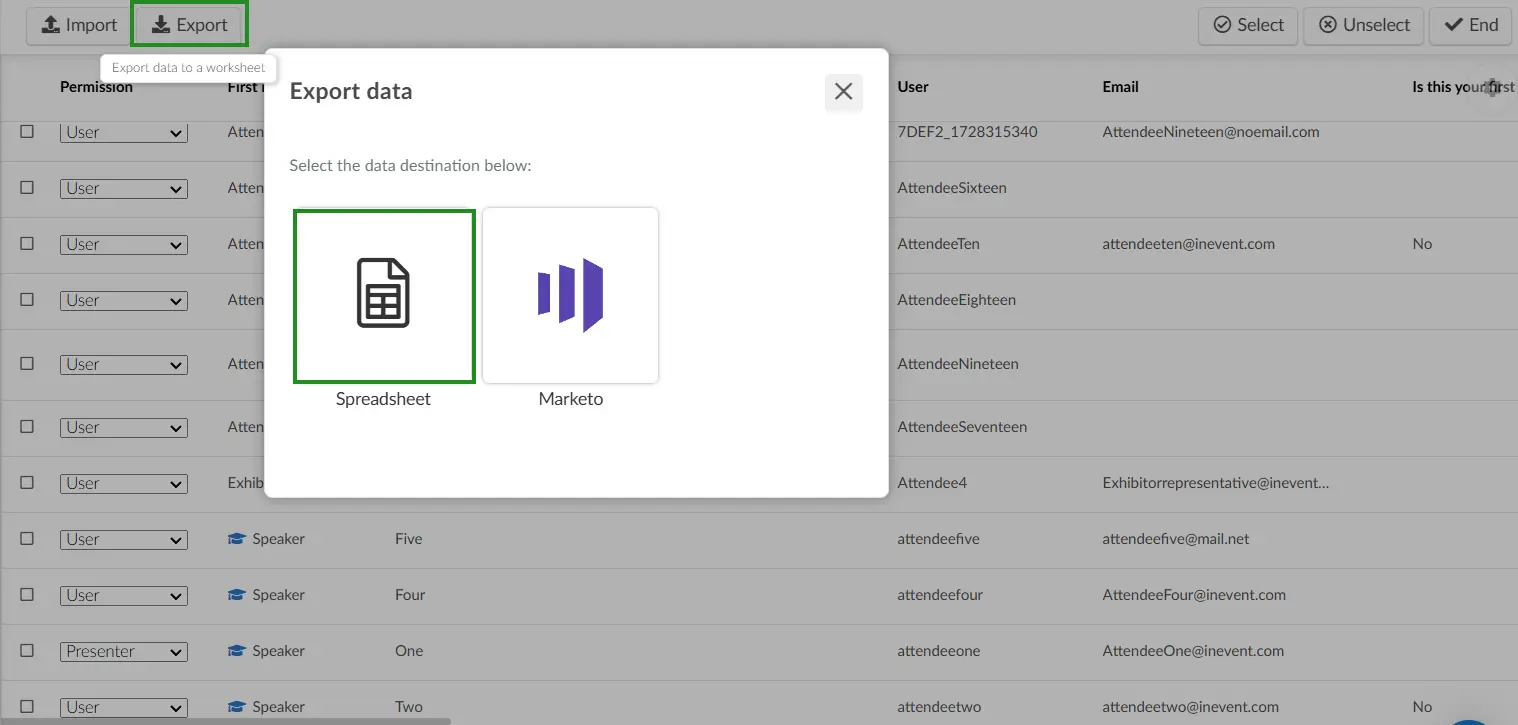
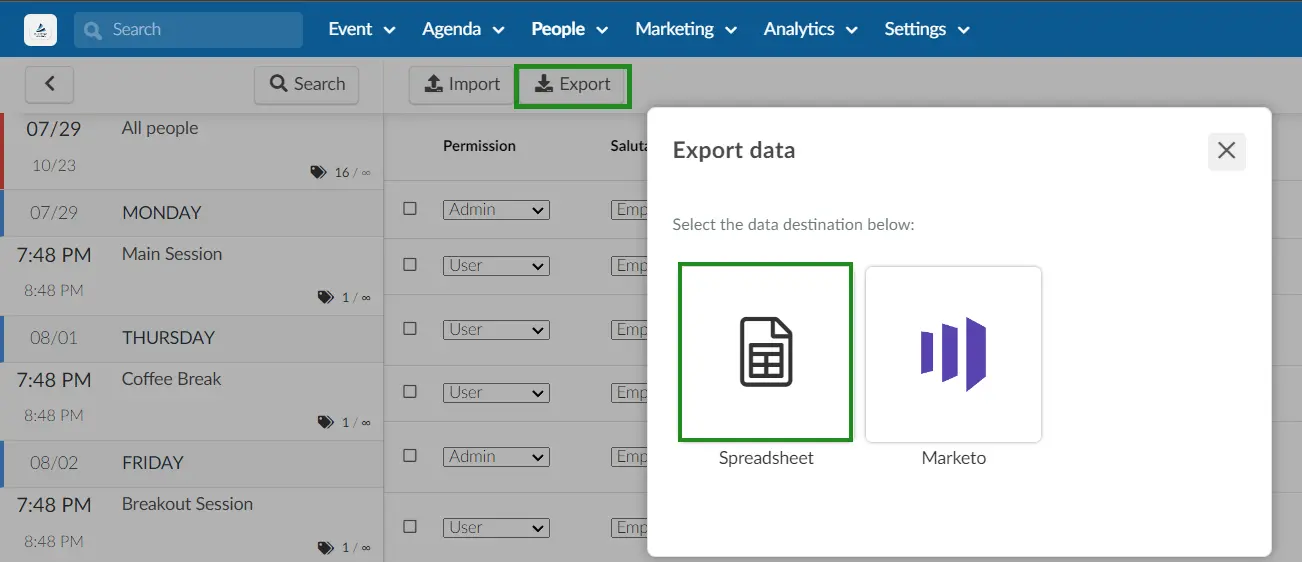
You can extract a report of your attendee's details directly from the Attendees page by clicking on Edit > Export and selecting Spreadsheet as the data destination.
When extracting a report, you can choose or combine from the available Automated report or select the information you want to be included in the report in Custom report.
This section will inform you on the available kinds of reports and on how to extract a report of your attendees.
Automated report
Automated reports are reports that have been tailored by InEvent and contains attendee information based on the category, in addition to general attendee information, such as the attendees' personal details, social media details, user tags, and status at the event. To extract an Automated report, follow the steps below:
- Click on the Edit button on the Attendees page.
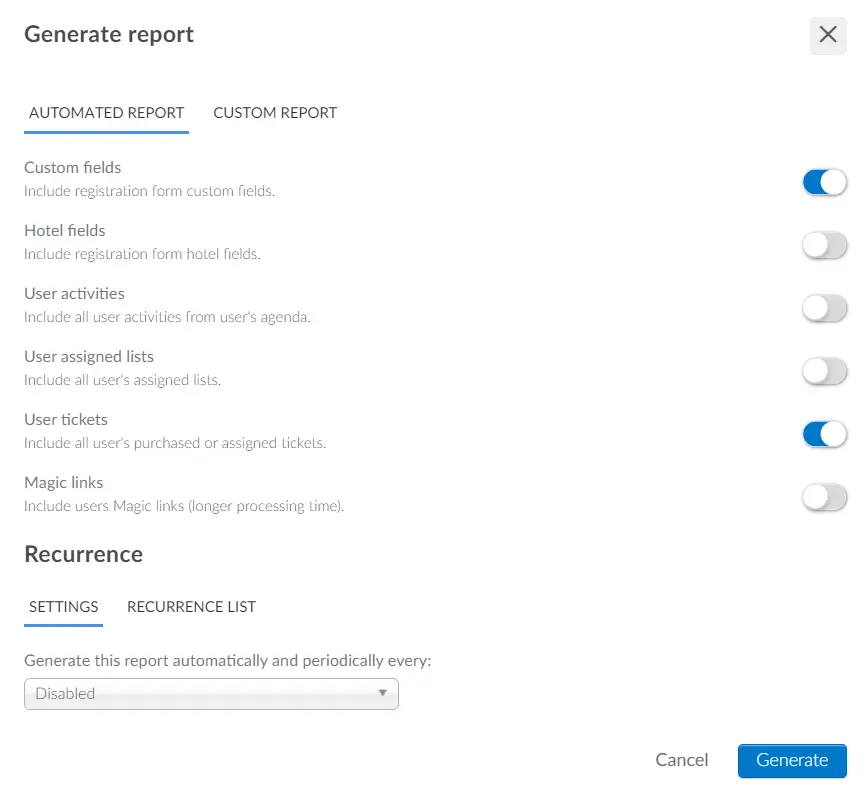
- Click on the Report button. The Generate a report pop-up box will be displayed.
- Select one or more Automated reports you would like to extract using the toggle button under the Automated report tab. The available Automated reports are:
- System fields: This report contains predefined fields such as NFC, SalesforceID, and FacebookID associated with each attendee.
- Custom fields: This report contains your attendees' answers to custom questions on the Registration form.
- Hotel fields: This report contains your attendees' hotel details, such as hotel name, check-in and check-out dates, and booking number.
- User activities: This report shows all the activities the user has in their agenda.
- User assigned lists: This report contains the lists in which your attendees belong.
- User tickets: This report contains your attendees' ticket information, such as their available tickets, in-use tickets, on-hold tickets, other held tickets, and ticket giver.
- Magic links: This report contains your attendees' magic links. In addition, it also includes your attendees' hotel details, such as hotel name, check-in and check-out dates, and booking number.
- Click on the Generate button. A blue notification banner will be displayed at the top of the page. Once the spreadsheet is processed, it will be sent to your e-mail.
Custom report
By extracting a Custom report, you can choose the information to be included in the report as needed. To extract an Custom report, follow the steps below:
- Click on the Edit button on the Attendees page.
- Click on the Report button. The Generate a report pop-up box will be displayed.
- Click on the Custom report tab.
- Click on Add columns and select the category of information you want to generate a report of. The available categories are as follows:
- Standard fields: This category contains attendees' standard fields, such as personal information, business information, social media information, QR code, and magic link.
- Custom fields: This category contains the custom questions that have been added to your registration form.
- Tickets: This category contains your tickets' ID and name.
- Tickets questions: This category contains ticket related questions.
- Lists: This category contains your custom lists.
- Guests: This category contains attendees' guest information, such as name and email.
- Custom fields (Guests): This category allows you to display further specific guest-related information in custom reports.
- Check the box(es) next to the information you want to generate a report of. The column will automatically be added to the report preview.
- Click on the Generate button. A blue notification banner will be displayed at the top of the page. Once the spreadsheet is processed, it will be sent to your e-mail.
After completing the steps above, you will find your Custom report showing only the columns you selected.
Recurring report
You can set up recurring reports to automate the generation of your reports and have them sent to your email. This allows you to select or create a time interval for generating reports automatically.
Follow the steps below to create recurring reports:
- Click on the Edit button on the Attendees page.
- Click on the Report button. The Export data pop-up window will be displayed.
- Select spreadsheet as your data destination. The Generate a report pop-up window will then be displayed.
- Select Automated reports or Custom reports.
- Scroll down to the Recurrence section.
- Click on the drop down menu of Generate this report automatically and periodically every and select your desired period. The available period options are:
- Every 12 hours
- Every day
- Every week
- Every month
- Custom: Allows you to create a custom period for generating reports.
- Enter a name for your report.
- Click on Generate to create your recurring report.

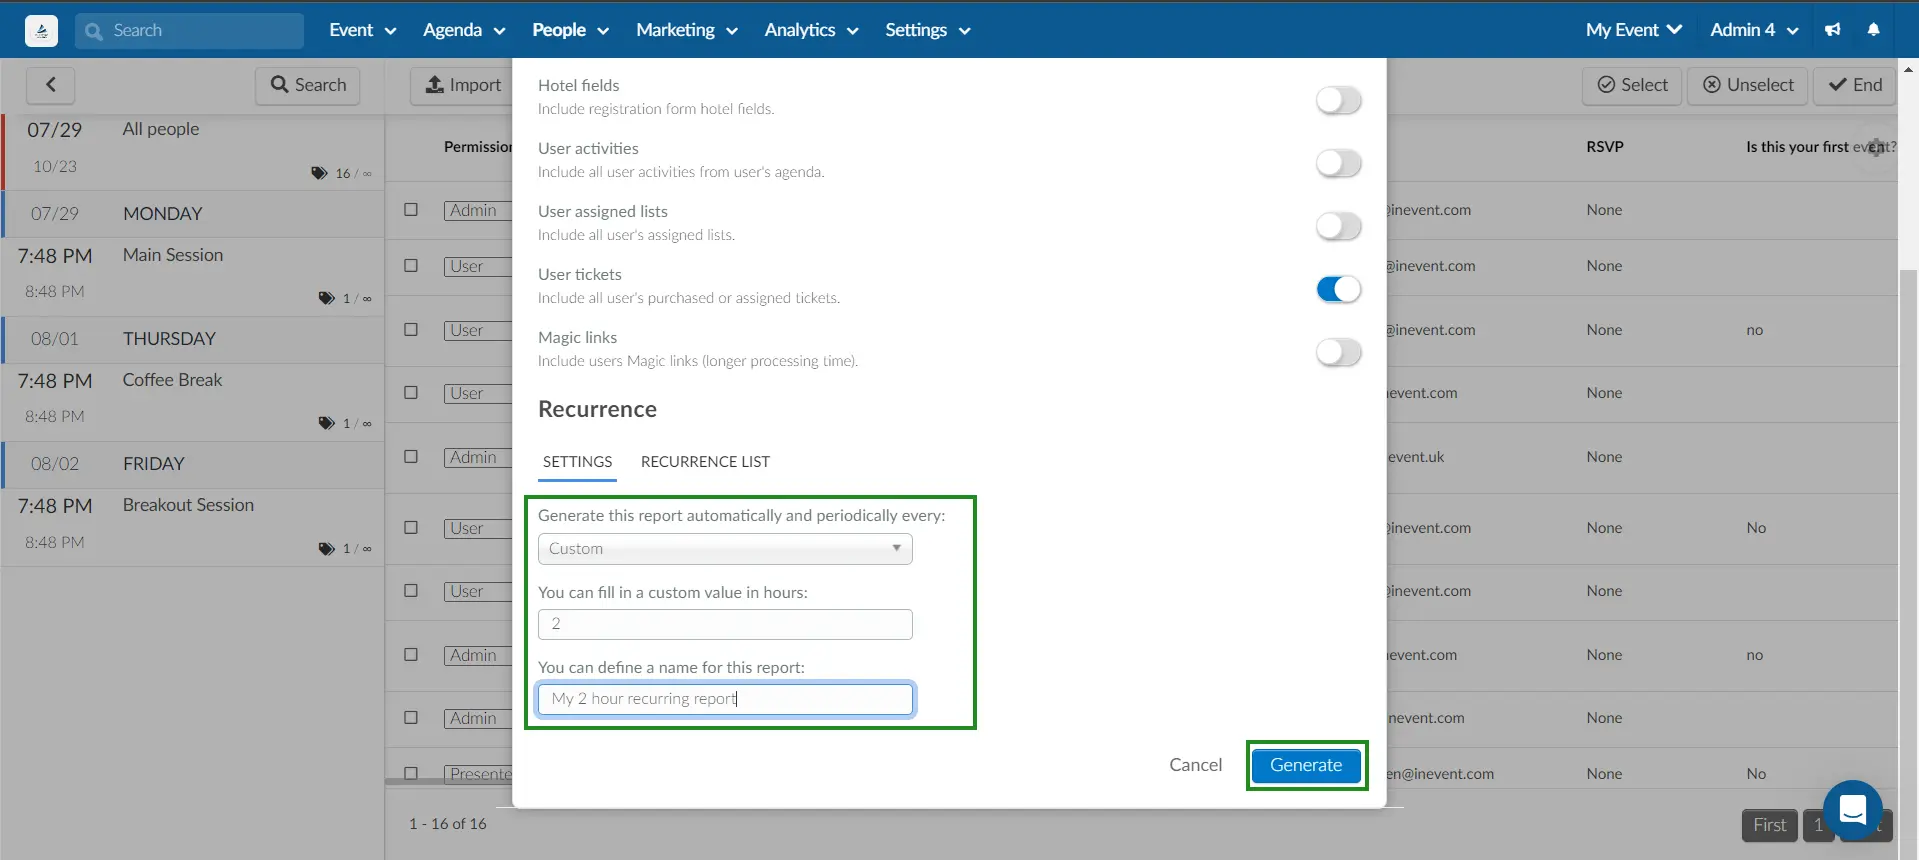
To create a custom recurring report follow the steps below from the Export > Spreadsheet > Generate Report interface:
- From the Recurrence section, click on the dropdown list and select Custom.
- Enter your desired period for generating your periodic reports
- Enter a name for your report and click on Generate to create your custom recurring report
Deleting recurring reports
If you want to stop receiving automatic reports via email, you can delete your recurring reports, to do so, follow the steps below:
- Press the Edit button and click on Report in the upper left corner. The Export data pop-up window will appear.
- Select spreadsheet as your data destination.
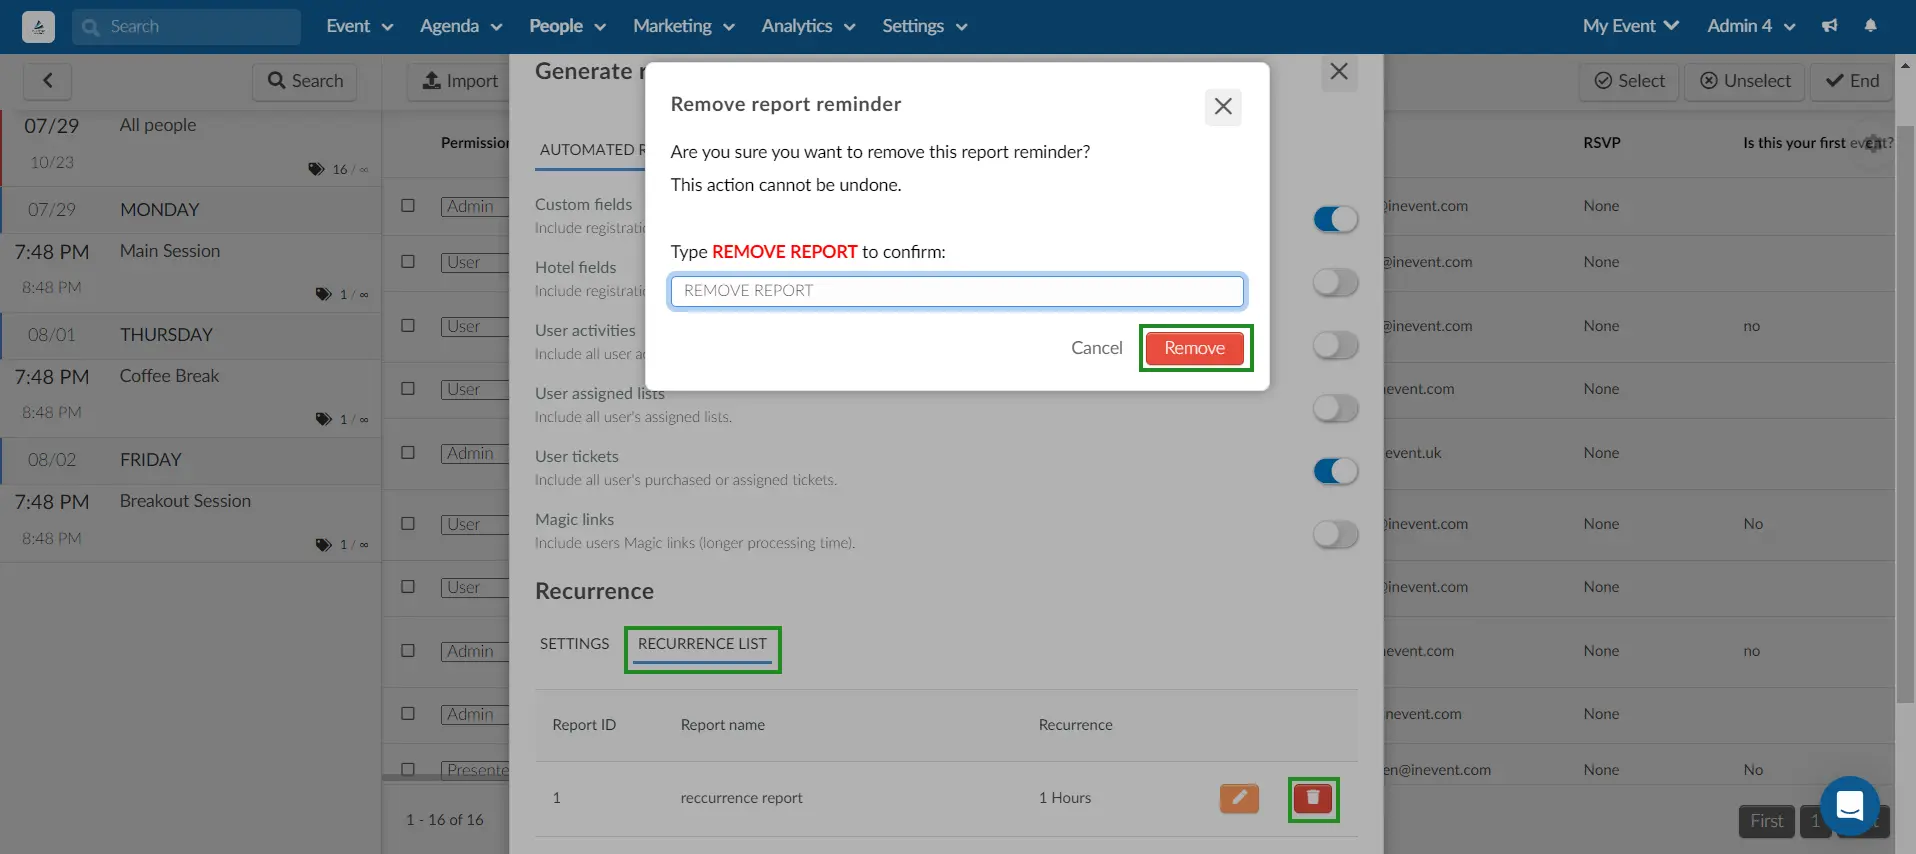
- From the Generate a report pop-up box window, select Recurrence List.
- Click on the corresponding red icon and enter the REMOVE REPORT confirmation text to delete your report.
- Click on Remove to finalize the deletion of your report.
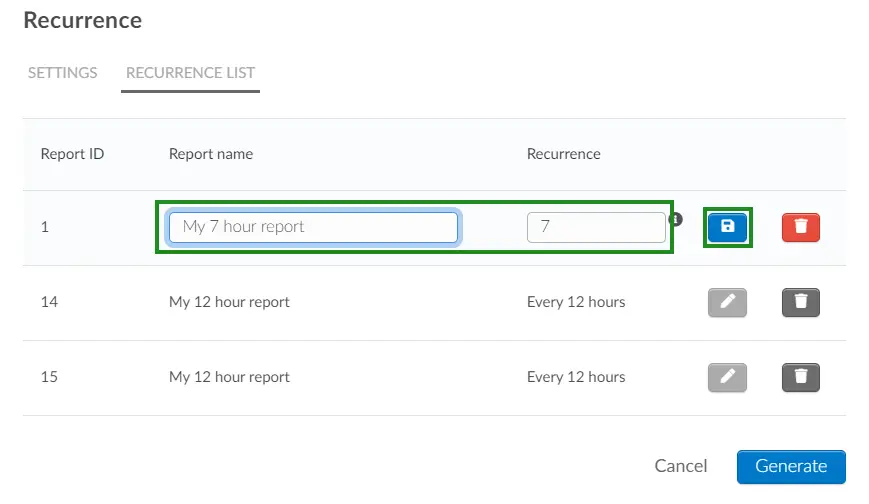
Editing recurring reports
You can edit the recurring reports you have created. This allows you to edit the name and recurring time of your reports. To do this, follow the steps below:
- Press the Edit button and click on Report in the upper left corner. The Export data pop-up window will appear.
- Select spreadsheet as your data destination.
- From the Generate a report pop-up box pop-up box, select Recurrence List.
- Click on the corresponding orange icon.
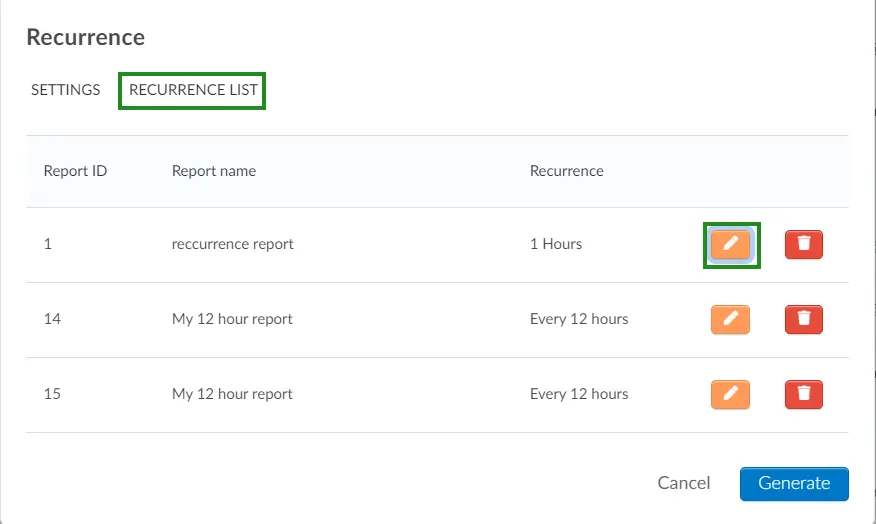
- Edit the Report name and Recurrence.
- Click on the corresponding blue icon to save the changes made