Integration with Microsoft Dynamics 365 (MSD)
 Updated 11 months ago
by
Chioma Okenwa
Updated 11 months ago
by
Chioma Okenwa
- Creating an Azure Active Directory Application
- Creating the Application User
- Adding your Microsoft Dynamics 365 credentials on InEvent
- Linking data between Microsoft Dynamics 365 and InEvent
This is a guide on how to connect with Microsoft Dynamics 365 Online tenant. To learn how to integrate with InEvent, read the following sections.
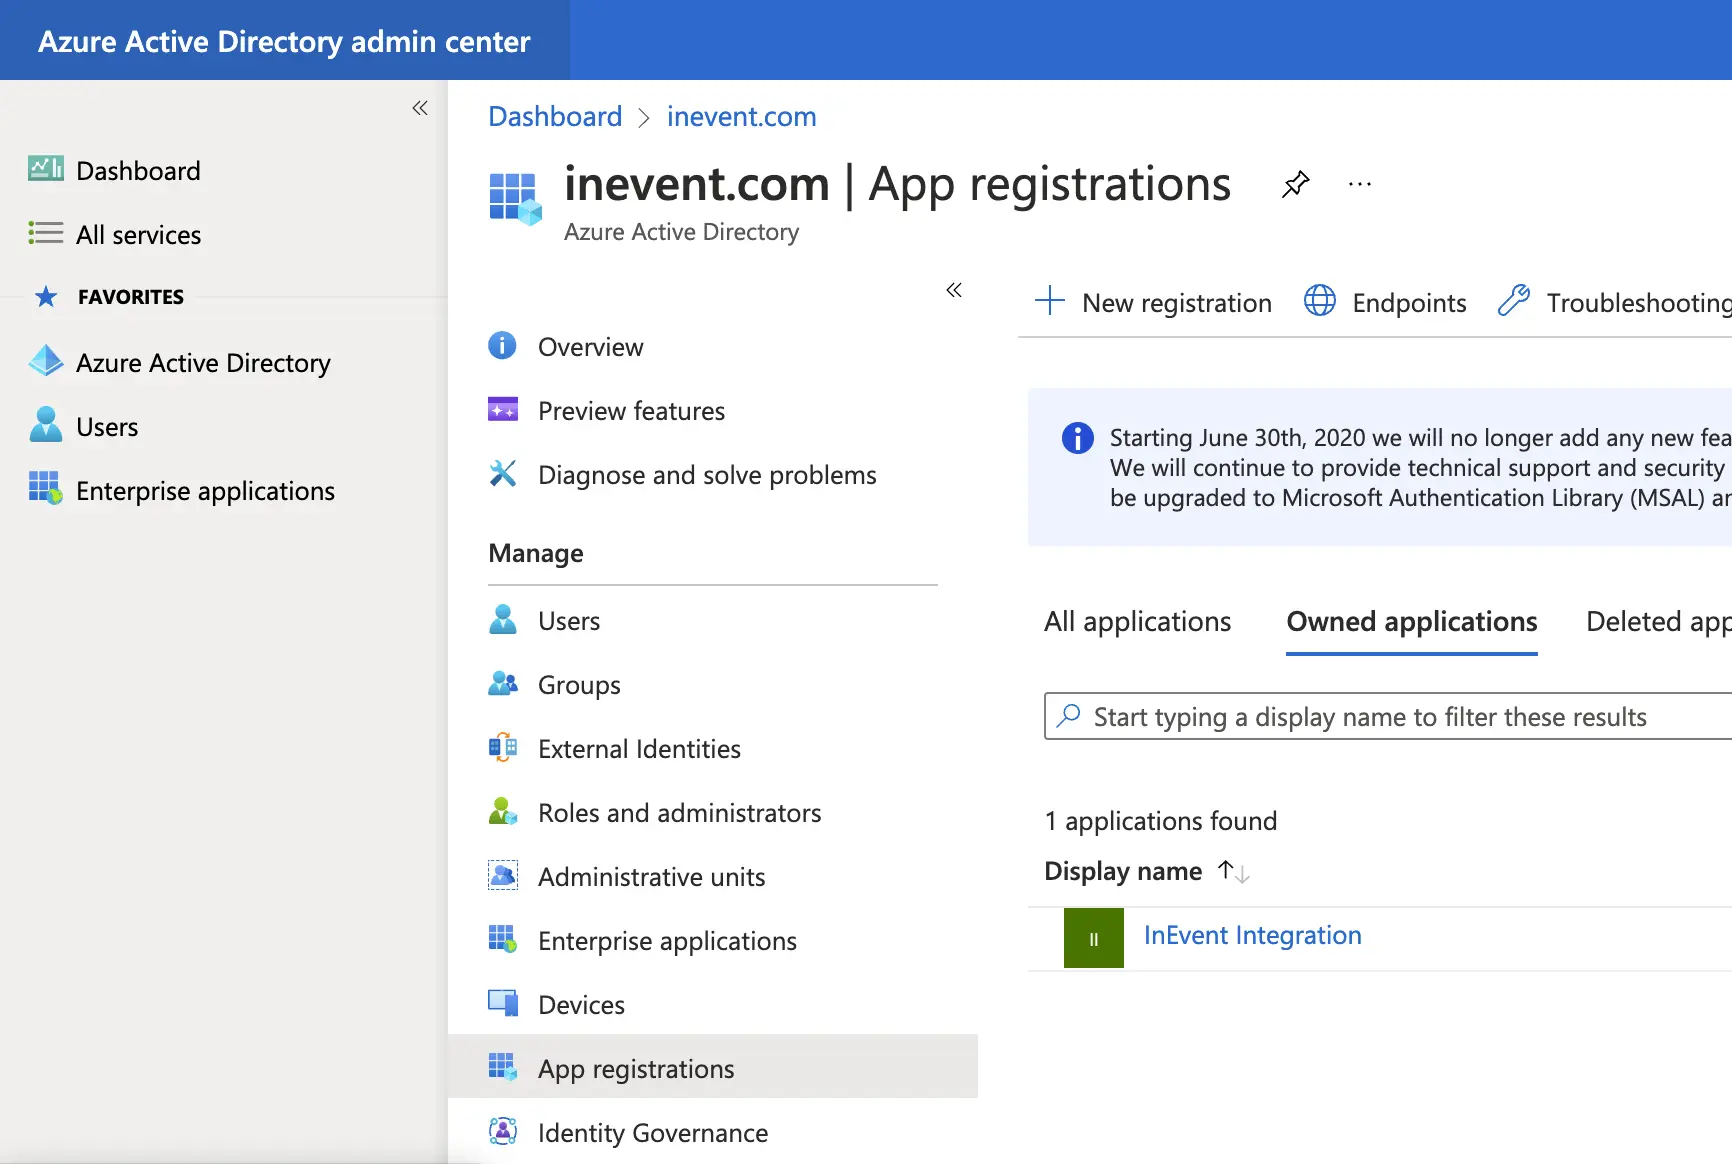
Creating an Azure Active Directory Application
Go to Azure Active Directory and select App Registrations:
Click on New registration, name it as InEvent Integration (feel free to select any name you prefer) and select the supported account types (in our case, it is Single Tenant - first checkbox). Leave Redirect URI empty:
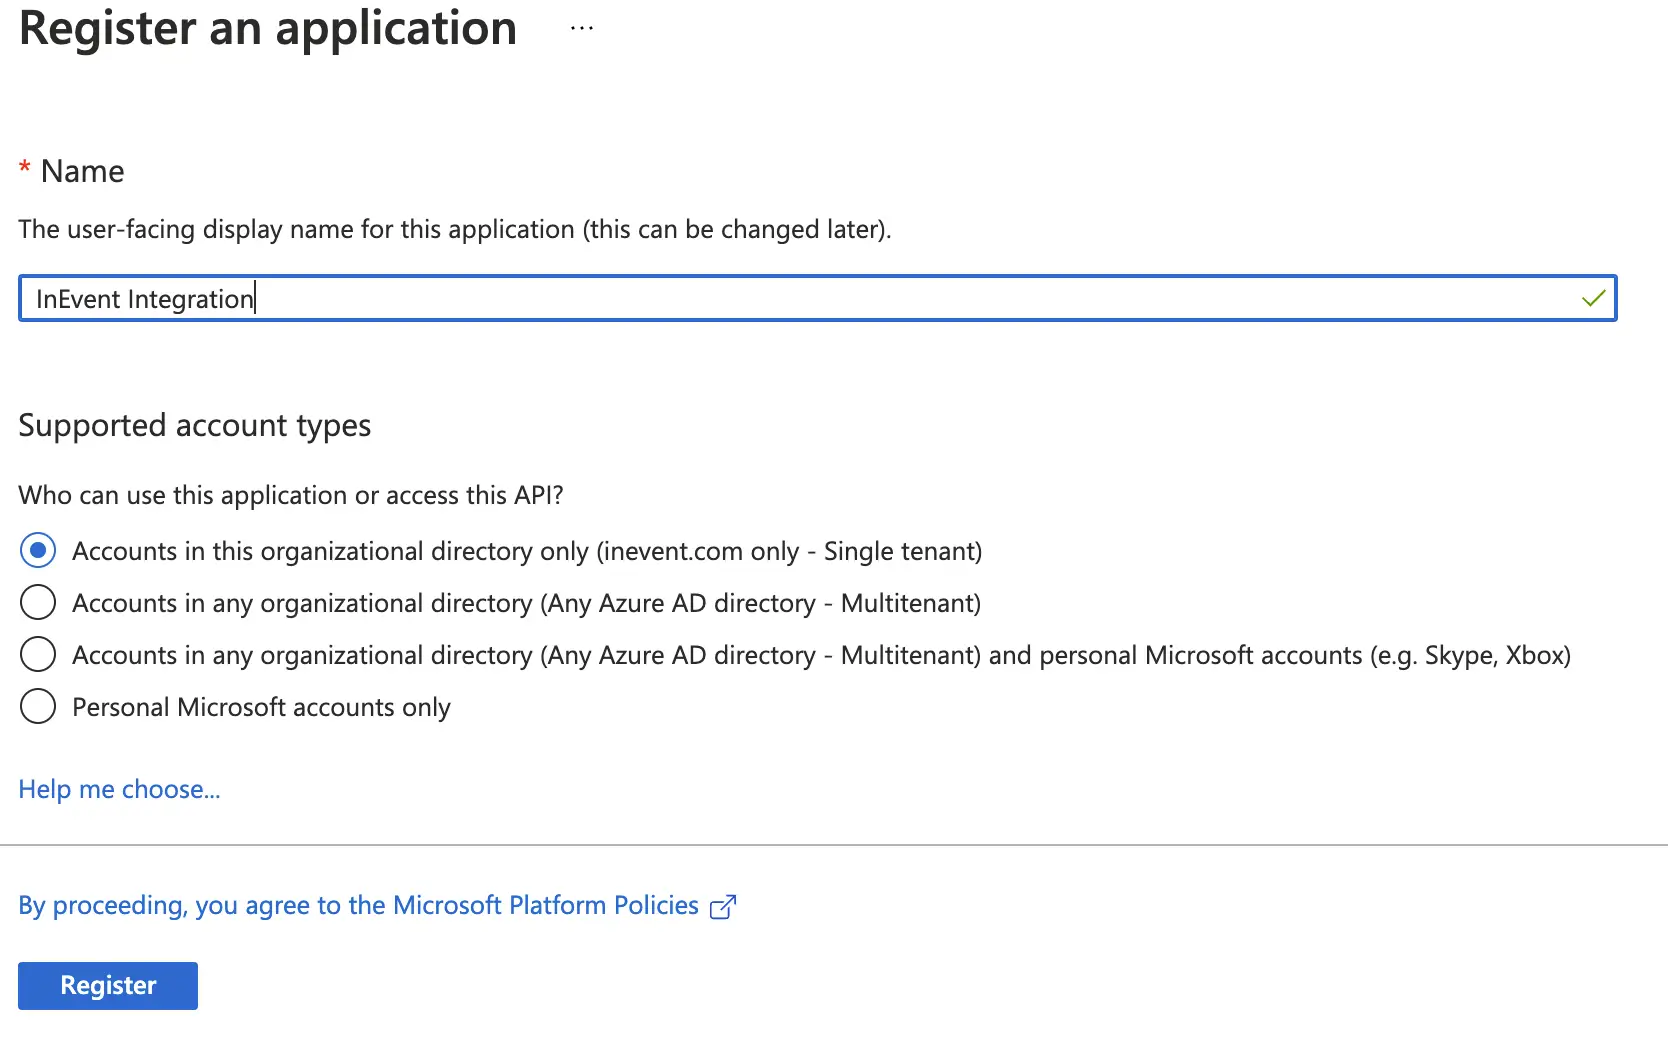
Once you have created it, open your application, copy the Application (client) ID (this will be your AAD Application ID) column value and save it for later:

Now go to Certificates & secrets and click on New client secret, give it a name and an expiration date:
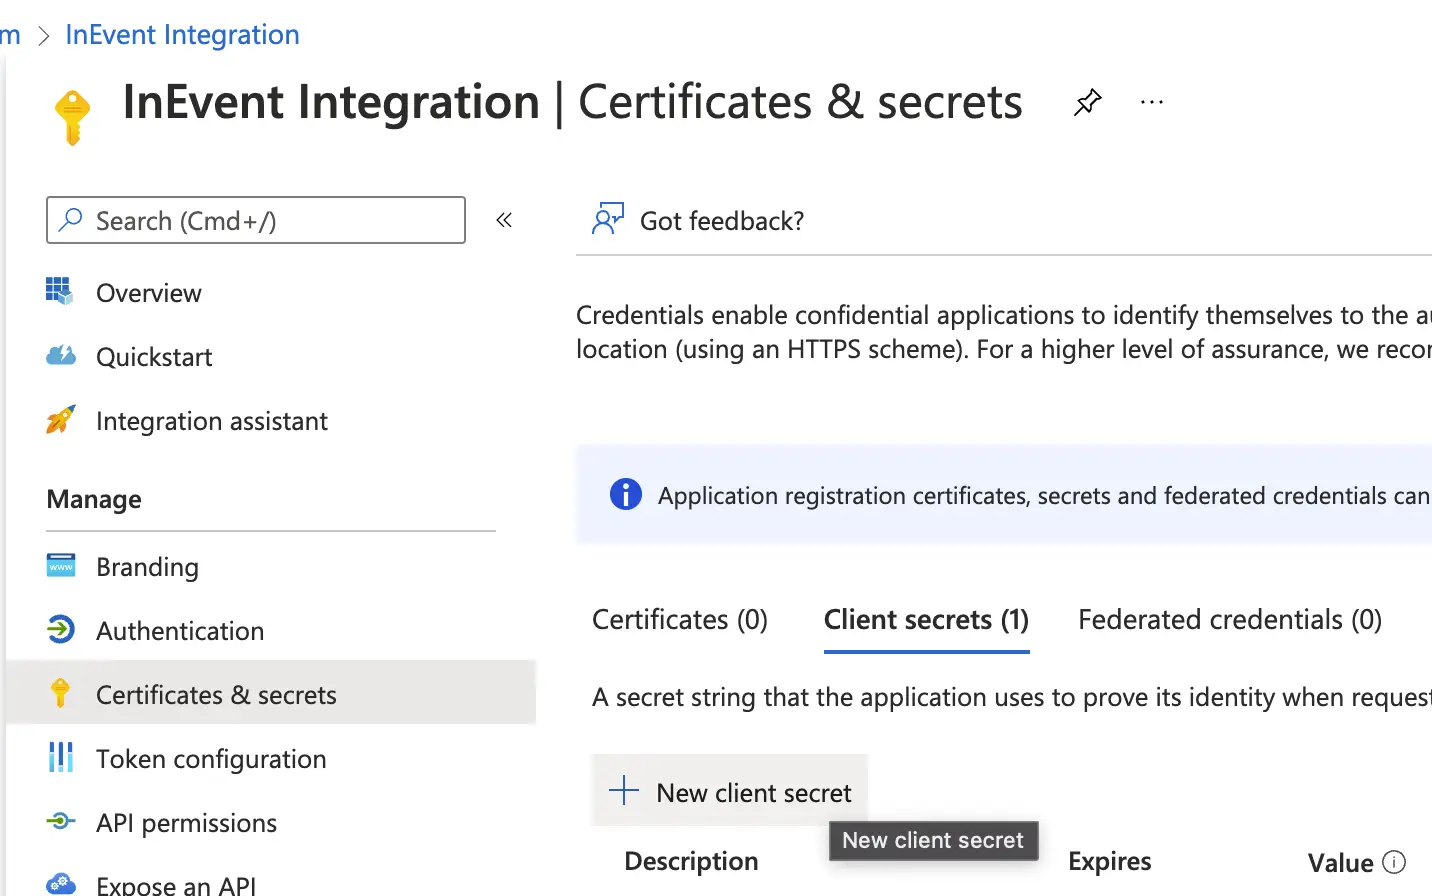
Once you have it created, copy the Value field (this will be your AAD Application Secret) and save it for later. Remember, this will be the only time you'll be able to view the certificate secret, so don't forget to copy it right now.
Creating the Application User
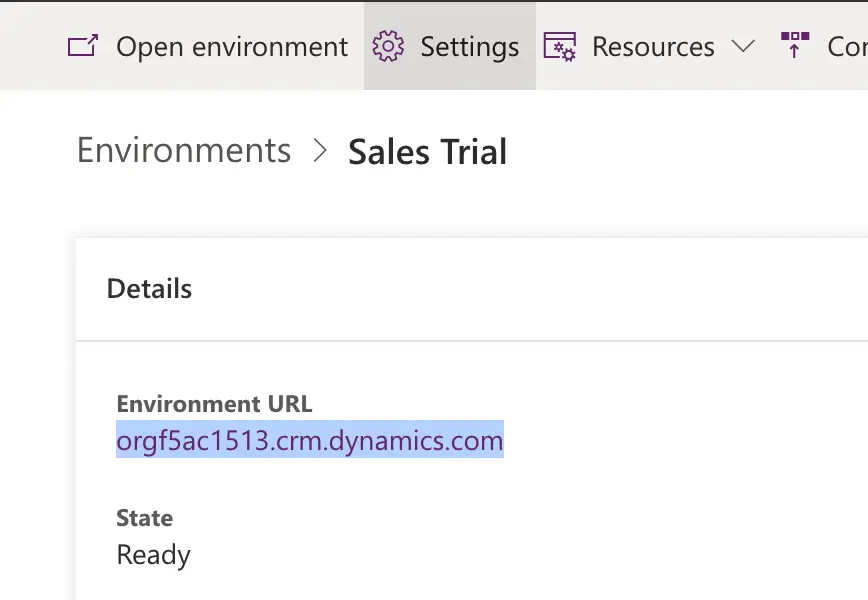
To create the Application User, go to Power Platform Admin Center and select your Dynamics 365 Marketing environment:
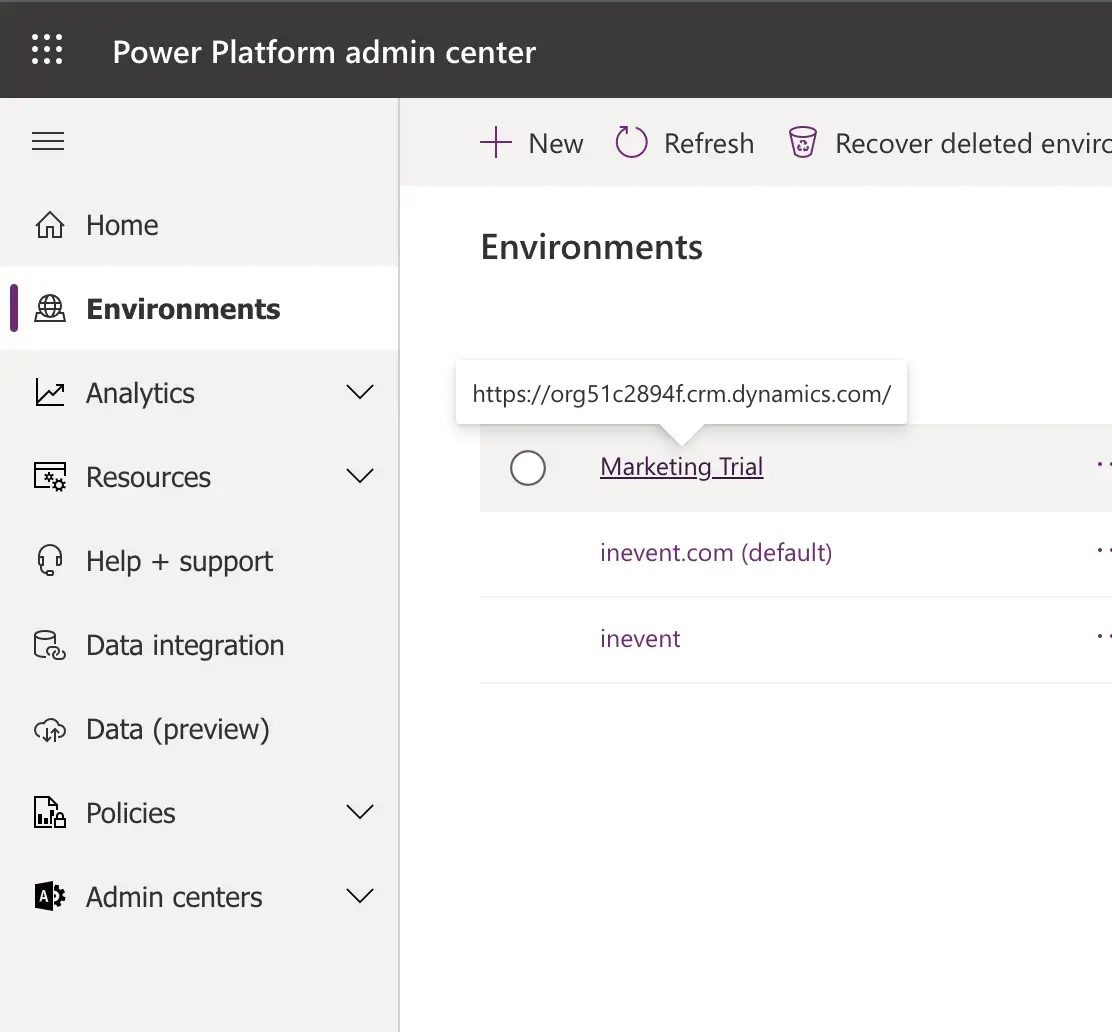
Copy the Environment URL (we will need it) and click on Settings:
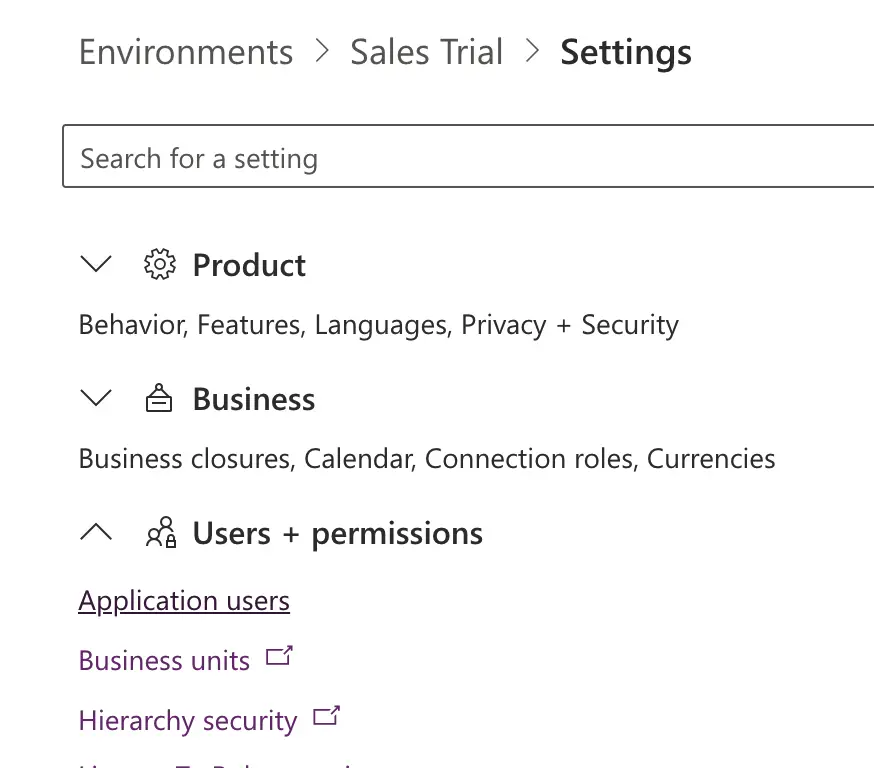
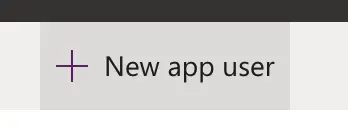
Select Users + permissions > Application users and then click on New app user:
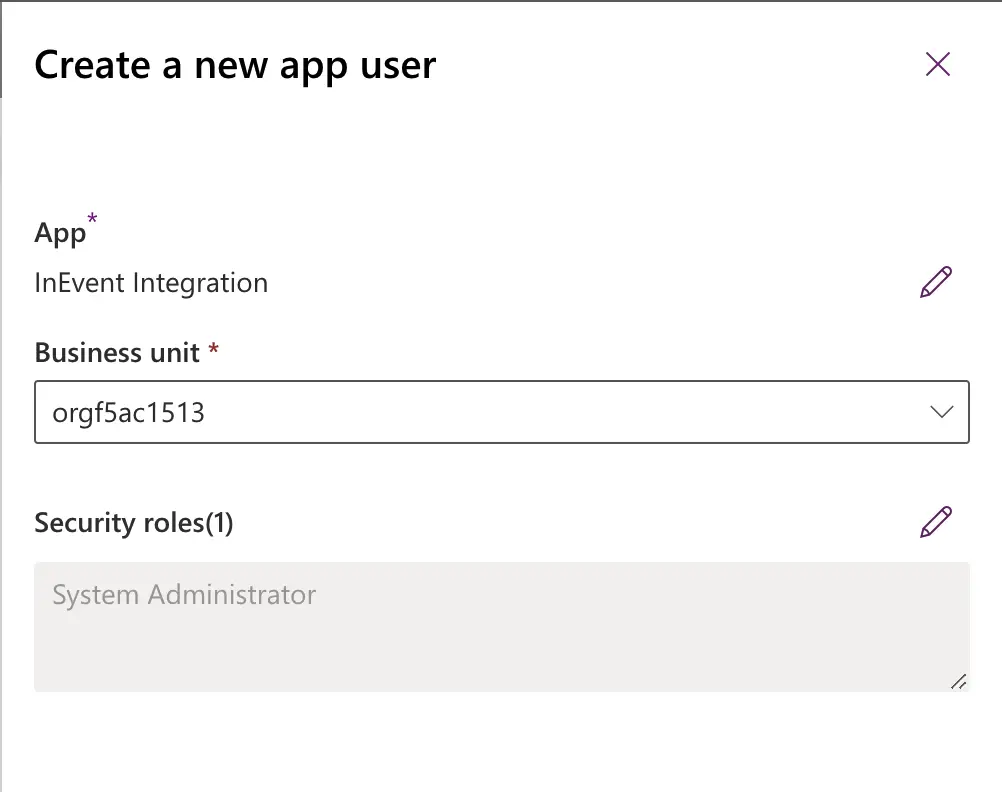
Click on Add an app and select the app you created in the previous section. On Business unit, select the id of your tenant and on Security roles, select System Administrator:
You are now ready to integrate your Dynamics 365 with InEvent!
Adding your Microsoft Dynamics 365 credentials on InEvent
To add your Microsoft Dynamics credentials on the InEvent platform, follow these steps:
- Go to the company level by clicking on your company logo at the top left of your page.
- Click on Integrations on the left-hand menu and select Microsoft Dynamics.
- Paste all required information you retrieved in the last two steps and click on Link account.
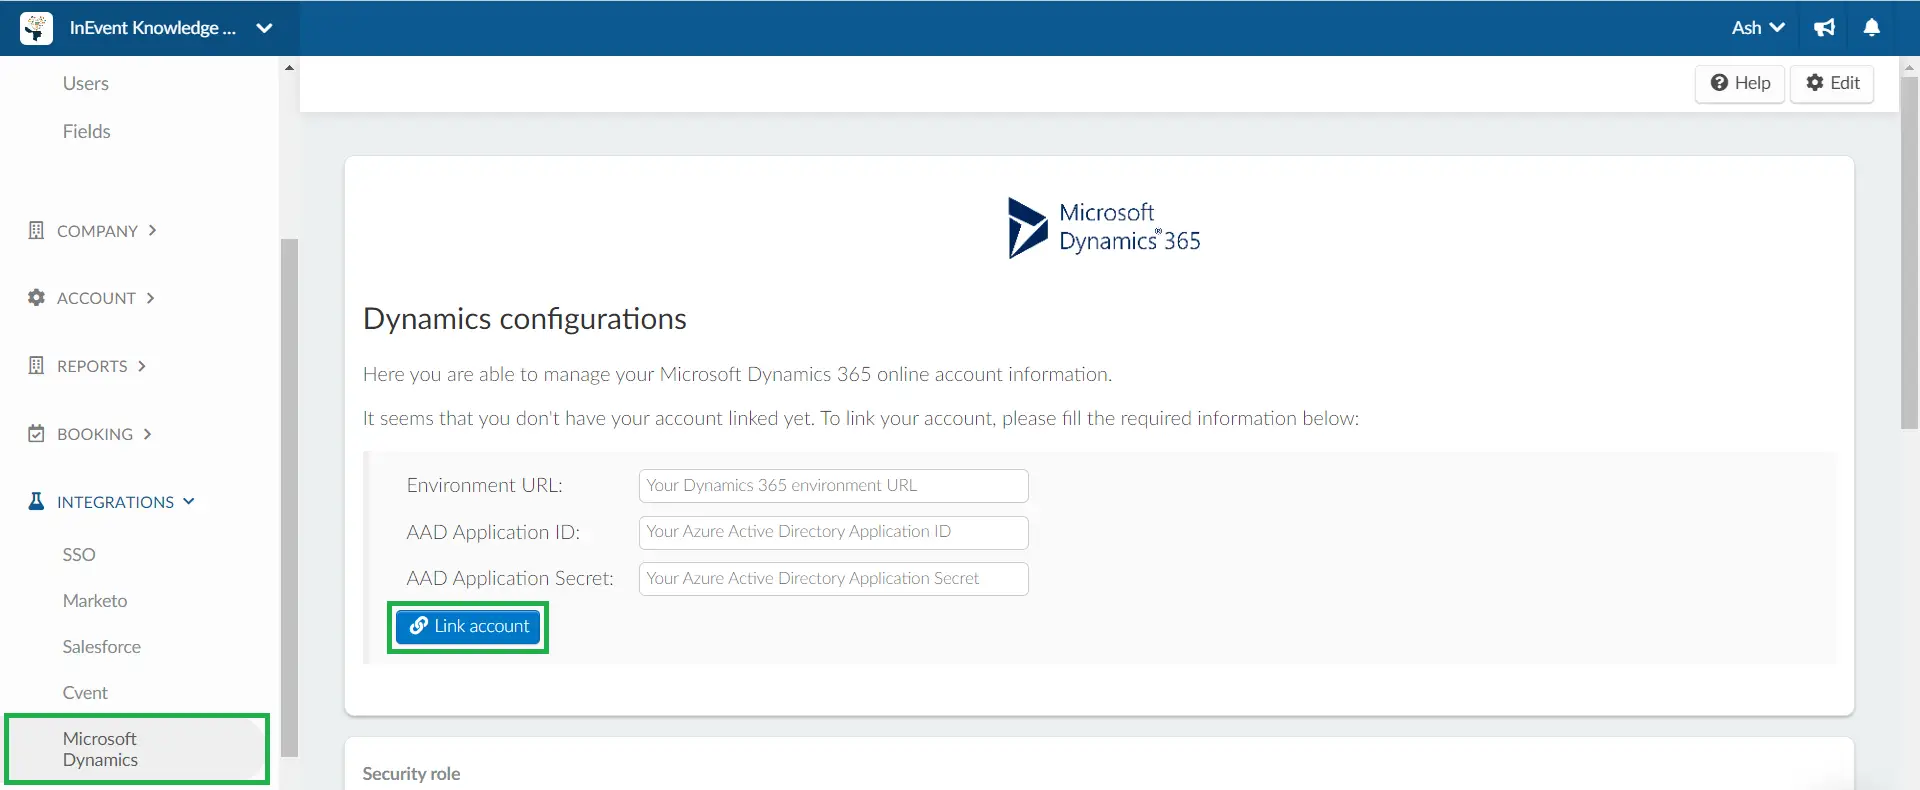
Done! You are all set.
Security role
If you decide to create your own security role for the credentials you have added to integrate your account with InEvent, you need to allow the following permissions for users listed below:
Item | Permissions | Level |
Core Records / Activity | Read | Business Unit |
Core Records / Contact | Create, Read, Write, Delete, Append To | Business Unit |
Core Records / Lead | Create, Read, Write, Delete, Append To | Business Unit |
Core Records / Note | Create, Read, Write, Delete, Append, Append To | Business Unit |
Business Management / User Settings | Read | Business Unit |
Marketing / Marketing List | Read, Append, Append To | Business Unit |
Customization / Entity | Read | Organization |
Customization / Field | Read | Organization |
Customization / Process | Read | Organization |
Customization / Relationship | Read | Organization |
Customization / System Job | Read | Organization |
Customization / Web Resource | Read | Organization |
Custom Entities / Attendee Pass | Create, Read, Write, Delete, Append, Append To | Business Unit |
Custom Entities / Check-in | Create, Write, Delete | Business Unit |
Custom Entities / Custom Registration Field | Create, Read, Write, Delete, Append, Append To | Business Unit |
Custom Entities / Event | Create, Read, Write, Delete, Append, Append To | Business Unit |
Custom Entities / Event administration | Create, Read, Write, Delete, Append, Append To | Business Unit |
Custom Entities / Event Custom Registration Field | Create, Read, Write, Delete, Append, Append To | Business Unit |
Custom Entities / Event Management Activity | Create, Read, Write, Delete, Append, Append To | Business Unit |
Custom Entities / Event Registration | Create, Read, Write, Delete, Append, Append To | Business Unit |
Custom Entities / Registration Response | Create, Read, Write, Delete, Append, Append To | Business Unit |
Custom Entities / Room Reservation | Create, Read, Write, Delete, Append, Append To | Business Unit |
Custom Entities / Session | Create, Read, Write, Delete | Business Unit |
Custom Entities / Session Track | Create, Read, Write, Delete | Business Unit |
Custom Entities / Solution Component Summary | Read | Organization |
Custom Entities / Speaker Engagement | Create, Read, Write, Delete, Append, Append To | Business Unit |
Custom Entities / Waitlist Item | Create, Read, Write, Delete | Business Unit |
Custom Entities / Website table configuration | Read | Business Unit |
Linking data between Microsoft Dynamics 365 and InEvent
Once you have added your Microsoft Dynamics credentials on the InEvent platform by following the steps here, you will be able to easily sync data between Microsoft Dynamics 365 and InEvent.
There are different places where data can be linked between InEvent and Microsoft Dynamics:
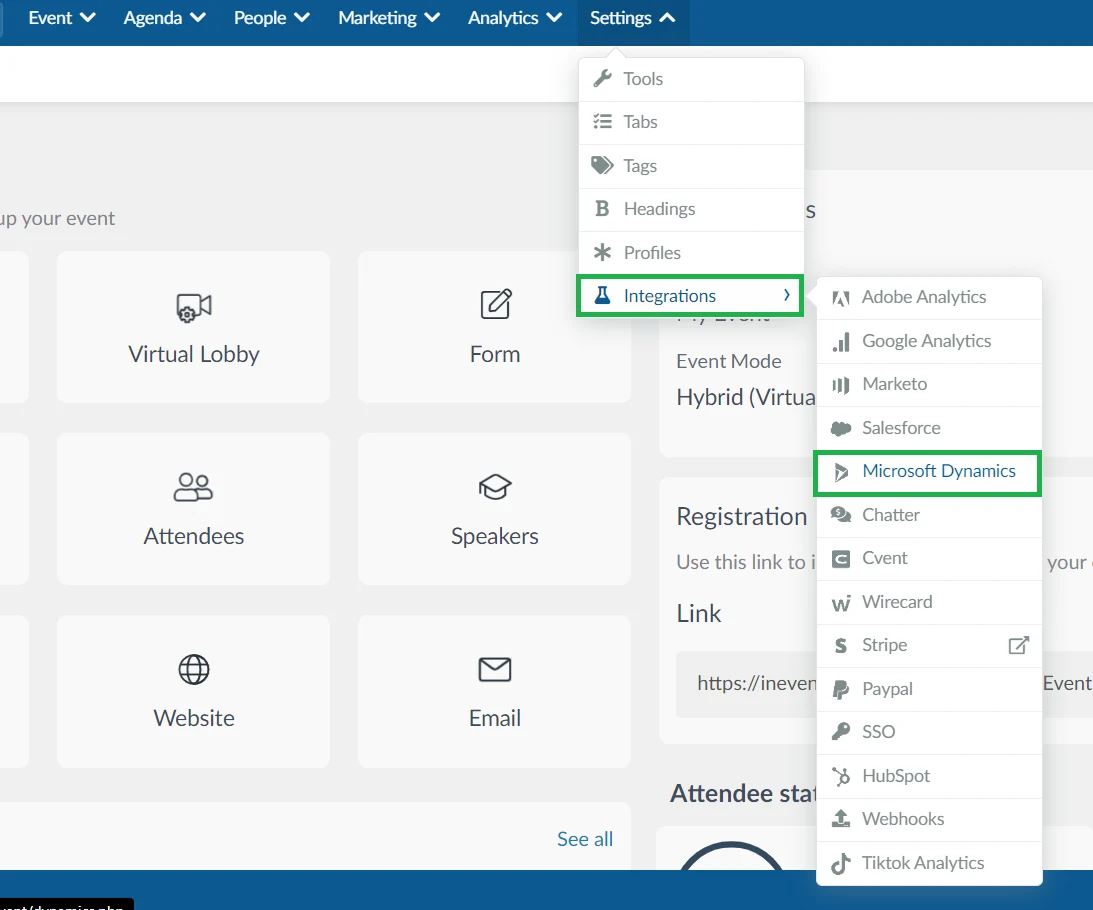
To link InEvent fields with Dynamic fields as well as create and export new events, navigate to Settings > Integrations > Microsoft Dynamics.
On this page, you can link the following items to be synchronized:
- Event
- Fields
- Event fields
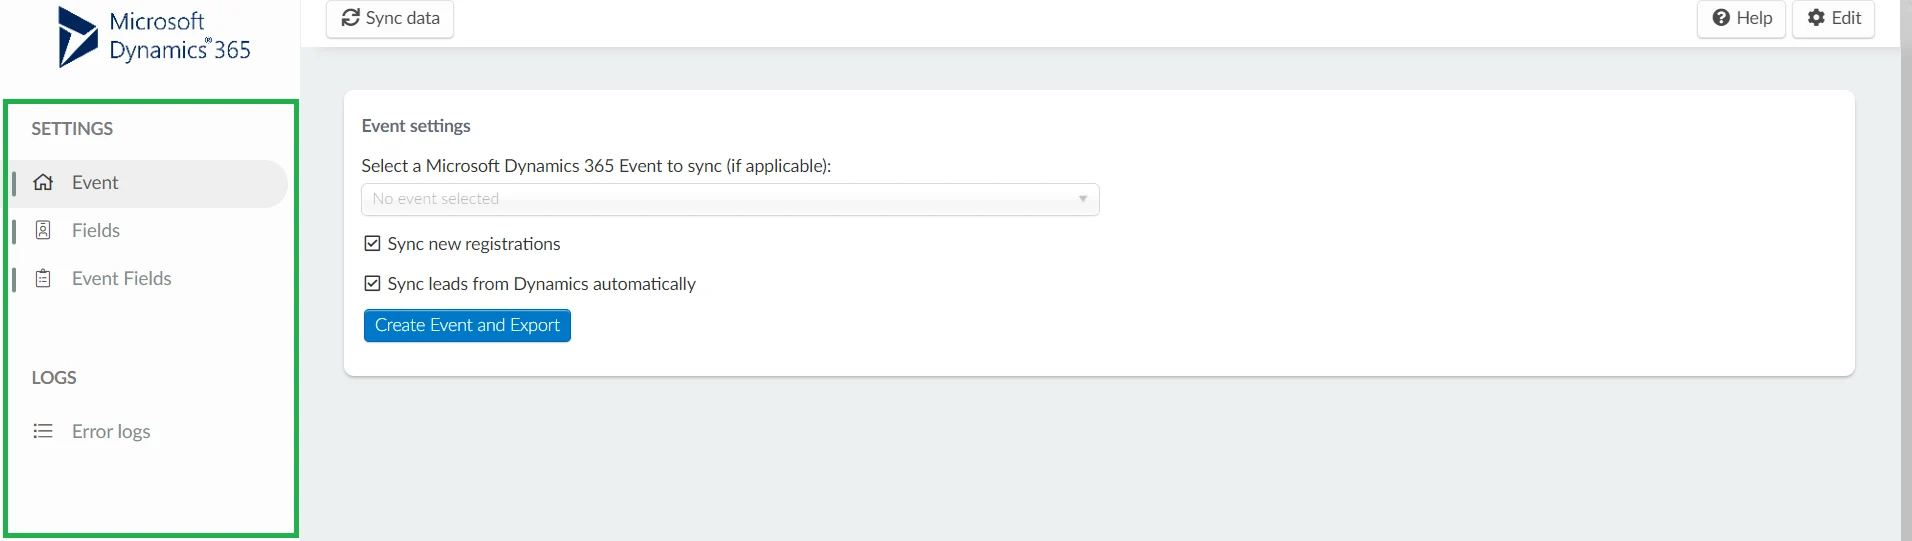
Event
On this page, you can select a Dynamics event to be synced with InEvent. Below are the available options:
Event settings
- Select a Microsoft Dynamics 365 Event to sync (if applicable): Using the drop-down box, select an existing Microsoft Dynamics event to be synchronized with your event.
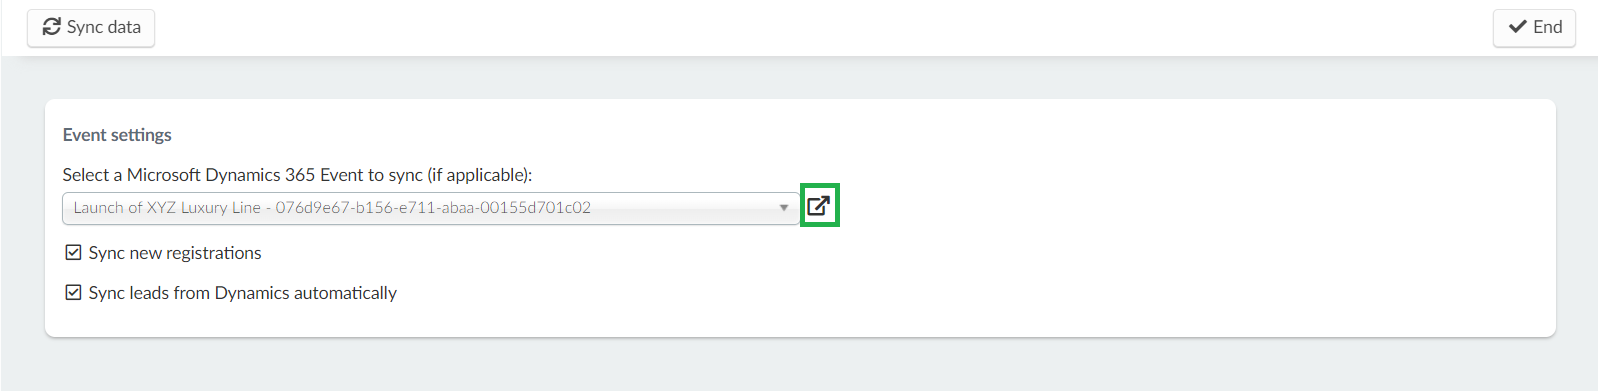
- Sync new registrations: Using the checkbox, enable or disable automatic synchronization of new data/users from InEvent to Microsoft Dynamics.
- Sync leads from Dynamics automatically: Using the checkbox, enable or disable automatic synchronization of data from Dynamics to InEvent.
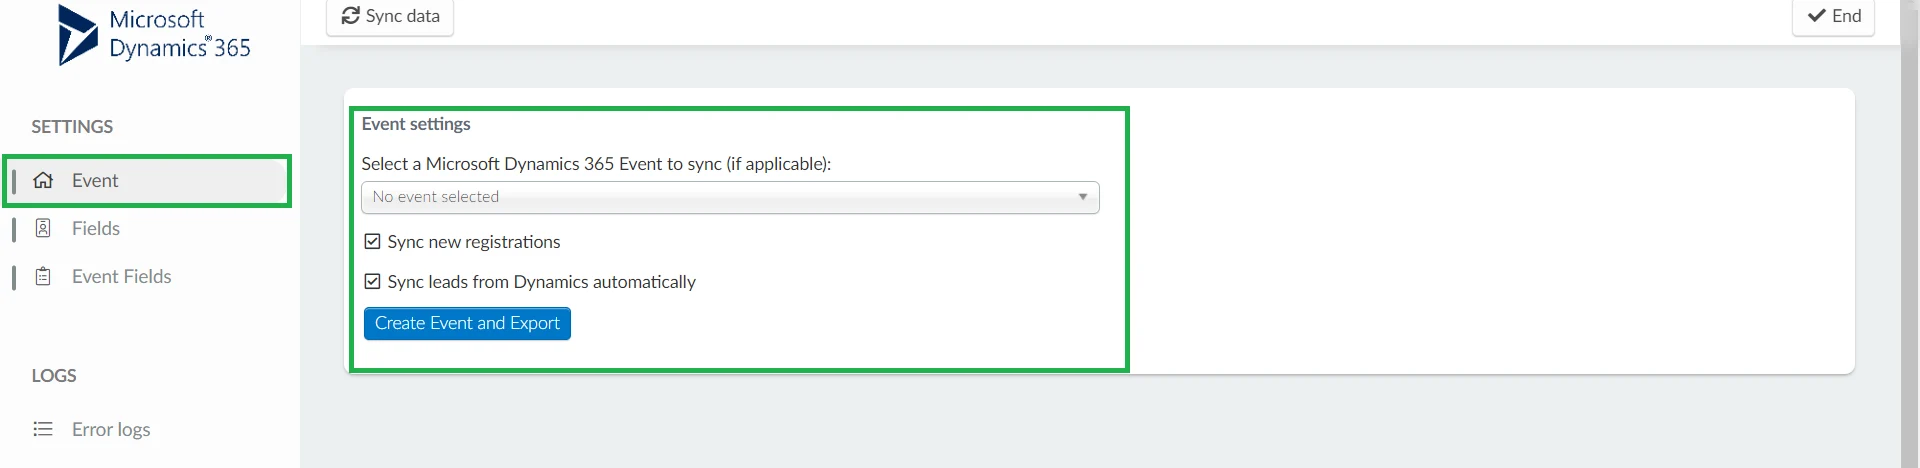
- Create Event and Export: This button will appear if no Microsoft Dynamics event is selected. You can create a new Dynamics event based on your InEvent event details. Click on the Create Event and Export button and click Export. After the event is created and its details exported to Microsoft Dynamics, you can select it using the Select a Microsoft Dynamics 365 Event to sync drop-down box.

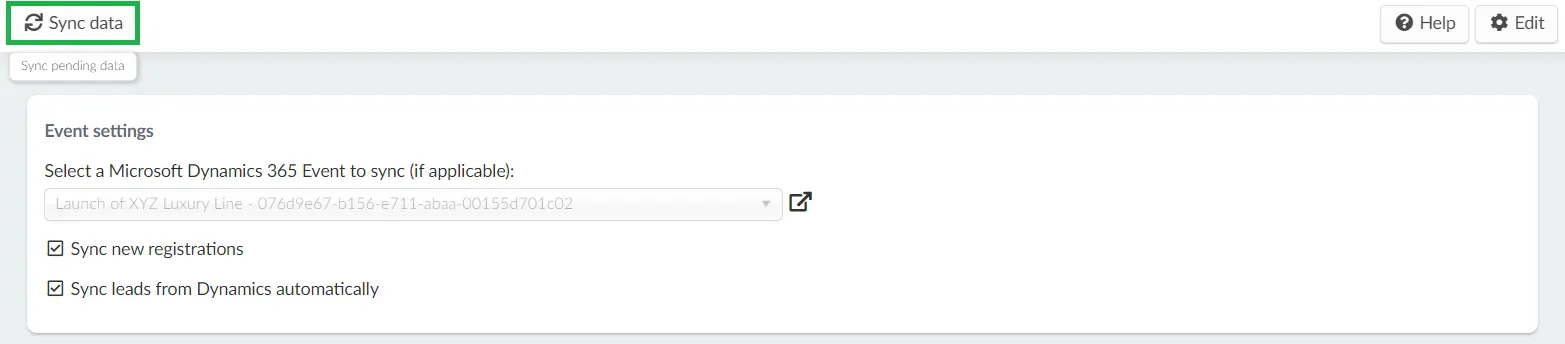
To automatically start synchronizing data between Microsoft Dynamics and InEvent, click on the Sync data button on the top left corner.
Fields
In this section, you can manage your Fields settings and map InEvent fields to your Microsoft Dynamics fields.
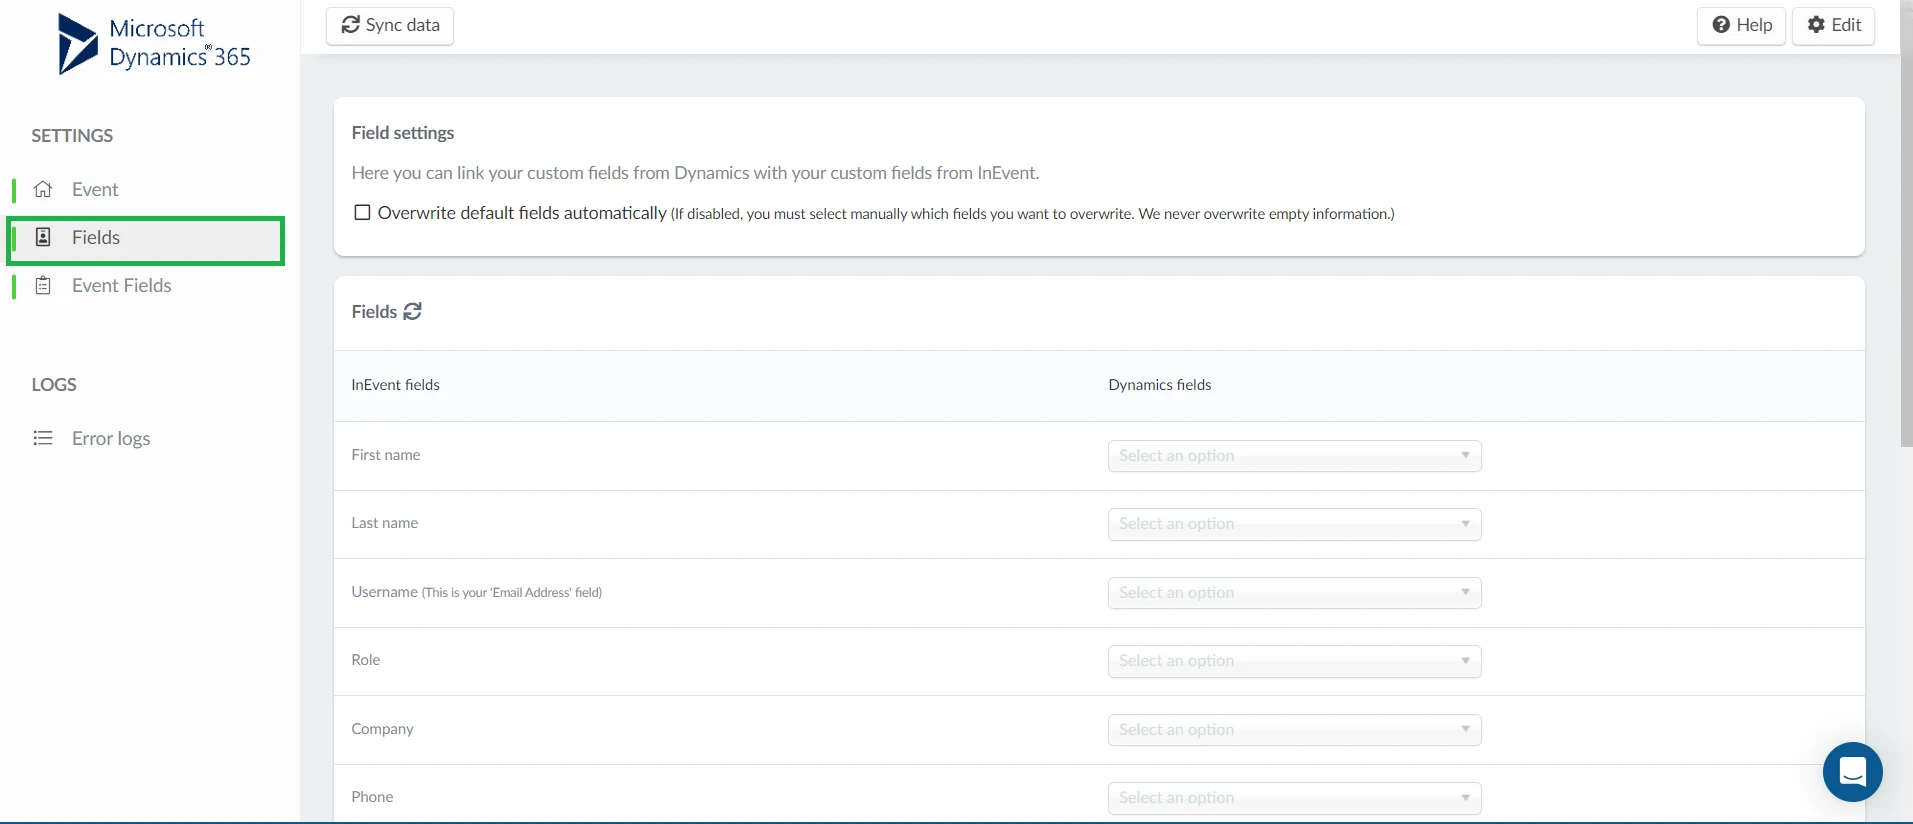
Field Settings
Using the checkbox, select whether you want to automatically overwrite default fields.

- If Overwrite default fields automatically is enabled, InEvent will automatically detect and map new entries from Microsoft Dynamics. Therefore, some fields will not appear in the InEvent Fields interface.
- If Overwrite default fields automatically is disabled, you must manually select the fields to be overwritten.
Synchronizing Fields
You can easily map and link your Dynamics fields to InEvent fields using the drop-down boxes.
The InEvent fields you can link with Dynamics fields are listed below:
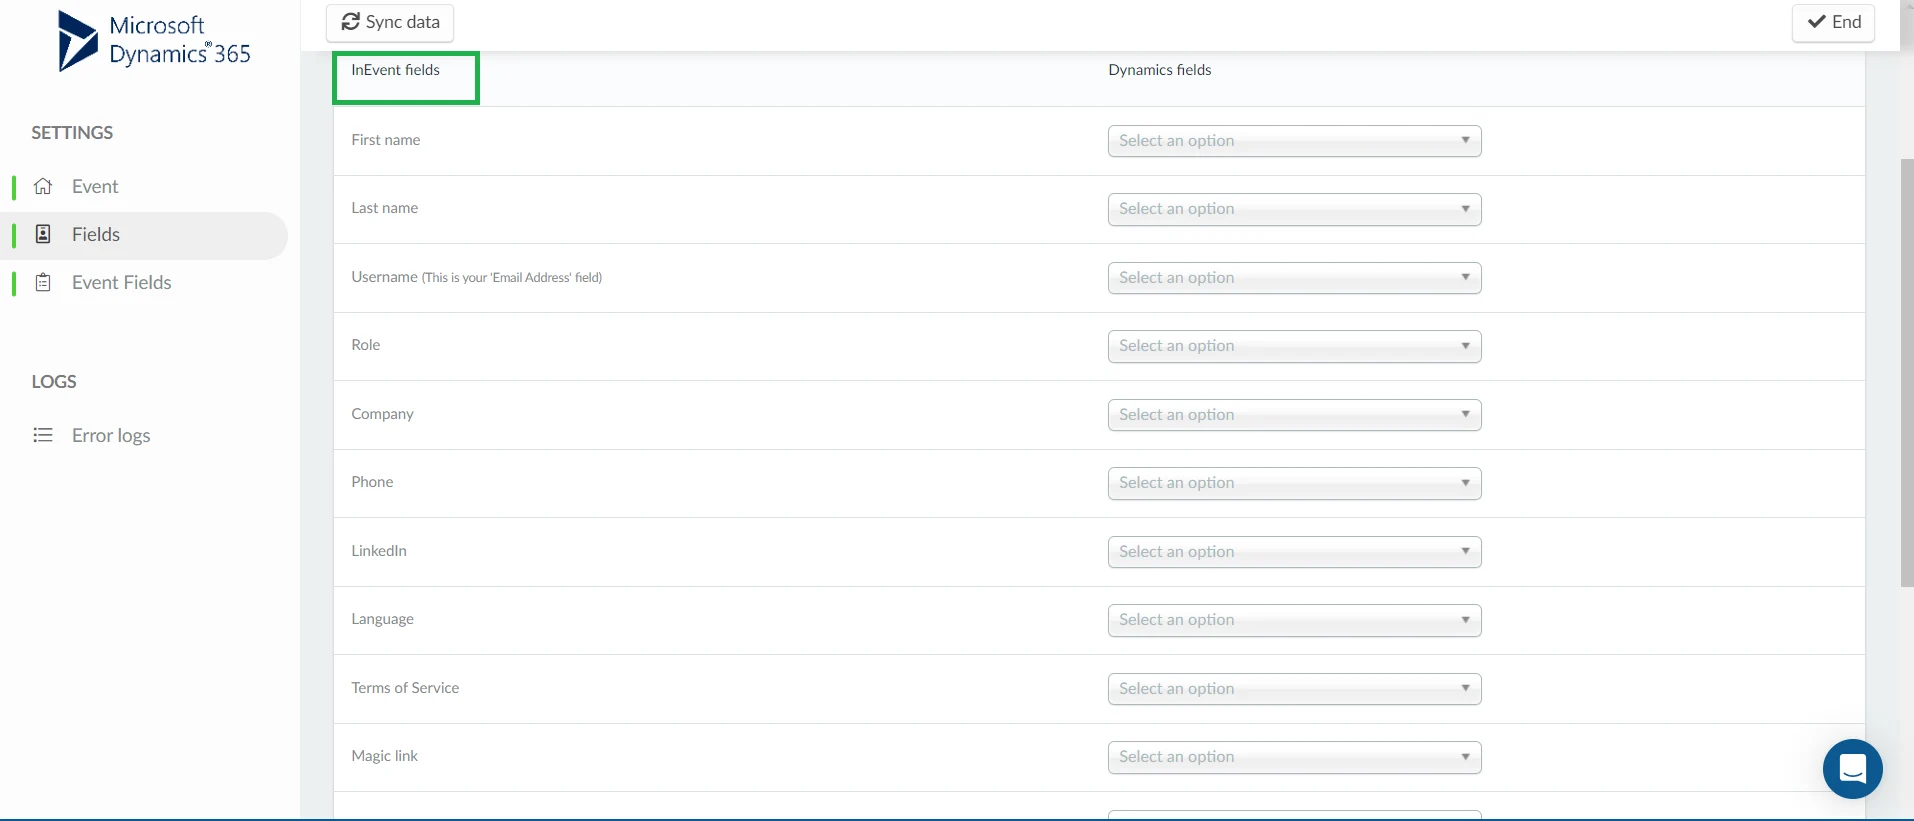
- First name
- Last name
- Username (Email Address)
- Role
- Company
- Phone
- Language
- Terms of Service
- Magic link
- Enrollment date
- Present
- Total Time Spent
- Custom questions in your Registration form

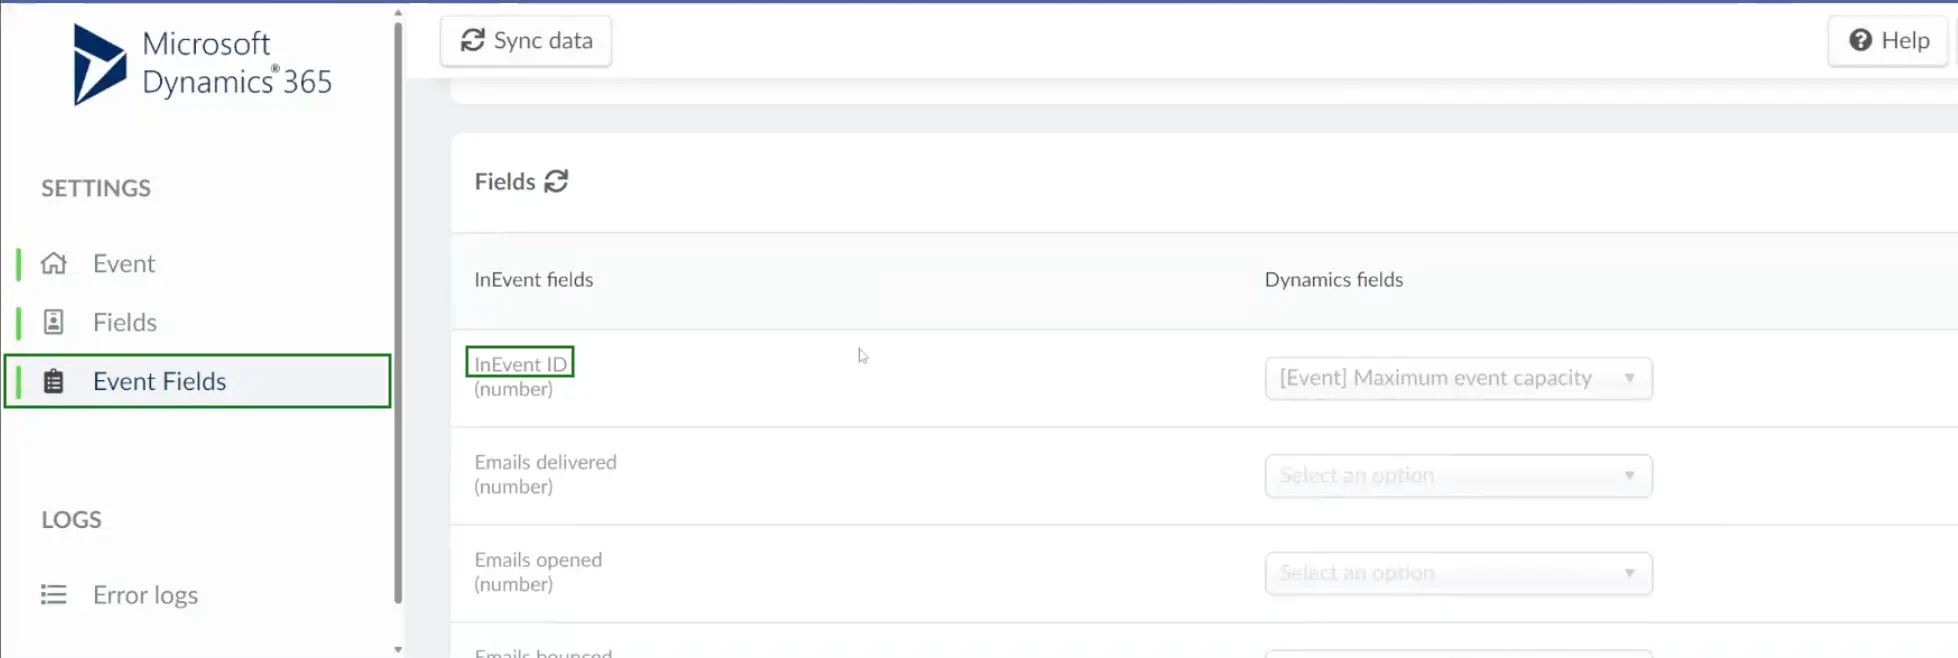
Event fields
On this page, you can map and link your Dynamics custom fields with InEvent Event fields using the drop-down boxes.
The Event fields you can map with MS Dynamics fields are listed below:
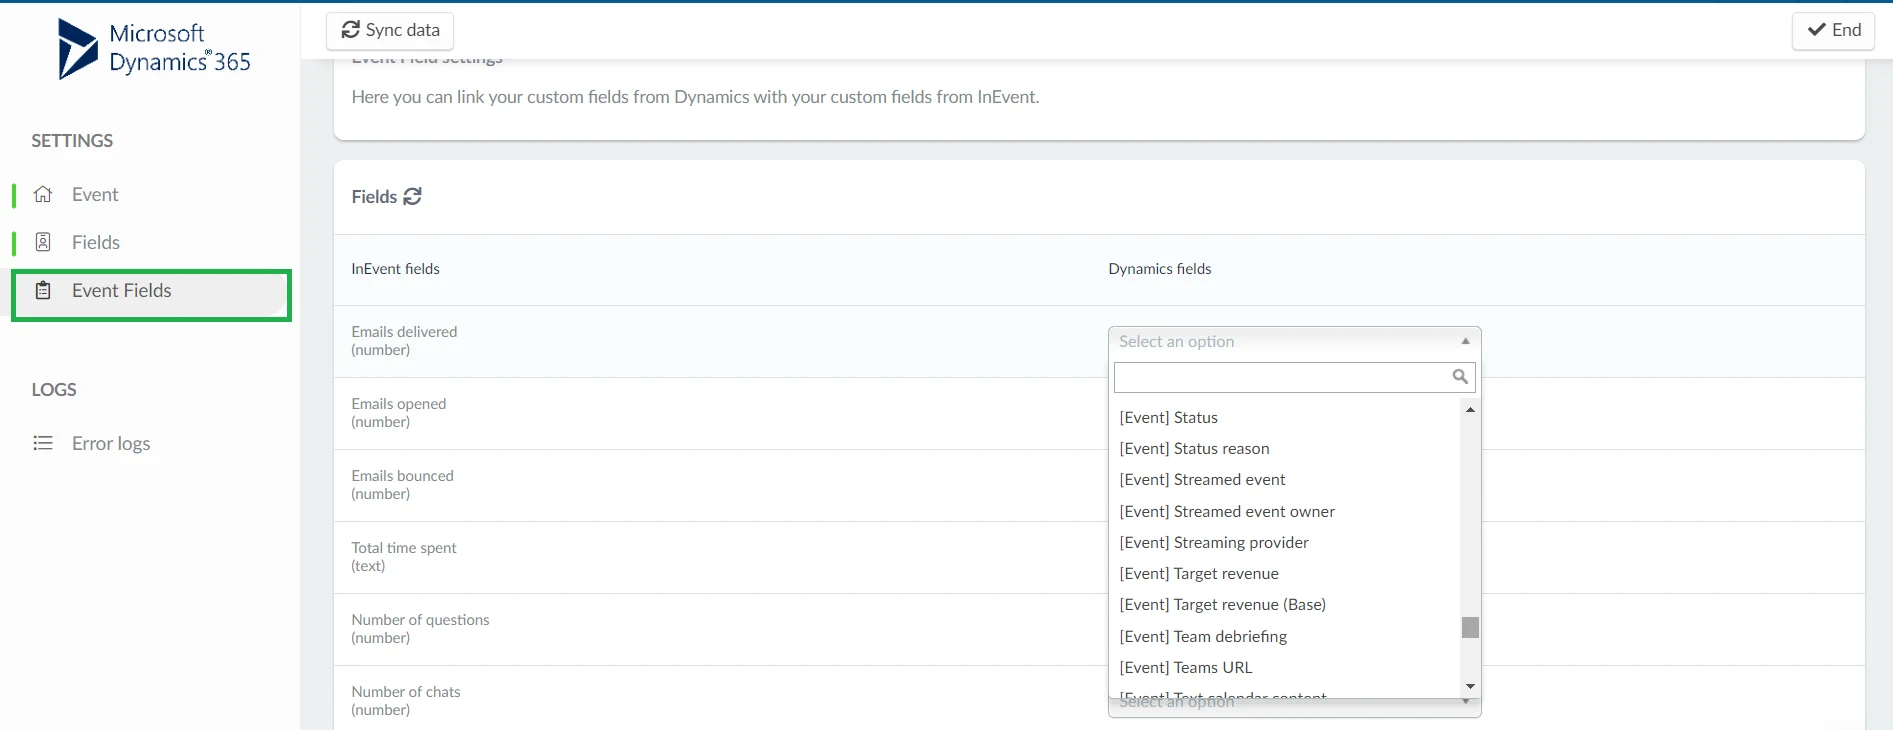
- Emails delivered (number): map this field with a custom dynamic field to show the number of delivered emails within the event in the Dynamics environment.
- Emails opened (number): map this field with a custom dynamic field to show the number of opened emails within the event in the Dynamics environment.
- Emails bounced (number): map this field with a custom dynamic field to show the number of bounced emails within the event in the Dynamics environment.
- Total time spent (text): map this field with a custom dynamic field to show the total time spent within an event in the Dynamics environment.
- Number of questions (number): map this field with a custom dynamic field to show the total number of questions asked within the event in the Dynamics environment.
- Number of chats (number): map this field with a custom dynamic field to show the total number of chats sent within the event in the Dynamics environment.
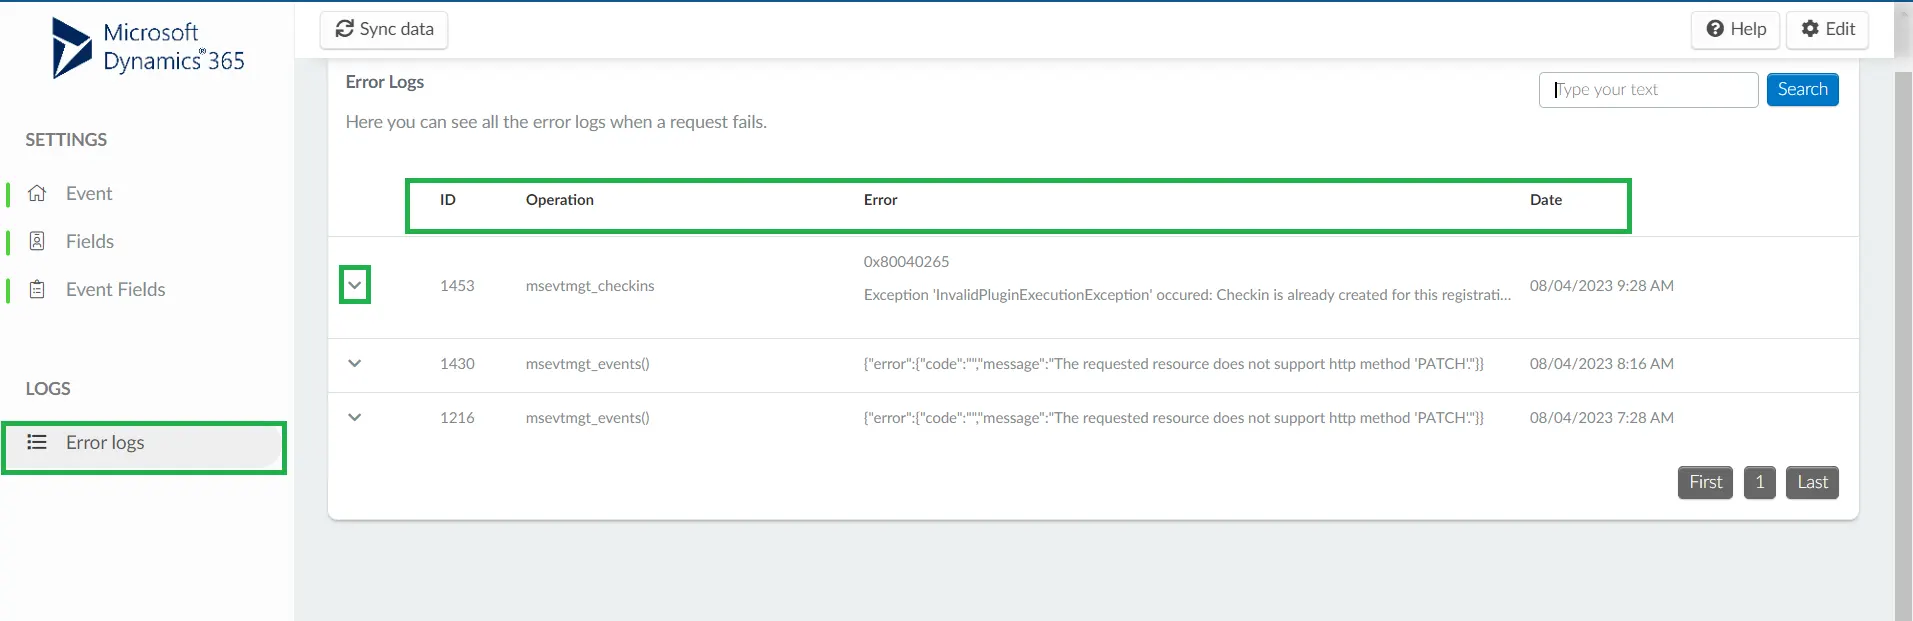
Error logs
On this page, you will find error logs of failed requests. The dashboard will display the ID, Operation, Error, Date (time and date of failed request). You can expand and close the error logs by clicking on the arrow button by the left side of each error. You can also search for an error log using the search box.
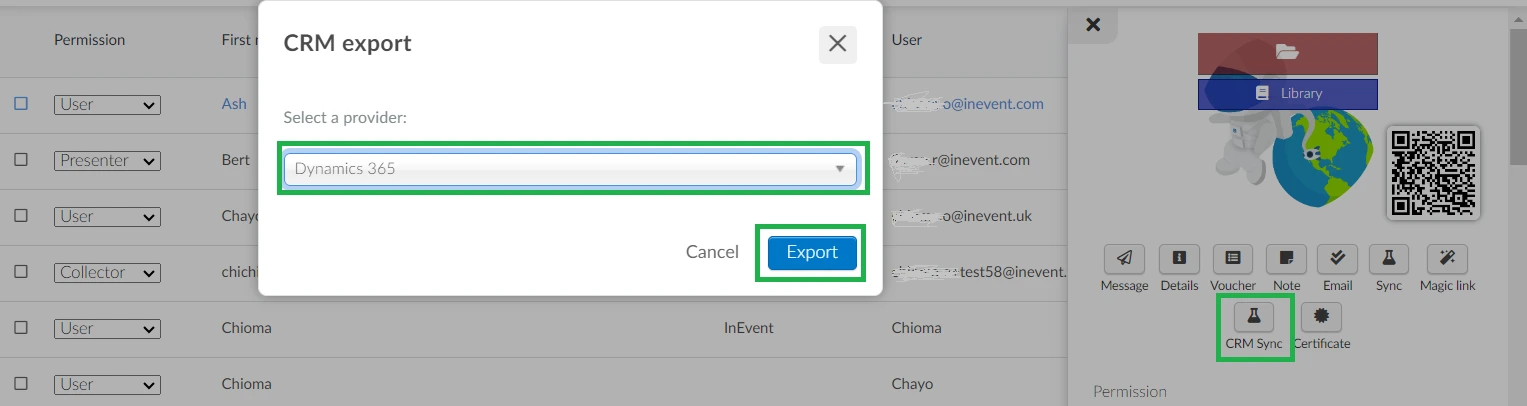
Synchronizing user data with Microsoft Dynamics
To manually synchronize user data from InEvent with MS Dynamics, go to the People > Attendees page, where you can sync data such as attendee registration, check-in status, questions, and chats from live sessions in the Virtual Lobby, etc. Simply click on a user, click on the CRM sync button, and select Dynamic 365 from the dropdown menu. Next, click Export to complete the sync.
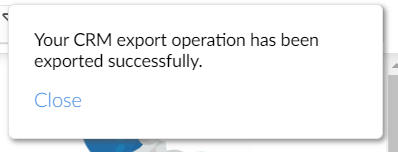
After you have done this, you will receive a notification on the platform when the data exportation has been completed.
Syncing additional event data
Along with the attendee data, you can also send the following pieces of event-related information to Microsoft Dynamics:
- Event ID: The unique identifier for the event in Microsoft Dynamics.
- "Originating event" on the Contact: This links the contact to the event they attended or were associated with in Dynamics.
- Owner of the Contact: Specifies the individual or team responsible for the contact in your Microsoft Dynamics instance.
Accessing event data on Microsoft Dynamics
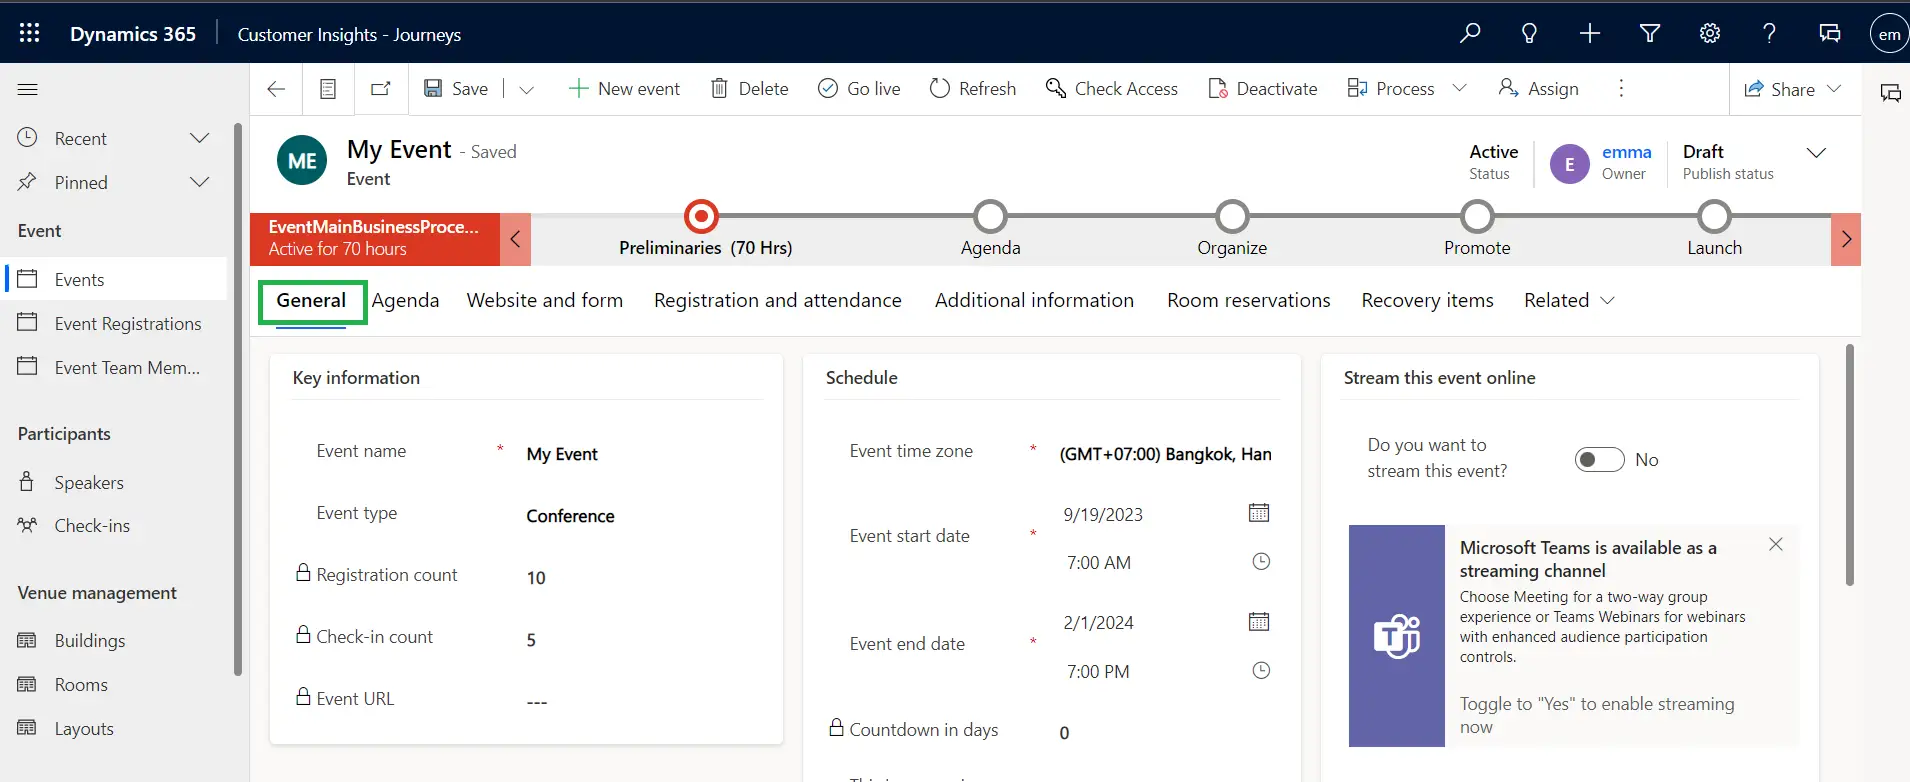
To access your event's data on Microsoft Dynamics, go to your Dynamics 365 account > Events > select your synced event.

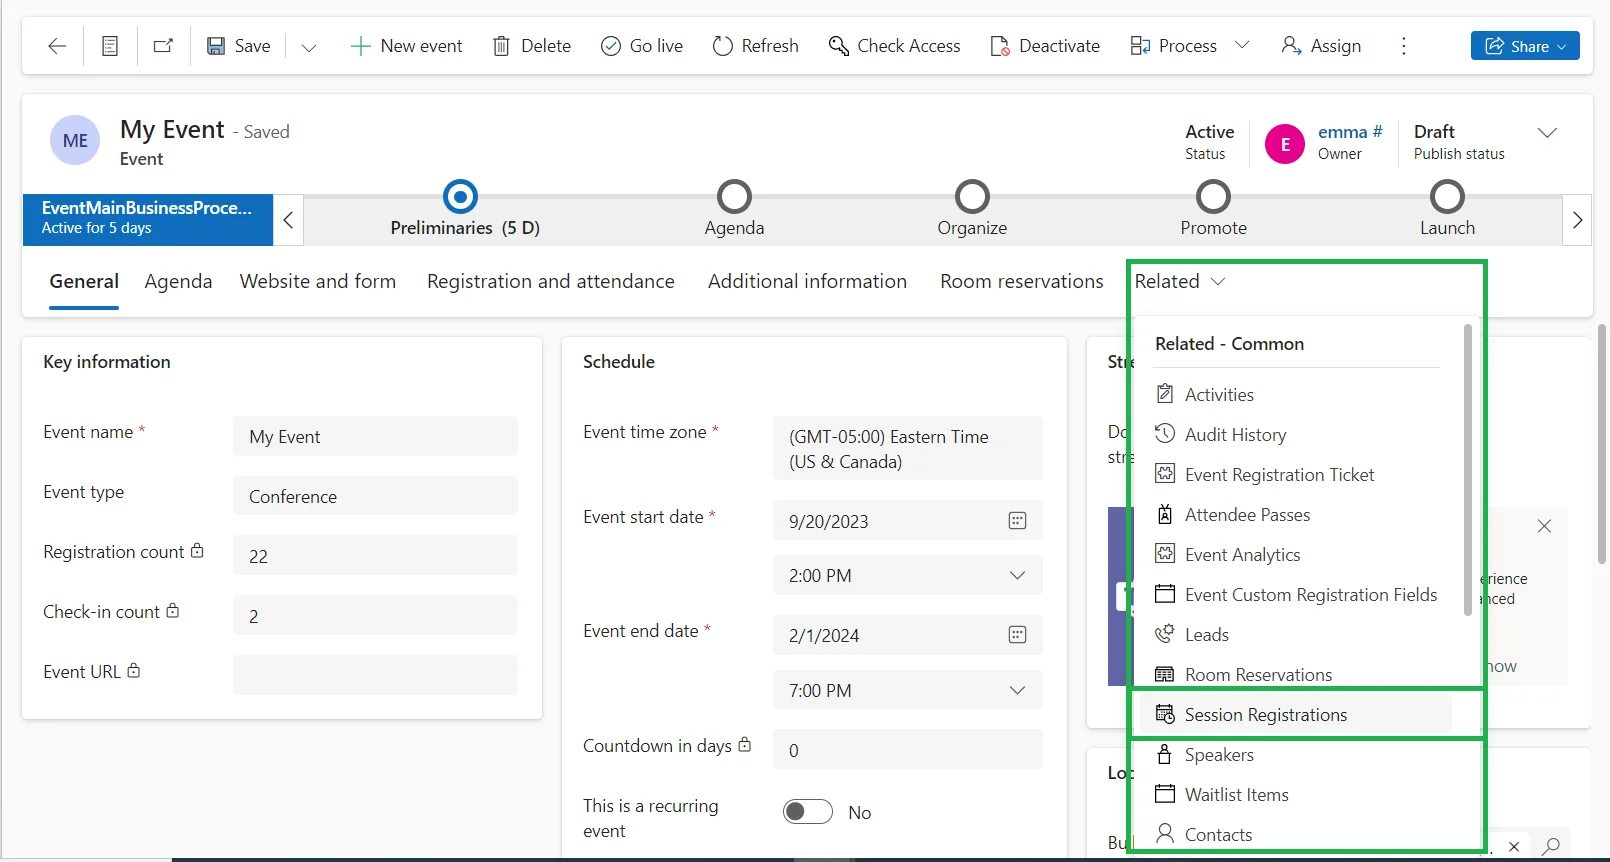
In the General page, you will see a summary of your synced event such as Registration count (attendees that have been synced from InEvent's platform), Check-In count (attendees with the Present status on InEvent's platform), Event time zone, Event start date, Event end date, etc.
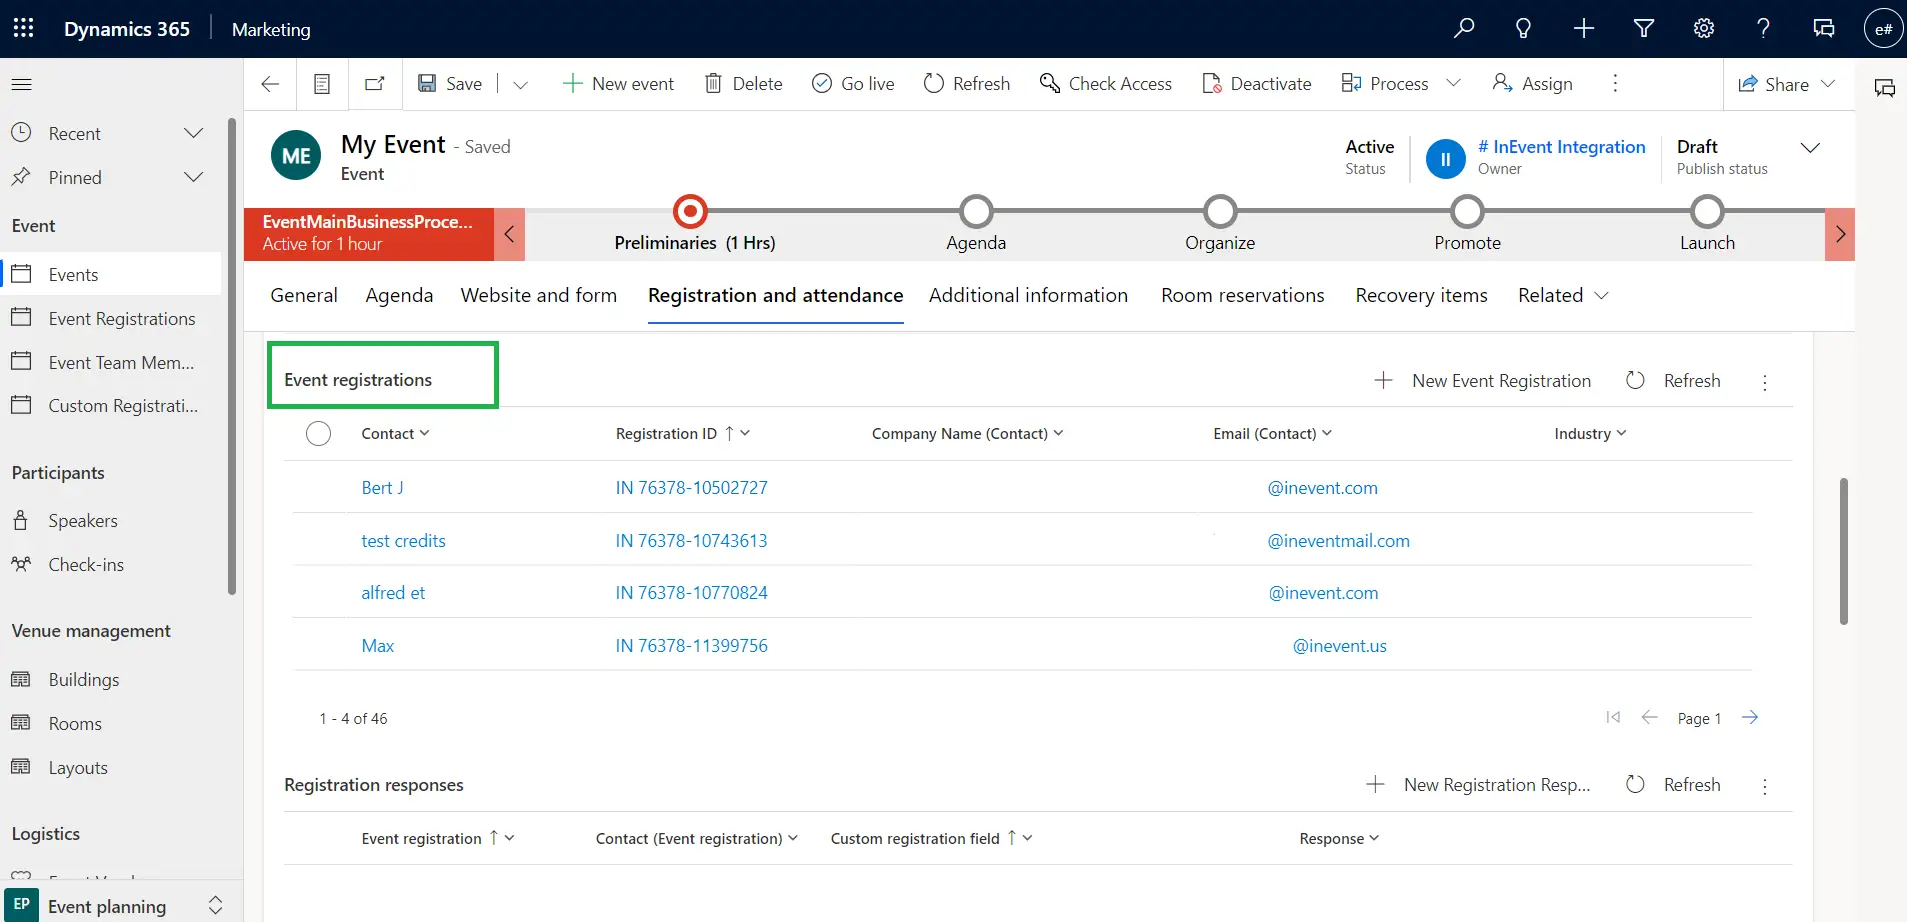
To view a breakdown of attendee data relating to registration and attendance information, go to Registration and attendance.
- Under the Event registrations section, you will see the list of attendees that have been successfully synced from InEvent's platform.
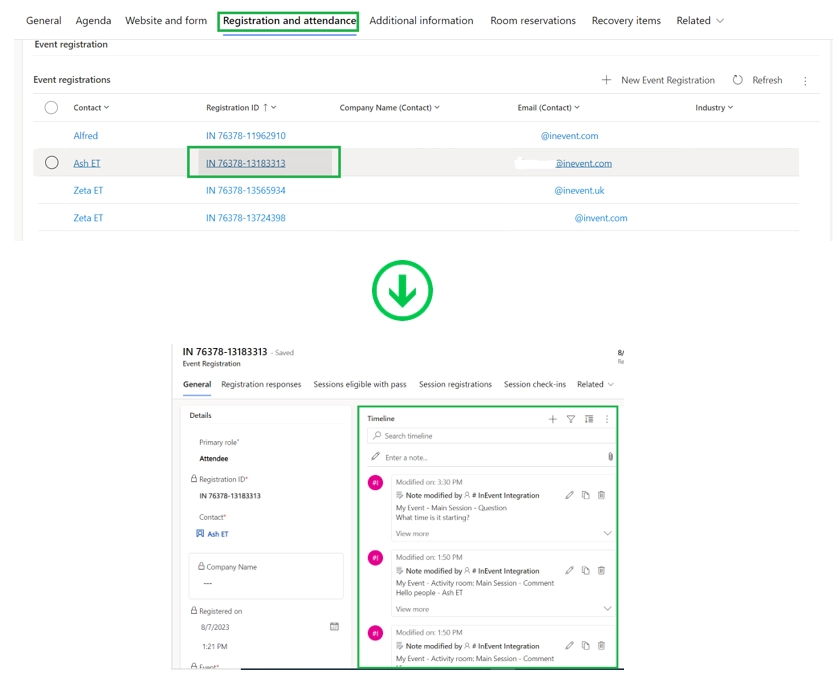
- By clicking on the Registration ID of an attendee, you will see the attendee's profile information as well as their comments and questions from live sessions in the Virtual Lobby which will appear under the Timeline field.
- Attendees whose status is set to Present on InEvent's platform, will appear under Registration and attendance > Event check-ins field in Microsoft Dynamics.
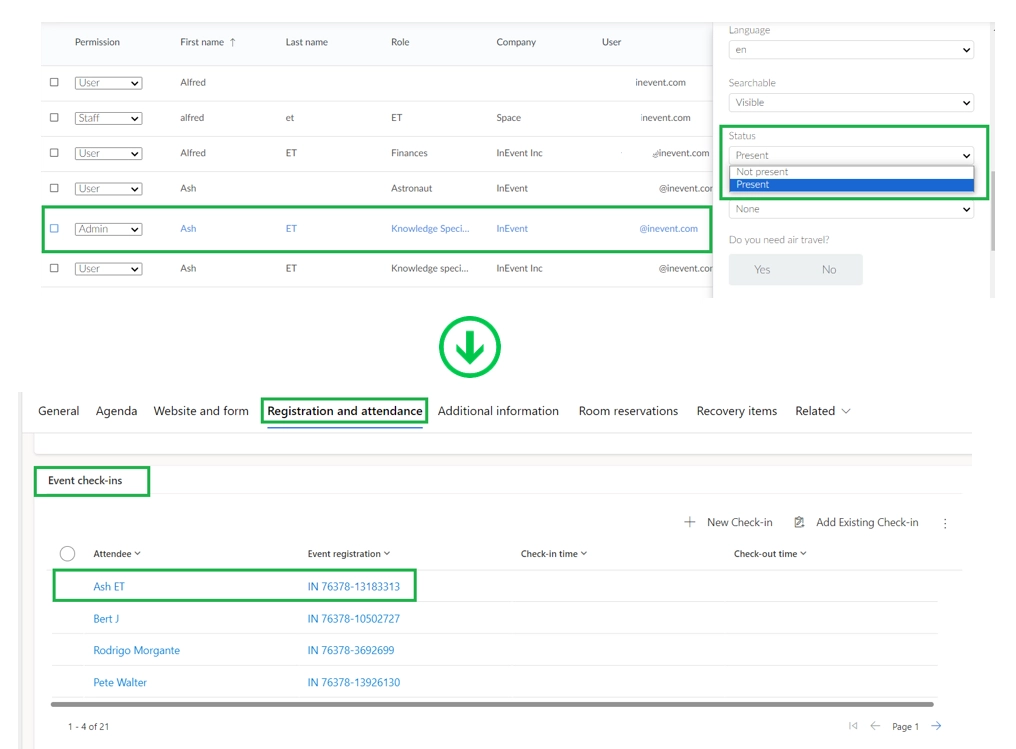
- They will also appear under Participants > Check-ins field.
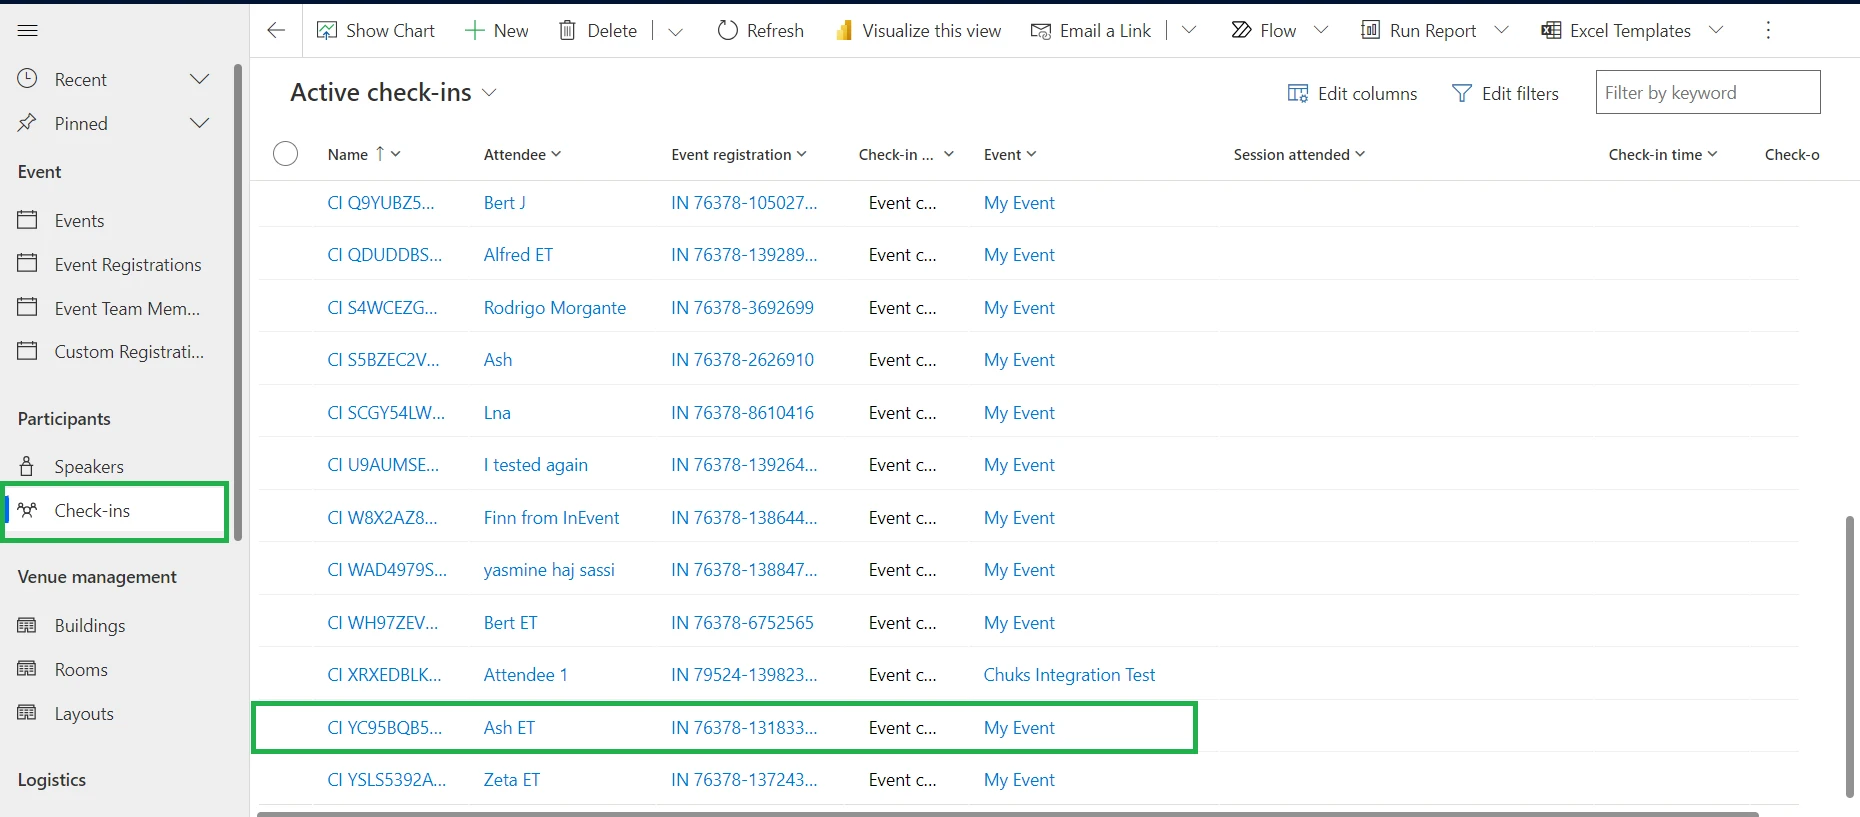
Once their attendance status is changed from Present to Not Present on InEvent's platform, their data will no longer appear under Event > Registration and attendance > Event check-ins field or Participants > Check-ins field.
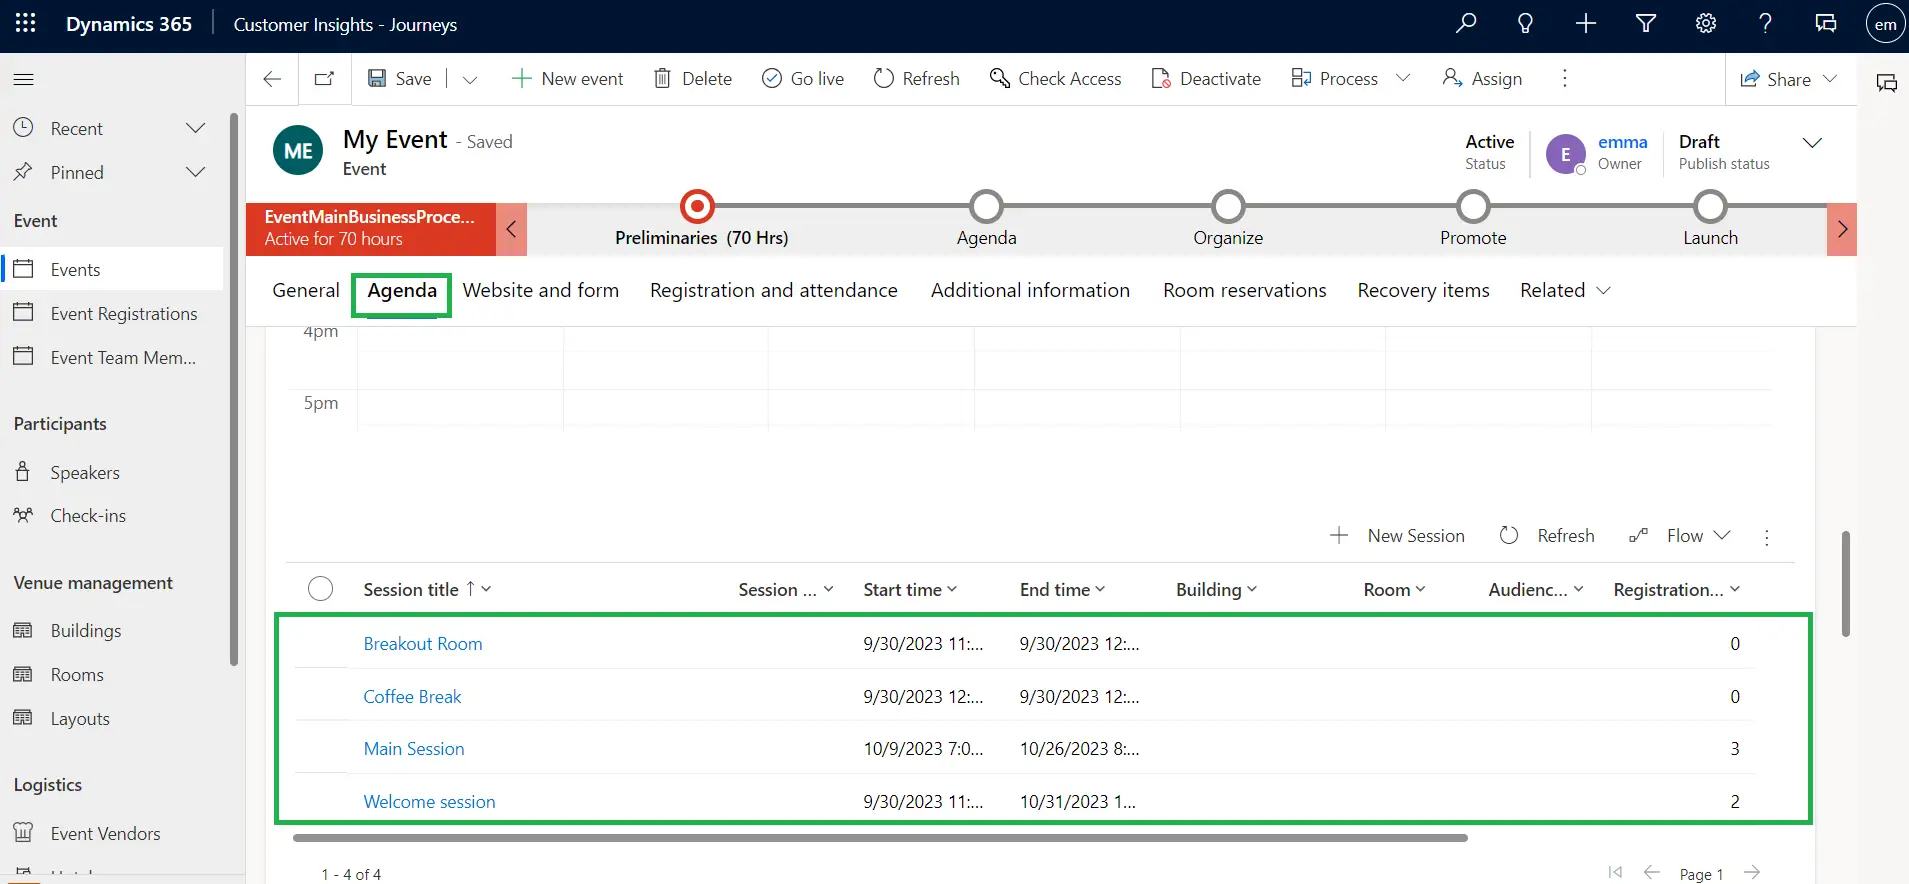
To see a breakdown of data in the activities of your synced event, click on Agenda page. Scroll down to the Sessions field and select the desired activity.
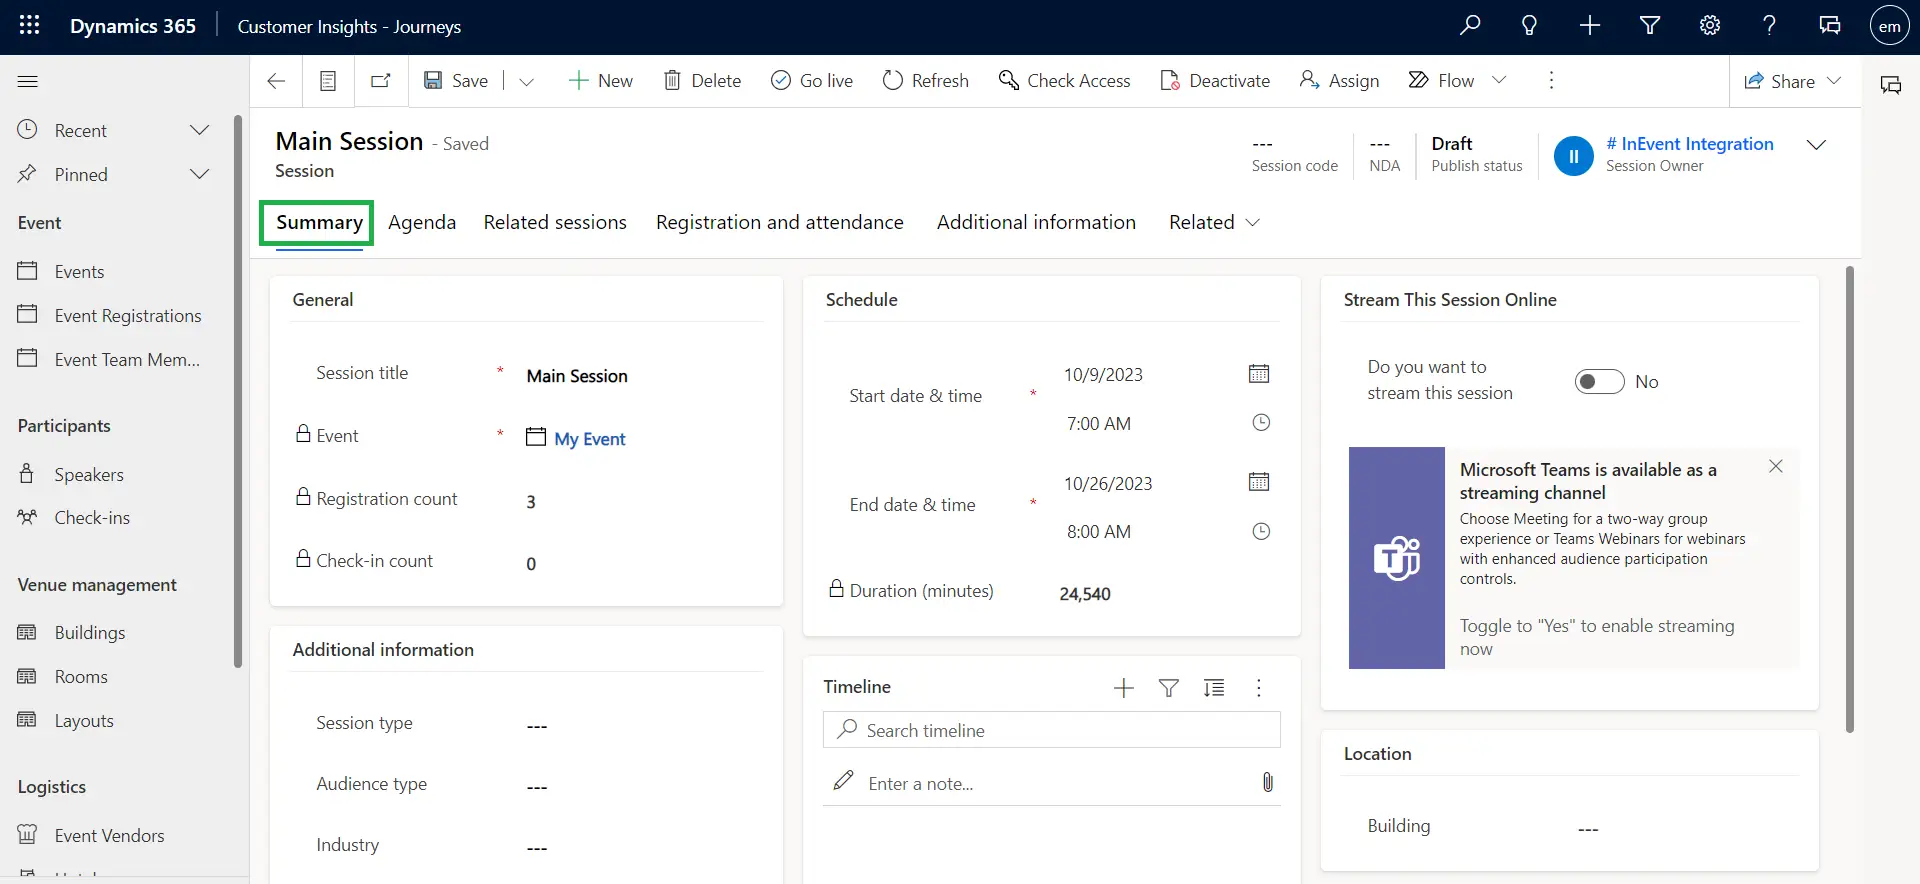
- In the Summary page, you will see a summary of your activity such as Registration count (attendees that have been synced from InEvent's platform), Check-In count (attendees with the Present status on InEvent's platform), Start date & time, End date & time, etc.
- To see more information relating to registration and attendance in an activity, go to Registration and attendance. In the Sessions registrations field, you will see more information of the attendees in that activity.
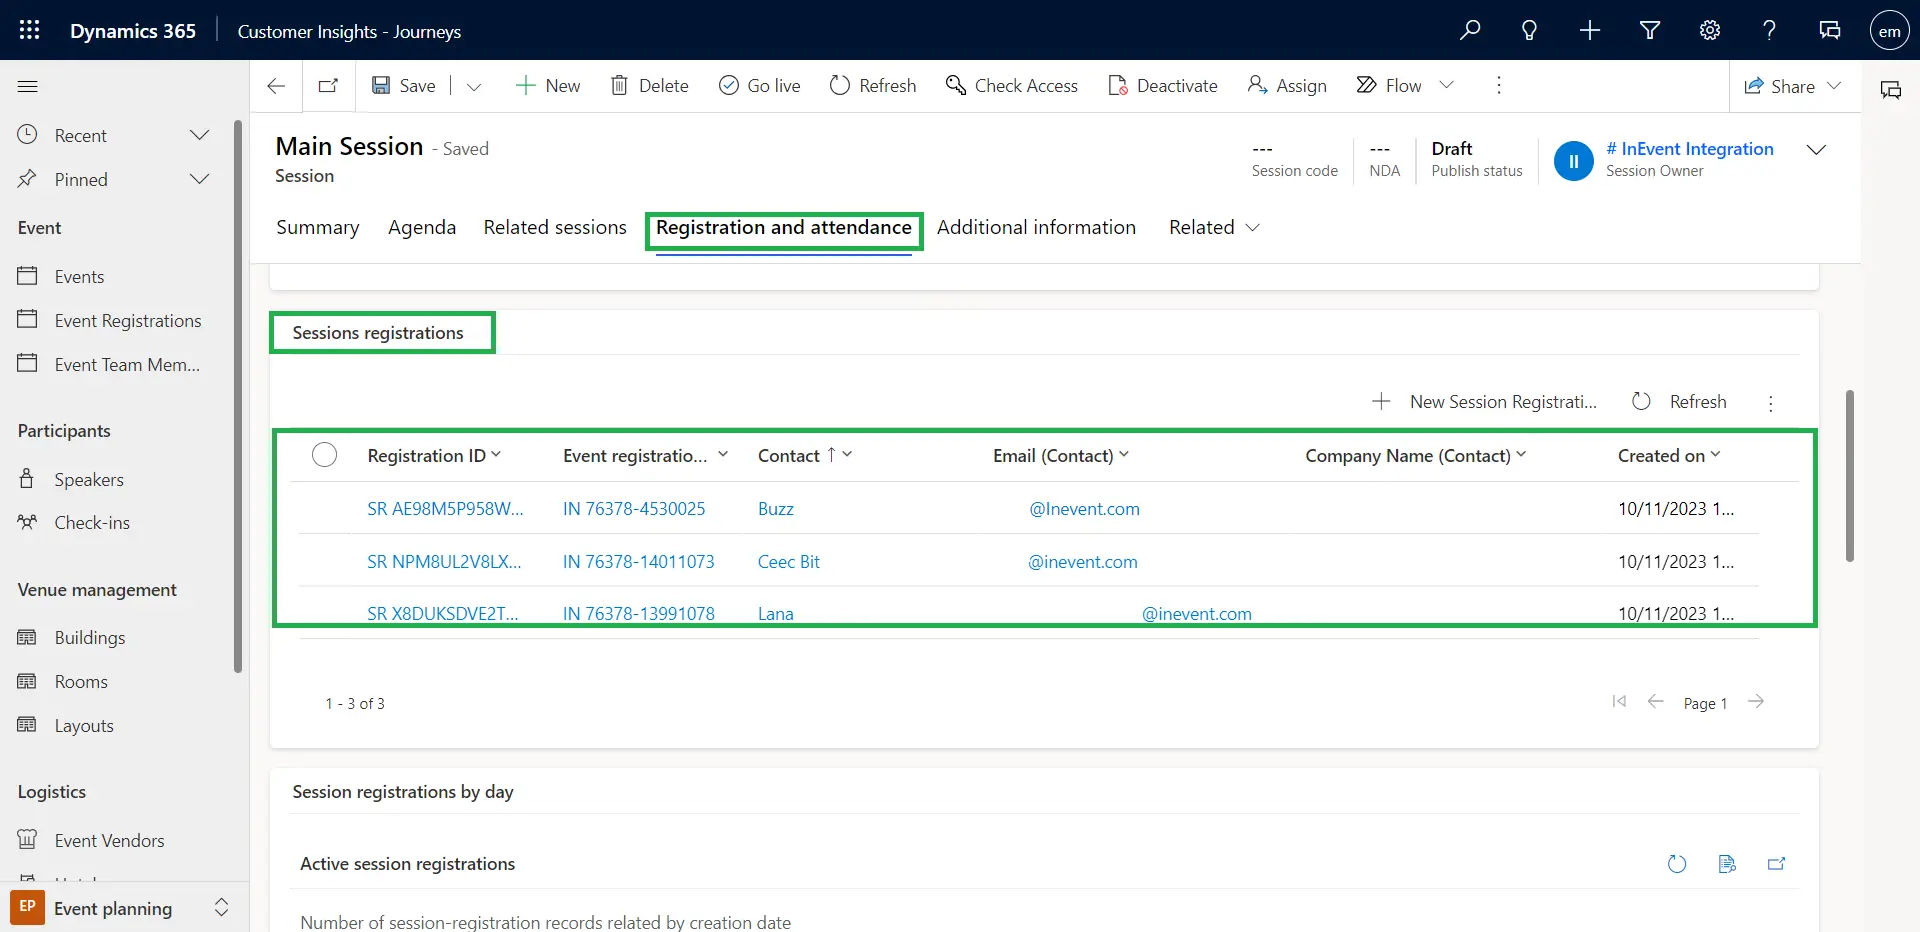
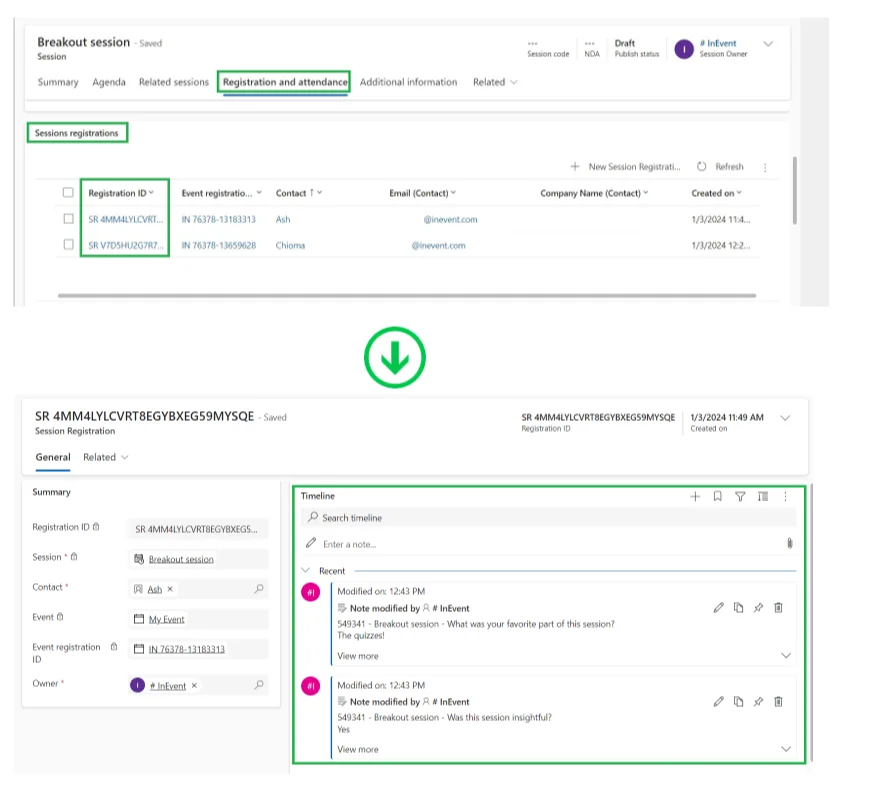
- To see the responses to the activity's feedback questions given by attendees, go to Registration and attendance > Session registrations in the selected activity. Click on an attendee's Registration ID and the feedback questions and responses of the attendee will be displayed under the Timeline field.
Alternatively, the Session registrations page can be accessed by clicking on the Related dropdown in your event's main page and selecting Session registrations. The list of attendees in all sessions will be displayed. Click the Registration ID of the desired attendee to view their feedback.
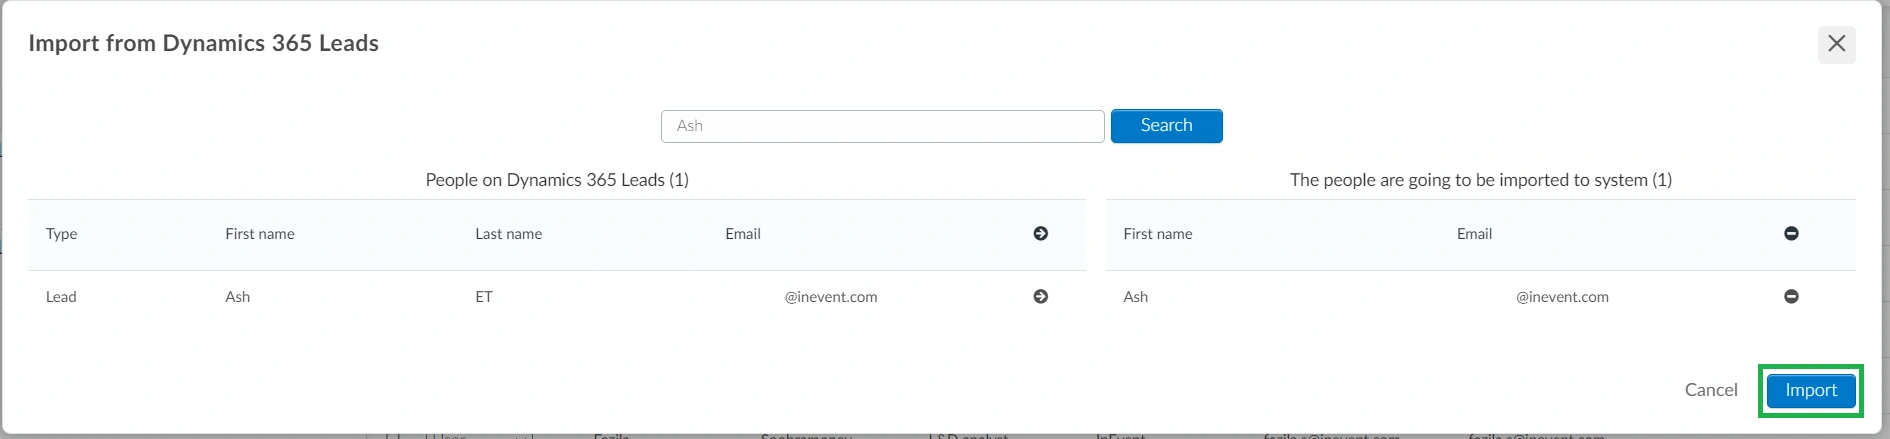
Importing leads
You can also import leads from Microsoft Dynamics into InEvent by completing the following steps:
- Navigate to People > Attendees page.
- Click on Edit on the top right corner of the page.
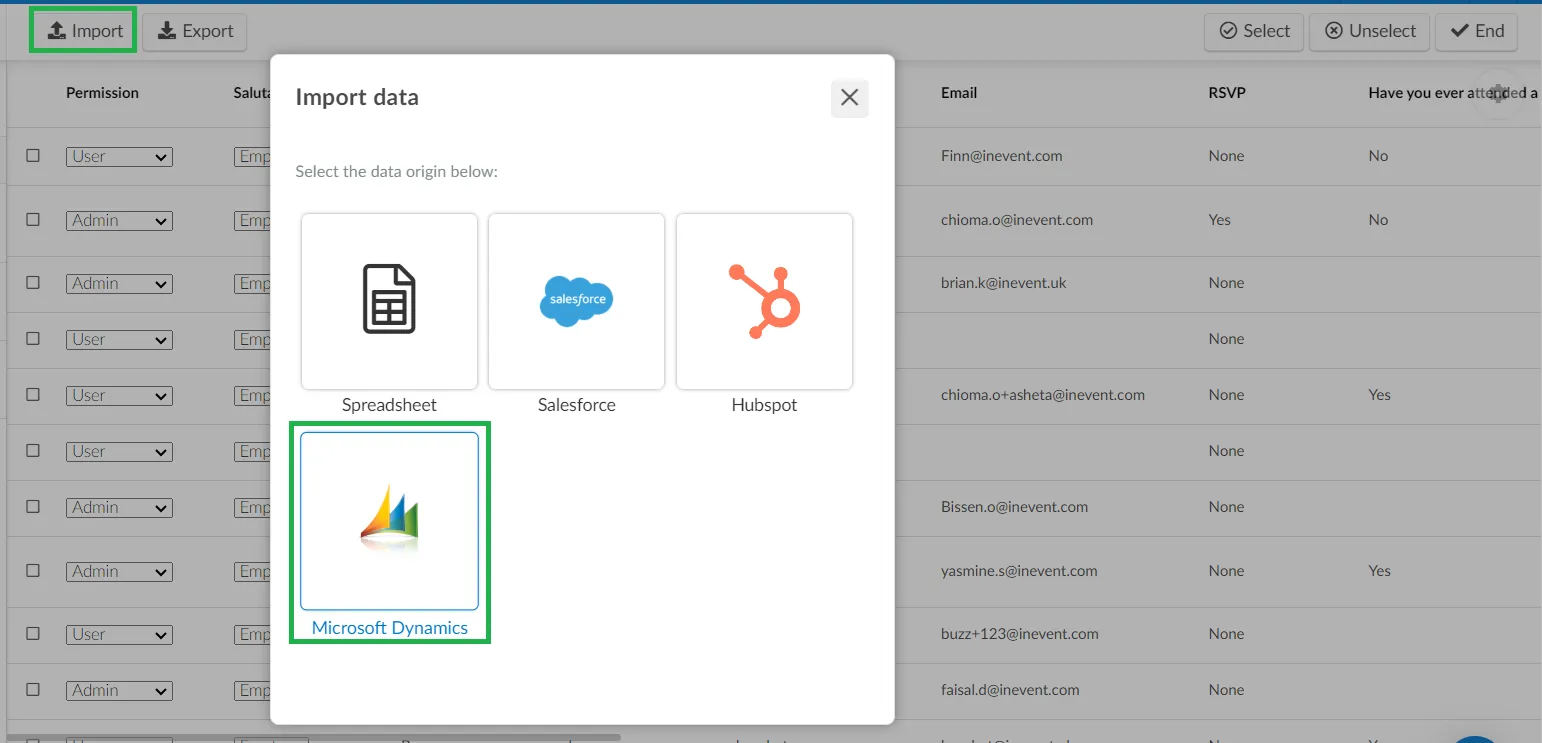
- Click on the Import button and select Microsoft Dynamics 365 as your data origin. A new window will be displayed.
- Enter the the name of the attendee in the search box.
- Click on the arrow beside the lead to add them.
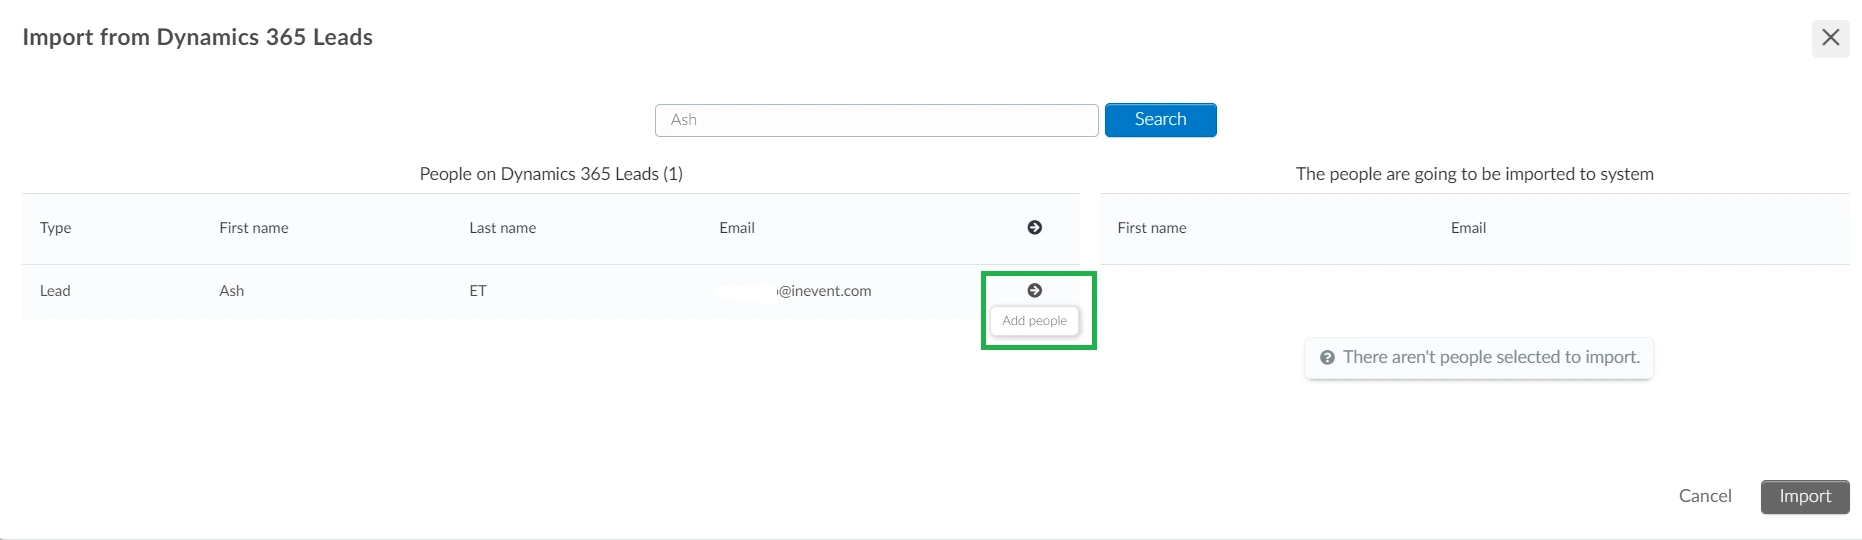
- Click on the Import button.
To import invitees (People > Invitees), you should follow the same process described above.
Integrating with MS Dynamics Sales
If you prefer to integrate with MS Dynamics Sales instead of MS Dynamics Events, you will need to create the following fields within your Dynamics environment to ensure a successful integration. These fields are necessary to sync event-related data including registrations, sessions, tracks, sponsors, speakers, lists, etc.
To simplify this process, create the required fields in your Microsoft Dynamics Sales environment using the specifications provided below. This will ensure seamless integration and accurate synchronization of event-related data.
{
    "activity": {
        "msEntity": "msevtmgt_session",
        "searchColumn": "msevtmgt_event",
        "columnset": [
            "msevtmgt_name",
            "msevtmgt_starttime",
            "msevtmgt_endtime",
            "msevtmgt_publishstatus",
            "msevtmgt_registrationcount"
        ],
        "linkEntitiesSet": [
            {
                "entity": "msevtmgt_sessiontrack_msevtmgt_session",
                "from": "msevtmgt_sessionid",
                "to": "msevtmgt_sessionid",
                "type": "outer",
                "attributes": [],
                "linkEntitiesSet": [
                    {
                        "entity": "msevtmgt_sessiontrack",
                        "from": "msevtmgt_sessiontrackid",
                        "to": "msevtmgt_sessiontrackid",
                        "type": "outer",
                        "attributes": [
                            "msevtmgt_sessiontrackid",
                            "msevtmgt_name"
                        ]
                    }
                ]
            }
        ],
        "cache": true
    },
    "track": {
        "msEntity": "msevtmgt_sessiontrack",
        "searchColumn": "msevtmgt_eventid"
    },
    "speaker": {
        "msEntity": "msevtmgt_speakerengagement",
        "searchColumn": "msevtmgt_event"
    },
    "sponsor": {
        "msEntity": "msevtmgt_sponsorship",
        "searchColumn": "msevtmgt_event"
    },
    "fields": {
        "msEntity": "msevtmgt_customregistrationfield",
        "searchColumn": "",
        "columnset": [
            "msevtmgt_text",
            "msevtmgt_type",
            "msevtmgt_choices",
            "msevtmgt_isrequired"
        ],
        "cache": true
    },
    "registration": {
        "msEntity": "msevtmgt_sessionregistration",
        "searchColumn": "msevtmgt_sessionid",
        "columnset": [
            "msevtmgt_contactid",
            "msevtmgt_sessionid",
            "msevtmgt_name",
            "createdon"
        ]
    },
    "responses": {
        "msEntity": "msevtmgt_registrationresponse",
        "searchColumn": "msevtmgt_eventregistration",
        "columnset": [
            "msevtmgt_registrationresponseid",
            "msevtmgt_customregistrationfield",
            "msevtmgt_response"
        ]
    },
    "attendance": {
        "msEntity": "msevtmgt_checkin",
        "searchColumn": "msevtmgt_sessionattended"
    },
    "annotations": {
        "msEntity": "annotation",
        "searchColumn": "objectid",
        "columnset": [
            "annotationid",
            "subject",
            "notetext"
        ]
    },
    "lists": {
        "msEntity": "list",
        "searchColumn": "",
        "columnset": [
            "listid",
            "listname"
        ],
        "cache": true
    }
}