Permissions profile and customized access
 Updated 1 year ago
by
Caleb Kotey
Updated 1 year ago
by
Caleb Kotey
Using the permissions profile, you can control the access level users will have when accessing the platform. This is especially useful when you have external agencies or partners who need to manage certain parts of your platform without having full access.
This article intends to show how to create permissions profiles for multiple events at the Company level or for a specific event at the Event level.
Understanding Keys for permission and permission bundles
In this section, you will find information about Keys for permission, Operation permission bundles, Page permission bundles and Permission scope.
Keys for permission
A Key for permission is a key or token which allows users to commit a certain action on the platform. You can limit the users' access level by giving them certain Keys for permission, or just keys for the actions they are permitted to do.
Operation permission bundles
An Operation permission bundle contains multiple Keys for permission. On the platform, Operation permission bundles are grouped by purpose, so you can you assign Keys for permission to commit actions quickly.
Operation permission bundles can be added when you are configuring Permissions profiles at the Company level.
Page permission bundles
A Page permission bundles also consists of multiple Keys for permission. However, it provides access to manage specific page at the Event level instead of the Company level.
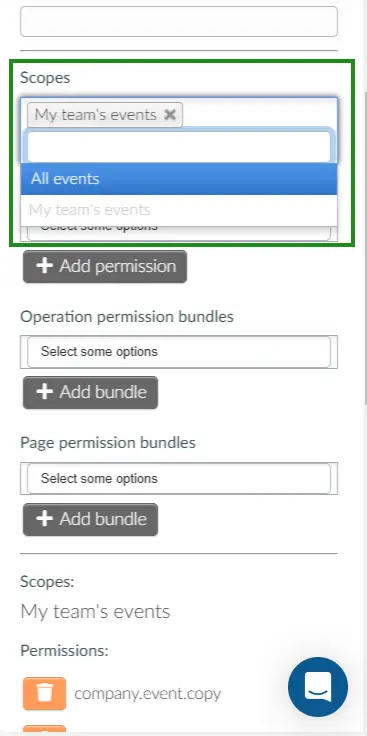
Permission Scope
Permission scopes provide admins with the ability to control how user permissions are applied across events within a company. There are two distinct permission scopes available:
- All Events: This is the default permission assigned to a user profile, granting access to all events within the company when the necessary permissions are applied.
- My Team’s Events: Permissions under this scope apply only to events created by the user or their team members. If an event was created by someone outside their team, the user will not have access to edit it when the Edit any event permission bundle is applied. For detailed information on user teams, refer to our Company User Teams article.
This setup allows admins to control permissions based on event ownership. If a user attempts to access and edit an event they do not have permission for, they will be redirected to a page informing them that they do not have access.
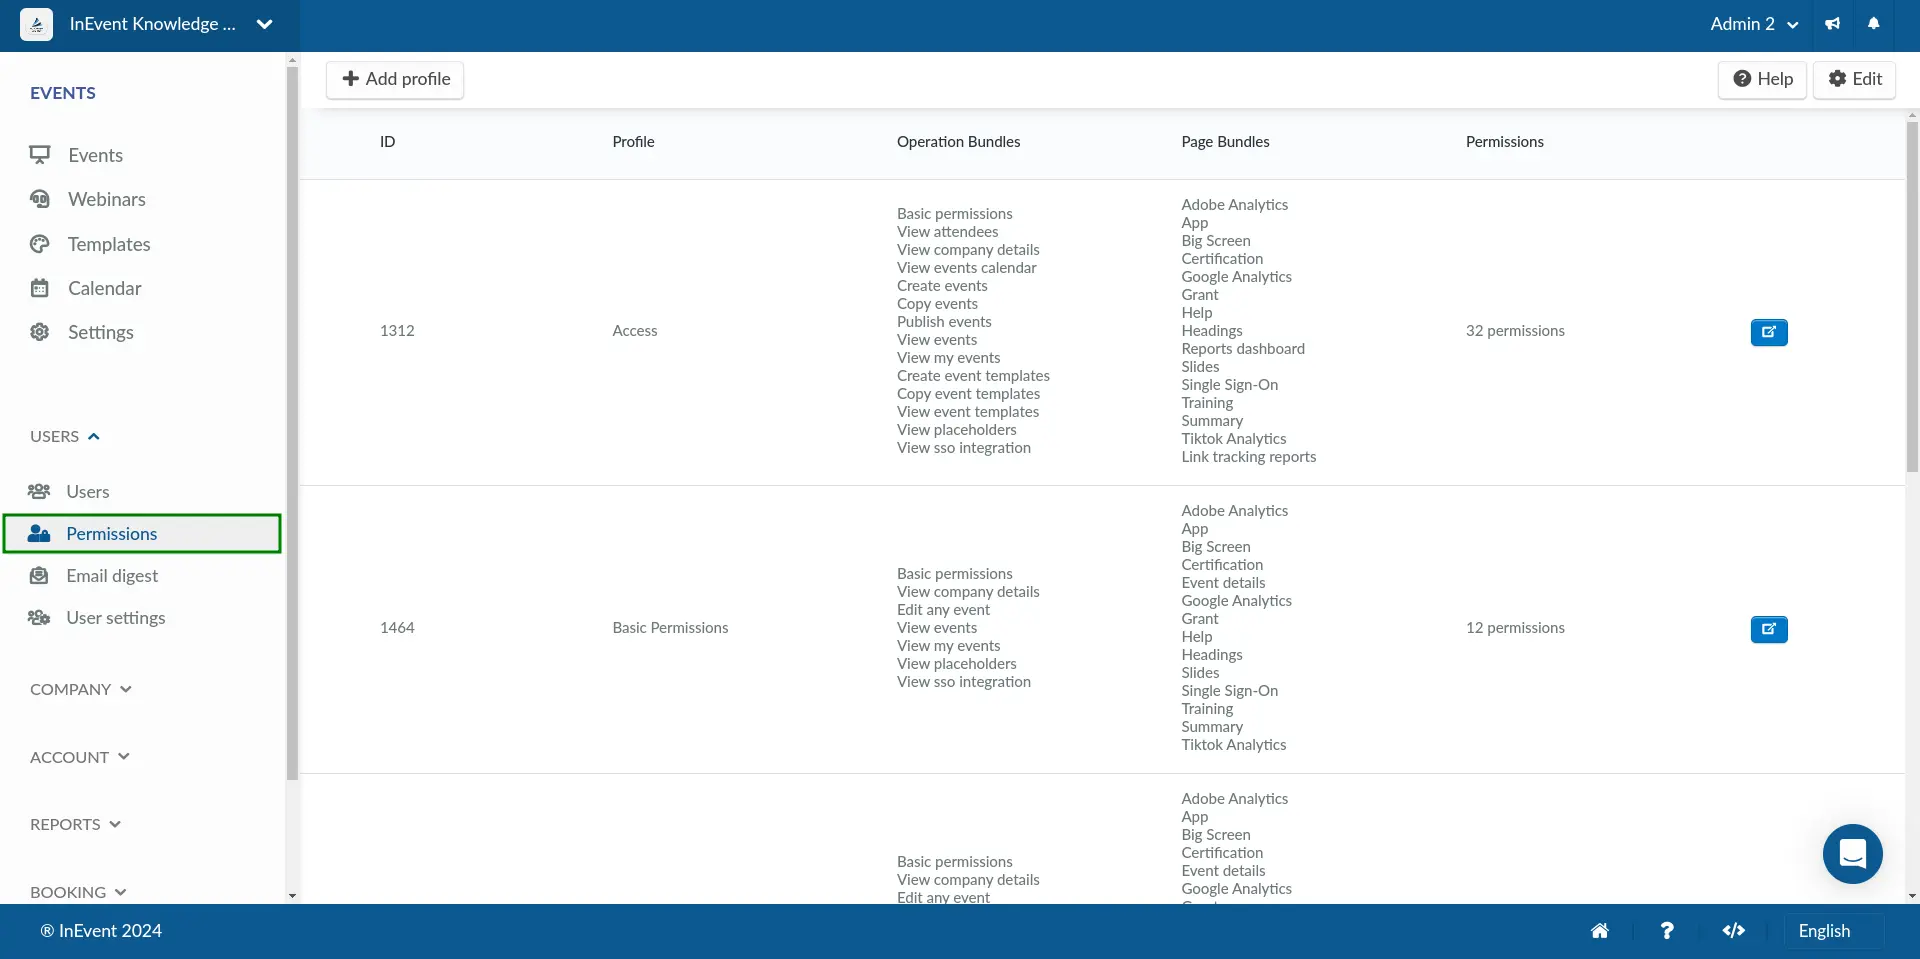
Permissions profile at the Company level
At the Company level, permissions profile is configured from the Permissions page. The Permissions page can be accessed by navigating to USER > Permissions.
This section contains information on creating, editing, and deleting a permissions profile, as well as associating a permissions profile with a user at the Company level.
Creating a permissions profile
To create a new permissions profile, complete the following steps:
- Click on Add profile on the top left corner of the Permissions page. The Add profile pop-up box will be displayed.
- Enter the desired Profile name in the text field.
- Click on Create.
After creating a permissions profile, you can proceed to add permissions to the profile.
Adding permissions to a profile
To add permissions to a profile, follow the instructions below:
- Click on the blue Open profile details button which corresponds to the desired profile. A pop-up box containing the profile's details will be displayed.
- Click on Edit on the top right corner.
- Select a Scope and Key for permission using the drop-down selector to assign a permission to the profile. Alternatively, you can select an Operation permission bundle to add Keys for permission in bulk, or select a Page permission bundle.
- Click on Add permission if you are adding a Key for permission. If you are adding an Operation permission bundle, click on Add bundle instead.
- Press End to save your changes.
After completing the steps above, you can proceed to associate the permissions profile with a user.
Associating a permissions profile with a user
After configuring your permissions profile, you can associate the profile with one or multiple users within your company. You can associate the profile with new and existing users.
New user
To associate a permissions profile with a new user when adding them to your company, follow the steps below:
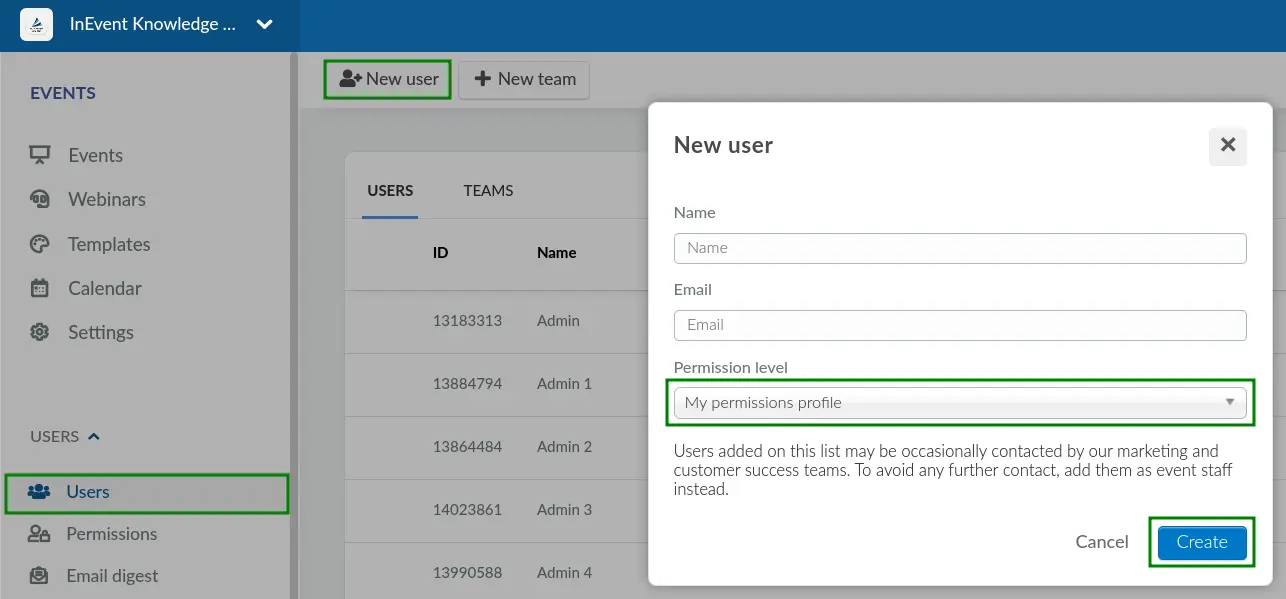
- Navigate to USERS > Users at the Company level.
- Click on New user.
- Enter the user's Name and Email.
- Select the desired permissions profile using the Permission level drop-down selector.
- Press Create.
Existing user
To associate a permissions profile with an existing user within your company, follow the steps below:
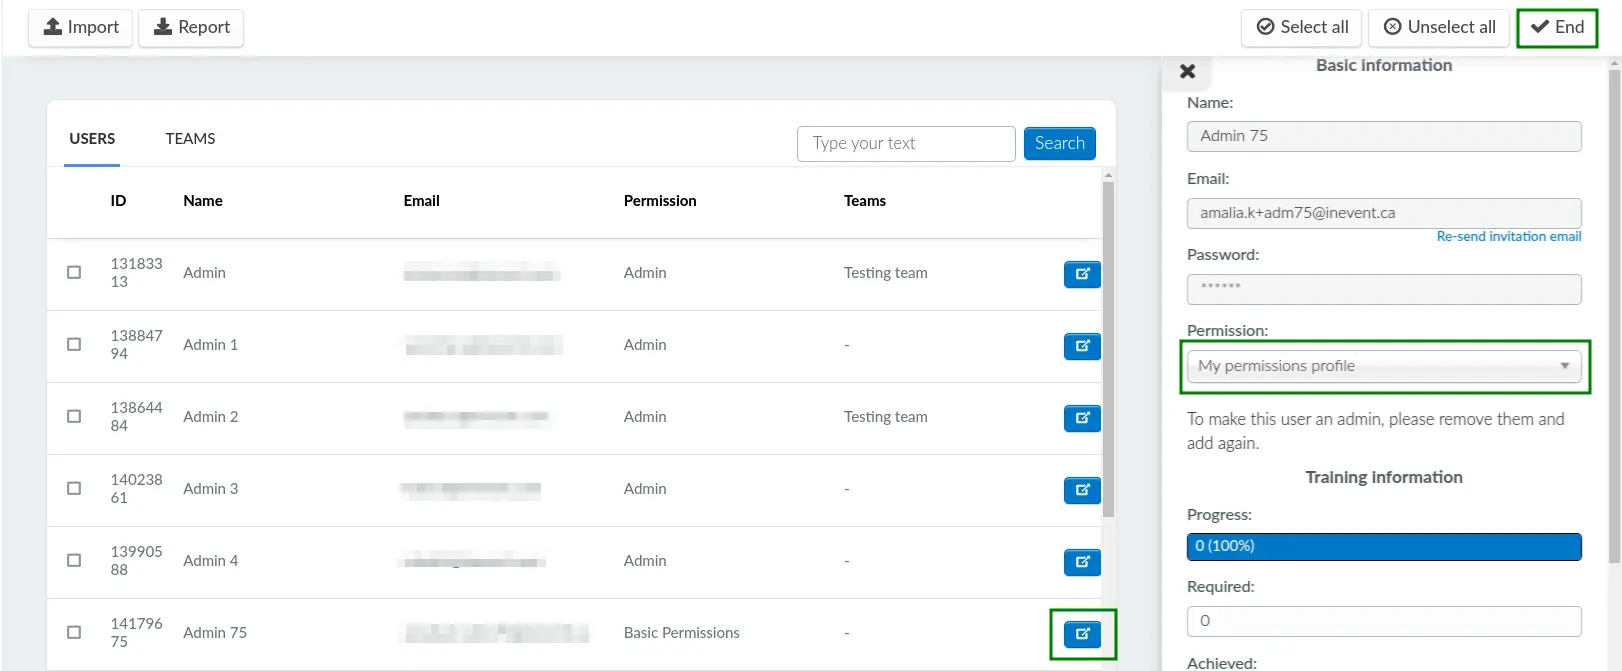
- Navigate to USERS > Users at the Company level.
- Click on the blue Open person details button which corresponds to the desired user. A pop-up box containing the user's details will be displayed.
- Click on Edit.
- Select the desired permissions profile using the Permission drop down selector.
- Press End to save your changes.
Editing a permissions profile
To edit the details of a permissions profile, click on the blue Open profile details button which corresponds to the desired profile in the User permissions page. A pop-up box containing the profile's details will be displayed. Then, click on Edit.
You can modify the name and add a description to the permissions profile using the text field. You can also add new Keys for permission, Operations permission bundles, and Page permission bundles, or remove permissions by clicking the orange trash bin button next to the permission. When you are finished editing the profile, press End.
Deleting a permissions profile
To completely remove a permissions profile from your company, complete the steps below:
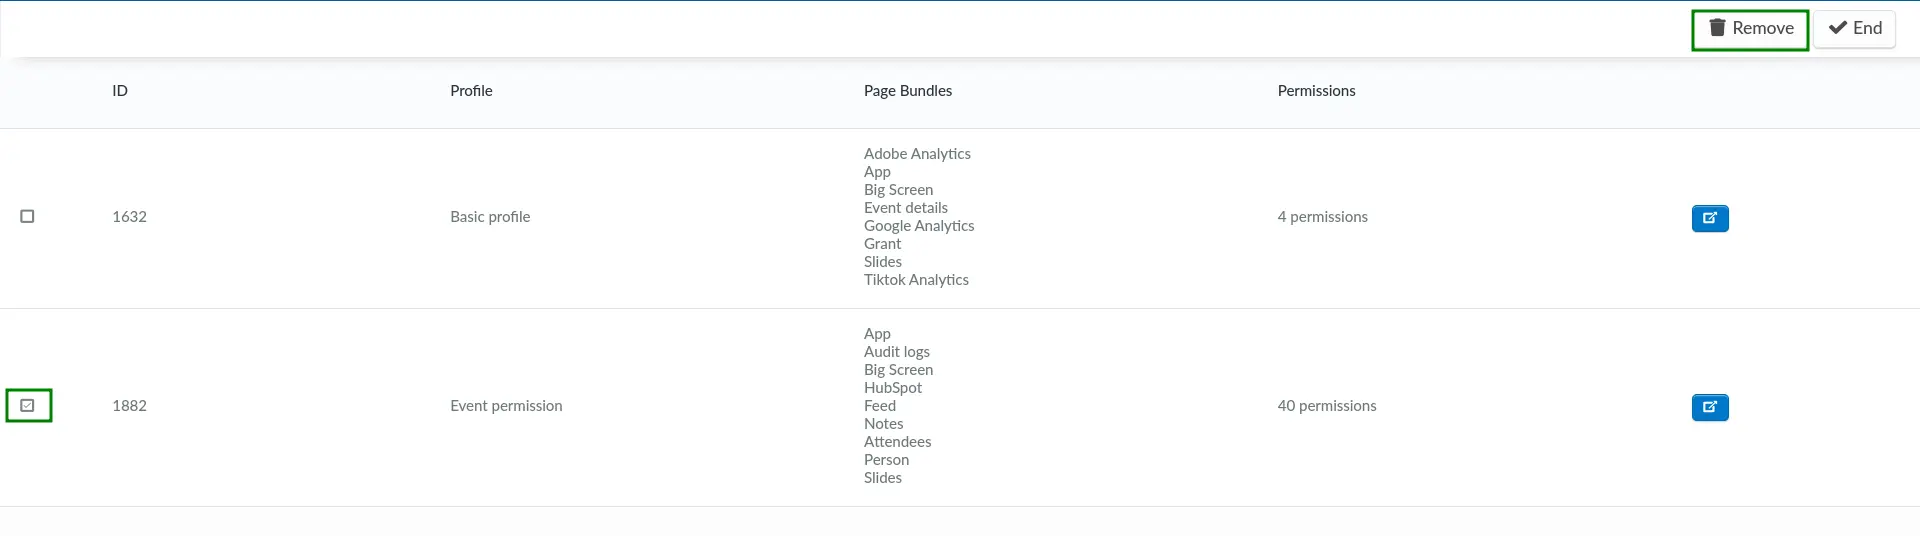
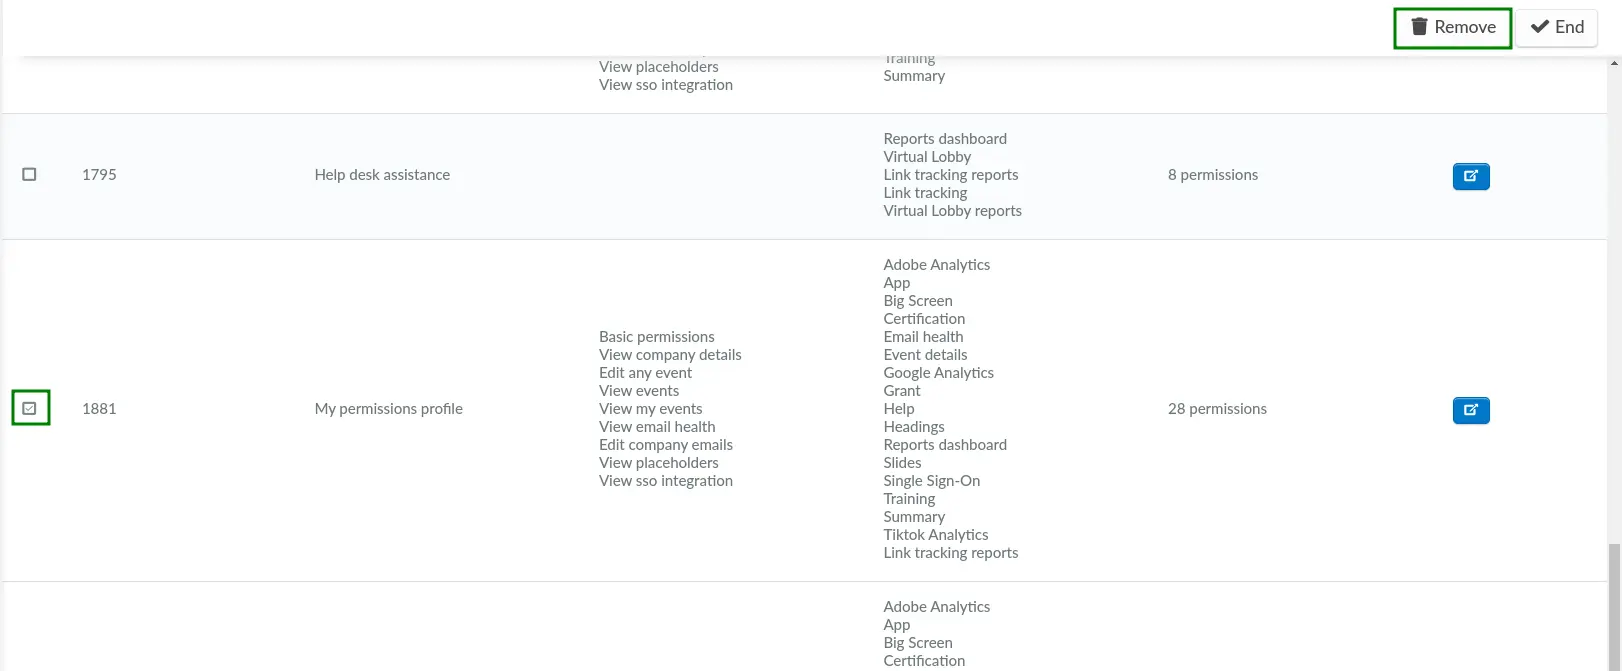
- Click on Edit on the top right corner of the User permissions page.
- Select the permissions profile(s) you wish to delete using the checkbox.
- Click on Remove. The Remove selected pop-up box will be displayed to confirm your action.
- Press Remove.
Permissions profile at the Event level
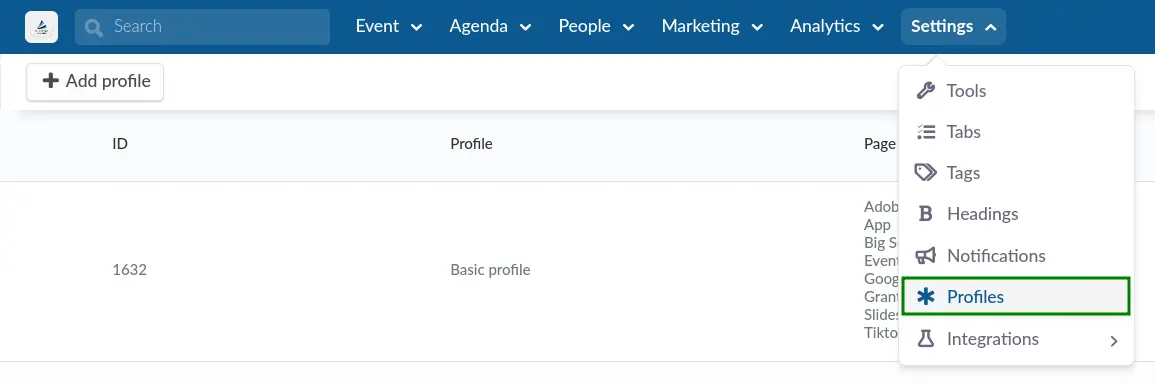
At the Event level, permissions profile is configured from the Profiles page. The Profiles page can be accessed by navigating to Settings > Profiles.
This section contains information on creating, editing, and deleting a permissions profile, as well as associating a permissions profile with a person at the Event level.
Creating a permissions profile
To create a new permissions profile, complete the following steps:
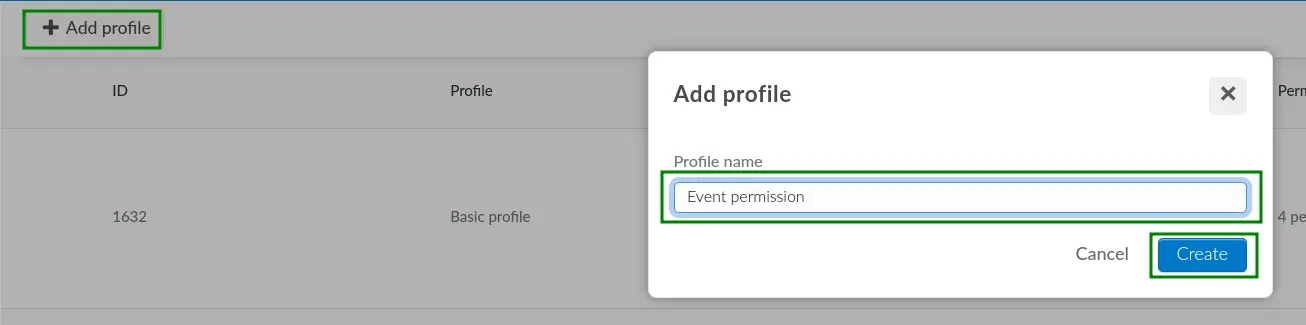
- Click on Add profile on the top left corner of the Profiles page. The Add profile pop-up box will be displayed.
- Enter the desired Profile name in the text field.
- Click on Create.
After creating a permissions profile, you can proceed to add permissions to the profile.
Adding permissions to a profile
To add and assign permissions to a profile, follow the instructions below:
- Click on the blue Open profile details button which corresponds to the desired profile. A pop-up box containing the profile's details will be displayed.
- Click on Edit on the top right corner.
- Select a Key for permission using the drop-down selector to assign a permission to the profile. Alternatively, you can select a Page permission bundle to add Keys for permission in bulk.
- Click on Add permission if you are adding a Key for permission. If you are adding a Page permission bundle, click on Add bundle instead.
- Press End to save your changes.
After completing the steps above, you can proceed to associate the permissions profile with a person within your event.
Associating a permissions profile with a user
After configuring your permissions profile, you can associate the profile with one or multiple persons within your event.
To associate a permissions profile with a person within your event, follow the steps below:
- Navigate to People > Attendees at the Event level.
- Click on the person you want to associate with the permissions profile. A pop-up box containing the person's details will be displayed.
- Click on Edit.
- Select the desired permissions profile using the Profile drop-down box.
- Press End to save your changes.
After completing the steps above, the person will be able to access the page(s) on the platform by using the link to the platform page.
Editing a permissions profile
To edit the details of a permissions profile, click on the blue Open profile details button which corresponds to the desired profile in the Profiles page. A pop-up box containing the profile's details will be displayed. Then, click on Edit.
You can edit the name and add a description to the permissions profile using the text field. You can also add new Keys for permission and Page permission bundles, or remove permissions by clicking the orange trash bin button next to the permission. When you are finished editing the profile, press End.
Deleting a permissions profile
To completely remove a permissions profile from your event, complete the following steps:
- Click on Edit on the top right corner of the Profiles page.
- Select the permissions profile(s) you wish to delete using the checkbox.
- Click on Remove. The Remove selected pop-up box will be displayed to confirm your action.
- Press Remove.