Sponsors - InEvent Webinar
This article intends to teach you how to manage sponsors when creating your InEvent Webinar.
How do I add sponsors?
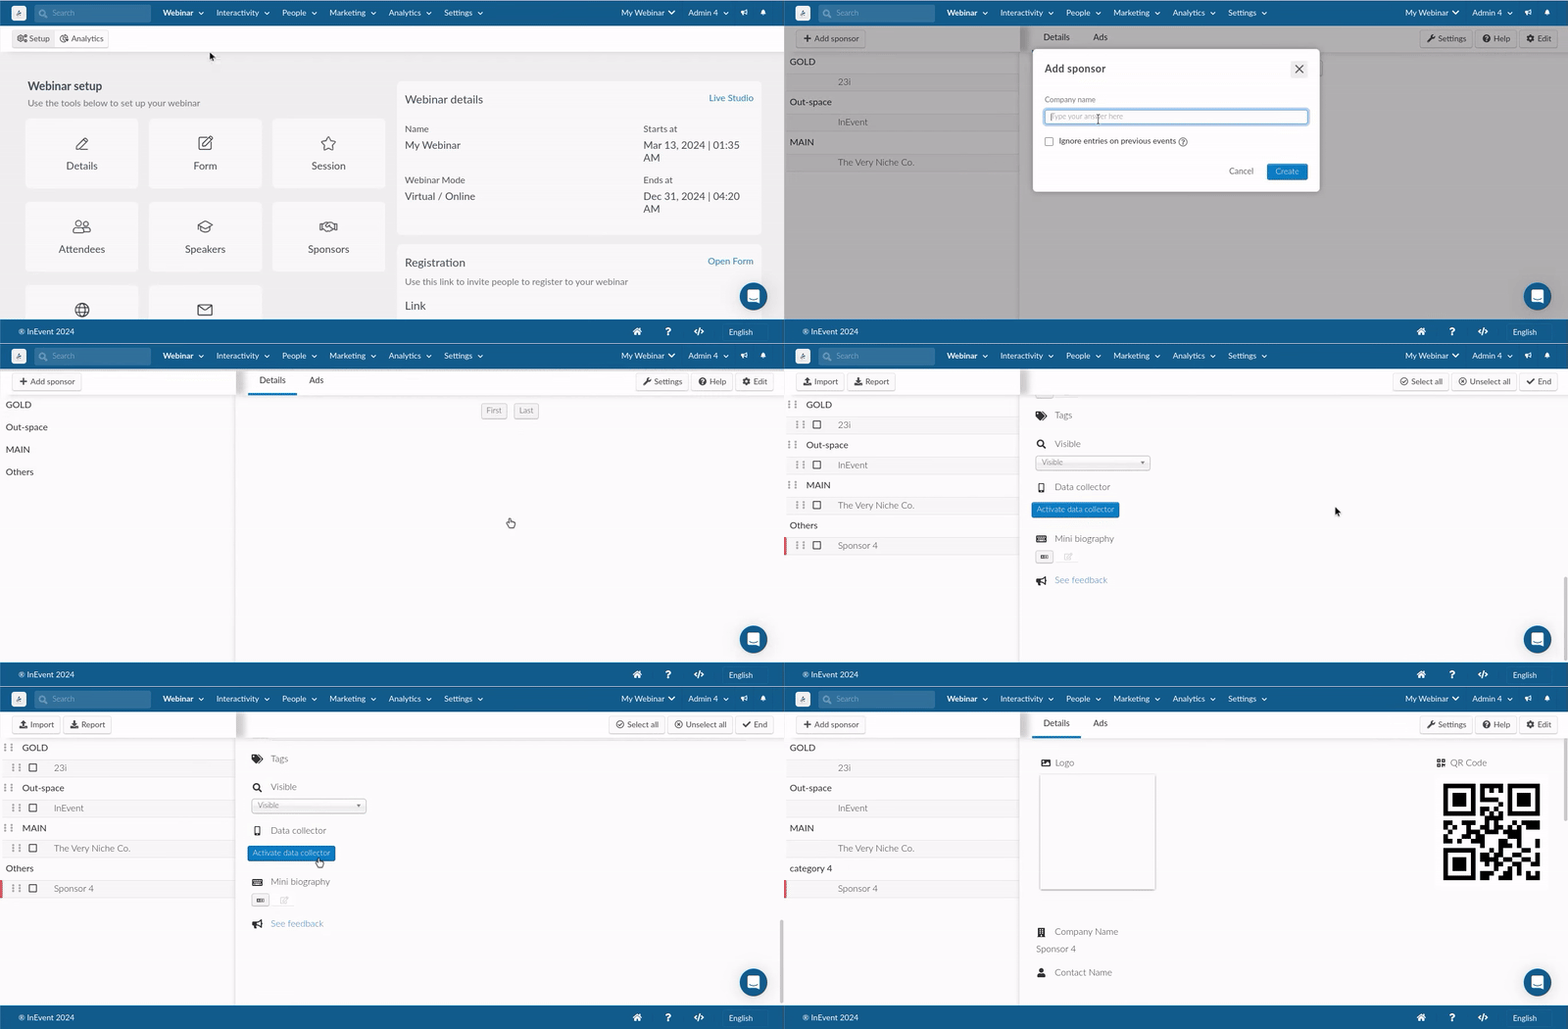
This is the first step to start the setup of the Sponsor in your InEvent Webinar. To do so, go to Webinar > Sponsors > click +Add Sponsor > type the sponsor's name and press Create.
Once you do that, click on top of the Sponsor’s name and the Details page will be displayed to start adding the information after pressing Edit.

Details
- Logo: To add an image to the Sponsor, click on the Red tab with the file icon under the word Logo. The desirable size is 750 x 750 (px by px)
- General information: You can edit the sponsor's name under company name. You can also add a contact name, telephone, email and website link.
- Categories: Add categories to display the sponsors categorized at the Website.
- Visibility: You can set your sponsors to be visible or invisible on the bottom right corner of the screen.
- Minibio: This is the space dedicated to having a brief text, link, or media of the Sponsor. It can also be translated into different languages.
People, Invite, Files, Tickets, and Chats
To learn more about these tabs, check this article.
Ads
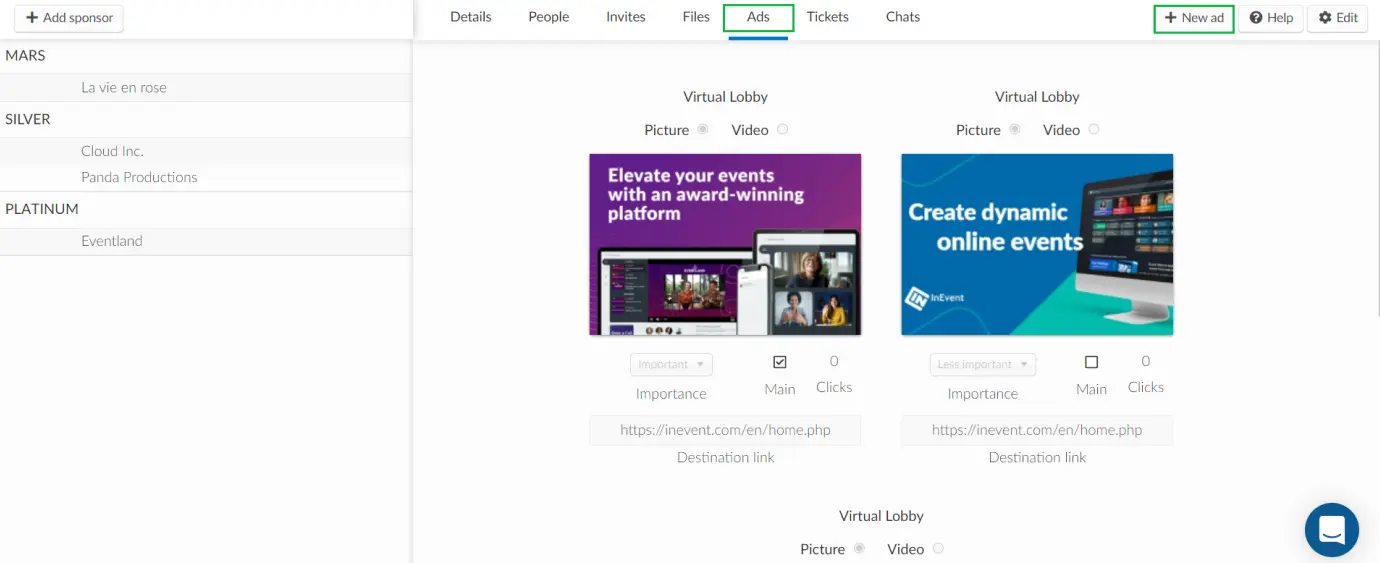
To create an ad, click on the Ads tab > + New ad > click on Virtual Lobby > press Create.
You can choose to display an ad as a picture or a video. Click here to learn more about it.

Where do I view the sponsors?
Sponsors can be viewed on the webinar Website and in the InEvent webinar booth.
How do I view sponsors in the InEvent Webinar?
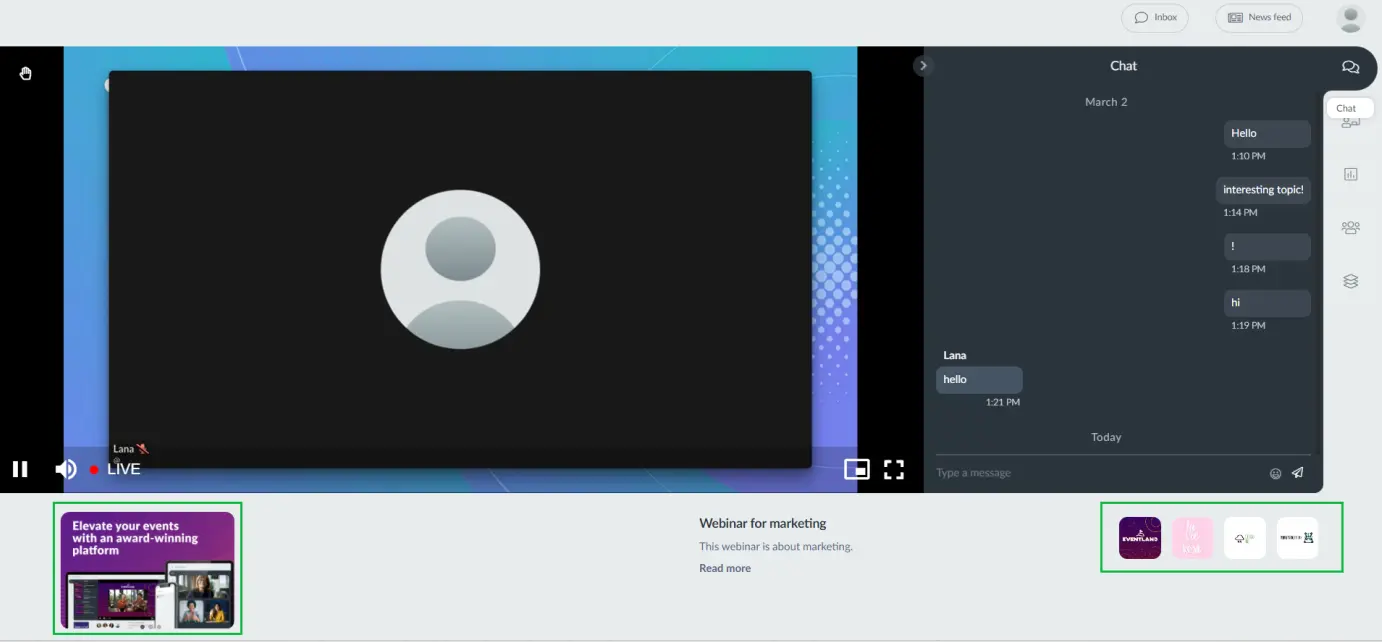
You will see the sponsors logo in the bottom right corner of the screen. In addition, users will be able to see the sponsor's category, company name, contact name, email, website link, telephone and minibio by clicking on the sponsor's logo.

How do I view the sponsors on the website?
For Sponsors' information to be displayed on the website, make sure to add a Sponsors' section.
After doing this, all information updated on the Sponsors page under Webinar > Sponsors should appear on your website.

