Salesforce Visualforce plugin
 Updated 7 months ago
by
Chioma Okenwa
Updated 7 months ago
by
Chioma Okenwa
Visualforce is a web development framework that enables developers to build sophisticated, custom user interfaces for mobile and desktop apps that can be hosted on the Lightning Platform. You can use Visualforce to build apps that align with the styling of Lightning Experience, as well as your own completely custom interface.
By using Visualforce pages, you will be able to synchronize and display information from your contacts and leads from the InEvent platform into Salesforce.
How do I link Visualforce with my Salesforce integration?
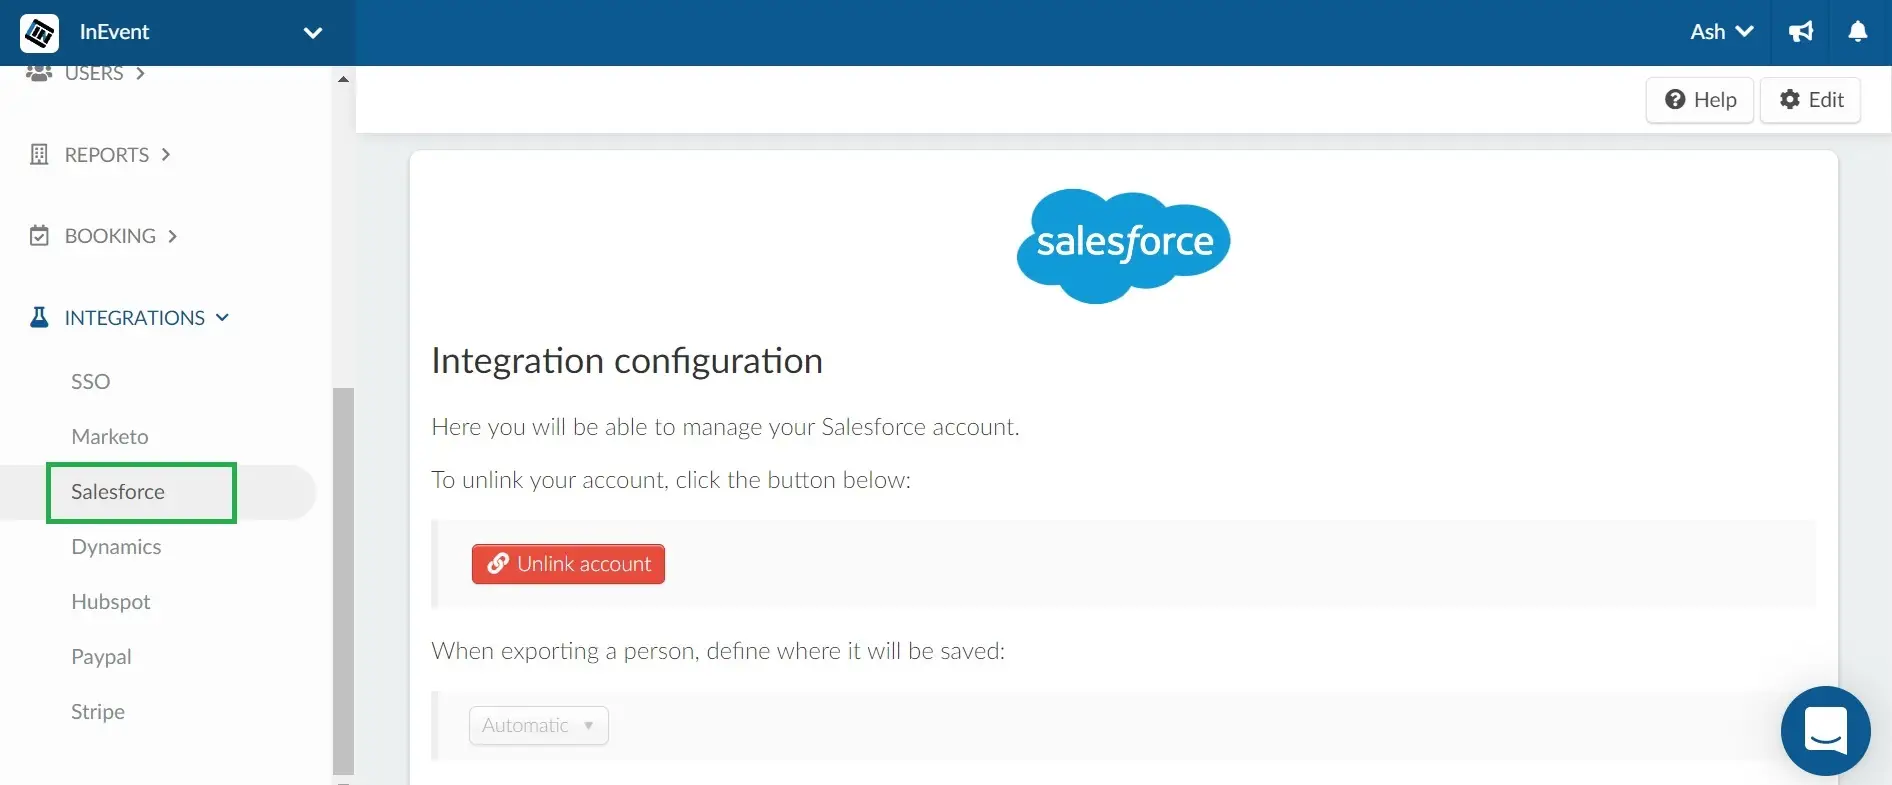
To link the Visualforce with your Salesforce integration, at the company level, scroll down until you see the Integrations sections on the menu in the left and press Salesforce.
Then, scroll down until you see VisualForce InEvent Token.
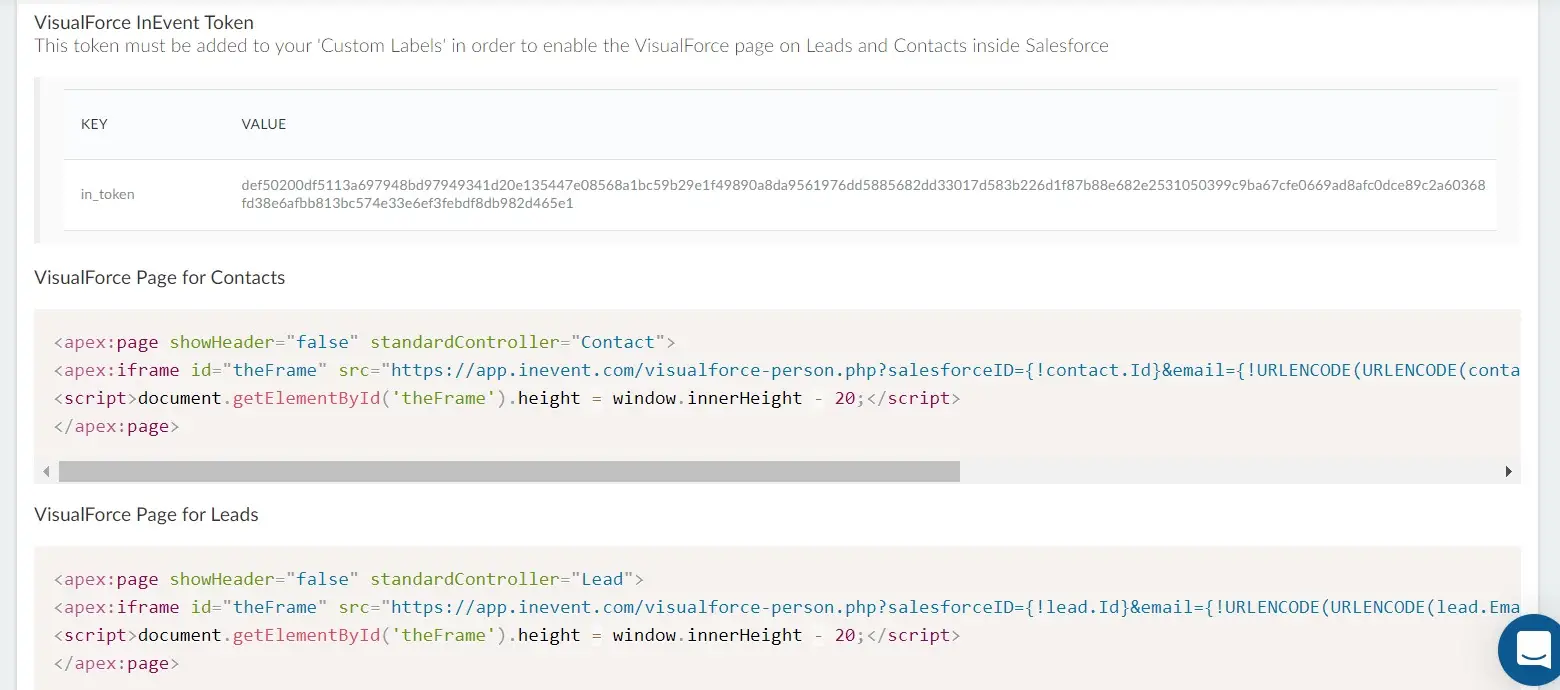
The VisualForce InEvent Toke, VisualForce Page for Contacts, and VisualForce Page for Leads values will be used in the step-by-step listed below.
Creating custom labels on Salesforce
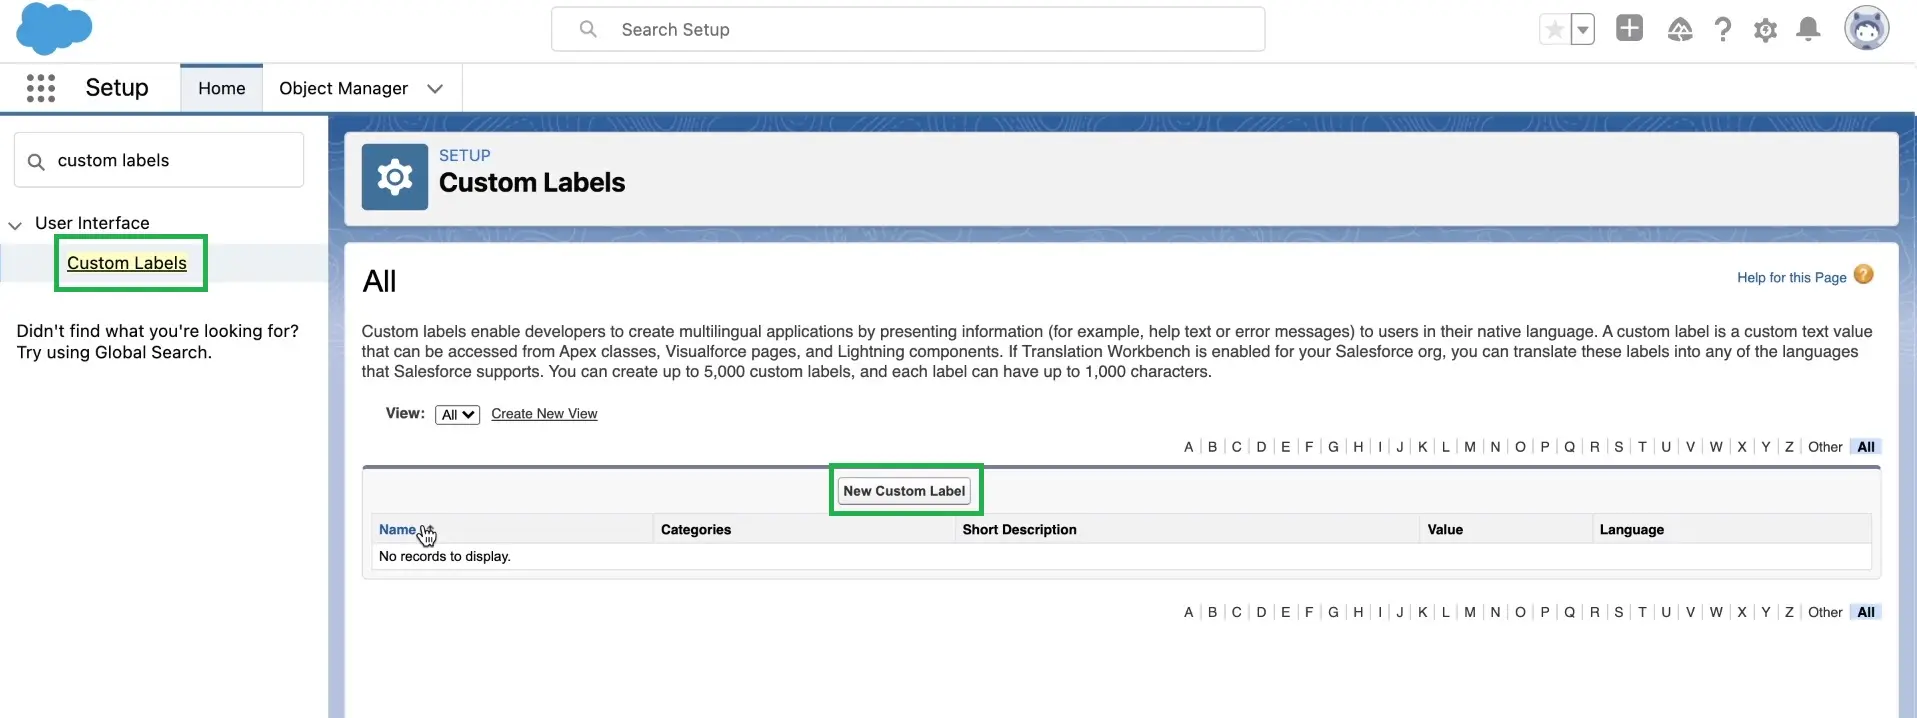
Logged into your Salesforce account, on the settings page, type 'custom labels' on the search bar.
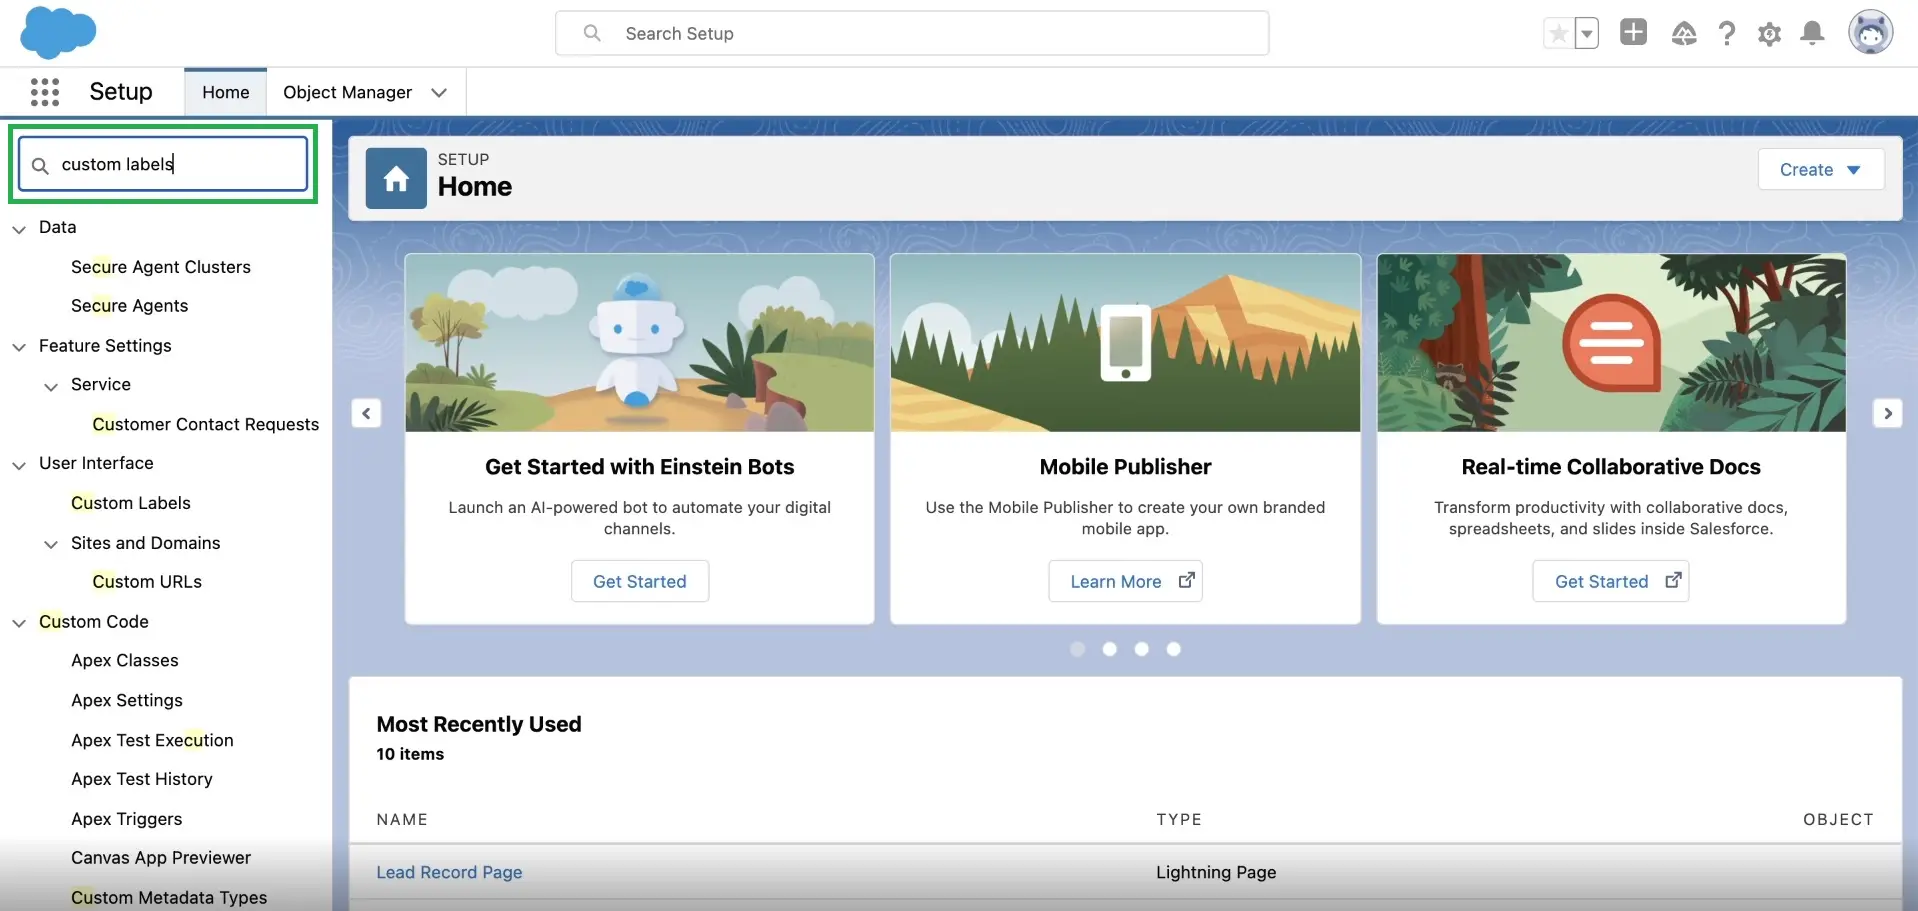
Then, press Custom Labels on the left-hand side. A new page will open up on the right and you should press New Custom Label.
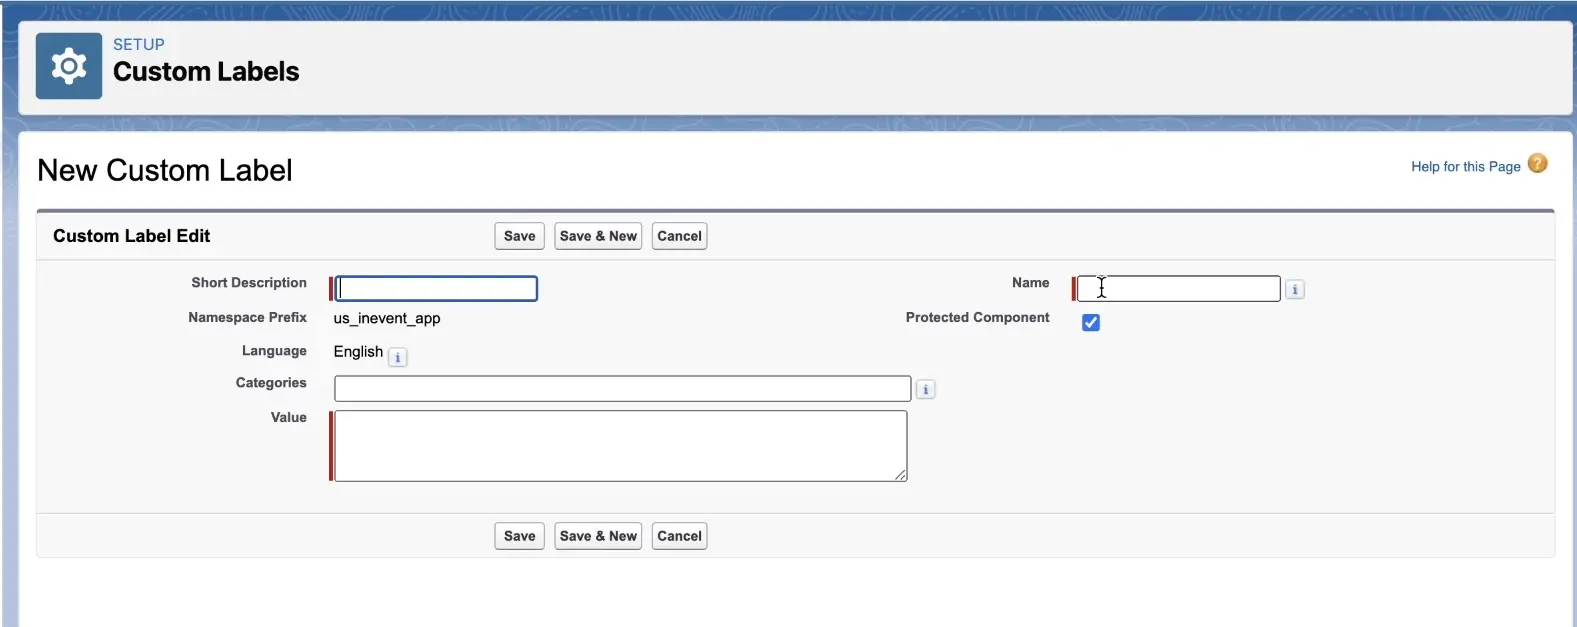
Next, you will need to type in the custom label's name, its description, and in the Value field, you should paste the VisualForce InEvent Token available in the InEvent platform. Press Save to save the changes.
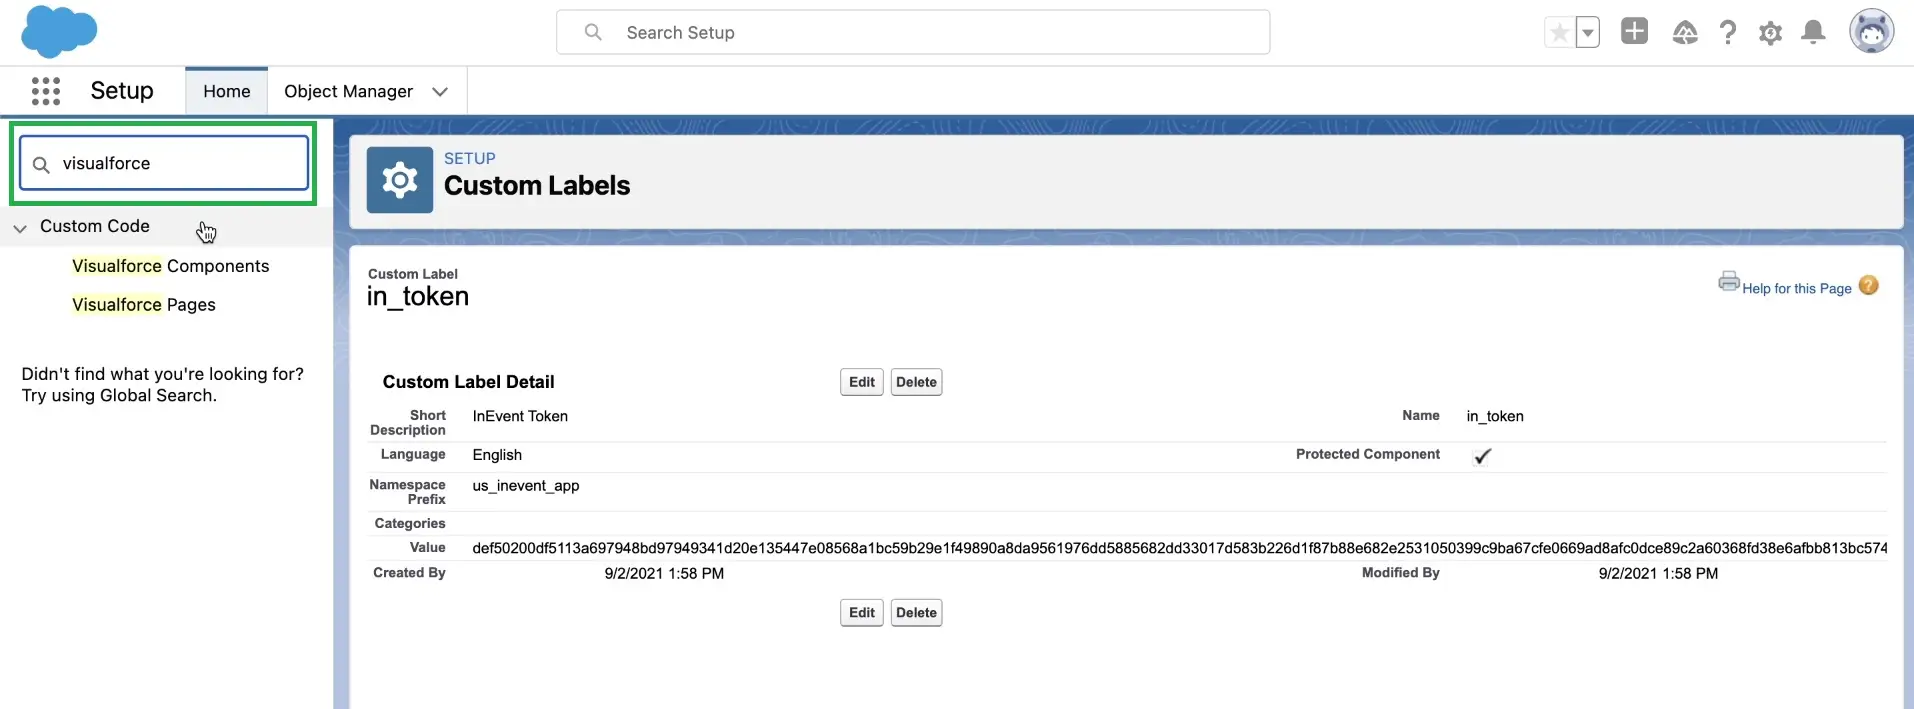
Now, type 'visualforce' on the search bar. Two results will come up and you should press Visualforce Pages.
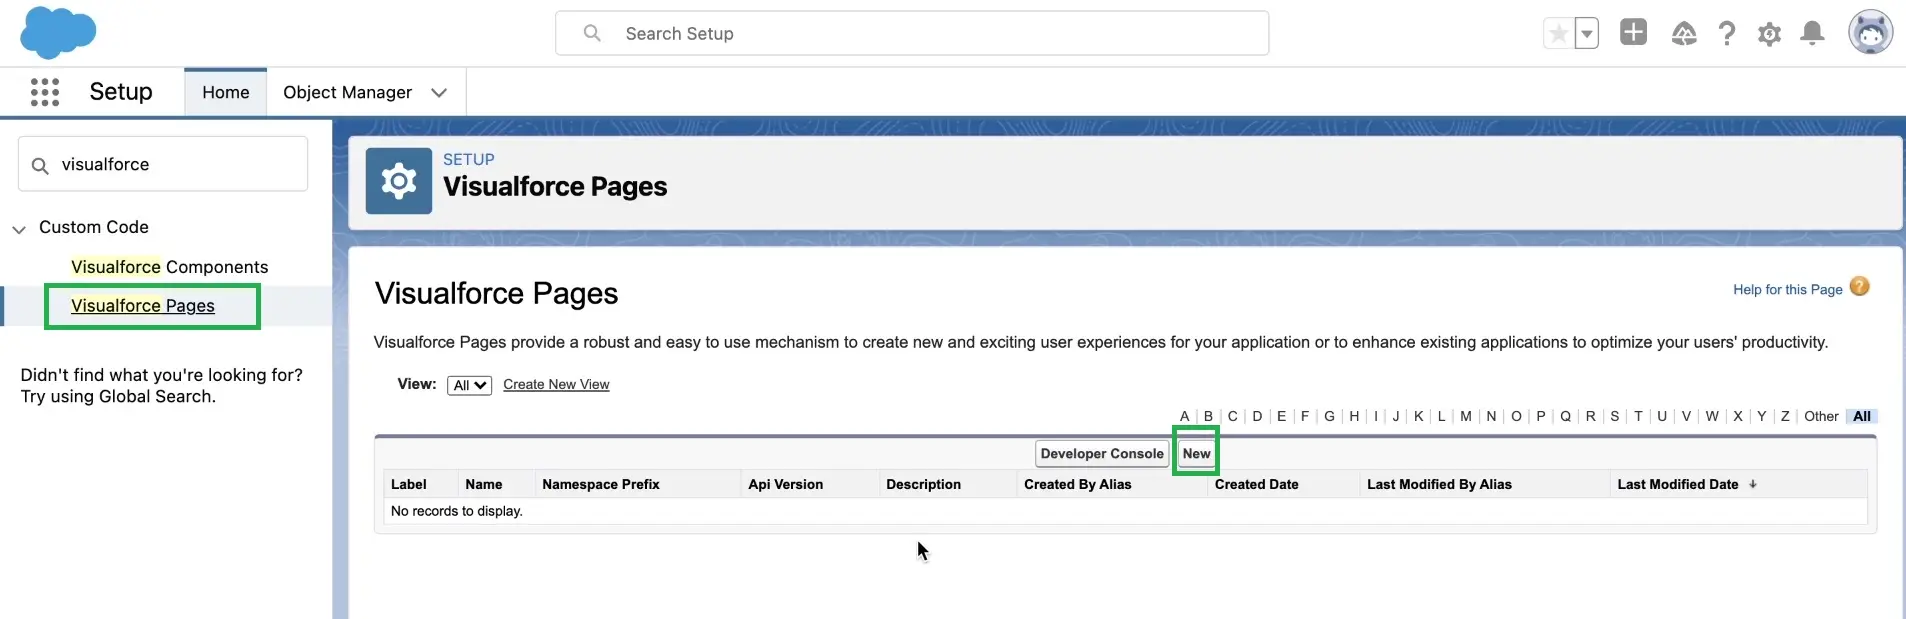
On the Visualforce Pages, press New.
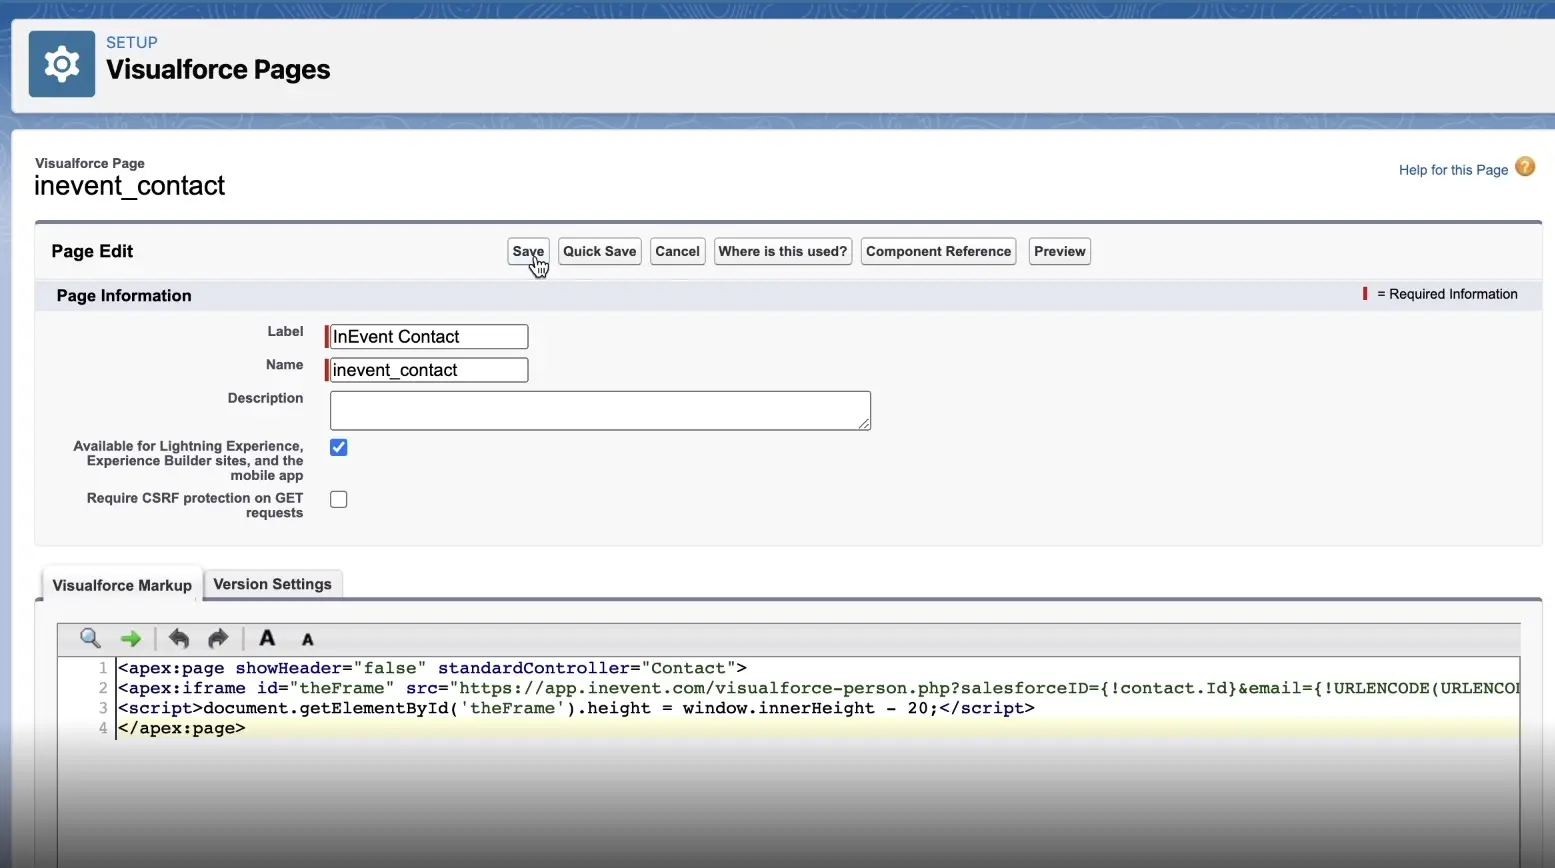
Next, you will need to fill out the fields: Label, Name, and description.
Erase the code displayed under VisualForce Markup, then, copy the VisualForce Page for Contacts from the InEvent platform and paste it to the VisualForce Markup field. Press Save.
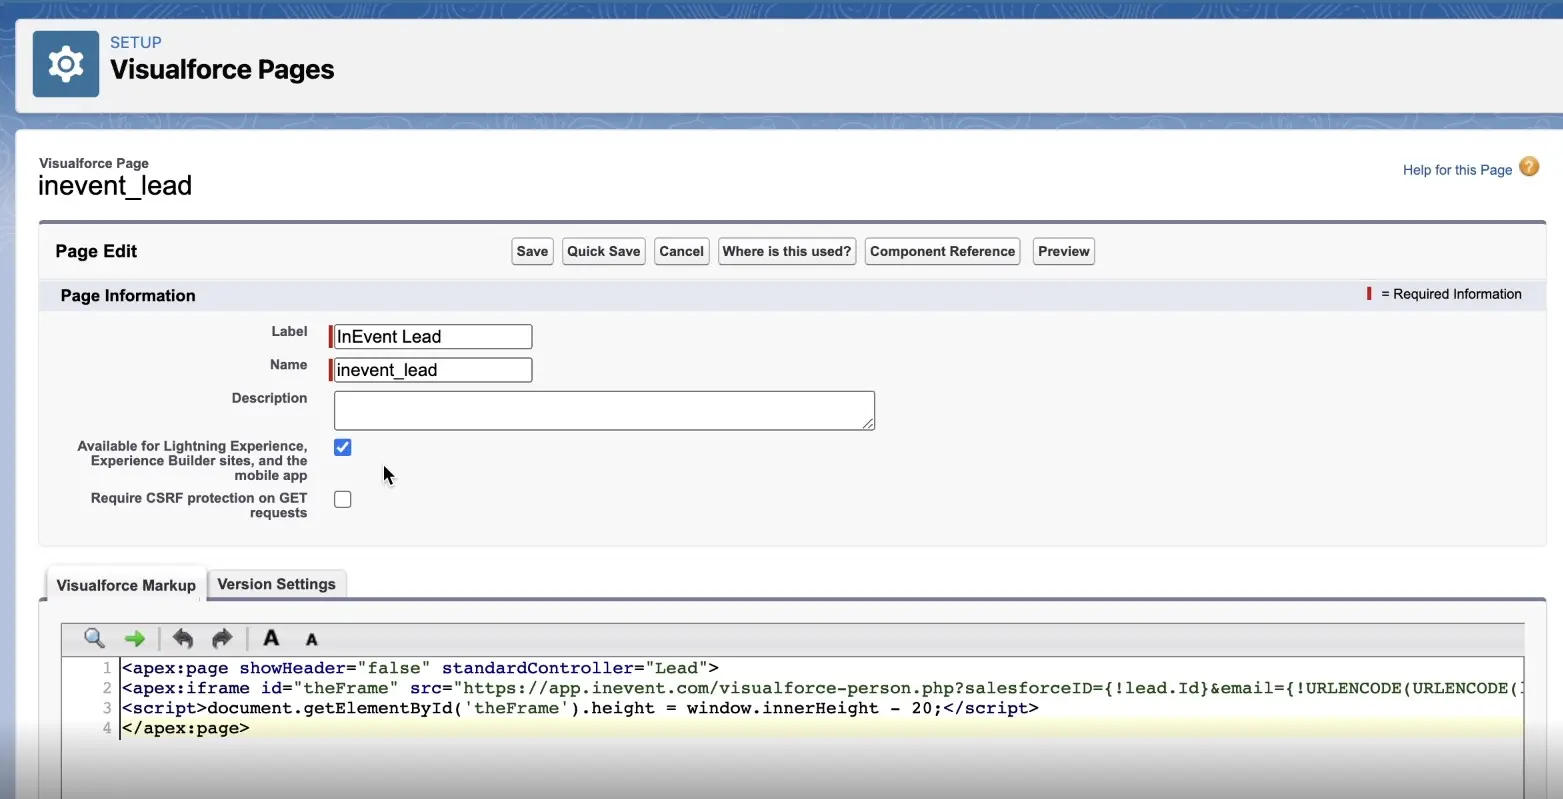
After saving it, click on VisualForce Pages again, on the left-hand side. A page identical to the one displayed above will open up again and you will need to fill out the fields Label, Name, and description.
Erase the code displayed under VisualForce Markup, then, copy the VisualForce Page for Leads from the InEvent platform and paste it to the VisualForce Markup field. Press Save.
Opening a Visualforce page from the App Launcher
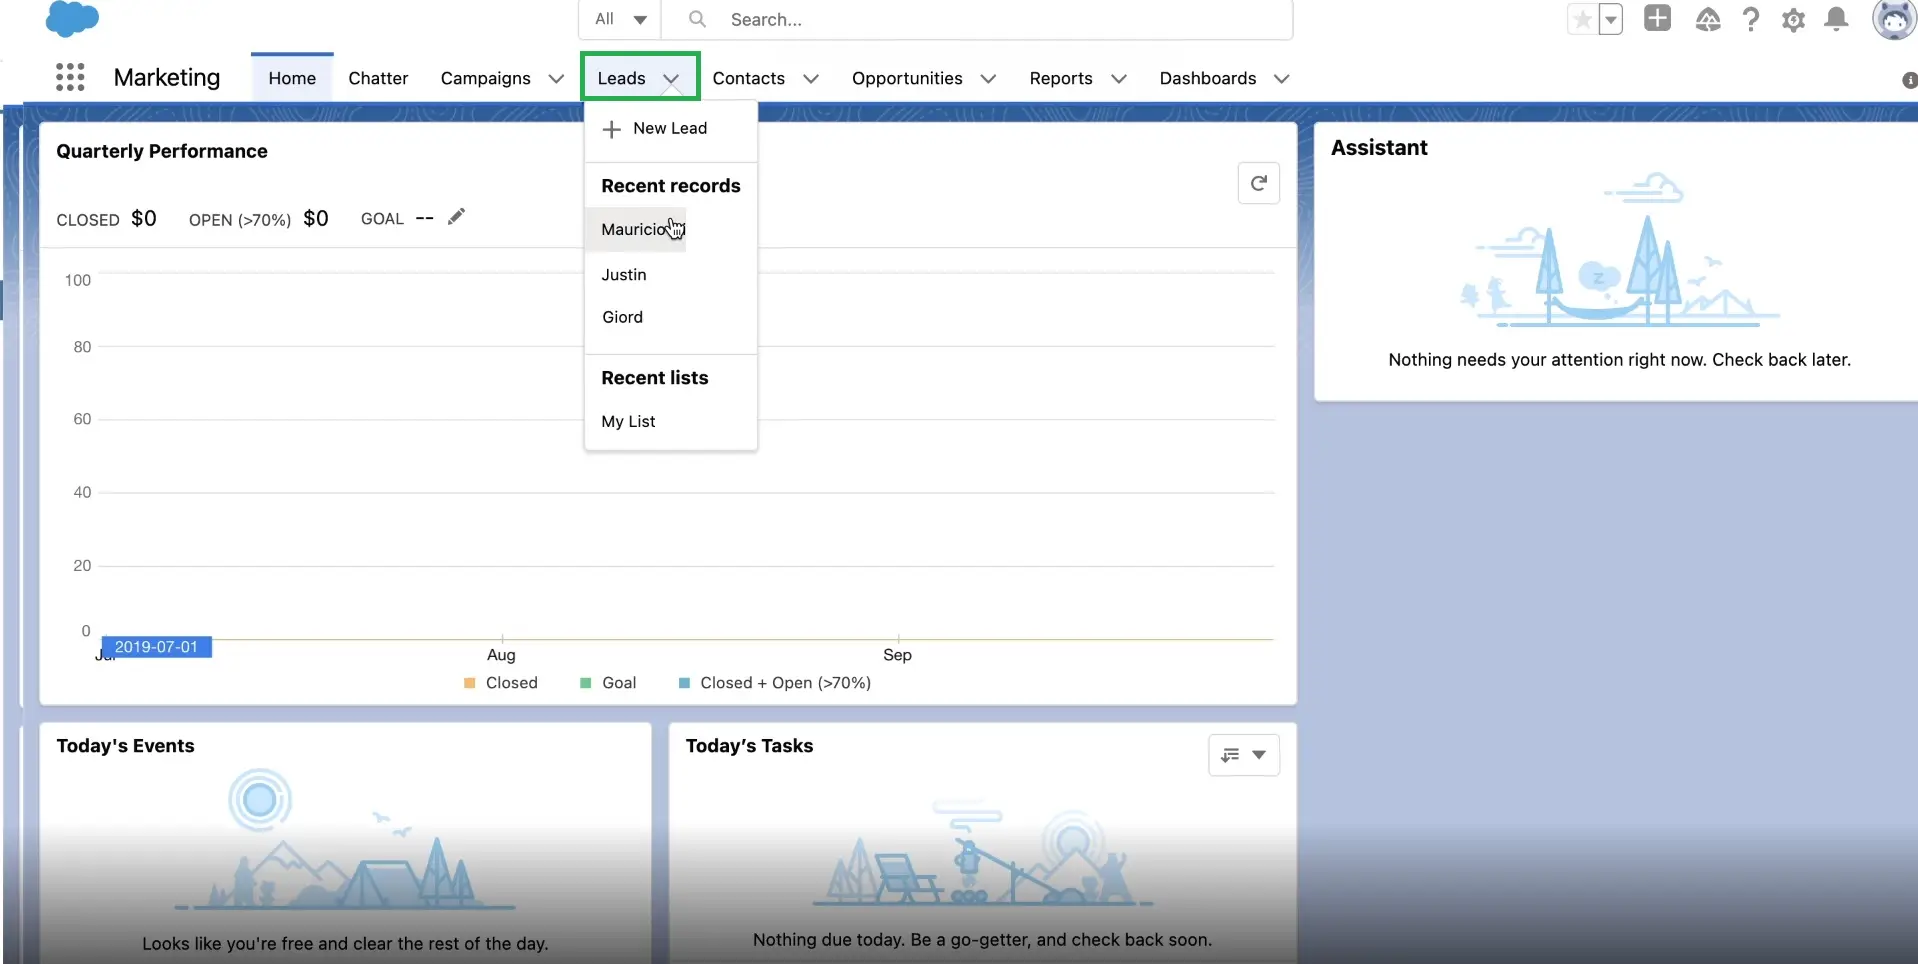
Your Visualforce apps and custom tabs are all available from the App Launcher. To open the App Launcher, click the 9-dots icon in the upper left corner. You can either select View All to see all of your apps and items, or select one from the menu.
After clicking on a custom app, you will need to select a tab (either Leads or Contacts) and within this tab, select a contact.
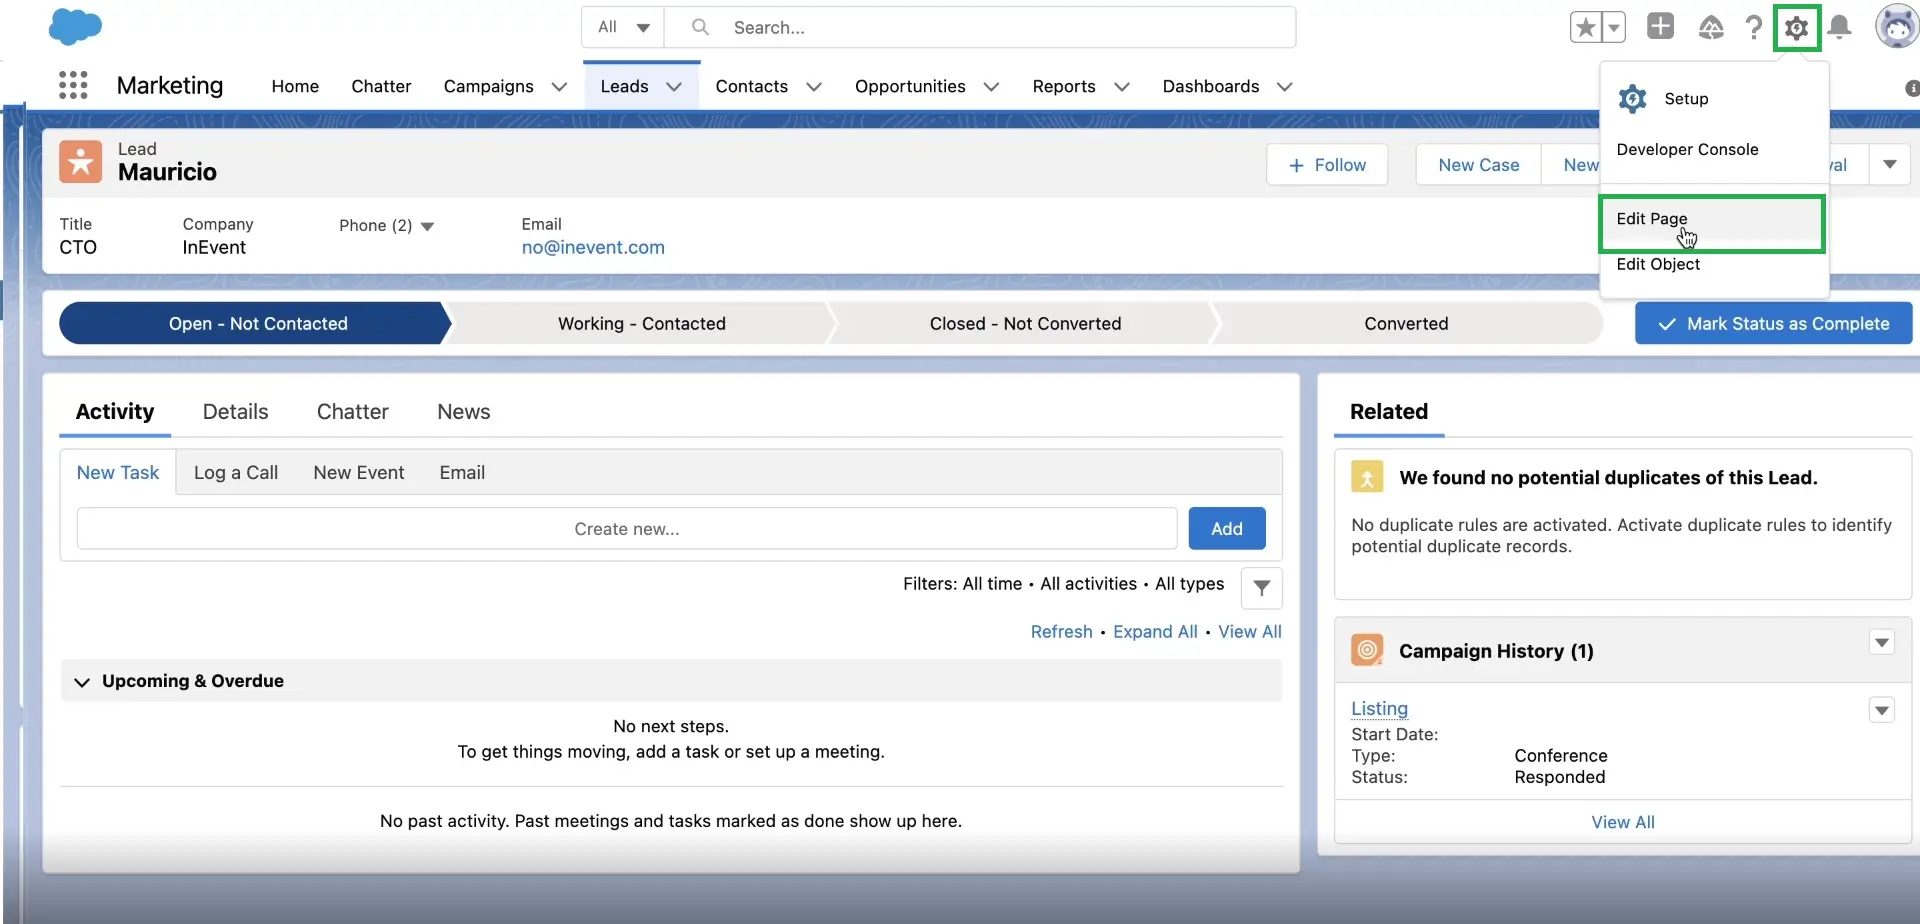
Next, click on the clog icon in the upper right corner and press Edit Page.
Adding a Visualforce page as a component
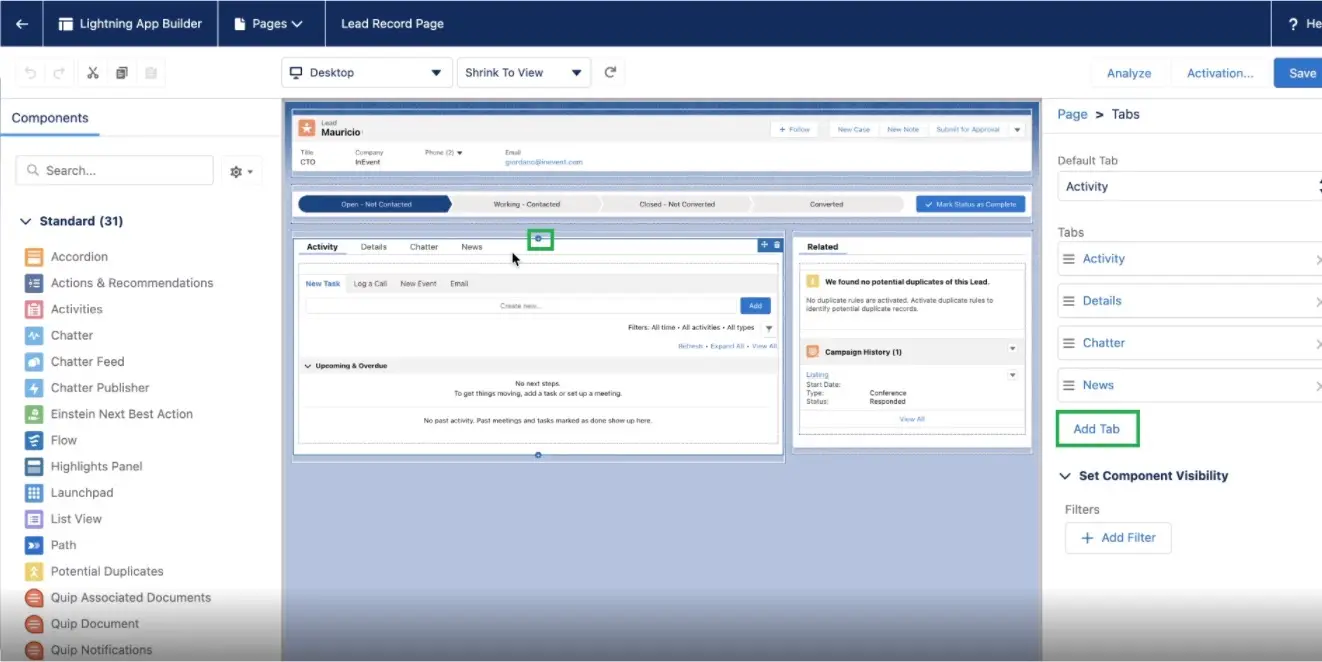
You can add Visualforce tabs to an app. To do so, click on the blue button with a + icon (highlighted in green in the image below). A window will open on the right-hand side, and you should press Add Tab.
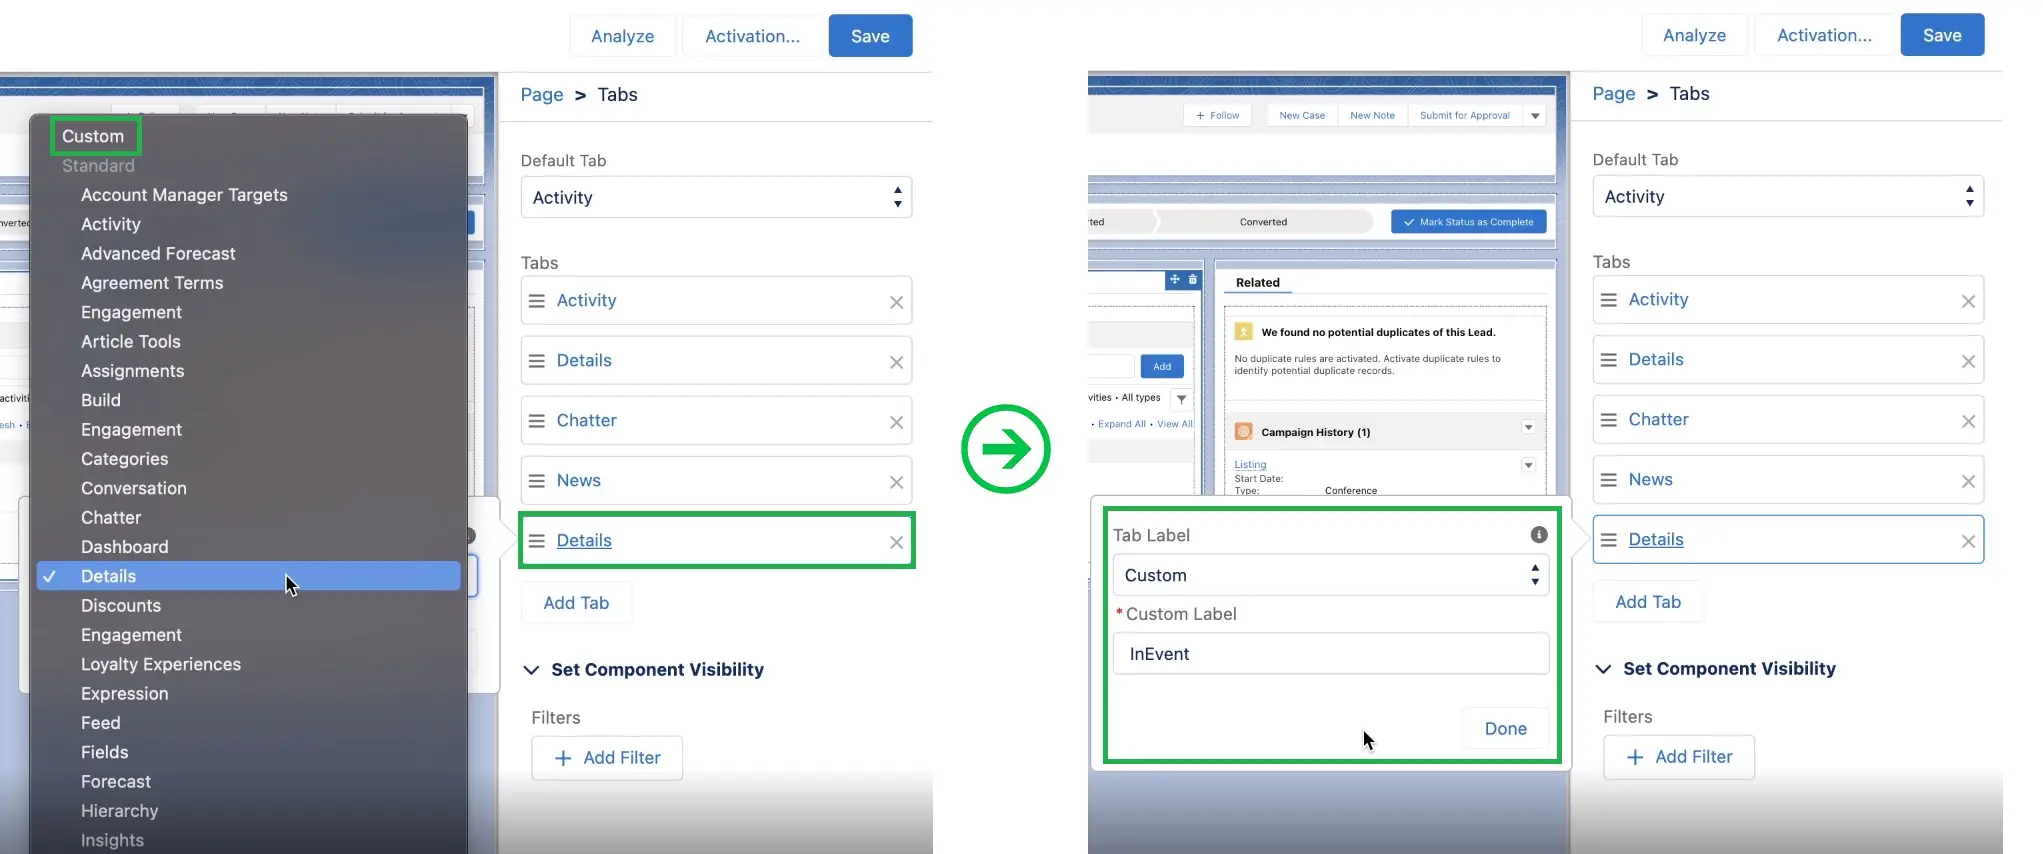
Click on the newly created tab and a dropdown menu will open on the left. Press Custom and next type the Custom Label's name.
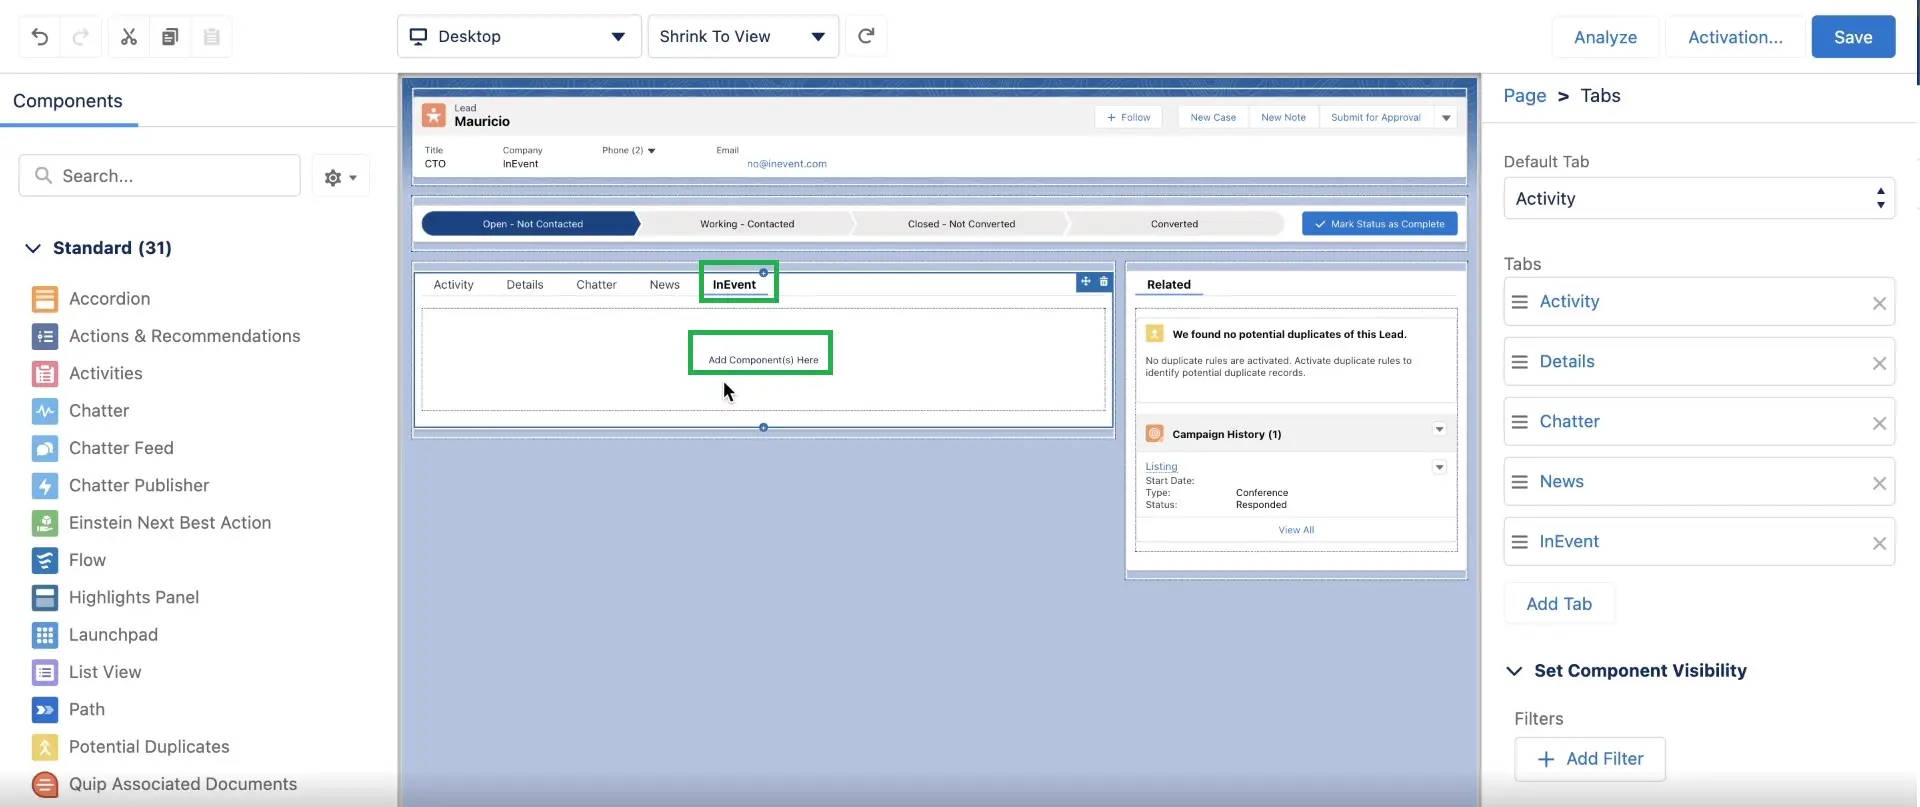
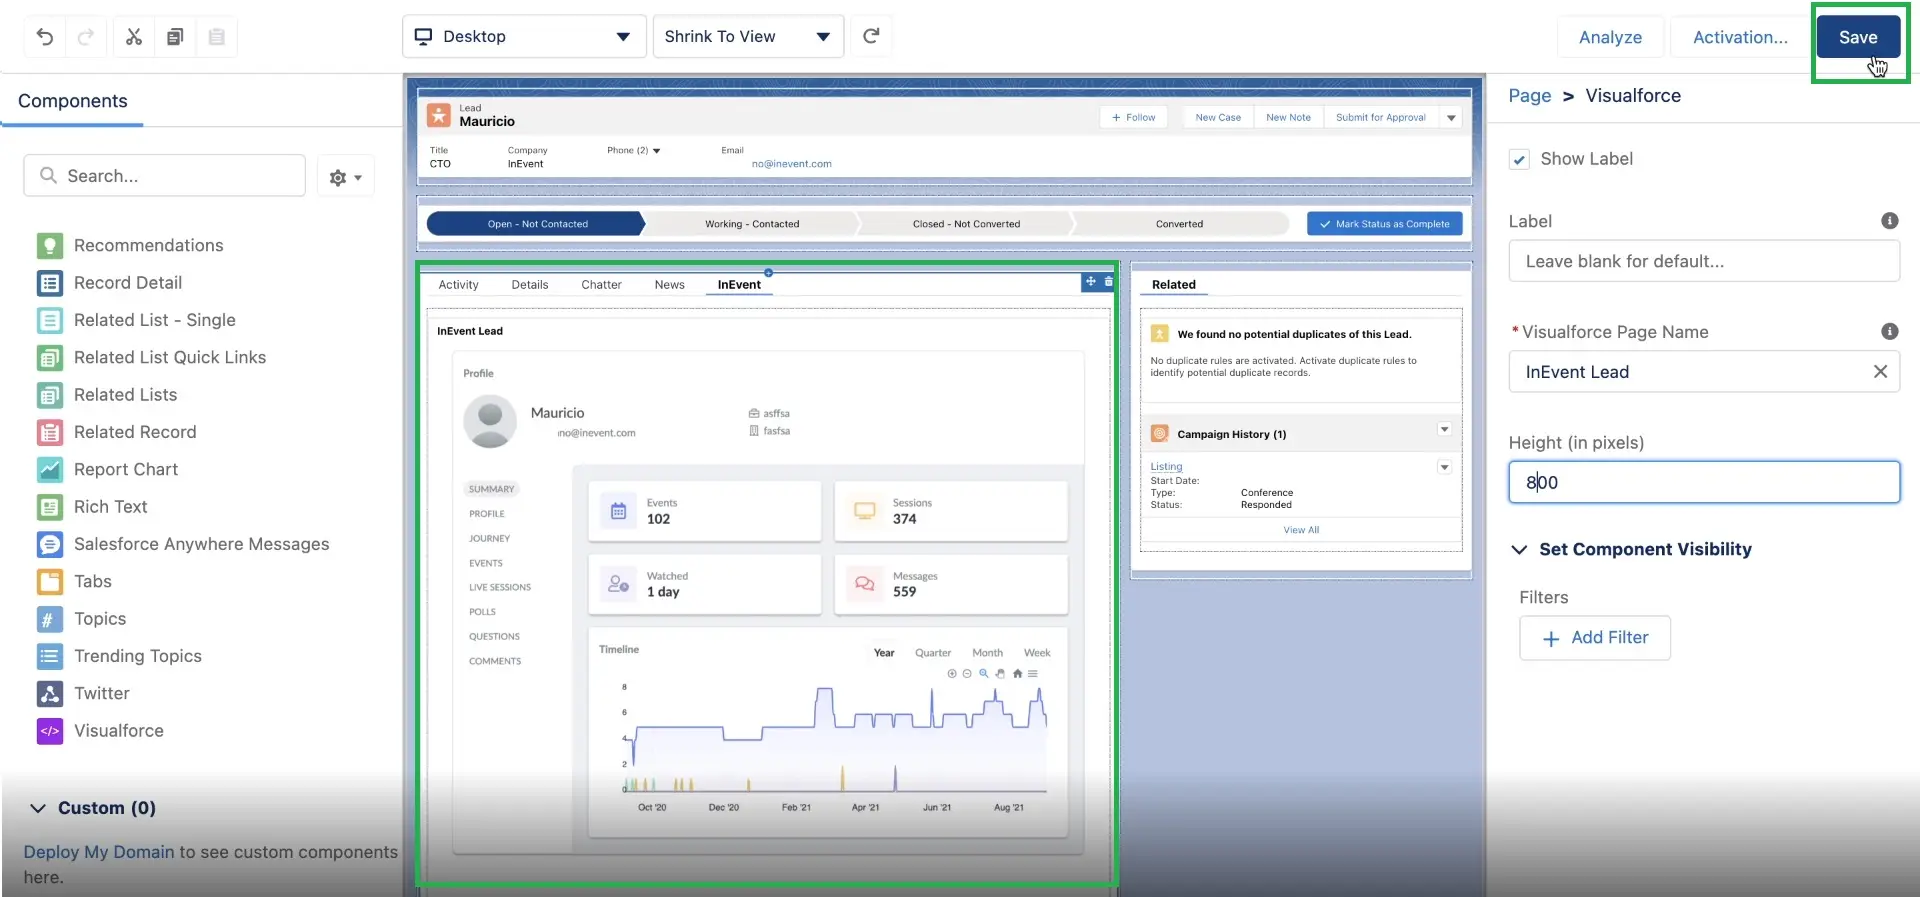
When you create a custom page in the Lightning App Builder, you can add a Visualforce page to this page by using the Visualforce component. To do so, click on the custom tab you have just created, and next press Add component(s) here. For example, the tab we created was called InEvent, so we clicked on the InEvent tab on the Lead's menu.
Then, in the Components' menu on the left, select Visualforce. In the menu on the right, you can select which Visualforce Page should be added to this custom tab. You can also edit the Visualforce Page by editing its Height in pixels.
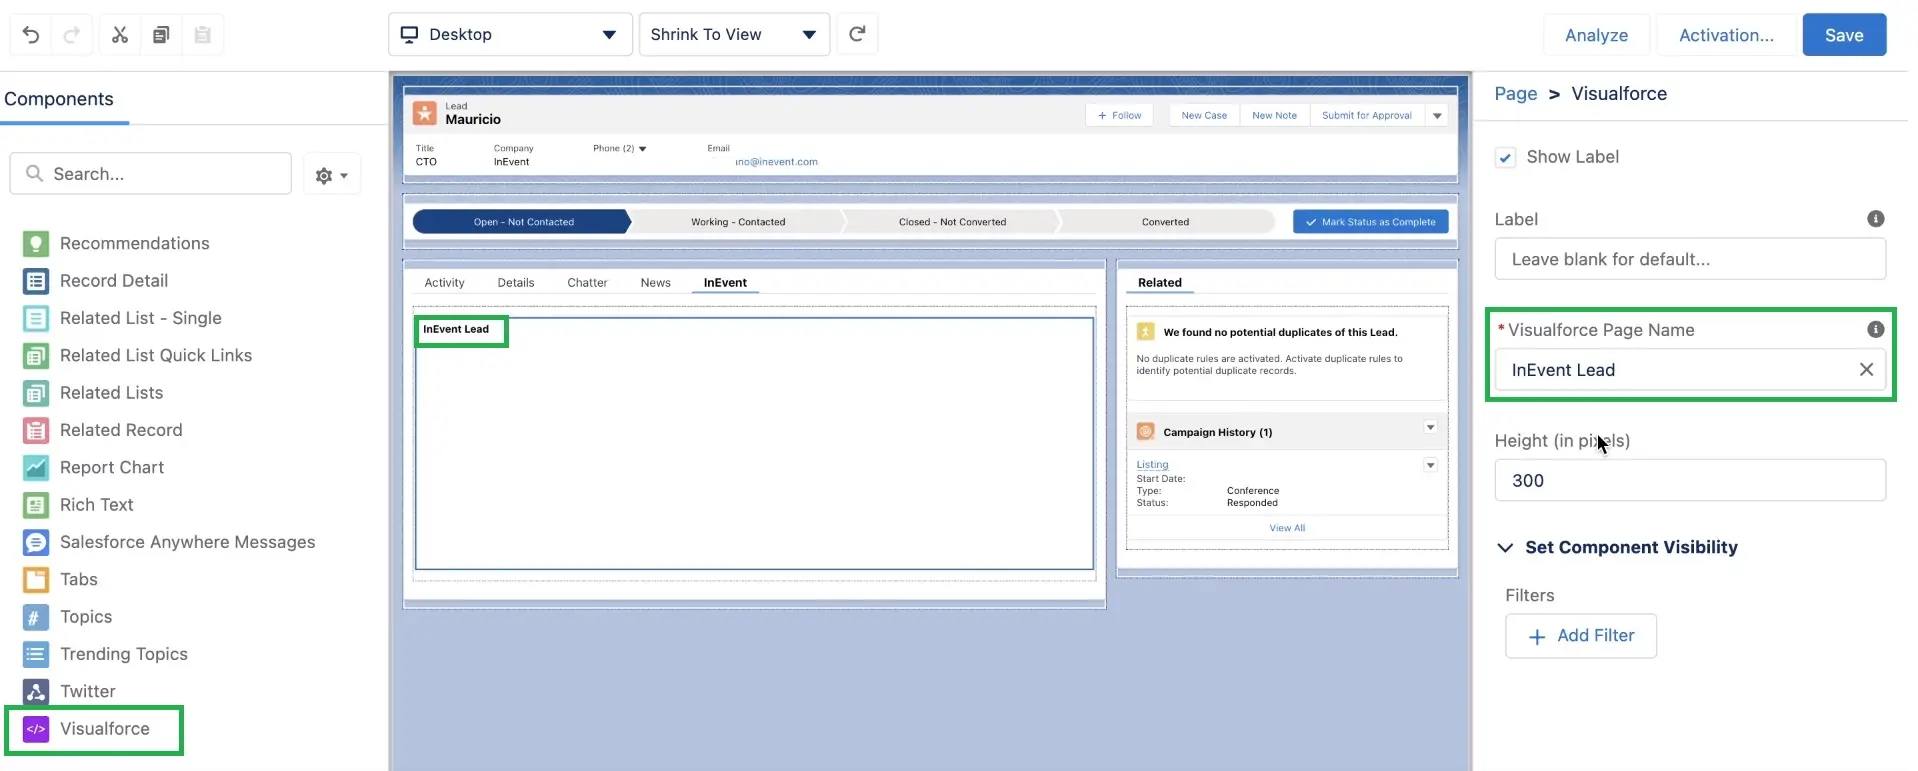
Once you have finished all the changes, press Save.
What information will be available on this custom page?
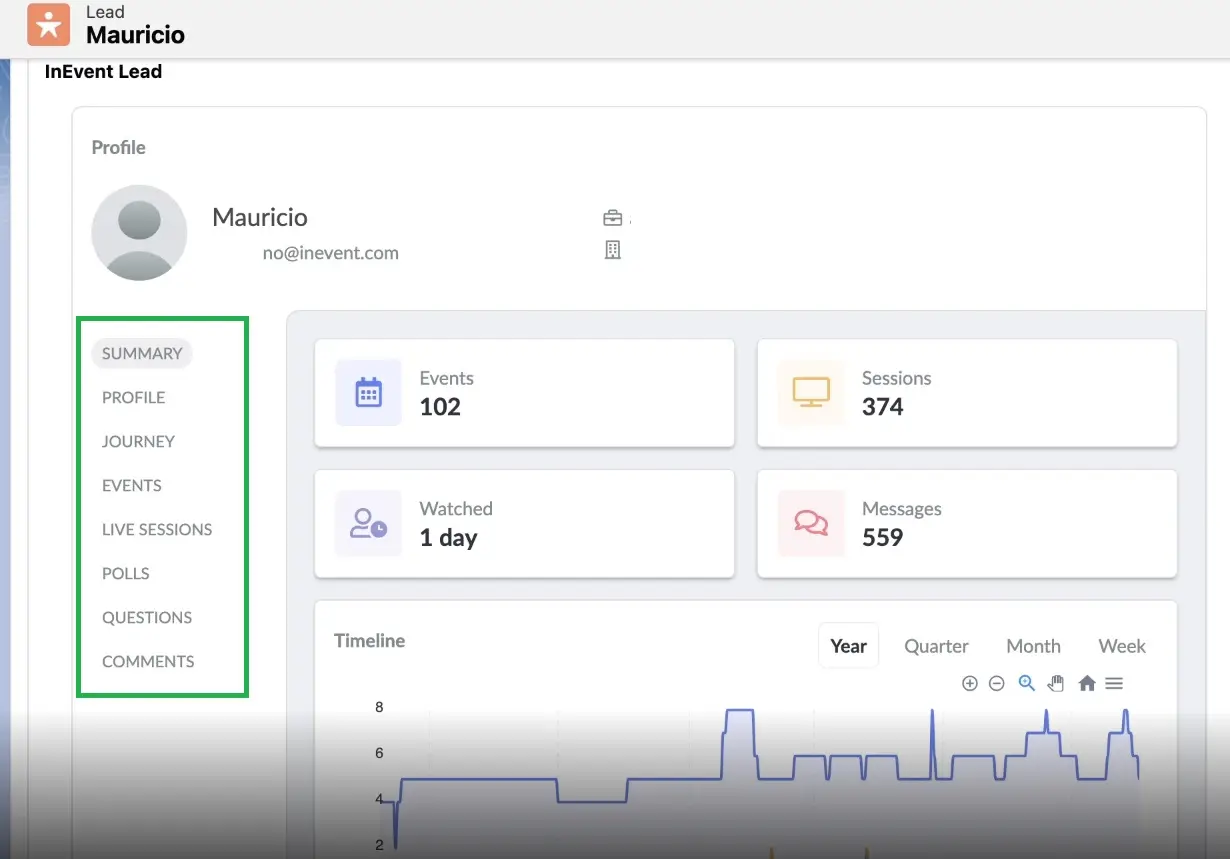
After setting up the Visualforce page as a component to either Leads or Contacts, you should be able to navigate through the custom page and retrieve information from InEvent such as:
- Summary: Check basic information regarding your lead in a handy way including information from all events this person has attended.
- Profile: It will include information such as first name, last name, their role and company information as well as tags associated with this person.
- Journey: It will list all actions and interactions related to this account.
- Events: It will include logs of ongoing and past events this person has attended.
- Live sessions: It will display Virtual Lobby reports, and list all sessions from all events this person has watched as well as its watch %.
- Polls: All polls answered by this lead.
- Questions: All questions asked by this lead.
- Comments: All comments shared by this lead on the chat tab inside various activities.
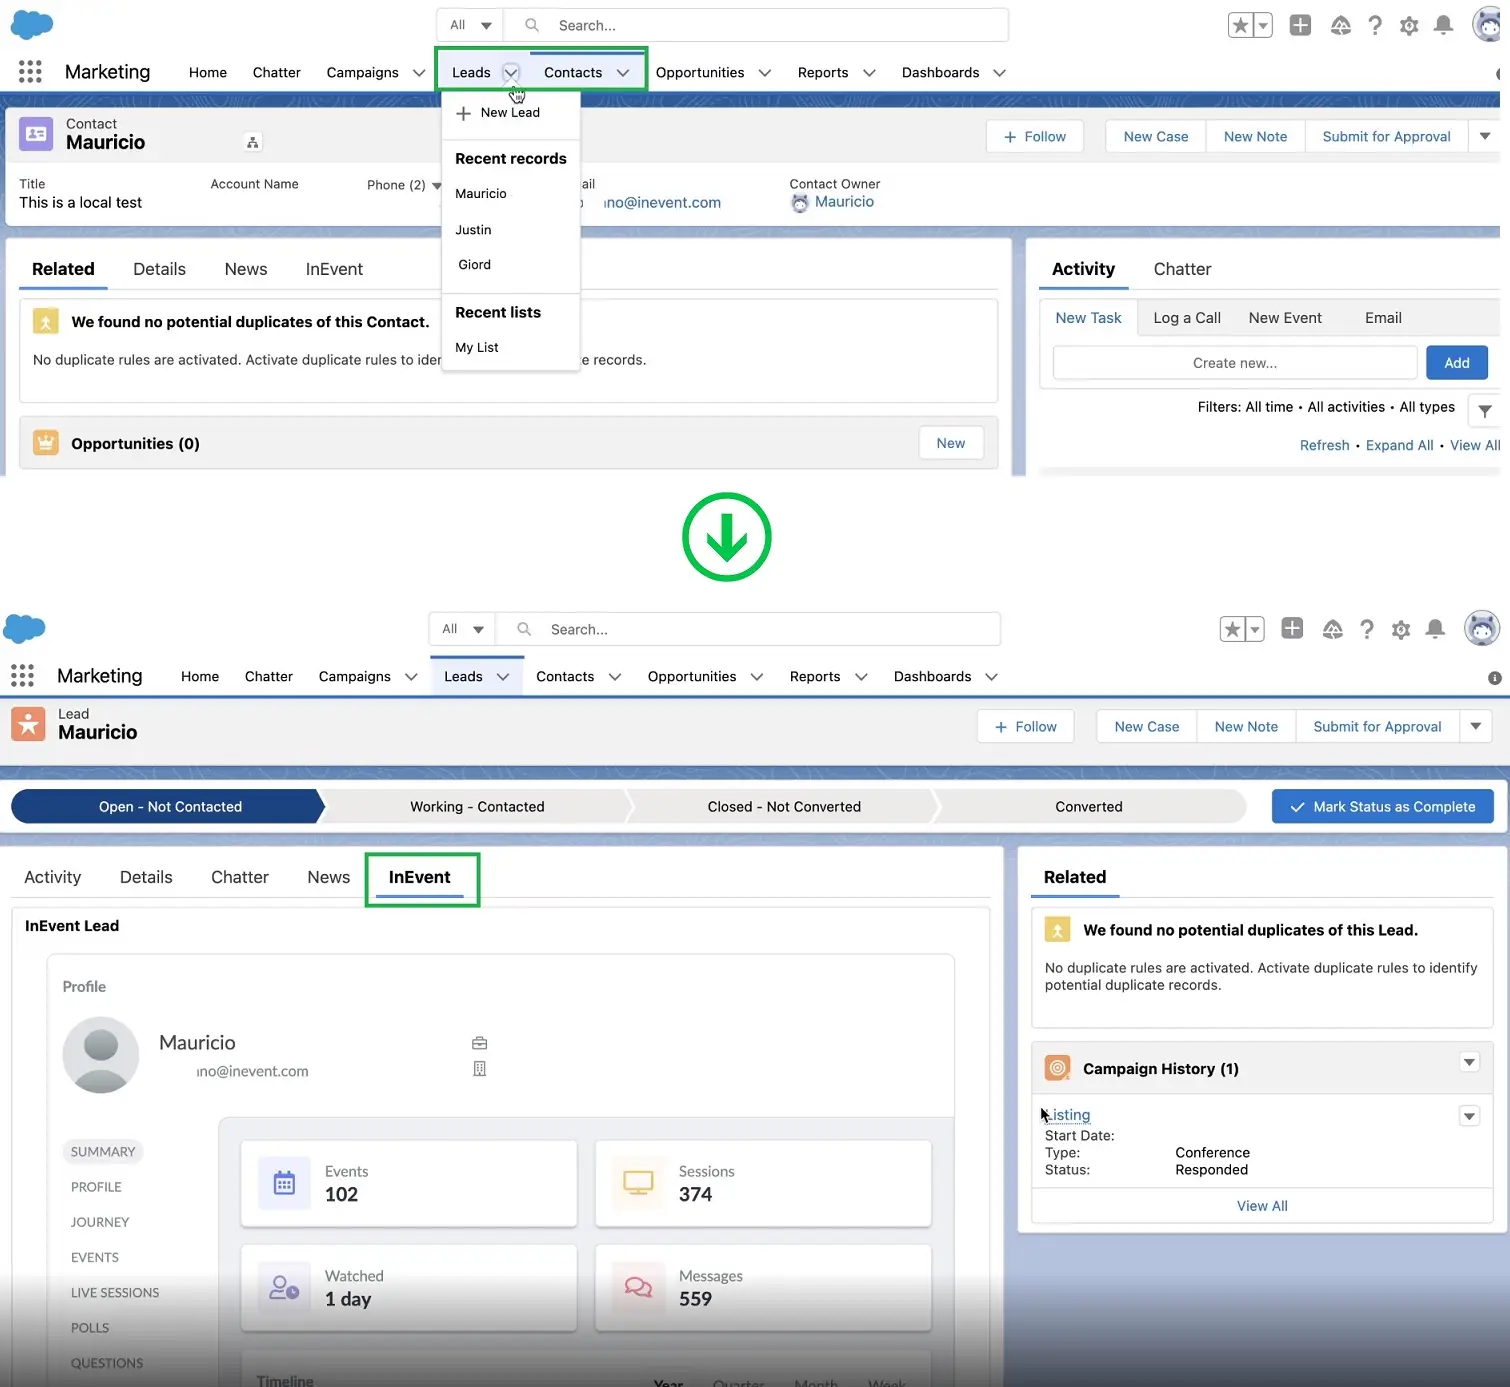
Where can I access this information on Salesforce?
To access this information on Salesforce, simply click on either Contacts or Leads and select a person. Then, click on the custom tab you have created, and the attendee's information will be displayed, as shown below:
Inspecting the Salesforce page to find the Visualforce page's unique URL
Since each page is accessible by a unique URL, this page can also be accessed outside of Salesforce or the InEvent platform. To get the page's URL, you will need to Inspect the page (right-click and click Inspect) and scroll down until you find a URL like the one displayed below:
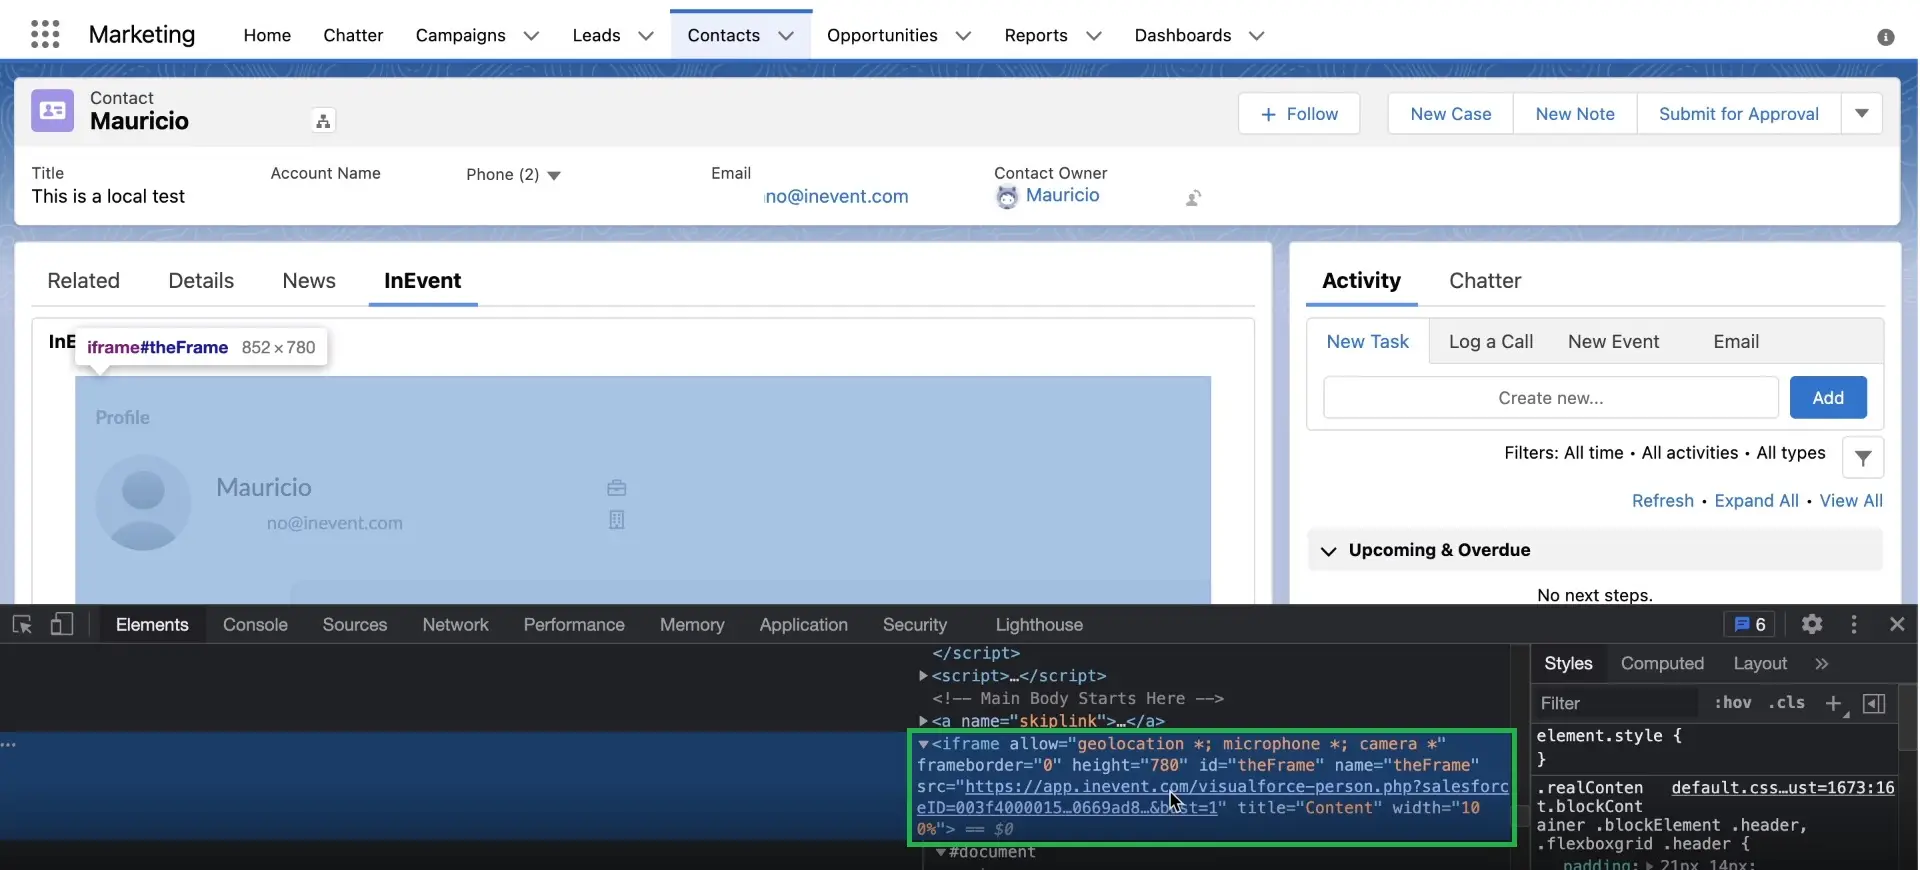
With this unique URL, you will be able to embed this page into a different CRM.
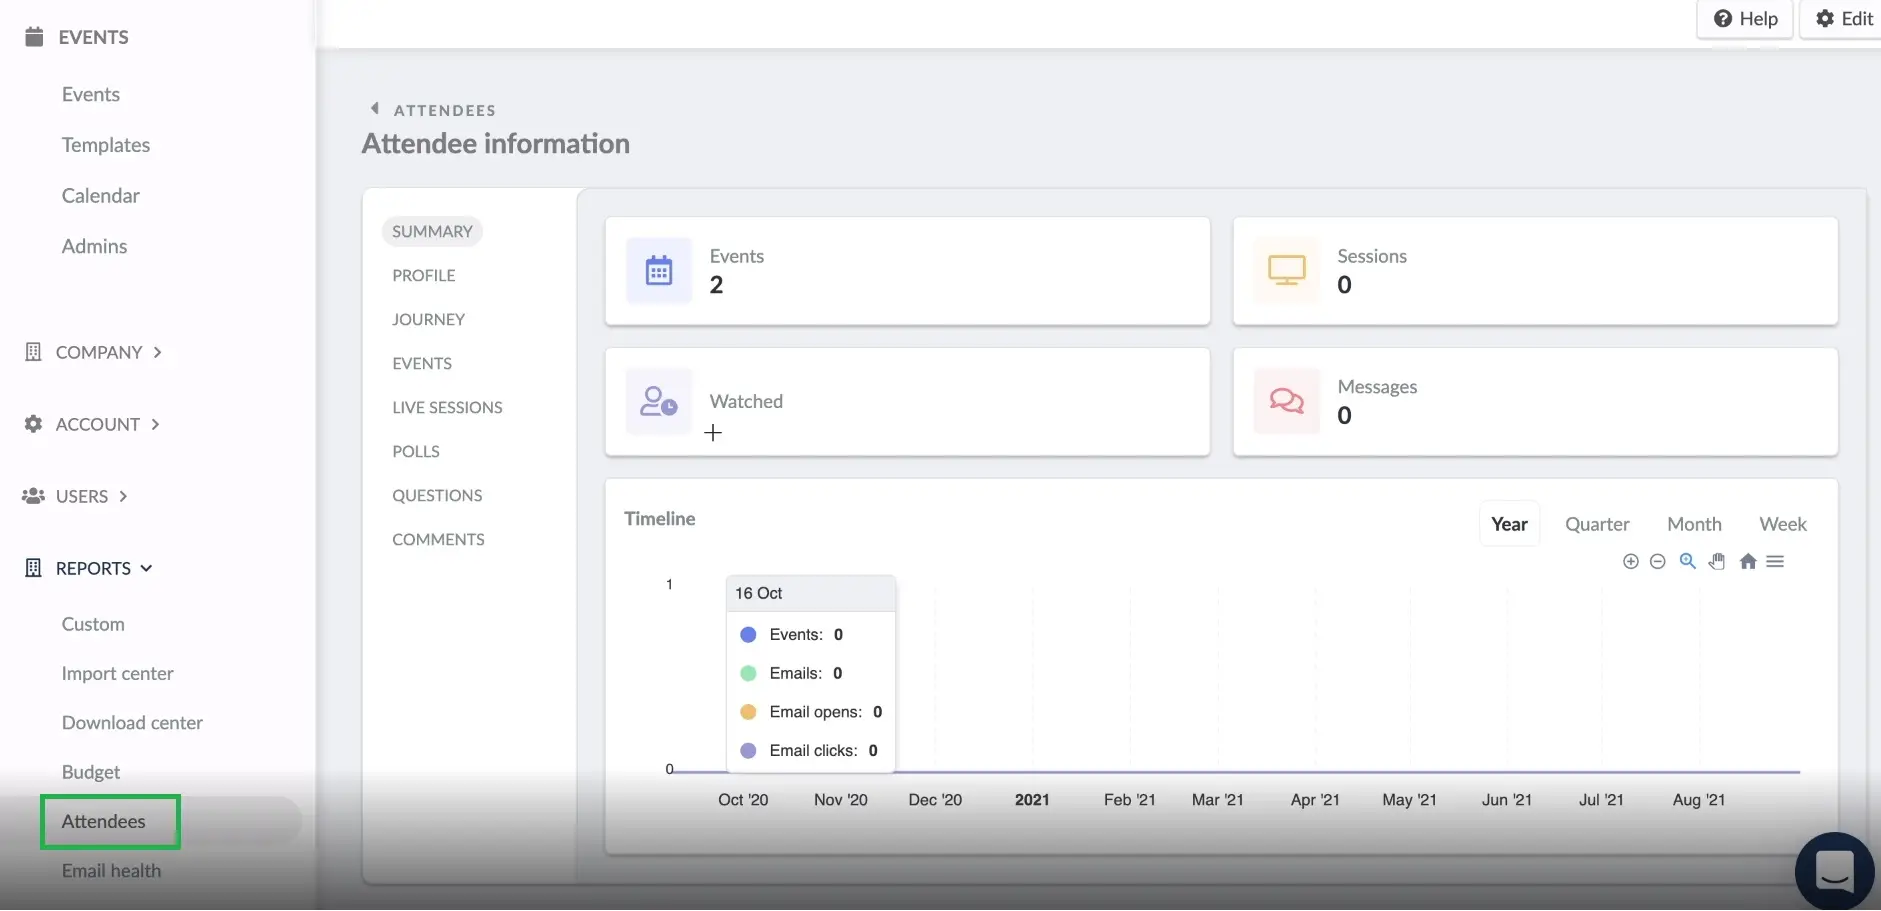
Where can I access this information on the InEvent platform?
At the company level of the InEvent platform, click on Attendee under the section Reports and there will be a list of all attendees from all of your events. Select an attendee and you will see this attendee's information, as shown below: