InEvent virtual backgrounds
 Updated 11 months ago
by
Faisal Durrani
Updated 11 months ago
by
Faisal Durrani
When planning your virtual event you were inclined to use a virtual background to look modern?
At InEvent you have the option to choose from a native virtual background tool or you can also download a third-party virtual webcam.
This article intends to teach you how to enable and use the native virtual background tool.
How to enable the InEvent Virtual background
If you, the event organizer, would like the speakers to have the option to blur their backgrounds or pick a different 'scenario', you should go to Settings > Tools > Live section and make sure Virtual background is enabled.
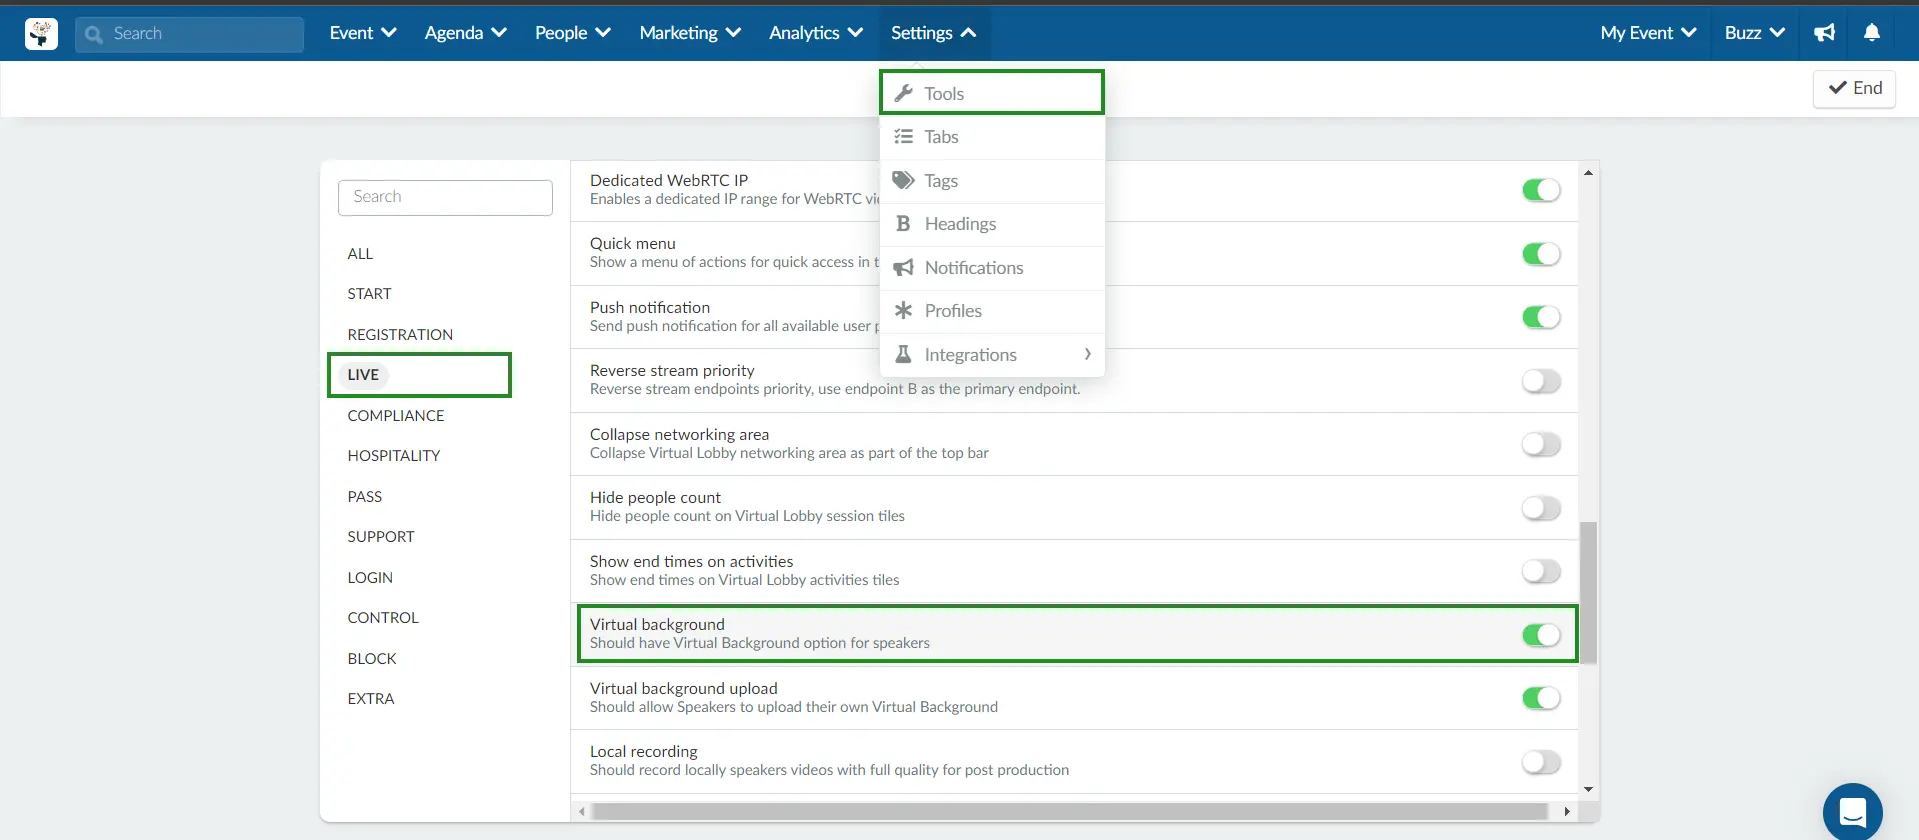
By enabling the Virtual background tool, speakers will see a device configuration pop-up where they will be able to choose their preferred background.
Customizing the Virtual Background
In the Platform
InEvent offers the option to select one of the default backgrounds as well as set up a virtual backgrounds of your choice.
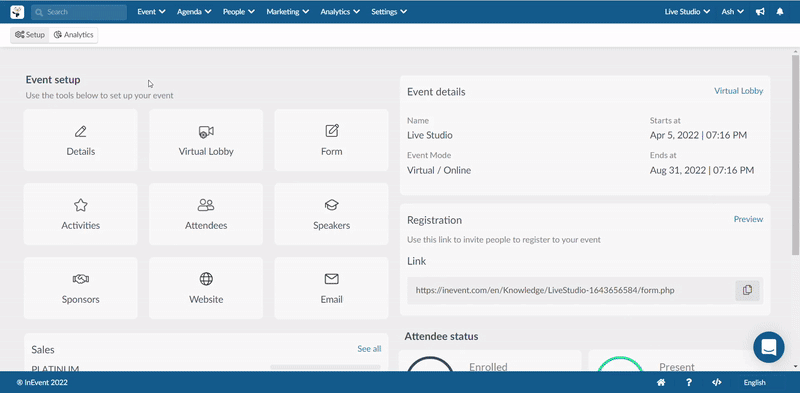
- To hide the default background, go to Event > Virtual Lobby > Virtual Background > Edit > untick the Enabled box.
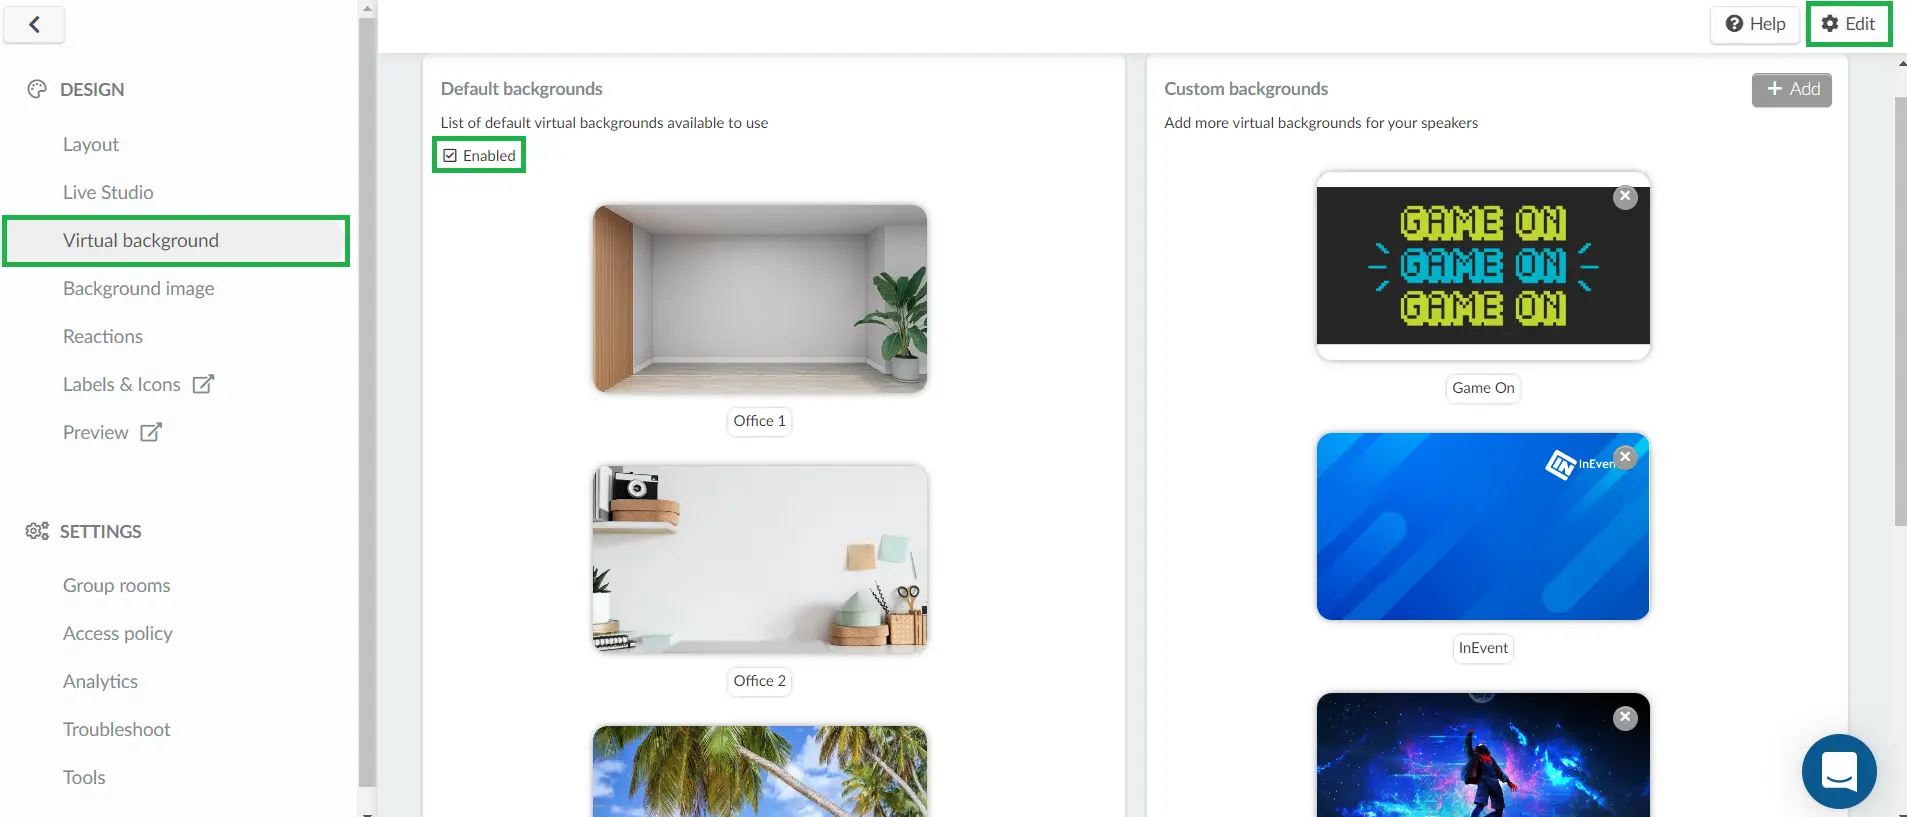
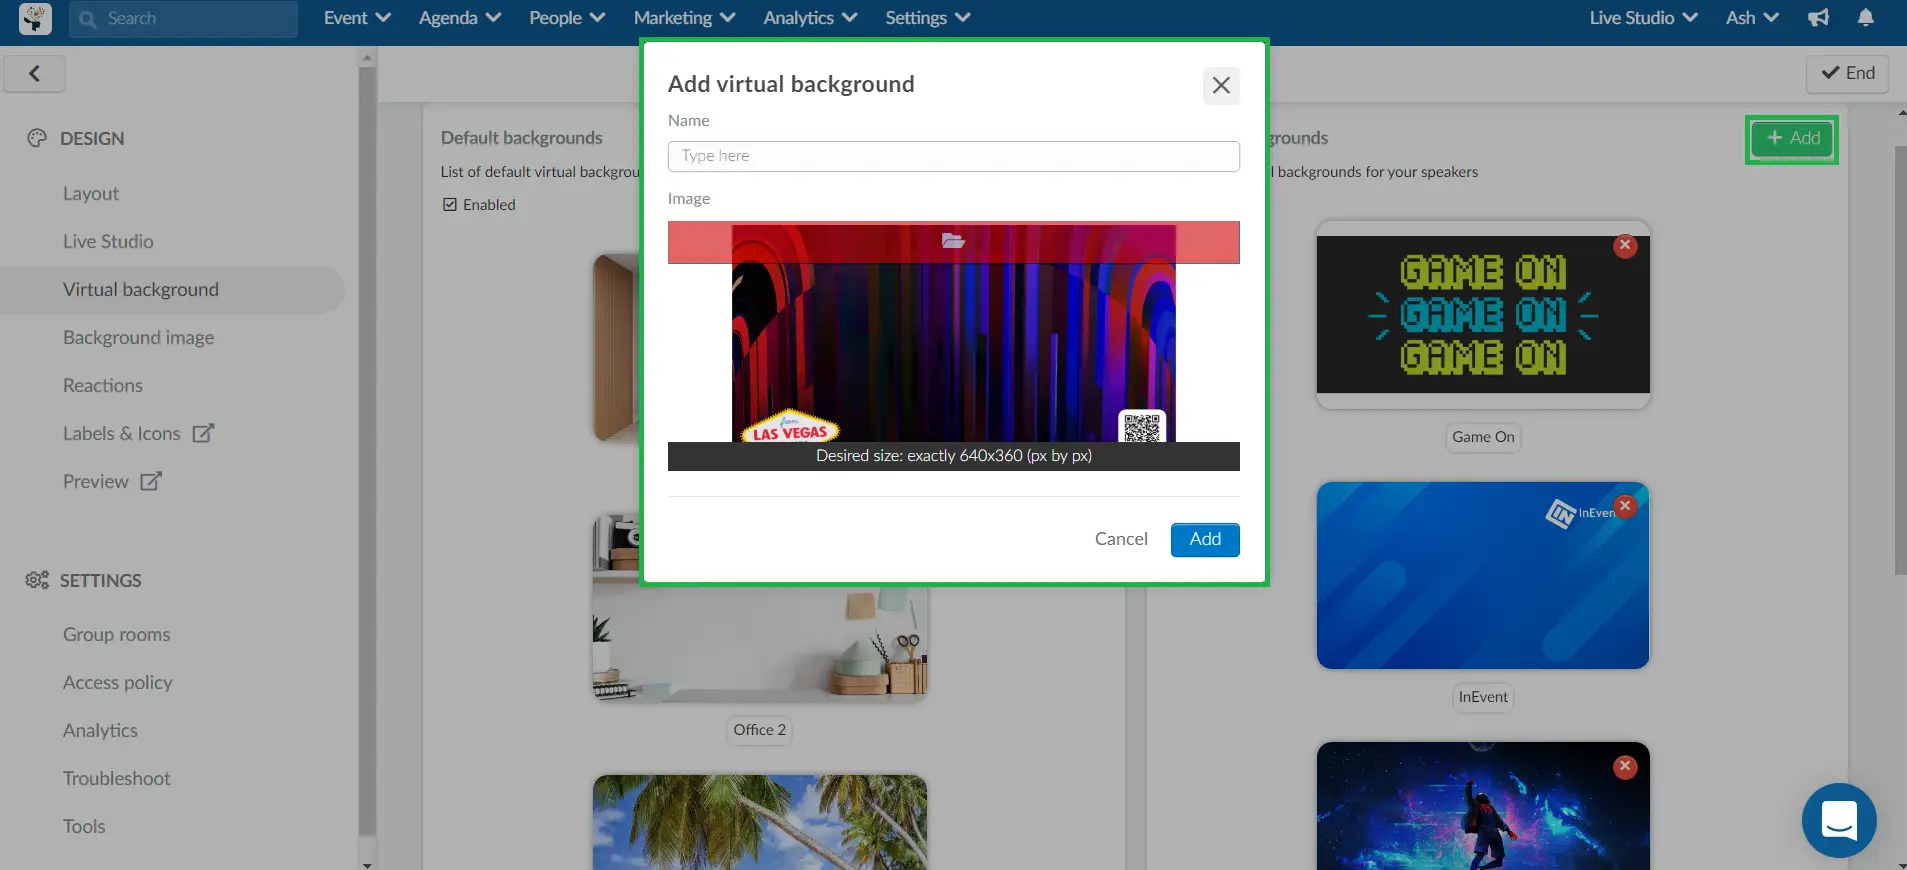
- To add a custom background click on +Add. A new window will appear to fill up the Name, and choose a file by clicking on the red bar > Add.
You can add as many virtual backgrounds as you wish.
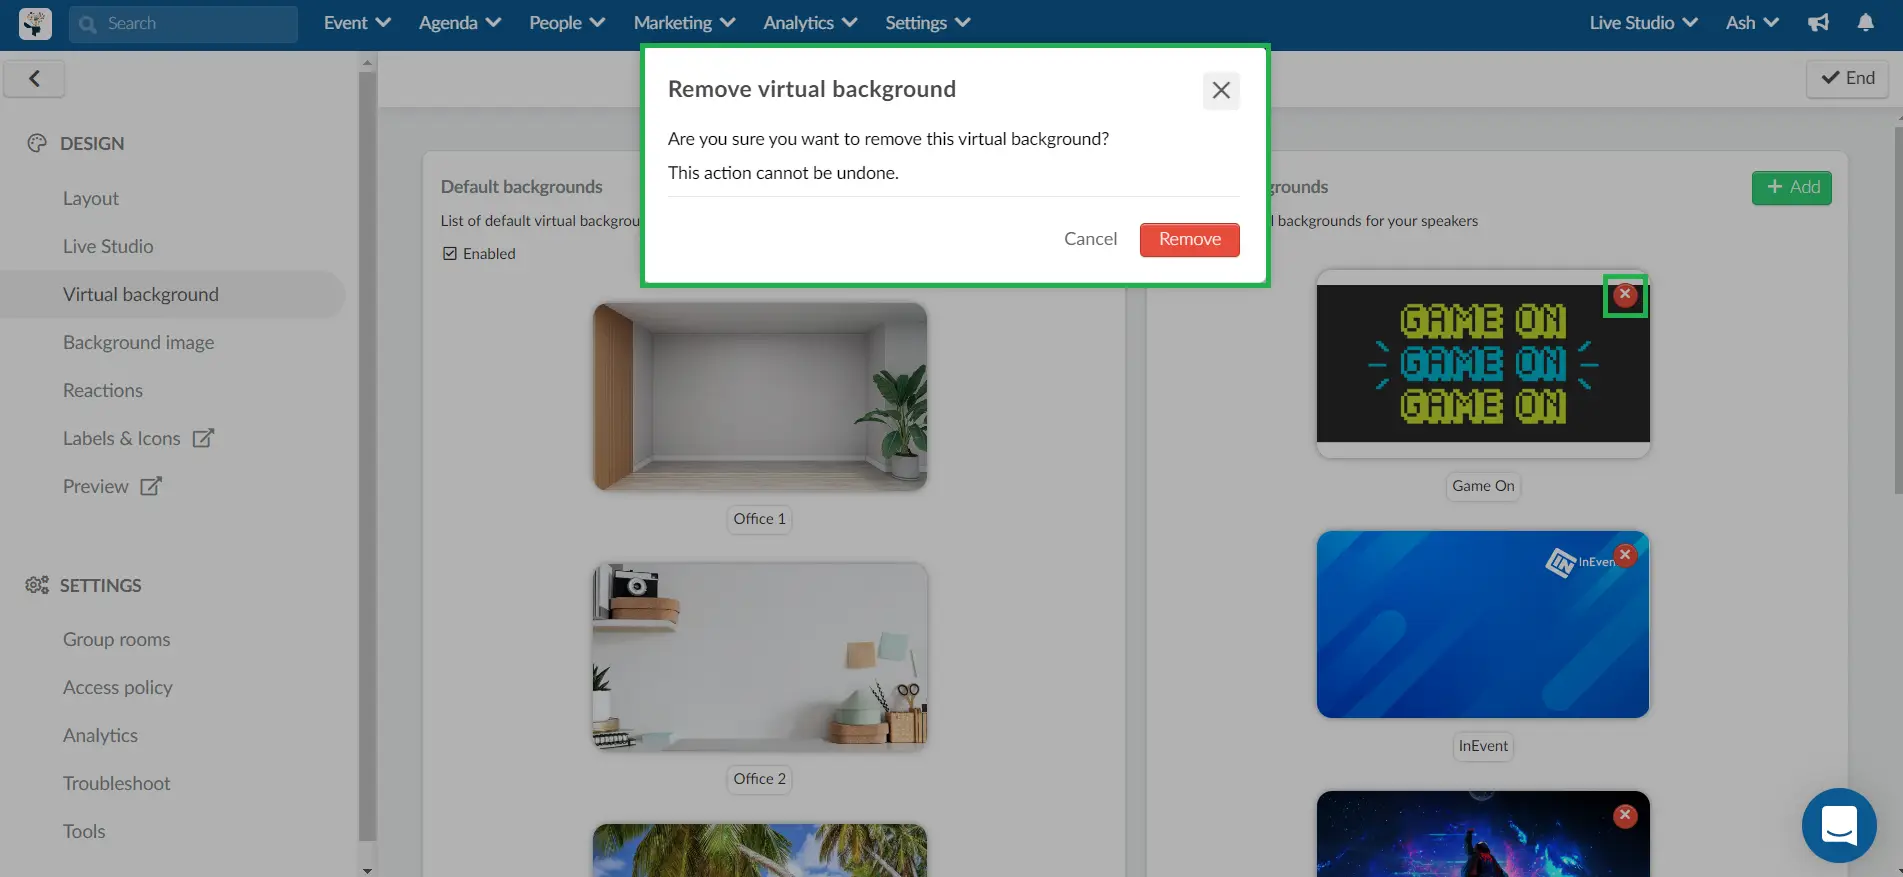
Removing a Custom background
To remove a Custom background from the platform, simply click on the Edit button > click on the cross sign in the upper right corner of the image you wish to remove > A pop up window will open for you to confirm removal.
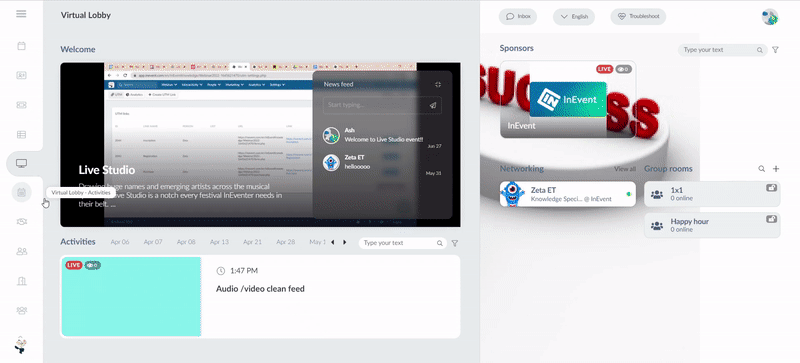
In the Virtual Lobby
You can also upload a Custom virtual background directly from the Virtual Lobby when joining an activity. Only room hosts, and users with admin or staff permissions can make such upload.
To add a custom background from the Virtual Lobby:
- Click on the activity you are joining.
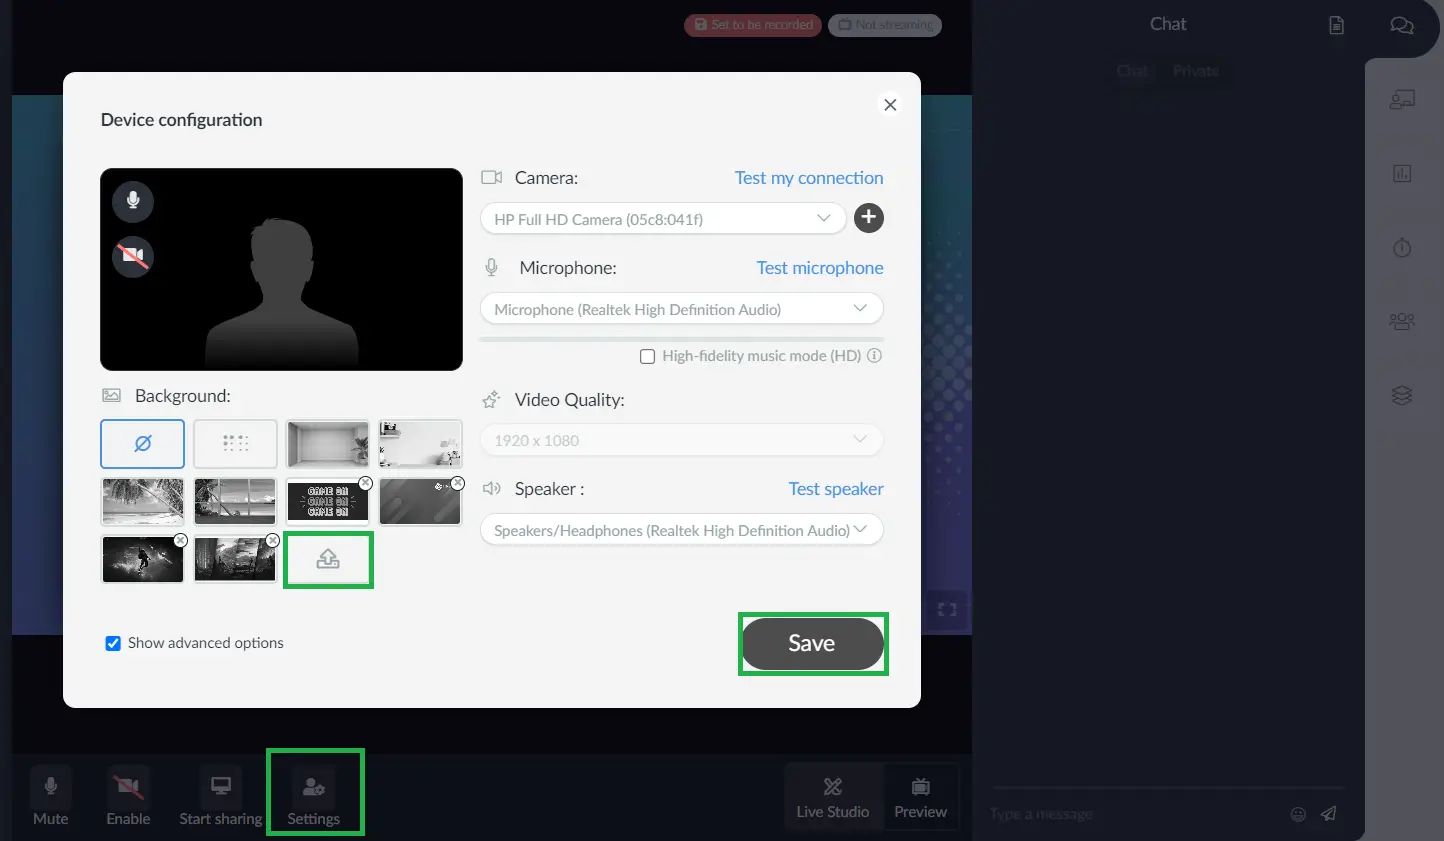
- Under the Background section in the Device configuration pop up, click on the Upload image button.
- Type the name of your Virtual background and click on the red bar to select an image.
- Click on the Add button once you are done.
Custom backgrounds can also be uploaded from inside an activity.
To do so simply click on the Settings button inside the activity and the Device configuration pop up will appear > follow the steps listed above to upload a custom background > press Save when done.
You can add as many virtual backgrounds and switch backgrounds as you wish.
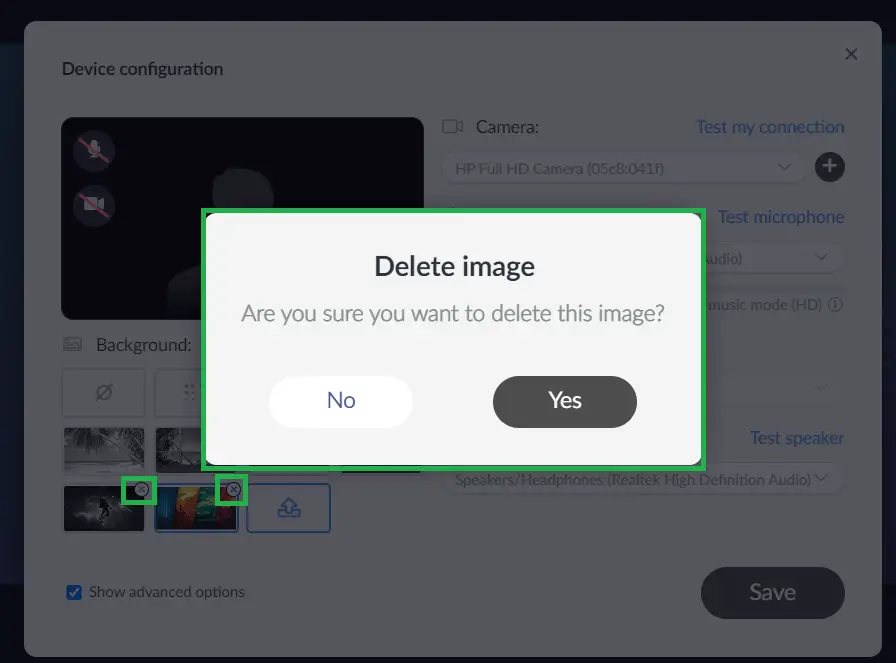
Removing a custom background
To remove a custom background directly from the Virtual lobby, simply click on the cross sign by the side of the image you wish to delete > a pop up window will appear for you to confirm the removal.
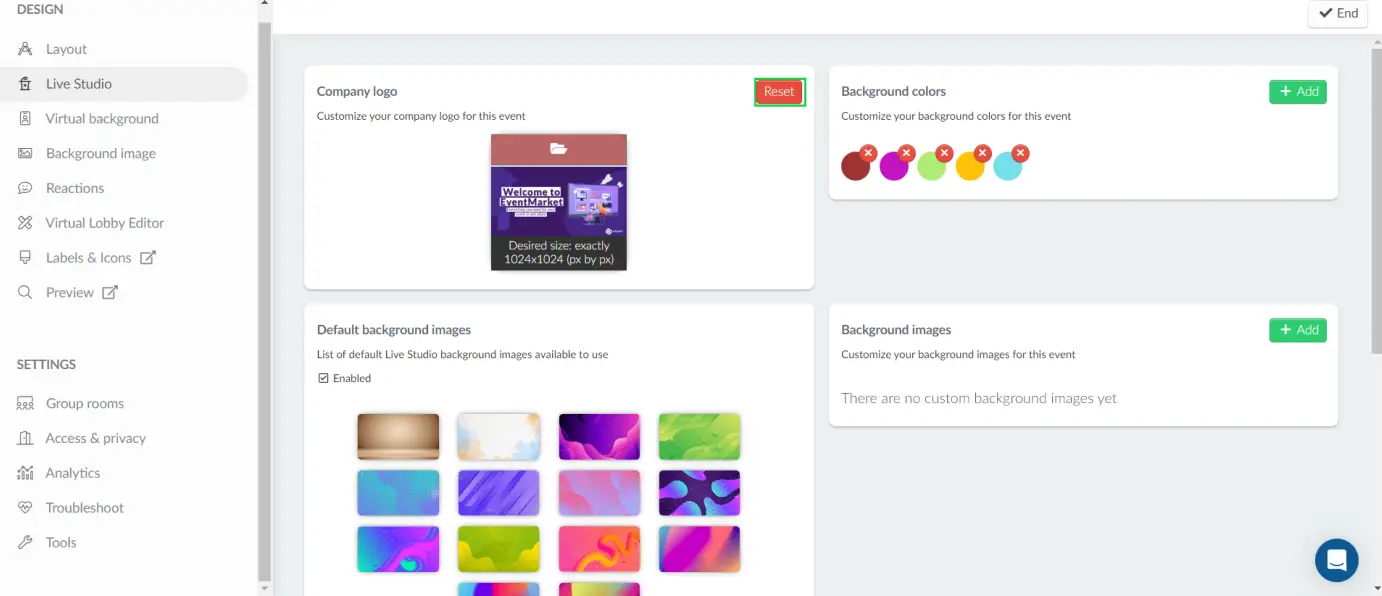
Customizing the Live Studio background
You can add a different company logo other than the default one retrieved from your company images to be shown when using the Live Studio. You can also customize the colors, and add images and video backgrounds.
To customize your company logo, background colors, images or videos, follow these steps:
- Go to Event > Virtual Lobby > Live Studio > click on Edit
- For the images, videos and colors, click on the +Add. For the company logo click on the red bar.
- You can select one of the options for the background colors. For the others choose a file from your computer.
- To save the changes made, click on End.
1920x1080px ).If you want the default company logo to come back, click on Edit and press Reset in the upper right corner of the Company Logo section.
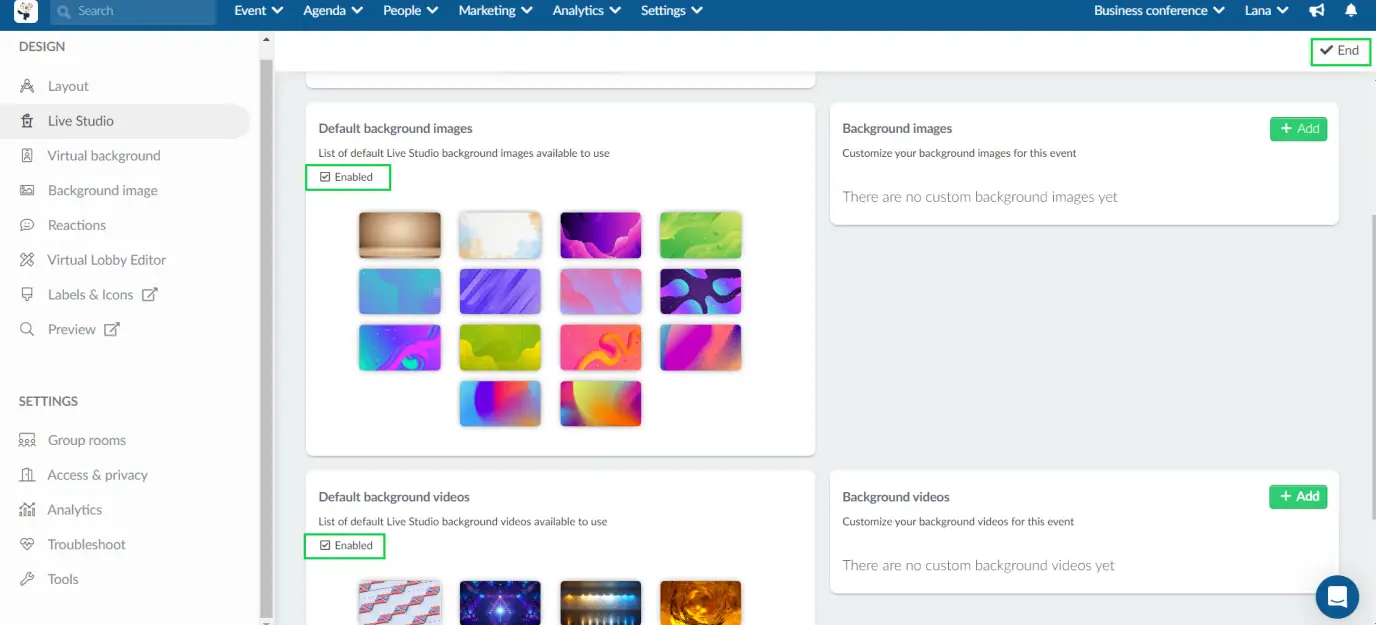
Disabling Live Studio background images/videos
By default, the Live Studio default background images/videos are enabled. However, you can disable them by pressing Edit and unchecking the enabled checkbox. Then, press End to save the changes.
Removing a Live Studio background
To remove a live studio background click on Edit and click on the cross sign in the upper right corner of the backgrounds you wish to delete > A popup window will open > Press Remove.
Here is an example of the pop up window when deleting a background color:

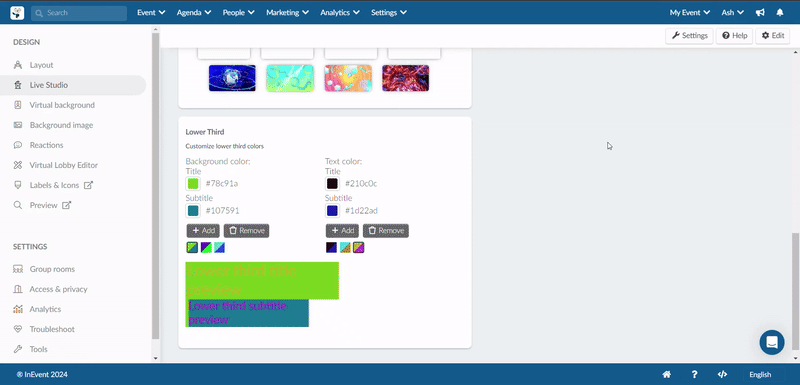
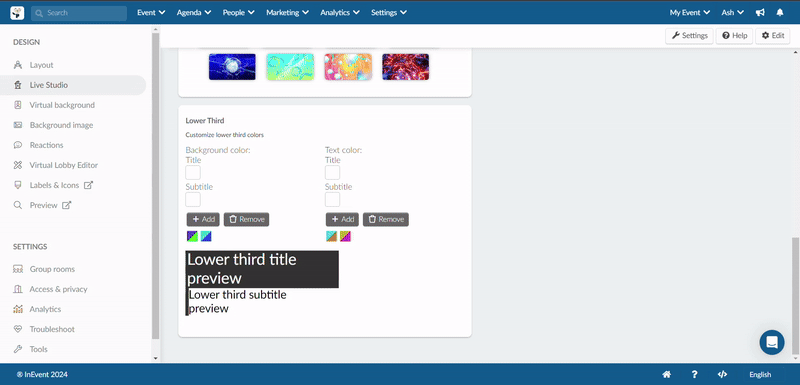
Customizing the Lower Third
You can customize the color schemes for the lower third's title and subtitle backgrounds and text. Follow these steps:
- Click on Edit.
- Select a background and text color for the lower third Title and Subtitle, and click on the +Add button.
- Click on Edit and click the Title and Subtitle boxes of the background color or text color field, depending on the element you want to customize.
- Select your desired background or text color from the color picker provided for the title and subtitle.
- Click on the +Add button and the chosen color scheme will be displayed under the background or text field.
- Preview the color personalization of your lower third by a color scheme
- Select a color scheme to see a preview of the lower third customization.
Removing a color scheme of the lower third
To remove a color scheme of the lower third from the platform, simply click on the Edit button > click on the color scheme you wish to delete and press Remove.