Live Studio
 Updated 2 months ago
by
Caleb Kotey
Updated 2 months ago
by
Caleb Kotey
- Enabling the Live Studio tool
- Choosing the Live Studio as the room video mode
- Room video provider and latency
- Room host
- Room co-host
- Closed captions
- Enabling the automatic closed captions function in your live studio activity
- Inside the Live Studio
- Starting the stream
- Stopping the Stream
- Drag and Drop
- Reactions
- Start sharing
- What can each permission level do in the Live Studio?
- Supported Browsers for Optimal Live Studio Streaming Performance
With the Live Studio, you can enhance your streaming by adding animations, lower thirds, chyrons, and custom backgrounds to it. This article intends to show you how to use the Live Studio as the room video mode in an online session.
Enabling the Live Studio tool
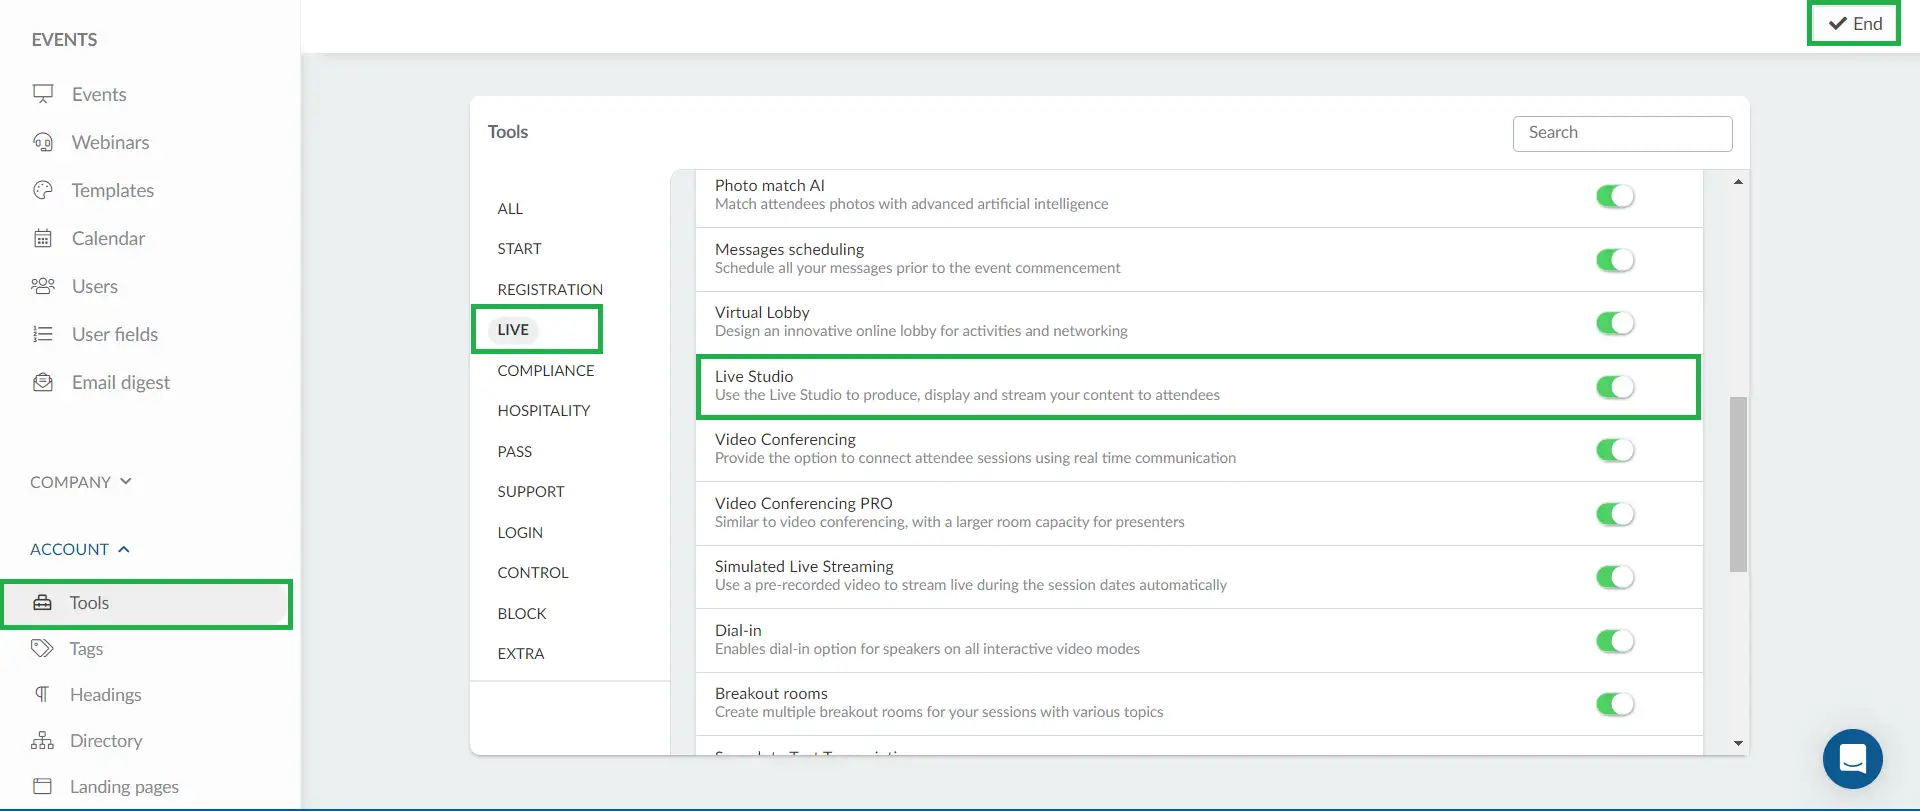
To enable this feature, go to Settings > Tools. Click on the Live section and scroll down till you see Live Studio Conferencing. Press Edit and toggle the button to enable it. Press End to save your changes.
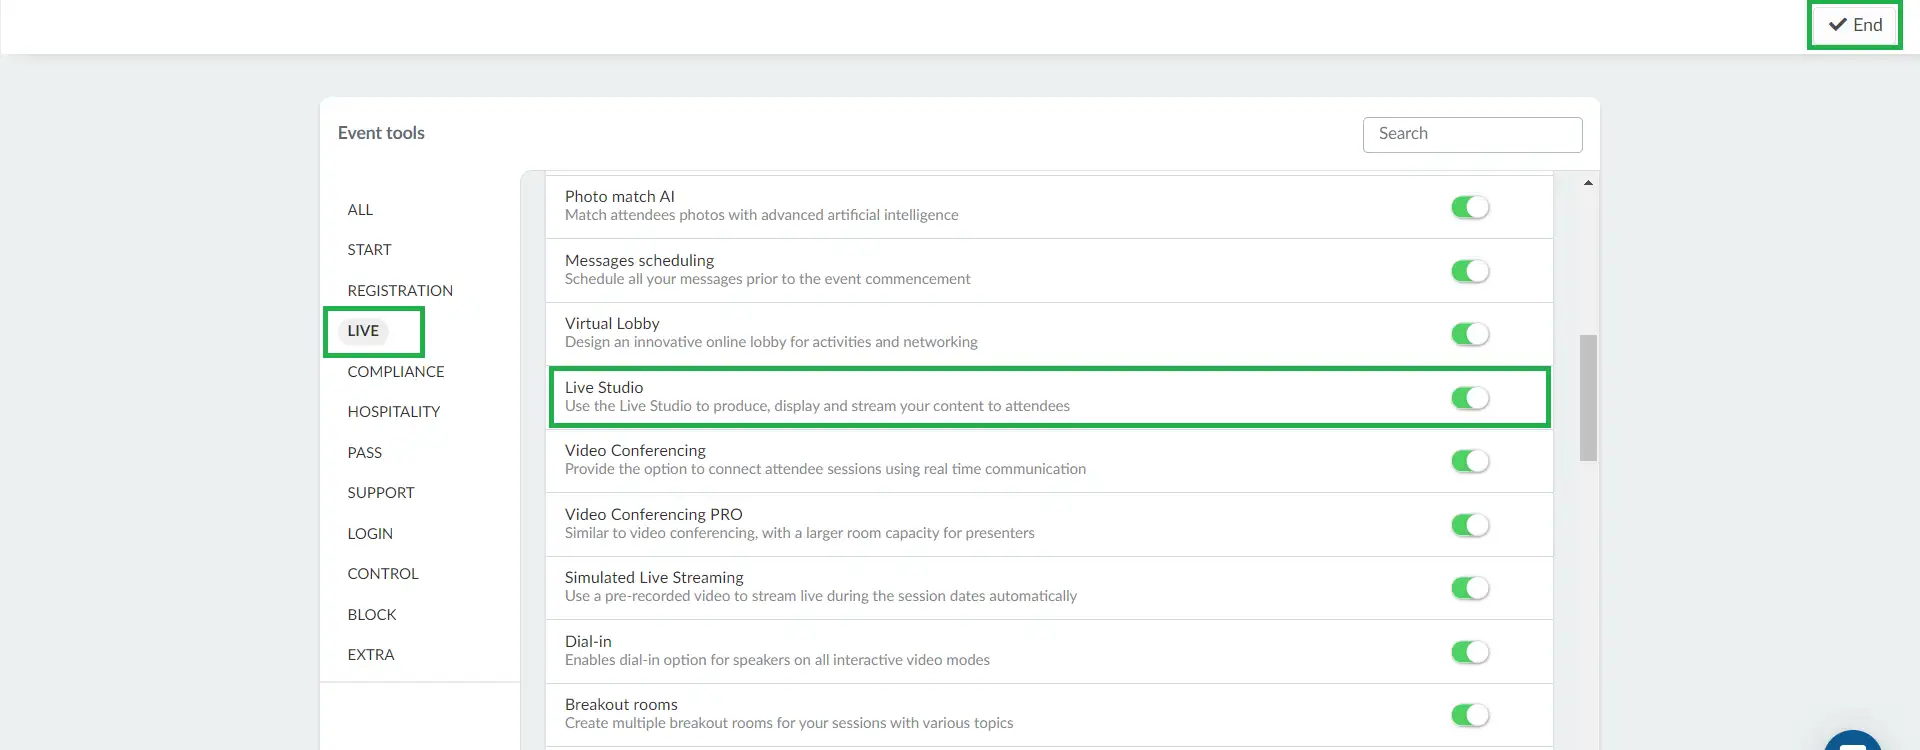
If instead of seeing a toggle button you see Click, you will need to enable this feature at the company tools. To do so, simply press Click and a new tab will automatically open at the company tools page. Click on the Live section, and scroll down till you see the Live Studio feature. Press Edit, and toggle the button to enable it. Press End to save your changes.
Choosing the Live Studio as the room video mode
Once you have created activities for your event's agenda, you will need to set up its details and configurations, such as the room video mode.
If the Live Studio is included in your plan, it will be the default setting for all activities, auto-enabled on each activity you create.
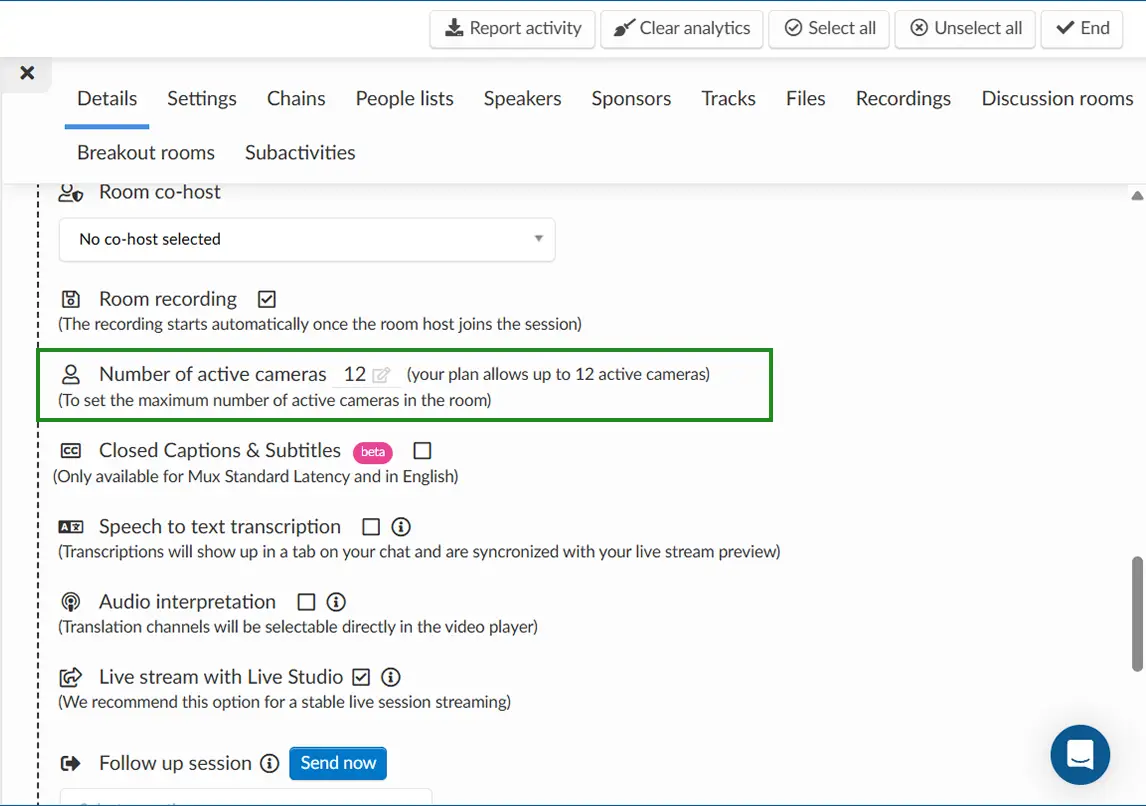
Number of active cameras
This setting defines how many presenter cameras can be enabled and displayed simultaneously during a Live Studio session. A Live Studio activity can include up to 12 presenters, and depending on your plan, up to 12 cameras can be active at the same time. Active cameras are those that are turned on and visible in the Live Studio.
By default, active cameras is set to 12, which is the maximum allowed depending on your plan.
To set or adjust the number of active cameras:
- Navigate to Agenda > Activity > Activity Details.
- Find the Number of active cameras setting and adjust the value as needed.
Room video provider and latency
Even though the Live Studio will allow speakers to interact with users, they will experience latency in the Preview, as is standard with live streaming technology.
Depending on the Room video provider: Mux or AWS IVS the latency seconds will vary.
Video latency
- Using Mux, you can choose between the Standard latency (20-30 seconds) and Low latency (10-15 seconds).
- Using AWS IVS you have automatically Low latency (10-15 seconds) enabled.
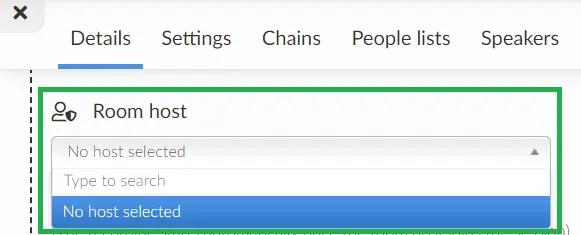
Room host
Only one host is allowed per room. This person will be responsible for starting and stopping the streaming, for the recording of the session, and will also be able to change the Studio streams and settings such as the layout, chyrons, and background.
To define the room host for your activity, go to Agenda > Activities, click on the desired activity then press Edit. In the Details section scroll down to Room host and from the drop down select a name from the attendee's list or type to search.
Room host switcher
If for some reason the room host needs to be changed, when the action is performed at the platform there is no need to refresh the Virtual Lobby page, because it will automatically reflect on the Live stream.
Both of them will be informed, as a message pop-up will appear as the image below:

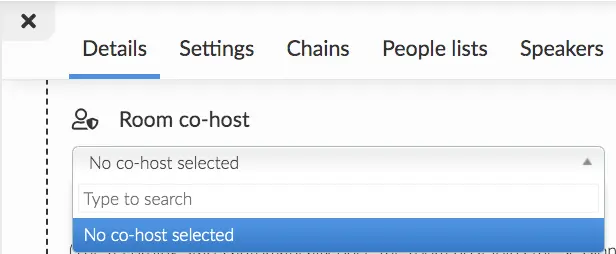
Room co-host
In addition to a room host, you can also add one co-host. This person will have the same permissions as a room host except for the permission to start and stop streams, as that control is reserved for the host.
To define the room co-host for your activity, go to Agenda > Activities, click on the desired activity then press Edit. In the Details section scroll down to Room co-host and from the drop down select a name from the attendee's list or type to search.
Room co-host switcher
If for some reason the room co-host is changed, when the action is performed it will automatically reflect on their Virtual Lobby pages. The previous co-host and the new co-host will receive notifications of this change :

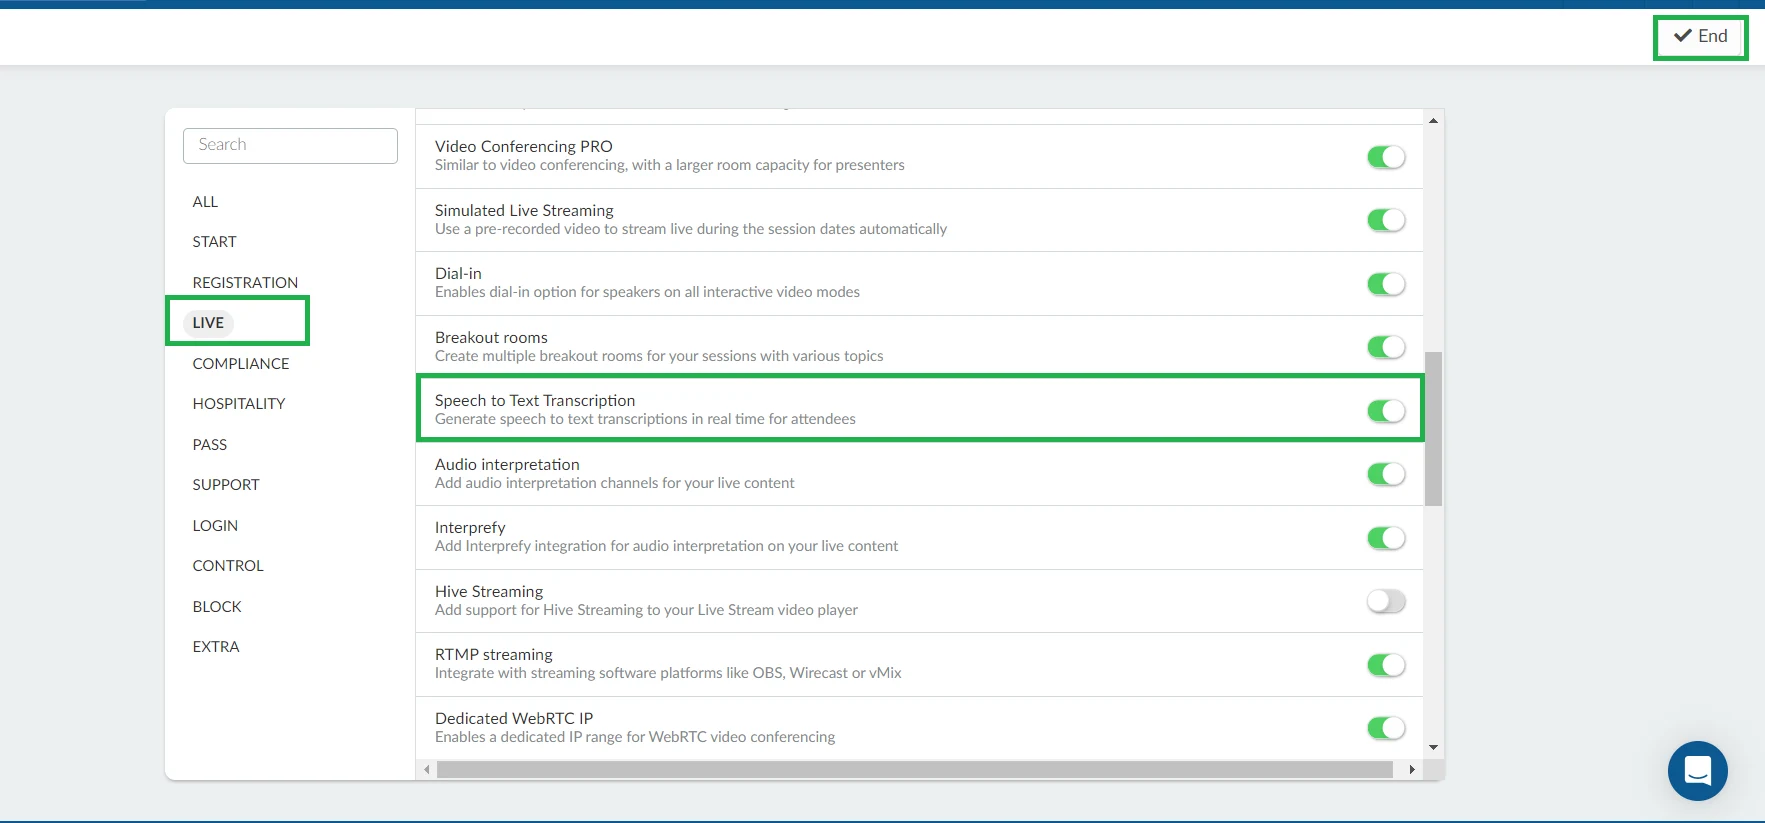
Closed captions
To enable closed captions in your live studio, go to Settings > Tools > Live section. Click on Edit and scroll down until you see the Speech to Text Transcription tool. Toggle its corresponding button on, and press End to save the changes.
If you are unable to enable this feature from the event level, you will need to enable it first from the company level tools.
Enabling the automatic closed captions function in your live studio activity
To enable the automatic closed caption function in an activity, follow the steps below:
- Navigate to Agenda > Activities.
- Choose your live studio activity and click the Edit button located in the top right corner.
- Scroll down to the Closed Captions feature and check the box to enable it.
- Select the desired speech language from the drop-down menu labeled Select the desired speech language.
- In the Select a translation field, choose the desired language(s) for translating the speech.
- Press End to save your changes.
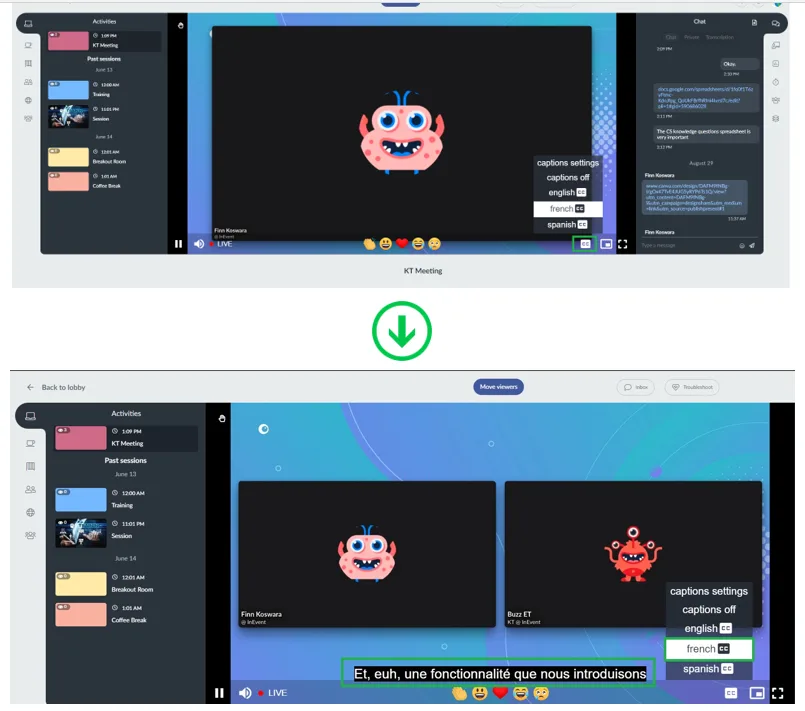
Once you have activated the Closed Captions feature on the platform, attendees can enable the captions when logged into the activity. To do this, click on the CC icon in the lower right corner of the activity screen, and choose the desired language for speech translation (if more than one language has been added).
In addition to activating captions/subtitles, you can customize the text's appearance in the captions settings. To disable captions, simply click on captions off.
Inside the Live Studio
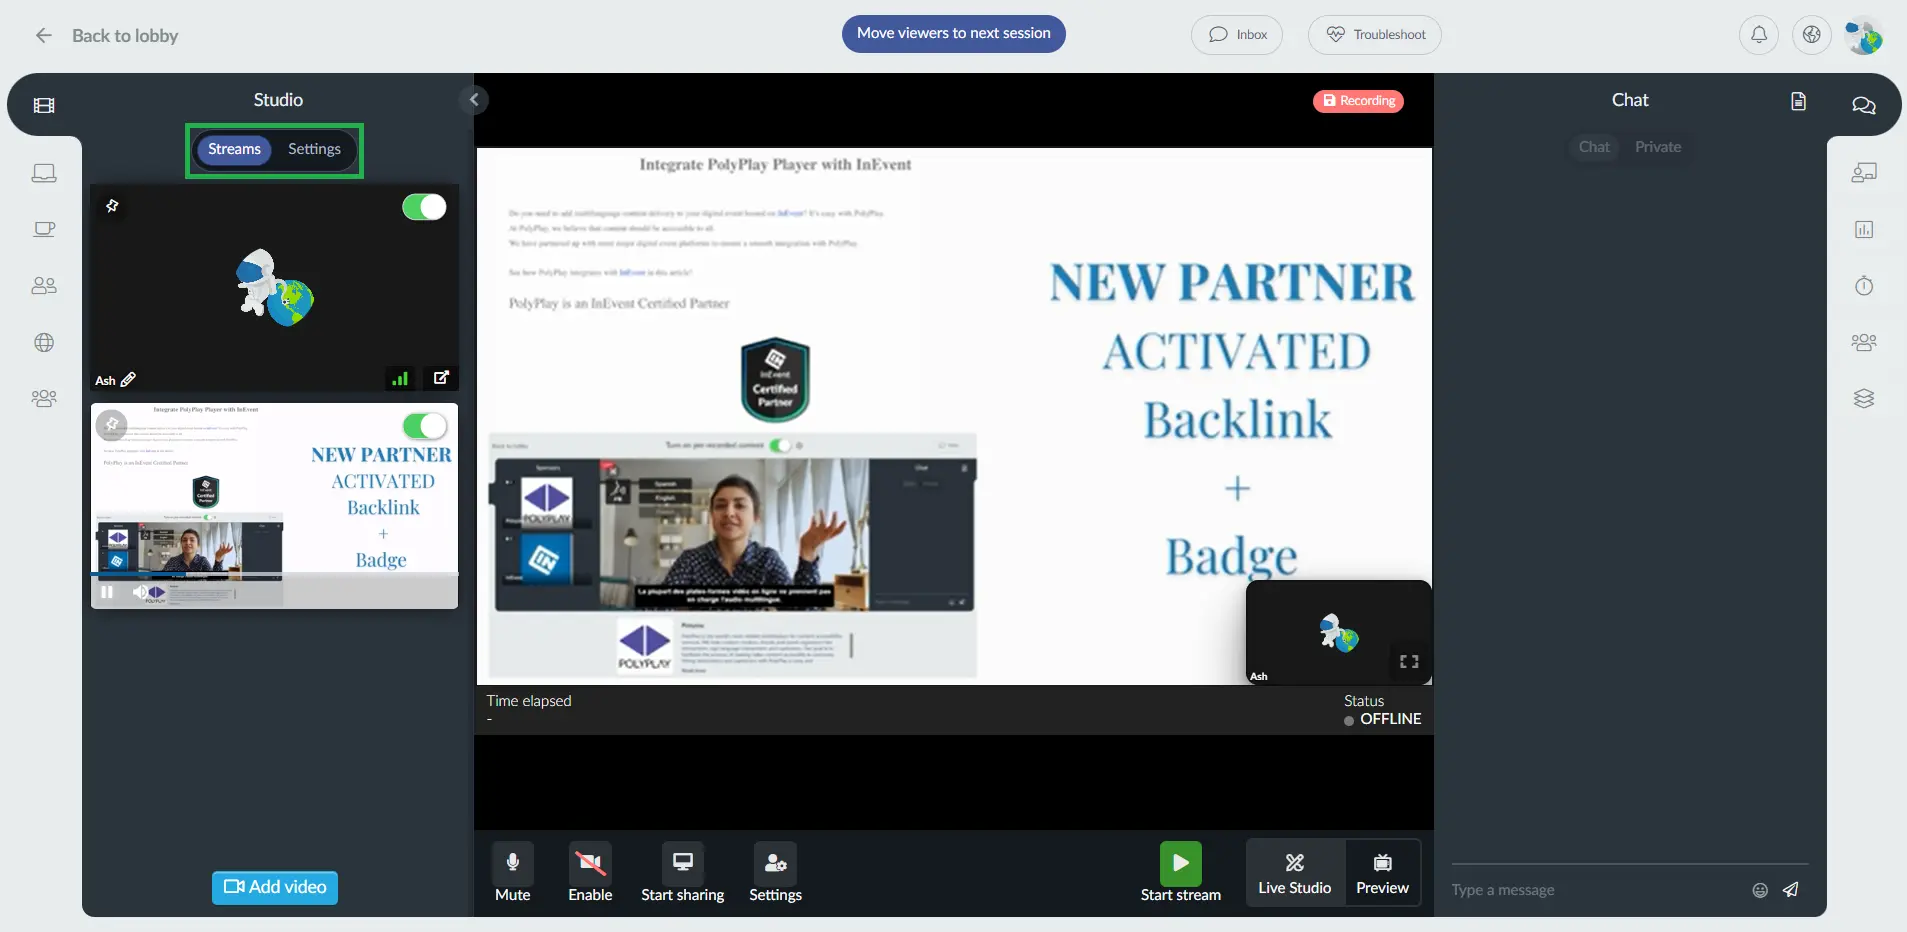
Once the room host joins the room, they will be able to switch between the Streams and Settings tabs.
Streams and Settings
You can find detailed information about Streams in the Live Studio - Streams article, and about Settings in the Live Studio - Settings article.
Room Status and Timer
Inside the room, the host will see a Status bar and a Timer that gives information regarding the Streaming status of the activity. The Status will be Offline and the Time elapsed will not count before the streaming starts. Once the room host starts the streaming, the status will become Live and the timer will begin counting.
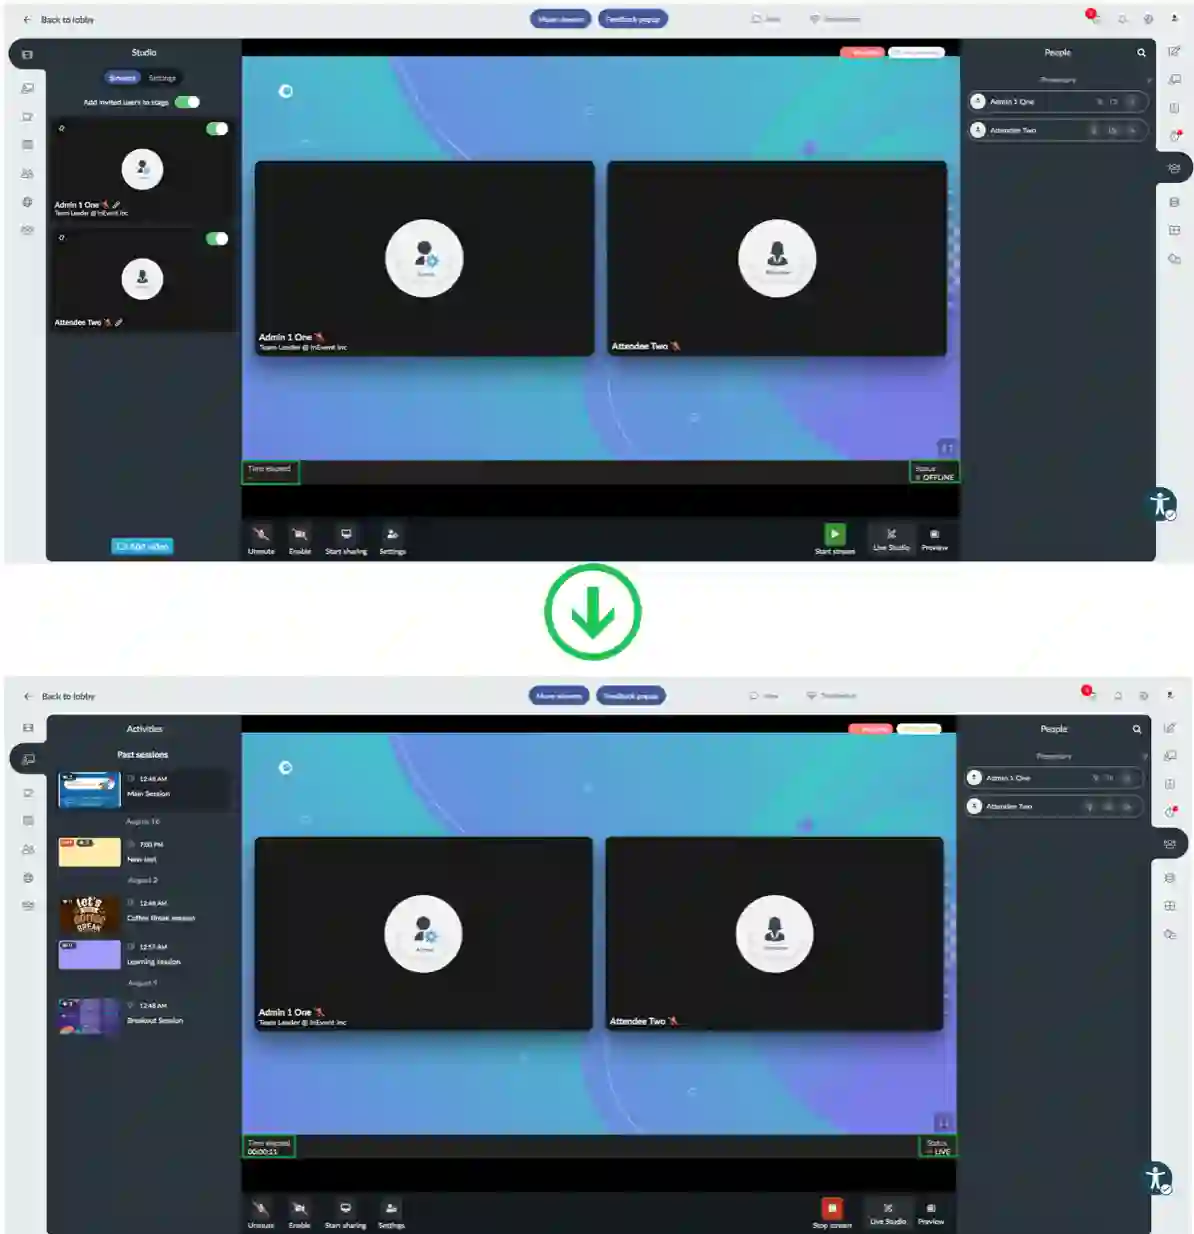
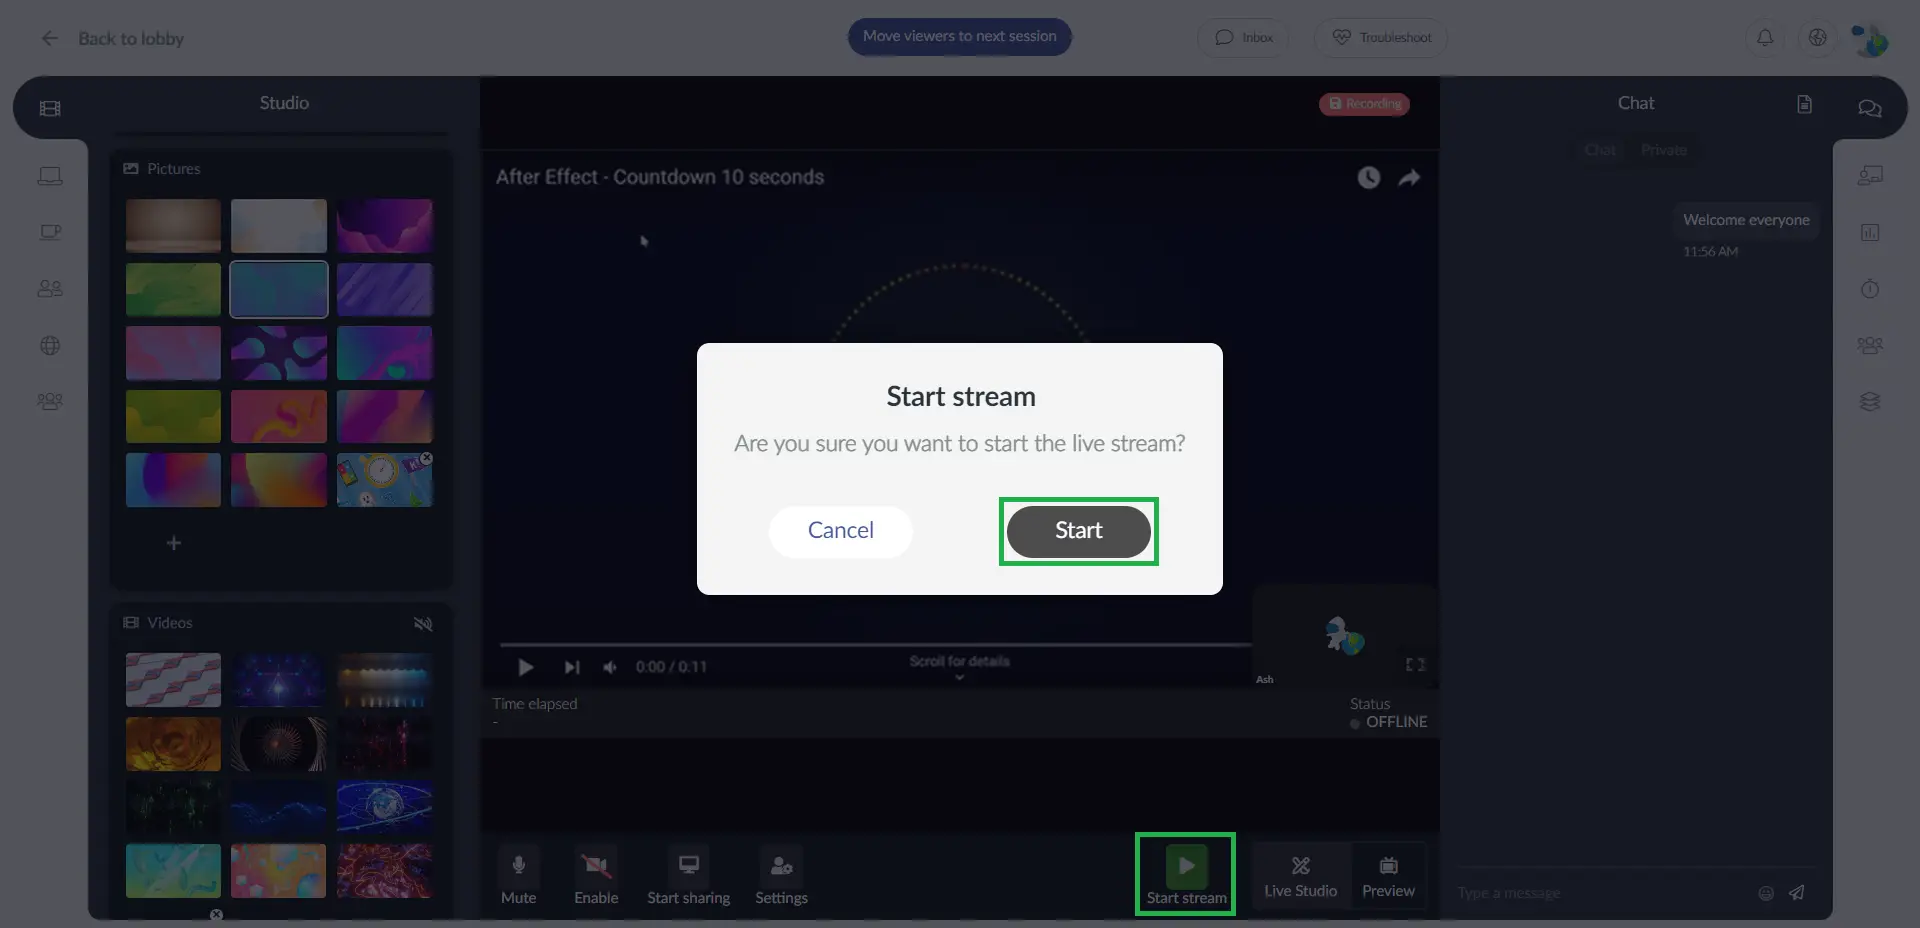
Starting the stream
When the room host determines that the stream is ready to start, they can select the green Start Stream button. When selected, a confirmation box will appear for the stream to start.
Stopping the Stream
Once the room host starts streaming, it will only stop after explicitly requesting for it by clicking on Stop Stream or if the room remains empty for five minutes.
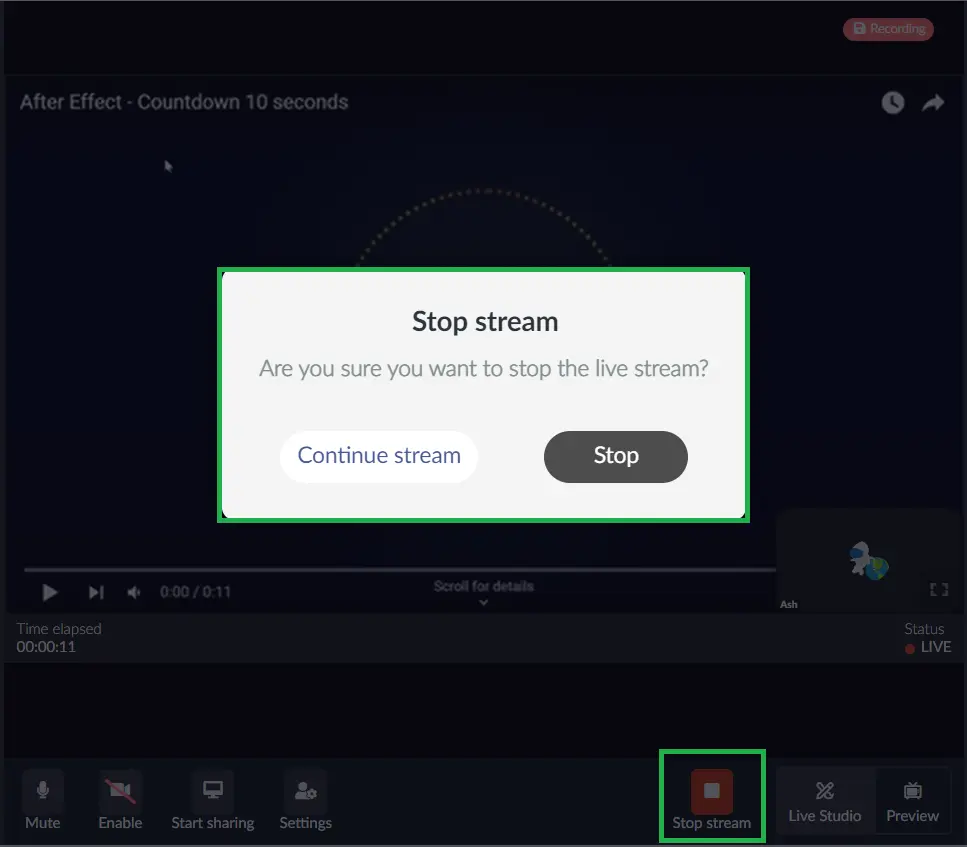
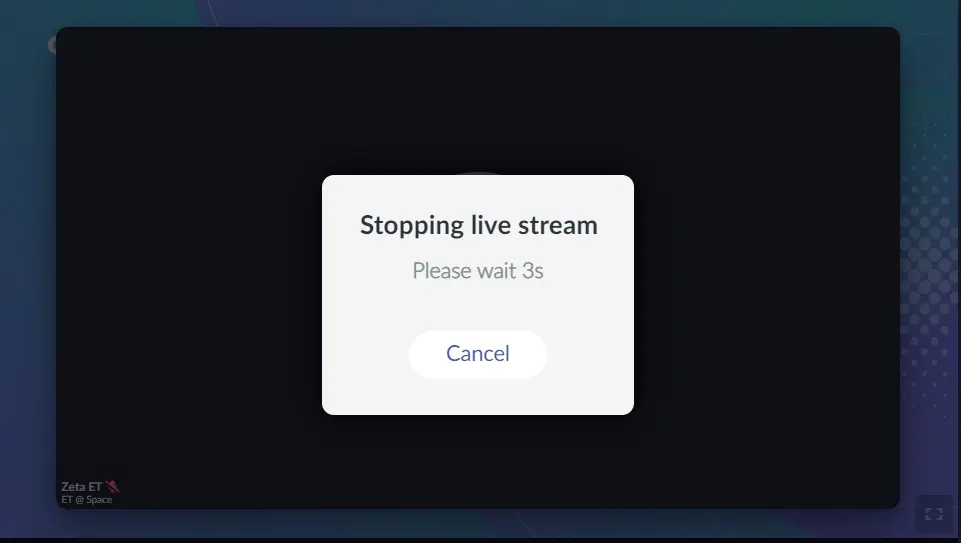
Similarly, a confirmation message will appear to end the stream, as shown at the image above. And then a notice will appear, counting from 5 to 1, stopping the stream.
Drag and Drop
The room host is also capable of dragging and dropping the disposition of videos on stage. To do so, simply click on top of the video and move around as shown in the gif below:
Reactions
If the Reactions feature is enabled, once the room host starts the streaming, the selected Reactions will be available for everyone to use.
The emojis will be displayed if the user hovers over with the mouse at the Live Stream screen, if the mouse is in another tab, the reactions can not be seen as displayed in the gif below:
Previewing the streaming
To view the activity like an attendee, you can select Preview.
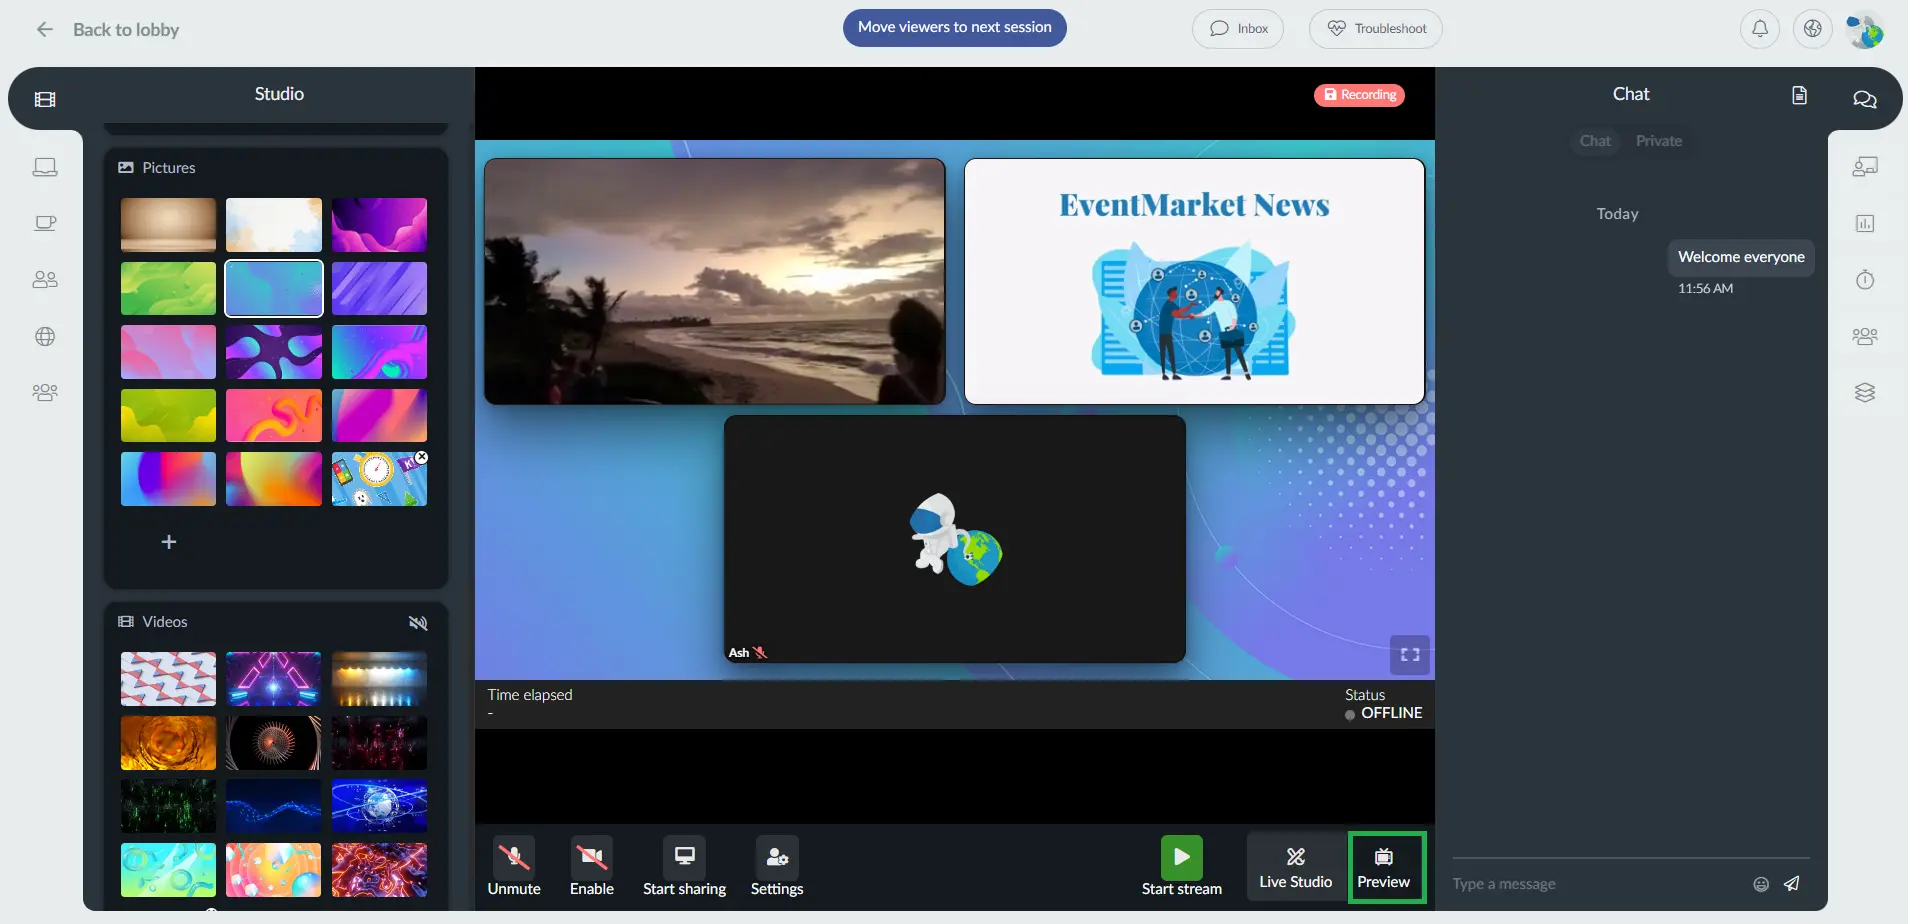
To go back to viewing the attendee as the room host or presenter, click Live Studio. Refer to the Control Room article to learn more about the speaker control bar.
Start sharing
To learn how to share your screen, a PDF file, or a video (Native from the Library or from your computer) take a look at the Screen sharing in the Virtual Lobby article.
What can each permission level do in the Live Studio?
Choosing the level of access your attendees will have on the platform means that they will have different permission levels throughout your event.
Here is what each permission level can do in the Live Studio room video mode:
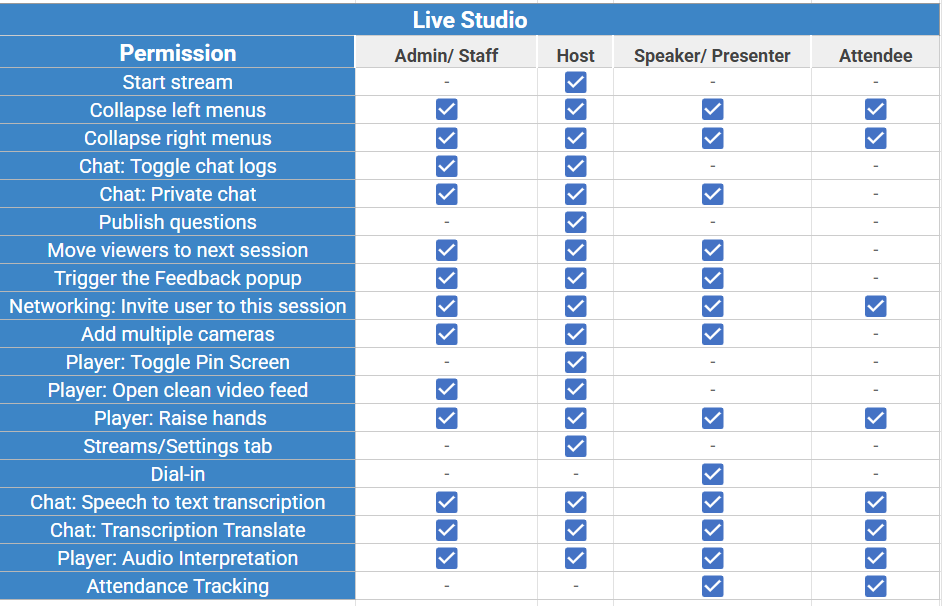
To learn more about the permission levels, refer to the Permission levels for attendees article.
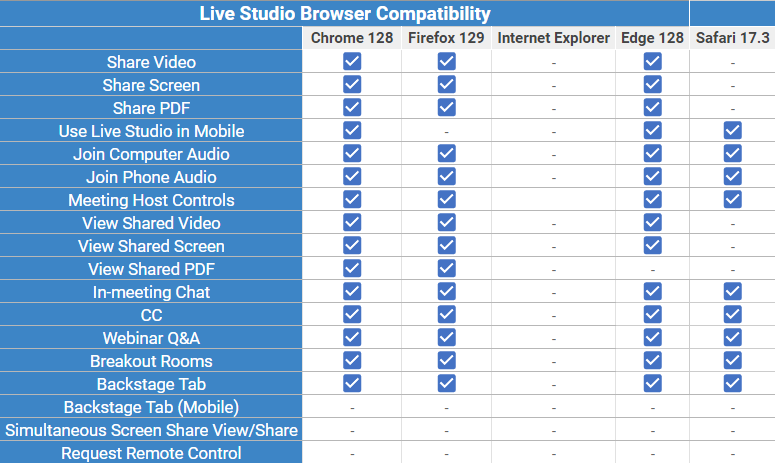
Supported Browsers for Optimal Live Studio Streaming Performance
For the best experience with live studio streaming, it's essential to use a supported browser. Below are the the recommended browsers to ensure seamless functionality and top-notch performance during your streaming sessions.