Attendance tracking
 Updated 3 months ago
by
Amalia
Updated 3 months ago
by
Amalia
- Enabling Attendance tracking
- Adding attendance tracking units
- Assigning attendance tracking units to activities
- Attendance tracking reports
With the attendance tracking tool, you will be able to track attendees' participation in different education programs, trainings and courses. You also have the possibility to award attendance certificates, using CEU and CPE units.
You can use Continuing Education Units (CEU) to certify that your attendees have actively watched them through to the end. You can also use the Continuing Professional Education (CPE) to track attendance in ongoing programs, trainings, and courses where consistent participation is a requirement to obtain certification.
Enabling Attendance tracking
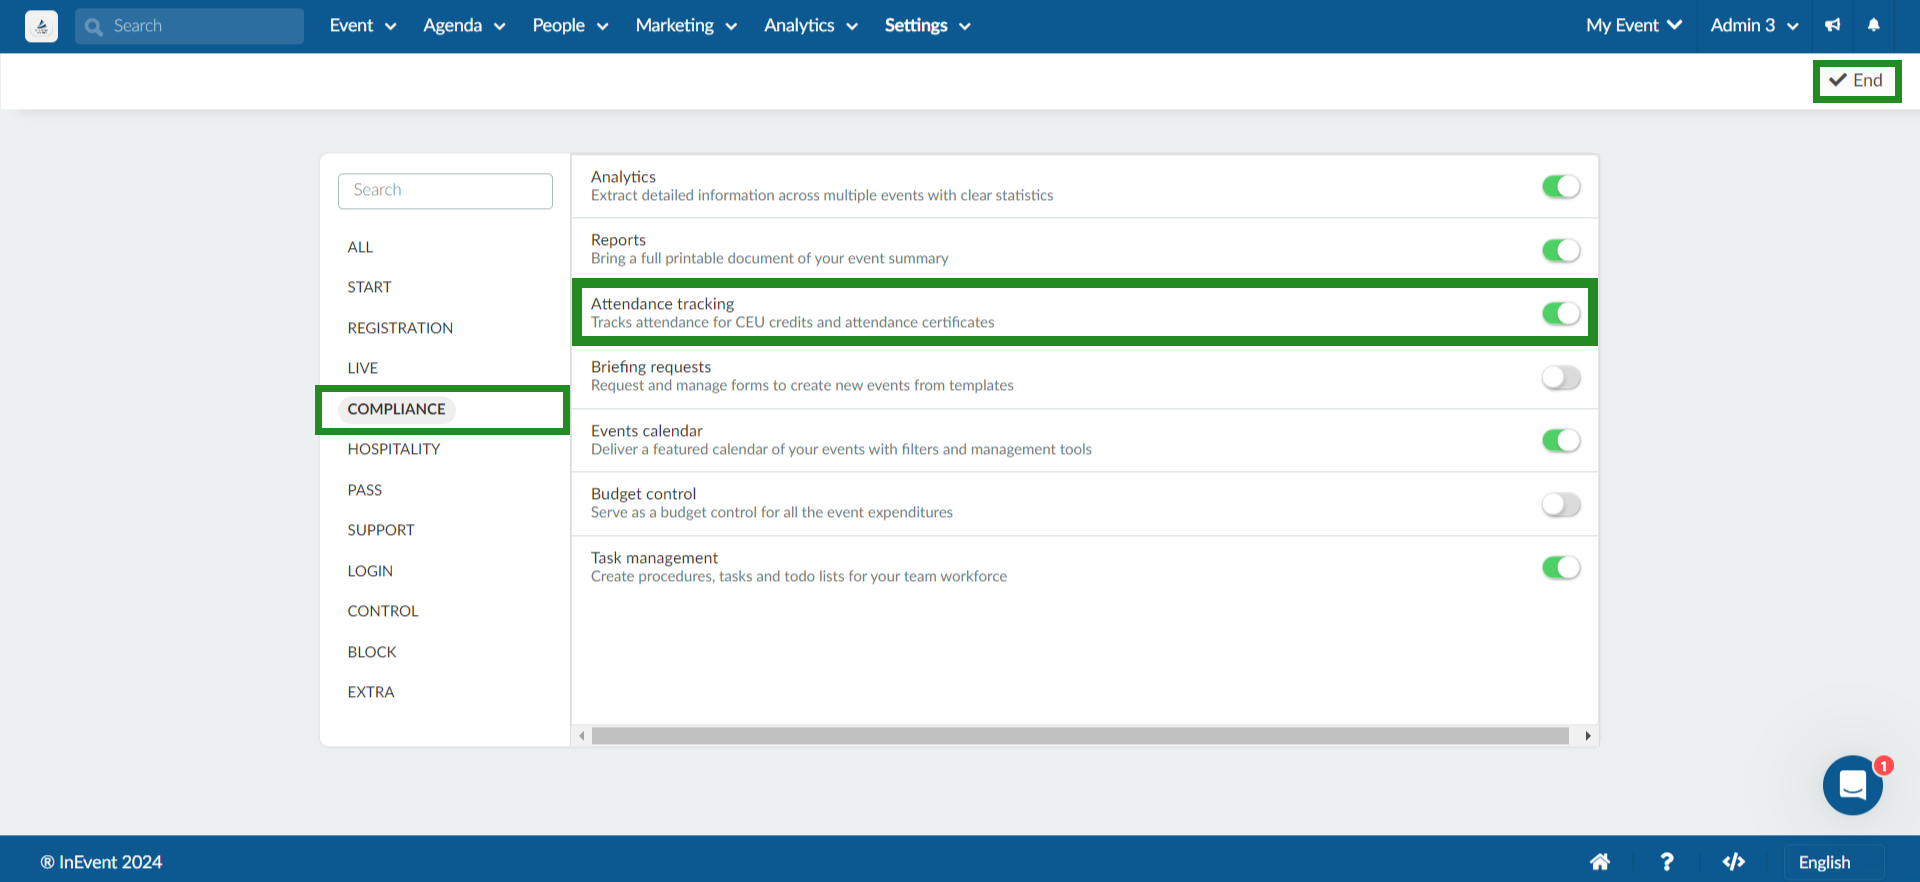
Attendance tracking can be enabled by navigating to Settings > Tools at the Event level. Locate Attendance tracking within the Compliance section, or type Attendance tracking on the search bar. Click on Edit, then enable the tool using the available toggle. Finalize by clicking on End.
If you see Click instead of a toggle, the tool needs to first be enabled within Company tools. Navigate to the Company level, and click Account > Tools in the menu on the left-hand side. Locate Attendance tracking within the Compliance section, or type Attendance tracking on the search bar. Click on Edit, then enable the tool using the available toggle. Finalize by clicking on End.

If you see Purchase instead of a toggle, this feature is not included in your active plan. Refer to the InEvent pricing page to verify which features are included in each plan.
Adding attendance tracking units
To add units, go to People > Programs > Attendance.
Then, press + Add unit. The Add unit pop-up box will be displayed with the following fields.
- Managed by: Defines whether the tracking unit should be managed by InEvent's internal system or external. For further information on external tracking system, refer to the Attendance tracking using external management system section.
- Select a template (Optional): Select an existing tracking unit as template. The available templates are (CEU) Continuing Education Units - 10 hours or (CPE) Continuing Professional Education - 50 minutes. Selecting a template will automatically populate the Acronym, Name, Hours, and Minutes fields.
- Acronym: Define the acronym of the tracking unit.
- Name: Define the name of the tracking unit.
- Hours and Minutes: Define the watch duration required to achieve one unit.
- Minimum frequency: Defines the minimum frequency of attendance confirmation pop-up windows displayed during live session to complete unit credits. Attendees are required to interact with the pop-up box and confirm their presence. The available options are Automatic and 1 to 12 times.
Once you have filled out all fields, press Create.
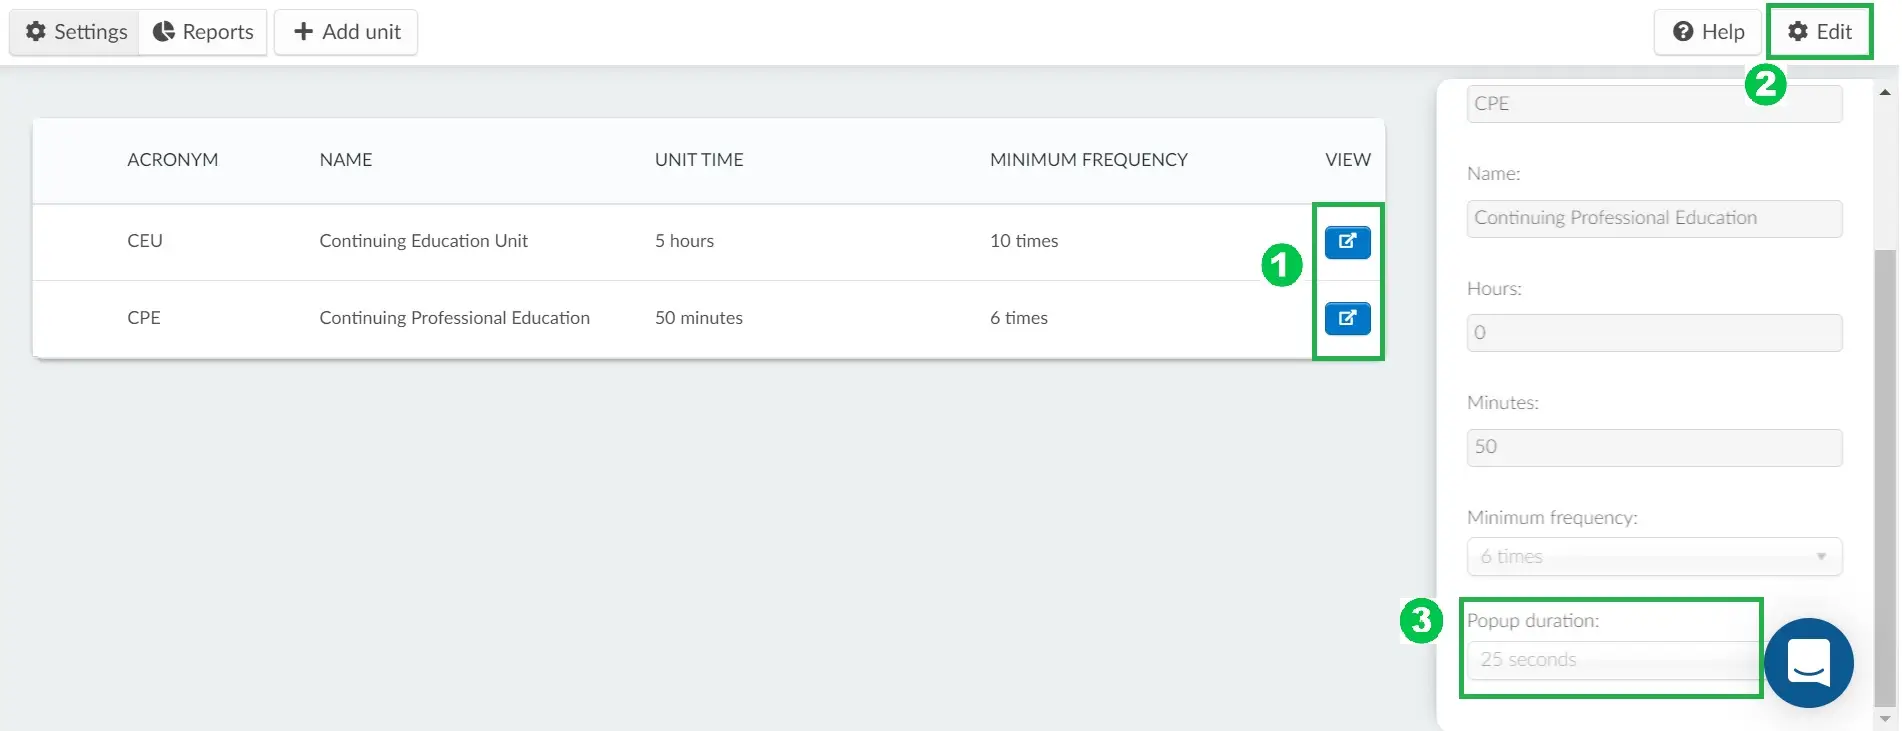
Pop-up duration
By default, the attendees will have 10 seconds to answer each pop-up. If the pop-up is not answered within 10 seconds, it will automatically disappear.
If you would like to modify the pop-up duration, click on the blue button next to the target credit and click on Edit. Then, locate the Pop-up duration drop-down menu and select the desired duration.
Attendance tracking using external management system
Event administrators may want to integrate an external system, such as SSO, for attendance tracking. In this case, the External system option in the Managed by drop-down menu can be used.
When External system is selected, the Hours, Minutes, and Minimum frequency fields are removed and replaced with a single External URL field. This field is to be populated with the URL of the external page with which attendees must interact with to complete the tracking unit credit.
Ensure to also configure the external system with the following InEvent platform parameters.
{{activityID}}{{personID}}{{eventID}}{{ssoUserId}}{{ssoTenantId}}{{activityExtId}}
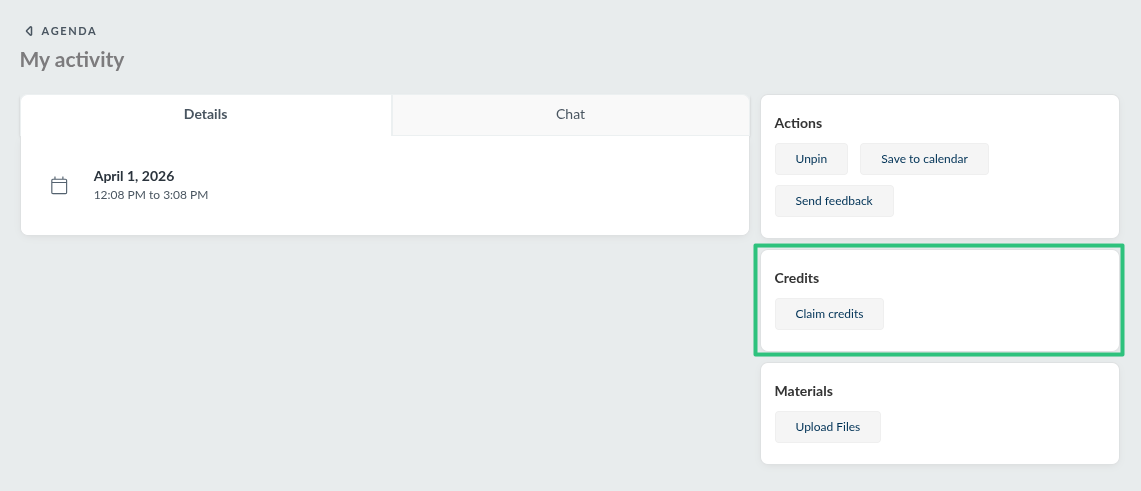
Activities associated with attendance units tracked externally, they will see the Claim credits button in the applicable session room pages. Clicking this button will direct them to the configured external page, and they will be able to complete the actions required to claim the credit.

The button is also visible in My Agenda page in the Virtual Lobby.
Assigning attendance tracking units to activities
To define which activities will award units, follow the instructions below;
- Go to Agenda > Activities and select an activity.
- Press Edit and Scroll down until you see Attendance tracking.
- Select a unit under the Select the attendance tracking unit field.
- Select a quiz under the Quiz completion field.
- Choose the Min Grade and Press the blue Add button.
Once the tracking units are assigned, the following pop-up box will be displayed during the assigned session.

Removing attendance tracking units from activities
To remove attendance units from activities, scroll down to attendance tracking and press the red trash can icon.

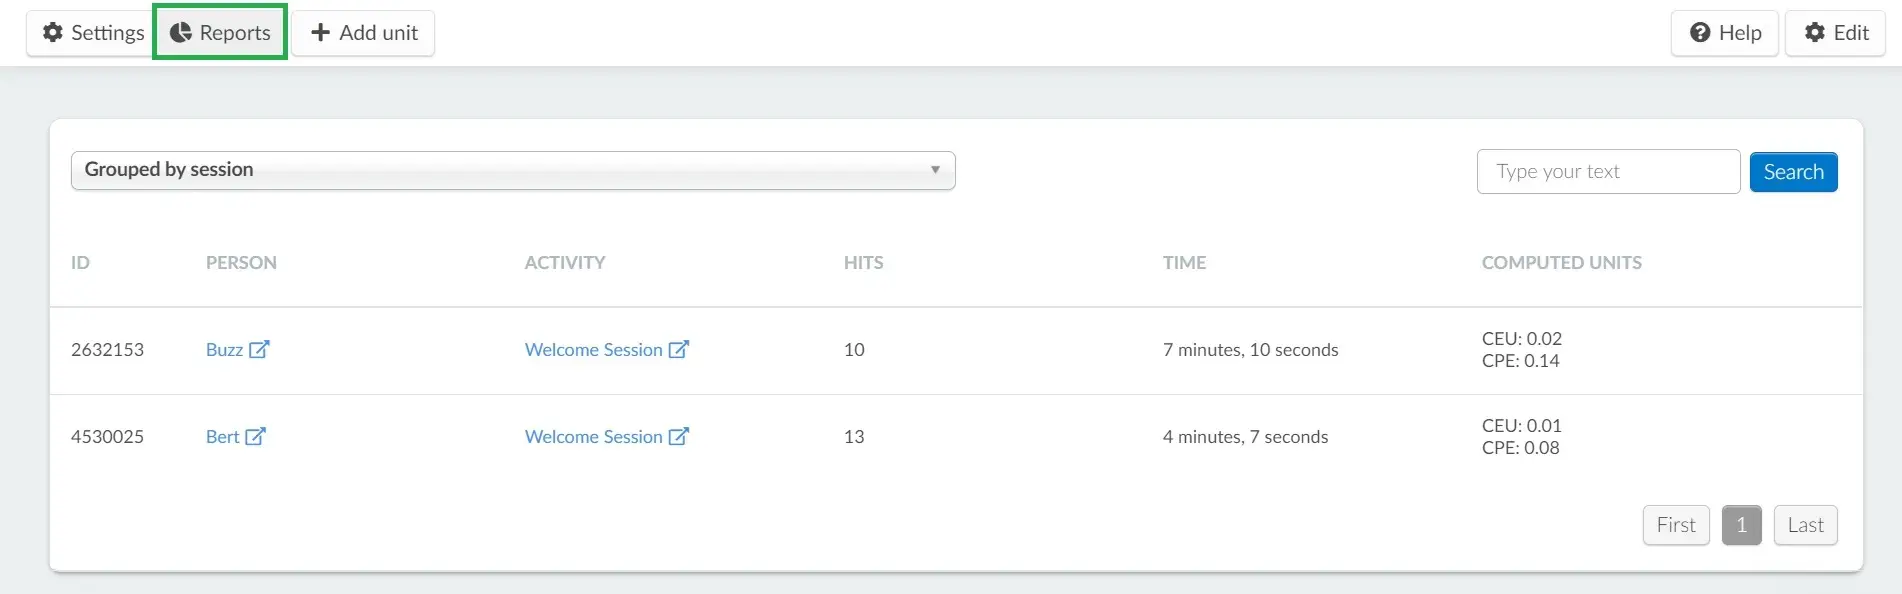
Attendance tracking reports
To check the attendance tracking reports, go to People > Attendance Tracking > and then click on Reports on the upper left corner. This way you can check the calculated credits for each user or session.
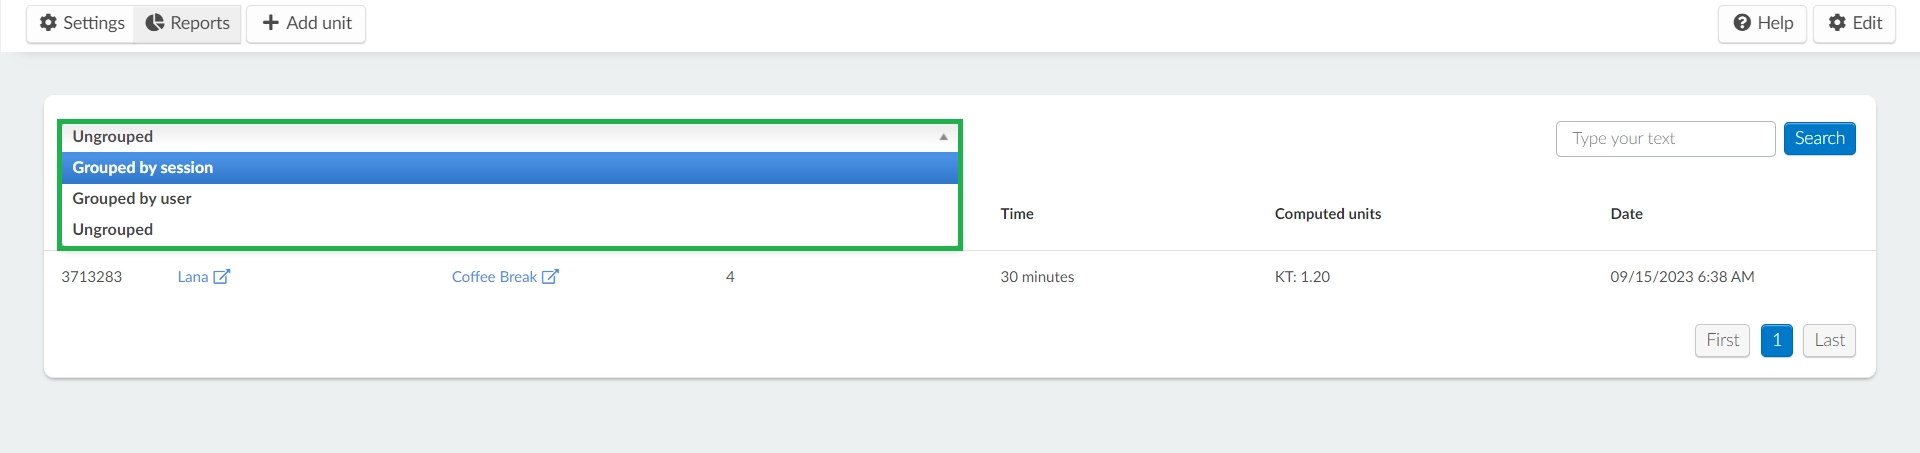
Grouping and ungrouping reports
You can specify whether you want to view a list of all your reports or if you prefer them grouped by specific fields:
- Grouped by session: You can filter the units calculated for each session.
- Grouped by users: You can filter the units calculated for each user.
- Ungrouped: You get all reports listed without being grouped by specific fields.
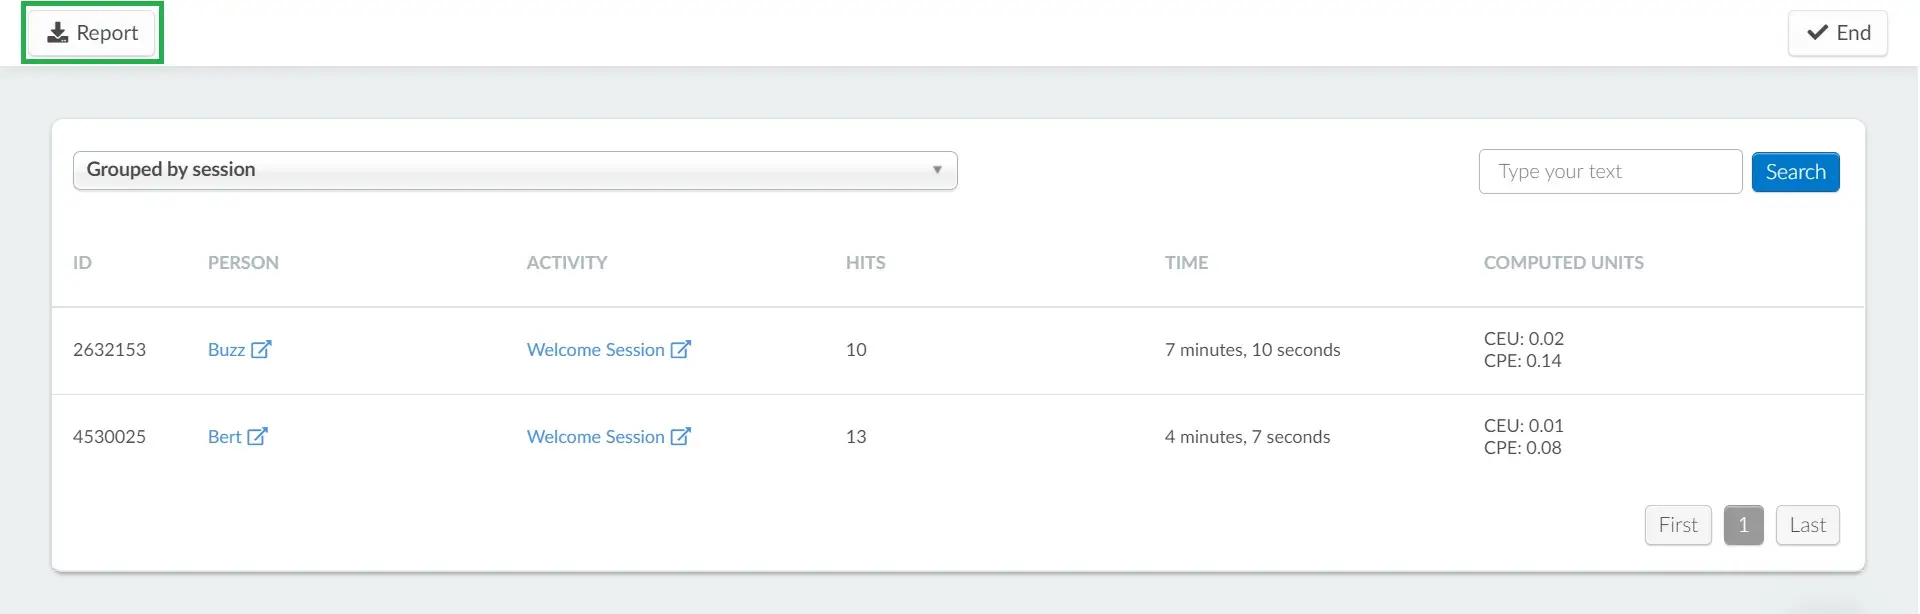
Grouped by session
The Grouped by session option will show tracking records grouped by session. You will find the following information:
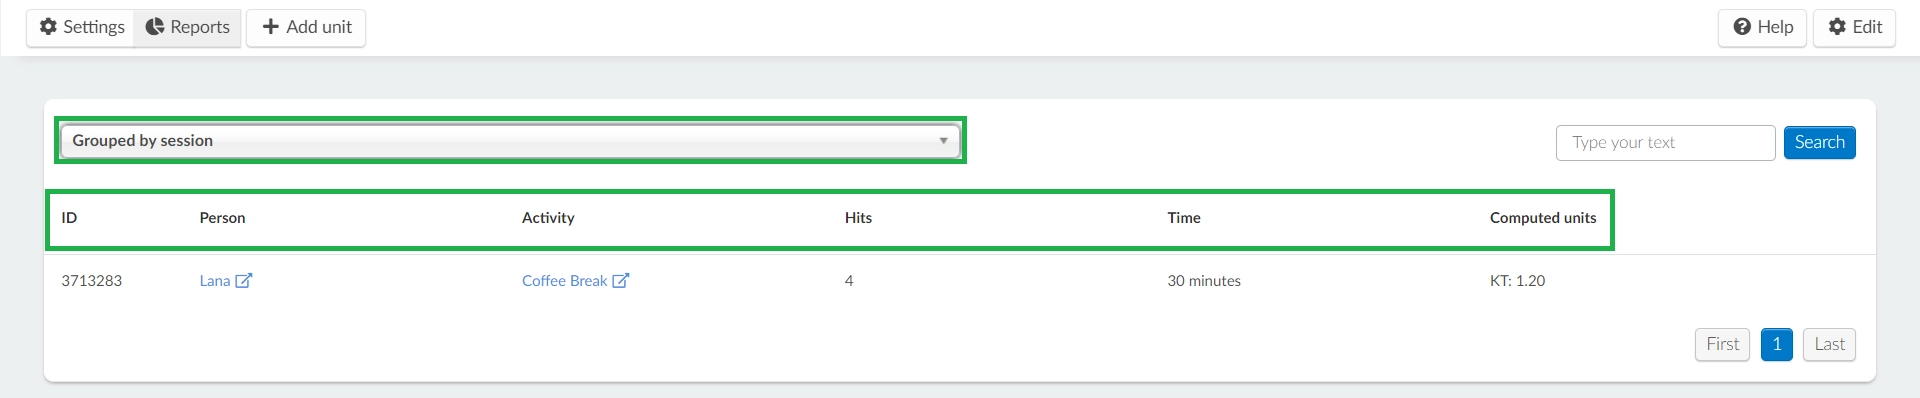
- ID: The ID of the attendee.
- Person: The name of the attendee.
- Activity: The name of the activity linked to the unit.
- Hits: Number of times the pop-up confirmation has been clicked by an attendee.
- Time: The duration of time an attendee has watched an activity.
- Computed units: The number of unit(s) achieved by the attendee, calculated based on the time watched and defined unit.
Computed Units Calculation
Computed are calculated by dividing the total time the attendee watched a session by the defined unit time (usually the length of the session). For instance, if a session is set to 60 minutes and the attendee watches the entire session, they achieve one computed unit. - Date: Shows the date and time of attendee accessing the tracked session.
Grouped by user
The Grouped by user option will show tracking records grouped by user. You will find the following information:
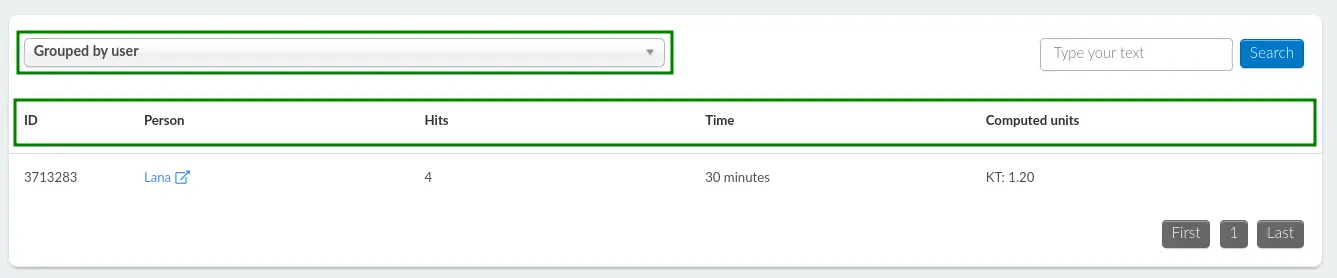
- ID: The ID of the attendee.
- Person: The name of the attendee.
- Hits: Number of times the pop-up confirmation has been clicked by an attendee in tracked activities.
- Time: The duration of time an attendee has watched tracked activities.
- Computed units: The number of unit(s) achieved by the attendee, calculated based on the time watched and defined unit.
Ungrouped
This option will show all tracking records individually, without being grouped. You will find the following information:
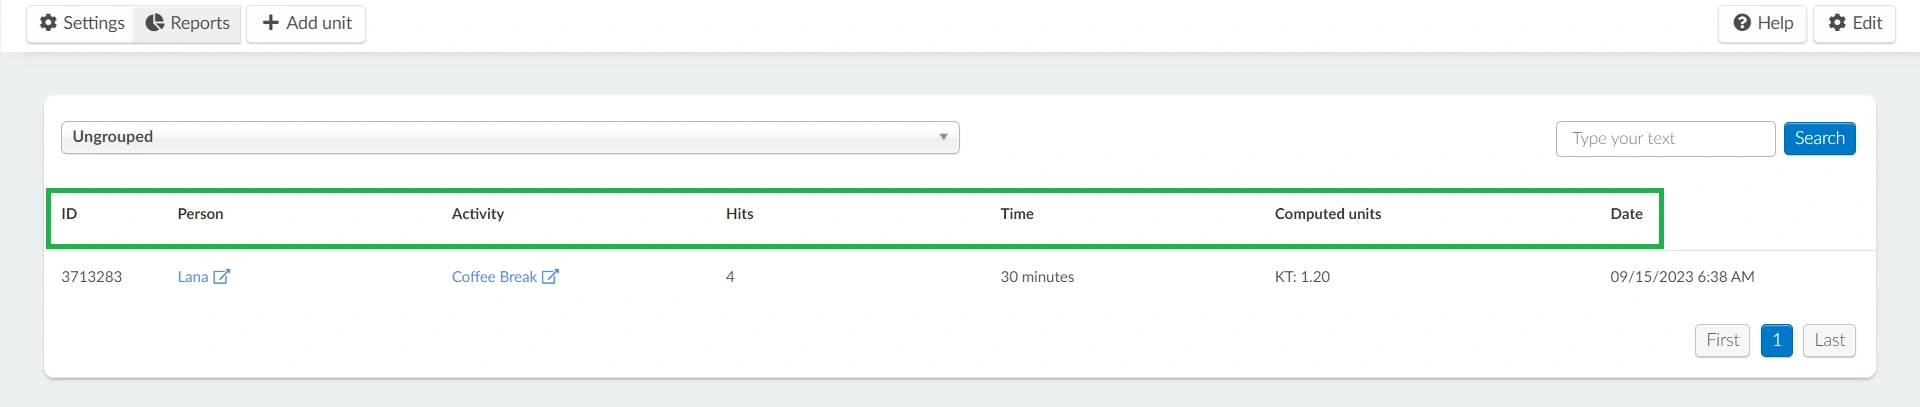
- ID: The ID of the attendee.
- Person: The name of the attendee.
- Activity: The name of the activity linked to the unit.
- Hits: Number of times the pop-up confirmation has been clicked by an attendee within the tracked activity.
- Time: The duration of time the attendee has watched the tracked activity.
- Computed units: The number of unit(s) achieved by the attendee, calculated based on the time watched and defined unit.
- Date: Shows the date and time of the attendee accessing the tracked session.
Generating attendance tracking unit reports
To have this information available in an excel sheet, press Edit and the Report button will appear in the upper left corner. Once you click the button, a message will appear at the top of the screen, advising you that you will receive the file with the data in your email when the process is complete.
Creating attendance certificates
Event attendees are often looking forward to receiving a certificate once the event is over so they are able to add it to their CV, and set themselves apart in a competitive industry. Refer to our Certificates of attendance article for further information on how to generate automated and personalized certificates of attendance for your event.