Live transcription and translation in the Virtual Lobby
 Updated 2 months ago
by
Chioma Okenwa
Updated 2 months ago
by
Chioma Okenwa
Throughout presentations in the Virtual Lobby, transcriptions will show up in a tab on your chat and it will be synchronized with your live stream preview, so everything said by the presenters will be automatically transcribed and translated to your audience.
Enabling speech to text transcription
To enable speech to text transcription, click on Settings > Tools > Live section. Click on Edit and scroll down until you see the Speech to Text Transcription tool. Toggle its corresponding button on, and press End to save the changes.
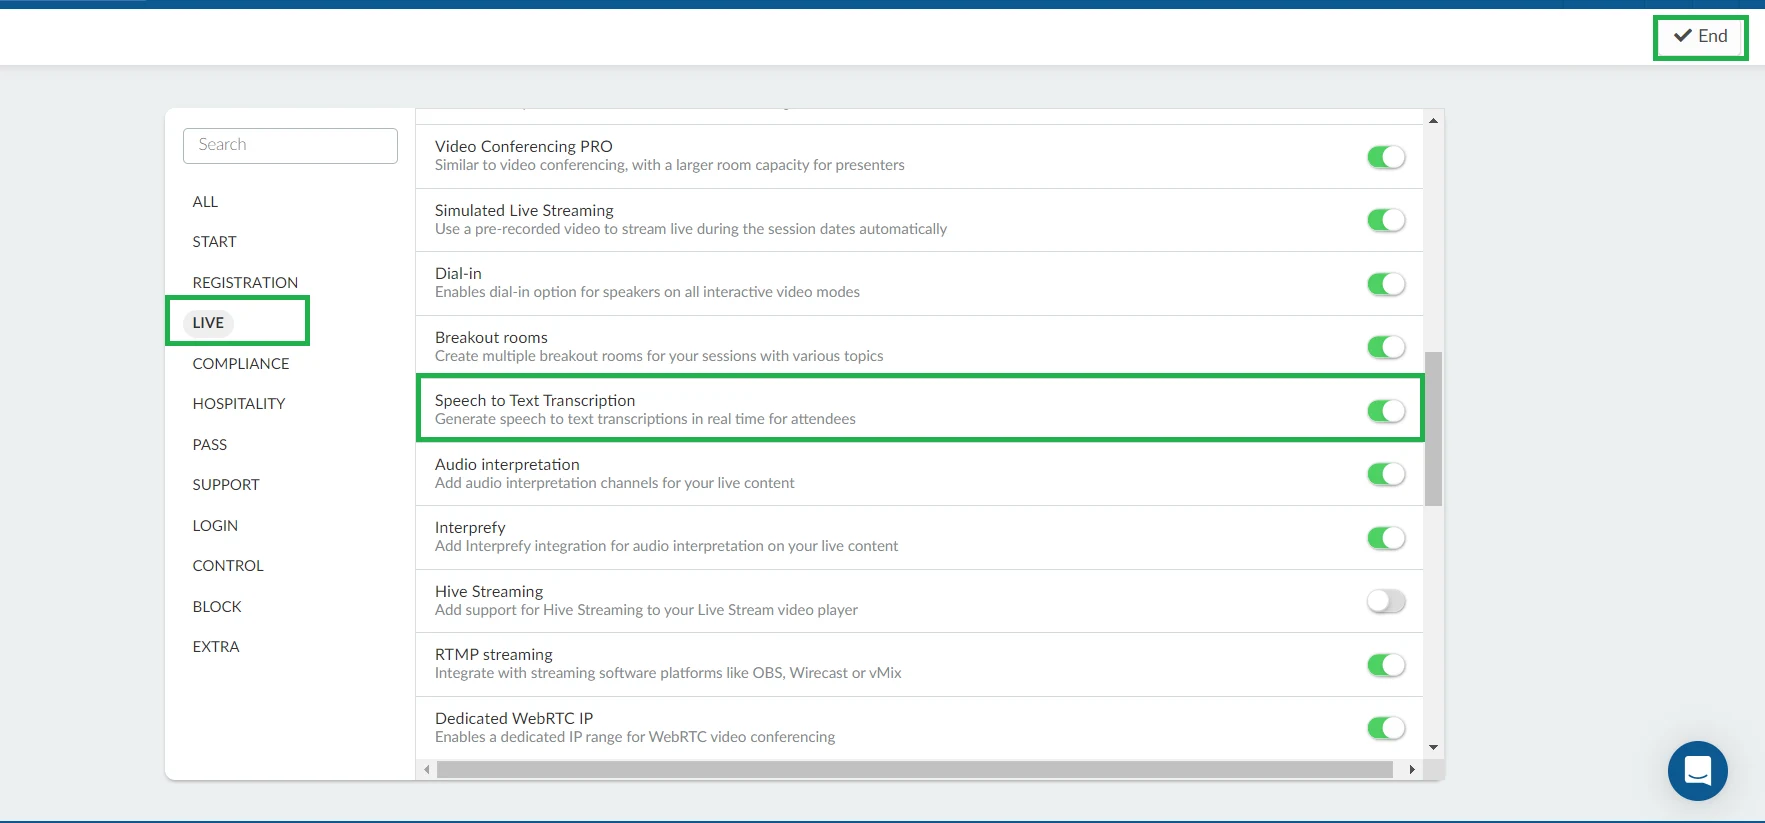
If you are unable to enable this feature from the event level, you will need to enable it first from the company level tools.
Enabling the feature within the activity
After enabling Speech to Text Transcription at the company and event level, follow these steps to enable it within an activity:
- Click on Agenda > Activities.
- Select an activity on the left-hand side, and a new window will pop up on the right.
- Press Edit and scroll down until you see Speech to Text Transcription.
- Enable the feature by ticking the checkbox on the right.
- Press End to save the changes.
Automatic Translation
If you want to convert the audio to a written format using speech recognition technology, you must enable automatic transcription in your sessions.
To enable automatic transcription, select Automatically (Artificial Intelligence) from the drop-down below How do you want to generate the transcription?
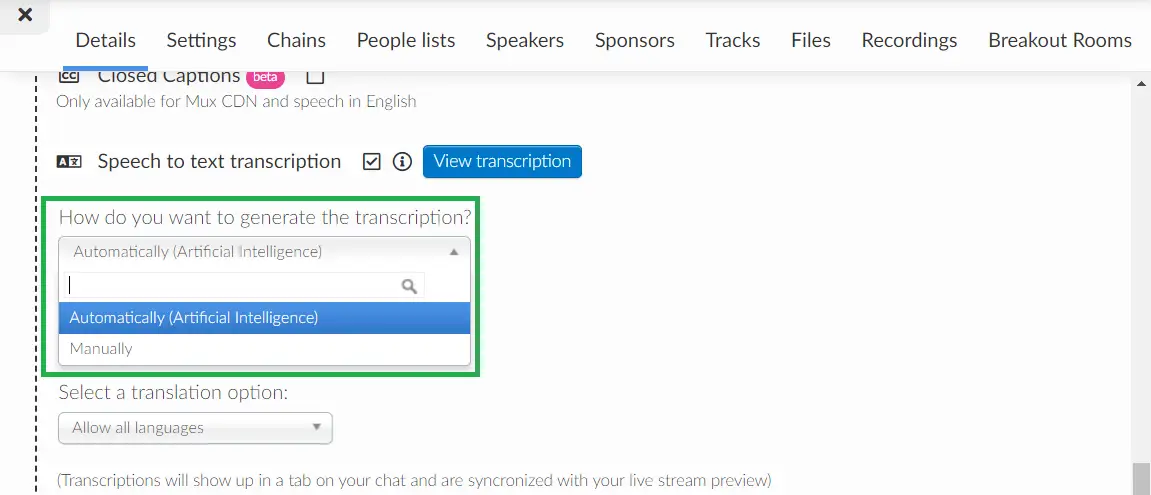
You will also need to select the desired speech language and a translation option, if you want the speech to be not only transcribed but also translated.
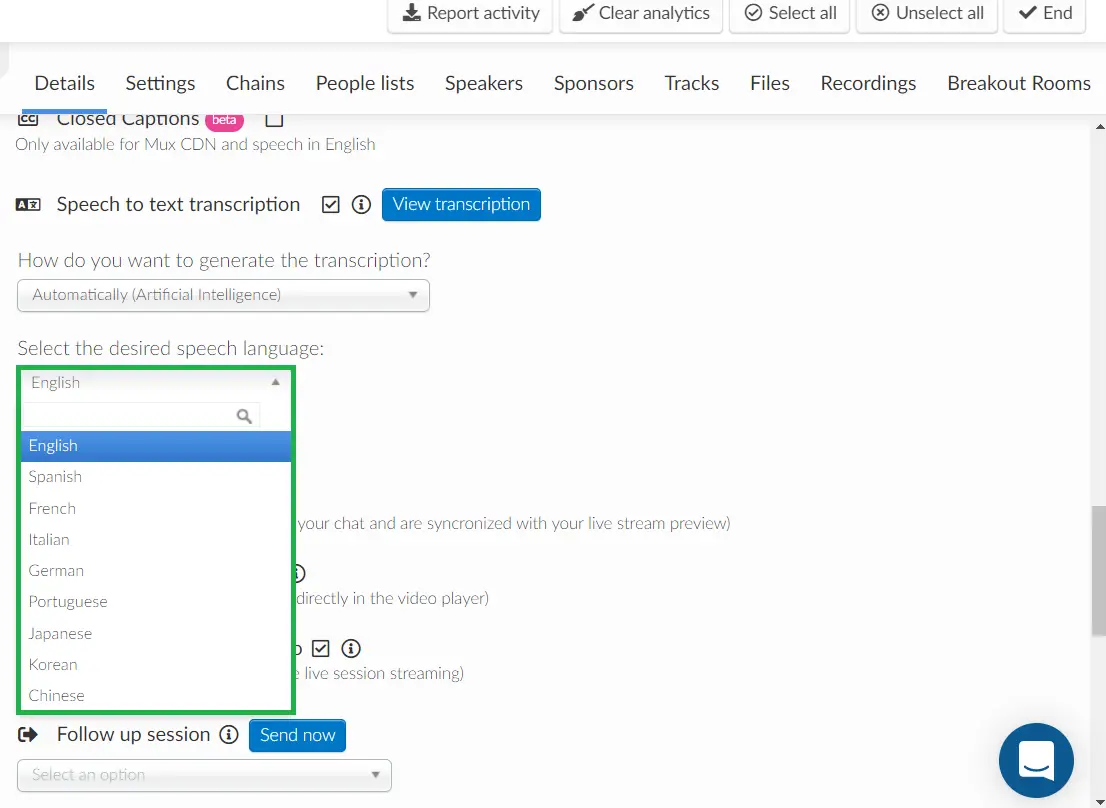
Selecting the desired speech language
To select a speech language for your session, simply click on the Select the desired speech language drop-down and select a language from the available options.
Selecting a translation option
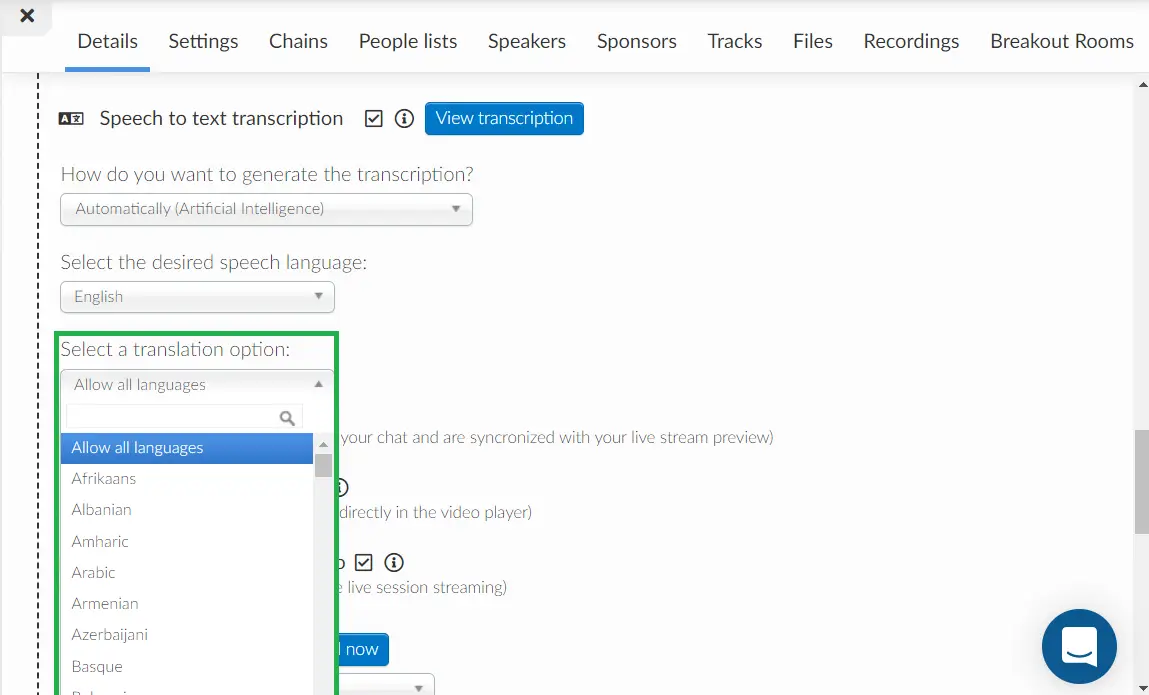
You can select a translation option for your participants to ensure that the speech is not only transcribed but also translated. There are two ways to go about selecting a translation option:
- Allowing all languages: From the language drop-down menu, admins can select the option Allow all languages, which gives attendees a wide range of translation languages to choose from during a session.
- Choosing a translation language: From the language drop-down menu, admins can select one translation language that will be available for users inside a session.
When using RTMP room video mode, after selecting the desired speech language and translation option, the transcription service will start automatically when RTMP streaming starts and will end when the streaming stops.
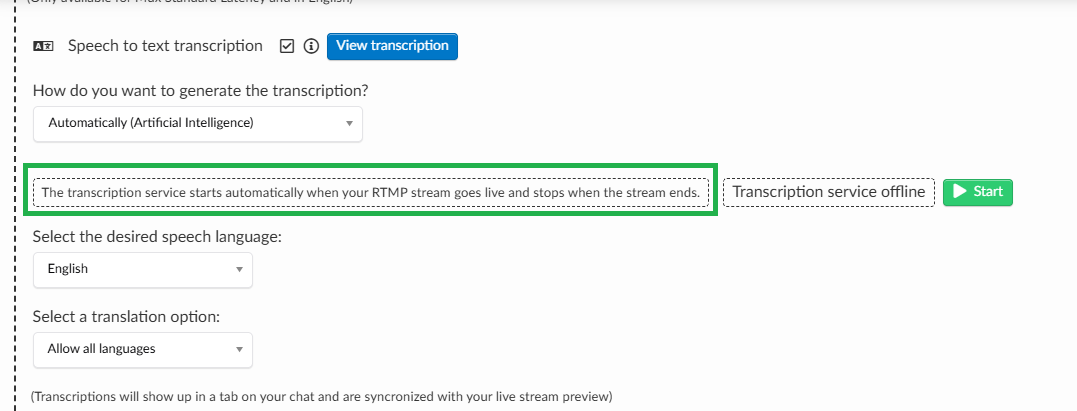
The Start button next to the Transcription service offline field is optional and can be used as a backup. When you click Start, a pop-up window will appear, prompting you to select the endpoint you are streaming to.
After selecting the endpoint, a message will appear confirming that the transcription is starting. Click OK to proceed.

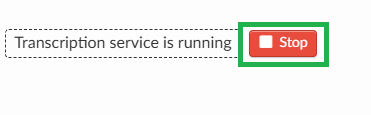
To stop the transcription, click the red Stop button.
Manual transcription
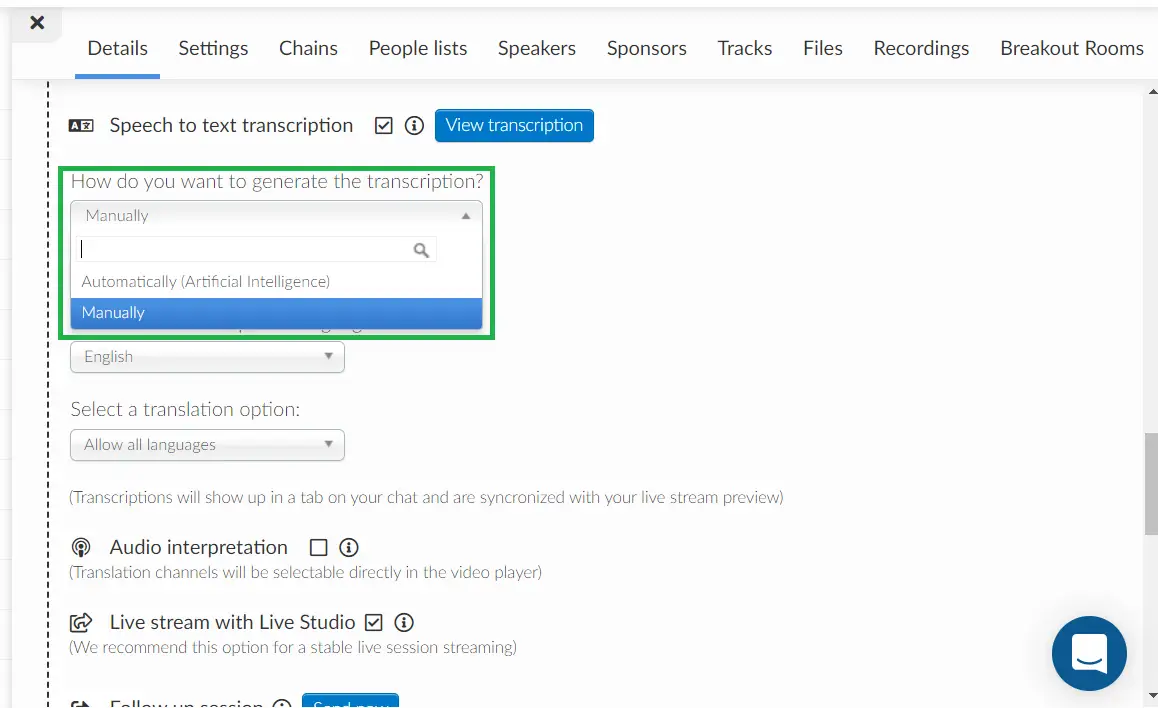
If you want the audio to be converted to a written format by a professional human transcriber, you must enable manual transcription in your sessions. To do so, simply select Manually under the How do you want to generate the transcription? drop-down.
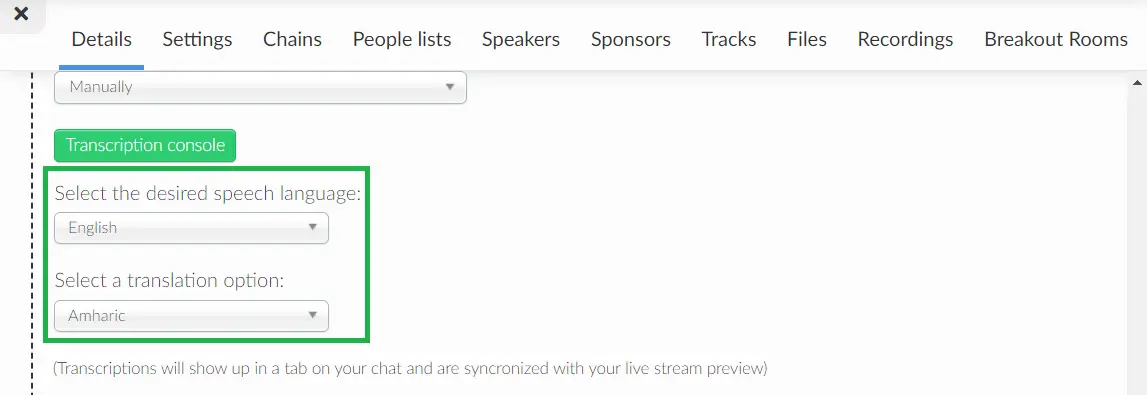
Next, select the desired speech language and a translation option, if you want the transcribers to not only transcribe the speech language but also translate it.
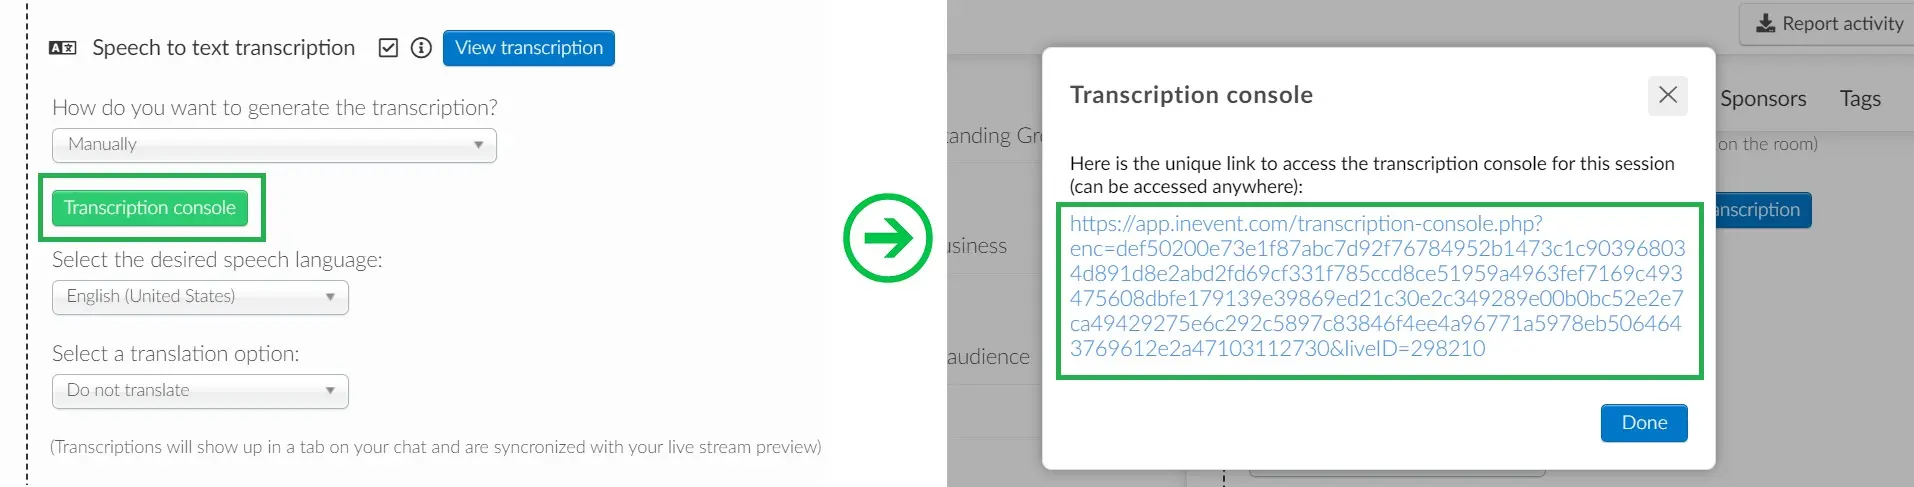
Then the transcriber will need to access the console to watch the session and convert the audio to text.
Accessing the Console
To share the Transcription Console link with the transcriptionist, click the Transcription Console button and copy the link that appears in the pop-up window.
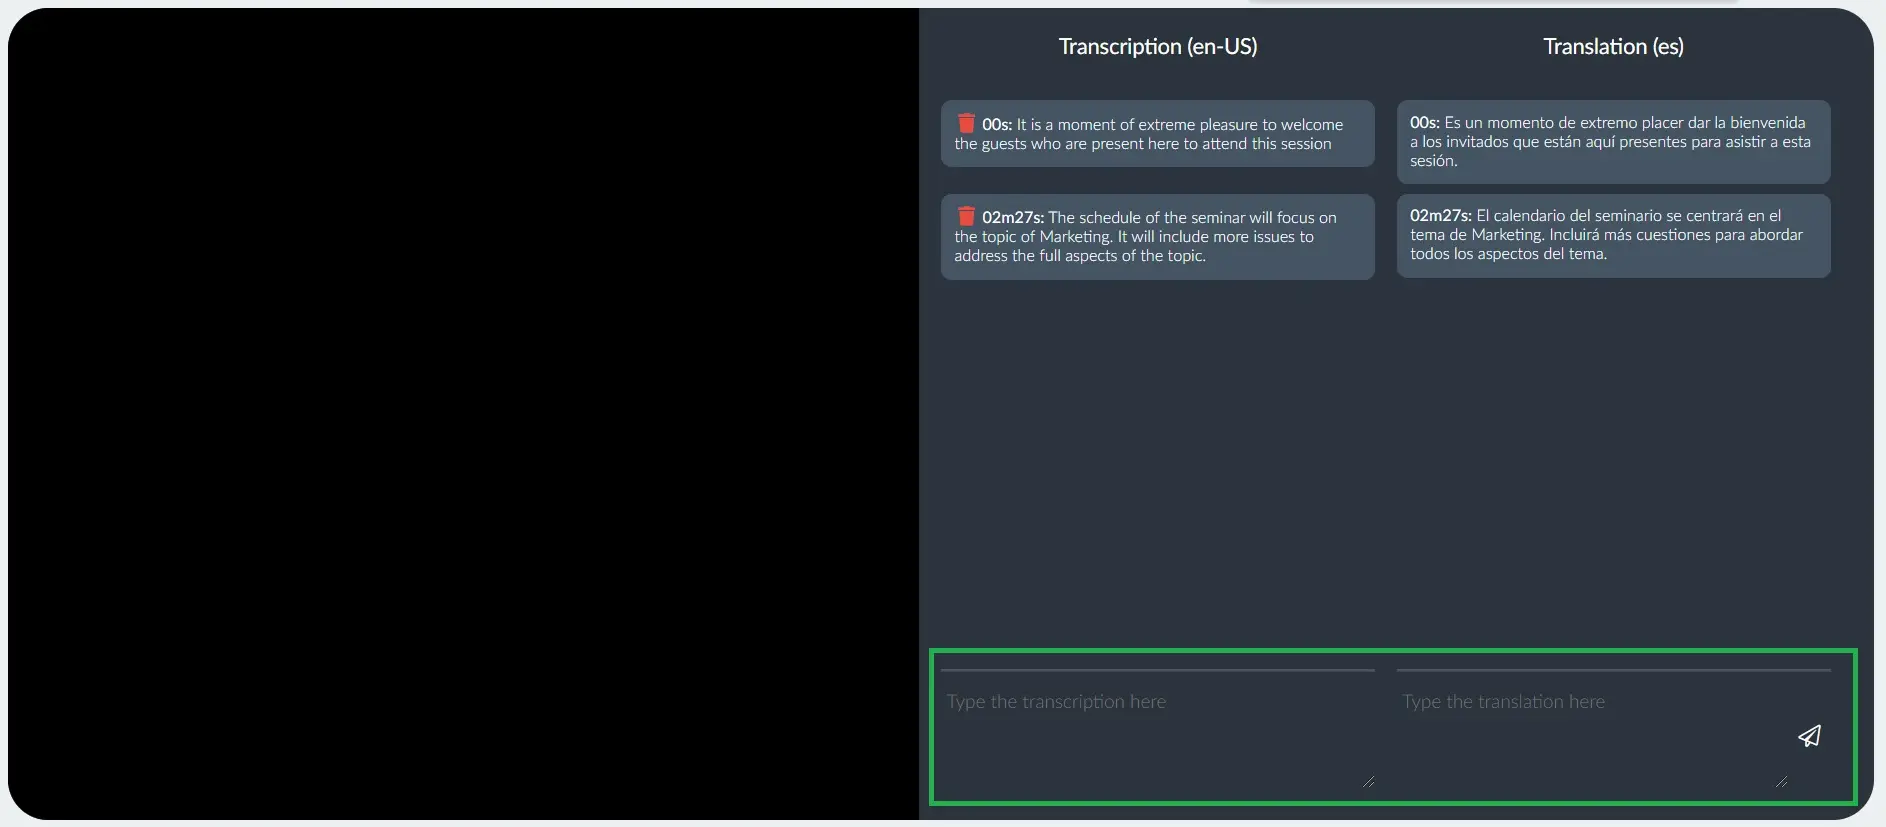
Once you share the console link with the transcribers, they will be able to access the console. Transcribers will see fields that say Type Transcription Here / Type Translation Here. Once they are done, they should click on the paper airplane icon to submit it.
Transcription location within the Virtual Lobby
When inside an activity in the Virtual Lobby, the presenters' speech transcription will show up under the Chat tab the Transcription field. The transcription will also be synchronized with the live stream.
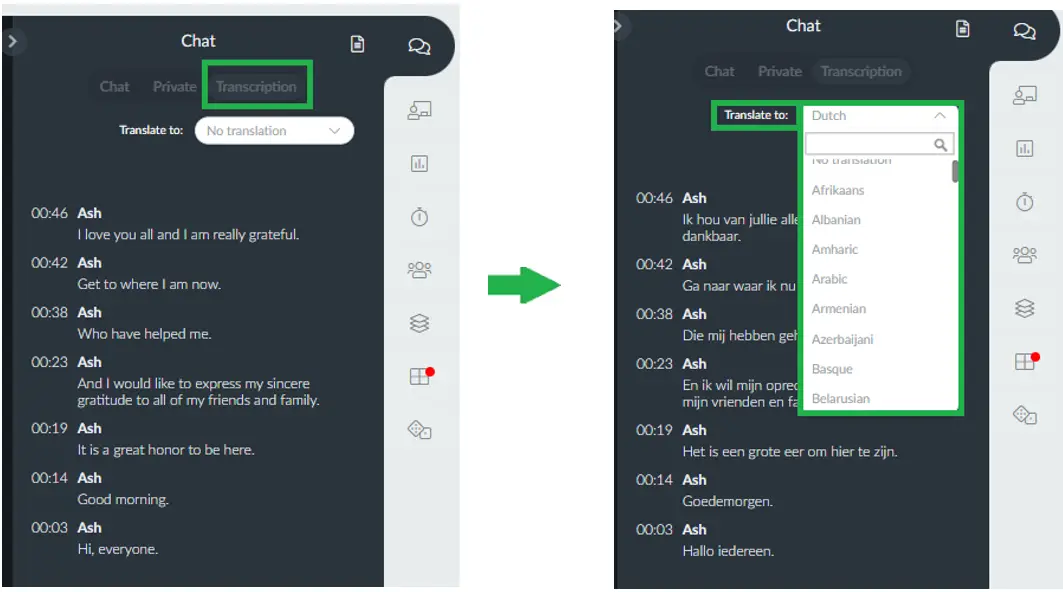
- If the admin has pre-selected Allow all languages as the translation option for transcriptions, attendees will be able to choose the translation language of their choice. They can select by clicking the Transcription tab and choosing a language from the Translate to drop-down.
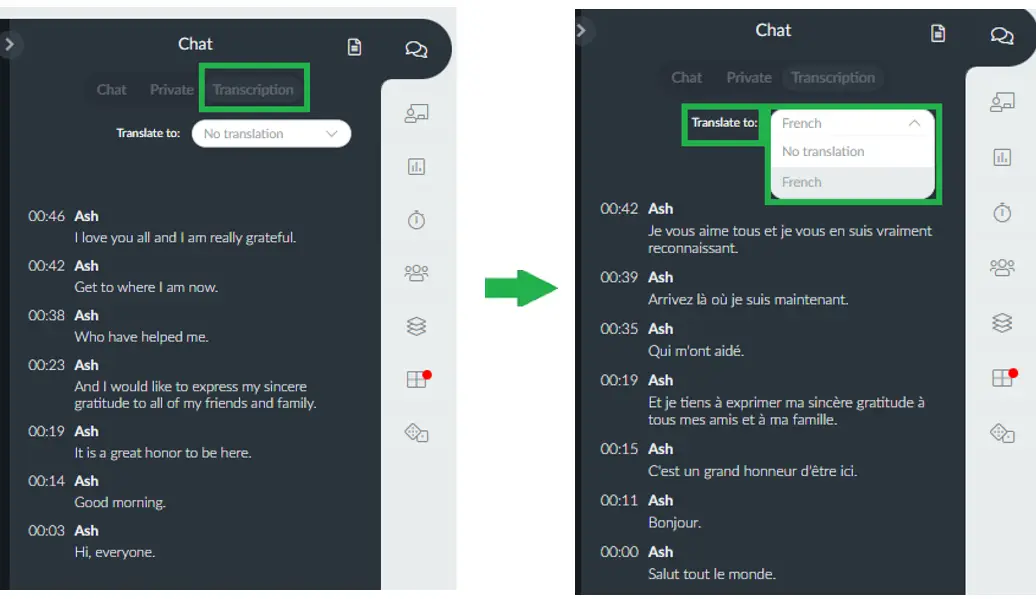
- If the admin has pre-selected a specific language as the translation option, attendees will find only that language available when they click on the Translate to drop-down.
Clearing transcriptions
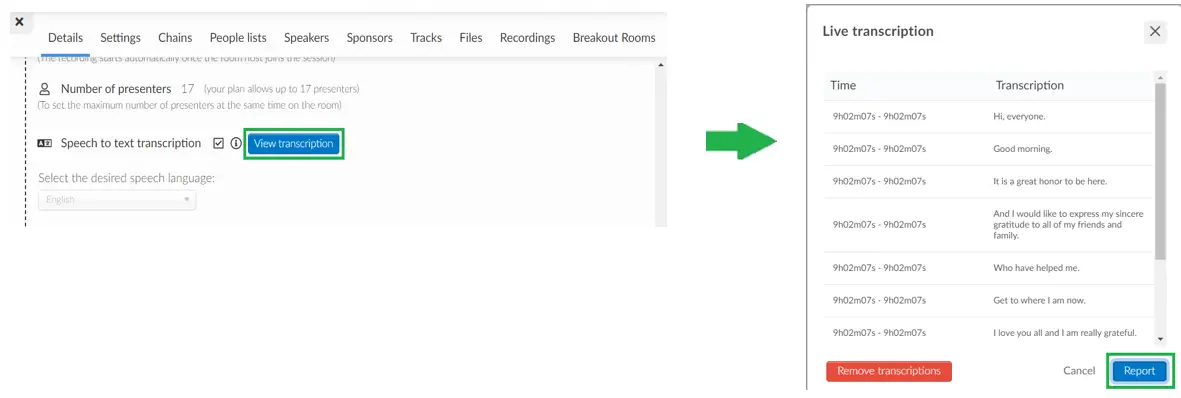
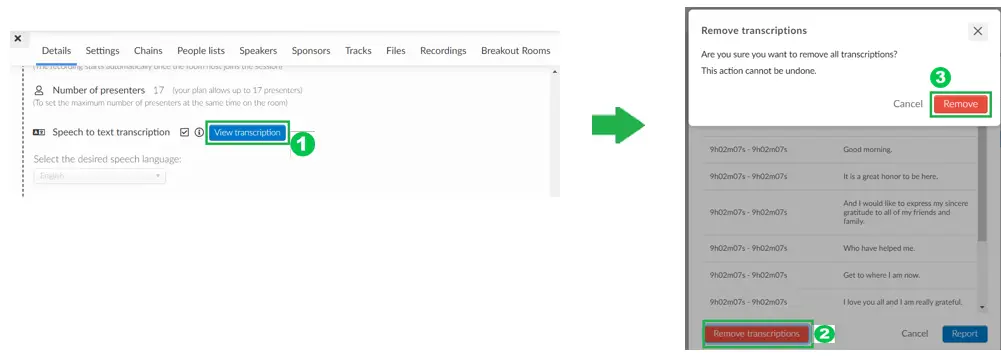
To clear the transcriptions from the Virtual Lobby. Go to Agenda > Activities and click on the Details tab. Locate the Speech to text transcription option and click the View transcription button.
A new window will pop up on your screen. Press the Remove transcriptions button, and a message will appear to confirm the removal. Click Remove as shown below:
Pulling the transcript files of the session
To pull the transcript of an entire session, in the activity’s details, you should click on the blue button View transcription. A new window will pop up and you should press Report. An excel file of the transcription report will be downloaded for you.