How to migrate all your Hopin Events to InEvent quickly
 Updated 11 months ago
by
Chioma Okenwa
Updated 11 months ago
by
Chioma Okenwa
In this article, you will learn how to export data from your events created in Hopin to the InEvent platform.
Exporting data from Hopin
Integration with HubSpot
Hopin offers a CRM integration with HubSpot that facilitates the import/export of data.
Click here to learn how to integrate your HubSpot account into InEvent. By doing this, you will be able to easily import your leads to InEvent's platform.
If your InEvent plan doesn't include integrations, you can still export a list of leads from your HubSpot account. To learn how to do it, click here.
Manually exporting data from Hopin
If your Hopin plan doesn't include integrations, you can export data from Hopin manually and then, import it to InEvent.
How to download your attendee list
There are 2 ways to generate the report as shown below.
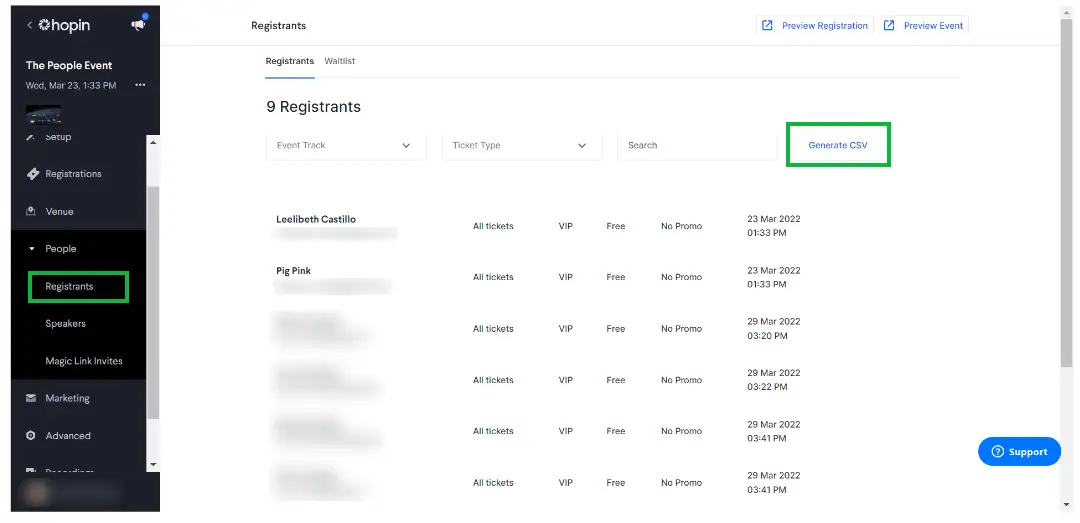
From the Attendees tab
- Sign in to your Hopin account and open your Events page.
- Go to your Event Dashboard and navigate to the People > Registrants tab. You will see a list of registered attendees with their names, email, ticket type and other data.
- Click Generate CSV to generate a report.
- The report will start processing and you will receive an email once it is ready.
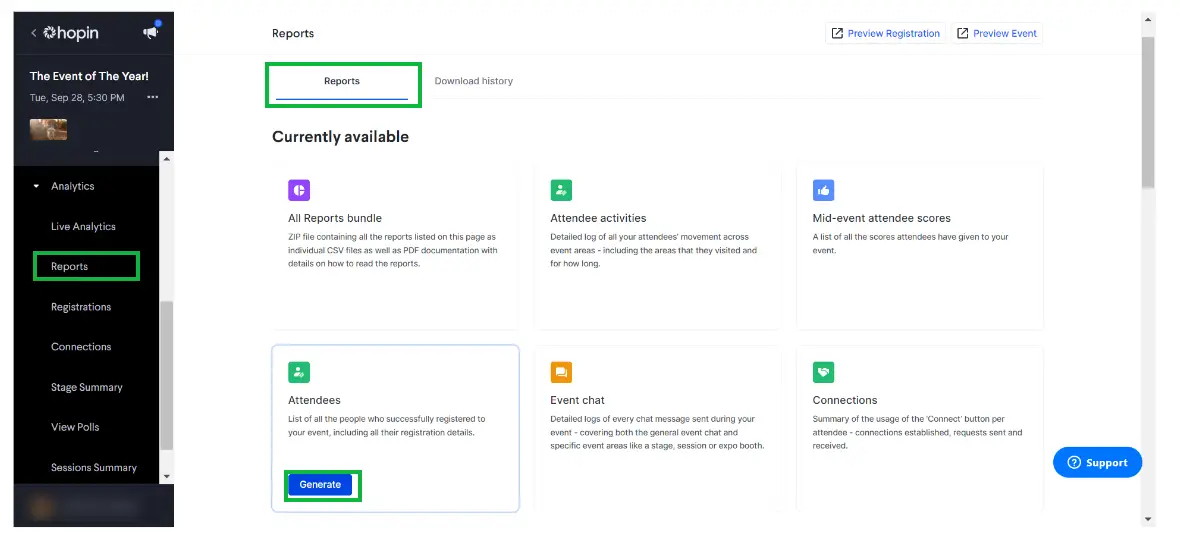
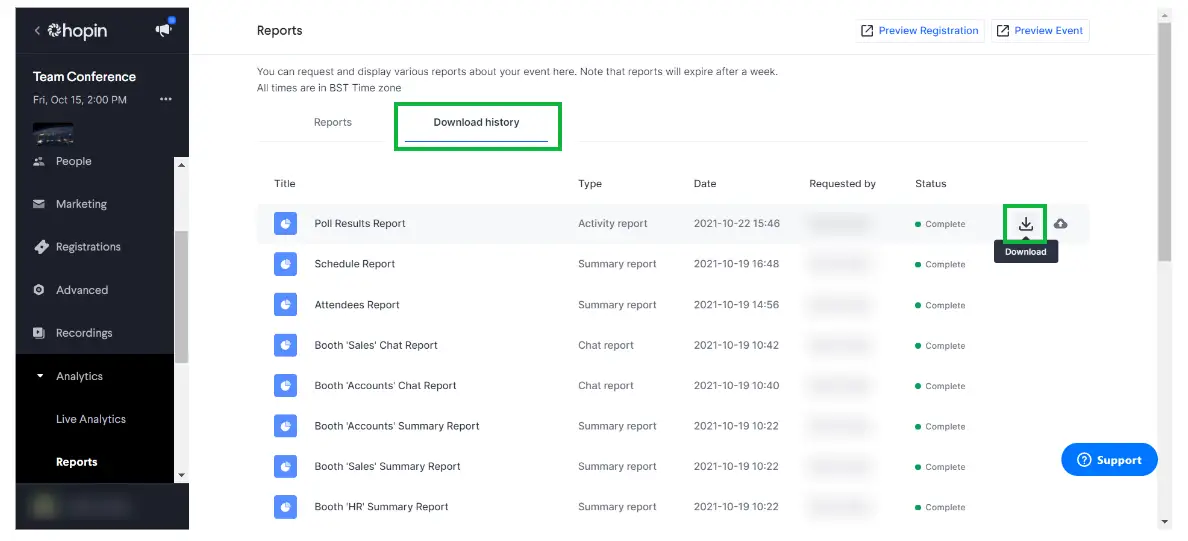
From the Reports tab
- Sign in to your Hopin account and open your Events page.
- Go to your Event Dashboard and navigate to the Analytics > Reports tab.
- Click the Generate button on the Attendees Report to generate a report.
- The report will start processing and you will receive an email once it is ready
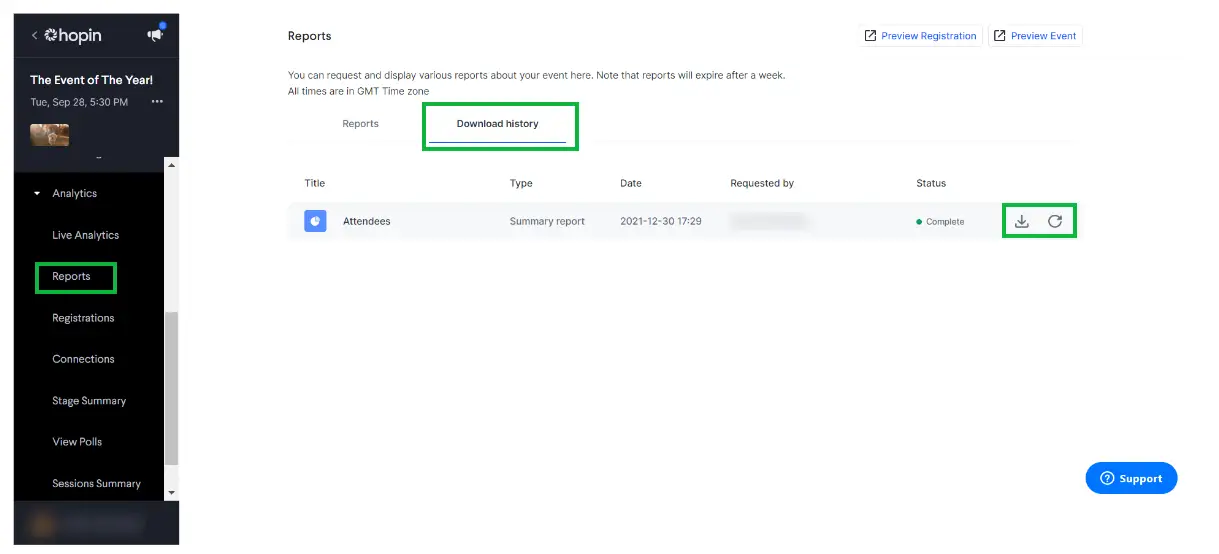
To access the Attendees report once generated:
- Go to your Event Dashboard and navigate to the Analytics > Reports tab.
- On the Download history tab of the Reports page, you will be able to track the report Status.
- Once the Status changes to Complete click the Download button to download the report as a CSV file. (Hover on the report in the list for the buttons on the right side to appear)
- If more attendees are added to your event at a later date or after the event is over you can also click on the Regenerate button to create a new, updated report and download an updated version.
How to download the schedule report
The Schedule Report generates an outline of what is included in your schedule. This will include each schedule segment you have created as well as any information linked to it.
To download the report, follow the steps below:
- Sign in to your Hopin account and open your Events page.
- Go to Event Dashboard > Analytics > Reports, find the Schedule Report and click Generate.
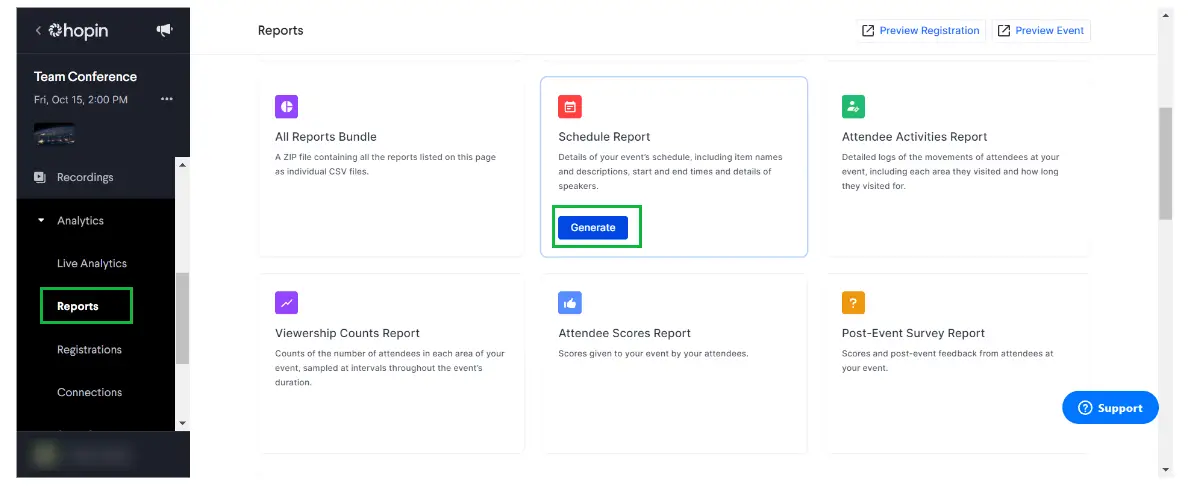
- Once you have generated the report, click on Download history and you should see your report at the top of the list.
- Hover over the report and the Download button will appear. Clicking on this will download the report to your computer.
- Once downloaded, the Schedule Report should look something like this:

Setting up your event
To help you set up the event let's take a look at this step-by-step. In this article you will learn how to:
- Create an event and add information on the Details page
- Add Sponsors, Speakers, and Content
- Create activities and choose the settings for the Virtual Lobby
- Learn more about Customization, Communication, and Registration
- Add Attendees, Invitees, and Leads
- Learn about the Interactions with attendees and finally Dry run
Importing data to InEvent
After checking the article mentioned above, you can take a look at this article in case you are planning on importing data in bulk.