Ticket transfer configuration
With InEvent, event organizers can allow attendees who hold tickets to transfer their tickets to other people using the Ticket transfer feature.
This article will guide you through the steps of activating and configuring Ticket transfer.
Enabling ticket transfer
To allow attendees to transfer their tickets, you must first have Tickets enabled.
To enable Ticket transfer, complete the following steps:
- Navigate to Marketing > Registration > Registration form.
- Press the Settings button at the top right corner of the page.
- Locate the Ticket transfer tool in the Registration section.
- Enable the tool using the toggle on the right.
- Click on the X button to close the Settings window.
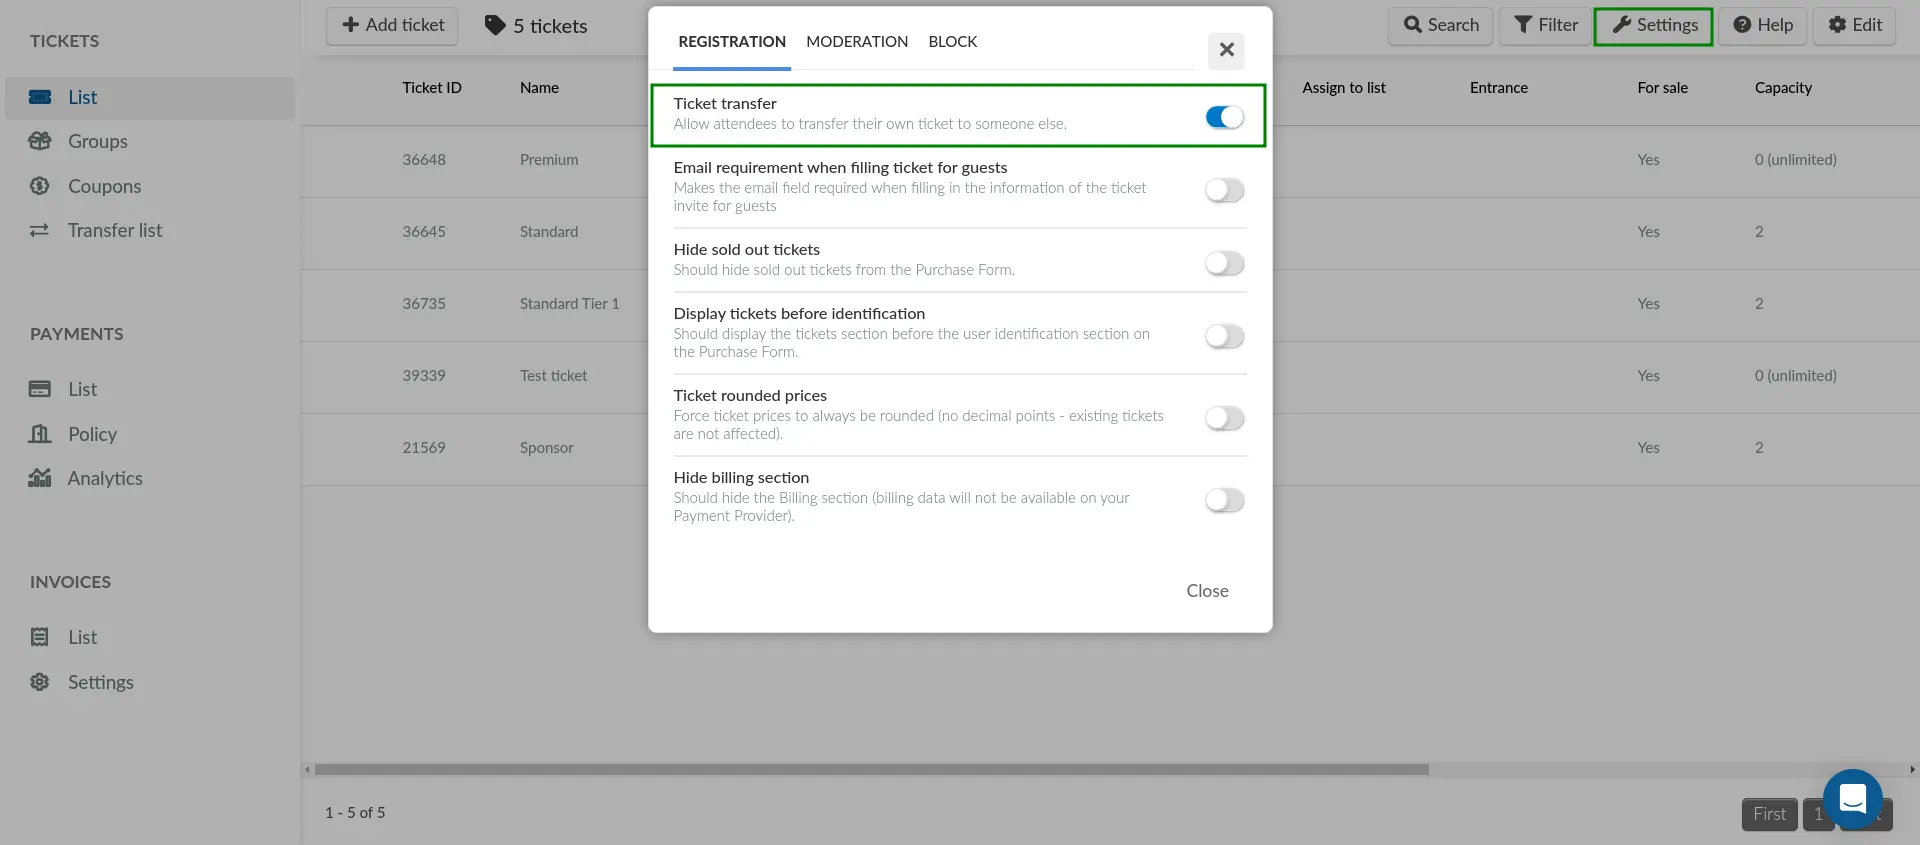
Once you have completed the steps above, attendees who hold tickets will be able to transfer their tickets to other people.
Are there features that are incompatible with Ticket transfer?
The following features are incompatible with Ticket transfer:
- Activities on Form
- RSVP Form
- Quick Form
- Guest Form
- Invite requirement
- Approval requirement
- Waitlist requirement
Hiding the manual ticket invite option
When ticket holders transfer their tickets, they have the option to fill out the ticket invite form on behalf of their guest by pressing Fill in now for your guest instead of the Send button.
If you do not want your attendees to fill in the contact details for the ticket recipient, follow the steps below:
- Navigate to Settings > Tools.
- Locate Hide manual ticket invite under the Block section.
- Click Edit on the top right corner of the page.
- Enable the Hide manual ticket tool using the toggle on the right.
- Press End to save your changes.
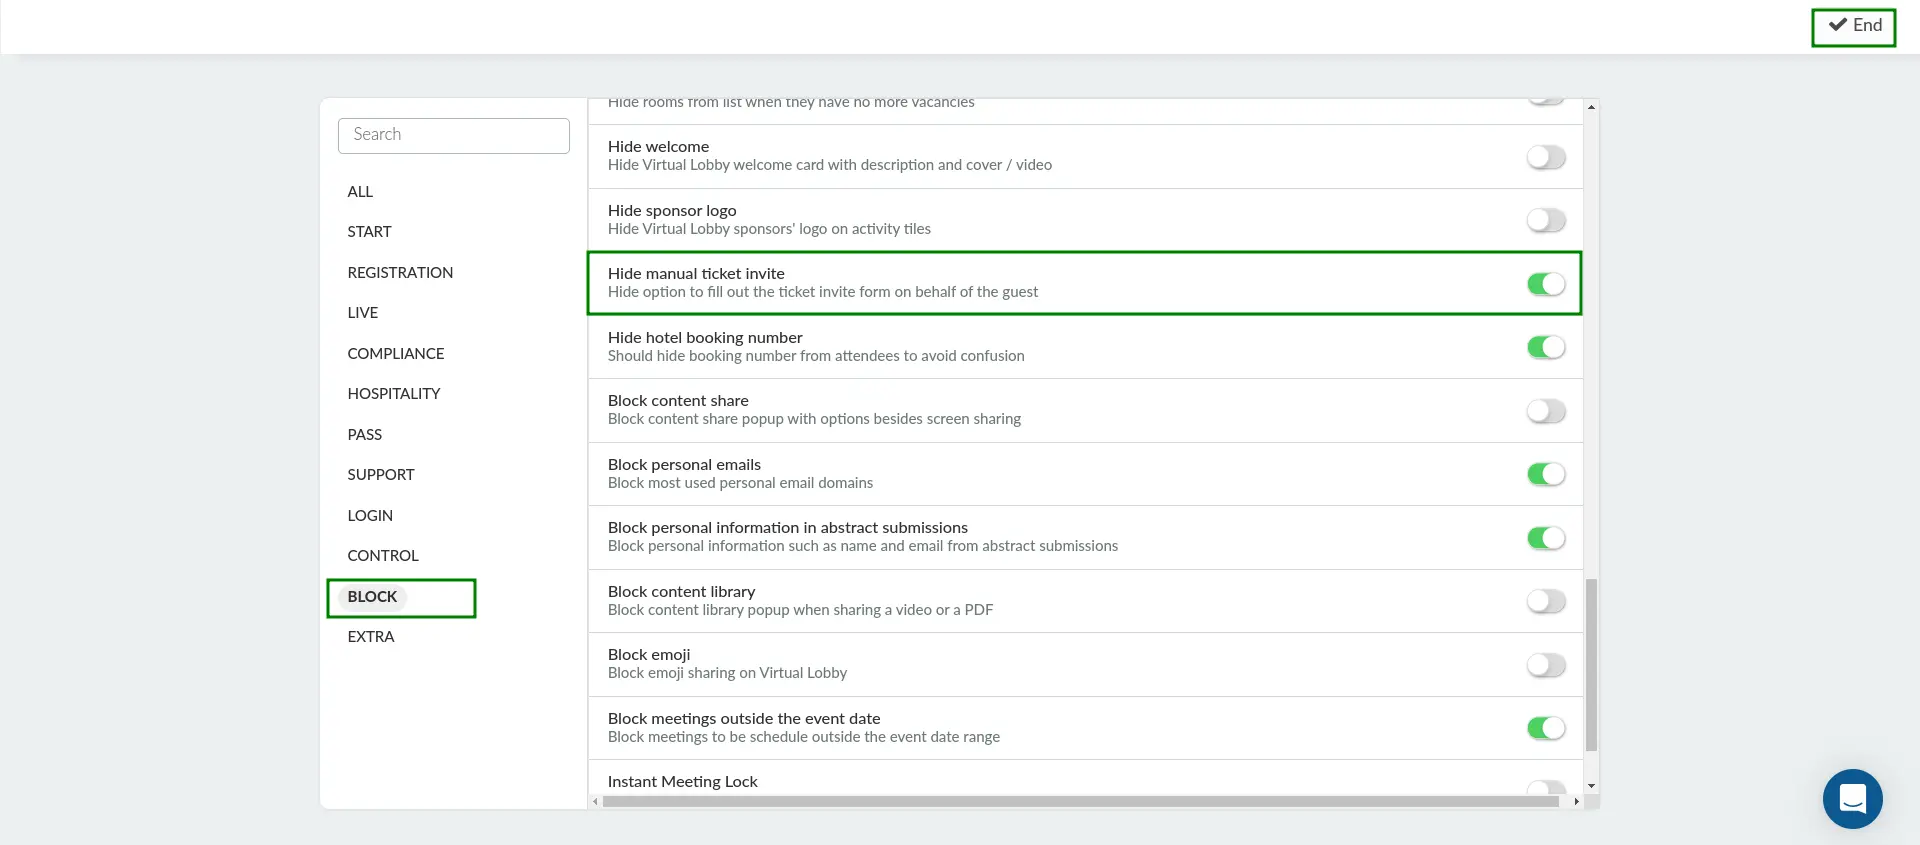
After completing the steps above, ticket holders will be unable to fill in the contact details for the ticket recipient.
Preventing transfers of specific ticket types
Once you have enabled Ticket transfer through Registration form > Settings, all available tickets can be transferred by attendees. To prevent attendees from transferring specific ticket types, follow the instructions below:
- Navigate to Marketing > Tickets > Tickets.
- Locate the ticket you want to restrict.
- Press the blue button on the rightmost column to Open ticket details.
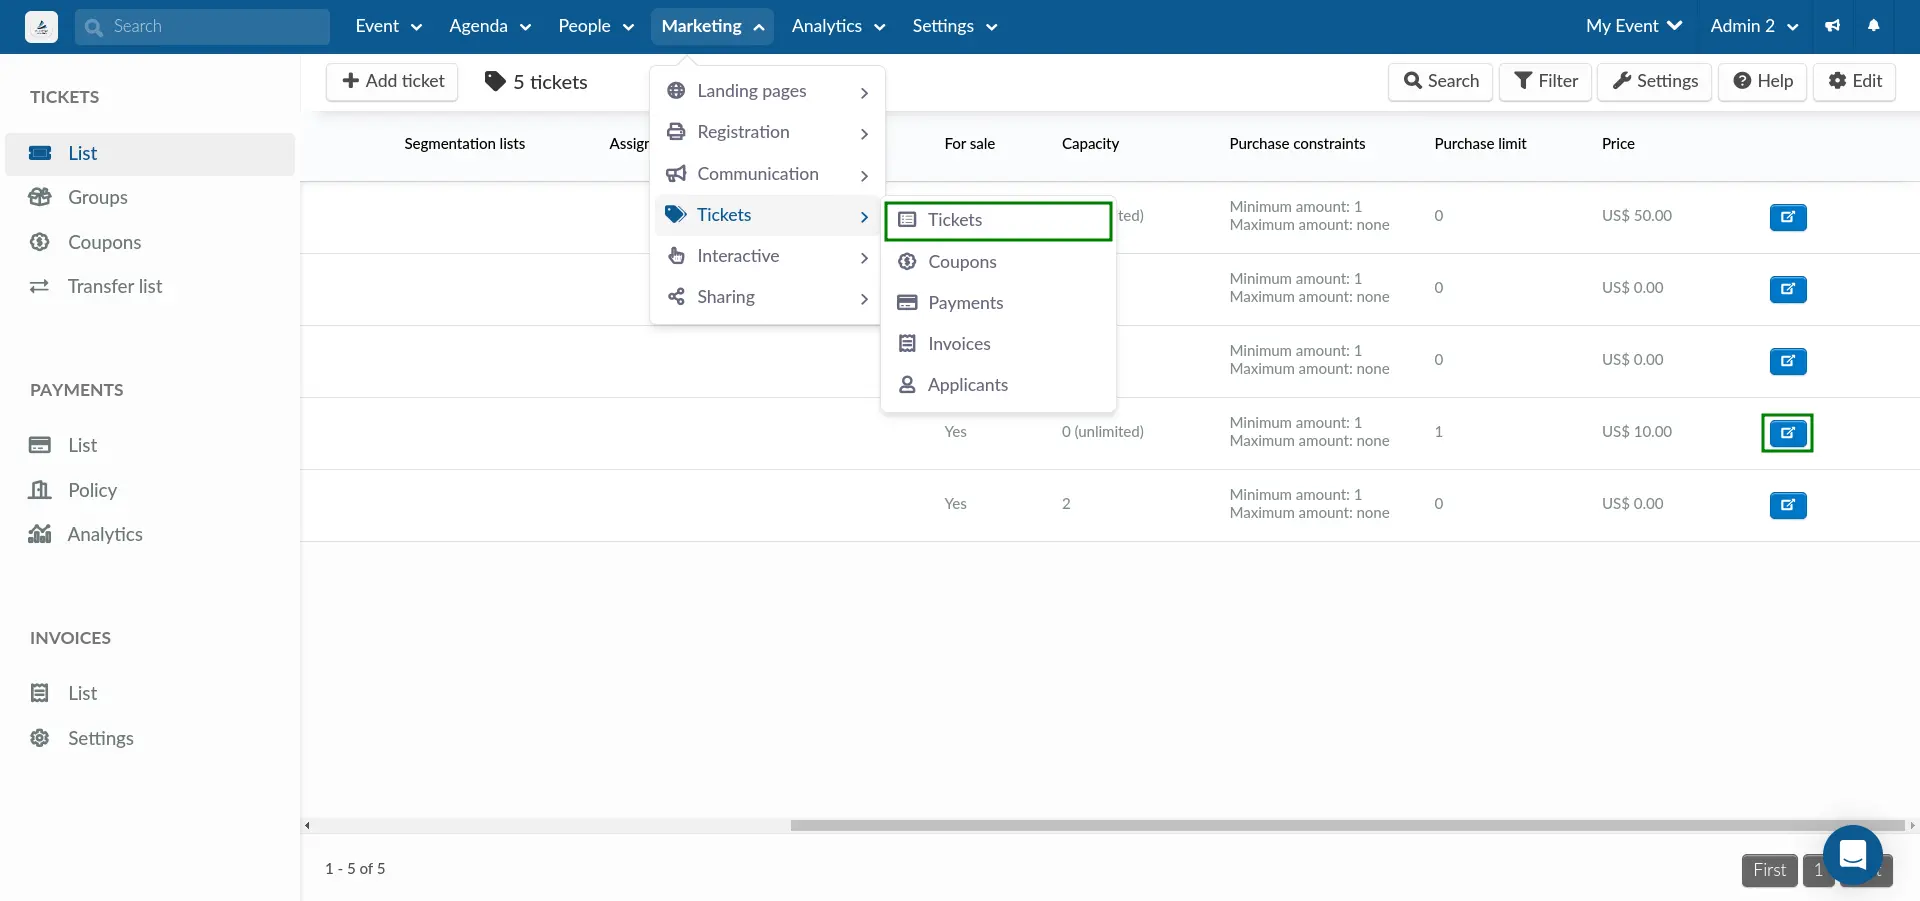
- Click Edit on the top right corner of the page.
- Uncheck the Can giveaway ticket box.
- Press End to save your changes.
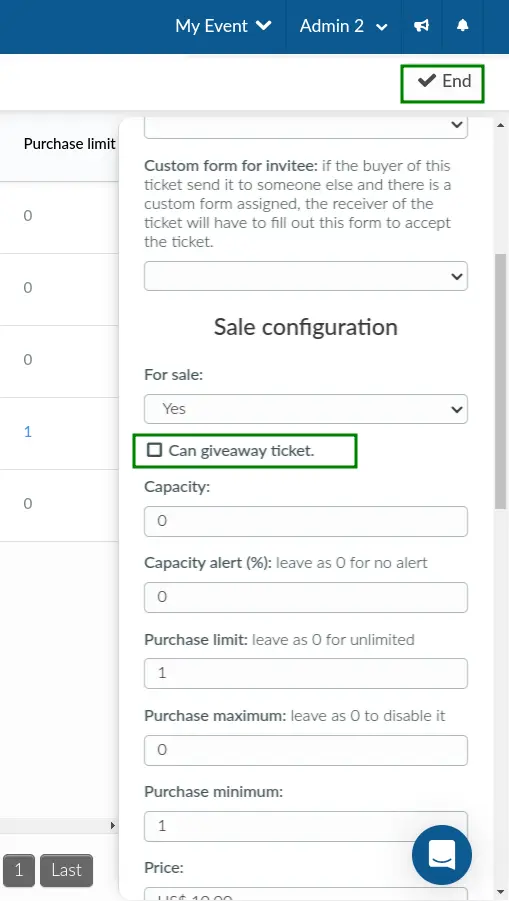
After completing the steps above, holders of the configured ticket type will be unable to transfer ticket.
Reviewing ticket transfers in your event
In the Transfer list section, event organizers can see details on pending and completed ticket transfers, which includes the following items.
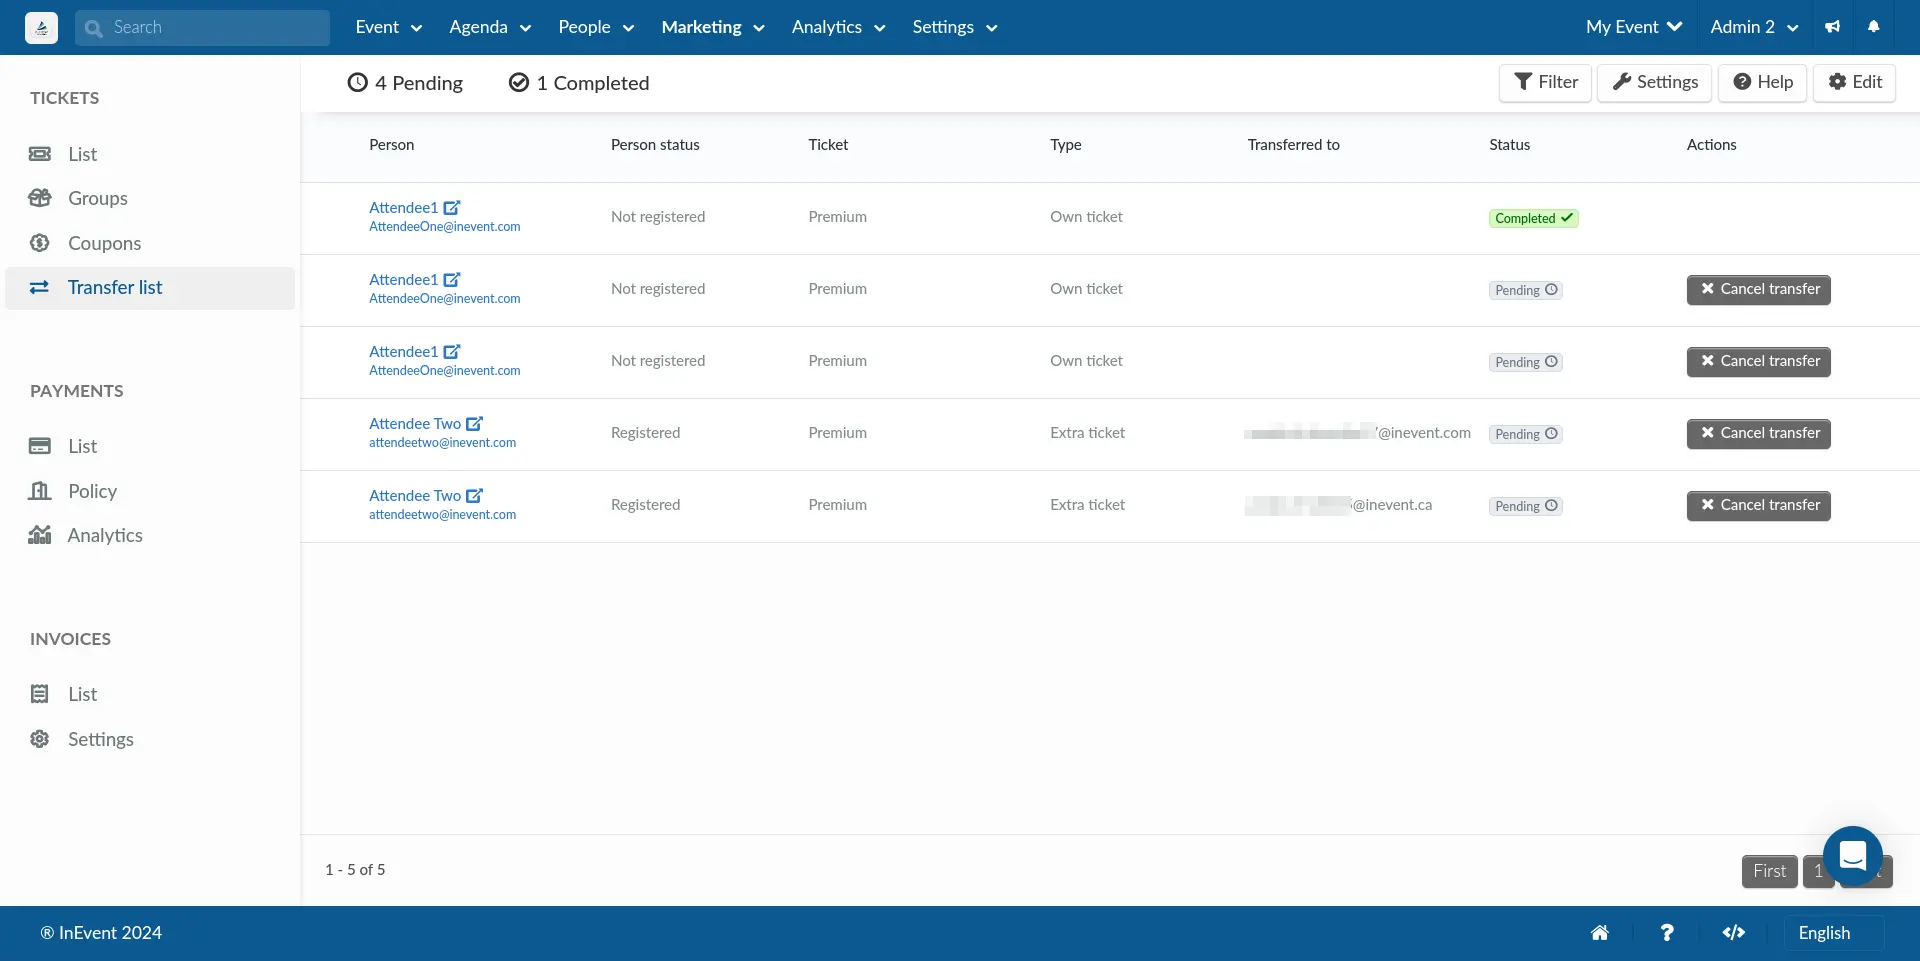
- Person: Name and email of the user who transferred their ticket
- Person status: The registration status of the user who transferred their ticket
- Ticket: The name of the ticket that is transferred
- Type: The type of ticket that is transferred. Own ticket refers to a user's active ticket, whereas Extra ticket refers to tickets that is not in-use.
- Transferred to: The email address of the ticket transfer recipient
- Status: The status of the ticket transfer
- Actions: The actions that can be taken by the event organizer in relation to the ticket transfer. The available option is Cancel transfer.
Filtering ticket transfers
Event organizers can filter the displayed ticket transfers using the Filter function.

You can filter ticket transfers based on the Transfer status and/or Person status. The available Transfer status filters are Pending transfers and Completed transfers. The available Person status filters are Not registered and Registered.
Canceling pending ticket transfers
Event organizers can cancel pending ticket transfers using the Cancel transfer action. To do so, click Edit and click on the Cancel transfer button next to the pending ticket transfer you wish to cancel.

In addition, you can cancel multiple ticket transfers at once. To do so, click on Edit and check the boxes next to the pending ticket transfers you wish to cancel. Then, click on the Cancel transfer button on the top right corner. On the Cancel transfer confirmation pop-up box, click on Yes, cancel to confirm.

After completing the steps above, the pending ticket transfer will be canceled.

