Webinar Ticket Management
 Updated 4 weeks ago
by
Amalia
Updated 4 weeks ago
by
Amalia
Using the ticket management dashboard, you will be able to configure your tickets, coupons, and payments, as well as create different types of tickets for your public and analyze your webinar success. Besides that, you can also separate tickets per group, segmentation, custom form, or invitees' name.
Enabling and disabling this feature
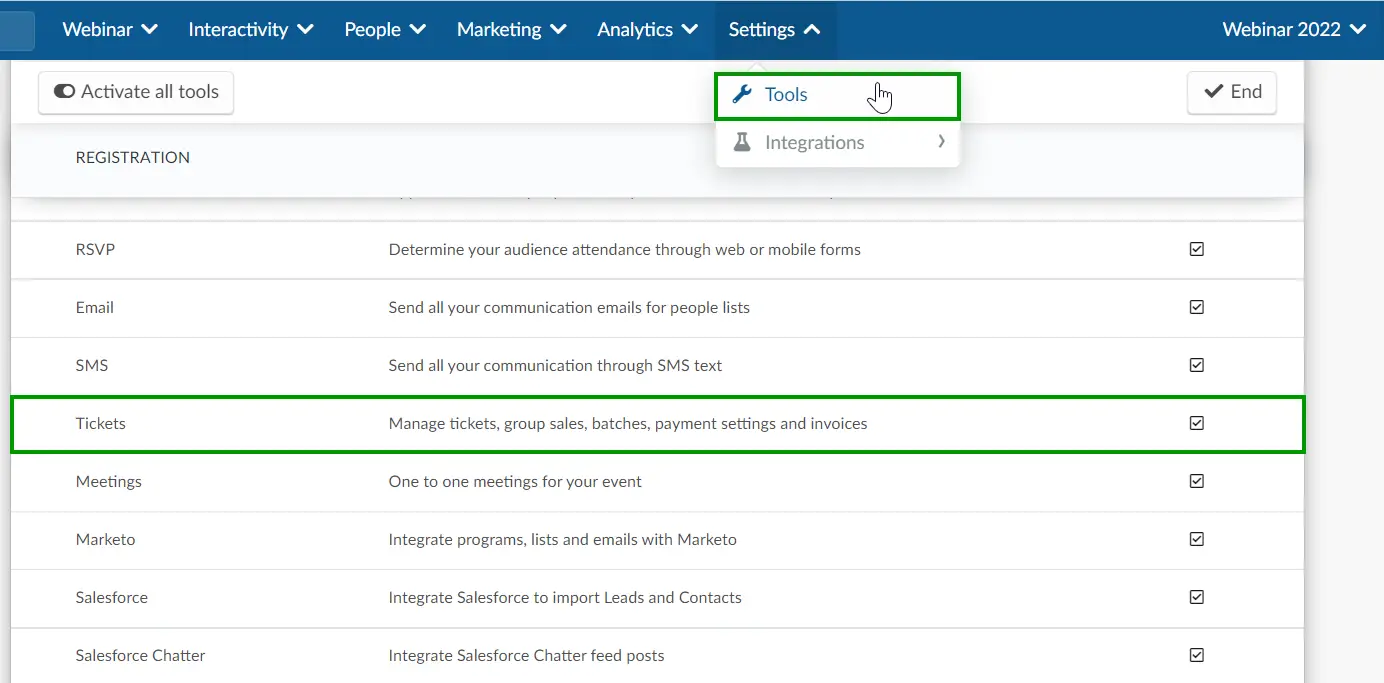
To enable the tickets tool, click on Settings > Tools > Edit > scroll down until you see the Registration section > enable Tickets by ticking the correspondent checkbox > press End to save the changes.
If tickets are a requirement to enroll in your event, you should also make sure the Ticket requirement is enabled. To do so, still, at the Webinar tools page, scroll down to the Control section and make sure the Ticket requirement is set to Yes. In case it's set to No, press Edit > tick the correspondent checkbox > click End to save the changes.

Creating tickets
Manually
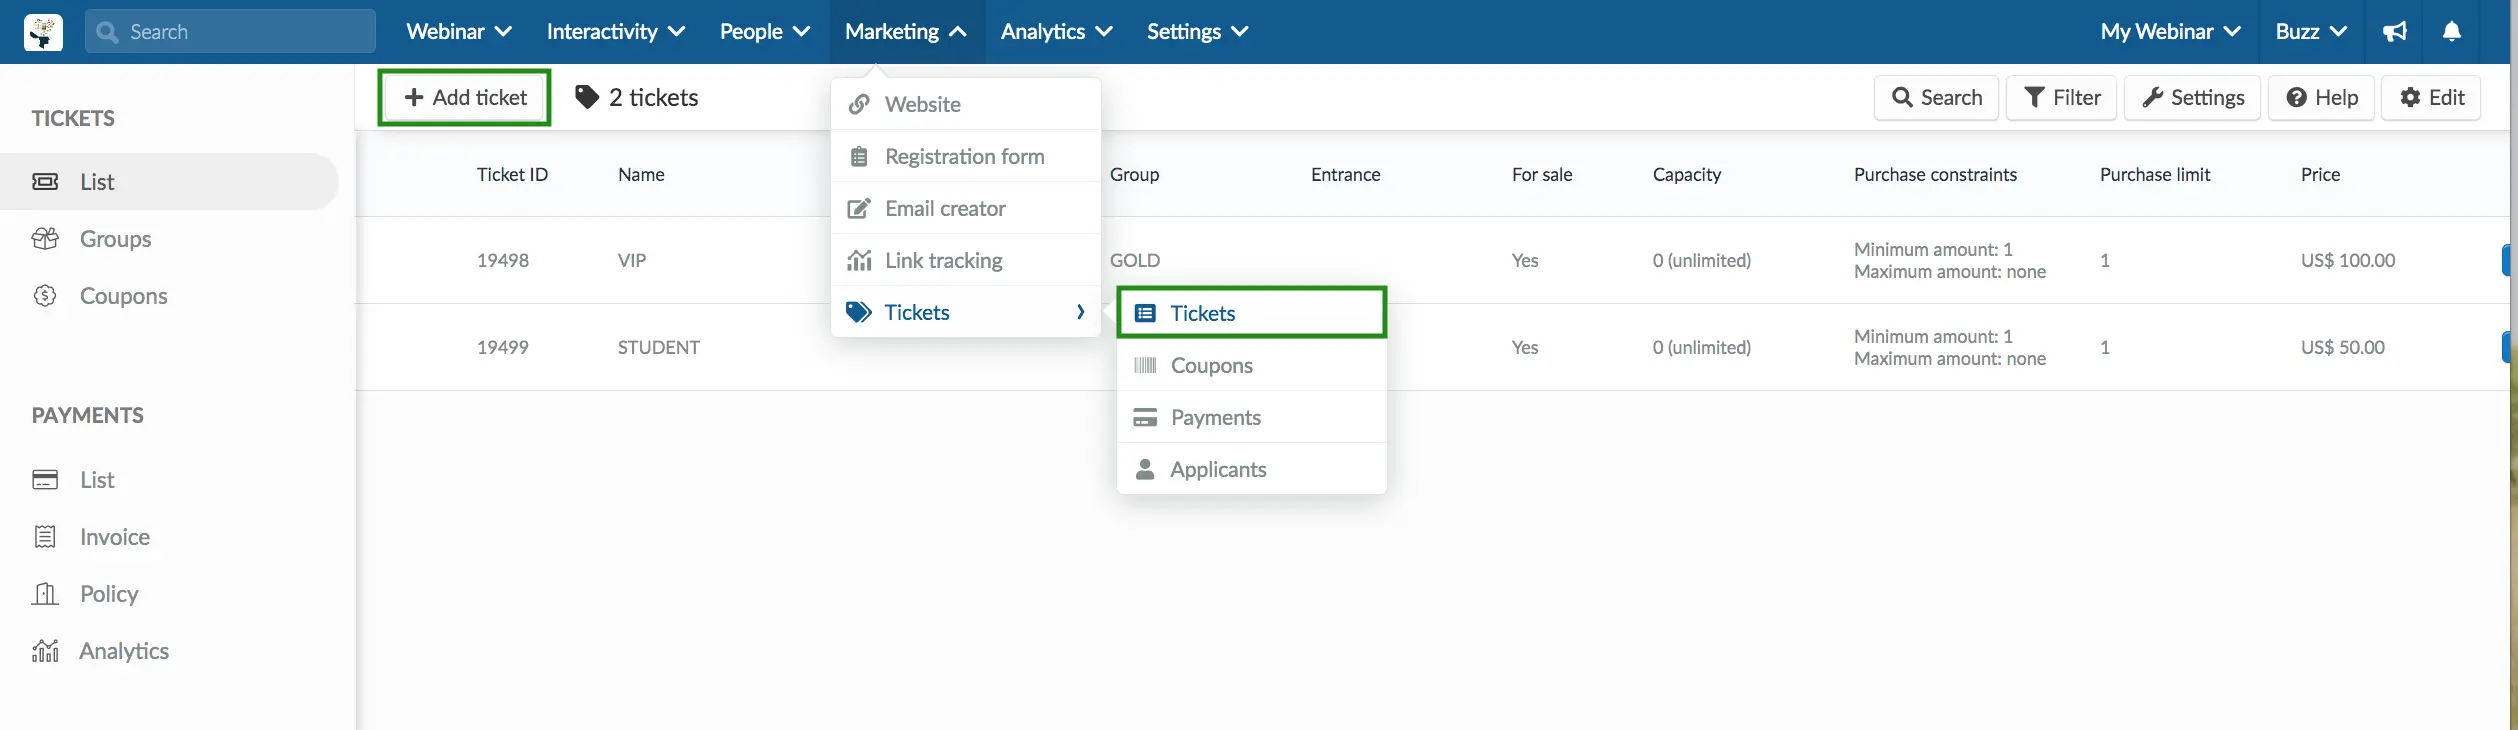
To create tickets, go to Marketing > Tickets > Tickets, then press the +Add ticket button on the top left corner. Then, type in the ticket name, price, and press Create.
Using a spreadsheet
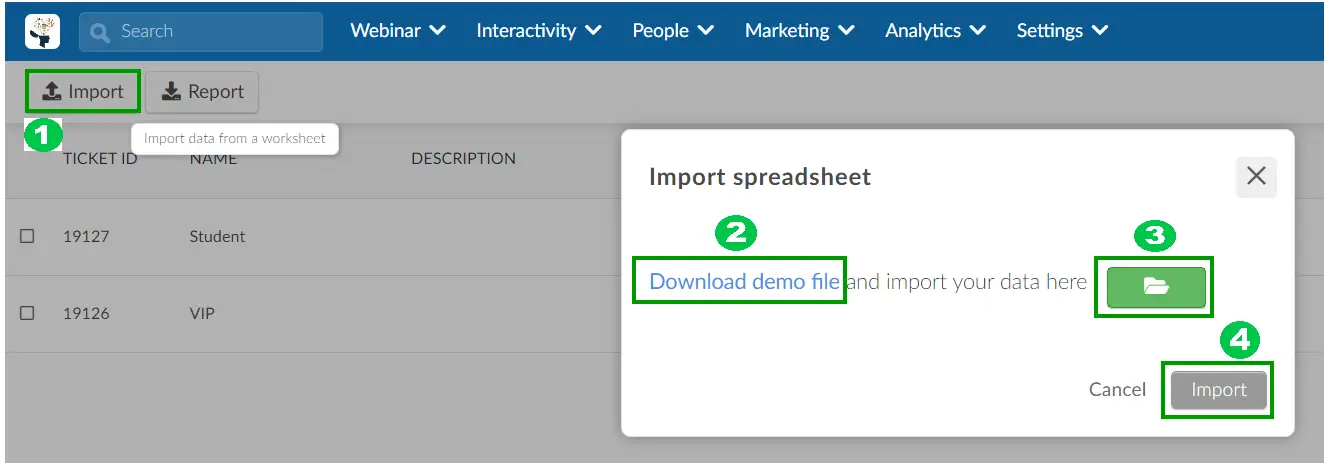
You can also bulk import tickets to the platform using a spreadsheet. To do so, on the Tickets page press Edit > Import > Download demo file.
The spreadsheet comes with an example of how to fill each of the columns. Once completed, the file should be saved on your computer and then imported using the green file button next to Import on our platform as shown below, then click the Import button.
Filling the spreadsheet
Once you have downloaded the demo file, fill in the columns with the necessary information needed for your ticket.
The following columns are available for filling.

description, entrance, segmentationList and assignList columns can be empty, whereas the rest of the columns have to be filled in.namepricedescriptionentrancecapacitypurchaseMinpurchaseMaxpurchaseLimitactivegroupsegmentationListsassignLists
segmentationList and assignList will not function within Webinars, even if either or both columns are filled.assignHoldergiveawayticket- Fill in 0 to represent No and 1 to represent Yes.
- When filling in the
groupcolumn, you can enter the name of a new group and it will be created on the platform. Alternatively, you can enter the name of an already existing group and the ticket will be added to that group.
Once completed, save the file to your computer.
Importing the spreadsheet to the platform
After filling and saving the demo spreadsheet, follow these steps:
- In the List section of the Tickets page, click on Edit.
- Click on Import at the extreme right corner of the page. A pop-up box will appear.
- Click on the green file button on the Import spreadsheet pop-up box and select the filled spreadsheet you want to import
- Click on the Import button to initiate the import process.
- Refresh the page to see the imported ticket(s) displayed with all the filled information once the import process is complete.

Editing the ticket information
Scroll to the right side and press the blue button on the ticket which you would like to edit. This opens a panel to the right, where you can edit the information of your ticket such as:
Basic information
- Name: what is the name of the ticket (VIP ticket, Sponsor access).
- Description: what the ticket entitles (gifts, exclusive access, lectures).
Group
You can use this to visually group the tickets at the time of purchase. This will affect how tickets are displayed on the purchase form.
To create ticket groups, follow the steps below:
- Click on Groups from the left menu of the page.
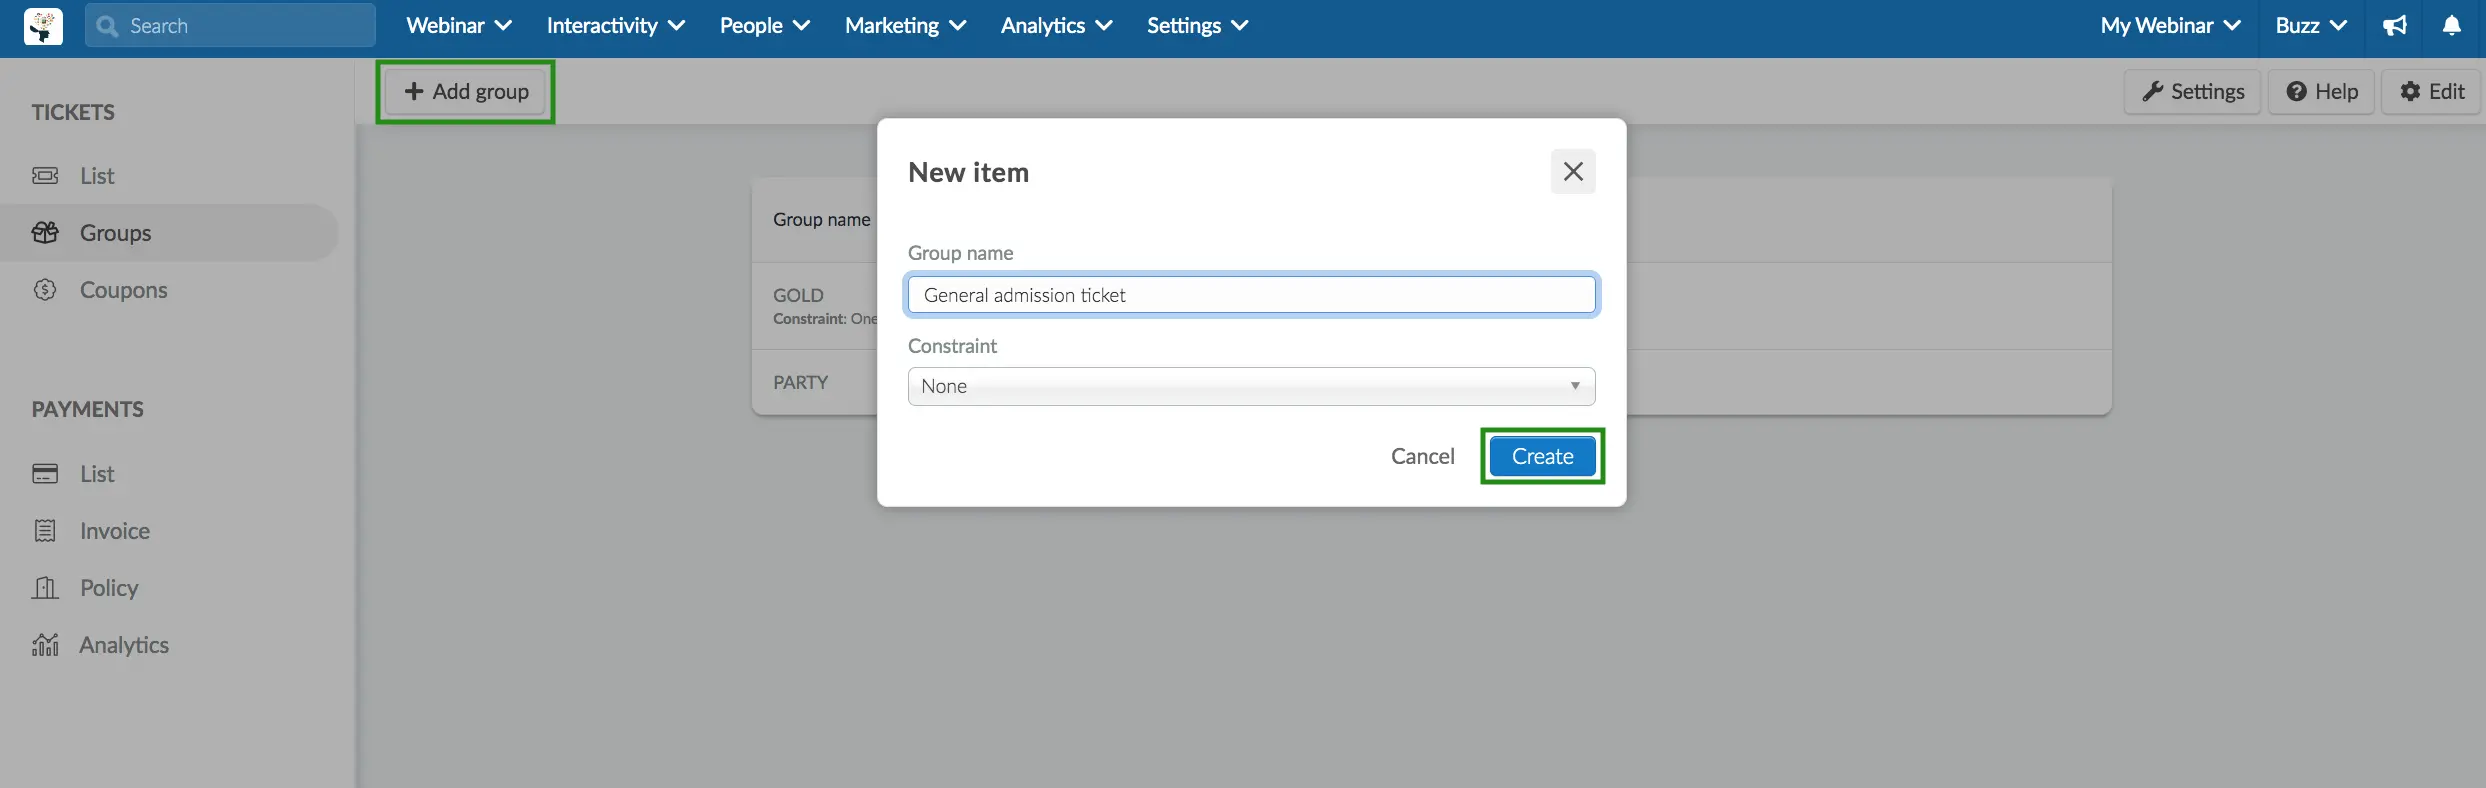
- Click on +Add group button at the top left corner and a new window will appear.
- Enter the group name and define if there will be a constraint. Under the Constraint, you can choose from:
- None: if you select this option, there will be no limit on how many tickets can be purchased from this specific group.
- One type of ticket: if you select this option, applicants will be able to purchase only one ticket from this specific group. See the example below (General admission tickets).
- Click on Create.
Under Constraint, you can choose from:
- None: if you select this option, there will be no limit on how many tickets can be purchased on this specific group.
- One type of ticket: if you select this option, applicants will be able to purchase only one ticket from this specific group. See the example below (General admission tickets).
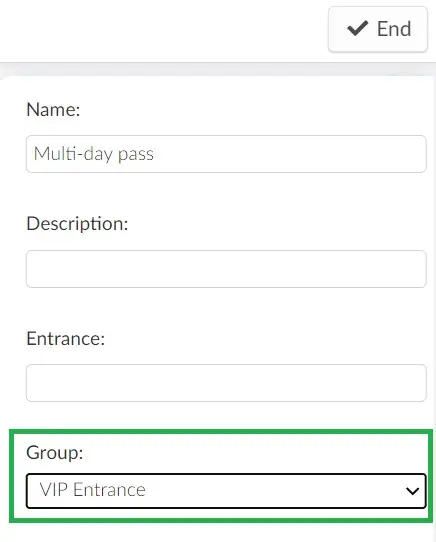
Next, you will need to scroll to the right side and press the blue button on the ticket you would like to add to a group. It will open a panel to the right, scroll down until you see Group and selecting a group from the dropdown bar.
This is how the created groups and their constraints will look like in the purchase form:

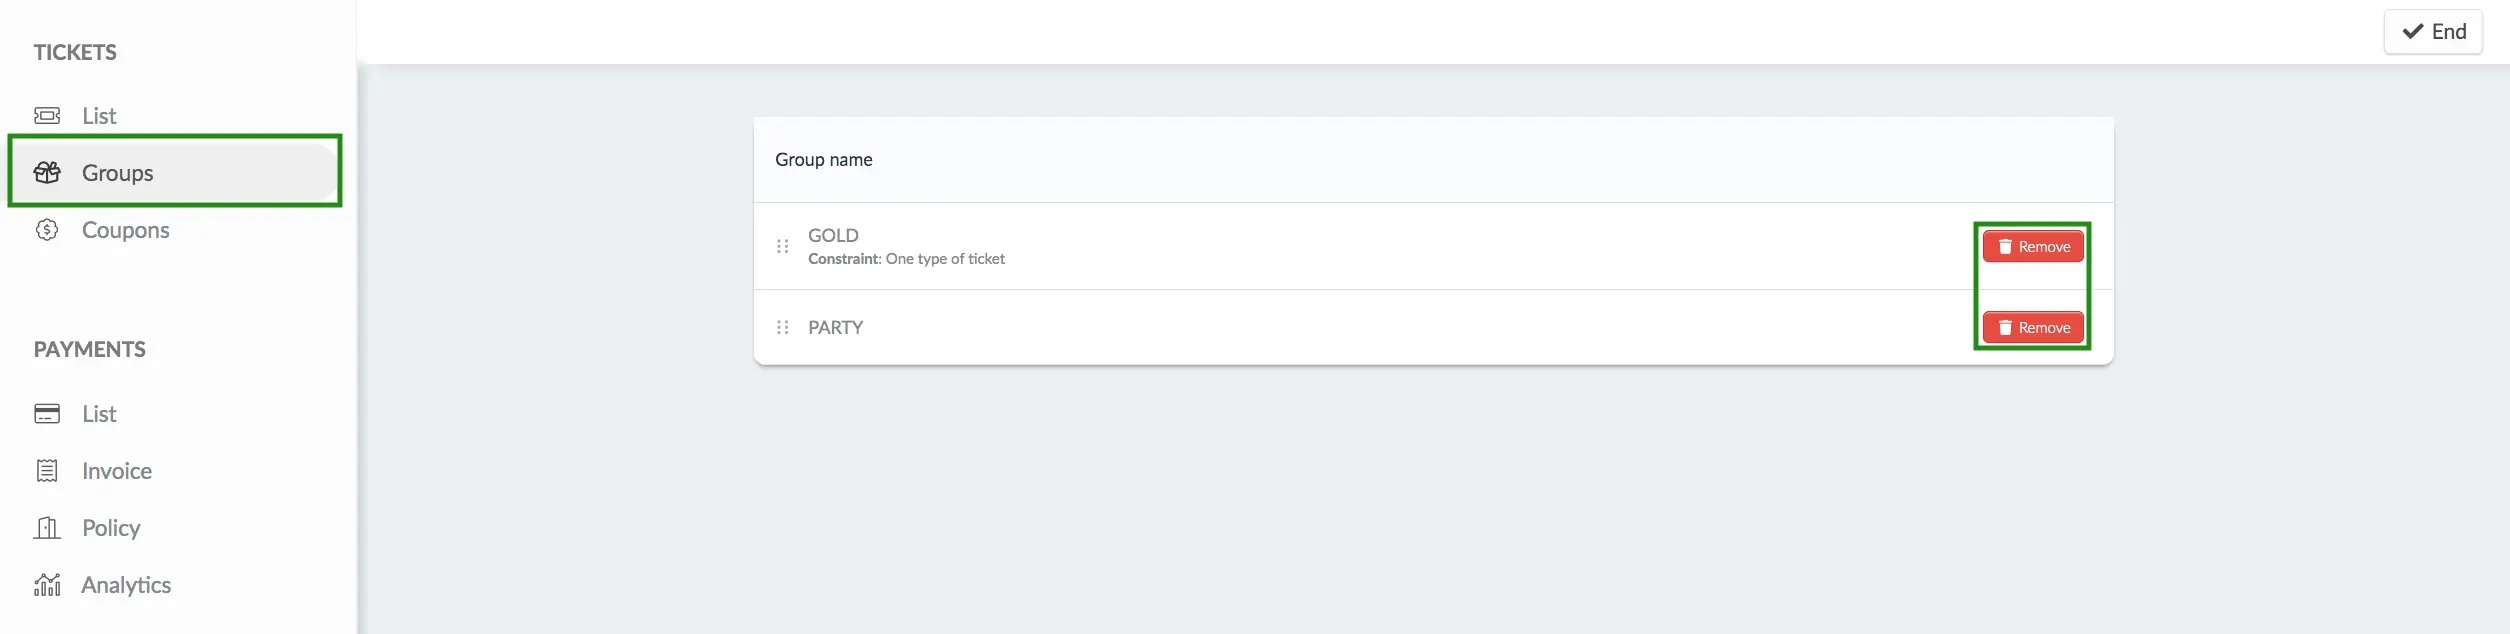
To see all created groups and their constraints, simply click on the Groups on the left menu tab and all the groups will appear. To delete a group and its constraints, click on Edit and then click on the Remove button.
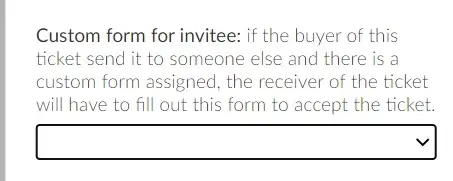
Custom form for the invitee
If the buyer of this ticket sends it to someone else and there is a custom form assigned, the receiver of the ticket will have to fill out this form to accept the ticket.
To do so, you will need to:
- Create a custom form with the questions you would like the invitee to answer.
- After that, on the tickets screen on the platform, choose the ticket type you want to add the form to, click on Edit, go to the section Custom form for the invitee, and choose the specific form for that ticket. Then, click on the End button to save your changes.
Sale configuration
- For sale: can the ticket be purchased through the form? If so, choose Yes. If it should not be released yet, check No.
- Capacity: the total amount of tickets available for purchase at the webinar.
- Purchase minimum: minimum number of tickets per purchase.
- Purchase maximum: maximum number of tickets per purchase.
- Purchase limit: the total amount of tickets that one participant can buy.
- Price: amount to be paid for the ticket.
- Discounts: create automatic discount policies for each ticket. Refer to the Coupons article to learn more about it.
Triggers - assigning ticket users to lists
This allows you control who can access your event activities by linking tickets to activities through the use of custom lists. Users that hold this ticket will be automatically synced with the selected list.
By assigning ticket users to the lists that are linked with activities from the agenda, you can set up which activities a type of ticket will be allowed to access.
To link tickets to activities so you can restrict who can access it, follow these steps:
- Create custom lists, following the instructions given in the Static and Contact lists article.
- Link the lists to the activities. You can learn how to do it in the Associating activities with a group of attendees article.
- Navigate to Marketing > Tickets > Tickets and select the desired ticket by clicking on the blue button at the far right. A new window will open on the right side.
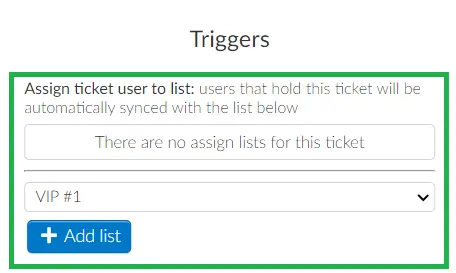
- Click on Edit and scroll down till you find the field Assign the ticket user to list under Triggers.
- Choose the list you want to attach to this particular ticket from the drop down menu and press the +Add list button
- Press End to save your changes.
Done! Now only attendees who have purchased tickets with linked lists will have access to certain activities.
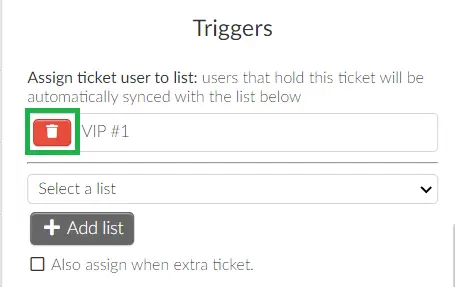
To remove a trigger list, click on the thrash icon beside the list
Triggers for multiple tickets
The trigger function can also be used when an attendee is purchasing multiple tickets that are linked to different lists. When attendees purchase multiple tickets that have a trigger assigned, by default, it assigns the users to the list specified by the active ticket.
Additionally, this feature automatically adds users to all the lists associated with the different tickets they have purchased. This way, attendees who buy multiple tickets can access the different activities defined by each of those tickets.
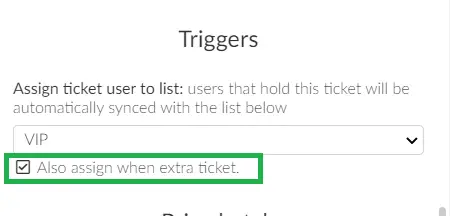
To enable this feature, tick the checkbox Also assign when extra ticket. When users purchase multiple tickets, the users' information will show up under the lists linked to each ticket in People > Lists. The users will also be able to access all activities linked to each list.
Price batch
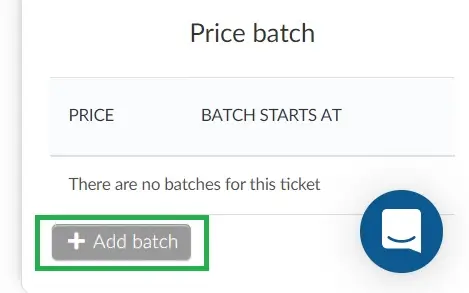
You can create different price batches for your ticket. To add a batch, press +Add Batch.
Add the value and the date you would like to start selling this batch.
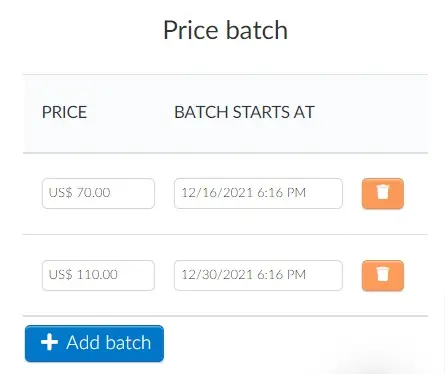
When done, press End to save the data. The end date of a batch is the beginning date of the following batch.
Your invitees, when filling out the registration form, will be able to purchase the tickets. The price displayed will be the one relevant to the purchase date.
Creating discount coupons for your tickets
To learn how to create coupons for your tickets, refer to the Coupons article.
Deleting a ticket
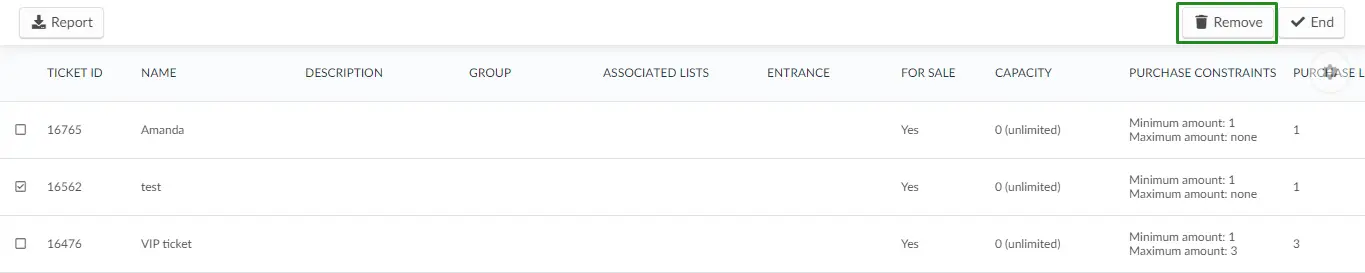
To delete a ticket, click Edit on the top right corner, select the ticket by ticking the check box on the far left side, and the Remove button will then appear on the top right corner. Press the Remove button, and click on the End button on the top right corner to finish.
Associating a ticket with an attendee
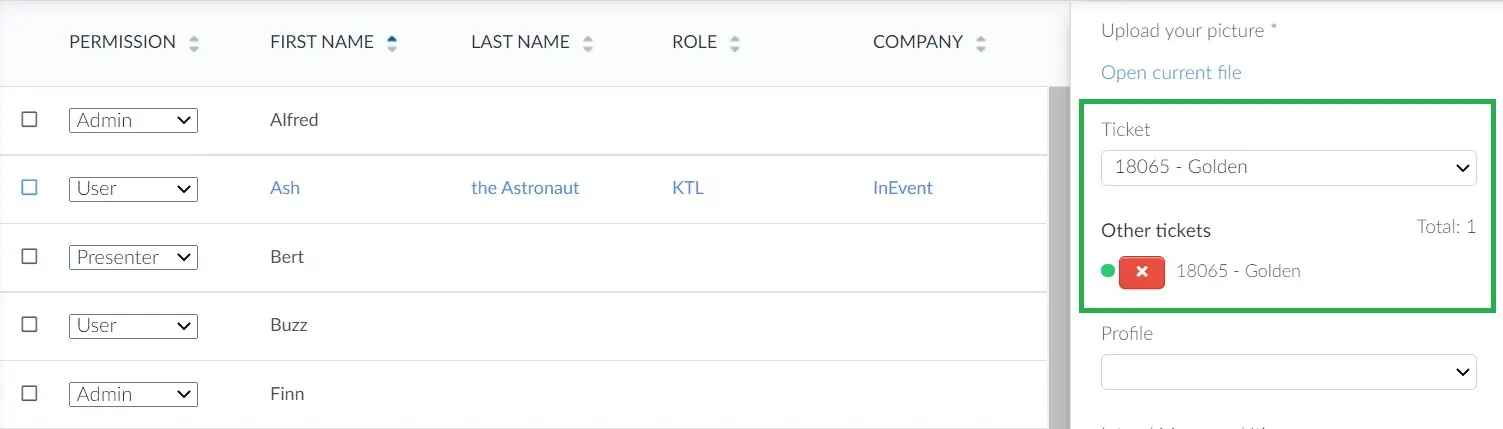
To manually associate a ticket with an attendee, press People > Attendees > Edit on the top right corner and click on an attendee from the list. A new screen will open on the right-hand side with all of the attendee's information.
On the new screen to the right, scroll down to Ticket, and using the drop-down box, select a ticket for the attendee. Click End to save the changes
Filtering tickets by groups
It is possible to filter tickets by groups. To do this, simply click on the Filter button at the top right corner of the page. From the drop-down menu, select the desired ticket group and click on the blue Filter button. Tickets belonging to the selected group will be displayed.
Searching for a ticket
You can search for a ticket by typing the ticket's name in the search bar and clicking on the blue search button. The ticket with the name you searched for will then appear as the only ticket:

Re-ordering tickets
It is possible to change the order of arrangement of tickets in the Purchase form.
Re-ordering ungrouped tickets
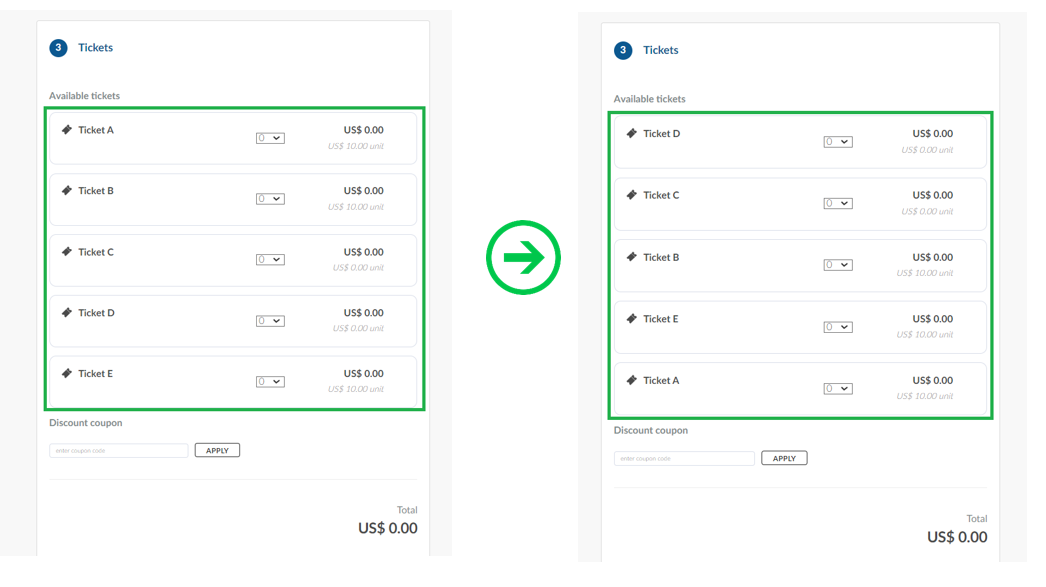
To re-order ungrouped tickets, in the Tickets dashboard, click on Edit and from the extreme left of the page, use the drag and drop icon beside the ticket to change the position of the ticket as you wish.
The change will be reflected on the Purchase form as seen in the image below:
Re-ordering groups
Changing the order of the ticket groups enables the group placed first to be listed first along with its respective tickets on the Tickets dashboard and on the Purchase form, along with its respective tickets.
To re-order ticket groups, click on Groups at the left corner of the Tickets page, click on the Edit button. Use the drag and drop icon beside each ticket to reposition the order of the groups. This will automatically reflect on the List page where the tickets are displayed.
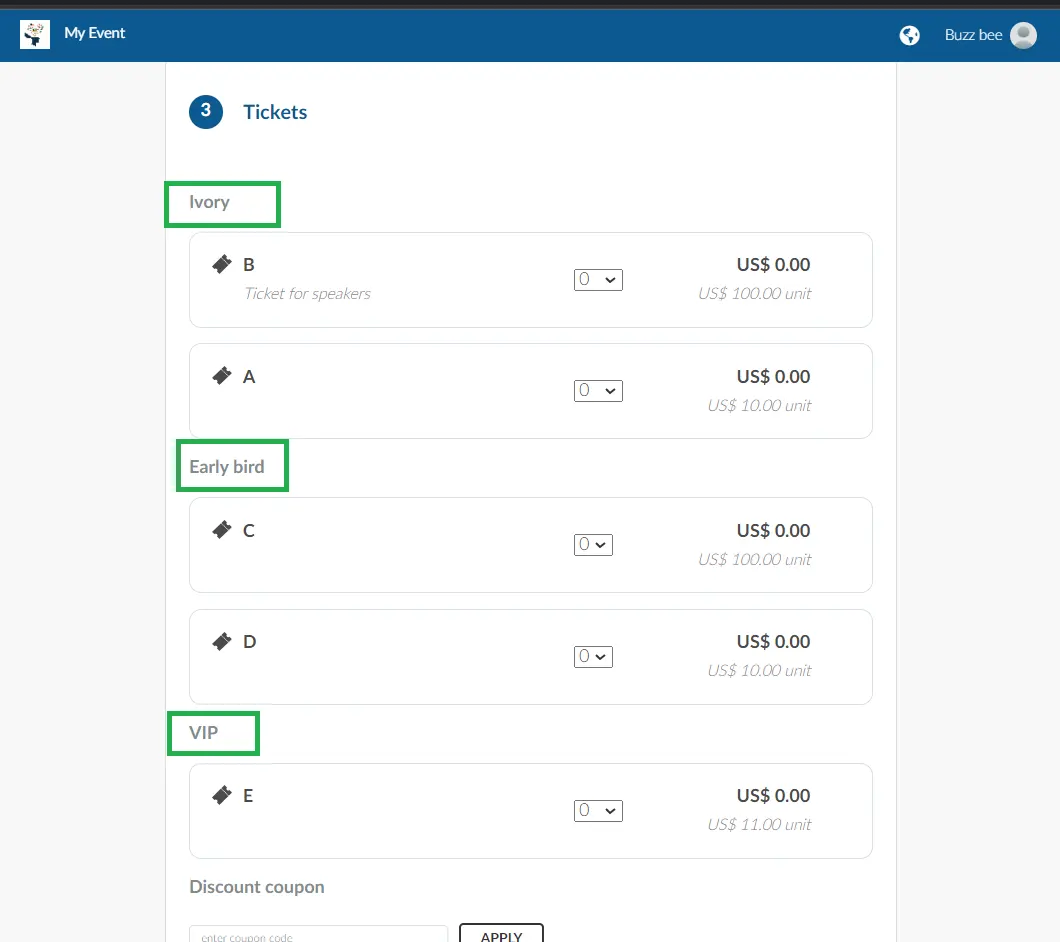
It will also be reflect on the Purchase form:
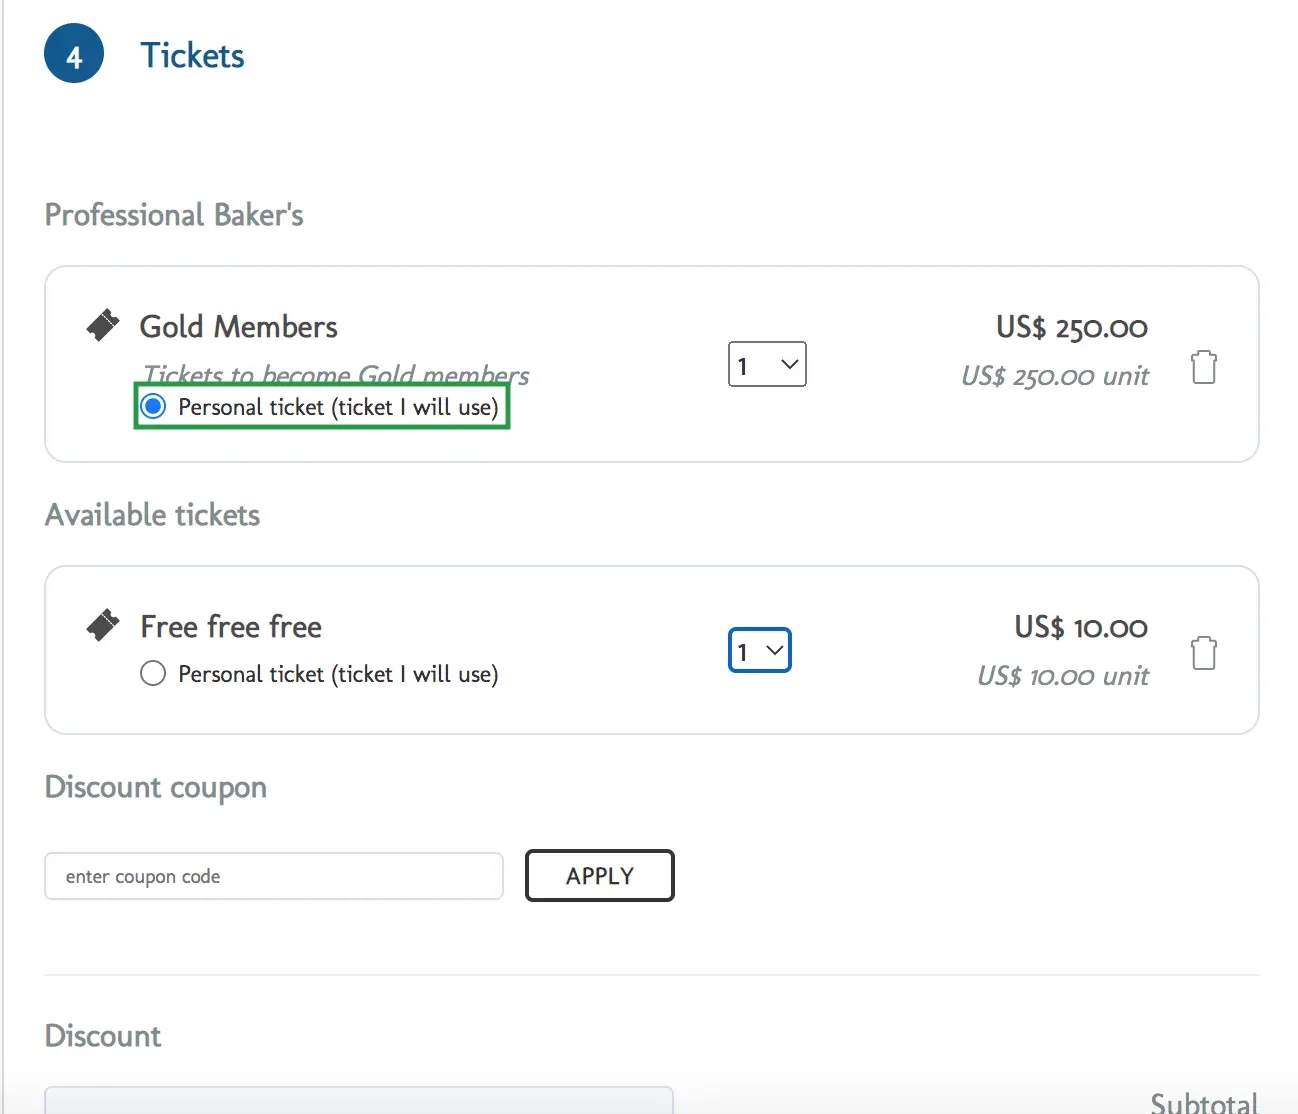
Participants assigning tickets to themselves
When a participant purchases multiple tickets, the platform automatically assigns the first ticket based on alphabetical order. However, this may not be the desired ticket for the participant, requiring them to manually change it from the My Tickets page in the Virtual Lobby. To avoid this, participants can select their desired ticket by clicking on the circle next to Personal ticket (ticket I will use) on the Registration Form.
Sending a ticket to another person
Refer to the Sending extra tickets to another person article for further information.