Multiple registration forms for multiple groups
 Updated 2 years ago
by
Amalia
Updated 2 years ago
by
Amalia
When organizing an event with a wide variety of audiences, it may be necessary to have different registration forms for specific groups of attendees. With InEvent's Attached forms feature, you can set up different registration forms for different groups of attendees.
This article will guide you in preparing and creating multiple registration forms (tailored to different audiences) using Attached forms.
Prerequisites
To set up different registration forms for specific groups of attendees using Attached forms, it is necessary to configure the following features in your event:
Enable Invite requirement
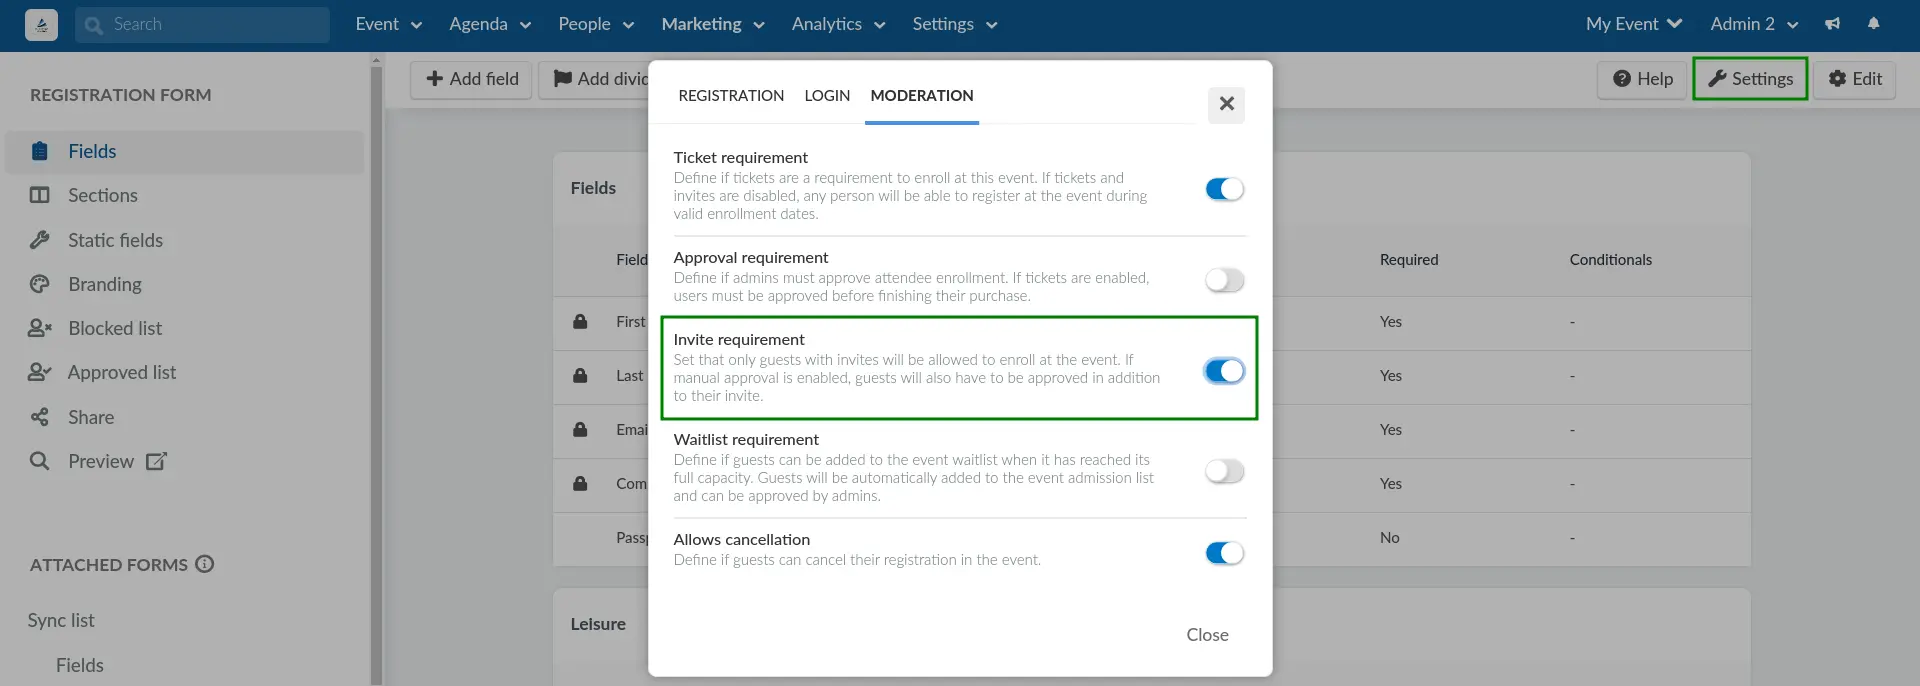
Before configuring registration forms, check that the Invite requirement feature is enabled in the platform. To do so, complete the following steps:
The Invite requirement tool needs to be enabled when you want to create List-based multiple forms with the Registration form. This ensures that the form checks whether or not attendees can access the List attached form. For more information, refer to our article on adding attached forms to the registration form.
To enable invite requirement, complete the following steps:
- Navigate to Marketing > Registration > Registration form from the Event level.
- Click on Settings under Registration form on the left hand panel.
- Click on Edit and scroll down to Invite requirement under the Settings section.
- Tick the checkbox to enable the feature.
- Press End to save your changes.
Add invitees
When enabling invite requirement, participants will not be able to register unless they are invited. Make sure you invite your participants so that they can register. Learn how to add invitees and follow the necessary steps.
Create a custom list of attendees
After enabling the Invite requirement feature, you can proceed to define groups to which you will assign questions. This is achieved by creating a Custom list.
Create a Registration form with common questions
After setting up a Custom list of attendees, you can proceed to set up a Registration form with common questions for all audience.
Create unique questions using Attached forms
Once you have configured the prerequisites above, you can proceed to add Attached forms to assign unique questions for attendee groups defined by custom lists. You can ensure only the custom list views these set of unique questions in the Attached form through selecting a list that is allowed to answer questions.
You can also add questions based on a selected ticket and allow only participants who select that ticket to answer the question.
After following the above steps, you have successfully created multiple Registration forms by adding an Attached form within the Registration form.