Creating your own Certificate of Attendance template
 Updated 2 days ago
by
Caleb Kotey
Updated 2 days ago
by
Caleb Kotey
InEvent's attendance tracking system allows you to not just keep track of your attendees' accomplished time units, but also enables them to obtain certificates following their accomplishments. Using InEvent's Certificates feature, event administrators can create and customize certificates using InEvent's pre-configured certificate templates.
InEvent also allows you to create and configure your own templates to achieve a more personalized certificate of attendance for your attendees. In this article, you will find the guide on how to create your own certificate template using the custom certificate template builder.
Enabling the Attendance tracking feature
Before proceeding to create your own certificate template, ensure that you have enabled the Attendance tracking feature at your event. To do so, follow the steps below.
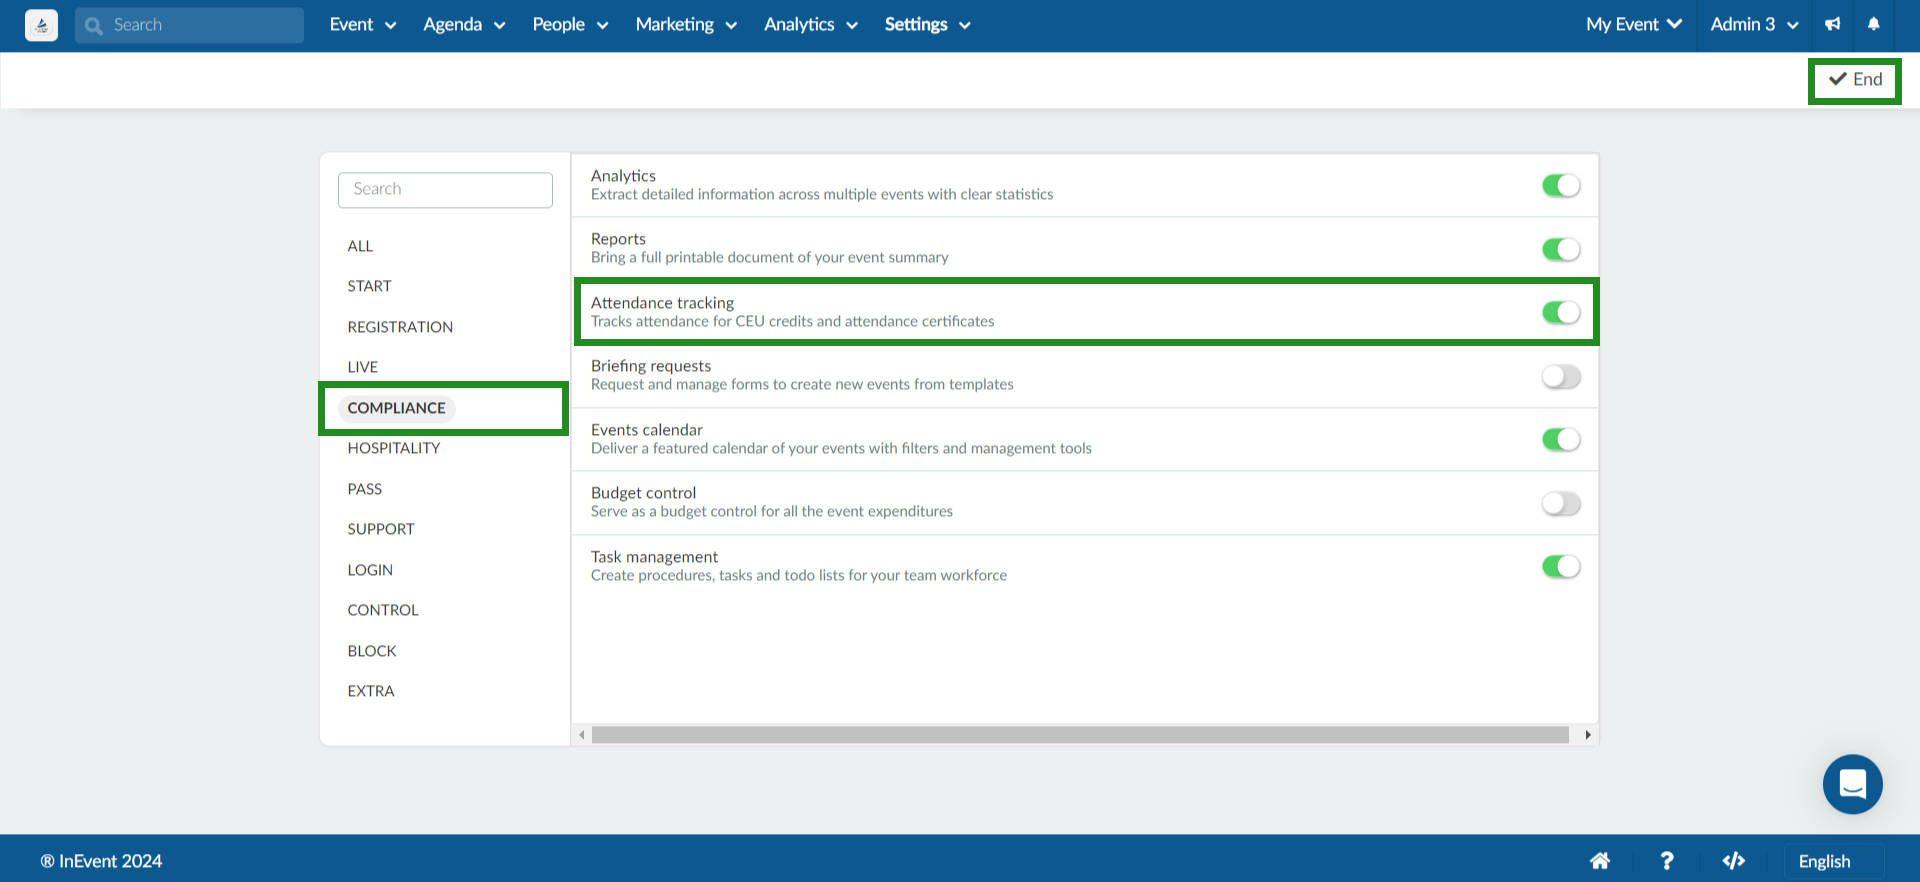
- Navigate to Settings > Tools under the Event level.
- Click on Edit on the top right corner.
- Locate Attendance tracking under the Compliance section.
- Enable the tool using the toggle on the right.
- Click on End to save your changes.
Once you have completed the steps above, you can start creating your own certificate template.
If you receive the following message:
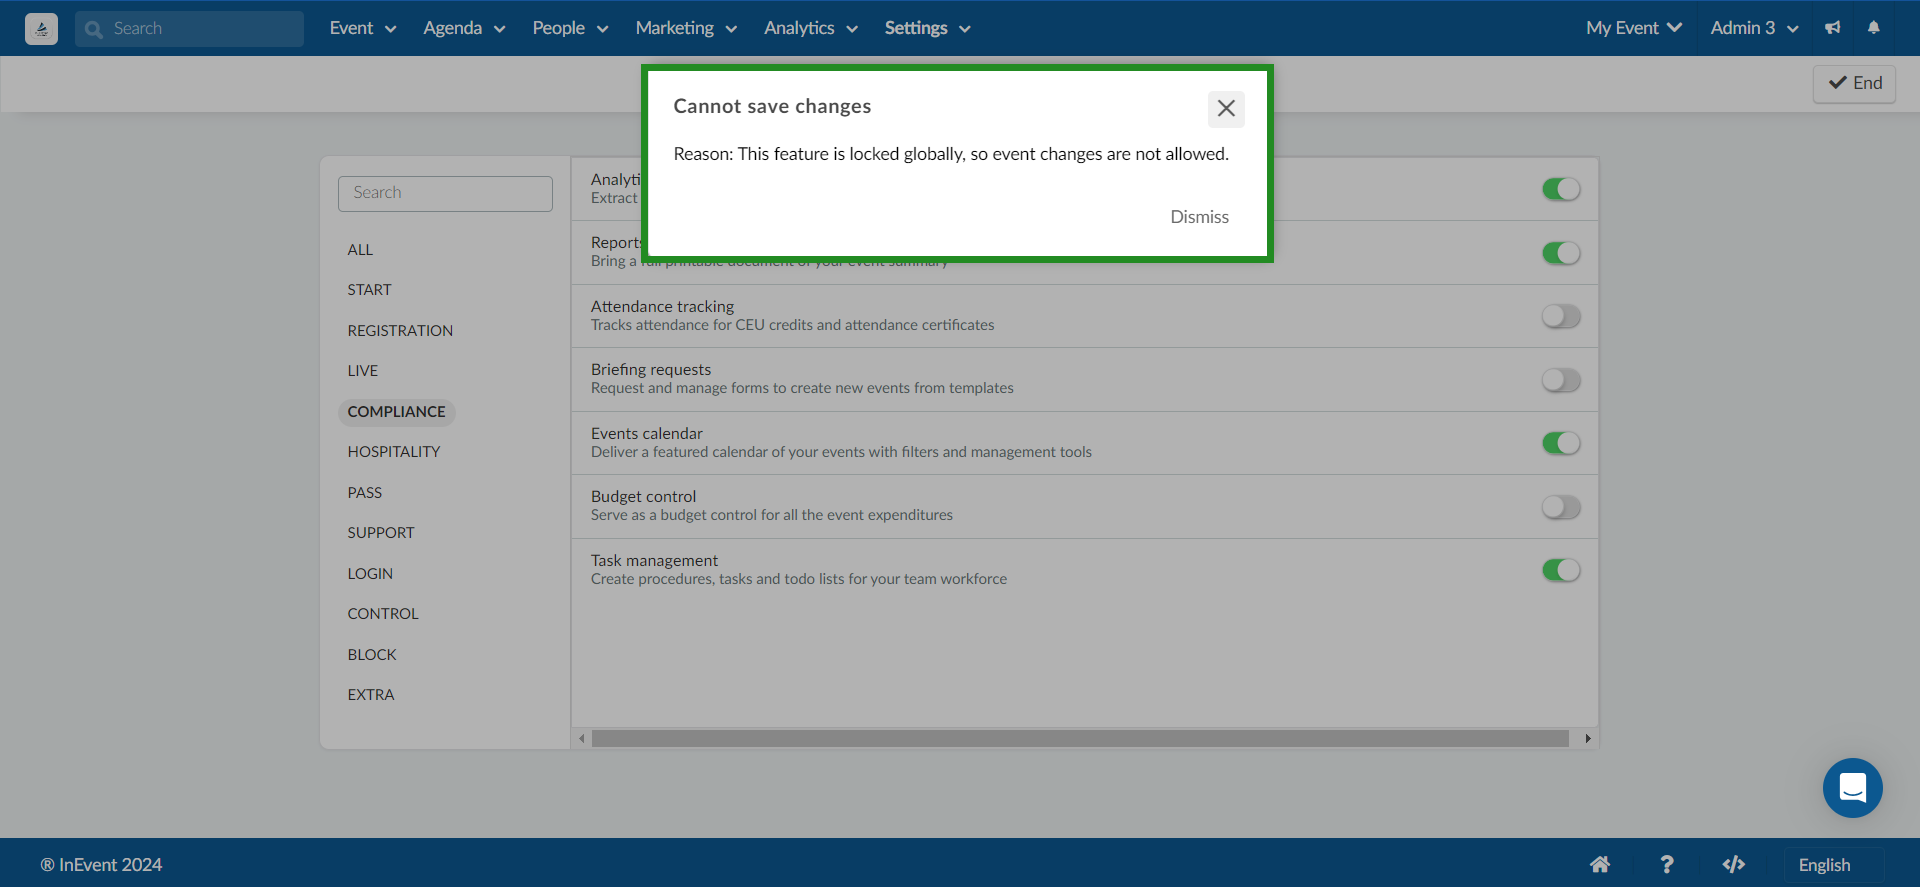
you need to first enable Attendance tracking within Company tools.
Creating a new certificate template
To start creating a new certificate template, follow the steps provided below.
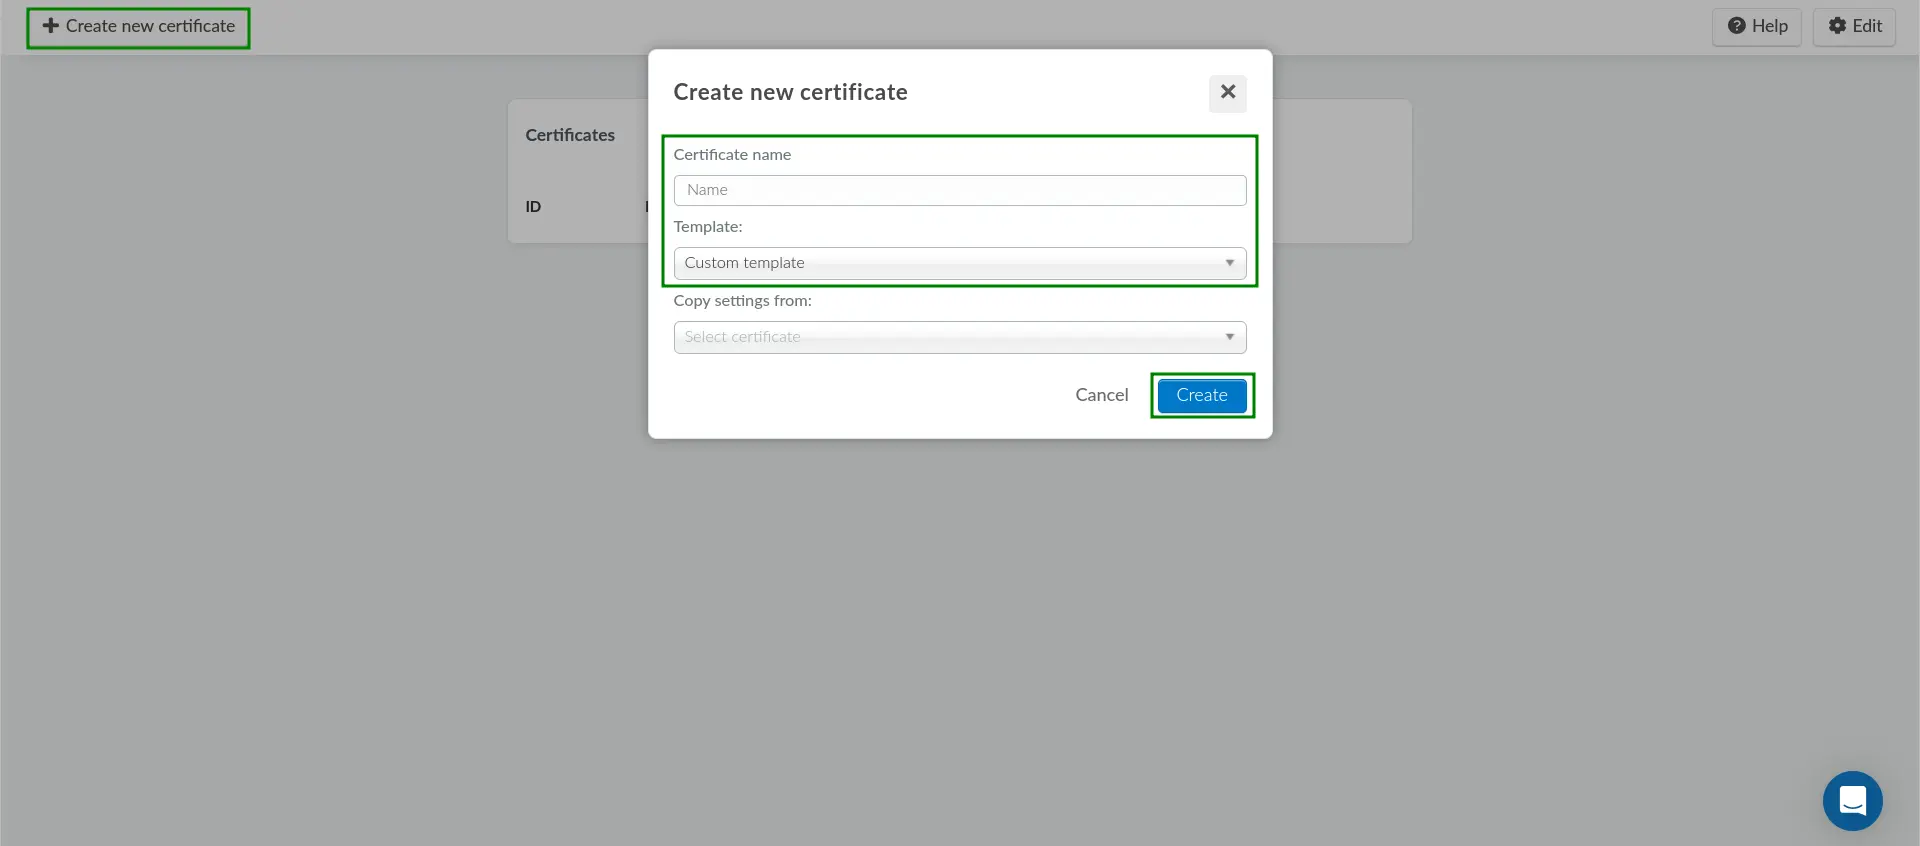
- Navigate to People > Programs > Certificates.
- Click on the + Create new certificate button on the top left corner.
- Enter the desired Certificate name on the field.
- Select Custom template using the Template drop-down menu.
- Click on Create.
After completing the steps above, you will be able to start using the certificate template builder.
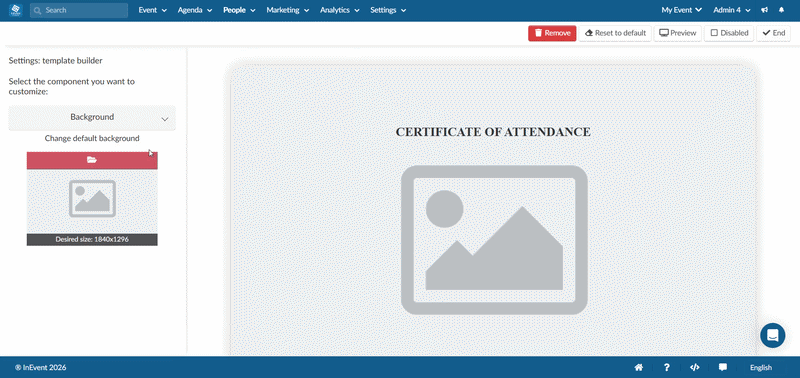
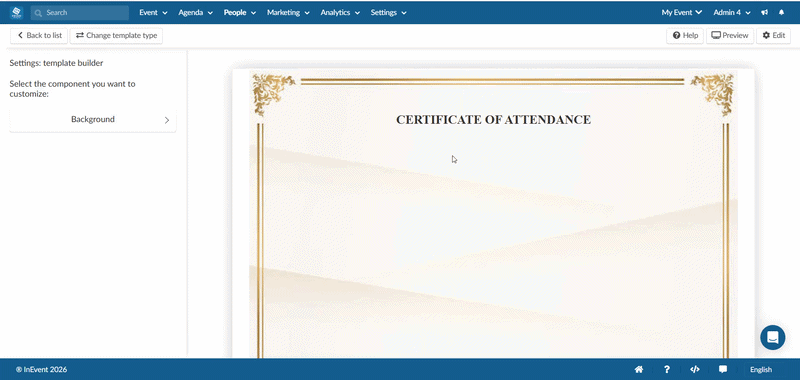
Using the certificate template builder
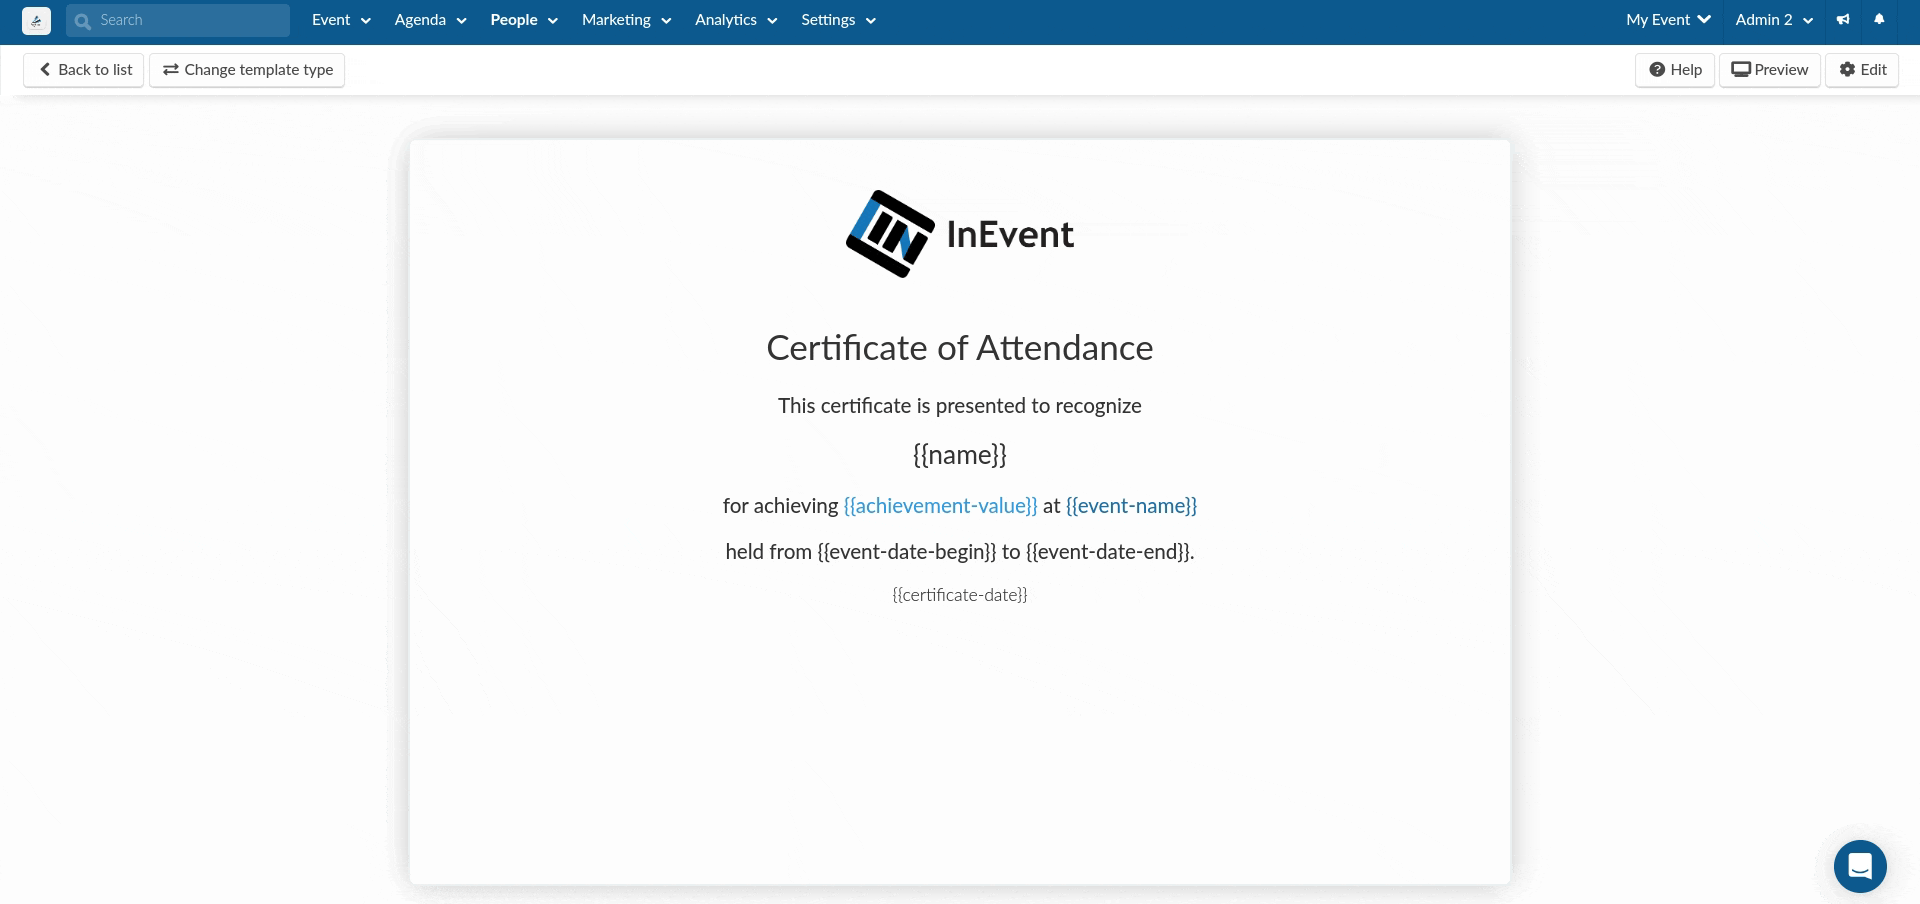
The certificate template builder allows you to build your own certificate template using a familiar text editor interface. To begin, click on the Edit button on the top right. Then, click on the TYPE YOUR TEXT HERE line. Doing so will display the text editor tools, using which you can modify the font size, type, color, and styles. You can also enter your own text replacing the default line as well as insert links, in-line images and tables.

You can also add a background image to your certificate to customize its appearance and match your event's branding. When adding a background image, make sure the image is appropriately sized and designed to work well with the certificate's text and dynamic content.
In addition, you can also use Dynamic content to automatically include the appropriate details for your event as well as your attendees and their appropriate accomplishments. To use the dynamic content, either click on Dynamic contents and select from the available entries, or enter the dynamic content tag directly in the text editor.
When you are finished, click on the End button on the top right to save your changes.
Event dynamic content
The following Event dynamic content entries are available for use within the custom certificate template builder.
Entry name | Dynamic content tag | Description |
Name |
| Name of your event |
Start date |
| Starting date of your event |
Start time |
| Starting time of your event |
End date |
| Ending date of your event |
End time |
| Ending time of your event |
Person dynamic content
The following Person dynamic content entries are available for use within the custom certificate template builder.
Entry name | Dynamic content tag | Description |
First name |
| Attendee's first name as registered in the event |
Last name |
| Attendee's last name as registered in the event |
Full name |
| Attendee's full name as registered in the event |
Email address |
| Attendee's email address as registered in the event |
Role |
| Attendee's role information as registered in the event |
Certificate dynamic content
The following Certificate dynamic content entries are available for use within the custom certificate template builder.
Entry name | Dynamic content tag | Description |
Achievement value |
| Attendee's achieved time on the event, displayed in hours and minutes |
Current date |
| Current date or date of certificate issuance |
Company name |
| Your company name in the InEvent platform |
Previewing your certificate
To preview how your certificate will look like for your attendees, click on the Preview button on the menu bar. Doing so will open a new browser tab, in which your certificate is displayed.
You can click on Download to save the previewed certificate as a PDF file. You can also click on Print to directly print it using your browser's print dialogue.
Resetting your certificate template to defaults
To reset your certificate to defaults, click on the Reset to default button on the top menu. The Reset Certificate pop-up box will be displayed. Then, click on Reset to confirm.

After doing so, your certificate template will be reset to defaults.
Removing your certificate template
To remove your certificate template, click on the Remove button on the top menu. The Remove Certificate pop-up box will be displayed. Then, click on Remove to confirm.

After doing so, your certificate template will be removed from your event.
Enabling your certificate
After finishing the customization process of your certificate template, you can enable it so that attendees can obtain the certificate. To do so, click on Edit. Then, click on the ▢ Disabled button. The Enable certificate confirmation pop-up box will be displayed. Click on Enable to confirm.

After doing so, the button will display 🗹 Enabled instead, and your attendees will be able to obtain the certificate.